
How to Back up Shopify with Automation & Schedules

Backing up a Shopify store is an essential routine that helps prevent huge issues if something goes wrong with your e-commerce website. You create a store’s copy that can be easily restored in an emergency. The good news is that you can do that even with the default export tools built into the platform. The bad news is that it may take a considerable amount of time if you do that regularly. Therefore, we’d like to share a better way to back up Shopify. The one that incorporated the . With the help of this app, you can create Shopify backups automatically following the preconfigured schedule. Below, we explain how to create a backup of Shopify’s most important elements: products, customers, and orders. You will learn how to create schedules to automate this process. Also, we explain how to restore Shopify backups afterward.

How to Back up Shopify Store
Since your Shopify backups should be created regularly, it is necessary to set up automated exports. The more often you create a copy of your website’s data, the more up-to-date your backups are. Depending on the traffic, you may need to create backups weekly, daily, or even hourly, and the Import & Export Tool knows how to help you. Follow these steps to create an automated backup Shopify needs:
Step 1: Launch a New Export Profile
You can create a new export profile by clicking the New Profile button under your Shopify Admin -> Apps -> Firebear Import & Export Tool -> Export.
Step 2: Do Basic Configurations to Automate Shopify Store Backups
Congratulations! You are on the Configure export screen. It’s a part of your export profile where everything starts and almost ends! Here, you need to configure the automation for your backups and specify the entity you wish to export:
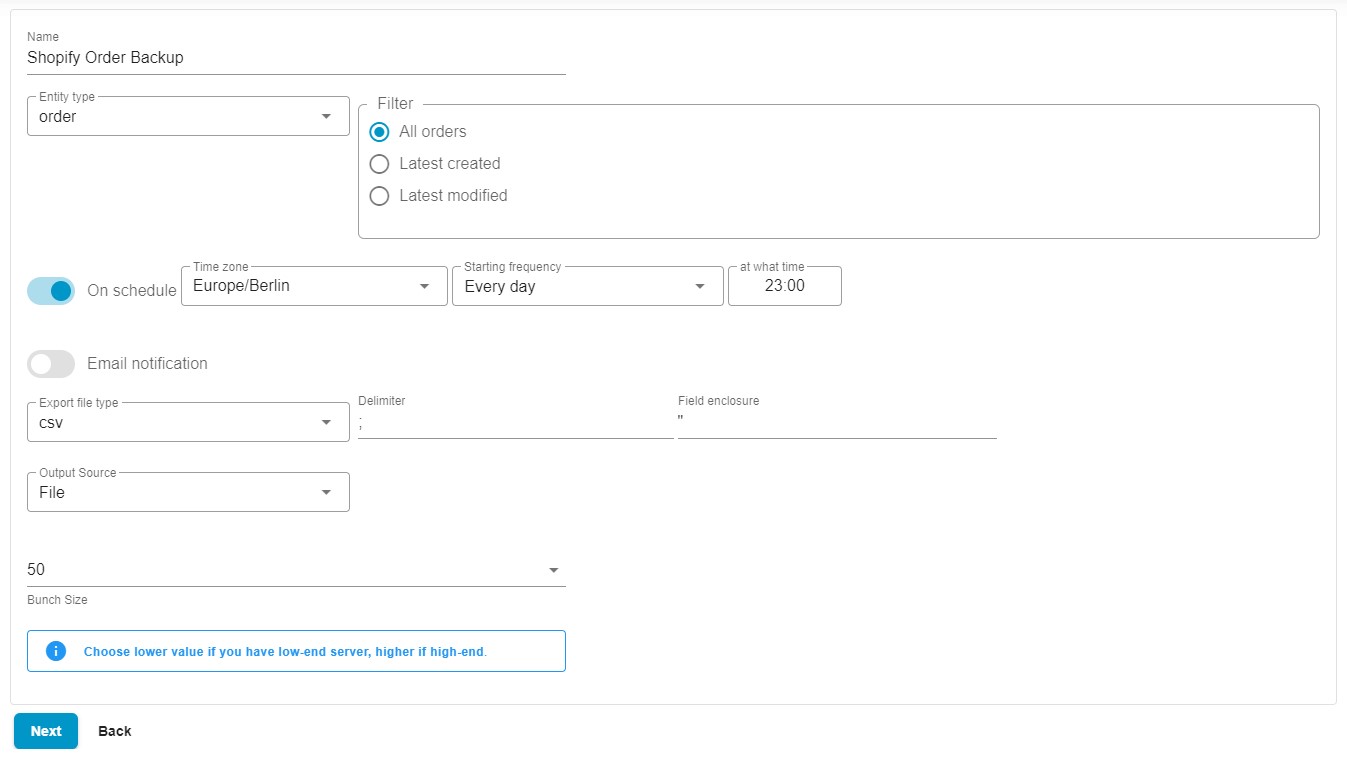
- Specify a name for your profile, for instance, Shopify Order Backup.
- Choose an export entity – Orders. You will need to create separate profiles for products and customers.
- Select All Orders. This option creates a backup for all Shopify orders.
- Now, let’s automate the process of backing up your Shopify website. Enable the On Schedule toggle to create a schedule of updates and specify your time zone. Next, choose a starting frequency. You can create Shopify backups every hour, day, week, or month. Configure the exact time to initiate the backup generation automatically.
- Configure email notifications for your Shopify store backups to stay informed on the results of every transfer.
- Now, you need to select your preferred file format. Choose CSV because it is supported by Shopify. Don’t customize your delimiter and field enclosure since the app uses the default system values.
Note that you can also export store backups as XML and XLSX files or even Google Sheets spreadsheets. - Choose File as your export source. After the export is complete, you will be able to download your backup to your computer. Alternatively, it is possible to send your backups over FTP, straight to Google Drive, or, as we’ve just mentioned, directly upload them to a Google Sheets spreadsheet.
- If you have a server with limited resources, you can choose a lower bunch size to reduce the load.
- Click “Continue” to proceed to the mapping screen.
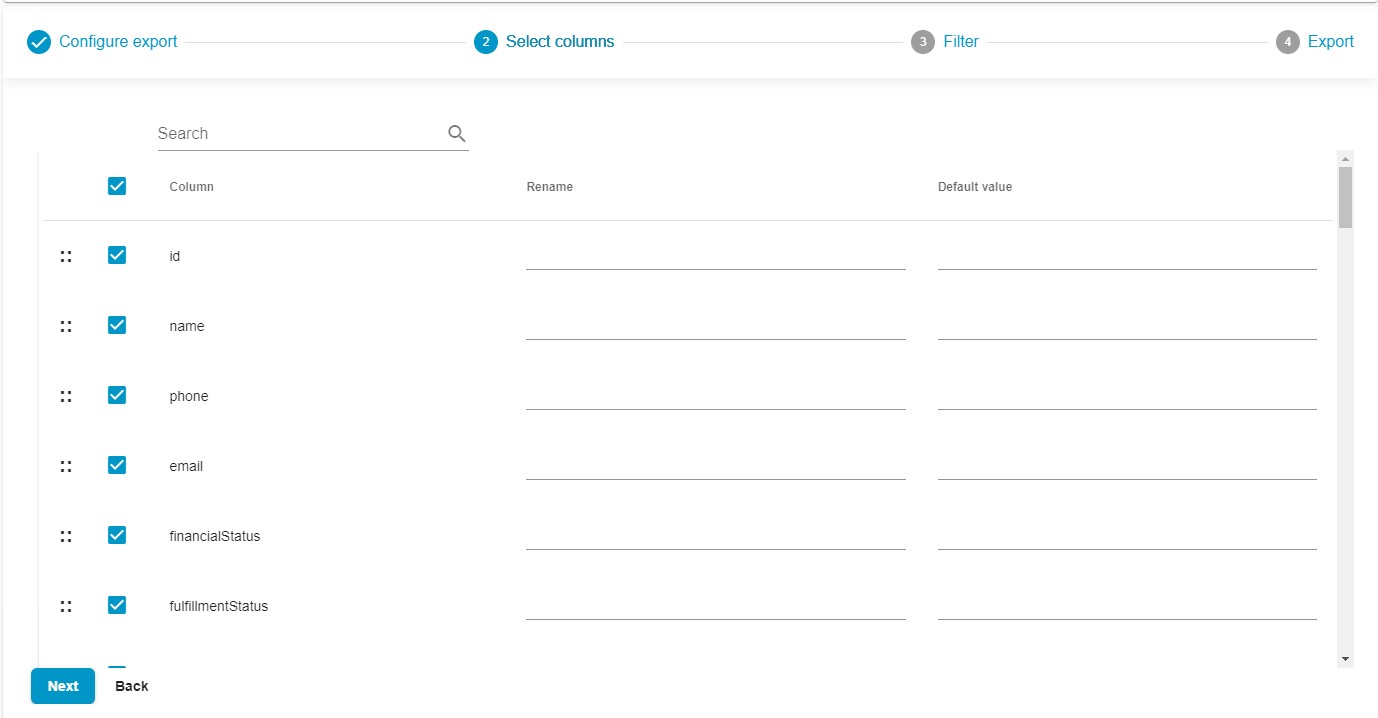
Step 3: Let The App Do Everything For You
You don’t need to do anything here, because your goal is to create a Shopify store backup with all the website’s data as it is. Proceed to the next step.
Filters are not necessary for your backups, too. Proceed to the next screen.

Now, you only need to click the Save & Close button to save your Shopify backup profile. It will be launched automatically according to the predefined schedule. You will be able to download your data file when the export procedure is complete or it will be available at another selected destination.

How to Restore Shopify Store Backups
Now, it’s time to unveil the process of restoring Shopify backups. You will need the Import & Export Tool for Shopify. Also, it is possible to rely on the platform’s default functionality if you create backups in a CSV format. Let’s describe the first approach since it is more convenient. After installing the app, follow these steps:
Step 1: Create a New Import Profile
Proceed to Apps -> Firebear Import & Export Tool -> Import and hit the New Profile button. The app redirects you to a new screen.
Step 2: Configure Basic Import Settings to Restore Shopify Backups
Here, you need to apply basic configurations to initiate the backup restoration:
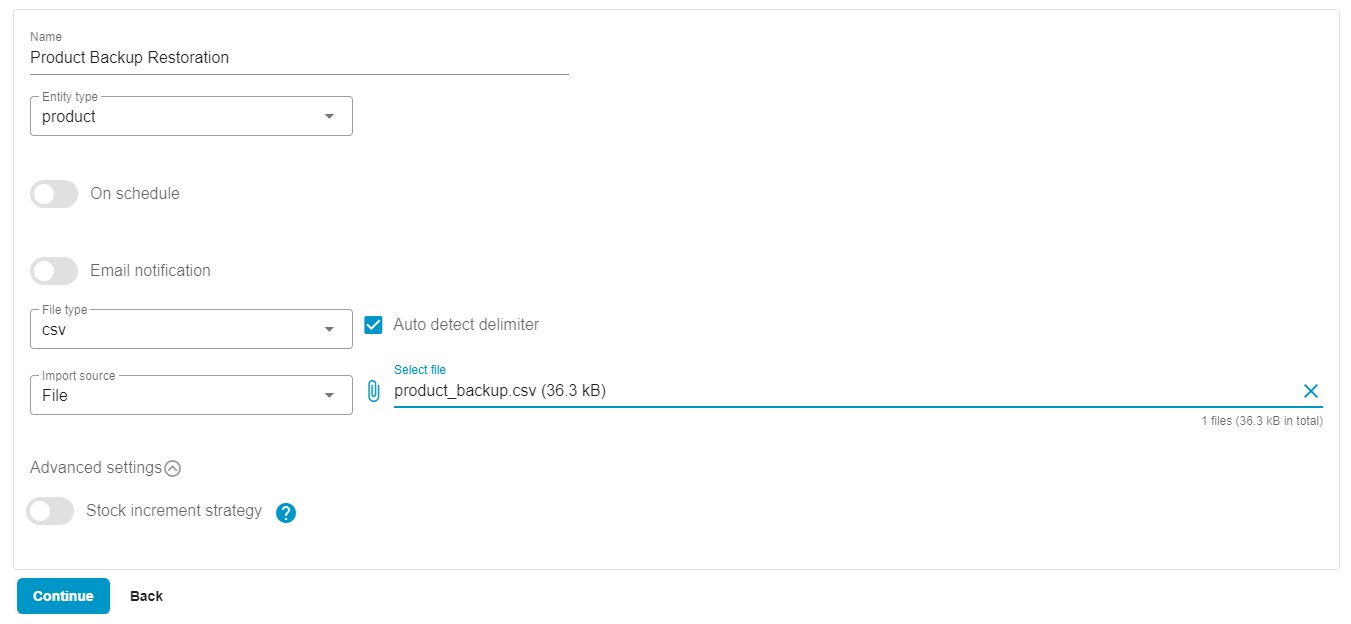
- Name your new import profile, for instance, Product Backup Restoration.
- Choose the entity to import: products or customers. Soon, we are going to add support for orders.
- Note that you don’t need to enable Shopify import automation since the restoration is not repetitive.
- Enable Shopify import notifications or monitor the progress in your admin instead.
- Now, it’s time to select a file format: CSV if you use it to store your backups. In addition to it, our app supports XLSX, XML, and Google Sheets spreadsheets.
- You may activate the Auto detect delimiter feature to let the app identify delimiters in your CSV automatically. But if your backup was created in our app, the proper delimiters are already specified.
- Choose your import source depending on where you store your backup files. If it’s your computer, choose File from the Import source dropdown, click on the paperclip icon, navigate to your file, and select it. Note that you can also import backups to Shopify via FTP or from Google Drive, Google Sheets, or URL.
- Skip the advanced settings section because the Stock Increment Strategy toggle should be disabled. Thus, you inform the app to import the quantity provided in your backup file.
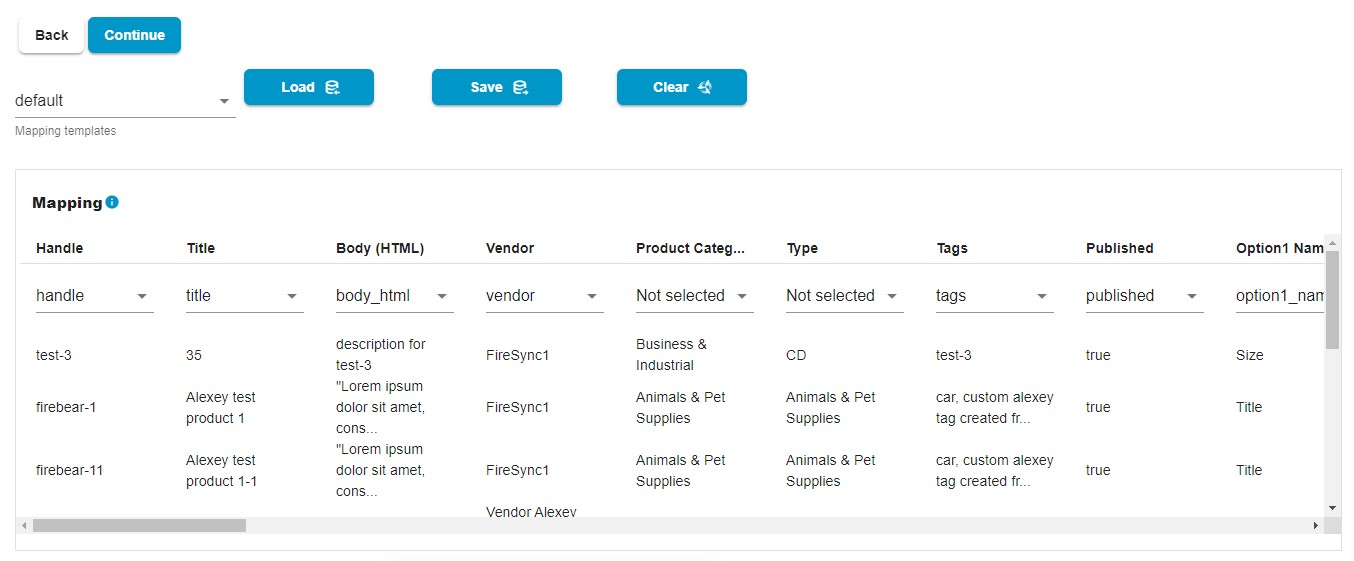
Step 3: Let The App Restore Your Backup
Like in the case of backup creation, you don’t need to do anything with your mapping section. You’ve created a backup file that is fully compatible with Shopify’s requirements. Proceed to the next step.
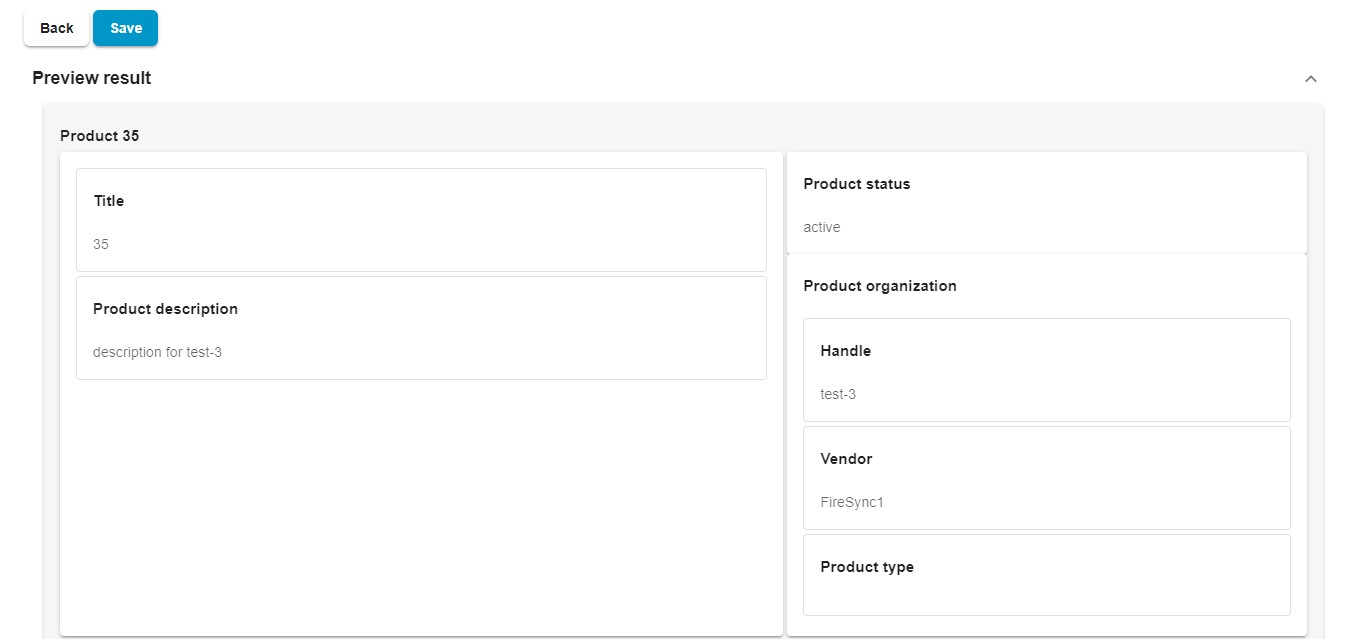
You can examine whether your backup file is correct on the Preview screen. The Import & Export Tool displays the entities you import even before they are uploaded.
Click the “Save” button to save your import profile. Next, click the “Import” button to restore your Shopify backup.
Note that you need to configure separate import profiles for products, customers, and orders.
Final Words
As you can see, the Import & Export Tool acts as a Shopify backup app but is better than most such things. And here is why. Our application not only helps you create and restore backups, but it is also a perfect solution for improved and automated data management and third-party integrations. With this application, you will always be aware of how to back up a Shopify store, connect it to a dropshipping platform, or integrate with an ERP system. For further information, read our Import & Export Tool manual or contact us directly.