
How to Archive Orders in Shopify

Below, we explain how to archive orders in Shopify. You will learn how to create a zip archive with your orders for more efficient storage or management.
When you export Shopify orders with the platform’s default tools, they are gathered in a CSV file. But what if a Shopify archive with orders is required?
You will need the to archive orders in Shopify. Furthermore, our app lets you automate this process, archive only the latest modified orders, or pack only orders with a specific status into a zip. We detailly describe all these aspects below.
Table of contents
What Does Archive Order Mean On Shopify?
Before working with the practical aspect, we need to define clearly what this guide is about. So, what does it mean when you archive an order on Shopify? Let’s see.
Under archiving orders in Shopify, we assume the process when you export orders as a zip file or another similar format.
There are several reasons to do so:
- Backup. You may need to archive orders in Shopify to store them compactly as a backup.
- Dropshipping. You may also need to create a zip file with your Shopify orders to provide it to a dropshipping platform you work with.
- Other Integrations. Also, a Shopify order archive may be an integral component of data exchanges between your e-commerce website and other third-party systems, such as various ERP platforms.
- Storing & Reporting. Or you may need to store your orders for specific periods for the sake of reporting.
No matter what motivates you to archive orders in Shopify, there is one reliable way to do that.
How to Archive Orders in Shopify
Adding orders to an archive is a very intuitive task. First of all, you need to create a new export profile.
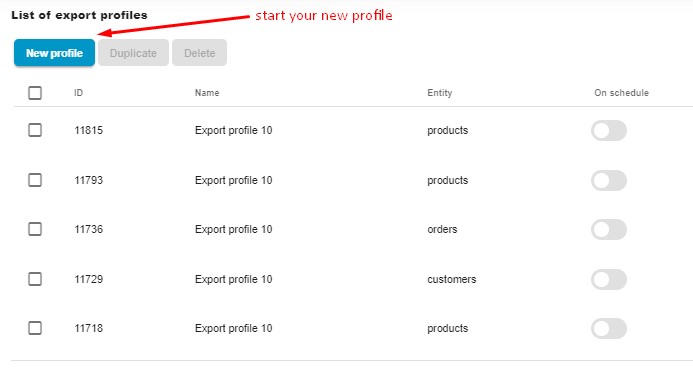
Step 1: Create a New Export Profile
You can create a new export profile to archive Shopify orders under Shopify Admin -> Apps -> Firebear Import & Export Tool -> Export. Click the “New Profile” button.
Step 2: Configure Basic Export Settings
The Configure export screen provides the ability to set several parameters that impact your order export. For instance, you can configure automation or specify the transfer of the latest modified orders only:
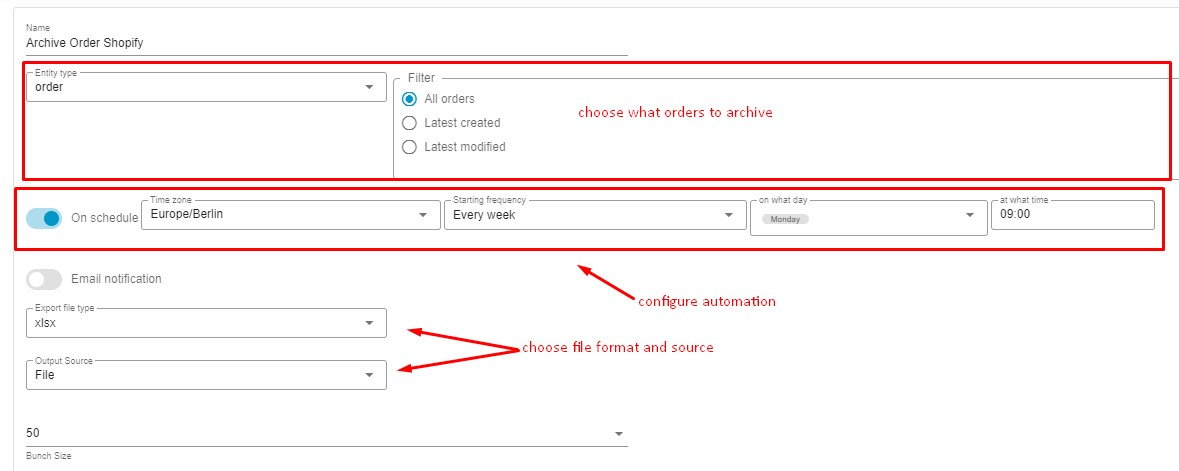
- Specify a name for your profile, for instance, Archive Order Shopify.
- Choose an export entity – Orders.
- Select All orders, Latest created, or Latest modified. For instance, the first option lets you archive all orders available in the system. The second one transfers only the latest created orders. When you create your order export profile for the first time, it exports all orders. When you launch this profile for the next time, the application exports orders created after the previous profile launch. The same approach is applied to the latest modified orders.
- Next, you can automate your order export. Enable the On Schedule toggle to create a schedule of updates and specify your time zone. Next, select a starting frequency. For instance, you may add the latest modified orders to a zip archive once a week.
- If you decide to go with regular updates, configure email notifications for your order exports to stay informed on the results of every transfer.
- Now, you need to select your preferred file format. You can choose CSV, XML, XLSX, or Google Sheets spreadsheets. Note that you can only use the first three options to add Shopify orders to an archive. Choosing Google Sheets as your file format will create a new spreadsheet on the connected Google Drive account.
- Choose File as your export source. After the export is complete, you will be able to download your order archive from Shopify. Also, our app lets you rely on FTP transfers, Google Drive exports, and direct uploads to a Google Sheets spreadsheet.
- If you have a server with limited resources, choose a lower bunch size to reduce the load.
- Click “Continue” to proceed to the mapping screen.
Step 3: Configure Mapping
If you want to archive order data as it is used within Shopify, don’t do anything on the mapping screen.
However, if you want to apply changes, you can:
- Replace the default column names with any cusom namings;
- Change column order;
- Delete columns that you don’t need;
- Use default values to replace the absent data.
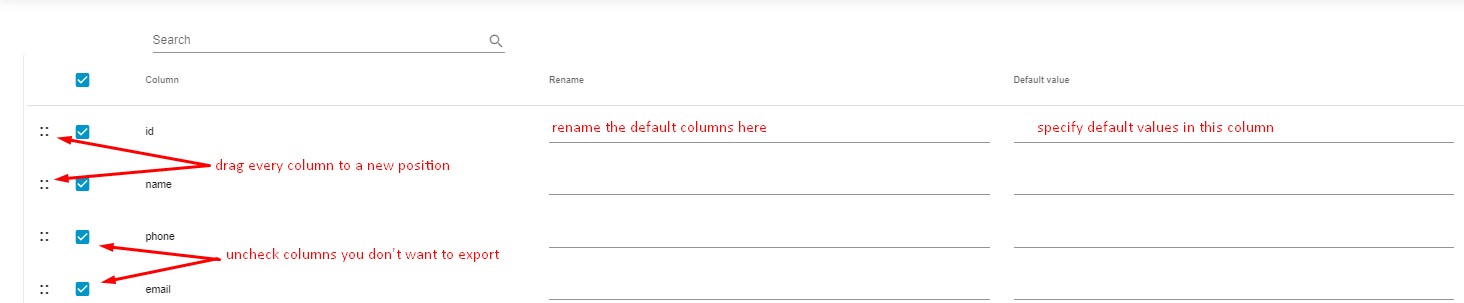
Configure mappings to simplify the way you export Shopify orders to an external system. Proceed to the next screen to keep the structure of your data file untouched.
Step 4: Create Filters
Now, it is very important to create a filter to export the particular orders you want to archive. For instance, you may need to archive only closed orders:
- Click the “+” button to add a filter.
- Choose status as your filter criteria.
- Select closed from the value dropdown.

How to automatically archive an order when this order is fulfilled in Shopify? You need to set up regular exports, as we’ve already mentioned above, and then create a filter based on the fulfillment status:
- Click the “+” button to add a filter.
- Choose fulfillmentStatus as your filter criteria.
- Select shipped from the value dropdown.

These are just two examples of filters to archive orders in Shopify. You can create more to follow your specific business case.
When you are done with the filters, proceed to the final step.
Step 5: Save Your Profile & Export Data
Click the Save & Close button to save your Shopify export profile. The app will launch this process automatically according to the predefined schedule.
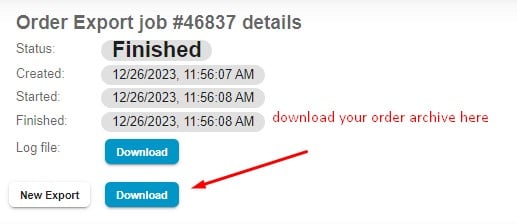
Alternatively, you can run it immediately by clicking the Export button. You will be able to download your Shopify orders as an archive when the export procedure is complete. Click the Download button:
Final Words
You can easily archive orders in Shopify no matter what your final goal is. With the Import & Export Tool, this process can be fully automated even when you need to transfer data to third parties. Contact us to learn more on how to archive orders in your particular situation. Follow the app’s manual for more interesting features of the Import & Export Tool.