
Advanced Shopify Import: How to Import Files to Shopify from URL
![]()
Today, we continue our exploration of different ways to import files to Shopify. This time, we’d like to introduce you to Shopify URL import. This approach allows you to seamlessly transfer data from any publicly available URL, providing a more efficient alternative to the traditional manual file uploads. To achieve this, you’ll need to install the , which will supersede the standard Shopify data transfer method, unlocking previously unavailable features. Below, you will learn how to import products to Shopify from a URL. Also, our application enables Shopify customer import from a URL, and support for other entities is coming soon. We will teach you how to transfer your update with different file formats and automate imports entirely with the help of schedules and mapping. Be sure to explore our Shopify Cookbook for additional valuable insights and tips to enhance your Shopify experience.

Table of contents
Standard Shopify Import
First of all, let’s take a closer look at the standard Shopify import procedure. While it represents a fundamental method to update data on your e-commerce website, there is no place for URL uploads. The default procedure incorporates the following steps:
- Access Your Shopify Admin: Begin by logging into your Shopify admin panel.
- Navigate to the Section You Want to Update: Inside the Shopify admin, find and access the section you want to update. It has the “Import” button. Click it!
- Select Your Data File: Next, select the data file you wish to import. Ensure that your file is in a compatible format, as per Shopify’s requirements. It should be a CSV file that consists of attributes Shopify uses.
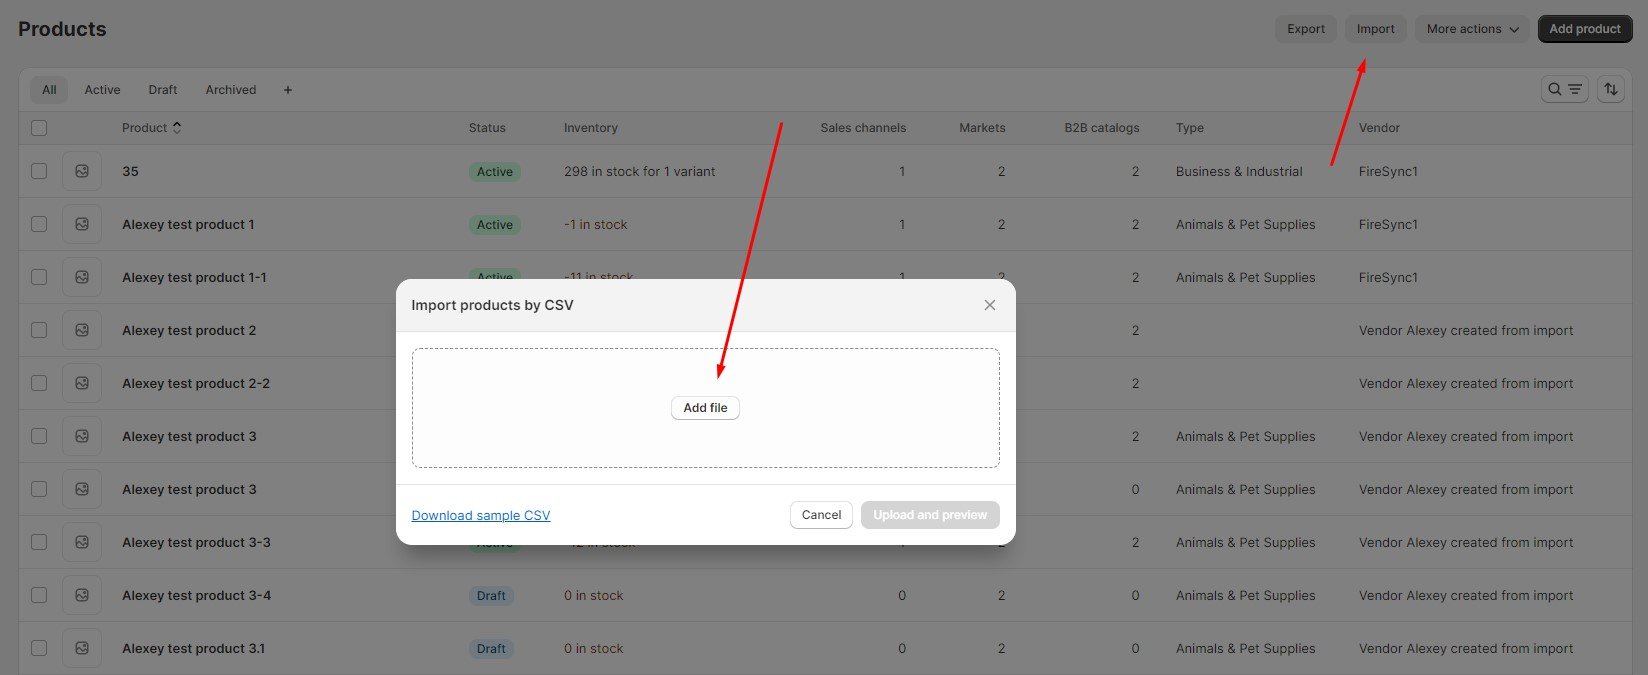
- Complete the Update: Now, after you’ve manually selected the file, upload it by clicking the “Import” button.
As you can see, the standard Shopify import process offers a straightforward way to manage your e-commerce data. However, there is no place for URL imports. If you’re looking for more advanced features and efficiency, you might consider the alternative approach that involves the Firebear Import & Export Tool. But let’s first look at the advantages of Shopify URL imports over manual file uploads.
Shopify URL Import Advantages
Depending on your needs, you may leverage different advantages of Shopify URL imports, so let’s focus on the core benefits:
- Efficiency: Importing products from a remote URL can be more efficient than manually uploading them. Especially when you automate this process with the help of schedules.
- Real-time Updates: Depending on the implementation, importing from a remote URL may allow for real-time updates, ensuring that product information is always current. With the Firebear Import & Export Tool, you can easily achieve this goal by incorporating schedules into the update process.
- Centralized Management & Multi-Channel Selling: If your products are listed on various platforms or suppliers’ websites, importing from remote URLs can centralize management. Changes made by your suppliers can be reflected in your Shopify store without manual intervention.
- Integration with ERPs & Other Systems: For businesses using Enterprise Resource Planning (ERP) systems and other business instruments, importing from remote URLs can be part of a larger integration strategy, ensuring seamless communication between your e-commerce platform and other business processes.
- Effortless Expansion: If you’re expanding your product catalog or working with new suppliers, the ability to import from remote URLs can make the onboarding process more efficient and less labor-intensive.
How to Import Products & Customers to Shopify from URL
Let’s dive into importing products and customers into Shopify from URL, using different strategies. The process is divided into a few intuitive steps:
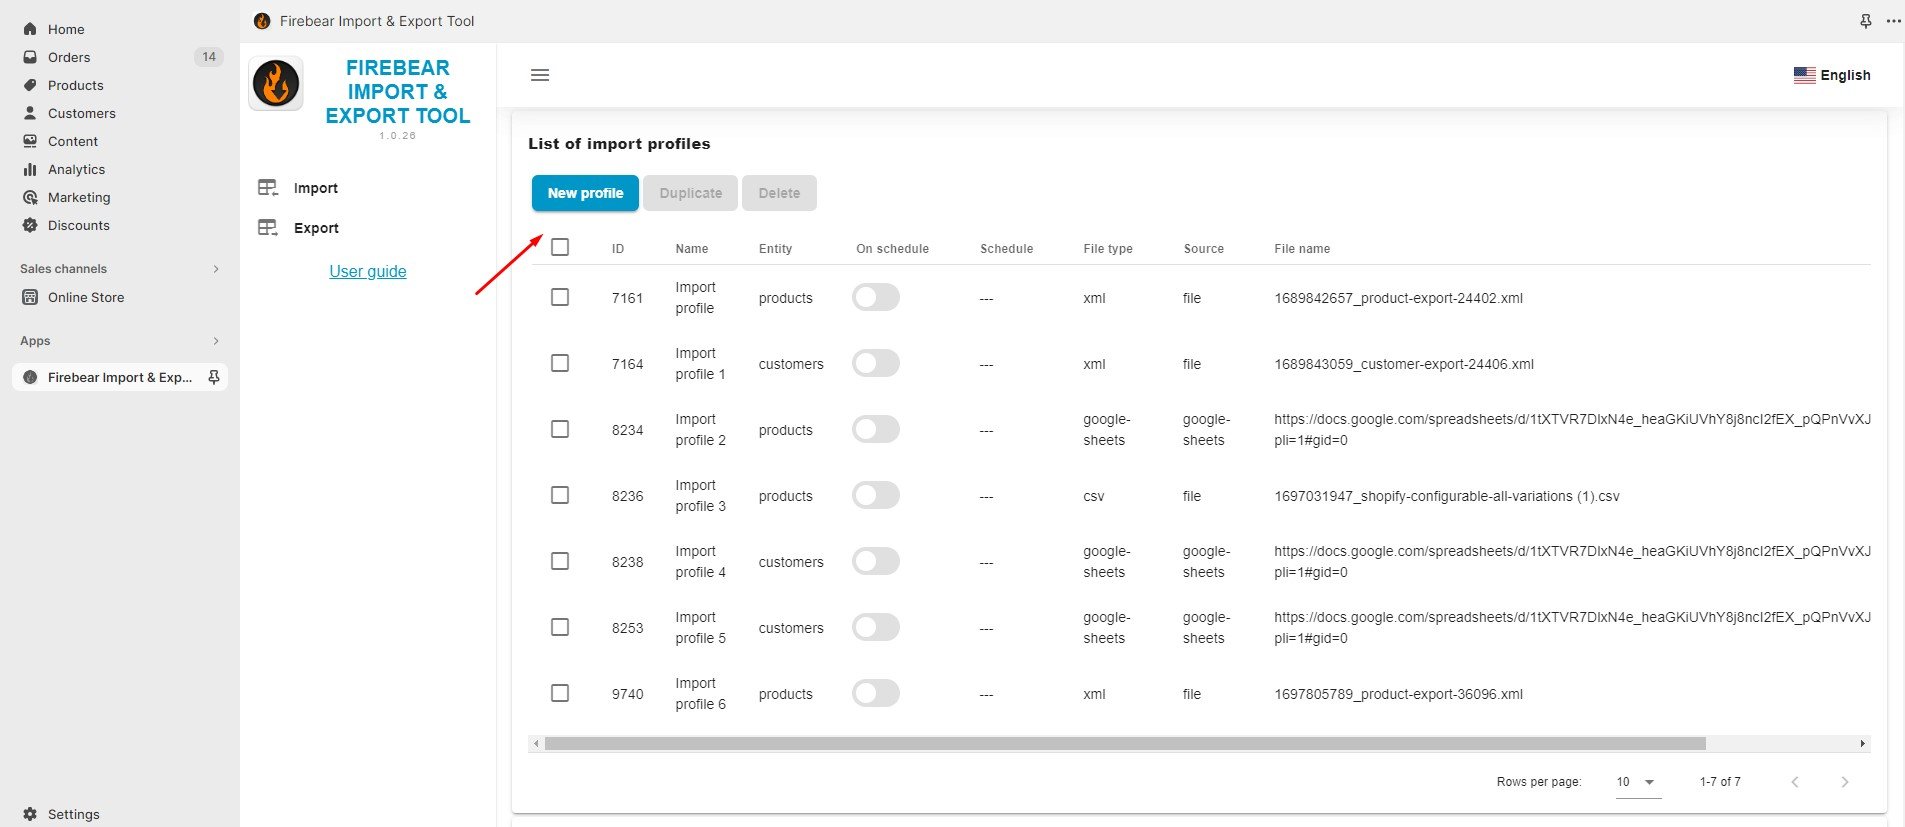
Step 1: Access the Import Profile
Create a new import profile under Apps -> Firebear Import & Export Tool -> Import -> New Profile.
Step 2: Select File
When on the “Select File” screen, follow these steps to import an update to Shopify from a URL:
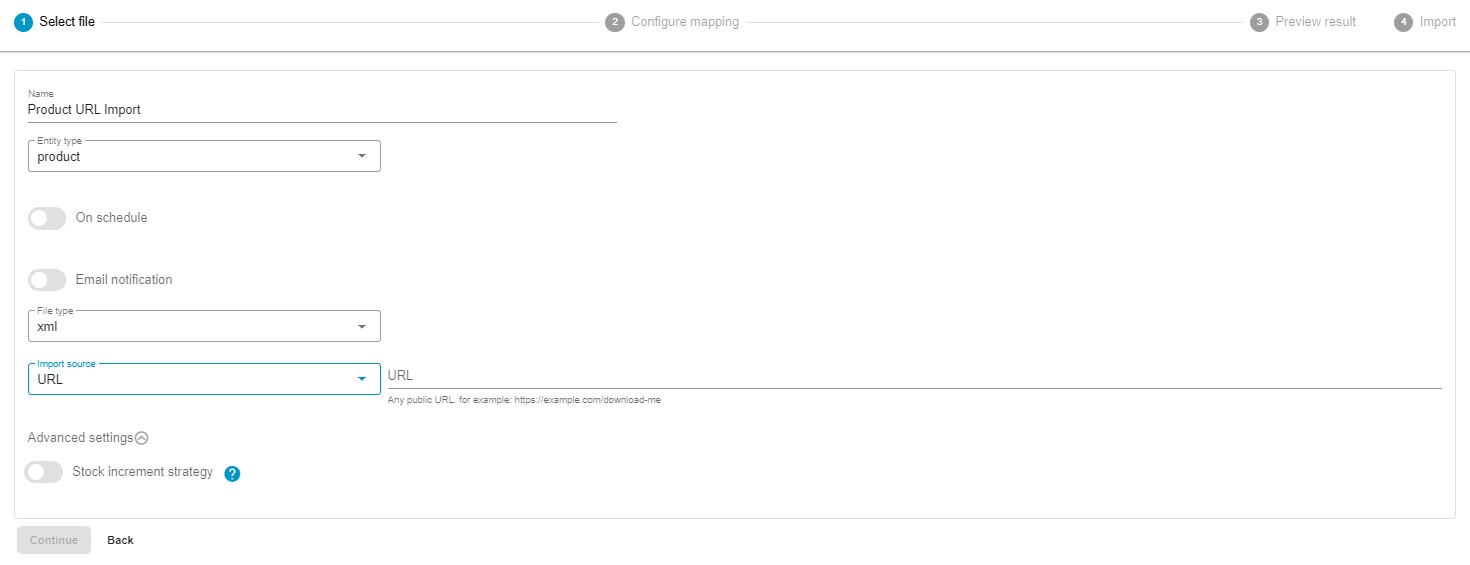
- Name your new import profile.
- Choose the entity to import. Decide whether you want to import products or customers to Shopify from a URL. Support for other entities is coming soon.
- Enable the On Schedule toggle to create a schedule of updates for Shopify URL imports. This feature will help you automate your product and customer updates.
- Enable notifications for Shopify import results to stay informed on how your URL imports run.
- Select a file format of your Shopify URL imports. Our app supports XLSX, XML, and CSV formats as well as direct imports from Google Sheets spreadsheets.
- Now, choose “URL” as your import source and specify any public URL, for example https://example.com/download-me. The app also lets you update via FTP or from Google Drive. Manual file uploads are possible too.
- Before going any further, finetune advanced settings: choose whether you want to turn on the Stock Increment Strategy. If it is enabled, decide whether you want to activate the Reload Product Before Update option.
Note that when you enter a URL for importing, the file type hidden behind this address is crucial since the app cannot import all files. For example, using an image URL for a CSV import from a URL leads to an error.
To let you avoid this issue, the app checks the file’s MIME type and doesn’t download it if the MIME type is not suitable.
A MIME type which stands for a Multipurpose Internet Mail Extension is a standard that indicates the format of a file. It is a fundamental characteristic of a digital resource that influences its ability to be accessed and used over time.
Here’s a list of MIME types that the app currently supports:
|
1 2 3 4 5 6 7 8 9 10 11 12 13 14 15 16 17 18 19 20 |
"csv" => [ "text/html", "text/csv", "text/comma-separated-values", "text/x-comma-separated-values", "text/tab-separated-values", "application/x-csv", "application/csv", "text/plain", "application/octet-stream" ], "xml" => [ "text/html", "application/xml", "text/xml" ], "xlsx" => [ "application/vnd.ms-excel", "application/vnd.openxmlformats-officedocument.spreadsheetml.sheet" ] |
If you import an unsupported file, the app displays the following error:
Failed! Bad url. mime/type mismatch or max size exceed
Step 3: Configure Mapping
Within the mapping screen, you can specify the alignment of columns from your import file with the corresponding product properties in your Shopify store. Should your update introduce column names that do not meet Shopify’s requirements, you have the flexibility to easily replace them with appropriate alternatives in this section. Do that to enable your Shopify product or customer import from a URL.
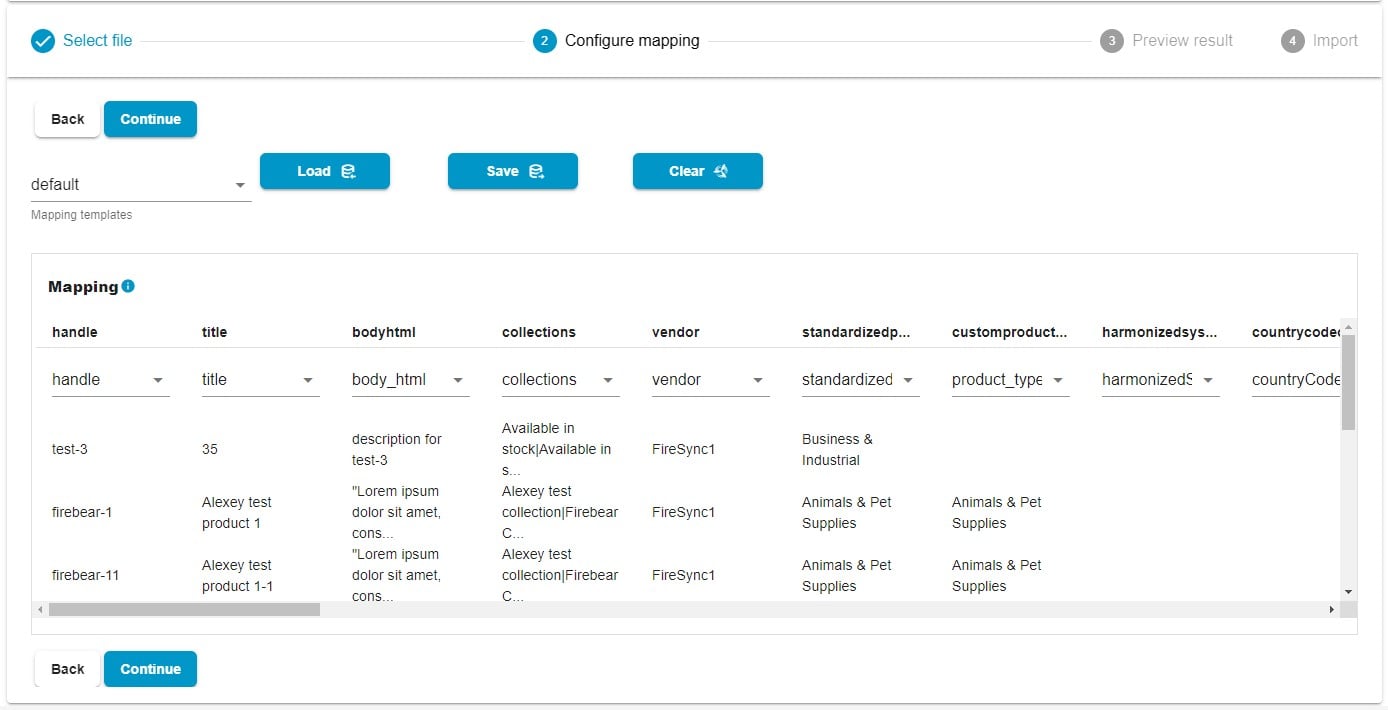
Click “Continue” to proceed to the next section.
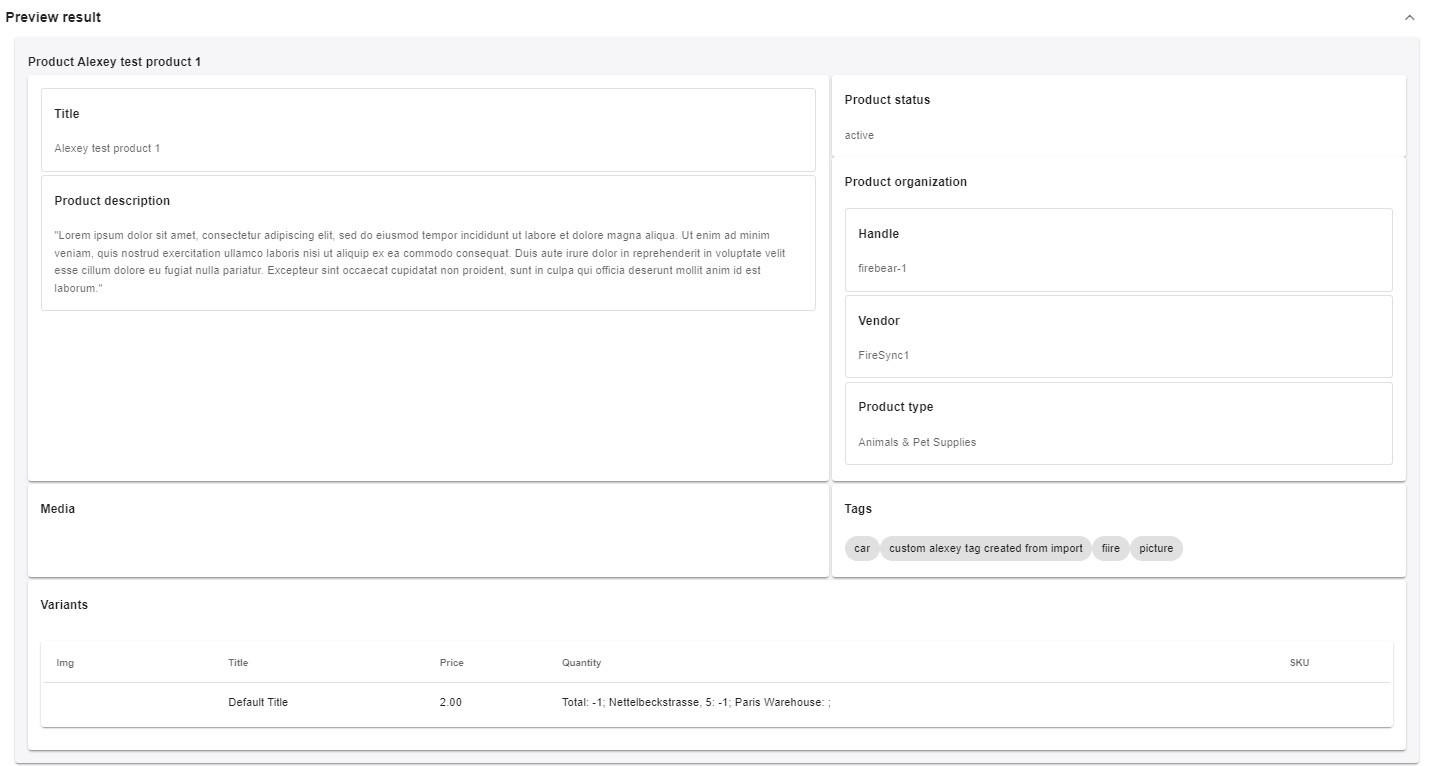
Step 4: Preview Results
The Import & Export Tool offers a preview of the imported data. This step allows you to catch mistakes that could result in failed imports. If you see any, you ask your update provider to fix them if you cannot address these issues during the mapping stage.
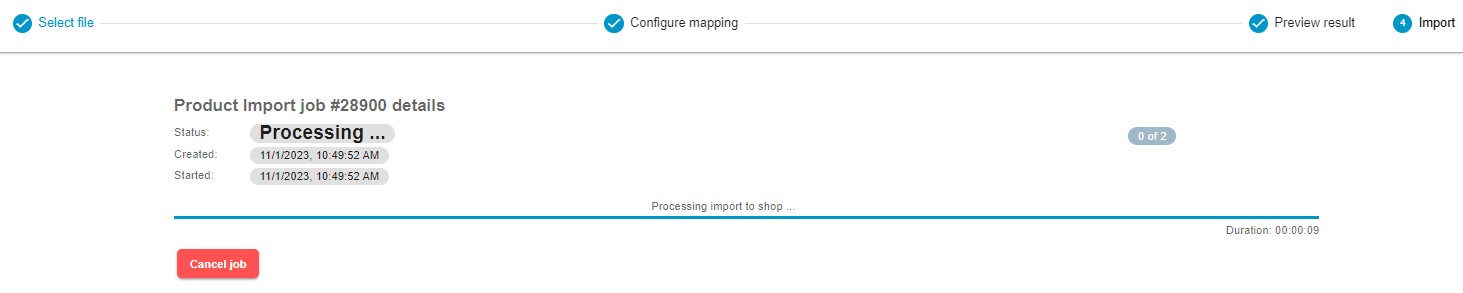
Step 5: Import
Click the “Save” button to save your Shopify URL import profile. It will be executed automatically if you’ve created a schedule. Alternatively, you can click the “Import” button to launch the transfer.
For more detailed information on enhancing your Shopify import, refer to our “Improved Import & Export Tool Manual.”
Other Features
Elevate your data management game with the powerful Firebear Import & Export Tool, designed to supercharge your Shopify experience. Here’s how this app takes your data handling to the next level:
- Easy Product Management: Effortlessly keep your product catalog up-to-date by managing product data and custom properties.
- Customer Data Made Simple: Simplify the import and export of customer details for smoother customer relationship management.
- Streamlined Order Insights: Extract valuable insights from transactions with a hassle-free export of order data for detailed sales analytics.
- Precise Data Mapping: Define accurate data relationships, ensuring seamless integration into your Shopify store.
- Flexible Scheduling: Set custom import and export schedules, automating data updates based on your unique business needs.
- File Format Freedom: Work seamlessly with CSV, XLSX, and XLS files for smooth data transitions.
- Google Sheets Integration: Collaborate effortlessly by transferring data between Shopify and Google Sheets with ease.
- Direct File Uploads: Simplify data management with straightforward import and export of data files that you upload and download manually.
- Secure Uploads: Ensure data transfer security with robust support for FTP/SFTP protocols.
- Google Drive Integration: Streamline data file uploads with seamless integration with Google Drive.
The Firebear Import & Export Tool is your all-in-one solution for Shopify data management. With support for multiple file formats, advanced scheduling, flexible mapping, FTP and URL uploads, and integration with Google Sheets and Google Drive, this app empowers you to optimize data processing while maintaining accuracy. For more details, visit: