
Advanced Shopify Import: Shopify Google Drive Integration
![]()
Although Shopify is undoubtedly one of the greatest e-commerce platforms, its import and export capabilities may appear somewhat constrained. Especially when it comes to import and export processes. By default, you are bound to manual file uploads, requiring a hands-on approach to get your data where it needs to be; for instance, on Google Drive.
Even a basic Shopify Google Drive integration is still impossible since you need to upload files manually. You export files from Shopify and then upload them to Google Drive or vice versa. However, this process can be streamlined. Let’s see how to connect Google Drive to Shopify, automating data transfers between the two systems. Below, we explore the import side of the process. You can learn about the export side of the Google Drive Shopify integration, in our export guide.
While Shopify’s built-in instruments prove insufficient for the task, the brings the desired functionality. You will learn how to integrate Google Drive with Shopify in a few clicks, seamlessly connecting the two systems with the help of the app. But let’s look at the default integration first.

Table of contents
Manual Google Drive to Shopify Import
If you want to import data from Google Drive into Shopify using the default Shopify tools, follow these steps:
- Export Data from Google Drive. First of all, navigate to your Google Drive and export the desired data file to your computer.
- Prepare Your Data. Ensure that the data you want to import is correctly formatted in a CSV file. Check whether column titles and values are suitable – you can learn more about CSV formatting requirements in our Shopify import guide.
- Log in to Your Shopify Admin Panel. Access your Shopify store’s admin dashboard and go to the section where the data you want to import belongs. If we assume that you deal with a product update, then you should navigate to the Products screen of your Shopify admin.
- Use the Import Tool. You’ll typically find the “Import” button within the relevant section. Click it to initiate the import process.
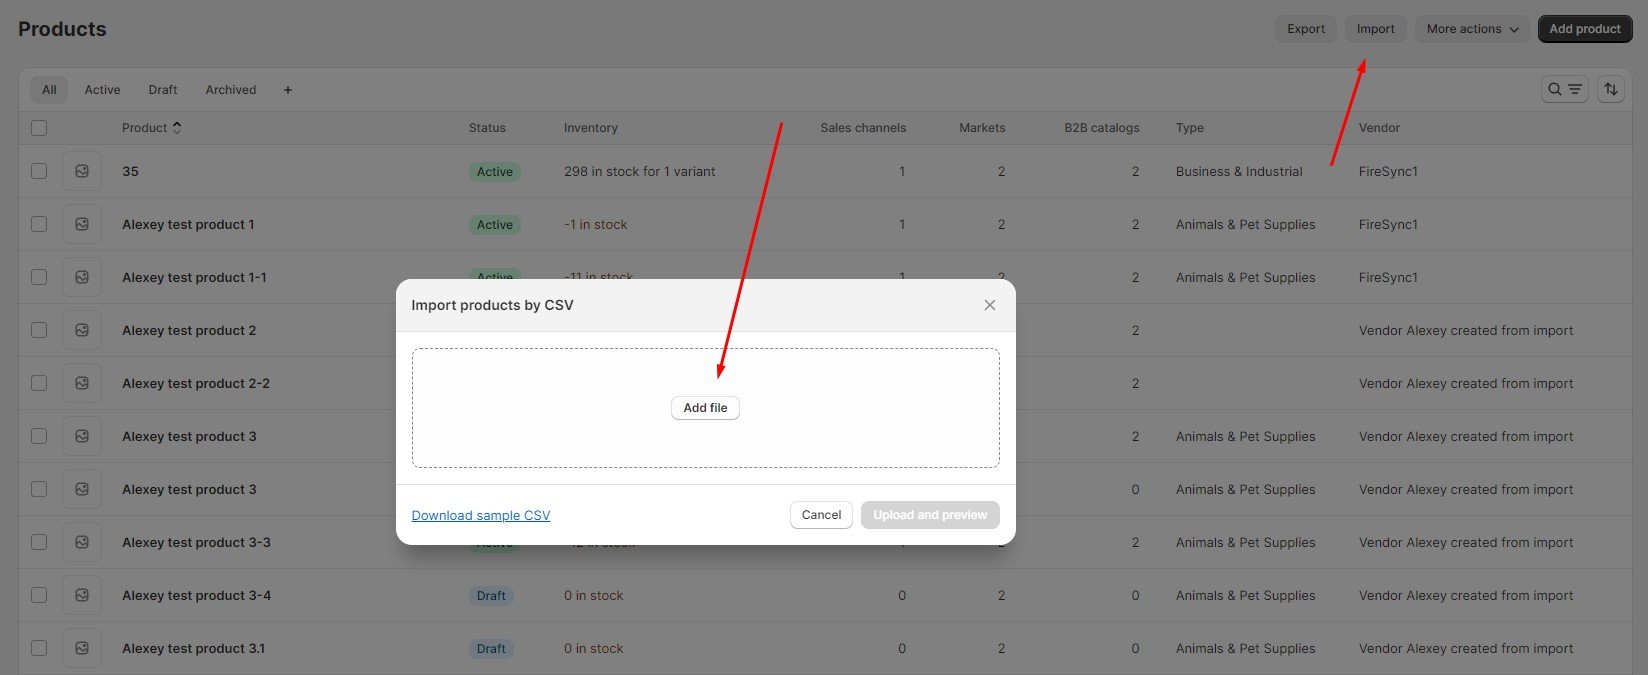
- Upload Your Data. The system will prompt you to upload your data file. Choose a CSV with your product update from your computer.
- Initiate the Import. Once you are satisfied with the settings, confirm the import. The system will process the data and update your product catalog.
Please note that the process can vary depending on the type of data you’re importing (e.g., products, customers, or orders). Does it look like a proper Shopify Google Drive integration?
No! It is just the default way to connect Shopify to Google Drive by importing files manually. As for more advanced synchronization, pay attention to the Firebear Import & Export Tool.
Automated Google Drive Shopify Integration
The Firebear Import & Export Tool lets you effortlessly connect Shopify to Google Drive. Follow these steps to establish the integration between the two systems:
Prepare Your Google Drive Storage for Shopify Google Drive Integration
Before you begin with your Shopify admin, you need to prepare your Google Drive storage. Here is how:
- Initiate the process by creating a new folder within your Google Drive. To do this:
- Click the “New” button located on the left side of your Google Drive main page.
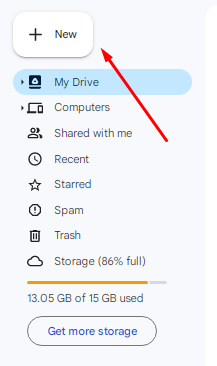
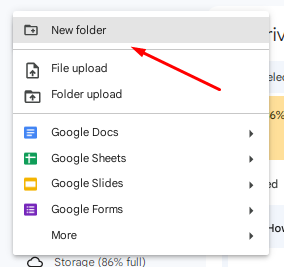
- Select “New Folder.”
- Click the “New” button located on the left side of your Google Drive main page.
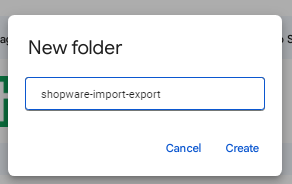
- Give your folder the name “shopware-import-export.” Yes, “shopware-import-export” is specifically tailored for Shopify. Remarkably, this folder can also serve the dual purpose of accommodating data for Shopware and BigCommerce.
- With your folder in place, you can now transfer your updates into the “shopware-import-export” folder. Here’s how:
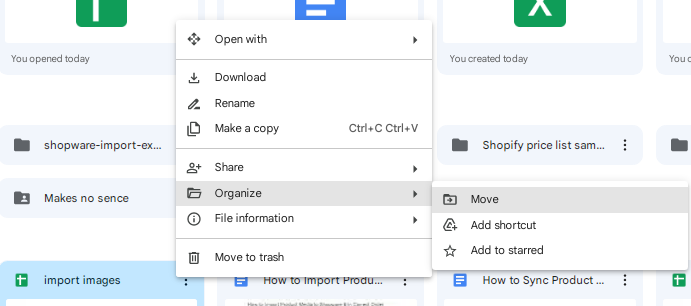
- Open the context menu.
- Click “Organize.”
- Select “Move.”
- Opt for the “shopware-import-export” folder and click “Move.”
Your storage is now ready. You can connect Shopify with Google Drive by creating an import profile.
Create a New Import Profile to Transfer Data From Google Drive to Shopify:
Here is how you configure a new import profile for your Shopify Google Drive integration:
- Head to “Apps” in your Shopify admin panel, followed by “Firebear Import & Export Tool.”
- Click on the “Import” option and the “New Profile” button.
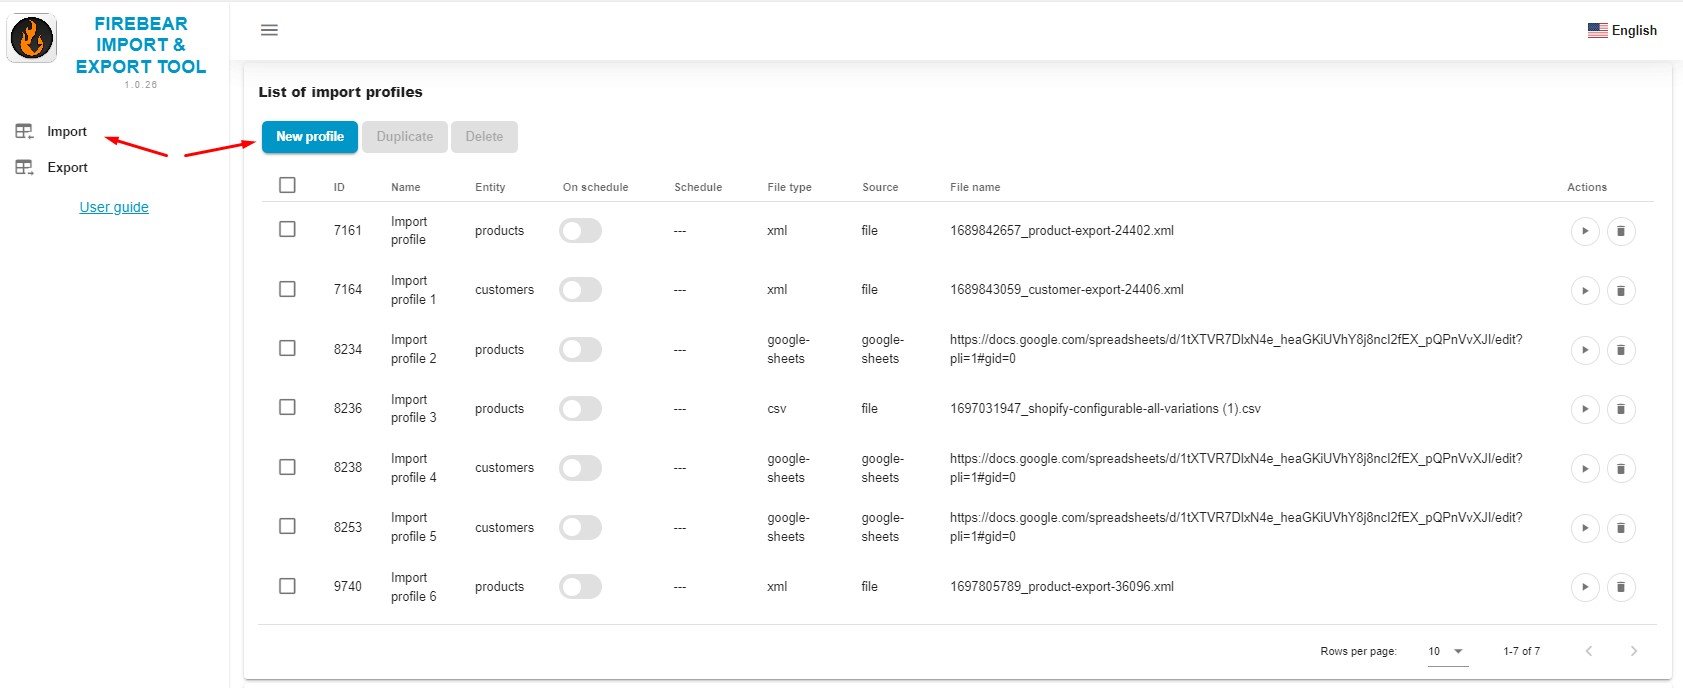
- This will bring up the “Select file” screen where you can apply basic configurations to your Shopify Google Drive integration:
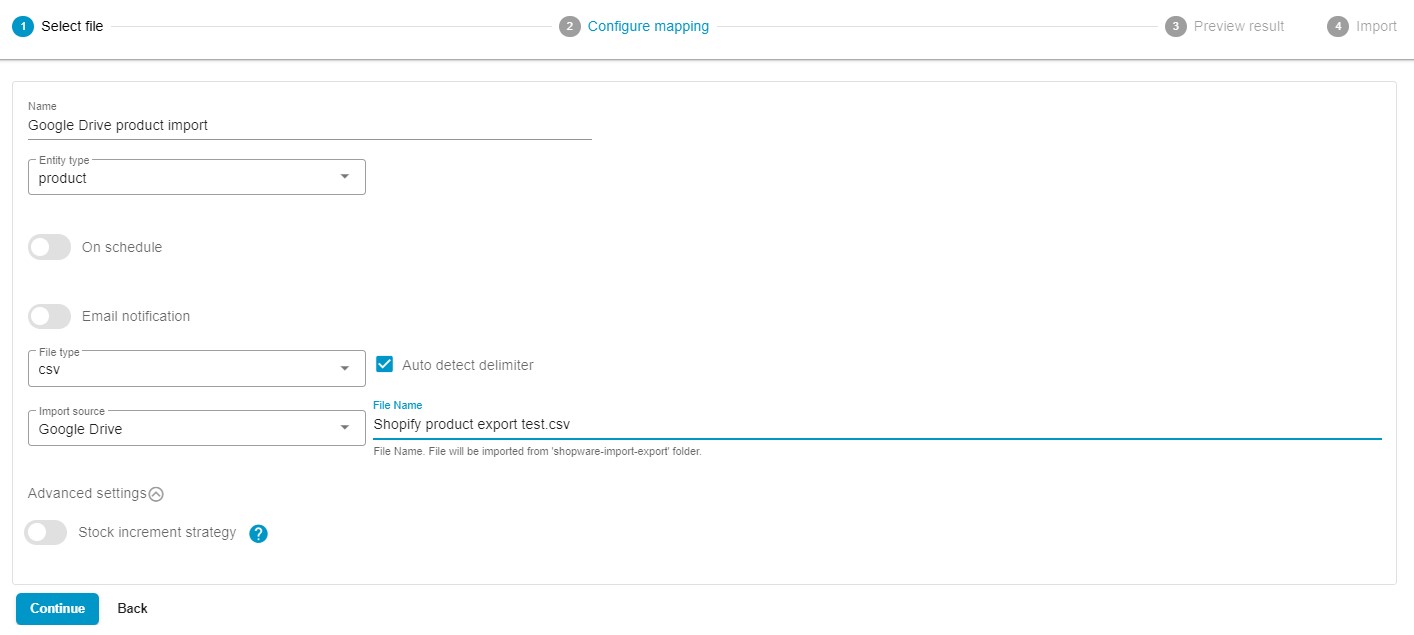
- Specify your profile’s name, such as “Google Drive Product Import.”
- Select the entity you want to import. Choose products to run the inventory updates. Also, you can import customers. Support for order import is coming soon.
- Create a schedule for updates. You need to choose a time zone and select how often you need the app to import product updates from Google Drive to Shopify: hourly, daily, weekly, or monthly.
- Configure email notifications as needed. The app can notify you about successful, failed, or both types of import.
- Choose your desired file format. By default, it should be CSV only. Our app also adds support for XML and XLSX. You can even establish a Shopify Google Sheets integration.
- You need to choose a file source for your update. Opt for Google Drive. Ensure that you grant the Firebear Import & Export Tool the necessary access permissions to your storage.
Now, specify the full file name with its extension, for instance, “Shopify product export test.csv.” Note that your file will be imported from the “shopware-import-export” folder on Google Drive. Alternatively, you can import data over FTP or from a URL. - Define separators or allow the app to automatically detect delimiters if your update is provided via CSV.
- Configure advanced settings, including the stock increment strategy.
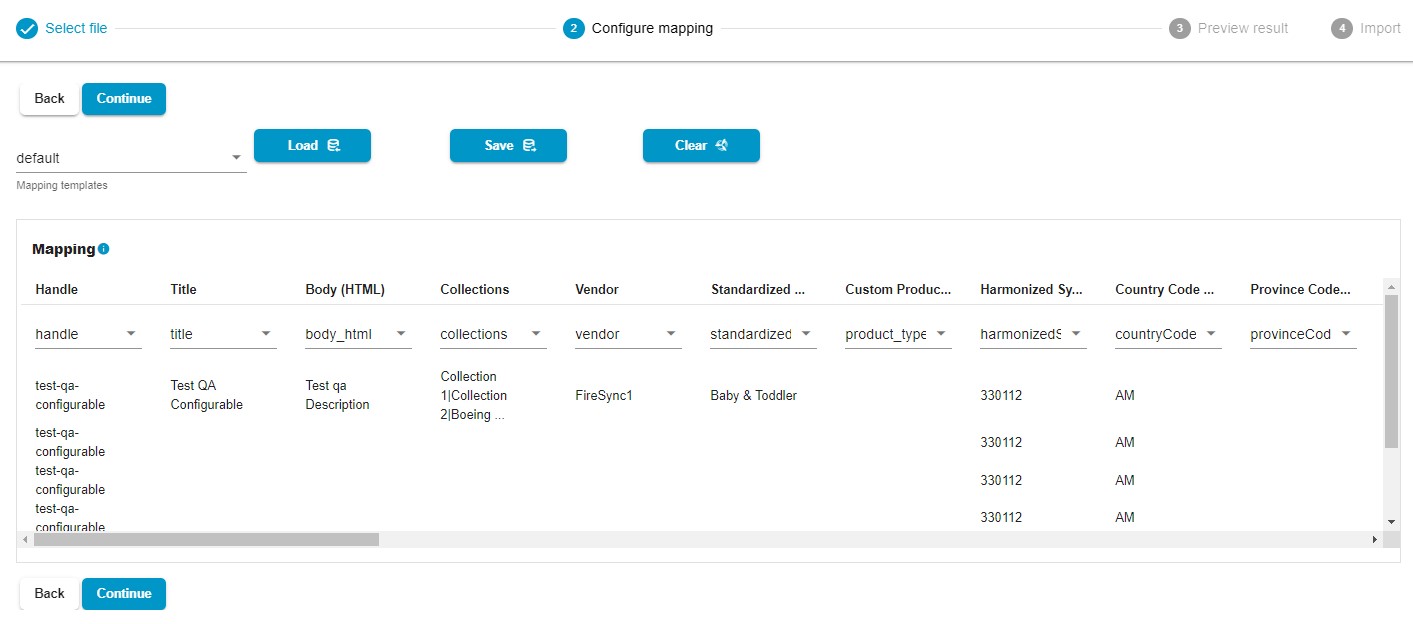
- Click “Continue” to proceed to the mapping screen. Here, you need to specify which columns from the imported file should align with the properties of your Shopify products. Otherwise, you won’t be able to establish the direct Shopify Google Drive import. If your update originates in another Shopify website, it won’t take any effort to map it. But if it is generated in a third-party system, you will need to examine column headers carefully and specify the corresponding names suitable for Shopify.
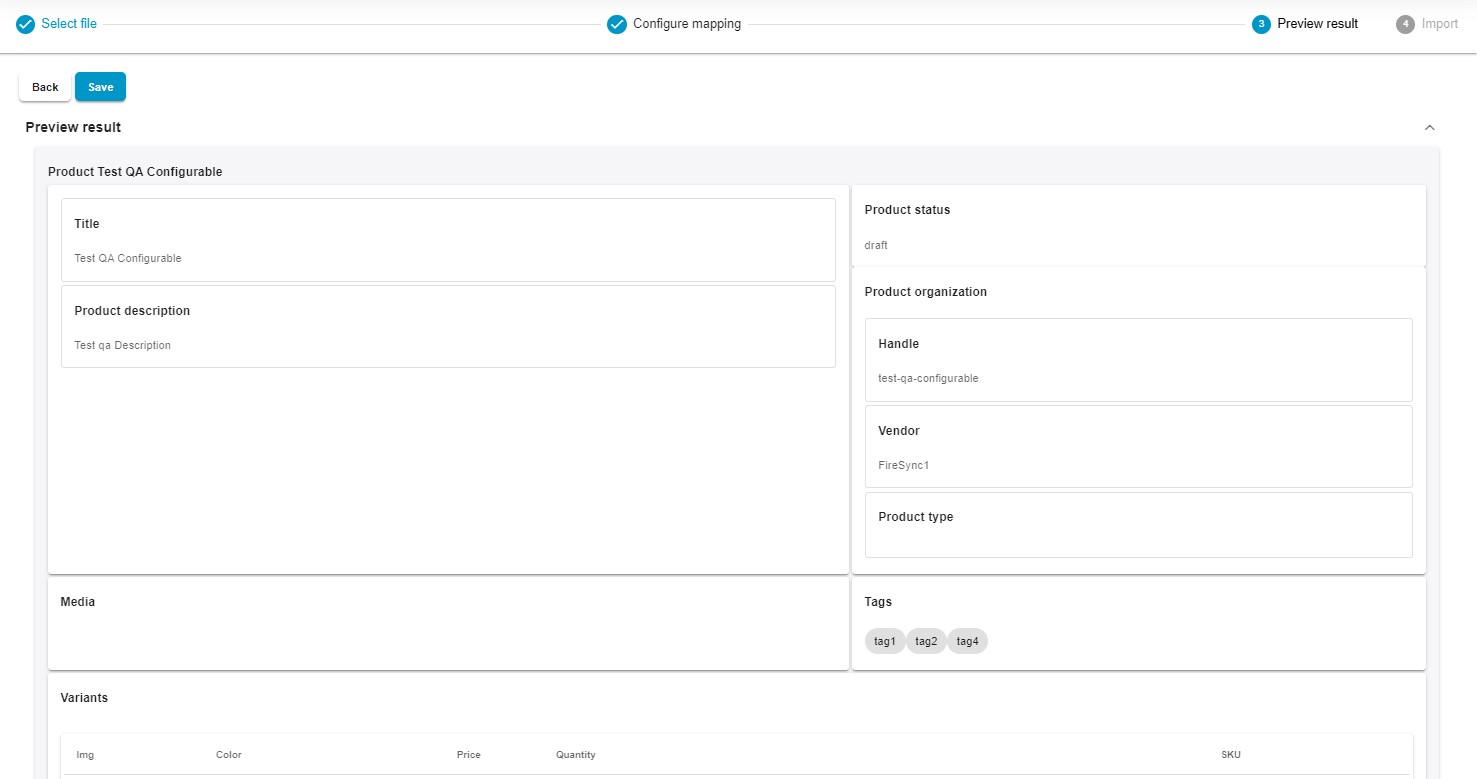
- The app provides a preview of how your products will appear after Google Drive Shopify files are on board. If something looks wrong, you still have a chance to fix it.
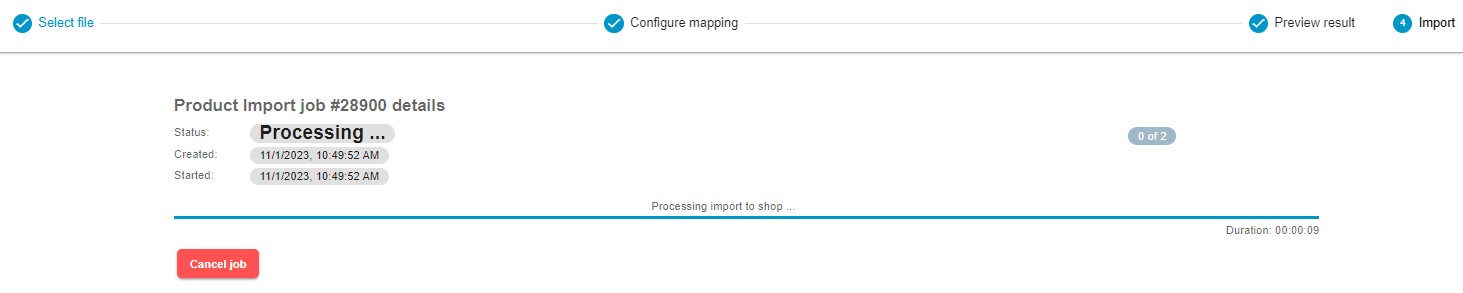
- Click “Save” – the Import & Export Tool will launch your Shopify Google Drive import profile following the schedule. If you didn’t create it, click “Import” to connect Shopify to Google Drive and start the import process immediately.
For a corresponding guide on Shopify export, check this tutorial: Shopify Export to Google Drive. You can also refer to our detailed documentation in the Firebear Import & Export Tool Manual.
Final Words
The Firebear Import & Export Tool doesn’t just address the typical challenges Shopify store owners face during data transfers. It takes these operations to entirely new heights and the Shopify Google Drive integration is a good example. In contrast to traditional data transfer methods, our application offers a wide range of features and functionalities designed to refine and diversify your data management. Import and export scheduling, data mapping, support for various file formats, and many other handy improvements introduced in our tool can dramatically enhance not only the way you connect Google Drive to Shopify but also multiple other integrations.
Admit that with these extensive capabilities up the sleeve, it is much easier to establish a seamless Shopify Google Drive integration than when you are stuck with the default tools. For a more in-depth exploration of the Import & Export Tool, please follow these links:
Shopify Google Drive FAQ
How do I link Google Drive to Shopify?
You either need to transfer data from Google Drive to Shopify manually or it is possible to automate this process with the Import & Export Tool. Install the extension, create a new folder on Google Drive, create a new import profile within your Shopify admin, and link the two systems together.
How to get a URL image from Google Drive?
Proceed to a Google Drive folder where the image is situated. Right-click on the selected image. Select “Get Shareable link”. The image link is now copied. You can add this link to a CSV file to import products with images to Shopify.
How do I get a URL link from Google Drive?
Go to your Google Drive and right-click on the file you want to share. Click Share > Copy link. That’s it. If you use the Import & Export Tool, it is only necessary to specify a file name to import it to Shopify.