
Enhance Your Shopify Data Export: Custom Columns

Although Shopify’s default export is enough for transferring data within the ecosystem, you may face multiple inconveniences when exporting data to third parties. The problem starts when you leave the territory of your e-commerce platform. Since Shopify applies a unique system of column names to the data you export, it is impossible to deliver your CSVs to third parties unless you replace the default column names with the ones the accepting party requires. Luckily, there is a more user-friendly and convenient solution.
Below, you will learn how to create a Shopify data export with custom columns. We explain how to prepare your export profile, replace the default column names with custom names, create a custom column order, and delete unnecessary columns from export.

Table of contents
Get The Proper Export Tool
Since the default export tool doesn’t support customization, you must use a third-party solution, such as the , to enable Shopify data export with custom columns. When the app is installed, proceed to the next step.
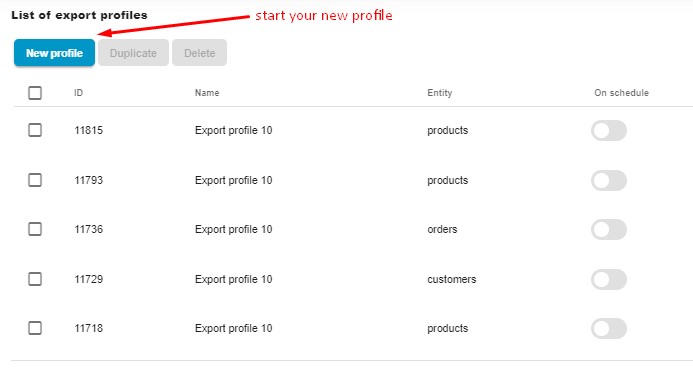
Shopify Data Export: New Profile
You can create a new export profile under Shopify Admin -> Apps -> Firebear Import & Export Tool -> Export. Click the “New Profile” button to take one step forward toward custom column export from Shopify.
Shopify Data Export: Basic Settings
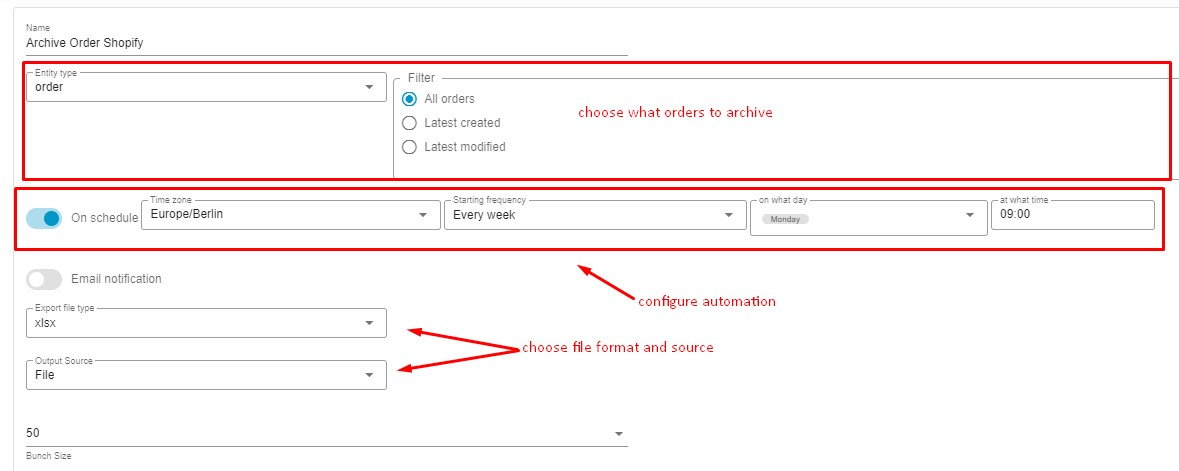
Now, you need to configure basic export settings to prepare your export profile for the customization of column names:
- Specify a name for your export profile.
- Choose an export entity – Orders, Products, or Customers.
For orders, you can select All orders, Latest created, or Latest modified to export only particular orders. - Next, it is possible to automate your Shopify export. Enable the On Schedule toggle to create a schedule of updates and specify your time zone, select a starting frequency, and set the export time.
- If you decide to go with regular updates on how your custom columns are exported from Shopify, configure email notifications.
- Now, you need to select your preferred file format. You can choose CSV, XML, XLSX, or Google Sheets spreadsheets.
- Choose File as your export source to download a file with custom columns after the Shopify data export is complete. Also, you can use FTP transfers, Google Drive exports, and direct uploads to a Google Sheets spreadsheet to transfer your customized update to a third party.
- If your server has resource limitations, choose a lower bunch size to reduce the load.
- Click “Continue” to proceed to column customization.
Shopify Data Export: Custom Columns
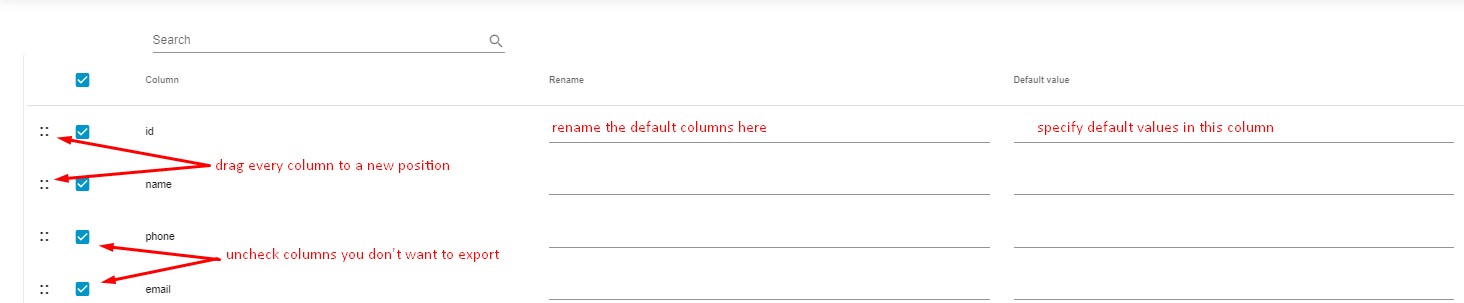
The mapping screen of the Import & Export Tool provides the ability to apply different customizations to the data you export. The following four options are at your service:
- Replace the default column names with custom ones;
- Customize column order;
- Delete columns that you don’t want to export;
- Use default values to fill in empty rows.
Set Custom Columns for Shopify Data Export
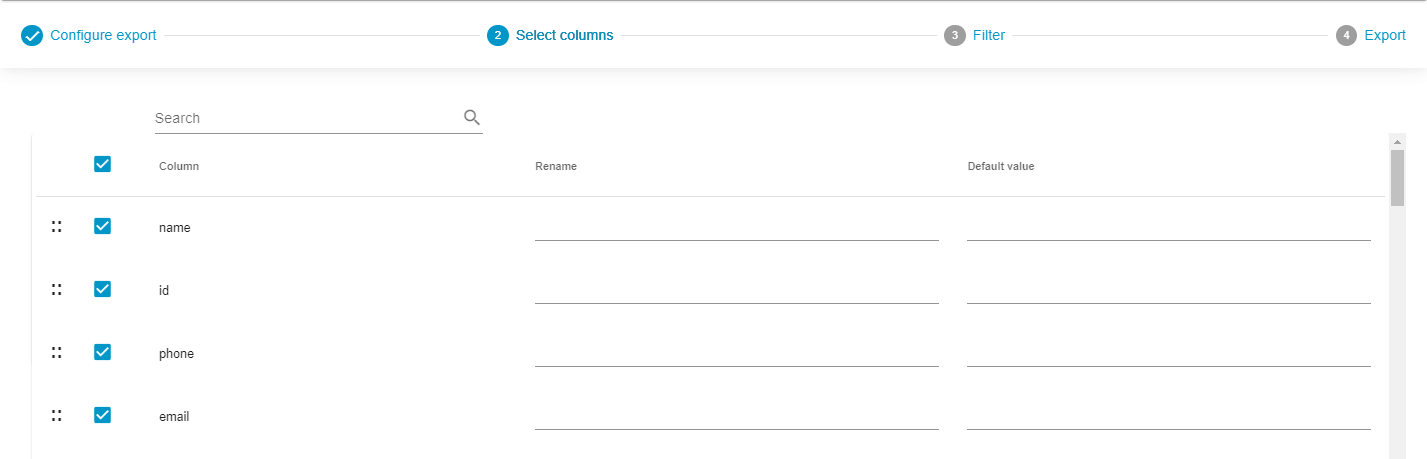
Let’s suppose, you need to customize column names for order export. Find the column you want to customize and specify the replacement in the Rename column. For instance, you want to replace the id column with order_id. That’s how it looks:
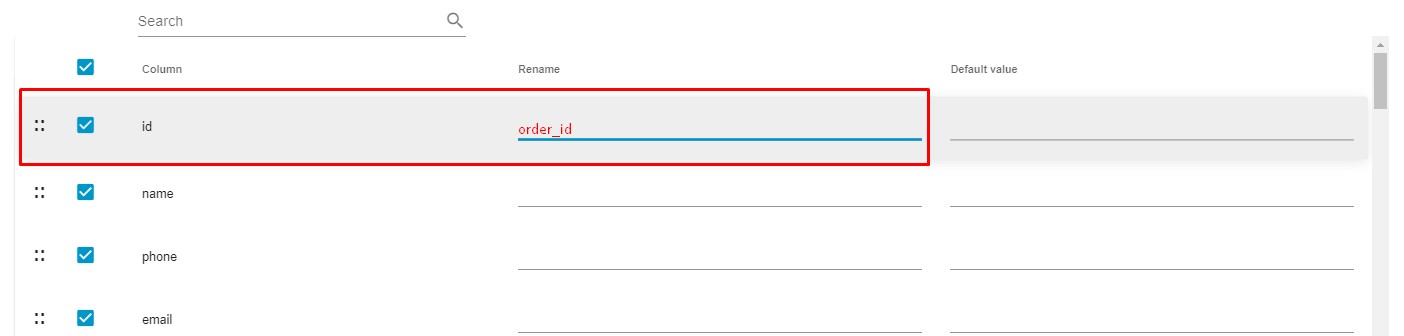
Apply such changes to all columns your custom export requires. Consequently, the accepting party will receive a table with column names that fit its requirements for 100%.
Specify New Positions For Columns in the Shopify Export Table
Use the four-dot handle button on the left of every column name to drag it to a new position.
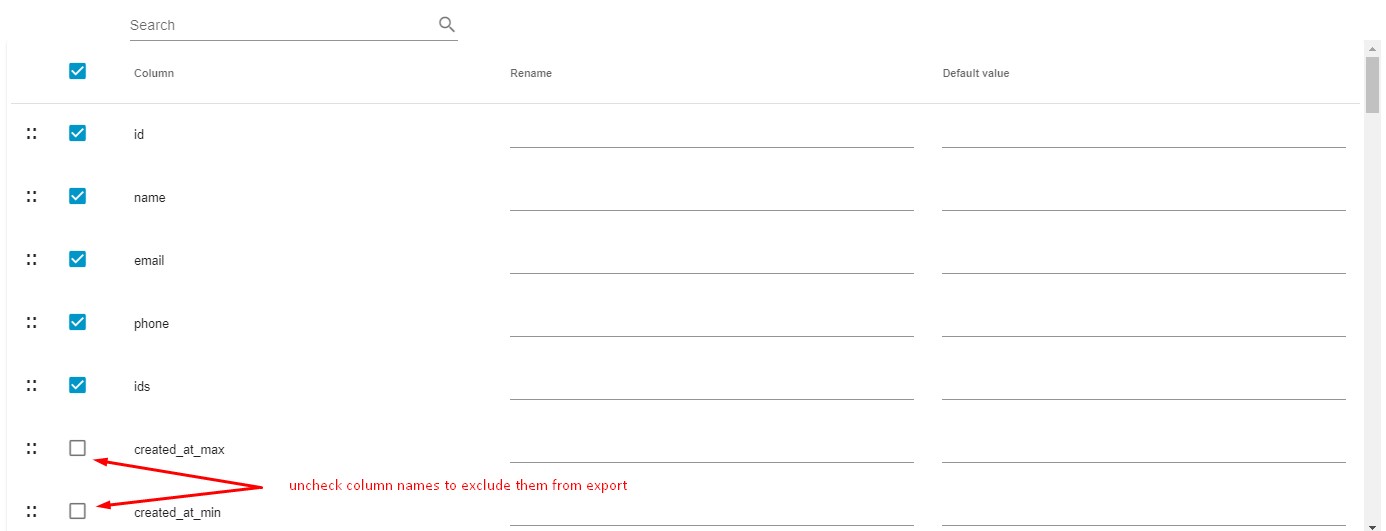
Exclude Columns from Export
Uncheck column names for columns that you don’t want to export.
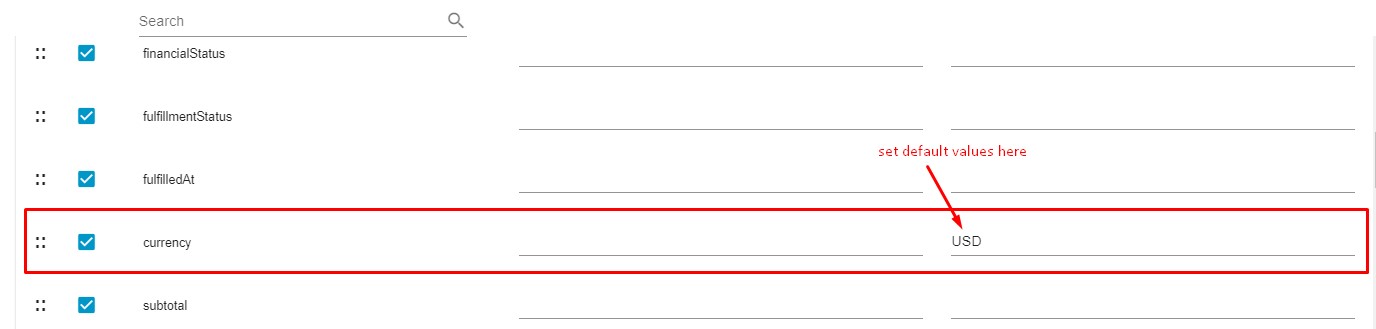
Set Default Values for Empty Rows in the Export Table
Set default values to fill in empty rows. For instance, there is no information about currency for one of the orders you want to export. You can set USD or another currency in the Default value column. Next, the app will fill in this value per each order that has now data in the currency column.
Note that you can use the search field to find the particular columns you want to edit, delete, or reposition.

Another important aspect is that you can save this mapping template in Shopify. You will be able to use it for other export profiles by duplicating and customizing the current profile. At the same time, the app will apply it to all exports you run using this profile.
Shopify Data Export: Filters
Before you launch your Shopify data export with custom columns, it is possible to narrow down the selection of rows in the table. Let’s suppose you need to export only closed orders:
- Click the “+” button – the app will add a new filter.
- Choose status as your filter criteria.
- Select closed from the value dropdown, and your filter is ready.

You can create multiple filters following your specific business case. When you are done with the filters, proceed to the final step.
Export Custom Columns from Shopify
Click the Save & Close button to save your Shopify data export with custom columns. The app will launch the transfer automatically according to the predefined schedule.
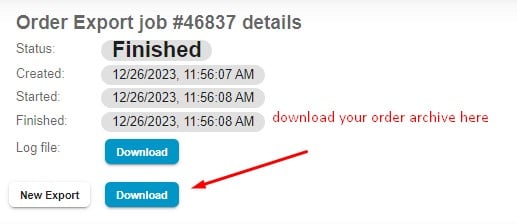
You can also run the export procedure immediately by clicking the Export button. If your export source is File, you will be able to download your table with custom columns as an archive when the export procedure is complete. Click the Download button:
Final Words
As you can see, Shopify data export with custom options is something every merchant can have in their arsenal of tools. Although this procedure is not available by default, you can easily implement it with the help of the Import & Export Tool, unlocking such premium features as import and export automation, support for multiple file formats and sources, and mapping templates for Shopify, to name a few. Read the app’s manual for more insights. Also, contact us to get more information on custom column export from Shopify or other data transfer inquiries.