
Shopify Product Handle Explained: Bulk Update & Editing Tips

In the following article, we cover the basics of Shopify product handle management. You will learn what a product handle is and how to improve updates associated with this product attribute and your Shopify website.
Below, we describe how to edit Shopify product handles in bulk. First, you will learn how to get product handles from Shopify. Next, we will teach you how to edit them. The final step describes how to import the newly created update back. Also, we clarify the importance of redirects in Shopify product handle editing.

Table of contents
What Is Product Handle in Shopify?
In Shopify, each product has a unique URL generated based on the product’s title. In addition to the store address, it also includes a part called the “handle.”
So, a Shopify product handle is the last part of the product’s web address that often consists of the product name and is designed to be user-friendly and SEO-friendly. It typically consists of lowercase letters, numbers, and hyphens, making it easy to read and share.
For example, if you have a product titled “Exercises in Futility T-Shirt,” the handle might be like “exercises-in-futility-t-shirt.” This handle is used in the product’s URL, helping customers and search engines navigate the product page.
Why does one need to edit a product handle in Shopify?
Shopify Product Handle Bulk Update
The main reason to edit Shopify product handles is SEO. If product handles are not SEO-friendly enough, you may need to change them. And the more products you have, the more time you need to spend doing that. Unless you use the Import & Export Tool for Shopify. This app lets you get product handles in Shopify, edit them in bulk, and then reimport them back.
How to Get Product Handle in Shopify
The for Shopify is a perfect solution for mass product updates no matter whether you want to edit handle data or other aspects. Let’s see how the solution works in the case of Shopify product handle bulk updates. Below, we explain how to get product handles in Shopify.
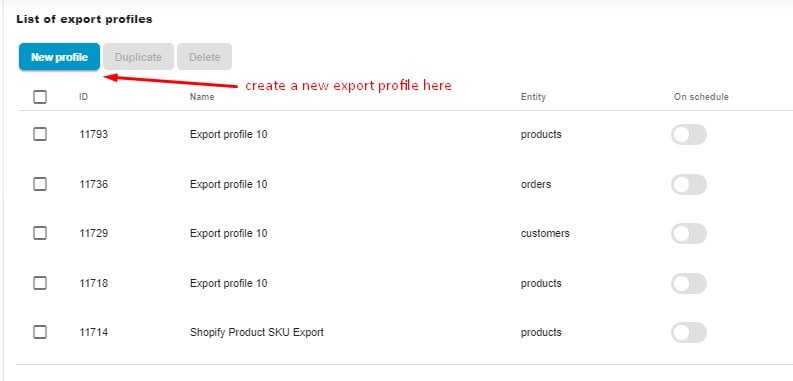
Go to Shopify Admin -> Apps -> Firebear Import & Export Tool -> Export to create a new export profile. Hit the New Profile button to proceed to the next step.
You are on the Configure export screen. It’s a place where you need to apply some basic configurations:
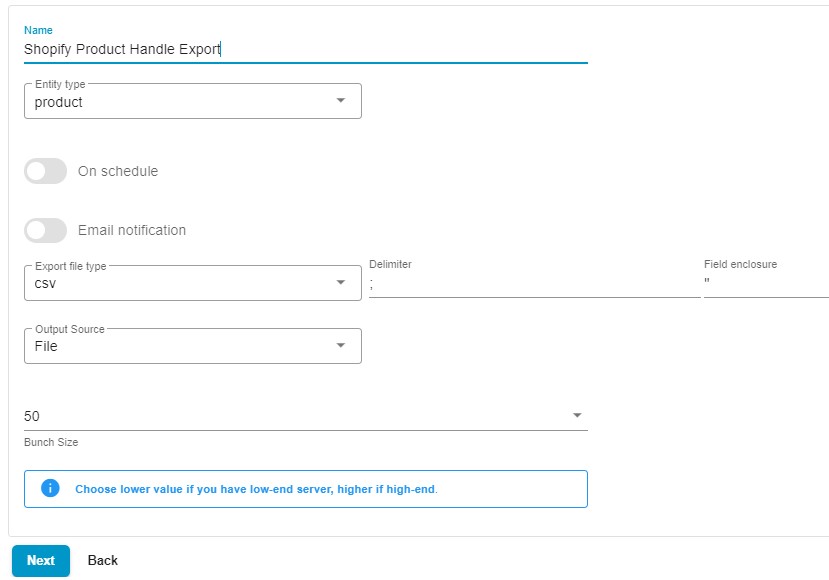
- Specify a name for your profile, for instance, Shopify Product Handle Export.
- Choose an export entity – Products.
- You don’t need to automate your Shopify product handle export if it is not a regular procedure.
- There is also no need to configure email notifications.
- Choose your file format. You can export handles from Shopify via CSV or transfer them as XML and XLSX files or straight to a Google Sheets spreadsheet. In the case of CSV, it is possible to specify a custom delimiter and field enclosure.
- Choose File as your export source to download your product handles from Shopify. Alternatively, you can send your product data over FTP, straight to Google Drive, or directly to a Google Sheets spreadsheet as we’ve just mentioned.
- If you have a server with limited resources, you can choose a lower bunch size to reduce the load.
- Click “Continue” to proceed to the mapping screen.
Since you don’t need to update the entire scope of product data, use the mapping screen to export only the columns essential for your update.
Unselect the columns that you don’t need.
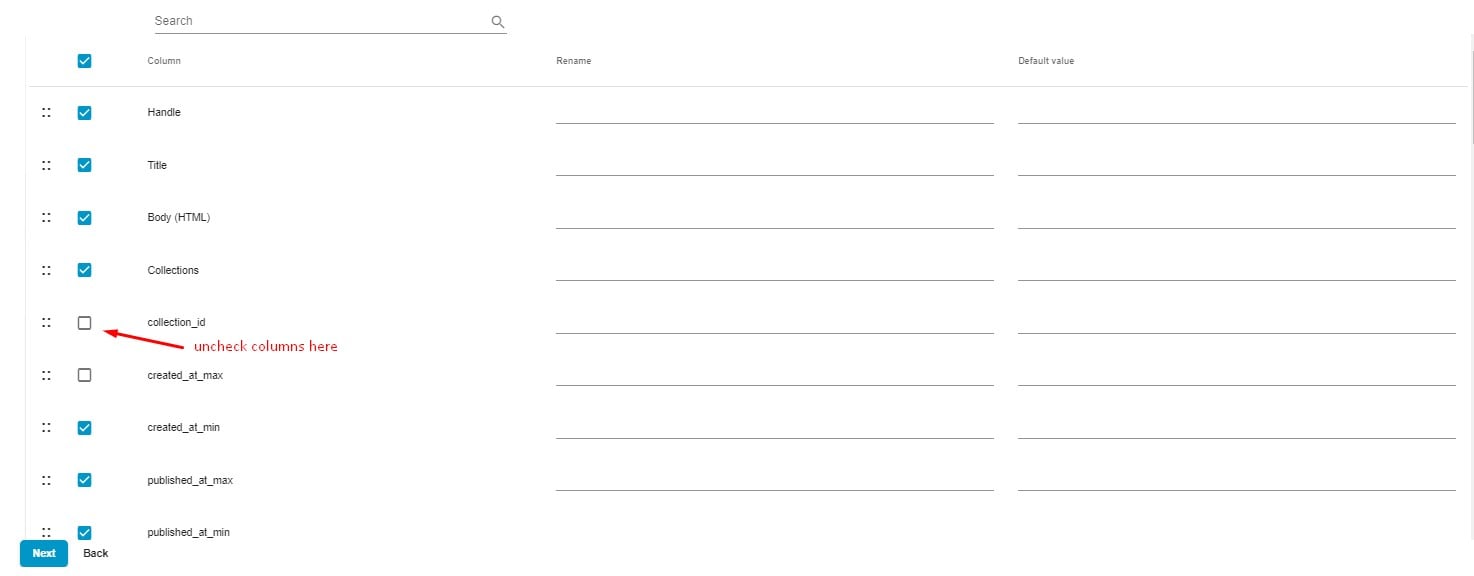
You may also use filters to transfer only handles of particular products.
Hit the + button to create a new filter. Choose a filtering parameter, such as a vendor, and then specify values to narrow down the selection of products in your export file.

Now, click the Save & Close button to save your Shopify product handle profile and Export to transfer the data from Shopify. You can download your product handles when the export procedure is complete, or the corresponding information will be available at another selected destination.
Managing Shopify: Change Product Handle
Now, open your file in a spreadsheet editor. You have all product handles listed in the Handle column. The Title column is situated to the right. You can use product titles specified there to make handles more SEO-friendly.

Apply all the necessary changes and save your file to proceed to the next step.
How to Import Updated Product Handle to Shopify
That’s almost all. You need to re-import your product handles to Shopify.
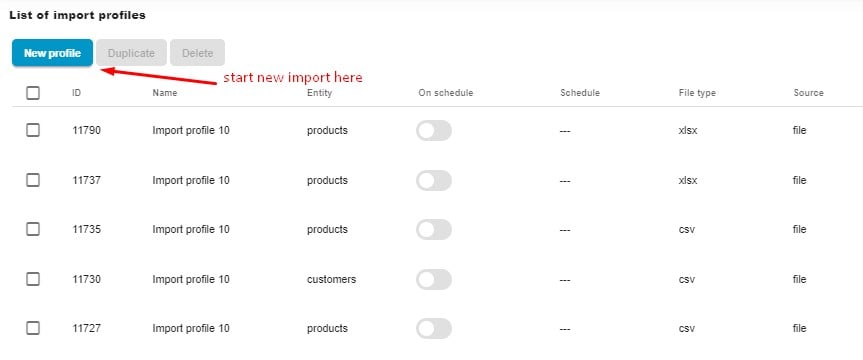
Proceed to Apps -> Firebear Import & Export Tool -> Import and hit the New Profile button. This will create a new import profile.
Now, you need to apply basic configurations to reimport product handles:
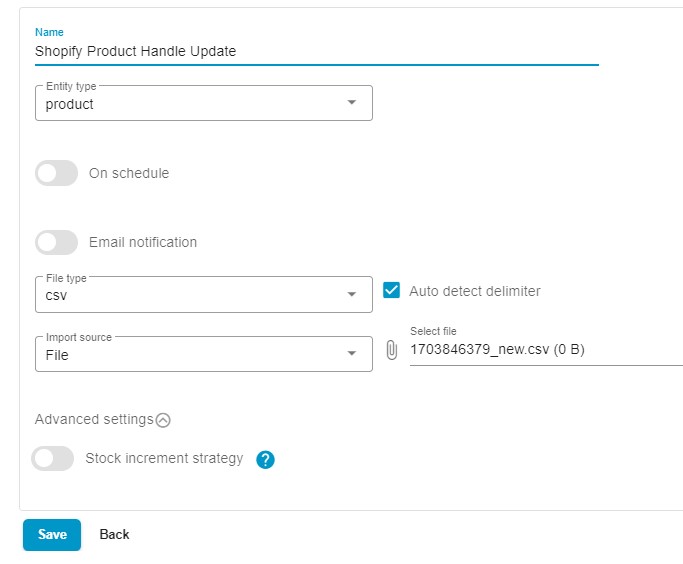
- Name your new import profile: Shopify Product Handle Update.
- Choose the entity to import: Products.
- Note that you need to enable neither Shopify import automation nor notifications.
- Select a file format: CSV, if you’ve used it for export, or XLSX, XML, and Google Sheets, if you store your product handles in one of these forms. In the case of CSV, activate the auto-detect delimiter feature.
- Choose your import source depending on where you store your update. If it’s your computer, choose File from the Import source dropdown, click the paperclip icon, navigate to your file with product handles, and select it. You can also import files to Shopify via FTP or from Google Drive, Google Sheets, or URL.
- Keep the Stock Increment Strategy toggle disabled to transfer the current product qty specified in your update file.
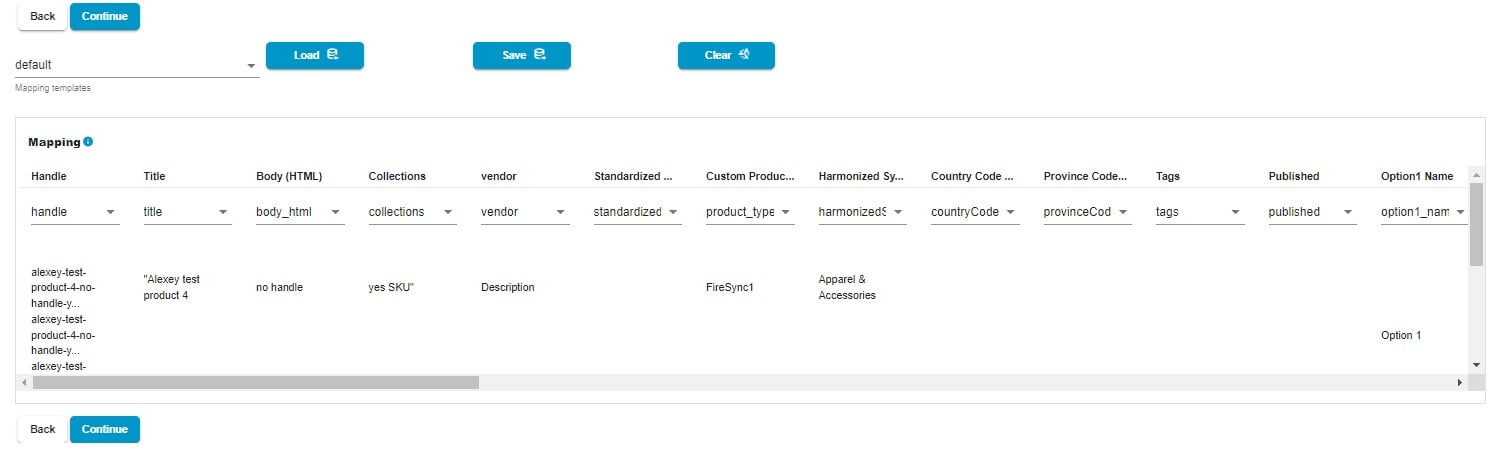
You don’t need to do anything with your mapping section, so proceed to the next step.
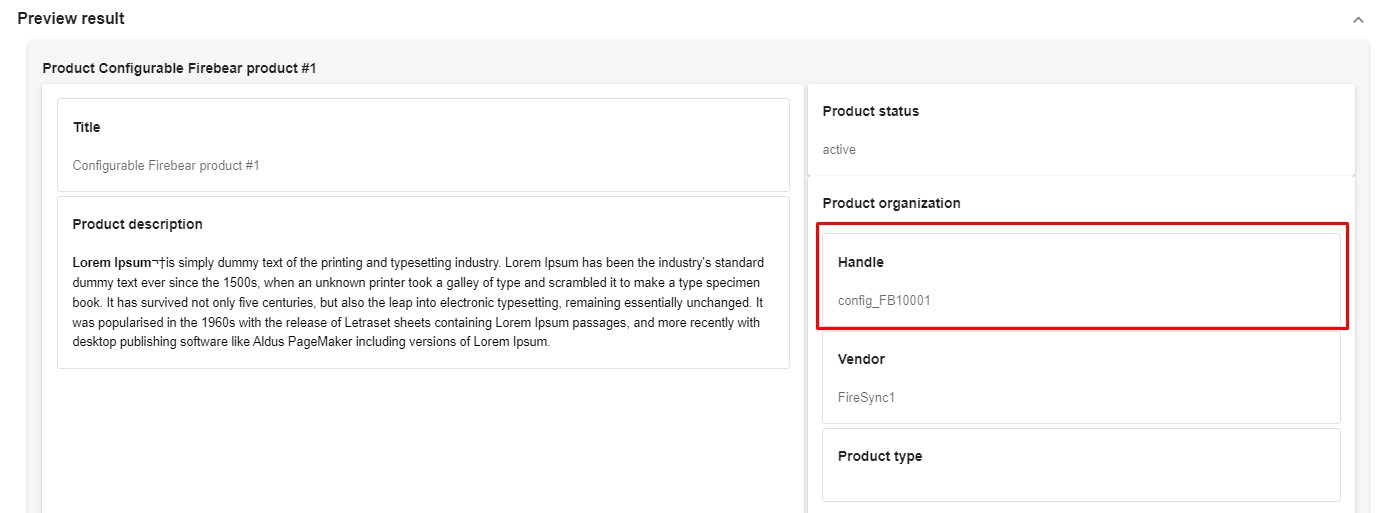
The Preview screen lets you see how changes will be applied to product attributes, including the handle. The Import & Export Tool displays the renewed products even before uploading them. As for the URL updates, they are displayed in the Handle column.
Click the “Save” button to save your import profile. Next, click the “Import” button to bulk update product handles in Shopify.
Redirects from Old Product Handles
Now, let’s say a few more words on why it is necessary to use a redirect when you update a product handle in Shopify. Using redirects from old handles to new handles is crucial for maintaining SEO and ensuring a positive user experience. When you change a product’s handle or the URL structure, keep the following things in mind:
- Maintain SEO Rankings. Search engines have indexed your old URLs, and they associate certain rankings with those URLs. When you change a URL without implementing redirects, search engines treat it as a new page, and the SEO authority and rankings from the old URL may be lost. Redirects help transfer the SEO value from the old URL to the new one.
- Preserve Backlinks. If other websites have linked to your product pages, those links point to specific URLs. Redirects ensure that users clicking on those existing backlinks are still directed to the correct, updated pages on your Shopify store.
- Avoid 404 Errors. Without redirects, changing URLs could result in 404 errors (Page Not Found) for both users and search engines. Such errors can negatively impact user experience and may lead to a loss in SEO rankings.
Regarding the types of redirects, there are two types of redirects depending on the situation:
- 301 Redirects. A 301 redirect is a permanent redirect that informs search engines that the old URL has permanently moved to a new location. This type of redirect is recommended for SEO purposes when you update Shopify product handles because it transfers the majority of the SEO authority from the old URL to the new one.
- 302 Redirects. A 302 redirect, in turn, is a temporary redirect, indicating that the move is temporary and that the old URL may be used again in the future. If you are not going to restore your old product handles, don’t use 302 redirects. From the SEO perspective, 302 redirects are not ideal for permanent changes, as search engines may not transfer as much authority as with a 301 redirect.
Thus, using 301 redirects when changing product handles in Shopify is the preferred method for SEO. This ensures that search engines understand the permanent nature of changes and help preserve the SEO value of the old URLs. It also provides a seamless experience for users and avoids such inconveniences as 404 errors.
Final Words
Handles are an inevitable part of the product data in Shopify. A product handle is a unique product identifier, an SEO enhancement, and a unique part of a product page URL. And Shopify product handle editing is something that you can optimize dramatically with the Import & Export Tool. For more information about the app, the Shopify product handle update, and multiple other import and export tactics, contact us and read our Improved Import & Export Tool Manual.