
How to Migrate from Zen Cart to Magento 2 or Sync Data Between Them
While thousands of merchants worldwide use , there are enough reasons to leave the platform. It offers lots of features, quite decent flexibility, and a relatively big community, but Magento provides better ecommerce opportunities, motivating merchants to migrate from Zen Cart to Magento 2. Are you also a Zen Cart merchant? Would you like to upgrade your online storefront with more features and get access to a broader community with tons of third-party modules? You’ve come to the right place! Below, we describe the Magento 2 Zen Cart migration – a procedure that provides all the missing features. Besides, you will find out how to synchronize data between the two systems, but let’s start with the Zen Cart description and then compare the platform with Magento 2.

Table of contents
Introduction to Zen Cart
Zen Cart is a free, user-friendly, and open source shopping cart software. Developed by shop owners, programmers, and designers, it introduces a robust alternative to many existing e-commerce platforms. Zen Cart is relatively easy to install and use. The platform requires only basic skills in website building to create a simple online storefront. But if you need a more robust option, third-party specialists are mandatory, unless you have a vast experience in e-commerce development.
It is also necessary to draw your attention to the default design of Zen Cart. For many merchants, it is a reason not to choose the platform at all or move to something more pleasant to the eye if they are already using it. To make an e-commerce website on Zen Cart attractive, you need to hire a team of developers or purchase a third-party theme.
As for the positive aspects of Zen Cart, they include various customizations available on the platform. Since it is licensed under GPL2, you can freely modify the source code. Wait a minute! Does an average merchant want to deal with the source code? It doesn’t seem so. But it is better to have this opportunity than to be limited to a few basic options.
Another important thing about Zen Cart is its built-in integration with many popular payment gateways. This feature lets you accept payment right after your store is launched. At the same time, the ecosystem offers several decent payment modules that can be easily installed.
And if your hosting provides satisfies server requirements for Zen Cart, you can easily use it. The platform supports servers with relatively simple characteristics. And you can create and configure your domain!
These features are listed on the homepage of Zen Cart’s website. Considering its design and drawbacks mentioned on multiple external resources, it is hard to imagine, why so many people choose this platform to run their e-commerce stores. Let’s compare Zen Cart with Magento 2 to understand the difference.
Magento vs. Zen Cart
The following materials are based on the report created by . Both Magento and Zen Cart ascend. The Magento ecosystem includes 146,455 stores. As for Zen Cart, the platform is home for 22,205 websites.
Zen Cart is free to use but lacks commercial options, while Magen offers them along with its community edition. Thus, our favorite e-commerce platform is well ahead of Zen Cart in Top 10K Sites, Top 100K Sites, Top 1M Sites, and Entire Web despite the recent growth of Zen Cart. The following diagrams show that Zen Cart is far behind:

While Magento has better usage coverage in more websites categories including Shopping, Business & Industry, Clothing, Arts & Entertainment, and 216 others, Zen Cart is leading in Books & Literature, Crafts, Animation & Comics, Mental Health, as well as ten more categories.
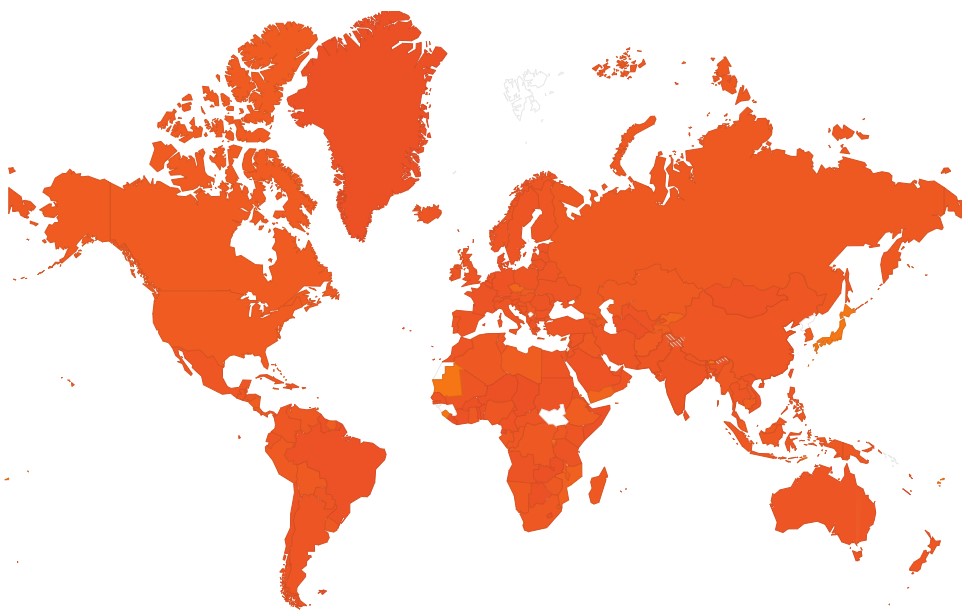
As for the geographical distribution, Zen Cart is more frequently used in Japan and Micronesia, while Magento dominates in other countries. The following map created by SimilarTech illustrates the situation:
Despite the recent growth, Zen Cart is still far from being as popular as Magento. It’s caused by various limitations, poor design, and a small ecosystem, which doesn’t let the platform grow fast enough to become a serious competitor for our favorite e-commerce system.
At the same time, Zen Cart is relatively simple and easy to use if you don’t need to implement any third-party customizations. The platform attracts new and new websites, but when a business grows, its limitations force merchants to migrate from Zen Cart to Magento 2. Let’s see how to deal with that.
How to Migrate from Zen Cart to Magento 2
If you are a Zen Cart merchant who looks for better e-commerce opportunities, you’ve come to the right place. Below, we describe how to migrate from Zen Cart to Magento 2 without any headaches.
As you might have already guessed, it is necessary to install a third-party extension to make the procedure as seamless as possible. Below, we introduce the only way to run the complete Zen Cart Magento migration with the minimum time and effort. As for the default Magento 2 import tools, they are limited and force you to recreate numerous areas of your old store manually. So what extension do you need?
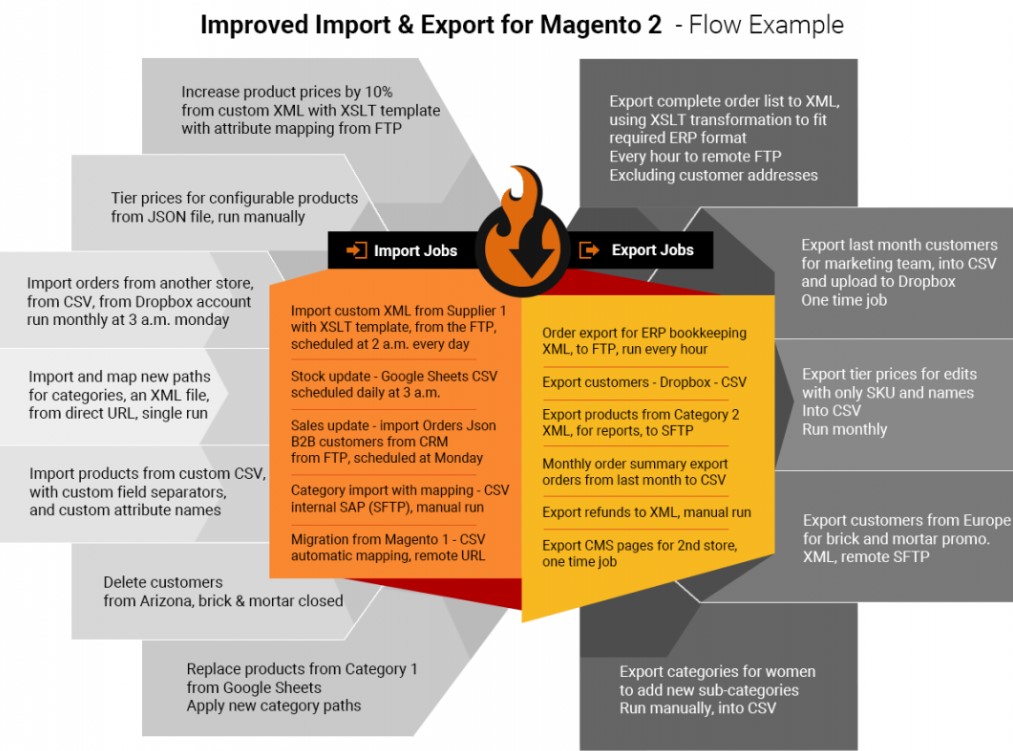
We recommend you to choose a third-party solution that not only adds the missing functionality but also provides the ability to work with all entities, automate data transfers, and solve the problem of different attribute standards. And all these features are represented in the Improved Import & Export extension – a module developed to move any data to and from your online storefront.
The Magento 2 Zen Cart migration is not the only purpose of our plugin. It also lets you connect your e-commerce store to all possible external systems including ERPs, CRMs, marketplaces, databases, etc. Let’s see how to import any data from Zen Cart to Magento 2 in a few clicks using data file transfers or API connections.
Migrate from Zen Cart to Magento 2 via Data Files
- Export products, orders, customers, catalog, and other entities in XML or CSV formats from your Zen Cart website. Try to find the corresponding export tools here: .
- When your old store is available as a set of data files, start importing its entities to the Magento 2 website. Use the Improved Import & Export extension. In the Magento 2 admin, create a new import job under System -> Improved Import / Export -> Import Jobs.
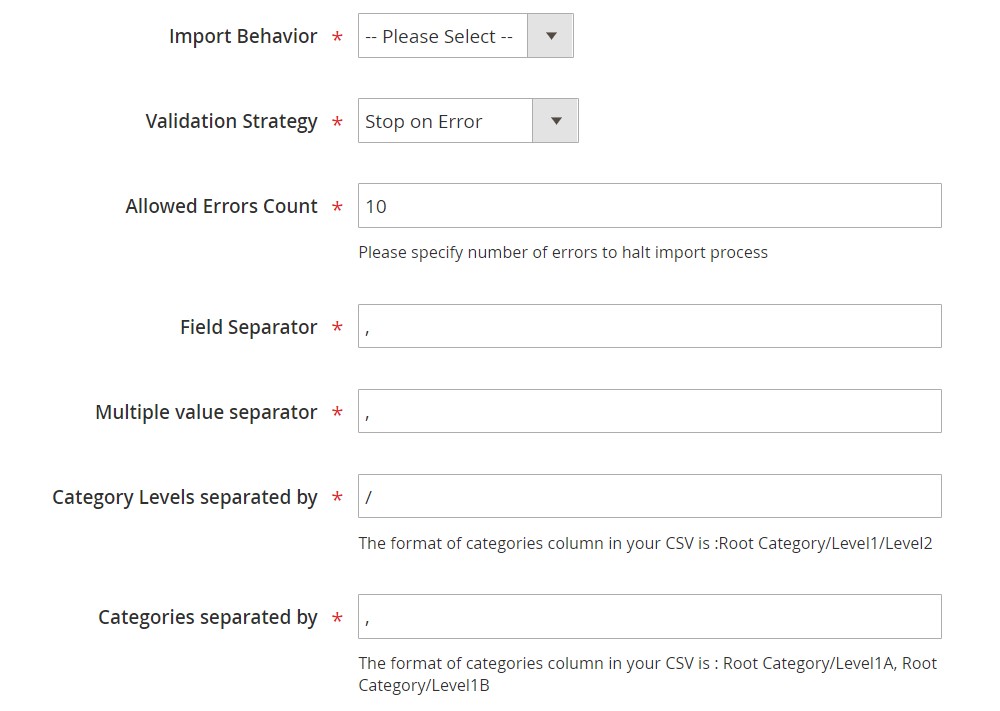
- Configure General Settings, Import Settings, Import Behavior, and Import Source:
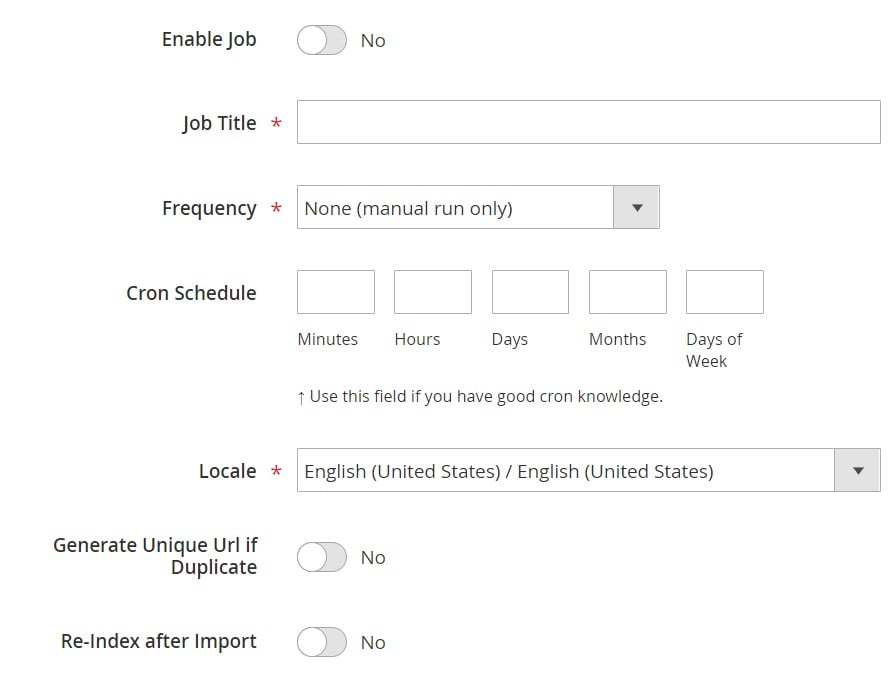
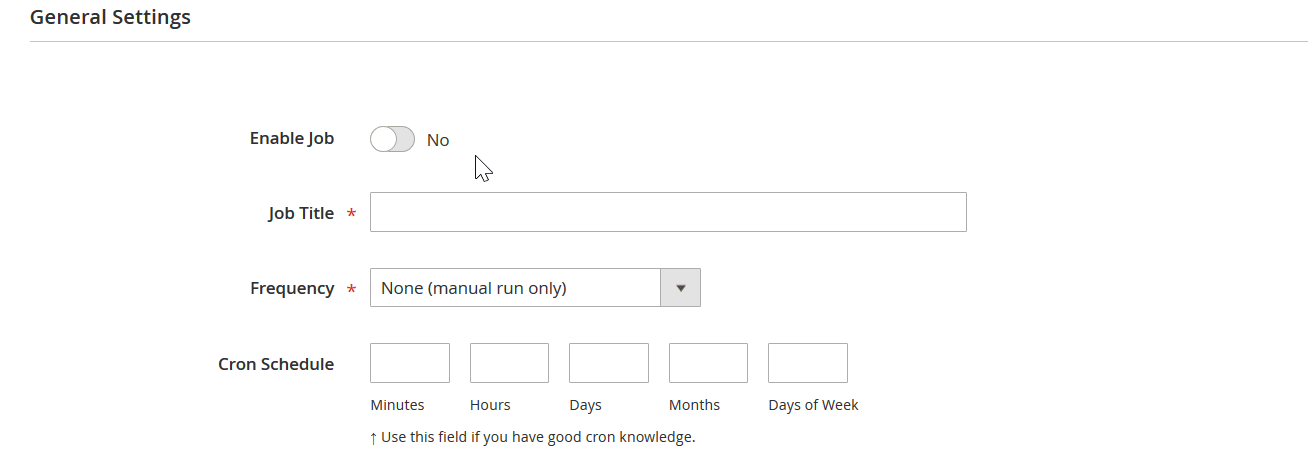
- In General Settings, type a job title and configure other parameters;
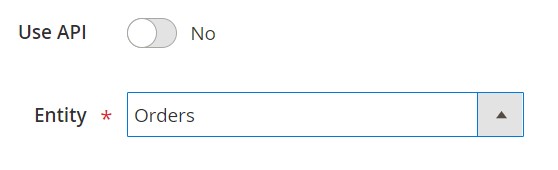
- In Import Settings, choose an entity that should be moved from Zen Cart to Magento 2. With the Improved Import & Export extension, you can transfer Products, Categories, Customers, Advanced Pricing, Orders, Attributes, Cart Price Rules, CMS Pages and Blocks to your Magento 2 website. Also, note that some entities include additional features in this block. Thus, it is possible to get rid of product associations or old categories for products in the Import Settings section;
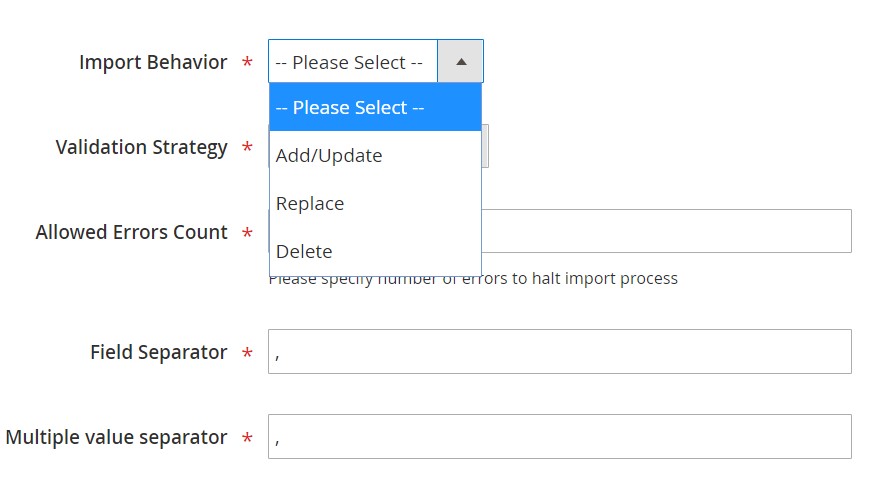
- In Import Behavior, choose one of the available import behavior options. Next, select a validation strategy suitable for the Magento 2 Zen Cart migration and specifying separators;
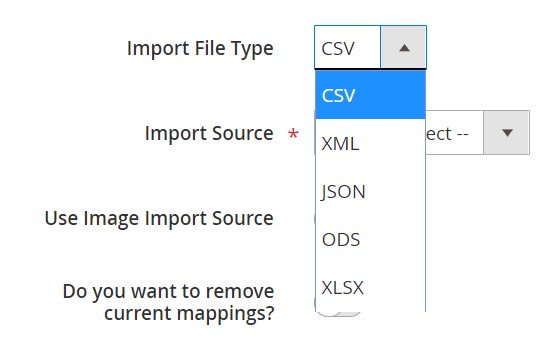
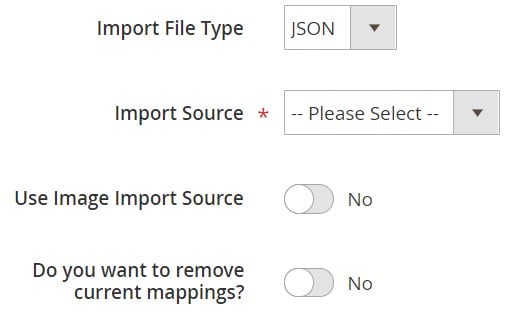
- In Import Source, select an import file type and file source. Configure other parameters and upload a data file. Next, you should validate it.
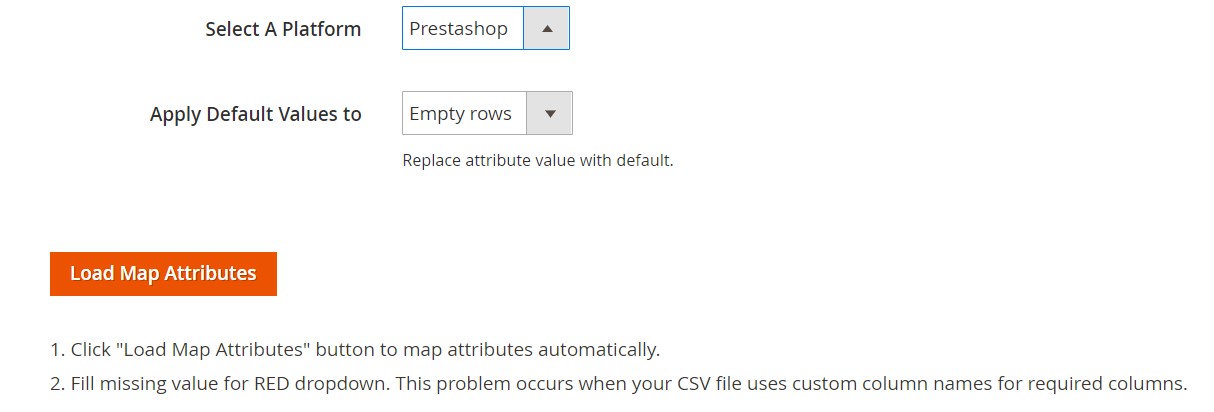
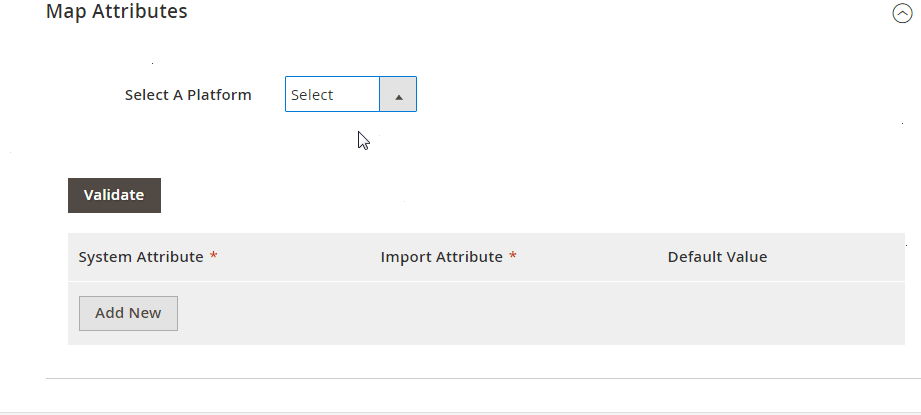
- Match Zen Cart attributes to ones used in Magento 2. Use a corresponding mapping preset or match attributes manually.
- In General Settings, type a job title and configure other parameters;
- Create a separate import job for each entity to complete the Zen Cart Magento 2 migration. Contact our support here to get more information: . We will help you run the Magento 2 Zen Cart migration on the basis of data files.
Migrate from Zen Cart to Magento 2 via API
The alternative way of running the same procedure is based on the ability to connect to Zen Cart directly using the Improved Import & Export Magento 2 extension. You can replace file transfers with REST or SOAP API connections as described below:
- In your Magento 2 admin go to System -> Improved Import / Export -> Import Jobs. Create a new import job there.
- You need to configure General Settings, Import Settings, Import Behavior, and Import Source, but the procedure differs from the one we’ve just described above:
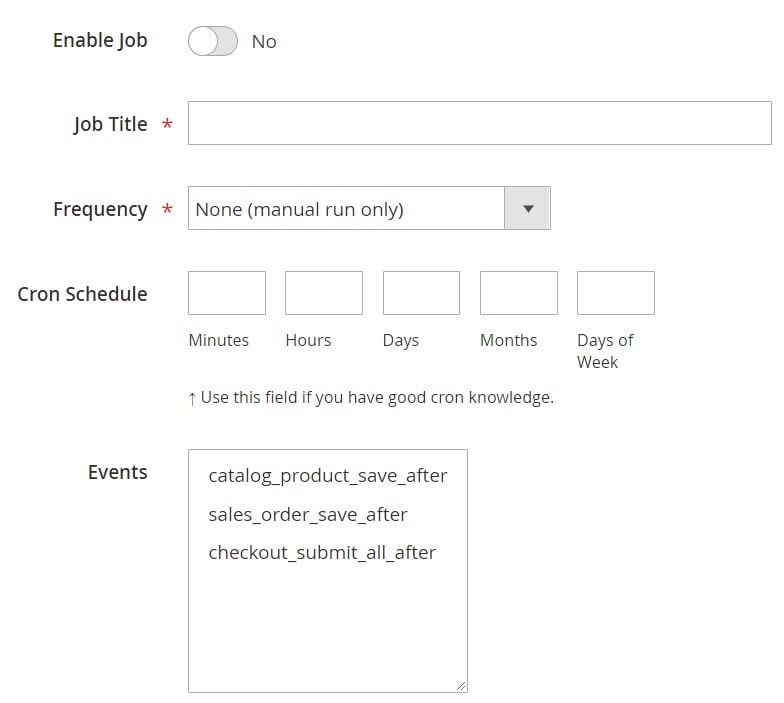
- In General Settings, type a job title and configure an update schedule if you need to transfer data more than once (the process is described further in this post);
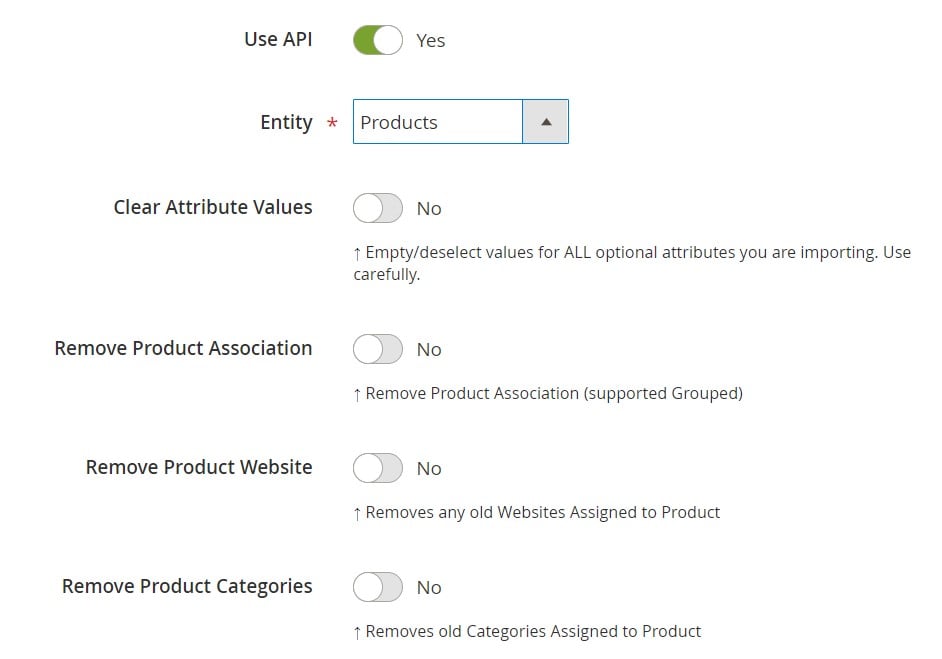
- In Import Settings, you should turn on API transfers. Set the ‘Use API’ parameter to ‘Yes’ to enable the feature. Next, choose an entity that will be transferred from Zen Cart to Magento 2;
- In Import Behavior, choose one of the available import behavior options and select a validation strategy. Type separators to finish the configuration;
- In Import Source, specify a type of the import file: you can run the Magento 2 Zen Cart migration on the basis of XML or JSON files. Next, select its source: it can be either REST or SOAP. Configure other parameters to continue. Don’t forget to validate the data file.
- Map Zen Cart attributes to Magento 2 attributes using presets or manually or the further import procedure will be interrupted.
- In General Settings, type a job title and configure an update schedule if you need to transfer data more than once (the process is described further in this post);
Create a separate import job for each entity and run multiple import processes to migrate from Zen Cart to Magento 2 via API. For further information, contact our support here: . You will get help regarding the Magento 2 Zen Cart migration via API.
How to Synchronize Magento 2 and Zen Cart
Chances are, you want to run the migration in several stages or need to sync both stores. Below, you will find a step-by-step guide that describes how to achieve this goal. Just like in the case above, the Improved Import & Export Magento 2 extension provides the ability to use either data files or APIs.
Synchronize Magento 2 and Zen Cart via Data Files
- Go to your Zen Cart website and export products, orders, customers, catalog, and other entities in XML or CSV formats just like in the case of a standard migration procedure. Look for third-party export solutions here: .
- Next, create a new import job in your Magento 2 admin under System -> Improved Import / Export -> Import Jobs.
- Configure General Settings, Import Settings, Import Behavior, and Import Source:
- In General Settings, specify a title of your new job and create a schedule of updates – this will enable automated import processes;
- In Import Settings, select an entity you want to move from Zen Cart to Magento 2;
- In Import Behavior, choose import behavior and validation strategy options. Next, specify separators;
- In Import Source, select a type of your import file and its source. Upload and validate the data file to continue.
- Apply a mapping preset or match attributes manually to make the Zen Cart output suitable for Magento 2.
- In General Settings, specify a title of your new job and create a schedule of updates – this will enable automated import processes;
It is necessary to create a separate import job for each entity to synchronize the entire data flow from Zen Cart to your Magento 2 website.
Now, we’d like to draw your attention to another side of the Magento 2 Zen Cart synchronization. The following guide illustrates how to provide your Zen Cart website with the Magento 2 data.
- To transfer data to your Zen Cart website, install extensions that enable data import from your Magento store: .
- Go to your Magento 2 admin and create a new export job under System -> Improved Import / Export -> Export Jobs.
- Configure General Settings, Export Settings, Store Filter, Export Behavior, and Export Source:
- In General Settings, specify a title of your new import job and create a schedule of updates. It will automate the Magento 2 Zen Cart synchronization;
- In Export Settings, select an entity you want to move from Zen Cart to Magento 2;
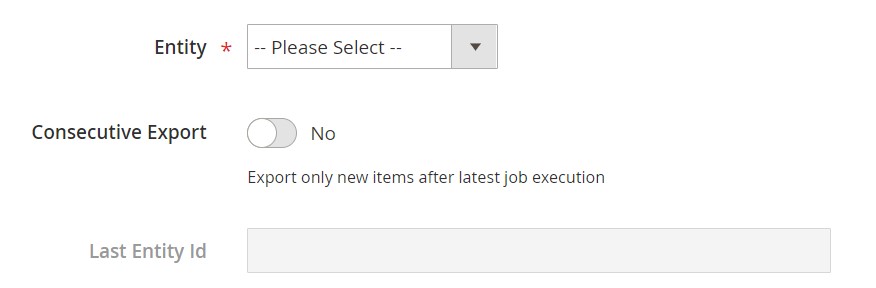
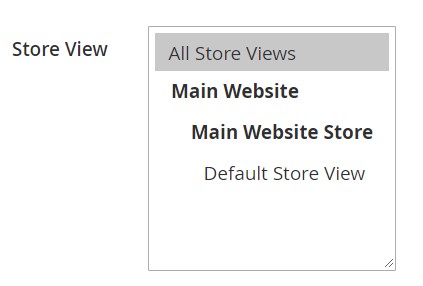
- In Store Filter, select a Magento 2 store view to export data from;
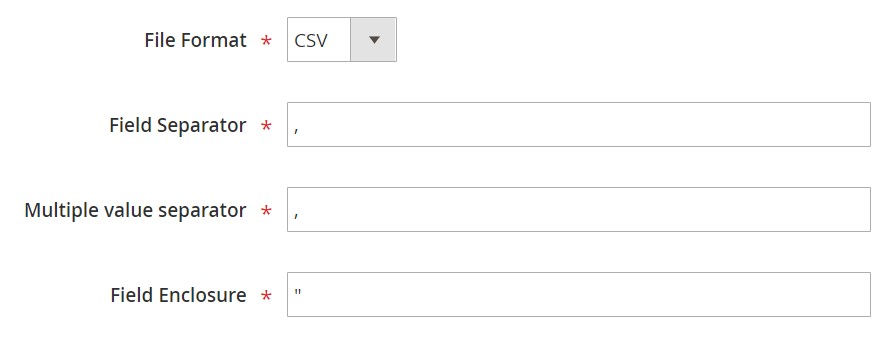
- In Export Behavior, configure the file format and specify separators;
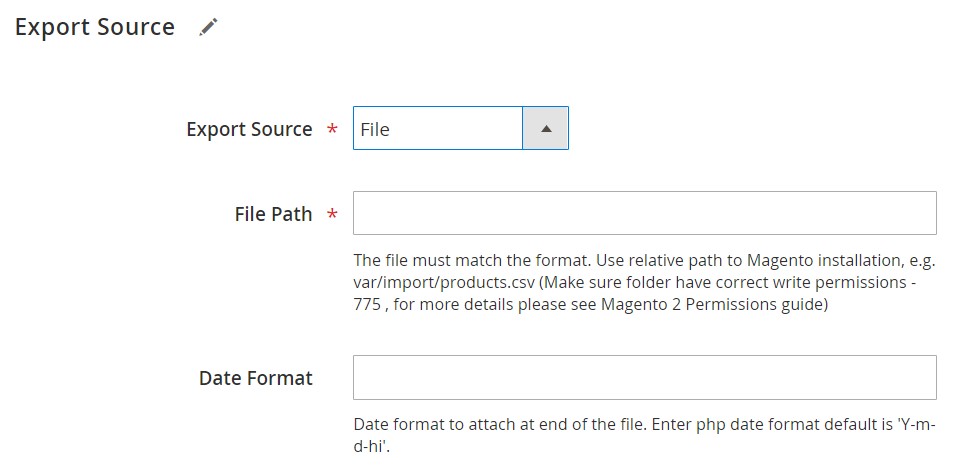
- In Export Source, choose a source to export your data file to.
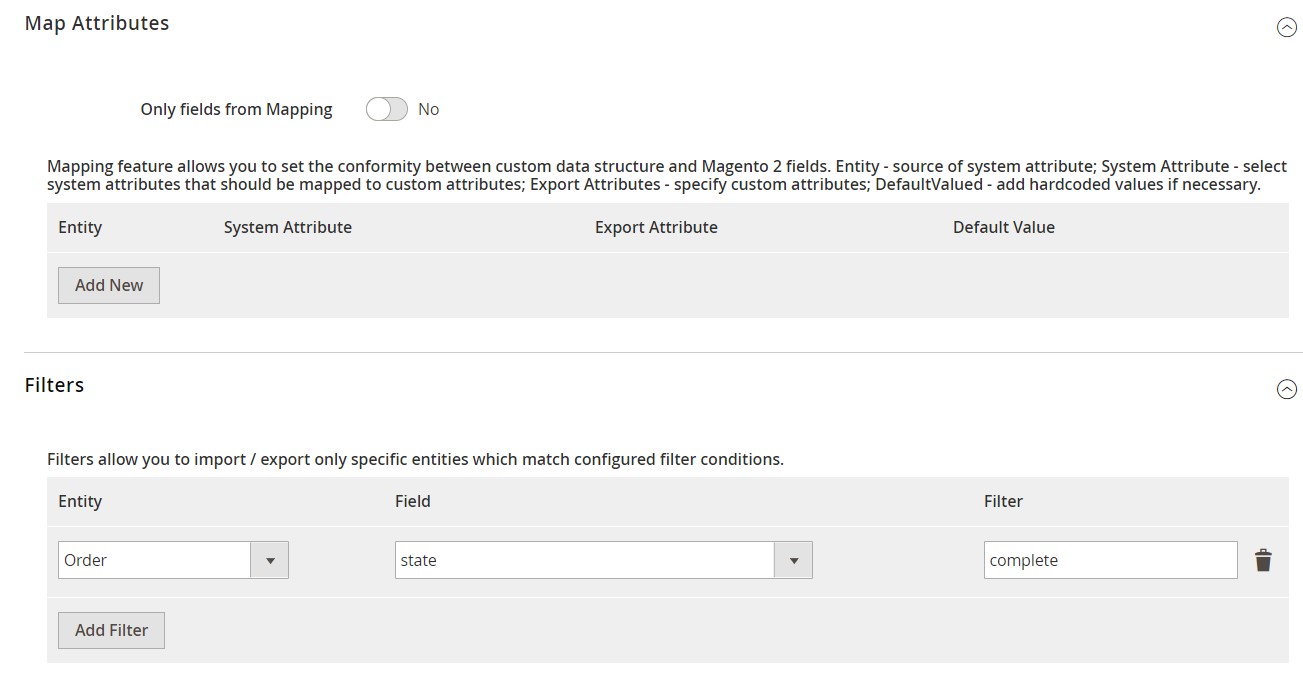
- Apply mapping and filters, matching Magento 2 attributes to ones used in Zen Cart.
- In General Settings, specify a title of your new import job and create a schedule of updates. It will automate the Magento 2 Zen Cart synchronization;
Don’t forget to create a separate export job for every entity used in the Magento 2 Zen Cart synchronization. Save and launch all import and export jobs to synchronize the two systems using data files. To find more information, contact our support here: . We will help you explore all the opportunities related to the Magento 2 Zen Cart migration via data files.
Synchronize Magento 2 and Zen Cart via API
Besides, the Improved Import & Export Magento 2 extension allows synchronizing Magento 2 and Zen Cart via API. The module enables moving all the necessary information from your old store to a new one via REST or SOAP.
- The beginning of this procedure is the same: go to your Magento 2 admin and create a new import job under System -> Improved Import / Export -> Import Jobs.
- Configure General Settings, Import Settings, Import Behavior, and Import Source:
- In General Settings, type a job title and configure an update schedule;
- In Import Settings, enable API transfers. As mentioned above, you should set ‘Use API’ to ‘Yes.’ Next, choose an entity you want to import from Zen Cart to Magento 2;
- In Import Behavior, choose an import behavior option and a validation strategy that satisfies your needs. Specify separators;
- In Import Source, select a type of your import file. As mentioned above, it can be either XML or JSON. As for an import source, you can use REST or SOAP. Configure other parameters and validate the data file.
- Apply mapping to match attributes used in Zen Cart to the corresponding Magento 2 designations.
- In General Settings, type a job title and configure an update schedule;
You have to create and configure a separate import job for each entity to enable multiple import processes synchronizing data transfers from Zen Cart to Magento 2 via an API connection. Also, create corresponding export jobs to provide Zen Cart with the Magento 2 data.
For further information, contact our support here: . We will help you with the Magento 2 Zen Cart migration via API.
Get Improved Import & Export Magento 2 Extension
Improved Import & Export Magento 2 Extension Features
Now, we’d like to draw your attention to the features of the Improved Import & Export extension that enable the Magento 2 Zen Cart migration. Our module completely revamps the default import and export processes of Magento 2 dramatically simplifying the migration. All data transfers can be automated even in the case of different attribute standards. Consequently, you can effortlessly migrate from Zen Cart to Magento 2.
Automated Import & Export
Being a one-time procedure, the migration from Zen Cart to Magento 2 doesn’t require automation, but the synchronization of the two platforms should be done on a regular basis, so it’s a good idea to let the module perform it for you. The Improved Import & Export extension enables you to cope with this problem automating data transfers in two different ways: via schedules and event-based triggers. Let’s describe each feature individually.
Schedules
Schedules are the most intuitive and easy way of automating data transfers you could even imagine. Being entirely based on cron, they let you leverage this technology to create fully independent import and export jobs. With the Improved Import & Export Magento 2 module, you can either rely on custom intervals or choose one of the predefined update schemes (which are fully customizable as well).
At the same time, profiles with no schedules are good for maintaining such tasks as the Magento 2 Zen Cart Migration. And with asynchronous data transfers, it is possible to launch every scheduled profile manually whenever you want.
The following gif image illustrates how to configure a schedule:
Events
If you need another approach to automation, the Improved Import & Export module offers it with event-based triggers. Use the following algorithm to automate data transfers between Magento 2 and Zen Cart:
- Create a trigger;
- Connect it to an event;
- Link an action to a trigger to launch it automatically.
Thus, transferring data to Zen Cart with a trigger, which launches the order export process after a new order is placed, can also be leveraged with our module. The same functionality can is introduced for import processes. Read this article for further information: How to Run Magento 2 Import or Export After Specific System Event or Process.
Advanced Mapping Features
Neither schedules nor triggers can make data transfers entirely automated since you may face the problem of different attribute standards. And it will occur during the Magento 2 Zen Cart migration preventing you from transferring data between the two systems. But the Improved Import Magento 2 extension is powerful enough to enable the complete automation. To simplify data transfer between Zen Cart and Magento 2, our tool offers the following mapping features:
Mapping Presets
With the Improved Import & Export extension, you can solve the problem of different attribute standards as fast as possible reducing all the headache of modifying data in an editor. Our module lets you apply mapping presets – predefined mapping schemes that reduce manual attributes matching.
Let the extension apply all the necessary changes automatically. Our module works as follows: it analyzes the input file, discovers third-party attributes, and matches them to the ones used in Magento. As a store administrator, you only need to select a matching scheme, which is applied to further updates automatically. The process of choosing a preset is very intuitive and looks as follows:
Matching Interface
Alternatively, the Improved Import & Export Magento 2 extension lets you map external attributes to the corresponding internal ones right in your Magento admin. You can take full control over mapping in a separate matching interface where third-party designations can be matched to the corresponding internal ones. Use manual attributes editing when a preset that satisfies your needs is absent, or you want to explore how everything works. The procedure looks as follows:
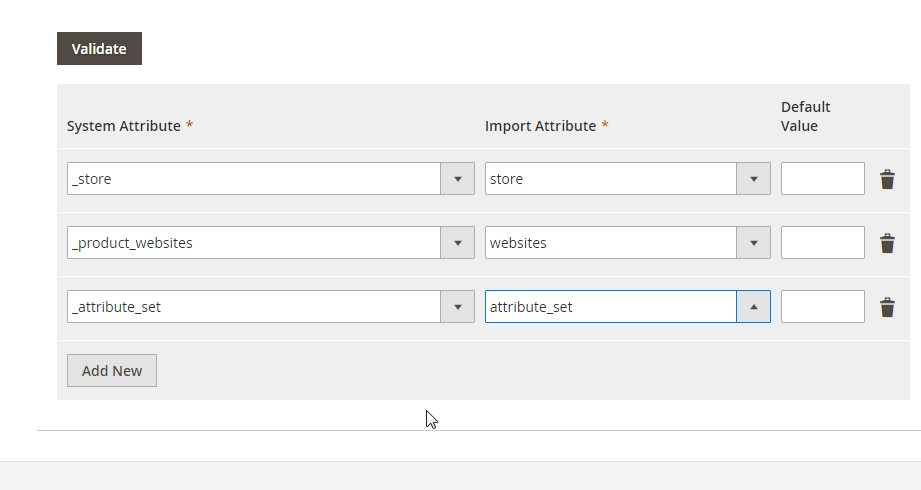
As for the “Default Value” column which appears in the gif above, use it to specify hardcoded attribute values, which are provided to all items related to a corresponding attribute. For instance, you can import product data from your old Zen Cart replacing multiple old categories with a new one. Specify a hardcoded value for the “_store” attribute, and the Improved Import & Export extension will replace the external values with the specified one. As you can see, attributes can be mapped in a very user-friendly manner, but what about their unsupported values?
Attribute Values Mapping
The Improved Import & Export Magento 2 extension adds a separate interface for attribute values mapping. Thus, our module provides the ability to automate the Magento 2 Zen Cart synchronization entirely, since no third-party value can interrupt data transfers!
Choose an external value and specify the internal one in front of it. Repeat the procedure until all third-party designations from your old Zen Cart store are replaced. For further information, follow this link: Attribute Values Mapping.
Attribute Values Editing
If attribute values mapping is not enough, you can always rely on another feature introduced in the Improved Import & Export Magento 2 plugin – attribute values editing. Our extension enables you to modify attribute values in bulk. You can use the following rules:
- Add a prefix to multiple attribute values;
- Add a suffix to multiple attribute values;
- Split multiple attribute values;
- Merge multiple attribute values.
Combine the rules above and create conditions to increase the efficiency of the applied changes. For further information, follow this link: How to Modify Attribute Values During Import and Export in Magento 2.
Category Mapping
Another useful feature is category mapping. It is a procedure that dramatically simplifies product transfers from Zen Cart (or other systems) to Magento 2. The Improved Import & Export extension allows matching external product categories to ones used in your catalog as follows:
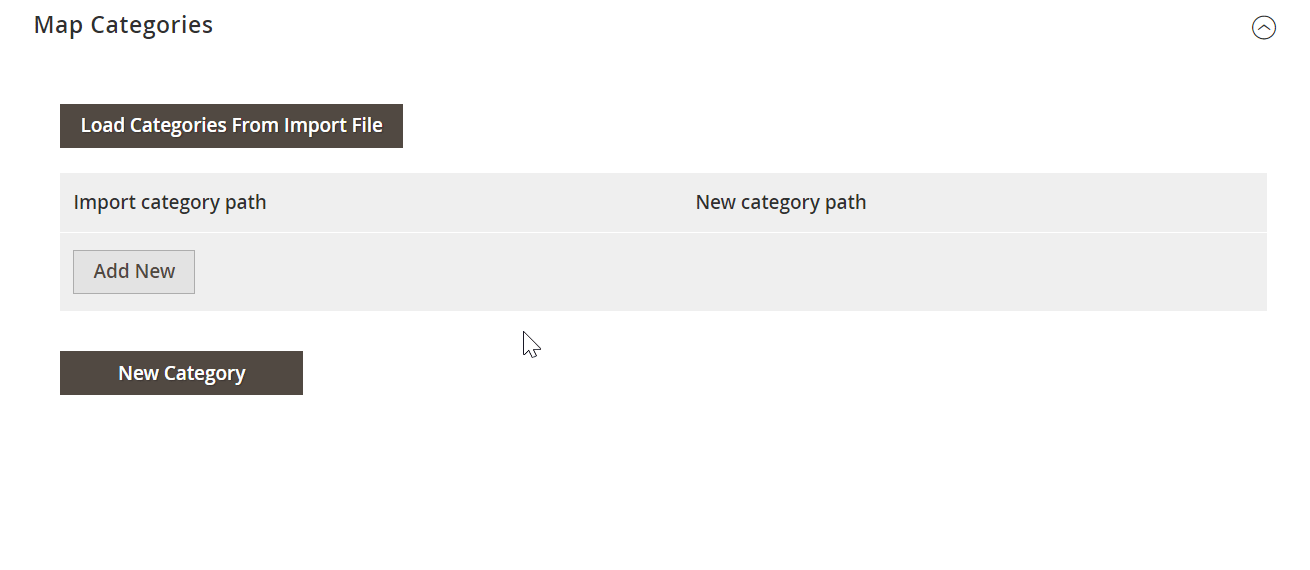
At the same time, you can generate new categories on the fly. Choose a parent category and specify a new one, and the extension will create it automatically. If your new Magento 2 store doesn’t include a category from the Zen Cart website, it’s no longer a problem. You can discover more information in this article: Category Mapping.
Attributes On The Fly
To fix the problem of absent attributes, our module provides the ability to create attributes on the fly via the following general form:
Attribute|attribute_property_name:attribute_property_value|…
You can discover more information in this article: Product attributes import.
Extended Connectivity Options
As for the extended connectivity options of the Improved Import & Export extension, they also dramatically improve every data transfer. The plugin not only offers the enhanced number of supported file standards but also introduces two alternative ways of transferring data between Magento 2 and external systems, which are not available in the default tools. Besides, it supports all Magento 2 entities. As for the default Magento tools, they work only with CSV files and much fewer entities.
Multiple File Standards
The Magento 2 Zen Cart migration on the basis of the Improved Import & Export extension can be established with XML and JSON file transfers. Besides, our module supports ODS and Excel file formats which can be leveraged for other data transfers. Another feature that substantially simplifies the migration is the ability to import compressed file archives. Our module unpacks them for you automatically.
Multiple File Sources
The following file sources can be leveraged to import and export data files:
- FTP/SFTP. Transfer data files using a local or remote server.
- Dropbox. Use a Dropbox account to establish a connection between the two systems. Alternatively, you can rely on Box, OneDrive, Google Drive, iCloud, and Amazon Drive.
- URL. A direct URL can be used to import a data file as well.
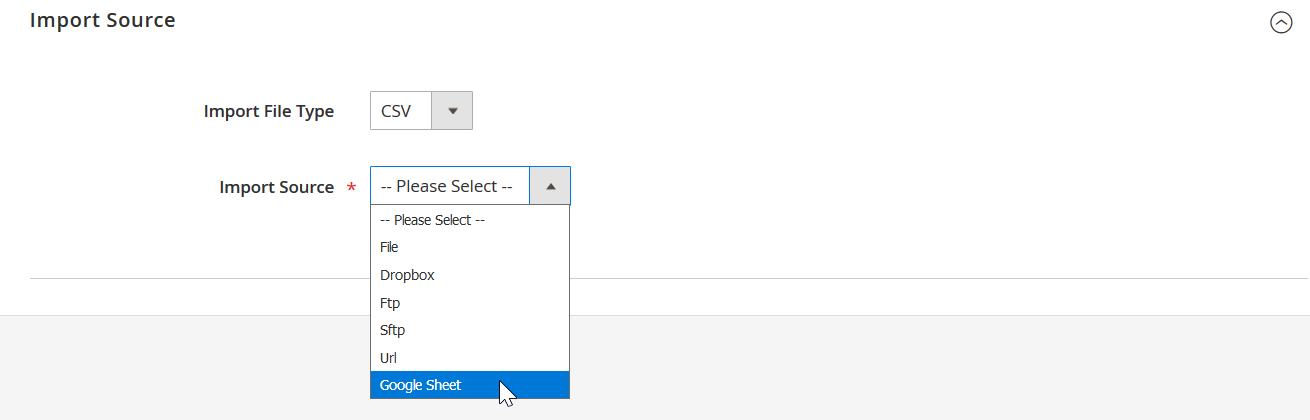
Alternative Ways of Import & Export
Besides, the Improved Import & Export Magento 2 extension adds new possibilities related to data transfers in addition to the additional file formats and sources. The module enables direct API connections and works with intermediary services.
To connect Magento 2 to Zen Cart, you can leverage REST or SOAP APIs. And Improved Import & Export supports GraphQL as well. Note that all API connections are fully compatible with mapping, scheduling, and other extension features.
Intermediary services are represented by Google Sheets, Office 365 Excel, and Zoho Sheet. Although they cannot be used to establish the migration from Zen Cart to Magento 2, you can utilize them for other integrations. The following image illustrates the integration on the basis of Google Sheets:

The following video shows the extension in action:
Final Words
Use the Improved Import & Export Magento 2 extension to make the Magento 2 Zen Cart migration fast, intuitive, and user-friendly. You will forever forget about multiple issues related to the default import and export tools. The extension will prevent you from spending hours recreating your old store on a new platform. With support for all entities and multiple file formats, API connections and various file sources, schedules and mapping, as well as other features, you will effortlessly import everything you need from any external systems to your new e-commerce website. For further information, follow the link below and contact our support:
Get Improved Import & Export Magento 2 Extension