
How To Import And Export Magento 2 Widgets
Today, we are going to talk about Magento 2 widgets – snippets of code that make it possible to display a wide range of content placing it at specific block references on your e-commerce website. The following article discusses their core features as well as sheds light on how to import and export Magento 2 widgets.

Table of contents
Key Features
Let’s take a look at the key features of Magento 2 widgets. First of all, they are designed to display data dynamically in real-time. Thus, you can create an absolutely new user experience on your e-commerce website. Use the Widget tool to place existing content anywhere in your store.
Note that Magento 2 widgets suit best for creating various landing pages as well as displaying promotional content at specific store locations. They can also be used externally. For instance, you can create interactive elements and action blocks for external review systems, video chats, voting, and subscription forms. Another purpose of Magento 2 widgets is related to the ability to provide navigation elements for tag clouds and image sliders.
Creating Magento 2 Widgets
Although there are several widget types in Magento 2, the process of their creation is similar. Let’s take a look at how to select a widget type.
Choose Your Type
- Go to the Admin sidebar and open the Content section. Choose Widgets under Elements.
- Here, you can add a new Magento 2 widget: tap Add Widget and do the following:
- In the Settings section, select a widget type and tap Continue;
- The chosen Design Theme should match the current theme.
- Tap Continue.
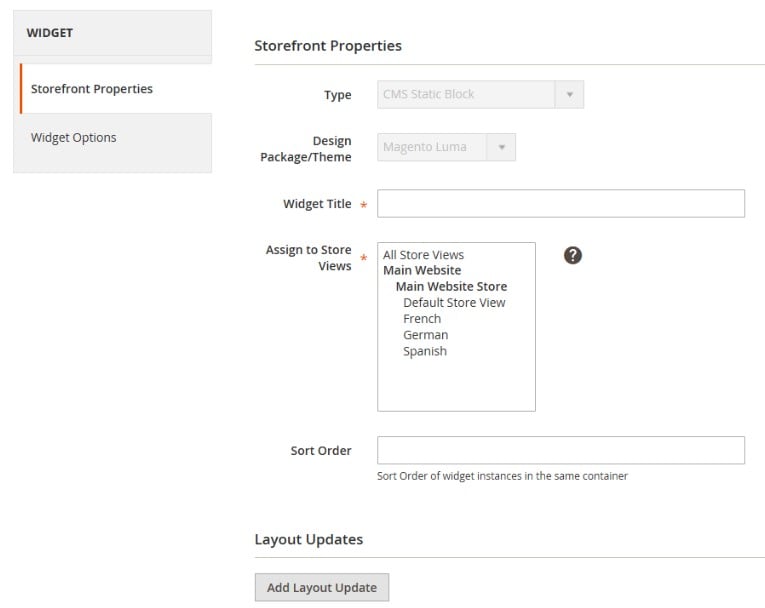
- Now, proceed to Storefront Properties and do the following:
- Enter a title for internal reference in the Widget Title field;
- Assign the widget to one, multiple, or all store views;
- In the Sort Order field, add a number to determine the block order priority to avoid co-occurrence with other content elements (set “0” for the top position).
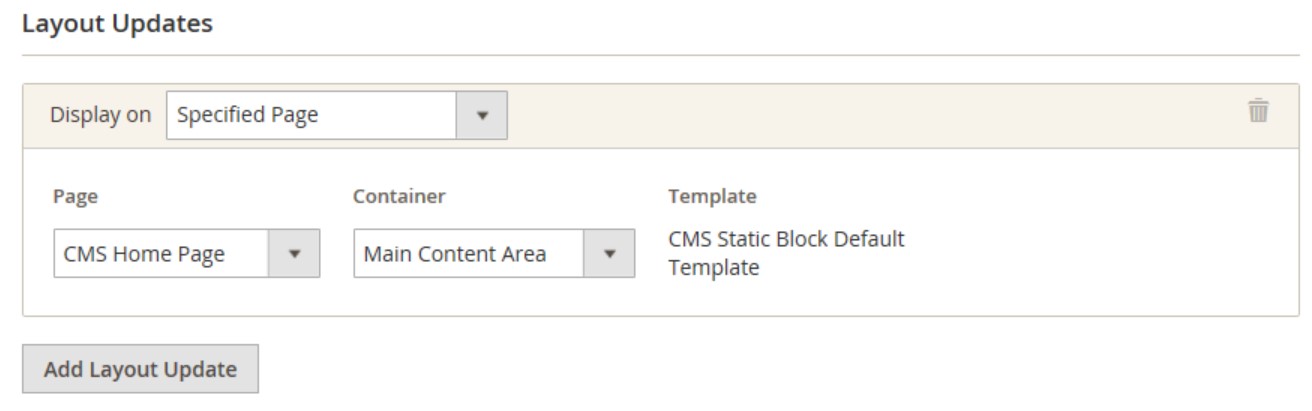
Set Widget Position
- Go to the Layout Updates section and hit the Add Layout Update option.
- In Display On, set the type of a page where the Magento 2 widget is to appear.
- In the Block Reference list, choose the page layout area to display the widget.
- If the widget is a link, apply one of the two options:
- Block Template – the content can be placed as a standalone unit on the page.
- Inline Template – the content can be placed inside other content (a link that goes inside a paragraph).
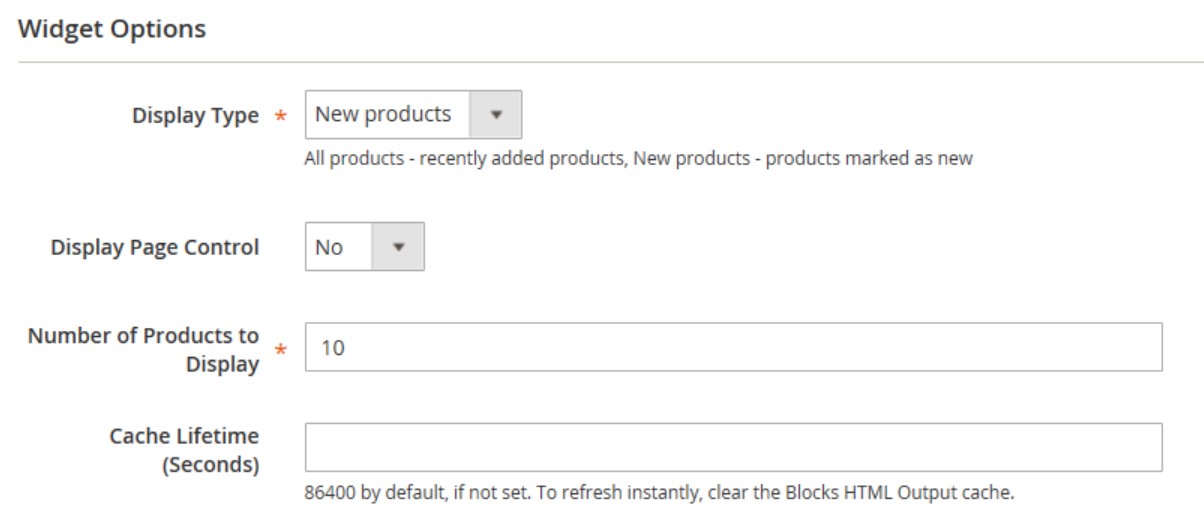
Configure Other Options
Each widget type offers a slightly different set of options, but the configuration process is essentially the same. Below, we explore how to configure a product list for a specific category adding pagination controls.
- In the panel on the left contains Widget Options we are going to work with.
- Tap Select Block and specify a Title that will be displayed above the list (widget) on the frontend.
- Now, it is necessary to enable pagination controls: set Display Page Control to “Yes” and do the following:
- Specify the Number of Products per Page;
- Set the total Number of Products to Display.
- Set Condition to narrow down the selection of products.
- Save changes.
- Update the cache if necessary. You will get the notification.
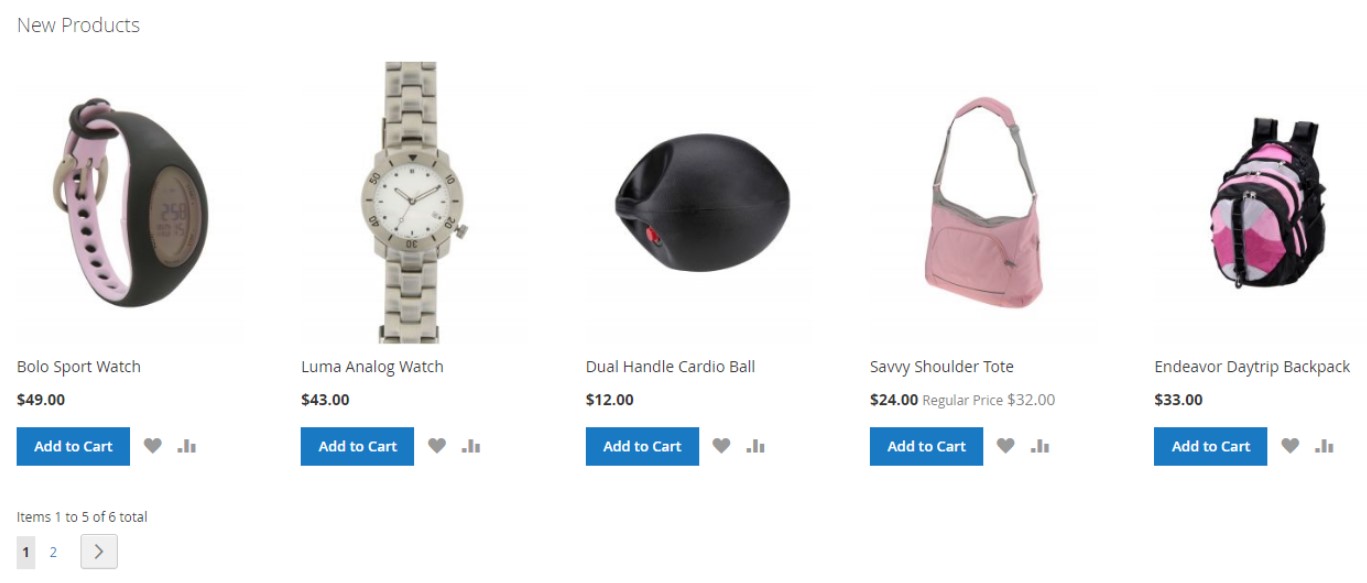
Now, when the Magento 2 widget is configured, go to your storefront to verify that it works correctly.
How to Import Magento 2 Widgets
Now, when you know how to create Magento 2 widgets, we should also describe how to import them.
- In your Magento 2 admin go to System -> Improved Import / Export -> Import Jobs and create a new import job.
- Configure General Settings, Import Settings, Import Behavior, and Import Source:
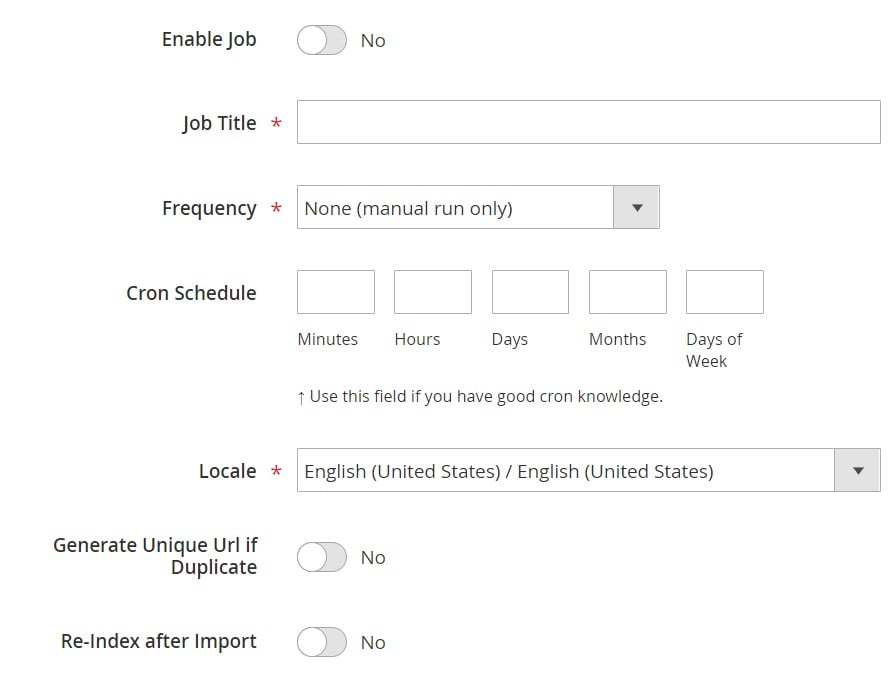
- In General Settings, type a title of your new job and create a schedule of updates to enable automated import processes;
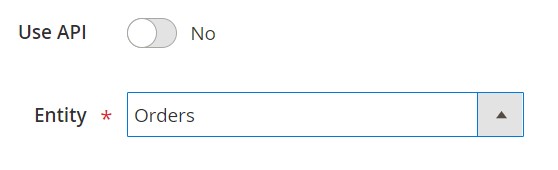
- In Import Settings, choose an entity you want to move to Magento 2 – widgets;
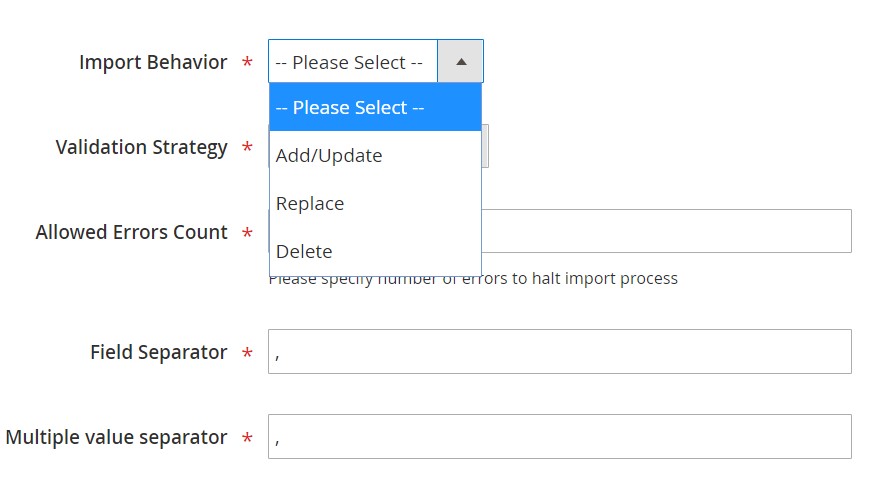
- In Import Behavior, specify import behavior, validation strategy, and separators;
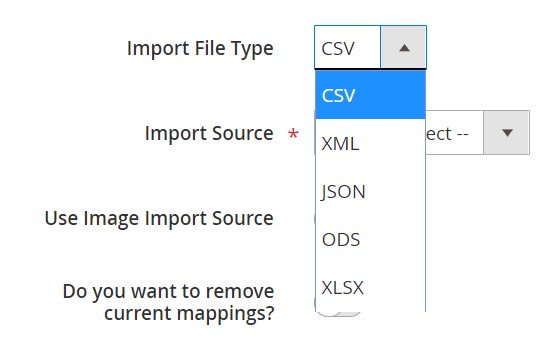
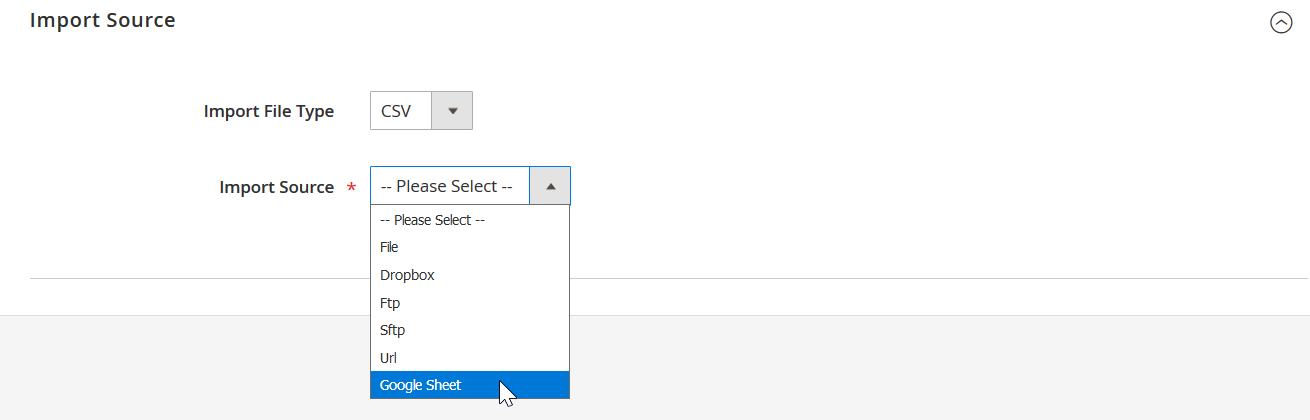
- In Import Source, choose a type of your import file and its source. Upload and validate data to continue.
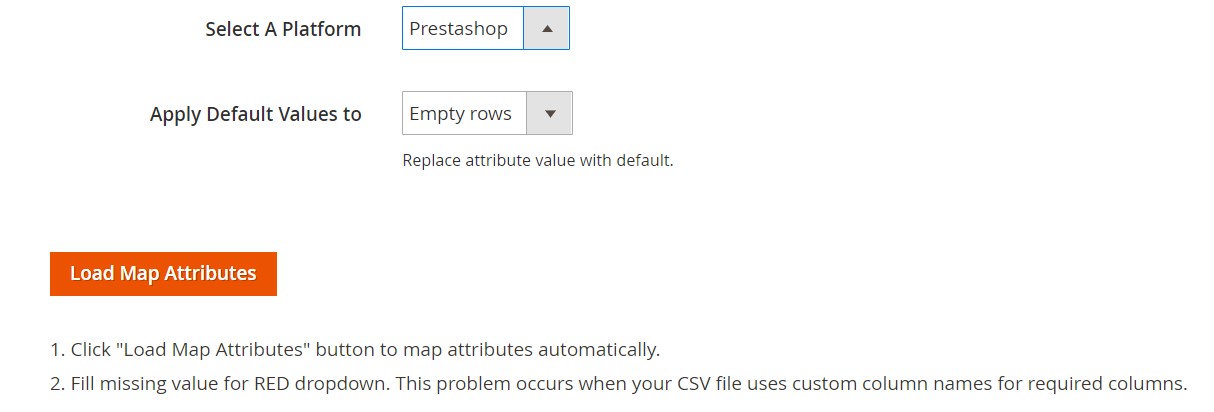
- Apply a mapping preset or match attributes manually if you import Magento 2 widgets from other platforms.
- In General Settings, type a title of your new job and create a schedule of updates to enable automated import processes;
For further information, contact our support here: . You will get help regarding the Magento 2 widgets import.
How To Export Magento 2 Widgets.
- In the Magento 2 admin, create a new export job under System -> Improved Import / Export -> Export Jobs.
- Configure General Settings, Export Settings, Store Filter, Export Behavior, and Export Source:
- In General Settings, specify a title of your new import job and create a schedule of updates;
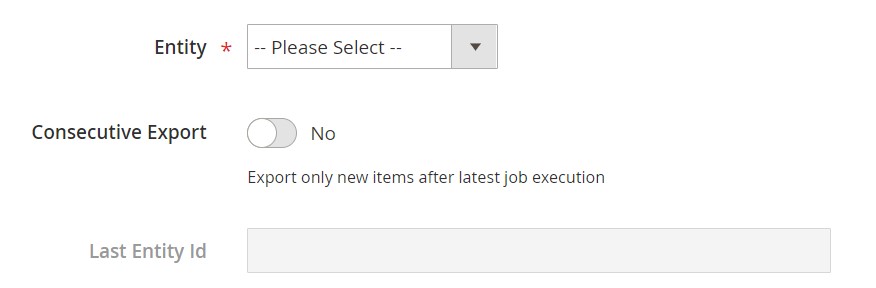
- In Export Settings, select an entity you want to move from Magento 2;
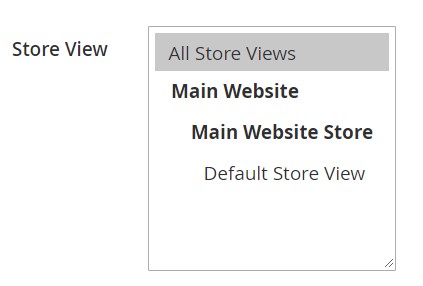
- In Store Filter, choose a Magento 2 store view to export widgets from;
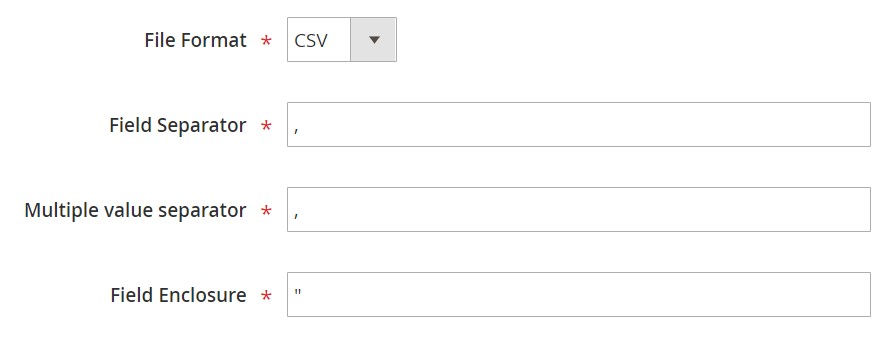
- In Export Behavior, configure the file format and specify separators;
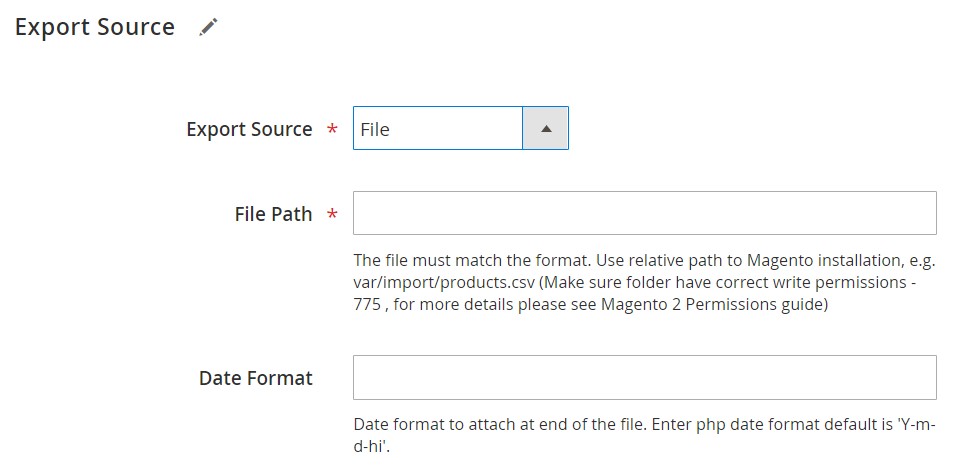
- In Export Source, choose a source to export your data file to.
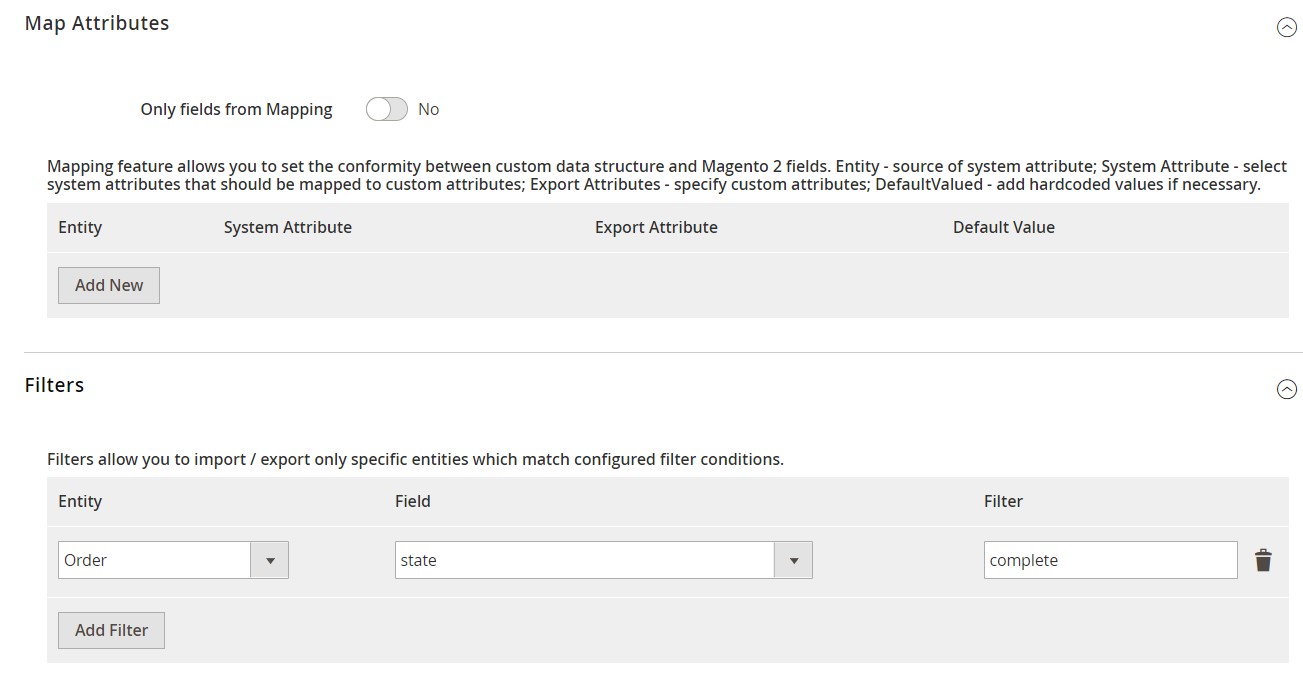
- Apply mapping and filters, matching Magento 2 attributes to ones used in an external system. If you transfer data to another Magento 2 store, the mapping is not necessary.
- In General Settings, specify a title of your new import job and create a schedule of updates;
For further information, contact our support here: . You will get help regarding the Magento 2 widgets export.
Improved Import & Export Magento 2 Extension Features
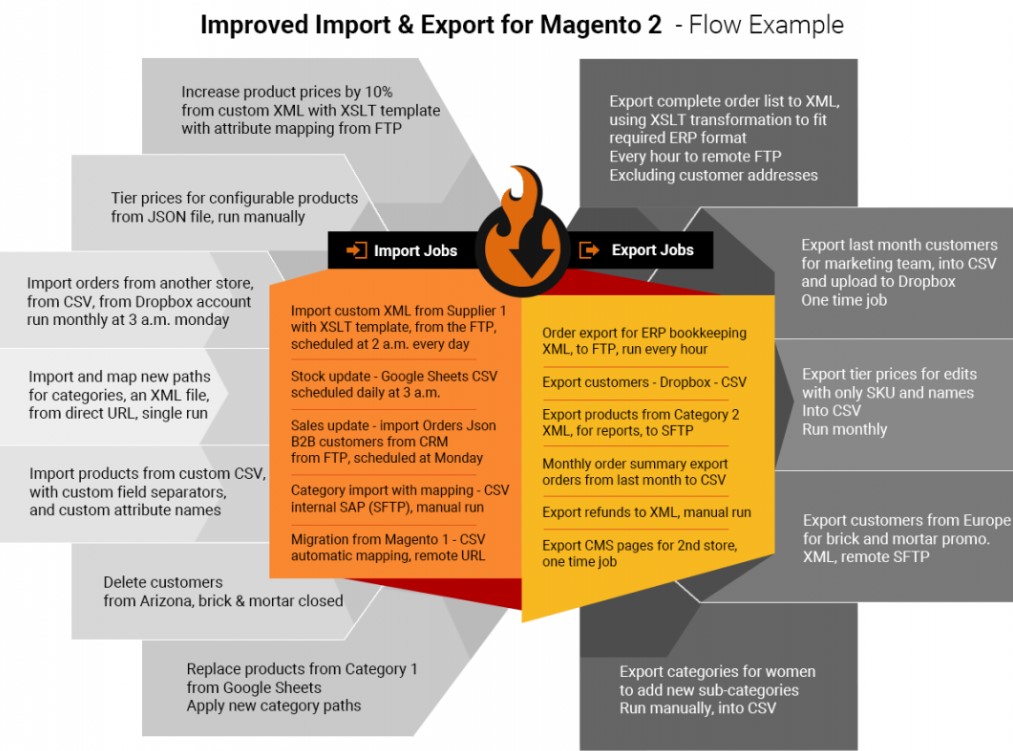
Now, when you are familiar with the Magento 2 widgets and their import and export, we’d like to draw your attention to the features of the Improved Import & Export Magento 2 extension that simplify all data transfers. With our module, you can leverage the following opportunities:
- all import and export processes can be automated;
- attributes from different systems can be easily matched;
- multiple file formats and all entities can be imported/exported.
As a result, you can effortlessly transfer widgets to/from Magento 2.
Automated Import & Export
If the transfer of Magento 2 widgets is not a one-time procedure, you can automate it using schedules or event-based triggers.
Schedules
Schedules incorporate cron enabling you to create custom update intervals or select predefined schemes (which are fully customizable). At the same time, our module provides the ability to create profiles with no schedules, which are useful if you want to transfer Magento 2 widgets only once. And with asynchronous data transfers, it is possible to launch every scheduled profile manually whenever you want. The following gif image shows how to configure a schedule:
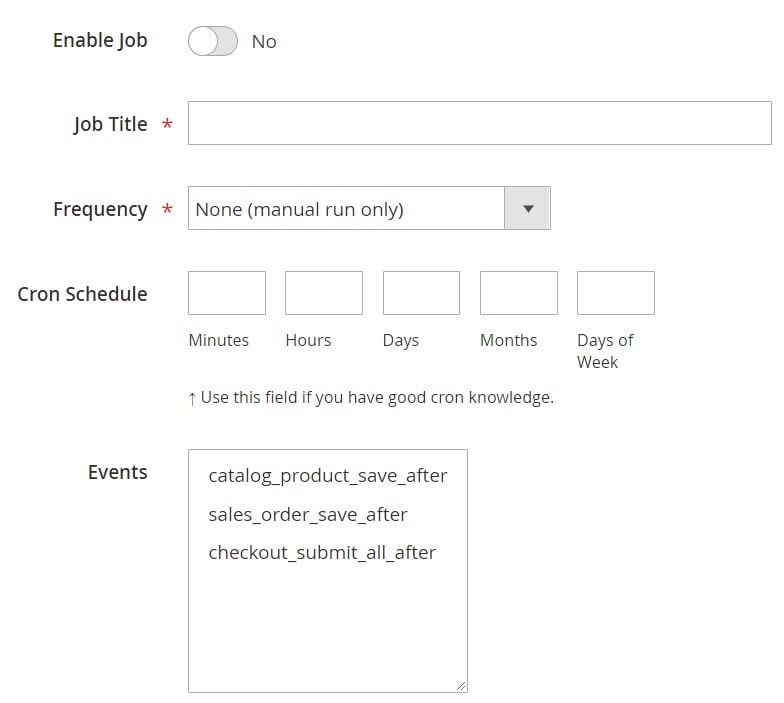
Events
Besides, the Improved Import & Export module offers event-based triggers. You create a trigger, connect it to an event, and link an action to a trigger to launch import/export processes automatically. Read this article for further information: How to Run Magento 2 Import or Export After Specific System Event or Process.
Advanced Mapping Features
To automate data transfers, you not only have to create a schedule of updates but also map third-party attributes to ones used externally. In the case of the default tools, this procedure takes lots of time and effort because you should repeat it every time a new update is required. As for the Improved Import & Export Magento 2 extension, it dramatically simplifies every data transfers to and from Magento 2 by introducing the following features:
Mapping Presets
Solve the problem of different attribute standards in just a few clicks. The Improved Import & Export Magento 2 extension lets you streamline mapping presets – predefined schemes that eliminate manual attributes matching.
You enable the plugin to do all the necessary changes automatically, so it analyzes the input file, discovers third-party attributes, and matches them to the ones used in Magento. Select a matching scheme, and it will be applied to all further updates automatically. The process of selecting a preset is displayed below:
Matching Interface
You can also map external attributes to the corresponding internal ones right in your admin enabling the Magento 2 widgets import. Our module provides the ability to take full control over mapping in a separate matching interface where external designations can be matched to the corresponding internal ones. The procedure looks as follows:
In the “Default Value” column, you can specify hardcoded attribute values provided to all items of a corresponding attribute. While attributes can be mapped in a very user-friendly manner, what about their values?
Attribute Values Mapping
A separate interface for attribute values mapping is also available in the Improved Import & Export Magento 2 extension. It lets you automate all data transfers since no third-party values can interrupt them!
The feature is very straightforward: choose an external value and specify the internal one in front of it. Repeat the procedure until all third-party designations are replaced. For further information, follow this link: Attribute Values Mapping.
Attribute Values Editing
If attribute values mapping is not enough, the Improved Import & Export Magento 2 module offers attribute values editing – another handy feature. With its help, you can modify attribute values in bulk via the following rules:
- Add a prefix to multiple attribute values;
- Add a suffix to multiple attribute values;
- Split multiple attribute values;
- Merge multiple attribute values.
Combine them and create conditions to increase the efficiency of the applied rules. For further information, follow this link: How to Modify Attribute Values During Import and Export in Magento 2.
Category Mapping
Another mapping feature is useless regarding Magento 2 widgets since it is related to categories. The Improved Import & Export Magento 2 extension provides the ability to map external categories to ones used internally dramatically simplifying product transfers from external systems to Magento 2:
At the same time, you can generate new categories on the fly. Choose a parent category and specify a new one. Next, the extension will create it automatically. You can discover more information about this feature in this article: Category Mapping.
Attributes On The Fly
And if you face the problem of missing attributes, our module provides the ability to create them on the fly via the following general form:
Attribute|attribute_property_name:attribute_property_value|…
You can discover more information in this article: Product attributes import.
Extended Connectivity Options
As for the extended connectivity options, they also dramatically improve data transfers including ones related to Magento 2 widgets. The Improved Import & Export Magento 2 extension not only offers the enhanced number of supported file standards but also provides two alternative ways of transferring data between your e-commerce store and external systems. Besides, it works with all Magento 2 entities.
Multiple File Standards
The Magento 2 widgets import and export can be established on the basis of CSV, XML, JSON, ODS, and Excel file transfers. Another feature that essentially simplifies the process is the ability to import compressed file archives because they are unpacked automatically.
Multiple File Sources
The following file sources can be leveraged to import and export data files with Magento 2 widgets:
- FTP/SFTP. Transfer data files using a local or remote server.
- Dropbox. Use a Dropbox account to establish a connection between the two systems. Alternatively, you can rely on Box, OneDrive, Google Drive, iCloud, and Amazon Drive.
- URL. A direct URL can be used to import a data file as well.
Alternative Ways of Import & Export
As for the alternative ways of import and export, our module adds absolutely new possibilities related to data transfers. The Improved Import & Export extension enables direct API connections and works with intermediary services.
To connect Magento 2 to other platforms, you can leverage REST, SOAP, or GraphQL API. All connections are fully compatible with mapping, scheduling, and other extension features.
Intermediary services are represented by Google Sheets, Office 365 Excel, and Zoho Sheet. The following image illustrates the integration on the basis of Google Sheets:

The video below shows the extension in action:
Final Words
You can not only create Magento 2 widgets easily but also import and export them to and from your e-commerce website since the Improved Import & Export extension provides this functionality. Besides, you can leverage our module to synchronize your store with any external systems, migrate from old websites, or transfer all entities. For further information, follow the link below and connect our support:
Get Improved Import & Export Magento 2 Extension