
How to Export Custom Fields from Shopware 6

Custom fields are the hidden gems of your Shopware 6 e-commerce arsenal. They let you customize your online store to perfectly fit your specific business requirements, offering a world of opportunities that enhance your products, engage your customers, and fine-tune your operations. In this article, we will teach you how to export custom fields in your Shopware 6 store. You will learn how to harness this powerful instrument to your advantage, providing you with the insights you need to supercharge your business and elevate your e-commerce performance. So, get ready to embark on this journey that empowers you with complete control over Shopware 6 custom fields. You will learn what Shopware custom fields are, how to manage them, and how to export custom fields from Shopware 6. Also, don’t forget to peruse our Shopware Cookbook to discover more useful materials about the ecosystem.

Table of contents
What Are Shopware 6 Custom Fields?
In Shopware, custom fields are like those extra notes you jot down to help you remember things. They’re additional data fields that you can attach to products, customers, or orders. These nifty fields give your business the flexibility to store and manage unique information that’s vital for your daily operations.
There are 10 types of custom fields in Shopware 6:
- Select – this custom field type lets you specify different options one or more of which can be selected;
- Object selection – it lets you refer to other data fields with direct references to them;
- Text field – with the text field, you provide a place to store text;
- Media – it provides the ability to add a media file to display on the product details page;
- Number – with this custom field, you can enter numbers;
- Date/Time – it is a selection mask for date and time;
- Checkbox – this custom option represents a checkbox used to activate or deactivate information;
- Active/Inactive switch – it includes a switch that provides a boolean data set in the background;
- Text Editor – with this option, you can add a text editor to enter styled text to the frontend;
- Color picker – this custom field is associated with the ability to select a color from a color palette or by entering the HEX code.
How to Manage Custom Fields in Shopware 6?
Shopware 6 custom fields are available in your admin under Settings -> System -> Custom fields. You can seamlessly create new custom fields, make refinements to the existing ones, or retire the ones that have served their purpose.
Shopware 6 provides you with the flexibility to assign custom fields to various areas of your e-commerce website, such as customers, products, and orders.
If you are going to harness this powerful tool, our comprehensive guide to Shopware 6 custom fields is your trusted companion on this journey. Below, we focus on exporting custom fields from Shopware 6.
How to Export Custom Fields from Shopware 6
Since custom fields can be a part of product, order, or customer data, we’d like to describe each export procedure separately. Note that the export procedure incorporates the Improved Import, Export, and Mass Actions app. The application exports custom fields separately. It means that your output table stores each custom field in a unique column with a title prefixed by “custom_field_.”
Shopware 6 Product Custom Fields
To export custom fields associated with products, follow these straightforward steps:
Step 1: Create a New Export Profile
Click the New Profile button, located under Extensions -> Improved Import, Export & Mass Actions -> Product Export to create a new export profile.

Step 2: Configure Export Settings
Now, it’s time to choose an entity your custom fields are associated with. In this case, it is Products. Here’s what you need to do:
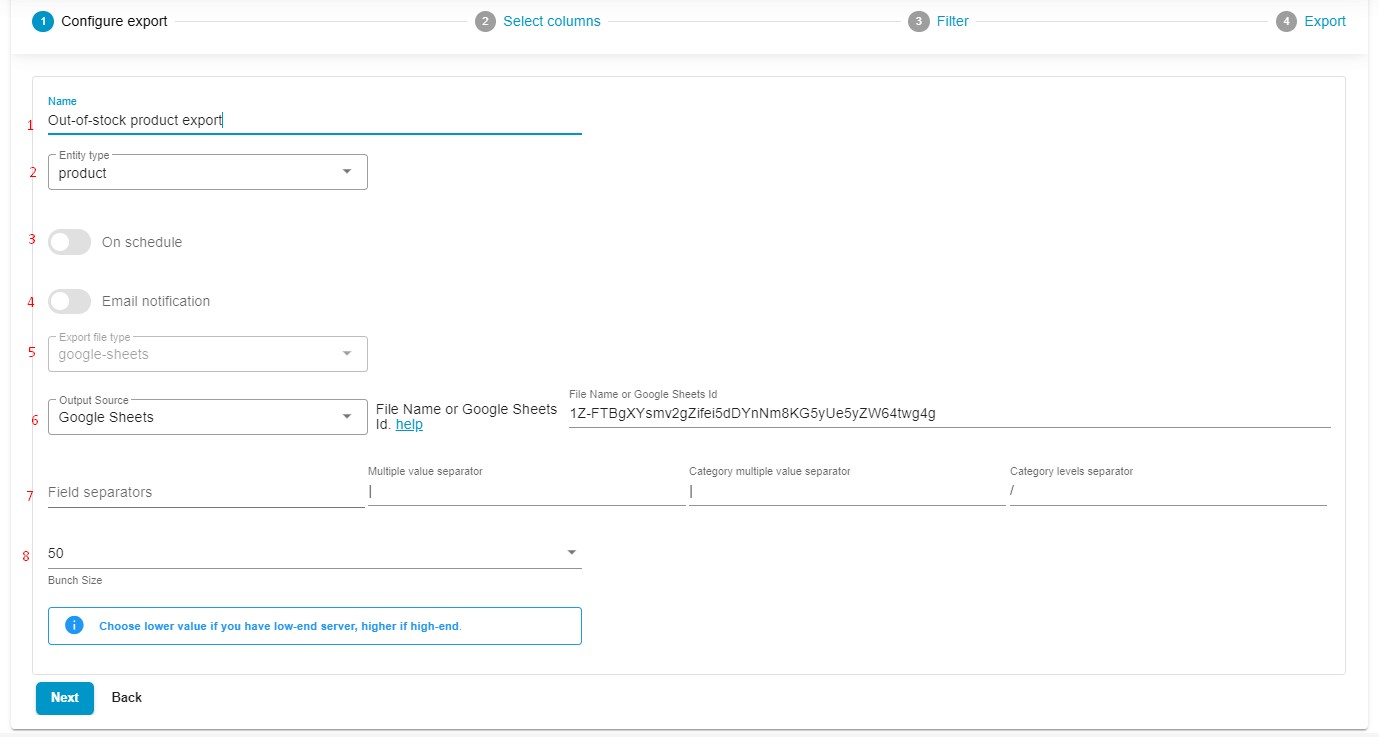
- Provide your export profile with a descriptive title.
- Choose the type of data you want to export – Products.
- If needed, establish a schedule for automated exports.
- Configure email notifications if you want to stay informed about successful, failed, or both types of custom field exports.
- Choose your preferred file format: XML, XLSX, or CSV. Alternatively, you can transfer custom fields to a Google Sheets spreadsheet.
- Decide on your preferred export source: FTP, Google Drive, Google Sheets, or a simple file download.
- Specify separators.
- For optimal performance, especially on low-end servers, specify a bunch size with a lower value.
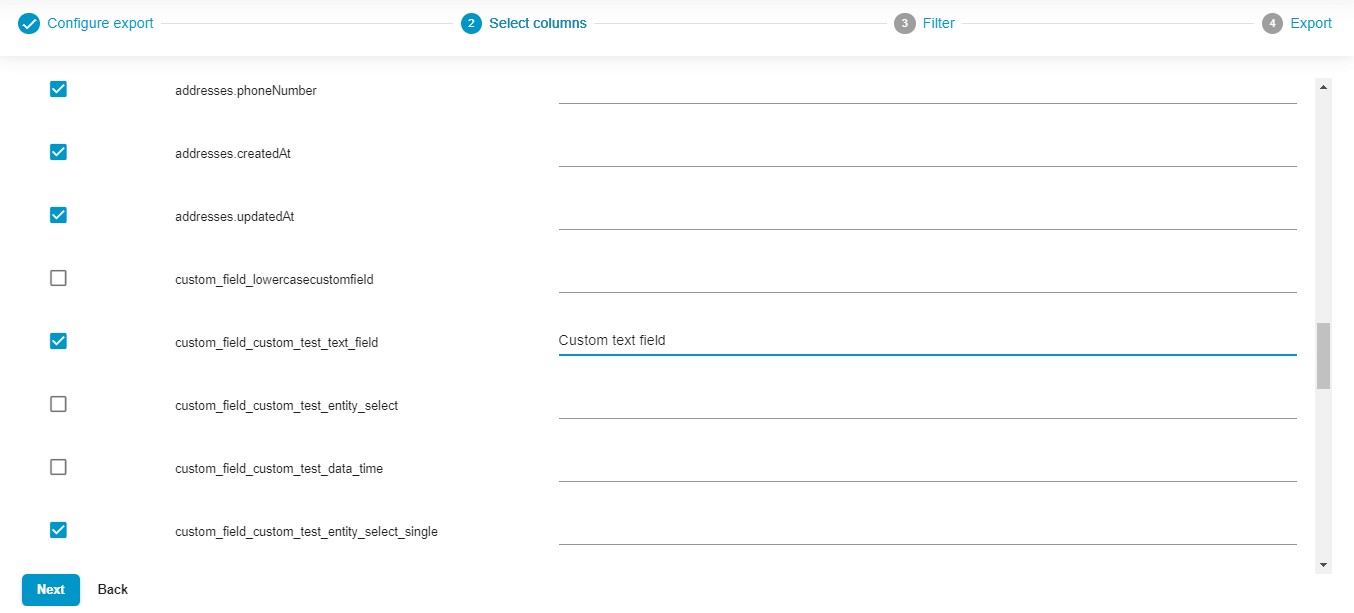
Step 3: Customize Columns
Click “Continue” to proceed to the “Select columns” screen. At this step, you can choose which custom fields to export: Uncheck any columns you prefer not to include in the export.
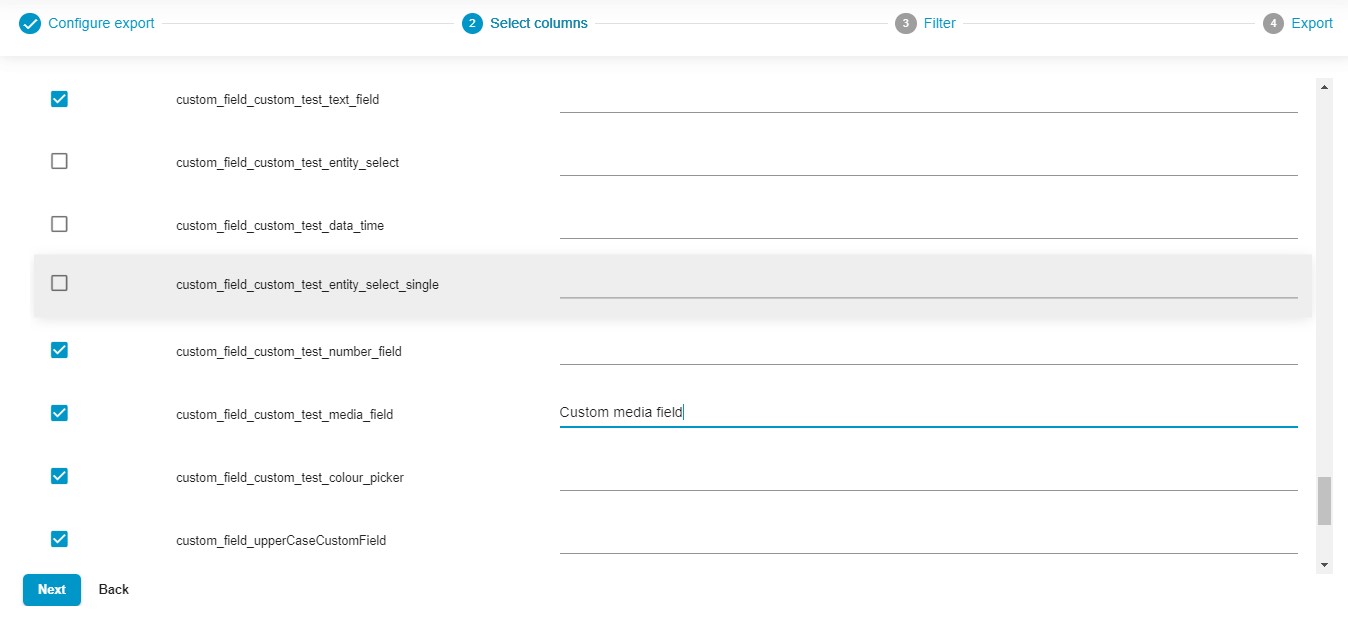
Also, you can customize the column titles to meet your partner’s specific requirements if you are going to provide your custom columns to a third party. You can easily rename default column titles by adding a new title (“Rename“) after the existing column name (“Column“).
Step 4: Apply Filters
The third screen of your export profile empowers you to create filters that refine the selection of records in your output. For instance, you can export custom fields for products that are out of stock.

Step 5: Save and Export
Click the “Save & Close” button to store your Shopware 6 export profile or hit the “Export” button if you’re ready to proceed.

By following these user-friendly steps, you can export custom fields for products from Shopware 6. For more in-depth information and detailed instructions, please refer to our Firebear Improved Import, Export & Mass Actions Manual.
Shopware 6 Order Custom Fields
Exporting custom fields for orders looks the same except you need to select a corresponding entity during the second step:
- Create a new export profile;
- Configure Export settings, selecting orders as your export entity;
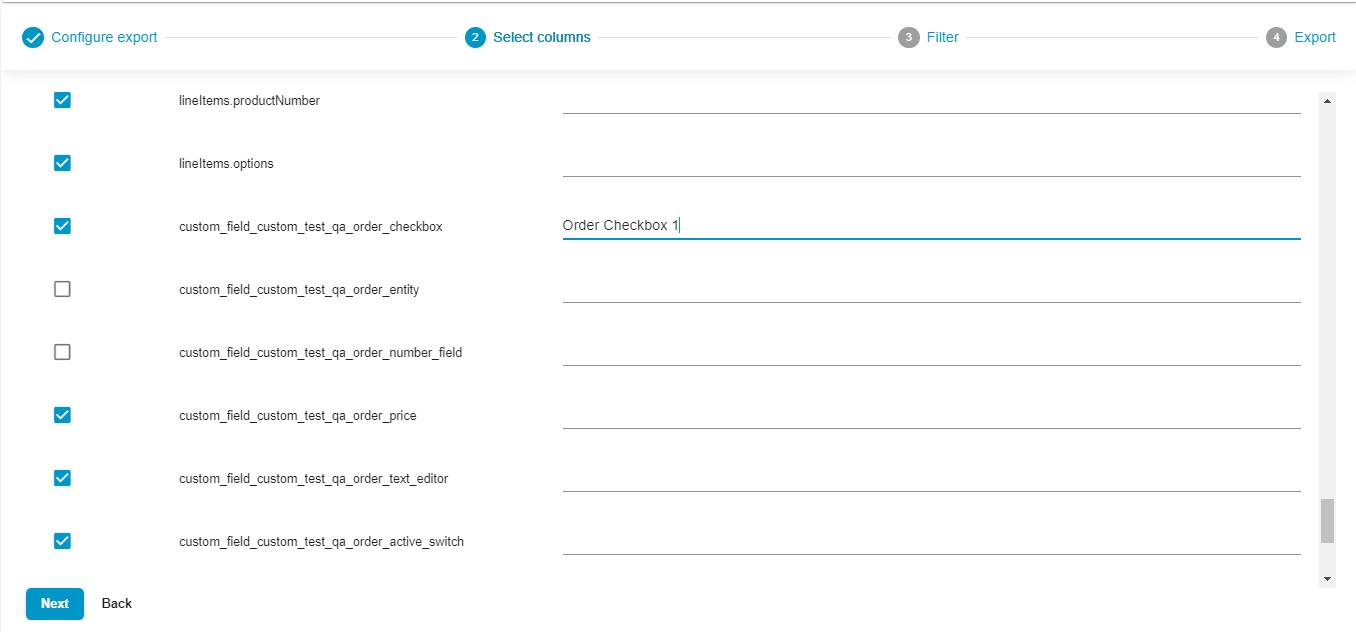
- Customize columns, selecting which custom fields you want to export. Also, it is possible to map custom field names and other attributes to third-party values here;
- Create filters to narrow down the selection of orders you want to export;
- Save your order export profile and run the transfer, moving your custom fields associated with orders out of your Shopware 6 website.
Note that if you already have a saved export profile for orders and then create custom fields: assign them to orders, add values, and save the orders, then when the existing export profile is launched, these new custom fields won’t be exported. You need to create a new profile so that these new/created custom fields are added there. The new export profile will export custom fields for orders successfully.
For more in-depth information and detailed instructions, please refer to our Guide to Shopware Order Export.
Shopware 6 Customer Custom Fields
Exporting custom fields for customers is identical. You only need to choose a corresponding entity during the second step:
- Create a new export profile;
- Configure Export settings, selecting customers as your export entity;
- Customize columns, selecting which custom fields you want to export. Also, it is possible to map custom field names and other attributes to third-party values here;
- Create filters to narrow down the selection of customers you want to export;
- Save your customer export profile and run the transfer, moving your custom fields associated with customers out of your Shopware 6 website.
For more in-depth information and detailed instructions, please refer to our Firebear Improved Import, Export & Mass Actions Manual.
Other Features
Now, let’s focus on other benefits introduced in the Firebear Improved Import, Export & Mass Actions application. As the owner of a Shopware 6 store, you have a powerful time-saver at your disposal that not only exports custom fields but also bridges the gaps left by the default Shopware 6 setup. This potent instrument redefines data management in numerous impactful ways, such as:
- Comprehensive Product Management: Work with your product data and custom properties with no barriers, ensuring that your catalog remains consistently updated.
- Streamlined Customer Data Handling: Seamlessly transfer customer details between your website and third parties, simplifying customer relationship management.
- Efficient Order Data Export: Efficiently export orders, gaining valuable insights into your transactions and sales analytics.
- Precise Data Mapping: Establish clear data relationships between any third-party names and native Shopware titles to ensure seamless integration between your Shopware 6 store and external systems.
- Customizable Scheduling: Tailor your import and export schedules to your preferences, automating data updates.
- Format Flexibility: Import and export files in different file formats, such as CSV, XML, and XLSX.
- Google Sheets Integration: Transfer data between Shopware 6 and Google Sheets seamlessly, facilitating collaborative data management and more.
- Simplified File Transfers: Use conventional imports and exports with direct file uploads and downloads, simplifying the entire data management process.
- Enhanced Data Security: Ensure robust data security and simple but powerful data exchanges with comprehensive support for FTP/SFTP protocols.
- Google Drive Compatibility: Optimize data file uploads with integrated Google Drive support, enhancing accessibility and convenient data management.
As you can see, the Firebear Import & Export Tool empowers Shopware 6 store owners to efficiently manage their e-commerce operations. Whether it’s maintaining your product catalog, managing customer data, or processing orders, this app simplifies complex tasks, ultimately enhancing the overall effectiveness of your e-commerce website. For more comprehensive information, please visit:
- Firebear Improved Import, Export & Mass Actions for Shopware 6
- Firebear Improved Import, Export & Mass Actions Manual
- Contact us