
How to Import Product Images to Shopware 6

Today, we describe a quite specific case of importing product images to Shopware 6. Usually, this process consists of two steps: upload media files to your Shopware 6 installation and then update products with the corresponding UUIDs of the images. However, if you use image URLs the import procedure may get stuck as described in this . Below, we shed light on how to import product images to Shopware 6 using the platform’s default instruments. You will learn what difficulties are associated with this process and how to import product images to Shopware 6 in an alternative way. And don’t forget to check our Shopware Cookbook for additional helpful materials.

Table of contents
What is UUID?
UUID stands for a Universally Unique Identifier. It is a 128-bit label Shopware 6 uses for storing information within the system. For instance, it uses UUIDs for various media files, including product images.
How to Import Media to Shopware 6
As we’ve just mentioned above, you can import product images to Shopware 6 by uploading the corresponding media files. Launch the import where you usually start: under Settings -> Shop -> Import/Export -> Import Tab.
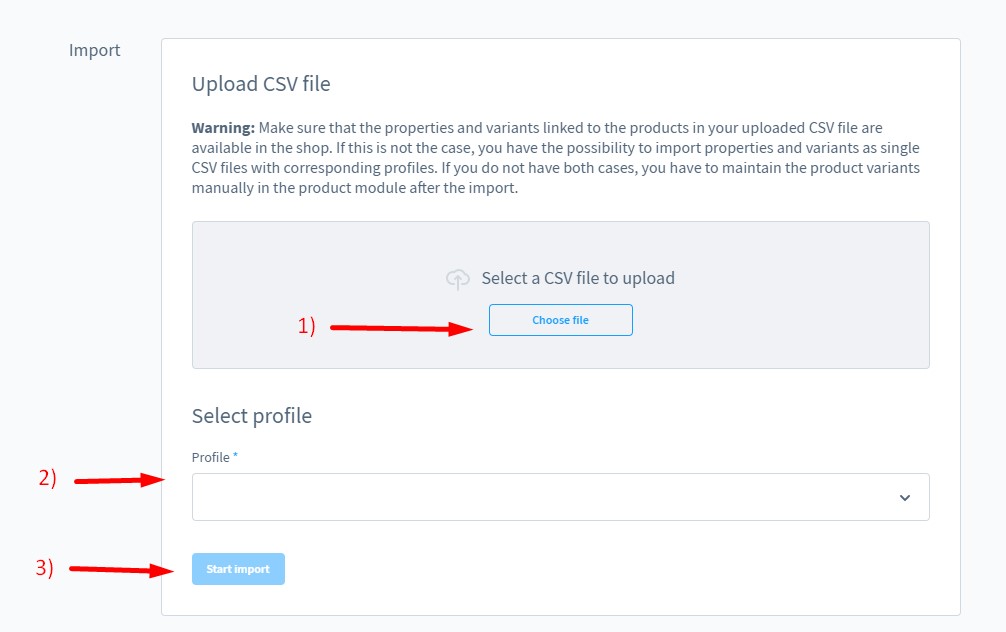
Select the default media profile (2) and choose the corresponding CSV file (1). The latter should contain all required information including the correct column names. If the provided information is not correct, you will need to edit your data file manually. Otherwise, you won’t be able to import media files to Shopware 6.
Once you have entered all fields, click Start Import (3).
Default Media File for Shopware 6
The default media file contains the following columns:
| id | It is a unique UUID of the media file. You can leave this field empty since it is automatically assigned during import. |
| folder_id | In this column, specify the UUID of the folder where the image to be used is located. Go to the configuration page of the respective image folder under Content -> Media. The ID is displayed in the address bar. |
| url | In this column, you can specify the URL of the medium you want to import. External URs are supported. |
| private | Use “0” for the standard import. Use other values depending on what plugins require. |
| type | Leave this field empty for import. This field is used to store the metadata of the medium for export |
| title | Specify an image title here. |
| alt | Specify an alternative SEO title here. |
As you can see, it is possible to import external media files to Shopware 6 due to the URL column. However, when you import products to Shopware 6, you may need to specify the UUID of the image already available in the Shopware installation instead of the direct upload.
If you use URLs, you may face the following issue:
Shopware 6 Image Import Failure
argues that importing a CSV into Shopware 6 with the help of the default import/export function leads to a failure. However, changing the image URLs to their actual final URL loads the images. But doing that manually is not a solution, since the update file contains more than 20k images.
According to , the context options follow_location and max_redirects are explicitly set to 0 when . Changing the context options to 1 and something greater than 0 respectively solves the issue.
The reason for this limitation is associated with security concerns. It’s possible to circumvent the url validator by simply redirecting to the attacker’s URL.
How to Import Product Images to Shopware 6
You can import product images to Shopware 6 along with products. You will need the Improved Import, Export, and Mass Actions app since it introduces an alternative way of importing product media to Shopware 6. With the help of the application, you can even import products to Shopware 6 replacing the existing images with the new ones.
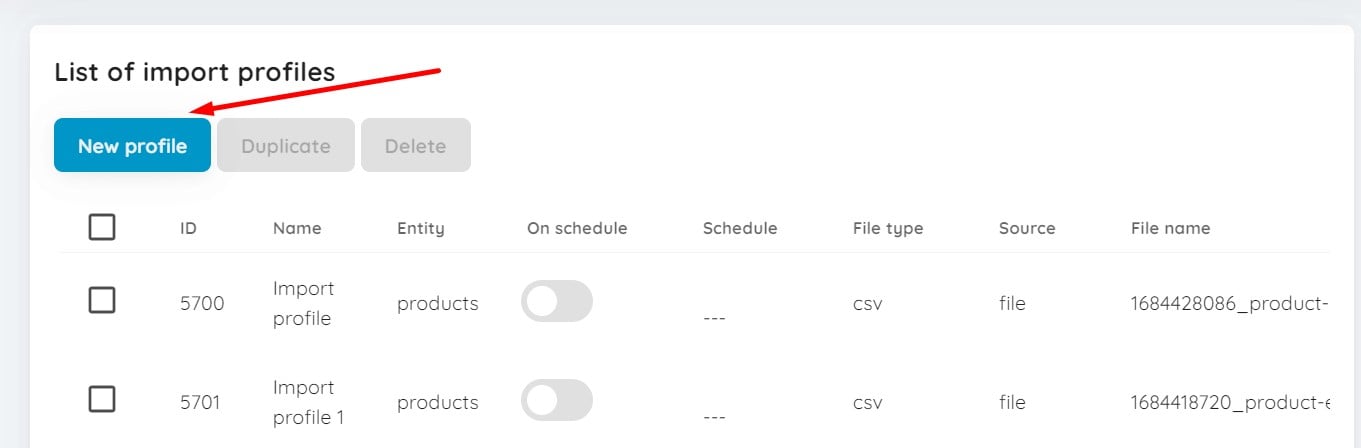
First of all, click the New Profile button under Extensions -> Improved Import, Export & Mass Actions -> Product Import.
You are on the Select file screen. Follow these steps to configure a Shopeare 6 import procedure that lets you import product images:
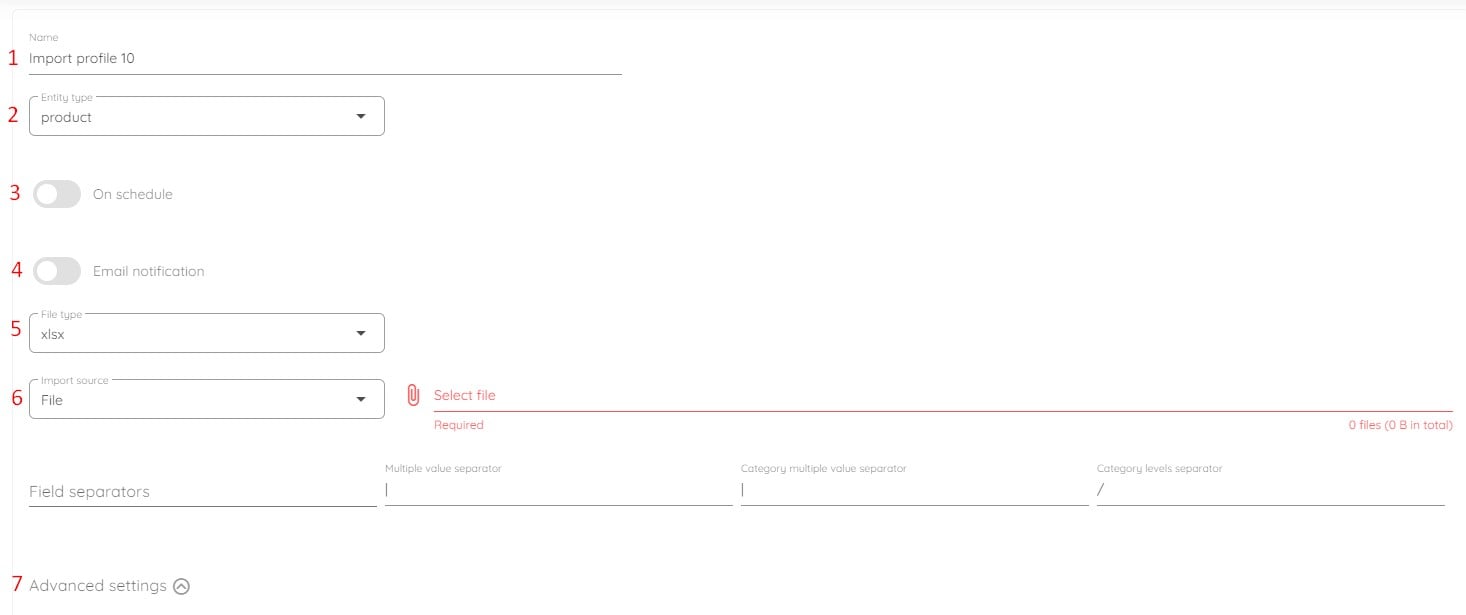
- Specify your profile’s name;
- Select an entity you want to import – Products;
- Create a schedule of updates if necessary;
- Configure email notifications if you wish to get updates on import results:
- Select your file format (XLSX, XML, or CSV);
- Choose your import source. If it is a file, provide your file that contains product image URLs along with other product properties. Alternatively, you can upload it via FTP. We recommend exporting the product file and applying changes to it or at least copying its structure and properties. Other sources include URL, Google Drive, and Google Sheets.
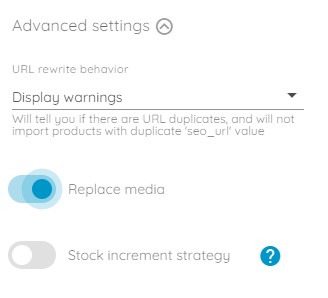
- Configure advanced settings: URL rewrite behavior, media replacement behavior, and stock increment strategy. Turn on the Replace media switch to import products, replacing their images already available on your website. Keep it turned off to add new images to the existing media library.
Now, tweak your mappings. It is a revolutionary import feature that lets you transfer any update to Shopware 6 even if it doesn’t contain any column that follows the Shopware requirements. The corresponding screen lets you specify which columns from the imported file match the product properties from your Shopware 6 website.
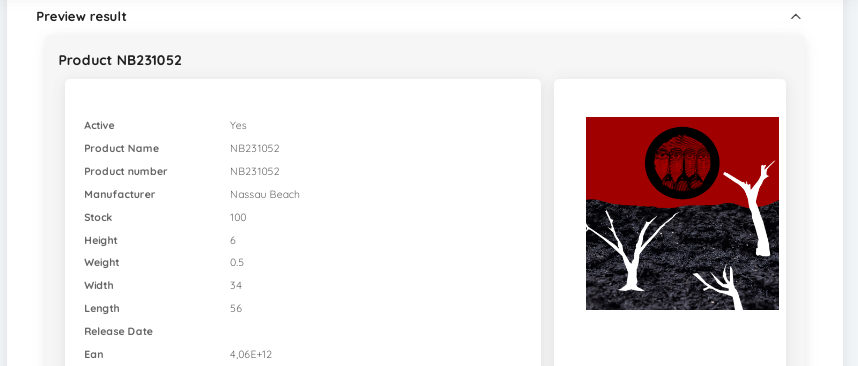
The Improved Import, Export, and Mass Actions app also lets you preview how products look after import. Here, you will see how the imported product images look after the update.
Let’s suppose that the cover_media_url and media columns contain an internal image URL of a file previously uploaded to your Shopware installation.

You will see the following result at the preview stage:
What if the same columns contain an external link?

The Improved Import, Export & Mass Actions app will easily import the corresponding product image, displaying it on the preview page:
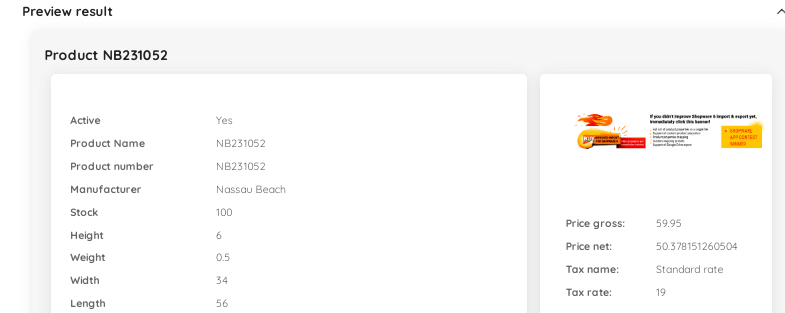
Next, click the Import button at the bottom of the Preview result page to start the import process.
However, in both cases, you can see that the import procedure provides only a cover image. So, how to import all product media to Shopware 6? You need to specify corresponding URLs in the cover_media_url and media columns.
How to use the cover_media_url and media columns in Shopware 6 product import
In the cover_media_url column, you should provide a single link to a cover image of a product. Just like that:
![]()
As for the media column, it may contain multiple links to other product images separated by your multiple value separators, such as “|”:

where 1 and 2 are links to external product images and 3 is a separator between them. As you can see, no spaces are used.
So, if you provide product update information via the cover_media_url and media columns in a similar manner, you will get the following results:
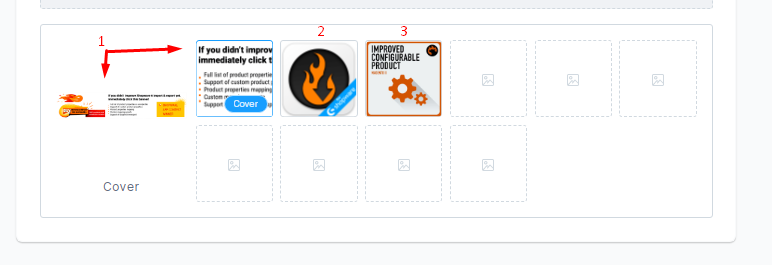
As you can see, the imported product contains both the cover image (1) and two additional media files (2 and 3) specified in the table that we’ve just imported.
You can read more about the enhanced Shopware 6 import in our Improved Import, Export & Mass Actions Manual. Also, learn how to import product images in any custom order: How to Import Product Media to Shopware 6 in Correct Order.
Other Features
The Improved Import, Export, & Mass Actions solution allows you to handle the most common issues with Shopware 6 data transfers. For example, you can easily update product images in several ways. Also, Shopware 6 doesn’t let you export all the necessary product information from Shopware 6 into a single file. However, the Improved Import, Export, and Mass Actions app allows you to do so. As a result, you get the ability to modify products in batch. Other advantages include:
- Product import and export with full support for custom attributes (properties) and images;
- Customer import and export with full support for addresses;
- Orders export;
- Full support for product variants with a full set of attributes;
- Product properties mapping with mapping presets;
- Import and export schedules;
- Import and export of CSV, XLSX, and XLSX files;
- Direct file uploads;
- FTP/FTPS uploads.
You can find more information about the Improved Import, Export & Mass Actions app here:
- Improved Import, Export & Mass Actions application for Shopware 6
- Improved Import, Export & Mass Actions Manual
Or just contact us.