
Ultimate Guide To Shopware 6 Export

We’ve already described how import processes look in Shopware 6 in our Ultimate Guide To Shopware 6 Import. Now, it’s time to describe the opposite side of data transfers – Shopware Export. By default, you get the ability to export information from your e-commerce website and pass it to any third-party system. Along with import processes, this functionality simplifies various content management chores and integrations with product comparison engines and marketplaces. In this Shopware 6 export guide, we explain the platform’s general data transfer options. You will learn how to export data from Shopware 6, what entities are supported, and how individual export profiles work. Also, we provide tips on how to enhance the default Shopware export with automation, mapping, filters, and support for additional file formats and sources.

Note that we provide Shopware integration with external platforms. Contact our support for further information or try our Improved Import, Export & Mass Actions.
Table of contents
Shopware Export Module
The export functionality of Shopware 6 is always available in your administration under Settings -> Shop -> Import/Export.
Exported File Characteristics
When you transfer data from Shopware 6, the output follows these conditions:
- It contains a UTF-8 character set.
- Semicolons are considered field separators.
- Quotation marks are used as string separators.
If the external system that needs your data has other requirements, you need to edit the exported file or create a corresponding export profile with new mappings and separators. However, this process is slightly limited. We explore it below.
Shopware 6 Export Interface
As we’ve already mentioned, you need to get to Settings -> Shop -> Import/Export in your administration and open the export tab to transfer the existing data from your Shopware 6 environment. The system lets you convert it into a CSV file only. Therefore, you need a third-party tool to change the file format. It is either another export app or a converter. We will focus on this problem below.
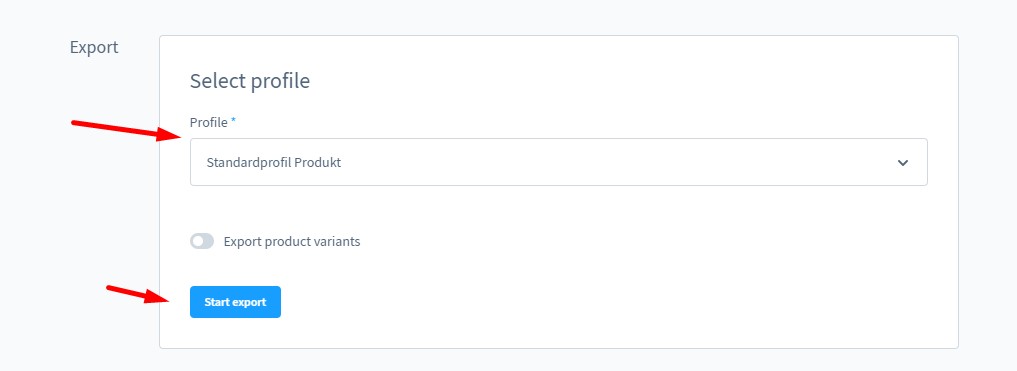
The interface of the basic Shopware 6 export module is very admin-friendly and intuitive. It lets you choose an export profile and launch the data transfer.
When you start the export process, its status is displayed in the Export activity grid.
Also, there is a history of export runs called Export activity. Each record in this grid has a context menu that lets you open the corresponding log entry, download the exported CSV file, or view the appropriate export profile. That’s it.
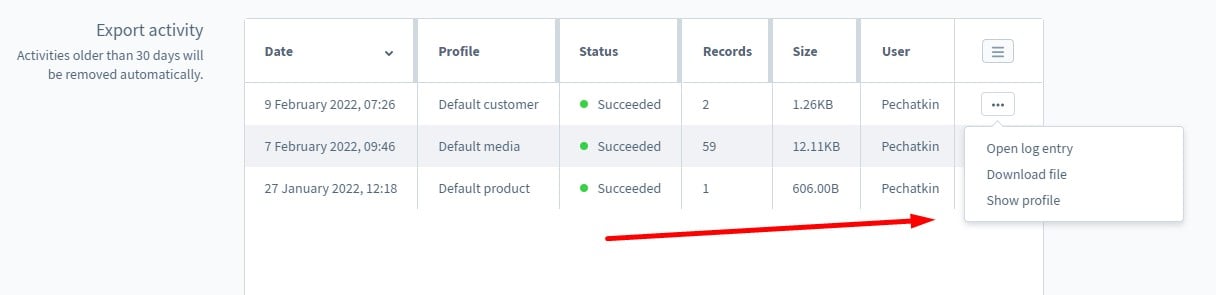
The Export activity section displays a history of your past exports. However, all exports older than 30 days are not displayed here. The section lets you open the used profile and export the CSV file again. Use the corresponding option in the context menu at the end of each line.
If you want to alter the default export process, you need to tinker with import/export profiles.
Default Shopware Export Profiles
The Profiles tab contains all the import and export profiles. Note that they are universal: you can use the same profile for import and export. However, it is possible to create a unique export profile that is based on different mappings and separators.
You can edit the existing profiles and also create new ones under the Profiles tab of the basic Import/Export module.
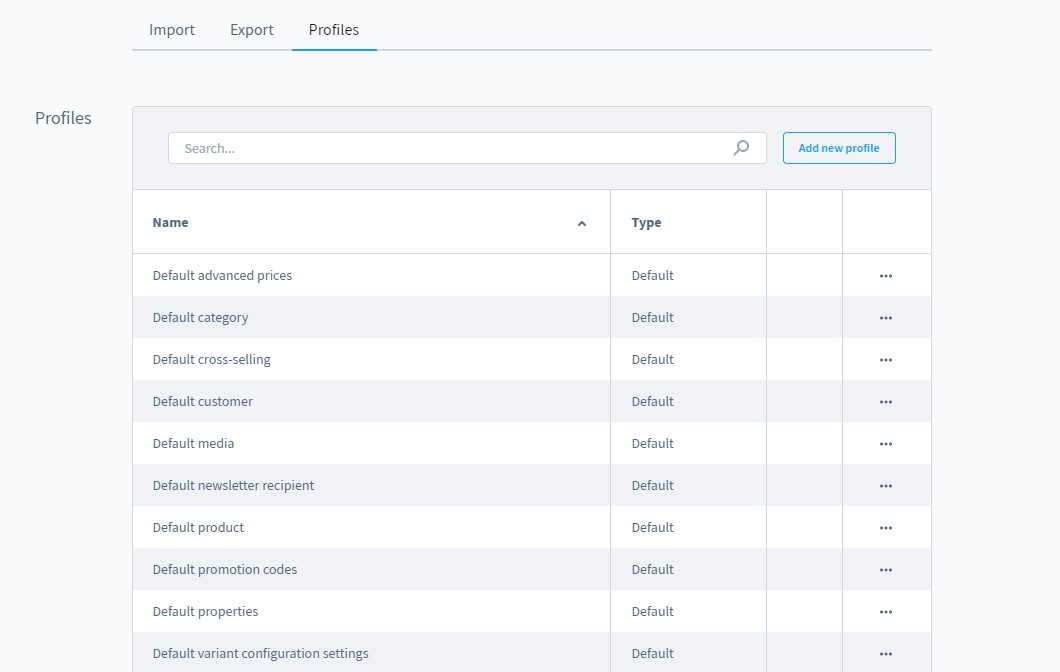
Use the context menu to open, delete, or duplicate profiles.
Hit the Add new profile button to create a new export profile. In the case of many profiles, use the search function to find the desired option.
How To Create Custom Export Profiles In Shopware 6
Below, we explain how to create custom Shopware export profiles for your specific business needs.
There are two ways to create a new export profile in Shopwasre 6:
- Hit the Add new profile button;
- Use the context menu to duplicate an existing profile and apply changes.
Let’s explore the first approach. Hit the Add new profile button, and Shopware 6 will display a window divided into the following two tabs:
- General;
- Field Indicator.
General Settings of Shopware Export Profile: Name, Object Type & Mappings
The General tab lets you name your new export profile and select its object type. The latter defines a certain mode for exporting data and reduces the number of mapping options according to the database from which the information is taken.
Use the mapping table to match CSV fields to their respective database counterparts. Also, pay heed to the fact that it is impossible to change the object type after introducing mapping options. That’s where you can create unique export mappings to satisfy the requirements of the connected systems.

Field Indicator: Separator & Enclosure Character
The Field Indicator tab lets you specify a separator and an enclosure character. In Shopware 6, they are used to indicate the separate field within a CSV file:
Separators split single fields. A semicolon is the default option. However, it is also possible to use caret (^) or comma (,).
Enclosure characters group multiple fields in your export file. They appear at the beginning and end of a text. Note that separator characters are ignored within enclosure characters. A double quotation mark is the default option. No alternative options are available in Shopware 6 by default.

Since profiles in Shopware 6 are universal, you may also define how the system should handle the import file values if your Shopware version contains import settings. You can enable the creation of new records in the store as well as overwrite existing information. Nothing similar is available for Shopware export.
Upload CSV File to Create New Export Profiles in Shopware 6
Shopware also lets you create a new export profile based on an existing CSV, which can be a file exported from another store. Upload it to Shopware 6 to provide your new profile with the corresponding fields. Next, assign them to the database entries. That’s it!

How To Create Mapping For Shopware Export
In a nutshell, creating a mapping scheme in Shopware 6 is reduced to just two repetitive actions: you specify values from a CSV file and set a corresponding database value in front of it. No matter whether it is import or export, the procedure is the same. However, you need to keep several nuances in mind.
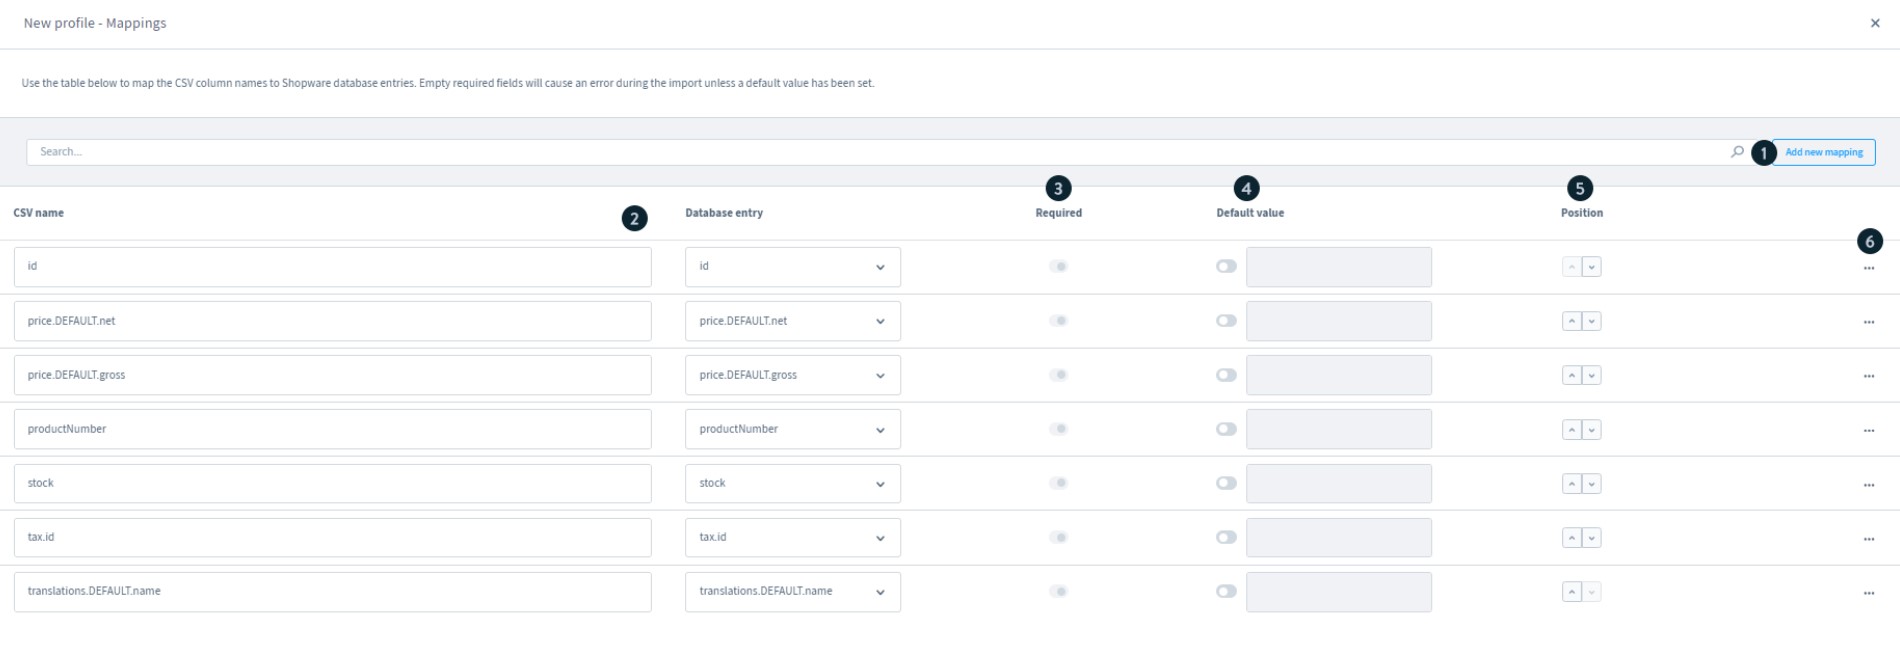
Add new mapping
Hit the Add new mapping (1) button to add a line (2) to the mapping section of your export profile, where you can match a database record with a required CSV entry for your Shopware export. Note that you should use the name of the corresponding column from the CSV file that will be used with this profile as a CSV name.
Specify required fields
Use the Require (3) toggle to specify whether the respective field is required. While this option does not influence export processes, it impacts how data is transferred to Shopware 6. The corresponding field in your import file must be populated if the toggle is active. Otherwise, you will get an import error.
Add default values
Shopware 6 also lets you specify default values (4). They are provided automatically upon import if the corresponding field is empty. This feature probably has no impact on export processes.
Specify a field position
This column lets you define which position (5) the corresponding field will appear in a CSV file. Thus, you modify the structure of your exported file.
Remove entities
Use the context menu (6) on the right and its Delete option to remove unnecessary fields from your export profile’s mapping scheme.
Import, Export & Mass Actions – Alternative Approach to Shopware Export
We’ve already mentioned that the default Import/Export module of Shopware 6 is associated with various limitations. If it is not enough to satisfy your business requirements, pay attention to our Improved Import, Export & Mass Actions app. Let’s highlight its core features:
- Update schedules – ultimate automation of your Shopware export processes;
- Advanced mapping – create any output your partners require, specify default values in empty raws for particular attributes, change the order of columns in a CSV file, and export only selected columns;
- Filters – use filters to export only specific products, customers, or orders;
- File Formats – export CSV, XMLS, and XLSX files from Shopware;
- File Sources – download exported files to your computer, send them to an external server over FTP, upload tables to Google Drive, or export Shopware data to Google Sheets spreadsheets.
The Import, Export & Mass Actions tool is designed to streamline import and export processes by introducing advanced mapping features, automation, and support for different file formats and sources. While Shopware 6 works with CSV only, you can effortlessly create XML, and XLSX files on Shopware export. As for sources, the extended flexibility of this solution lets you connect Shopware 6 to Google Sheets and Google Drive. You can also establish FTP exports.
Automation and mapping are the two other competitive advantages of our app. You can use the Import, Export & Mass Actions tool to transfer data between your e-commerce website and third-party systems in a fully automated mode. Just specify the update time and map third-party data to Shopware. Provide these parameters only once, and the app will do everything else for you on every Shopware export.
Note that we regularly provide updates and new functionalities for Improved Import, Export & Mass Actions. Contact our support for further information on the module and its current feature set that extends the default Shopware export. Follow this link to find the latest version of the extension there:
Final Words
Shopware export is quite straightforward and useful in most basic cases. You can freely rely on the built-in tools to generate CSV files with various entities from your e-commerce website. But the default exporter fails if you need to automate export processes or create unique mappings. In this case, using a third-party Shopware export app can help. Installing such tools as Import, Export & Mass Actions, for instance, dramatically extends the default export possibilities of Shopware 6, introducing multiple new features and benefits.
Shopware Export FAQ
What is Shopware Export?
Shopware Export is a feature that allows you to export data such as products, categories, customers, and orders from your Shopware store as CSV files. This is useful for data analysis, reporting, or transferring data to other systems.
How do I export products in Shopware?
To export products in Shopware, go to Settings – Shop – Import/Export – Export tab. Select a product export profile and start the data transfer.
Can I schedule regular exports in Shopware?
No, Shopware doesn’t let you schedule regular exports. However, you can schedule Shopware exports with the help of the Import, Export & Mass Actions App. Create a new export profile, and specify an export schedule to run transfers automatically.
What types of data can be exported from Shopware?
Shopware supports the export of various data types, including products, categories, customers, orders, and more.
Are there any plugins available to enhance Shopware export functionality?
Yes, there are several plugins available in the Shopware Store that can enhance the export functionality. Import, Export & Mass Actions, for instance, offers advanced features such as custom export templates, additional file formats, automated exports, and integration with third-party systems for more seamless data management.
Related posts
 How to Import & Export Shopware 6 Advanced Prices as Separate Entity
 How to Boost Sales with Shopware 6 Cross Selling: The Ultimate 2025 Guide
 solution25: Your Trusted Shopware Agency in New York & Germany
 How to Import Products to Shopware 6 & Automatically Assign Them to Parent Categories: A Time-Saving Import Feature You Shouldn’t Miss
 How to Export Metafields in Shopify: A Complete Guide
 Take Full Control over Product Visibility in Shopware 6: Introducing the ‘Replace Product Sales Channels’ Feature for Import
 New in Shopware 6 Product Import: Control Topseller Products with the markAsTopseller Field
 Magento 2 Export Customers Tutorial: Export Customer Data with Ease