
Exploring Shopware: How to Create Dynamic Product Groups in Shopware 6
![]()
Item grouping is vital for e-commerce management since it helps you automate various routine tasks. Thus, Shopware 6 lets you combine products in groups automatically with the help of dynamic rules. Next, you can display these groups in categories and other locations on your e-commerce website. In the article below, we explain how to add dynamic product groups in Shopware 6. Besides, the following material explores several other nuances of this platform’s feature. You will discover where dynamic product groups are situated in Shopware 6, how to create rules for dynamic product blocks, and how to assign dynamic product groups to Shopware 6 categories, product comparisons, and shopping experiences. Also, some import and export recommendations are available below. Let’s see where you can find the grouping tool in your admin and proceed to the creation of Shopware 6 dynamic product groups. More materials about the platform are available in this article: Shopware 6 Guides.

Note that we provide Shopware integration with external platforms. Contact our support for further information or try our Improved Import & Export Extension for Shopware.
Table of contents
- 1 How to Find Dynamic Product Groups in Shopware 6
- 2 How to Add Dynamic Product Groups in Shopware 6
- 3 How to Assign Dynamic Product Groups in Shopware 6
- 4 How to Import Dynamic Product Groups to Shopware 6
- 5 Shopware 6 Essentials FAQ
- 5.1 How to create a Shopware ID?
- 5.2 How to create a Shopware account?
- 5.3 What is Shopware master data?
- 5.4 How to add a shop in Shopware?
- 5.5 How to add a payment method to your Shopware account?
- 5.6 How to create a deposit in Shopware?
- 5.7 How to purchase Shopware extensions?
- 5.8 How to get support in Shopware?
- 5.9 How to migrate to Shopware 6?
- 5.10 How to automate import and export processes in Shopware 6?
- 5.11 How to integrate Shopware 6 with external systems?
How to Find Dynamic Product Groups in Shopware 6
If you’ve entered your Shopware 6 administration for the first time, you may not know where dynamic product groups are situated. However, there is nothing special about their location. You can find dynamic product groups in Shopware 6 as follows:
- Go to the main menu of your Shopware 6 admin;
- Unfold the Catalogues section;
- Click the Dynamic Product Groups link;
- Shopware 6 redirects you to the corresponding screen.
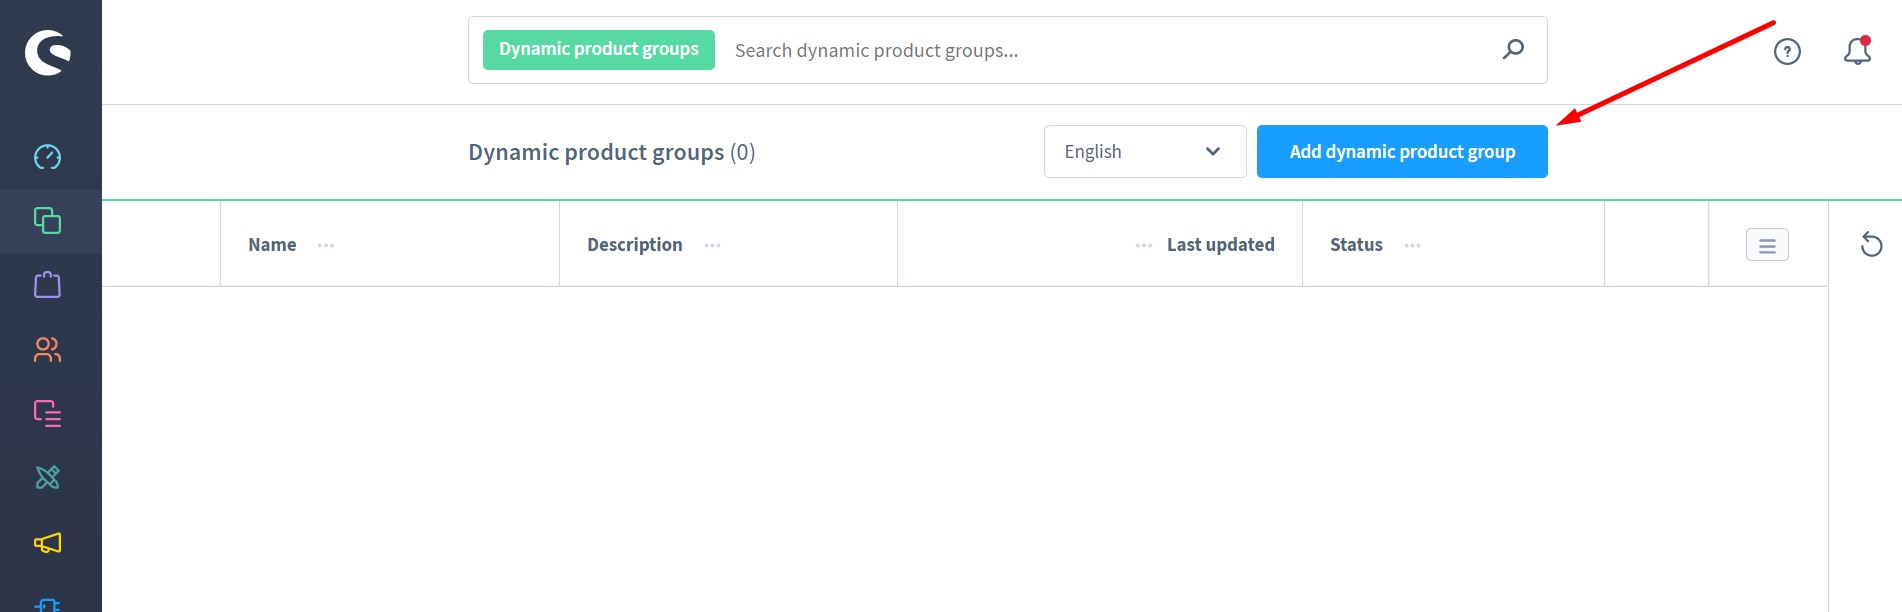
As you can see, the corresponding grid displays the date of the last change and the status of the product group. The latter indicates whether a product group uses valid rules. If not, it cannot be used. The context menu from the last column allows for editing or completely deleting dynamic product groups.

How to Add Dynamic Product Groups in Shopware 6
Adding a dynamic product group in Shopware 6 is simple and intuitive. From the screen mentioned above, hit the Add dynamic product group button.
The system redirects you to a new screen divided into the following two sections:
- General information;
- Conditions.
The first one lets you specify the name of your new dynamic product group and add its description.

The situation with conditions is a little bit more sophisticated but yet intuitive. The section is based upon containers that include dynamic rules. Below, you can see a basic container with a single unconfigured condition:
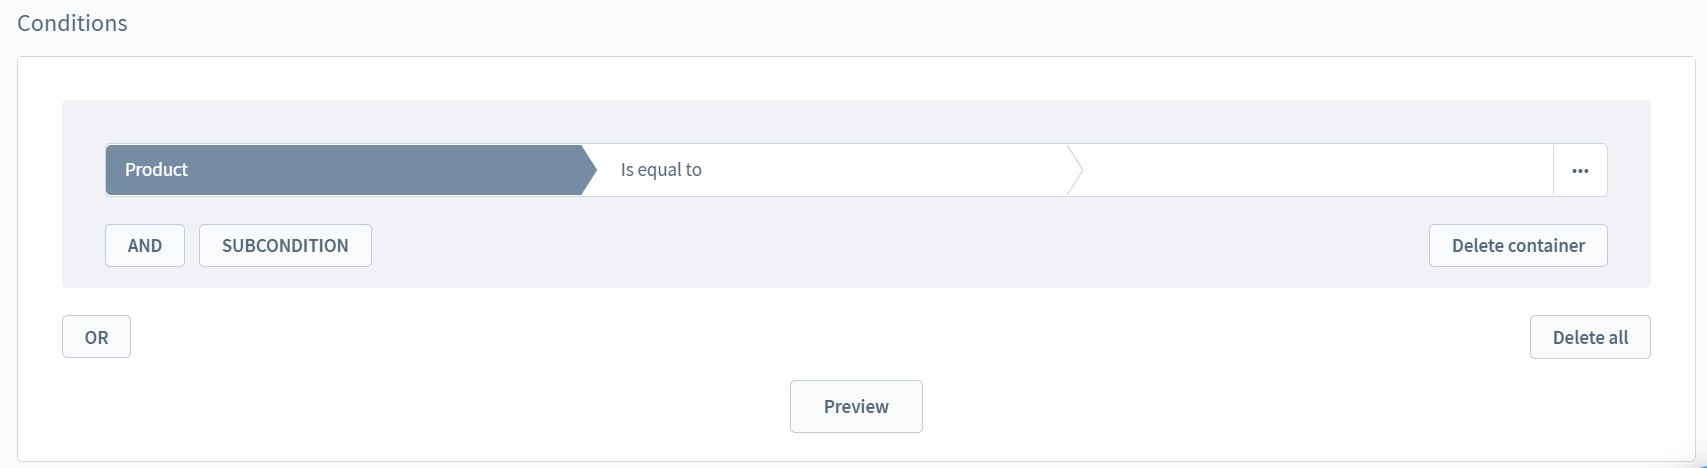
How to create rules for dynamic product blocks in Shopware 6
To create rules for dynamic product blocks in Shopware 6, you need to specify a base property. By default, it is Product. Let’s change it to Price.
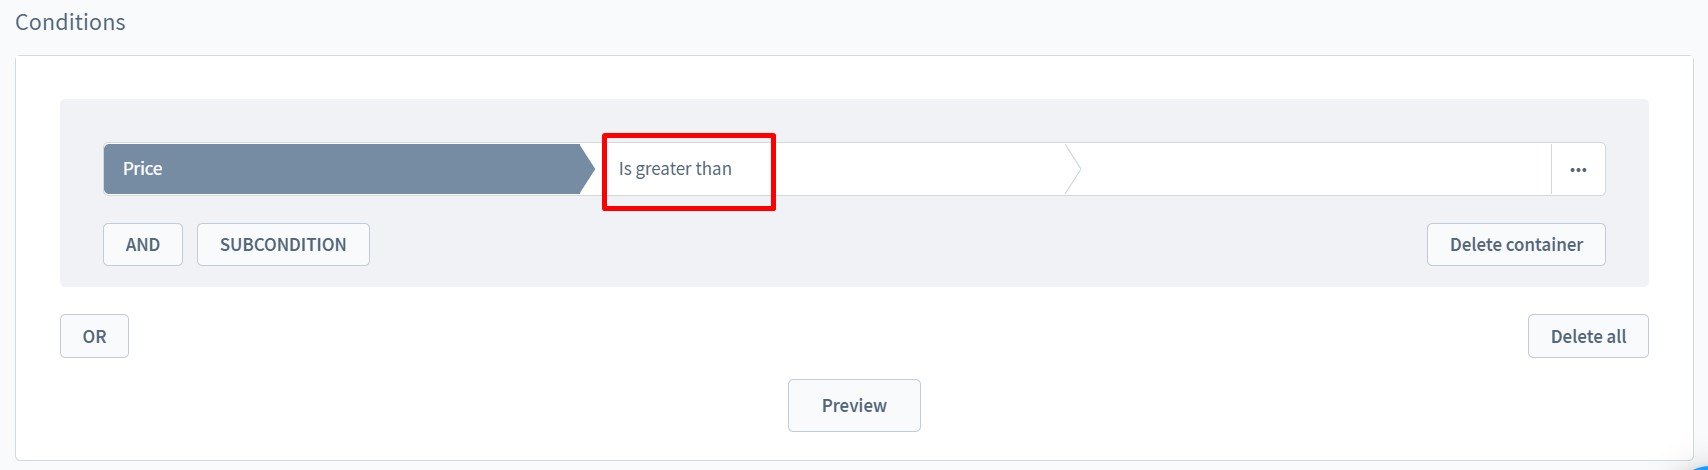
Next, it is necessary to choose an operator. For the Price attribute, Shopware 6 lets you set one of the following values:
- Is equal to;
- Is greater than;
- Is greater than/equal to;
- Is less than;
- Is less than/equal to;
- Is not equal to;
- Range.
Let’s set ‘Is greater than’.
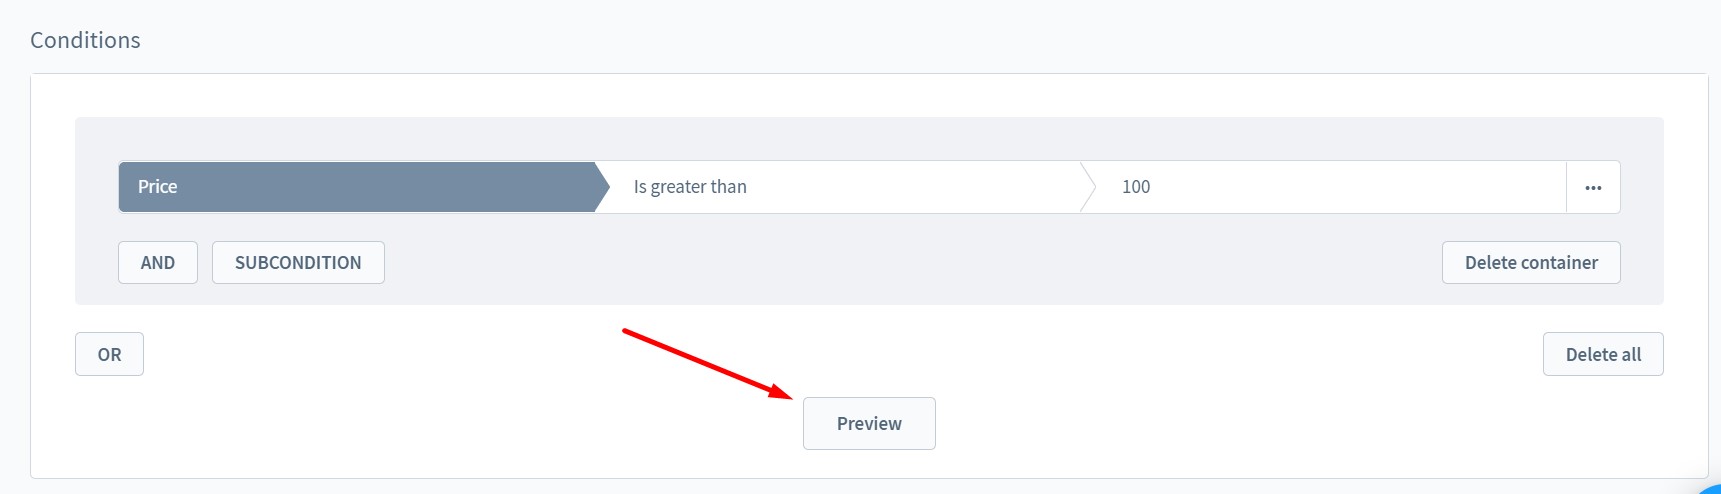
Now, specify the price value, creating your first condition that must be met.

All products with a price greater than 100 now belong to this Shopware 6 dynamic product group. You can check how the rule works by clicking the Preview button.
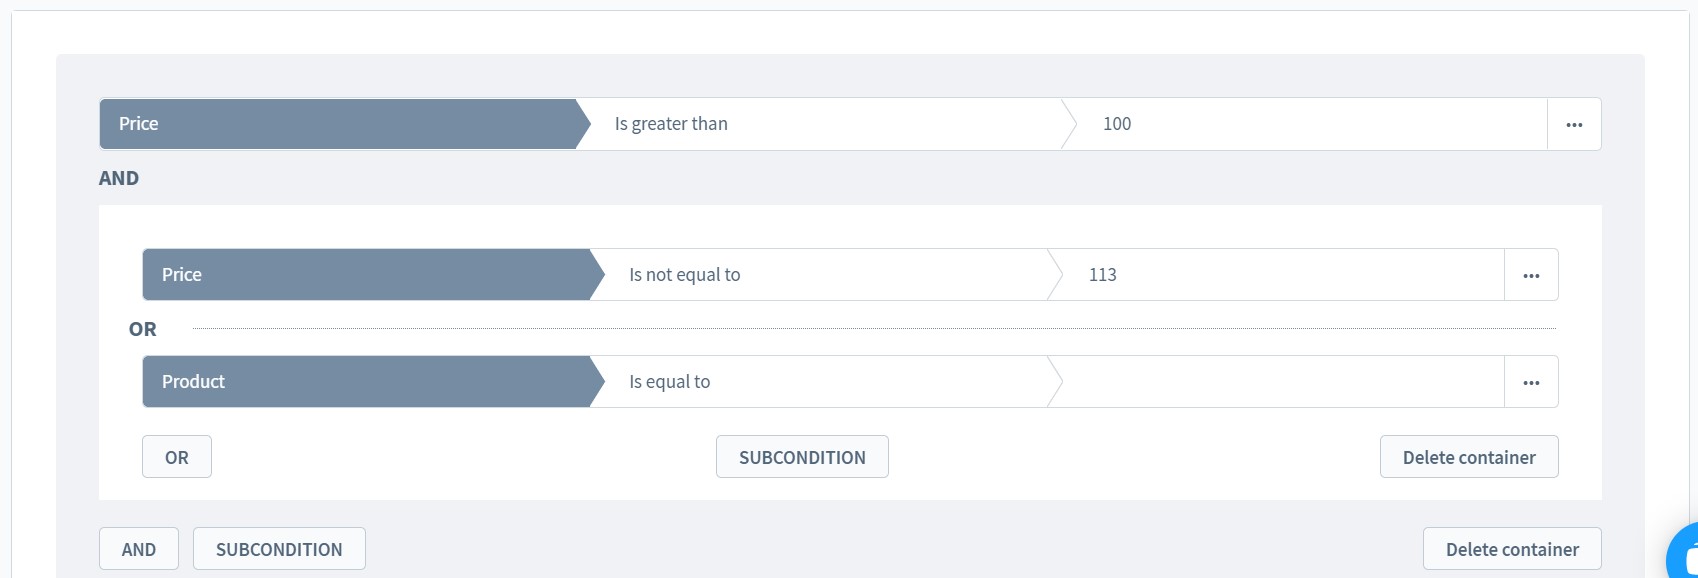
What about other control elements? Use the AND button to create more conditions. In this case, an item must meet all of them to belong to this group.
You can also create a further condition using the OR button. In this case, only one of the two rules must be met for the item to belong to the group.
As for the SUBCONDITION button, it creates rules that must be met along with the main container. You can create numerous sub-conditions with different relations to each other.
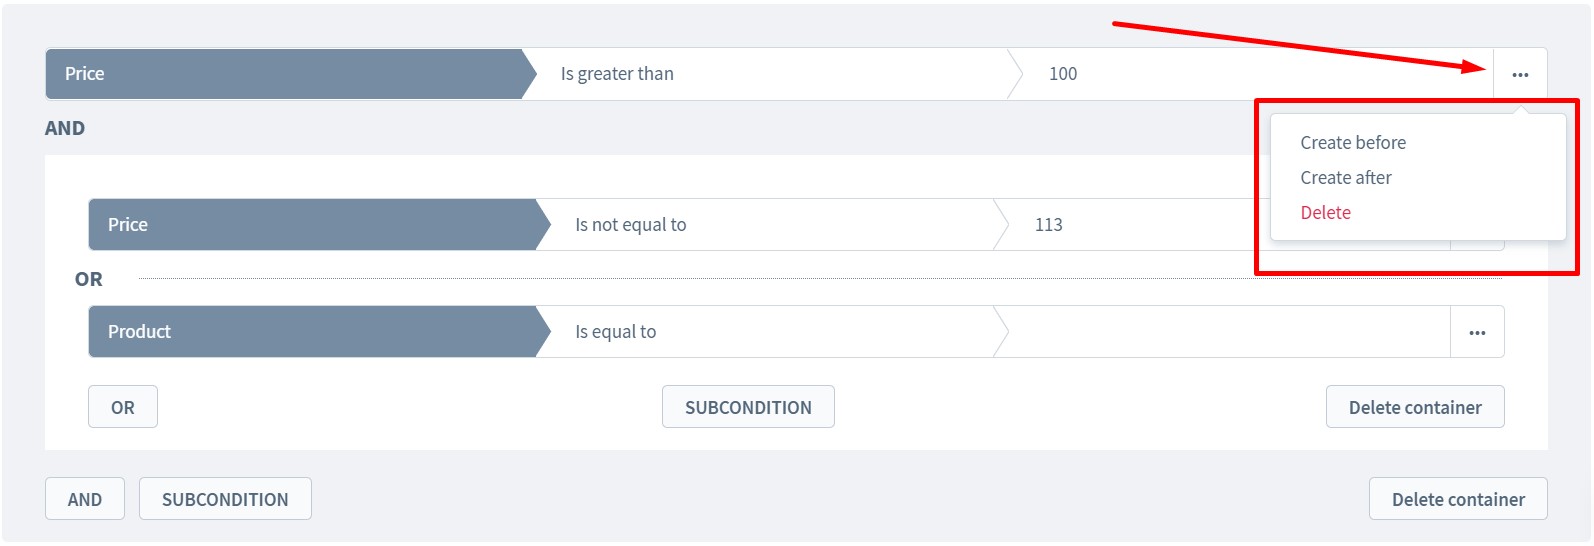
Also, note that the context menu on the right lets you create a new condition directly before or after the respective rule. Also, it enables you to delete the block.
How to Assign Dynamic Product Groups in Shopware 6
Dynamic product categories dramatically simplify various backend processes in Shopware 6. Thus, you can use them to automate how products appear in various sections of your online storefront:
- Categories;
- Product comparisons;
- Shopping experiences.
Let’s say a few more words about each storefront area and the use of Shopware dynamic product groups in them.
Categories
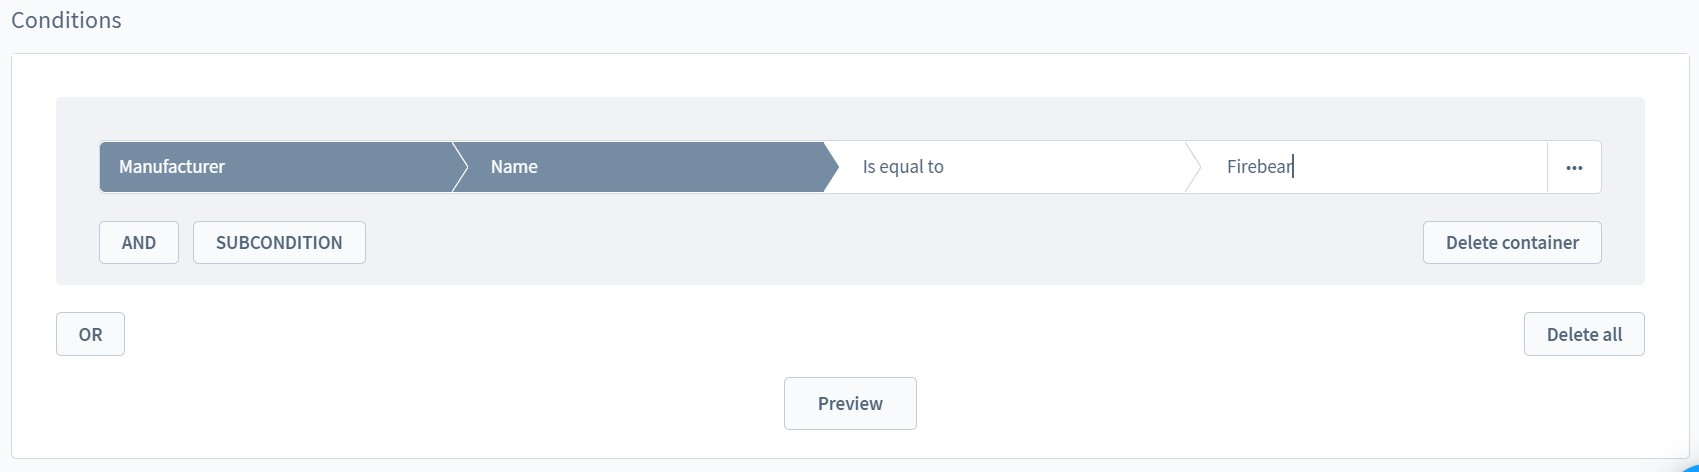
As we’ve already mentioned in our article dedicated to Shopware 6 categories, you can fill in your catalog with products automatically. It is necessary to create a dynamic product group that will add specific products to a corresponding category. For instance, you can create a manufacturer-specific section in your catalog.
Below, you can see a rule that filters out products that belong to a particular manufacturer – Firebear.
Product comparison
Shopware uses dynamic product groups in product comparison to add content to the feed. The feature lets you export products to existing price portals as well as create complete connections to new marketplaces. We describe it in more detail in another article.
Shopping Experiences
As for shopping experiences, Shopware 6 empowers you to fill in product sliders with the help of dynamic product groups. Create a rule to filter out the selection of items from your catalog and assign the new dynamic product group to the corresponding element of Shopware shopping experiences.
How to Import Dynamic Product Groups to Shopware 6
Our team lets you eliminate various routine processes associated with the Shopware 6 administration. We can help you import your existing data to your e-commerce website. Contact our support for more details. You can also try our to import various entities to Shopware 6. Please, consult our specialists before using the module for transferring dynamic product groups to Shopware 6. We will help you achieve the highest efficiency in this process.
The Improved Import & Export Extension for Shopware 6 provides the ability to import and export core entities between the platform and any external systems. You just need to create a corresponding data transfer profile. Also, the module lets you automate data transfers and apply mapping schemes to them, matching unsupported data records to ones used in your database.
Shopware 6 Essentials FAQ
How to create a Shopware ID?
Prior to working with dynamic product groups and other entities, you need to generate a ShopwareID. The system provides it along with a Shopware account which you need to create upon registration.
How to create a Shopware account?
Go to the Shopware registration page to create a new shopware account and get your Shopware ID. Click the Register Now link and fill in the registration form. The system will send a message with a confirmation link to your email address.
What is Shopware master data?
Master data combines all the core information about your company that consists of various contact details, such as an address, email, phone, company name, etc. You provide this information to Shopware 6 during the registration.
How to add a shop in Shopware?
Go to the merchant area to create a new Shopware shop. You can find a link that initiates a store creation on the start screen’s right section. You can select between a cloud storefront or an on-premise installation. Provide data about your new shop and save changes.
How to add a payment method to your Shopware account?
Shopware lets you add a payment method under Basic Information -> Accounting. You can choose between PayPal, credit card, or direct debit.
How to create a deposit in Shopware?
When the payment method is added, you can create a deposit for purchasing extensions. Go to Merchant Area -> Shops and specify a shop to provide funds to. Click Open Account Details and add funds.
How to purchase Shopware extensions?
Now, when you have a deposit on your account, it is time to buy your first Shopware 6 extension or theme. Go to the Shopware Marketplace or the Plugin Manager, choose tools you want to buy, and complete the purchase.
How to get support in Shopware?
You can get support regarding your account or license at info@shopware.com or +49 2555 9288 50, regarding accounting and financial services – at financial.services@shopware.com or +49 2555 9288 510.
How to migrate to Shopware 6?
Use the Improved Import & Export tool for Shopware 6 to migrate to your new e-commerce website. The extension provides the ability to move core entities to shopware 6 from any external platform, automating and simplifying this process. Contact our team for more information.
How to automate import and export processes in Shopware 6?
For regular data updates, the Improved Import & Export extension for Shopware 6 provides the ability to automate import and export processes. You can create a schedule per each data transfer job. Next, the module will launch the corresponding import or export process following the specified time frames.
How to integrate Shopware 6 with external systems?
You need the Improved Import & Export extension for Shopware 6 to integrate your website with various external systems, such as ERPs, CRMs, and accounting tools. Use our tool to automate repetitive import and export processes. Also, you can leverage it for modifying data according to the requirements of your Shopware store upon import and the connected platforms upon export.
Related posts
 Shopware 6 Advanced Pricing Guide + Import Tutorial
 How To Bulk Import Products In Shopify: CSV Description & Step-By-Step Guide
 Reputon Amazon Importer Review: How to Connect Shopify to Amazon in a Few Clicks
 How to Import Customers & Customer Addresses to Magento 2
 Magento 2 B2B Company Guide: Revealing Company Structure & Import
 Amasty ChatGPT AI Content Generator for Magento 2
 Magento Open Source and Adobe Commerce 2.4.7 Release Notes
 CopyAI Review 2023