
Shopify Products Explained: Everything You Need to Know
Whether you’re launching a new online store or scaling an existing business, Shopify products are the foundation of your e-commerce success. They include everything from physical goods and digital downloads to services and subscriptions, all managed through the powerful Shopify admin. But setting up and managing products efficiently requires more than just adding names and prices — you need to optimize descriptions, images, SEO settings, and inventory to maximize sales and streamline operations.
In this guide, we’ll break down everything you need to know about Shopify products, including product types, variants, inventory management, and bulk importing. You’ll also discover how to use Shopify’s built-in tools and third-party integrations to enhance your store’s functionality. Whether you’re a beginner or an experienced merchant, mastering Shopify product management will help you create a seamless shopping experience for customers and boost your online sales.
Table of contents
- What Are Shopify Products?
- Types of Shopify Products
- Shopify Product Variants: What They Are and How They Work
- Shopify Product Collections: Organizing Your Store for Better Navigation
- Shopify Products and Inventory Management
- Shopify Products and Bulk Importing
- Outro: Mastering Shopify Products for E-Commerce Success
- Shopify Product FAQ
What Are Shopify Products?
Shopify products are the items or services you sell in your Shopify store. Whether you’re offering physical goods, digital downloads, services, or subscriptions, every listing in your store is categorized as a product within Shopify’s system. These products are the foundation of your e-commerce business, and how you set them up directly impacts sales, inventory management, and customer experience.
Each Shopify product includes essential details such as:
- Product Name & Description — Helps customers understand what they’re buying.
- Product Images & Media — Supports images, videos, and even 3D models to showcase products effectively.
- Pricing & Inventory — Allows you to set prices, track stock levels, and manage SKU numbers.
- Variants & Options — Supports different sizes, colors, or materials under a single product listing.
- Shipping & Weight Details — Essential for accurate shipping calculations.
- SEO & Visibility Settings — Lets you optimize product pages for search engines and control where products appear.
You can find the extended list here: Shopify Product Data Entry Fields.
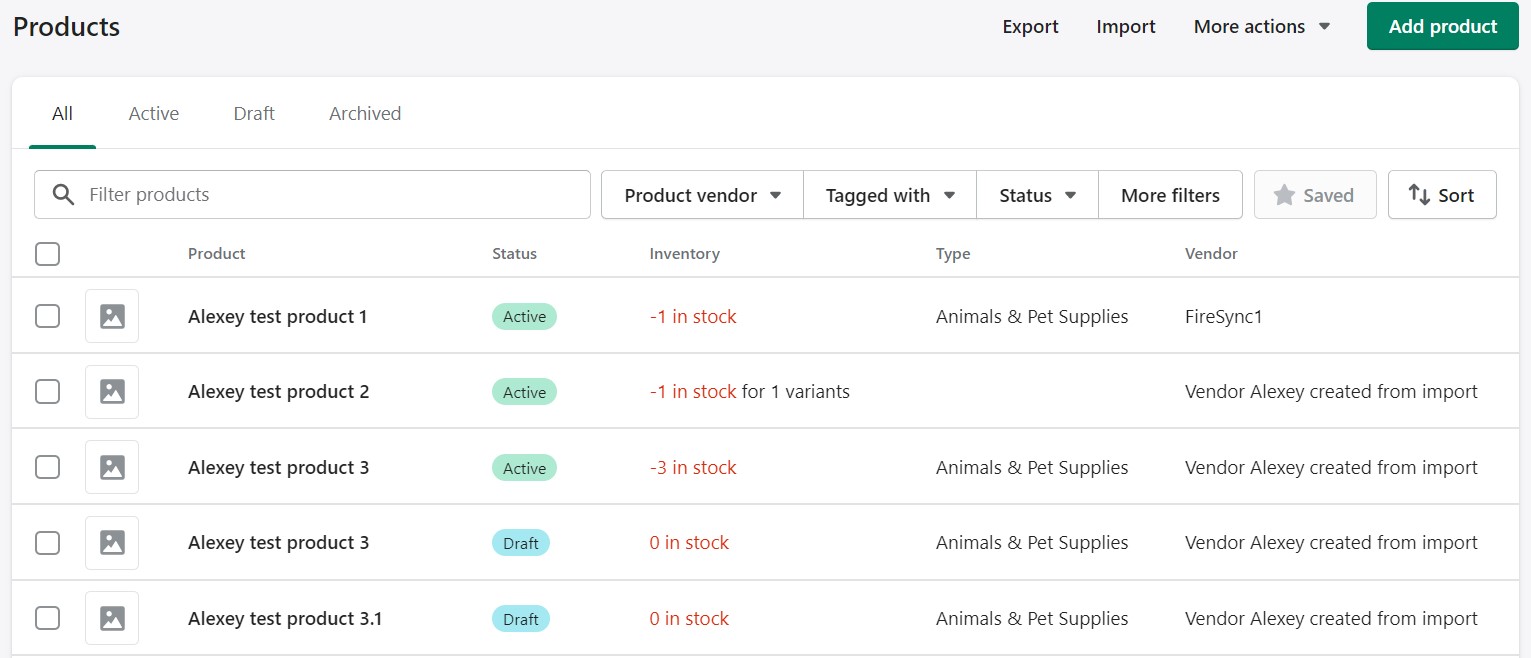
You can manage all Shopify products from the Products Page in your admin. From there, you can add new Shopify products manually, duplicate existing listings, or import them in bulk using a CSV file. Shopify also integrates with third-party apps that help automate product management, making it easier for businesses with large catalogs or frequent inventory updates.
By properly organizing and optimizing your Shopify products, you can enhance search rankings, improve conversion rates, and create a seamless shopping experience for your customers. Follow these links to learn more about Shopify product management:
- How to Edit Products in Shopify
- How to Archive Products in Shopify
- How to Delete Products from Shopify
Types of Shopify Products
Shopify supports various product types, enabling businesses to sell everything from physical goods to digital services. Understanding these categories helps merchants optimize their product listings and streamline inventory management.
- Physical Products are tangible items that require shipping or local pickup. These include clothing, electronics, home decor, beauty products, and handmade goods. Merchants can track stock levels, set up SKUs, and configure shipping details within Shopify’s inventory management system.
- Digital Products are downloadable files or online-access products that do not require physical delivery. Examples include e-books, software, design templates, online courses, and music files. Shopify does not support direct digital downloads by default, so merchants need an app like Digital Downloads to manage file delivery.
- Services are special Shopify products that service-based businesses can sell, such as appointments, consulting sessions, event tickets, and freelance work. Unlike physical goods, services do not require shipping or inventory tracking. To manage bookings and scheduling, store owners often integrate Shopify with third-party apps.
- Subscription-Based Products charge customers on a recurring basis for ongoing deliveries or access to exclusive content. These include subscription boxes, SaaS (Software-as-a-Service), membership programs, and auto-renewing consumable products like coffee or supplements. Shopify does not offer built-in subscription features, so merchants use apps like Recharge or Bold Subscriptions to handle recurring payments.
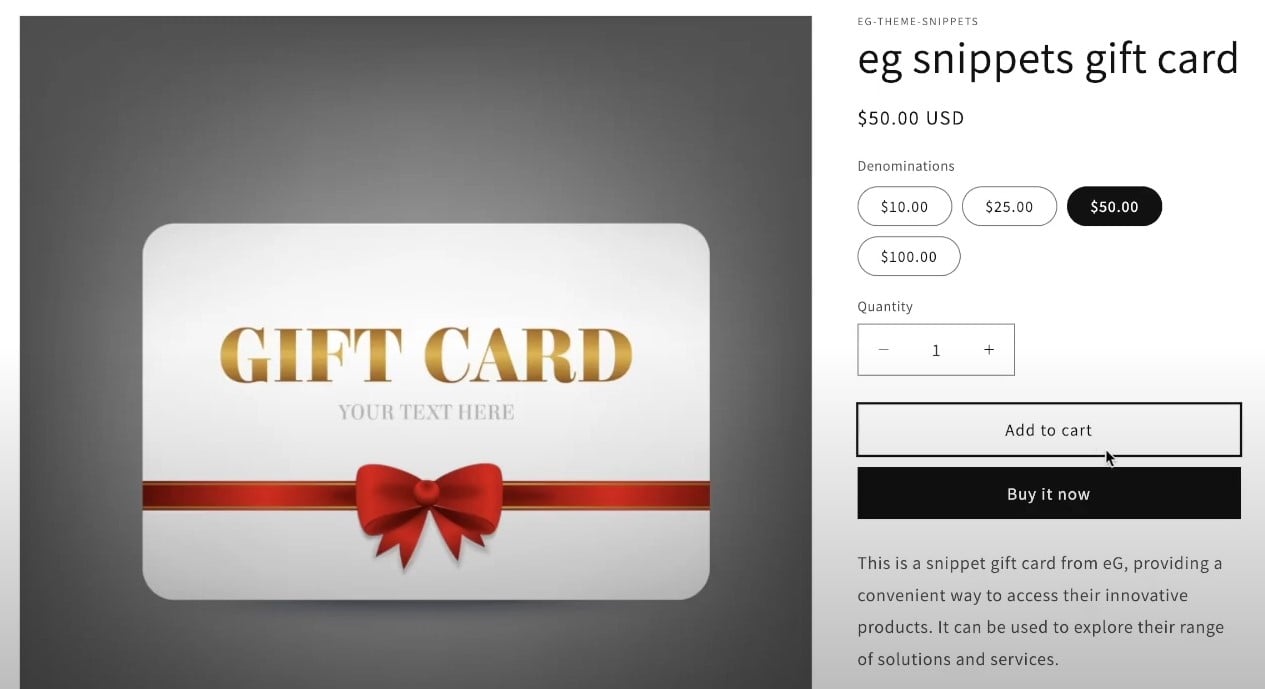
- Gift Cards are Shopify’s prepaid store credits. Customers can purchase digital gift cards with unique codes, which they can redeem later at checkout. Gift cards provide a flexible payment option and help drive customer retention, especially during holiday promotions.
- Bundled Products are multiple products grouped together as a single purchase, often at a discounted price. This strategy is commonly used for upselling complementary items or offering value packs. While Shopify allows basic bundling, more advanced bundling options with inventory synchronization require third-party apps like Bundler or Bold Bundles.
Each Shopify product type has unique inventory, fulfillment, and pricing requirements. Whether selling physical items, offering digital content, or running a subscription model, Shopify provides tools and third-party integrations to enhance product management. By selecting the right product type, merchants can improve store efficiency, streamline operations, and maximize revenue.
Shopify Product Variants: What They Are and How They Work
In many cases, products come in multiple variations, such as different sizes, colors, or materials. Instead of creating separate listings for each version of a product, Shopify enables merchants to use product variants, simplifying store management and improving the customer experience.
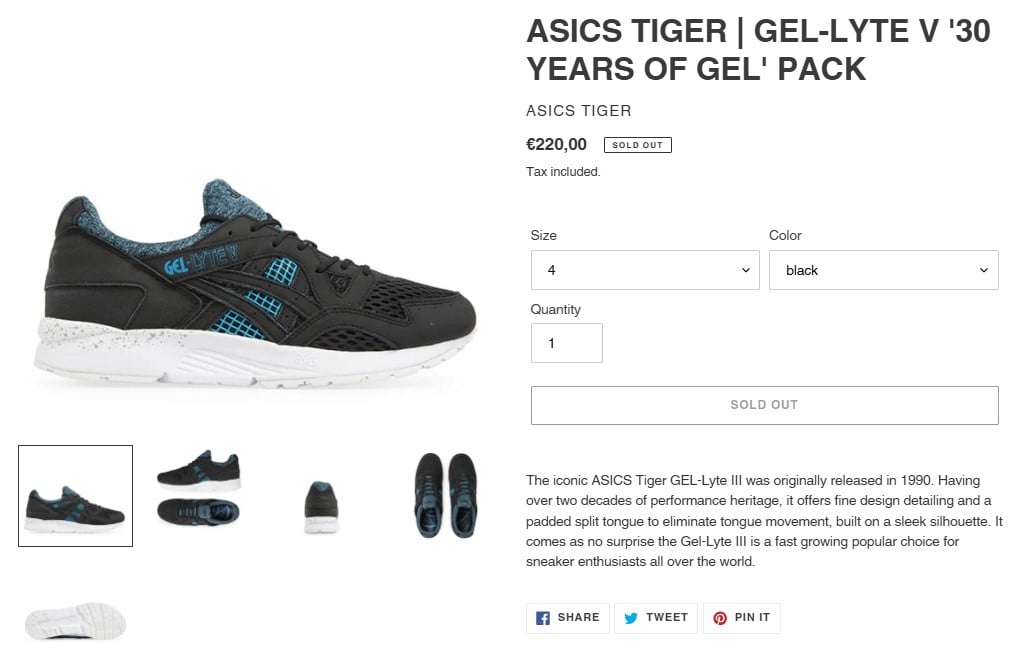
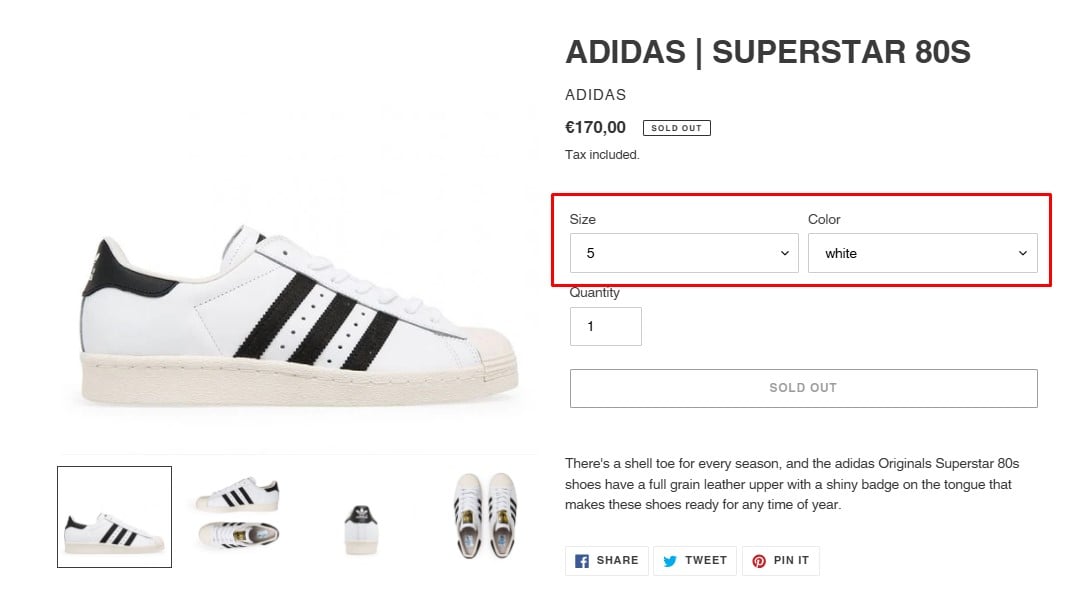
Each Shopify product can have up to three option types (e.g., size, color, and material) and a maximum of 100 variants per product. For stores that require more advanced variant management, third-party apps are available to extend Shopify’s limitations. Below, you can see a Shopify product page for ADIDAS | SUPERSTAR 80S with variants in different sizes and colors:
The key features of Shopify product variants include:
- Customizable Attributes — Merchants can create up to three product options (e.g., size, color, and finish) to define different variants under a single product listing.
- Unique Pricing & SKUs — Each variant can have its own price, SKU, barcode, and inventory level, making it easier to track stock and manage fulfillment.
- Inventory Tracking — Shopify allows inventory tracking at the variant level, ensuring merchants can monitor stock levels for each specific variation.
- Image Assignments — Store owners can upload and assign different product images for each variant, improving customer clarity and reducing confusion.
- Shipping & Weight Details — Each variant can have unique weight settings, affecting shipping rates and fulfillment logistics.
- Automatic Variant Selection — Shopify enables pre-selected default variants, ensuring a seamless checkout experience for customers.
While Shopify’s built-in variant system is flexible, it has some constraints:
- A maximum of 100 variants per product and only three product options (e.g., size, color, material).
- Variants cannot have sub-variants (e.g., a color option within a specific size).
- Bulk variant management can be complex, especially for stores with a large catalog.
For businesses that need more variant flexibility, third-party apps such as Infinite Options or Variant Option Product Customizer can help overcome Shopify’s limitations.
Using product variants effectively enhances navigation, simplifies inventory tracking, and improves user experience. By setting up clear product options, assigning relevant images, and keeping stock levels accurate, merchants can ensure customers find exactly what they need — leading to higher conversions and fewer abandoned carts. Follow this link to learn how to add product variants in Shopify.
Managing Shopify products effectively isn’t just about adding listings—it’s also about making them easy for customers to find. This is where Shopify product collections come in. A collection is a curated group of products that share common attributes, helping customers browse your store more efficiently.
Types of Shopify Collections
Shopify offers two main types of product collections:
- Manual Collections — Products are manually added and removed, giving you full control over which items appear in a specific collection.
- Automated Collections — Products are automatically included based on set conditions, such as tags, product types, or price range, saving time and reducing manual work.
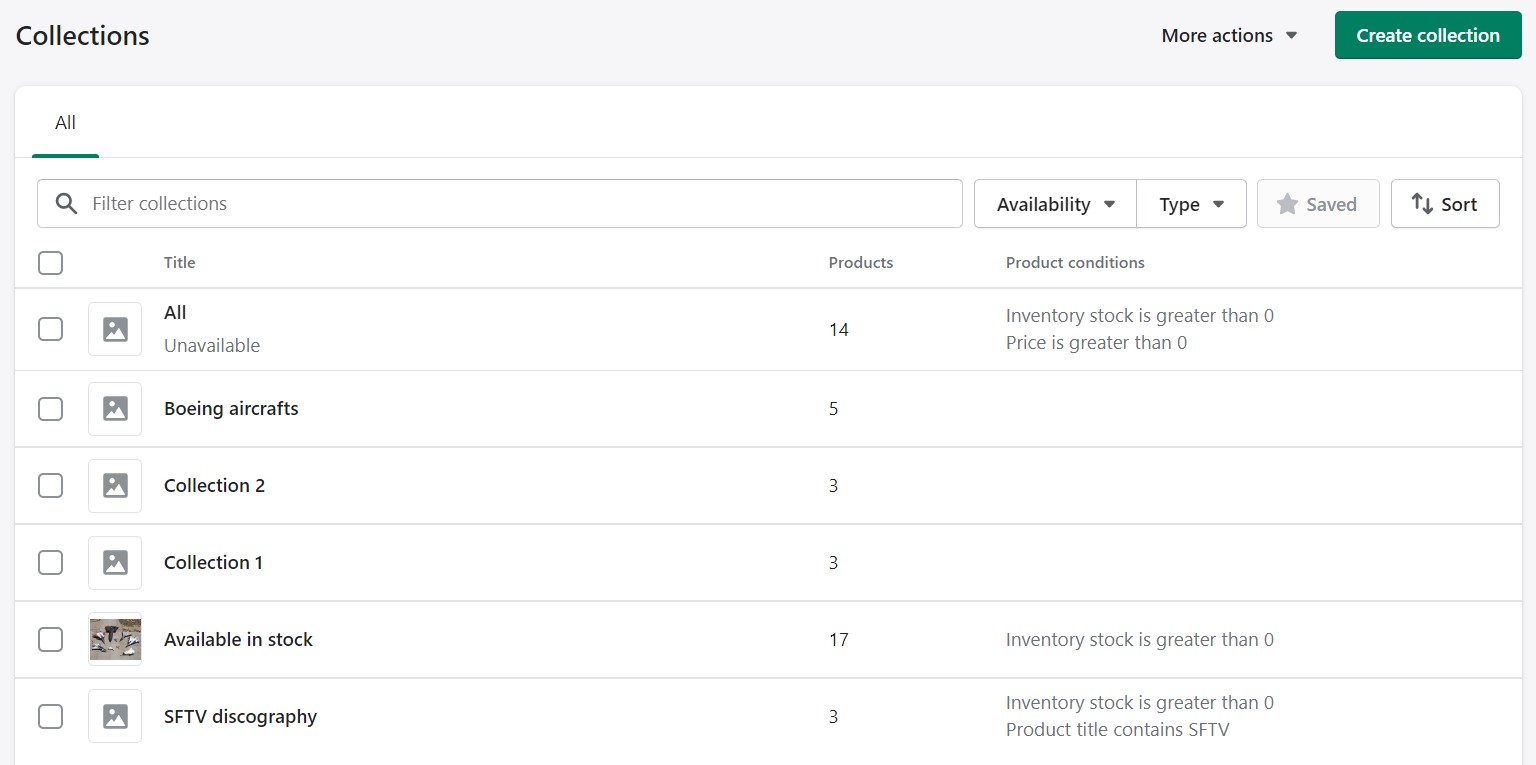
Using collections helps improve store organization, making it easier for customers to explore products by category, theme, or promotions. Popular collection types include:
- Seasonal Collections (e.g., Summer Essentials, Holiday Gifts)
- Category-Based Collections (e.g., Men’s Clothing, Electronics, Home Decor)
- Discounted Products (e.g., Clearance Sale, Under $50)
- Best Sellers & New Arrivals (e.g., Trending Now, Just Released)
By leveraging collections, you enhance product discovery, improve user experience, and increase sales by guiding customers toward relevant products.
Want to learn how to create and optimize Shopify collections? Read our Guide to Shopify Product Collections for step-by-step instructions!
Shopify Products and Inventory Management
In Shopify, products and inventory go hand in hand — proper inventory management ensures that stock levels are accurate, preventing overselling and stockouts while keeping customers satisfied. Each Shopify product can have unique inventory settings, allowing merchants to:
- Track stock levels in real time for individual products and variants.
- Set up SKUs and barcodes to streamline inventory organization.
- Enable low-stock alerts to prevent running out of best-selling items.
- Manage inventory across multiple locations for businesses with warehouses or physical stores.
Below, you can see a Shopify product inventory section with multiple locations:
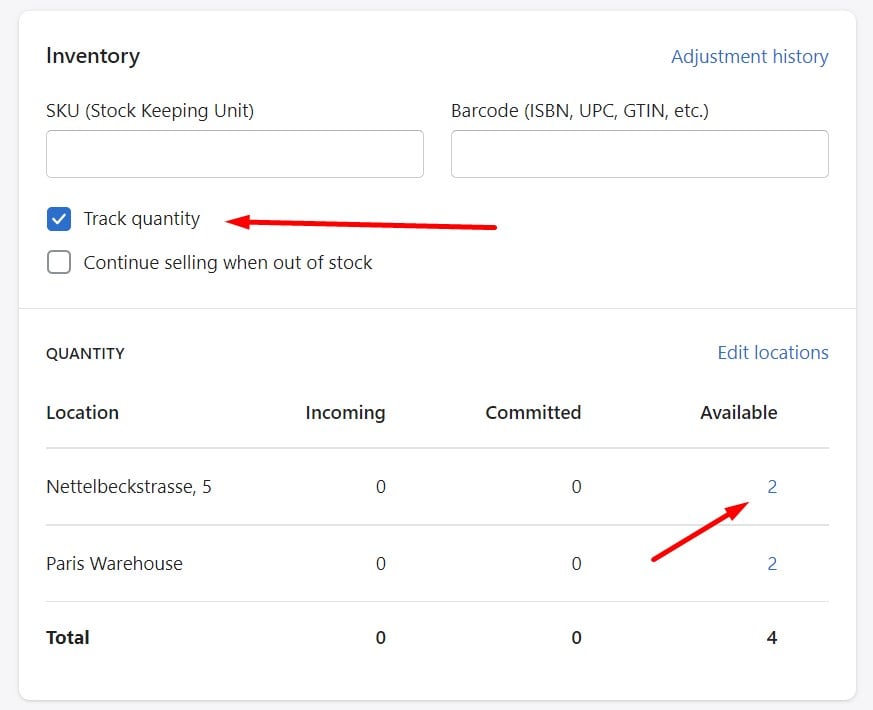
Whether you’re selling a small catalog or thousands of SKUs, Shopify provides built-in tools to simplify stock tracking and fulfillment. For advanced inventory automation, Shopify integrates with third-party solutions to synchronize stock across multiple sales channels.
📦 Want to master inventory tracking and prevent stock issues? Check out our Shopify Inventory Management Guide for expert tips and best practices!
Shopify Products and Bulk Importing
Managing Shopify products efficiently becomes crucial as your store grows. Instead of adding products manually, Shopify allows merchants to import products in bulk using a CSV file. This method helps streamline catalog management by:
- Adding multiple products at once, saving time and effort.
- Updating existing product details, including prices, descriptions, and inventory levels.
- Migrating product data from another e-commerce platform to Shopify.
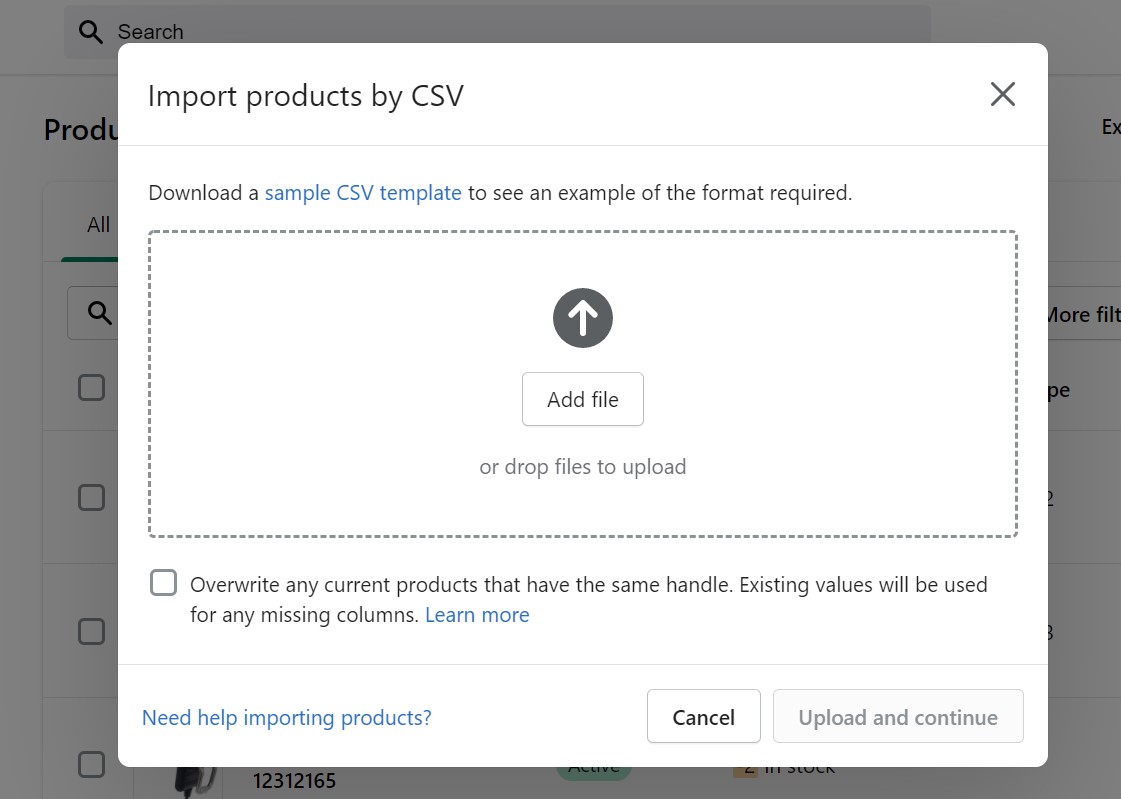
While Shopify’s default CSV import tool is useful, it comes with limitations, such as file size restrictions and formatting requirements. For larger catalogs or automated imports, merchants often use third-party solutions, such as the , to simplify the process.
Want to learn the best way to import products without errors? Read our Complete Shopify Import Guide for step-by-step instructions and expert tips! Contact us now to learn more about how we can streamline product import processes with AI-based mapping, schedules, support for multiple file formats and sources, etc.
Outro: Mastering Shopify Products for E-Commerce Success
Successfully managing Shopify products goes beyond simply listing items in your store. From optimizing product descriptions and SEO settings to handling complex inventory and bulk imports, every aspect of product management plays a crucial role in your store’s performance. By leveraging Shopify’s built-in tools, product variants, and third-party apps, you can ensure your products are well-organized, easy to find, and optimized for conversions.
If you’re selling physical products, tracking inventory and setting up clear product variants is essential for maintaining stock accuracy and preventing overselling. If you deal with digital products or subscriptions, using the right apps can automate fulfillment and improve customer experience. And for merchants with large catalogs, mastering CSV imports and automation tools can save valuable time while keeping product data consistent across multiple platforms.
📌 Want to take your Shopify product management to the next level? Explore our in-depth guides:
- How to Add Shopify Products
- How to Edit Shopify Products
- Shopify Product Data Entry: Detailed Guide to Fields
- How to Add Shopify Product Variants
- How to Archive Shopify Products
- How to Delete Shopify Products
- Complete Shopify Inventory Management Guide
- Shopify Import Guide
- Shopify Preorders Explained
By mastering these techniques, you’ll not only enhance your store’s efficiency but also increase conversions and customer satisfaction. Keep learning, stay ahead of the competition, and watch your Shopify business thrive!
Shopify Product FAQ
What are Shopify products?
Shopify products are the items or services you sell through your Shopify store. These can include physical goods, digital downloads, services, and even gift cards. Each product can be customized with details like descriptions, images, pricing, and variants to help customers make informed purchasing decisions.
Is Shopify good for selling products?
Yes, Shopify is one of the most popular platforms for selling products online. It offers user-friendly tools, a customizable storefront, and powerful features for managing inventory, processing payments, and marketing your store. Whether you sell physical items, digital products, or subscriptions, Shopify provides scalable solutions for businesses of all sizes.
Where are Shopify products?
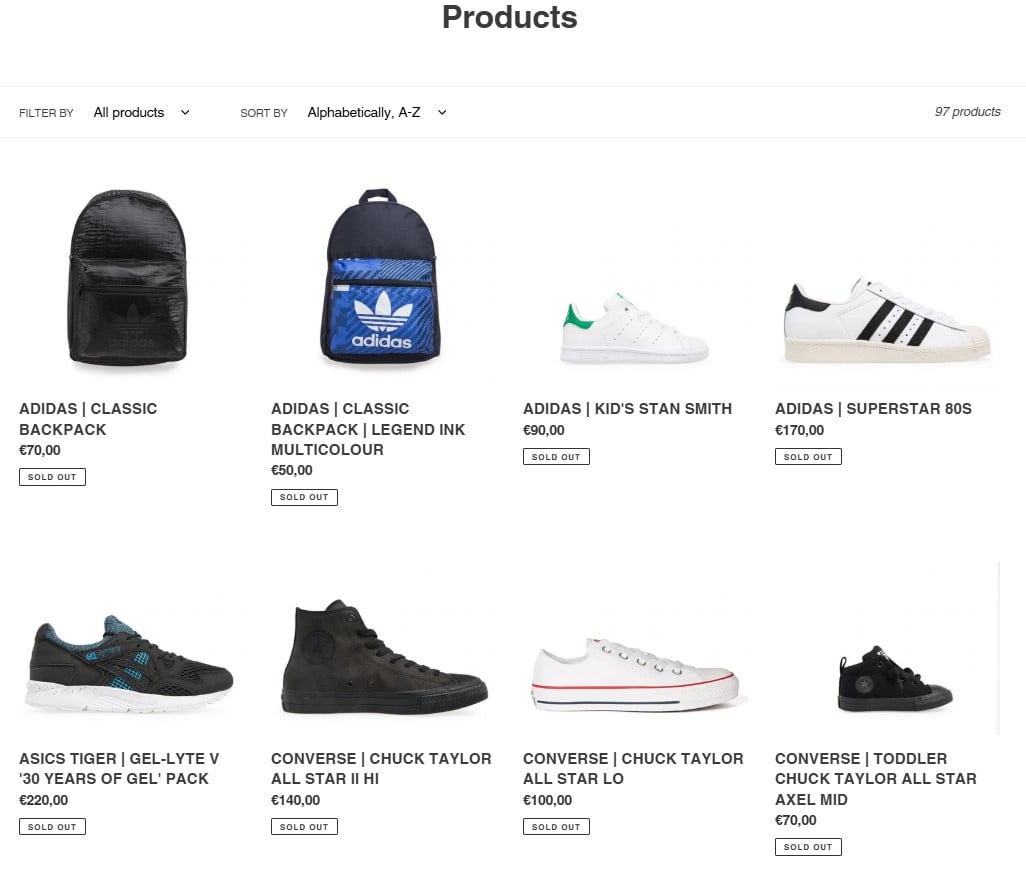
You can find and manage all your Shopify products in the Products section of the Shopify admin dashboard. This page displays a list of your products, which you can sort, filter, and edit. Additionally, products can be assigned to collections and sales channels to control where they appear on your storefront and other platforms.
Is it free to sell on Shopify?
No, Shopify is not free, but it offers various pricing plans to suit different business needs. While Shopify doesn’t charge for listing products, you’ll need to pay for a subscription plan, starting at $39/month. Additionally, there are transaction fees unless you use Shopify Payments.
How much does Shopify take per sale?
Shopify’s fees per sale depend on your subscription plan and whether you use Shopify Payments. If you use Shopify Payments, you only pay credit card processing fees (starting at 2.9% + 30¢ per transaction on the basic plan). If you use a third-party payment gateway, additional transaction fees (up to 2%) apply. Follow our guide to Shopify costs for more detailed information.
How to add products to Shopify?
To add products to Shopify, go to your admin dashboard and click on Products, then select Add Product. Fill out the required fields, including product name, description, price, and images. You can also add variants for products with multiple options like size or color. Save your changes to make the product available in your store.
How to sell digital products on Shopify?
To sell digital products on Shopify, you can use apps like Shopify Digital Downloads to deliver files to customers automatically after purchase. Simply create a product as you would for physical goods, then upload the digital file in the app. You can customize delivery settings and manage downloads directly from your admin.
How to import products into Shopify?
You can import products into Shopify using a properly formatted CSV file. Go to the Products section in your admin, click Import, and upload the file. Make sure your CSV matches Shopify’s specifications, including headers and formatting, to avoid errors during the import process.
How to organize products on Shopify?
To organize your products on Shopify, use collections to group similar items together, such as seasonal collections or categories like “Men’s Clothing” or “Best Sellers.” You can also use tags and product types to make it easier to filter and manage items in your admin.
Can I sell services on Shopify?
Yes, Shopify supports selling services in addition to physical and digital products. For service-based businesses, disable shipping options during product setup and use apps or integrations like booking tools to manage appointments or consultations.
Related posts
 How to Add Products to Shopify: Manually, as Duplicates, or via Import
 Shopify Gift Cards Explained: How to Set Up, Manage & Sell Them
 How to Delete Products from Shopify: Step-by-Step Guide
 How to Archive Products in Shopify: A Quick Guide
 Shopify Inventory Management: A Comprehensive Guide to Tracking and Optimizing Your Stock
 How to Export Metafields in Shopify: A Complete Guide
 Detailed Guide to Shopify Product Data Entry Fields
 How to Import Metafields in Shopify: A Complete Guide