
In-Depth Admin Exploration: Shopify Inventory Transfers
In the article below, you will find out what Shopify inventory transfers are. We focus on how to add inventory to Shopify with the help of transfers. To describe this process, we explain what each Shopify transfer screen means and what opportunities it offers. Below, you will find many visual materials portraying all steps of Shopify inventory transfers. Also, there is a detailed section dedicated to inventory import and export processes as a reliable alternative to inventory transfers! Now, let’s see what the most common use cases for inventory transfers on Shopify are and how to leverage them.

Table of contents
- 1 Shopify Inventory Transfers Defined
- 2 The Initial Step To Inventory Transfers on Shopify
- 3 Your First Shopify Inventory Transfer
- 4 Your Second Shopify Transfer
- 5 Receiving an Inventory Transfer on Shopify
- 6 Undoing an Inventory Transfer on Shopify
- 7 Inventory Export & Import in Shopify
- 8 Conclusion
- 9 Shopify Inventory Transfer FAQ
Shopify Inventory Transfers Defined
Shopify inventory transfers are all the processes that take place in your admin and let you record, track, and receive incoming inventory either between your store locations or from suppliers.
The two most common use cases for inventory transfers on Shopify are:
- Purchase Order. Let’s assume that you’ve confirmed a purchase order (PO) with your supplier. What’s next? Shopify lets you record the incoming inventory specified in this PO.
- Multiple Locations. Let’s suppose you have several warehouses and, after a revision, decide to move items from one location to another. Shopify lets you transfer all the goods and keep track of your inventory movements.
In both cases, the system provides you with the ability to indicate whether you’ve received full or partial inventory. Next, the inventory is automatically updated. As a store administrator, you can see the number of incoming items along with their expected arrival date, among other product details.
However, if you use a third-party fulfillment service, the default Shopify inventory transfer functionality is not available. It is impossible to create transfers for products that rely on external fulfillment software.
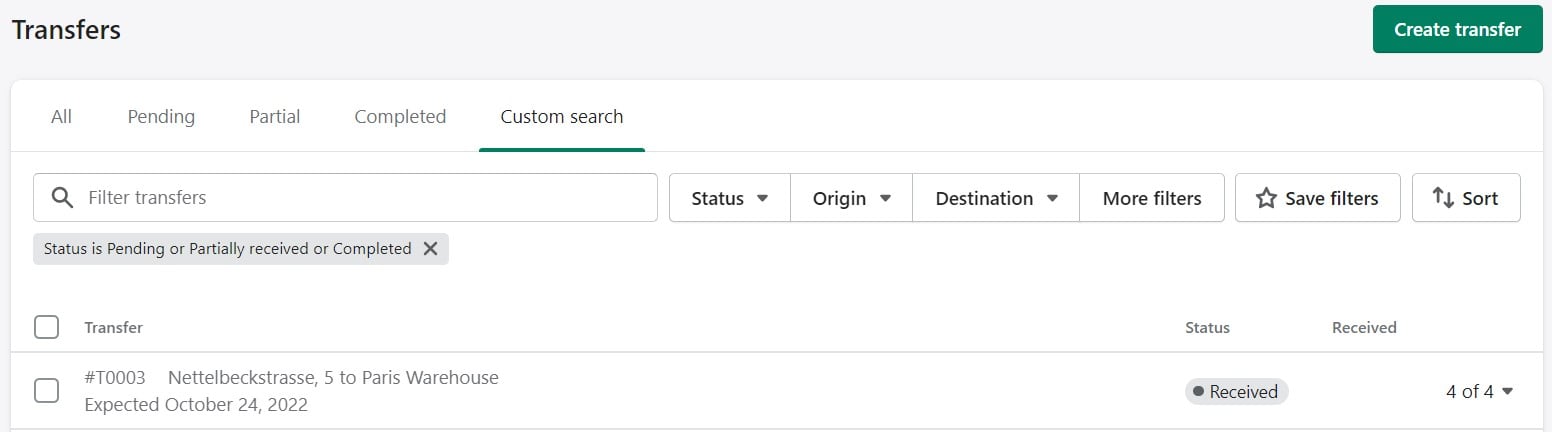
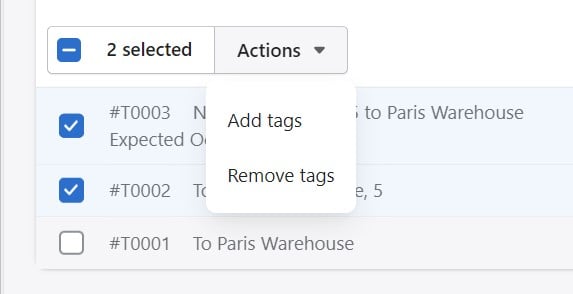
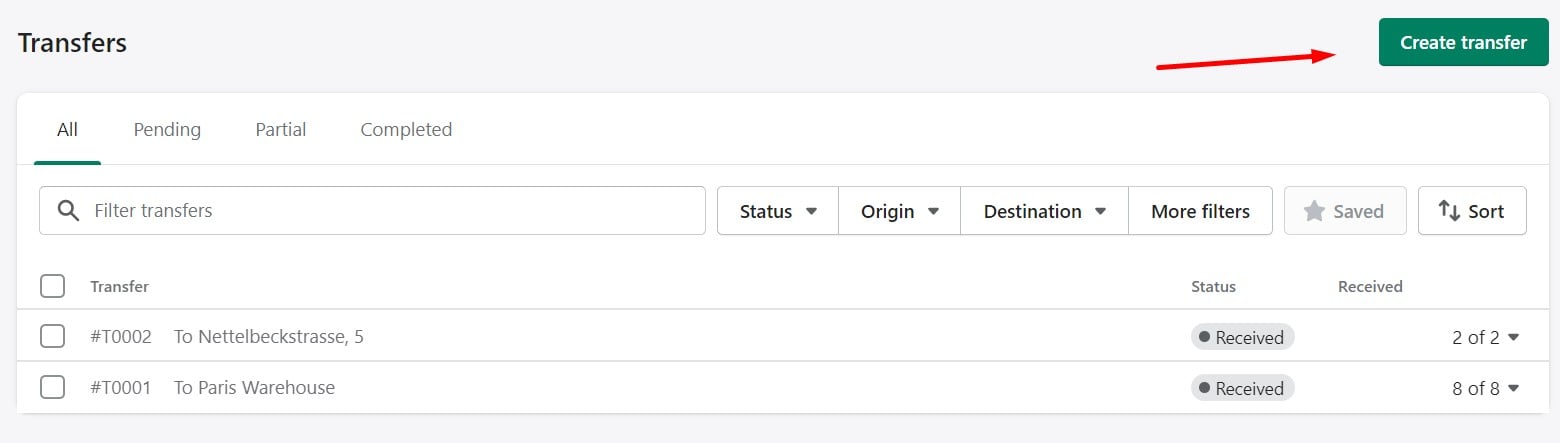
Your Transfers page lets you show all transfers together or display pending, partial, or completed ones.
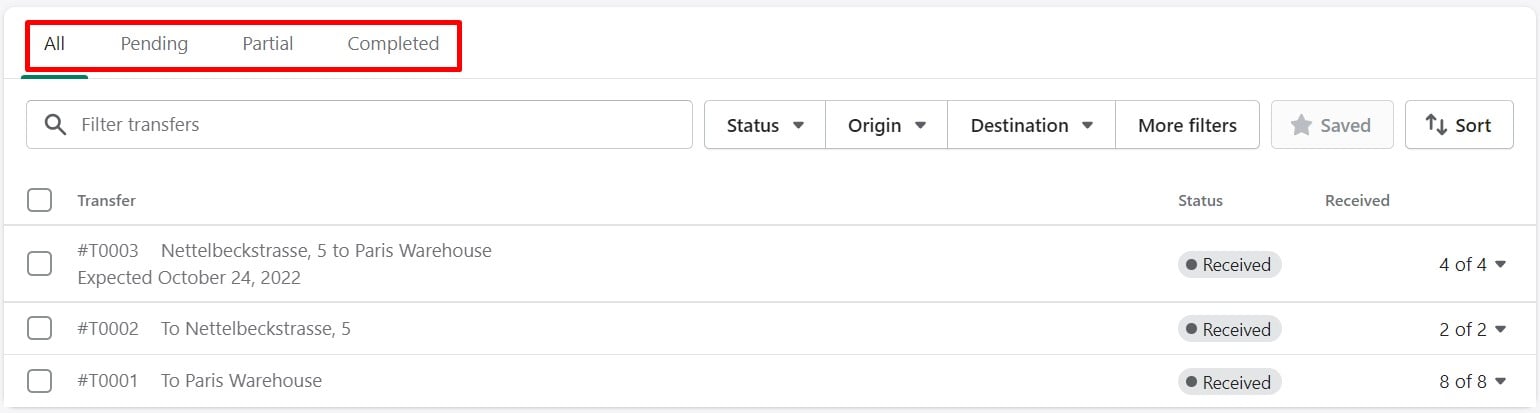
You can also filter out the selection of transfers by their status, origin, or destination. More filters are available upon clicking the corresponding button. And it is possible to save filters for further use.
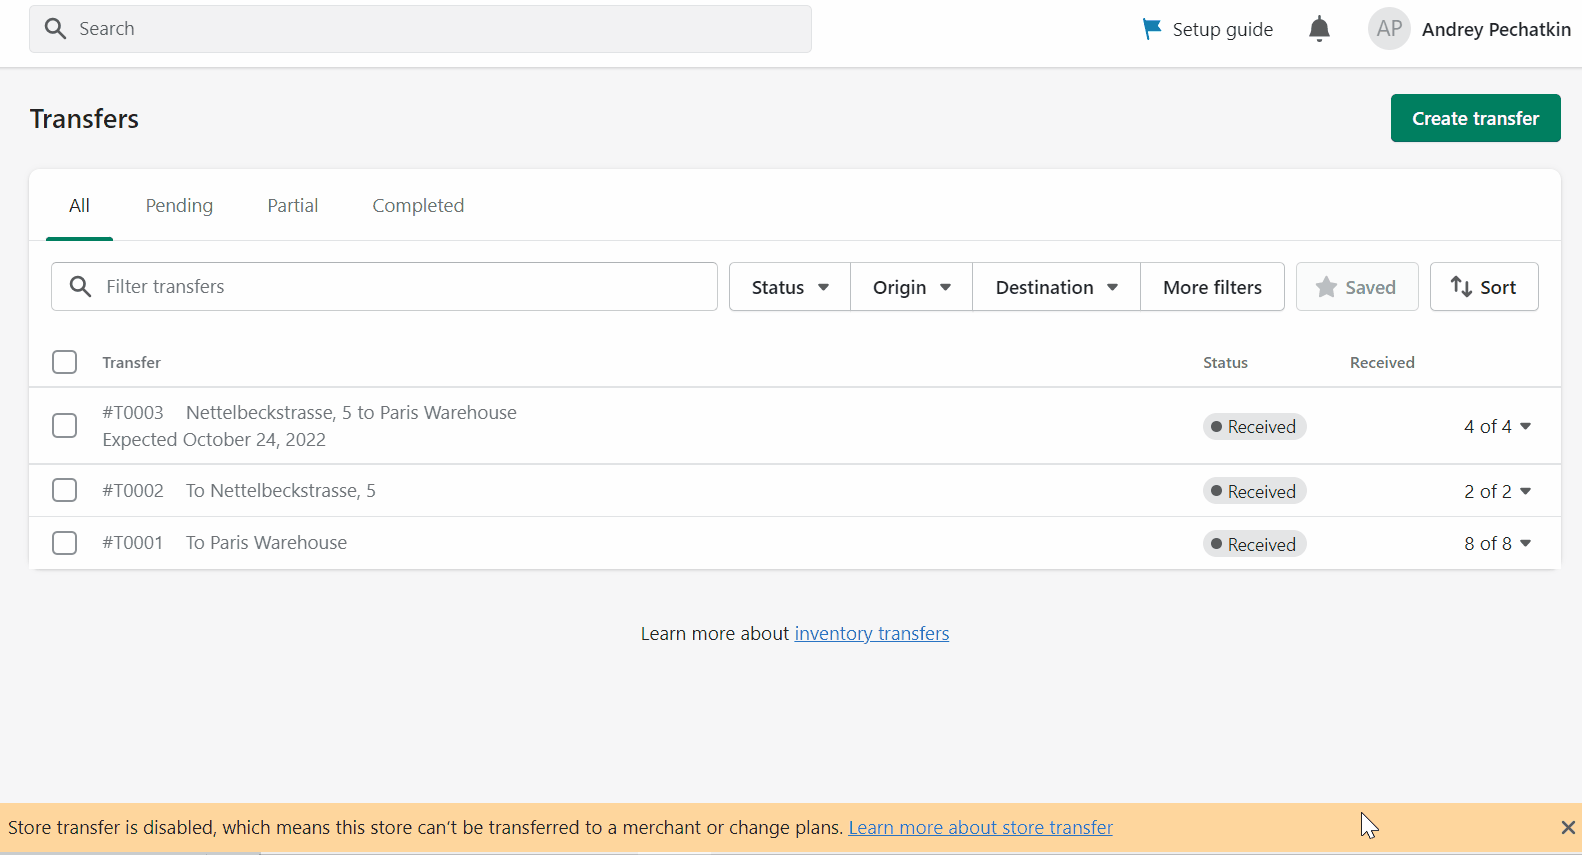
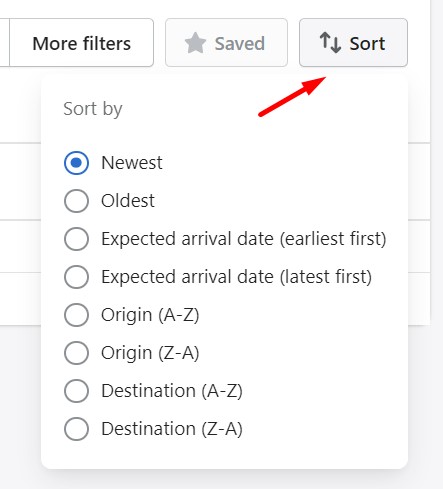
Sorting the list of transfers is possible too. You can rearrange all records in the grid from newest to oldest and vice versa. Other sorting parameters include expected arrival date, origin, and destination.
As for the grid, it displays a transfer name, status, and received/rejected amount. Click on the amount to see more detail.

You can also add or remove tags for the selected transfers by clicking Actions and selecting the corresponding command.
The Initial Step To Inventory Transfers on Shopify
Before going any further, you need to set up inventory tracking for products that you want to transfer. Use the default Shopify inventory management functionality to do that. Follow these steps to enable Shopify inventory transfers:
- In your Shopify admin go to Products.
- Choose a product for track and click its name.
- On the product details page, scroll down to the Inventory section and check the Track quantity option.
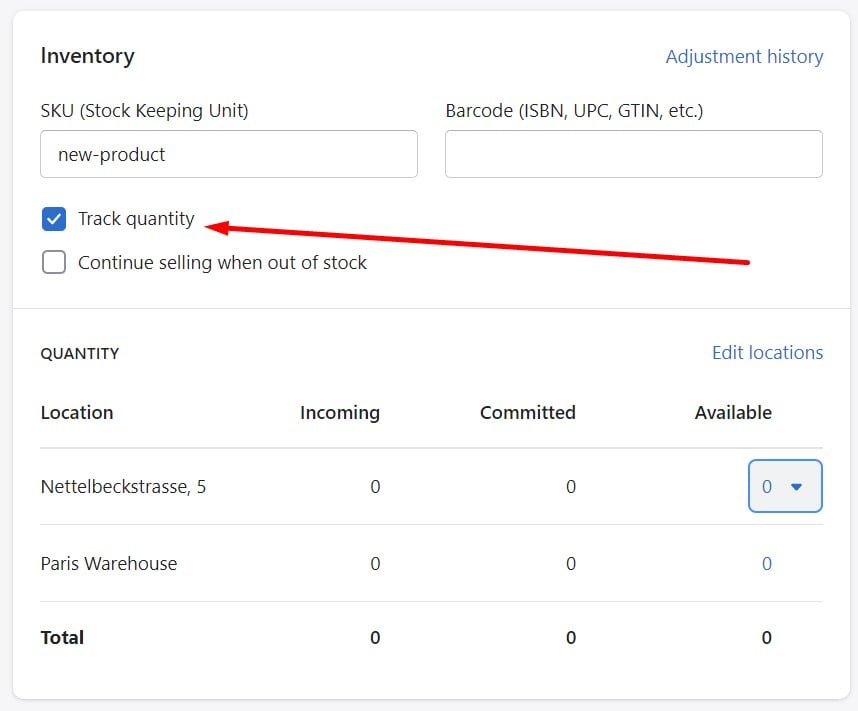
- You can optionally specify the quantity information for each location In the Quantity section.
- Click Save.
If you want to enable inventory transfers for variants, proceed to the variant’s details page and check the same option.
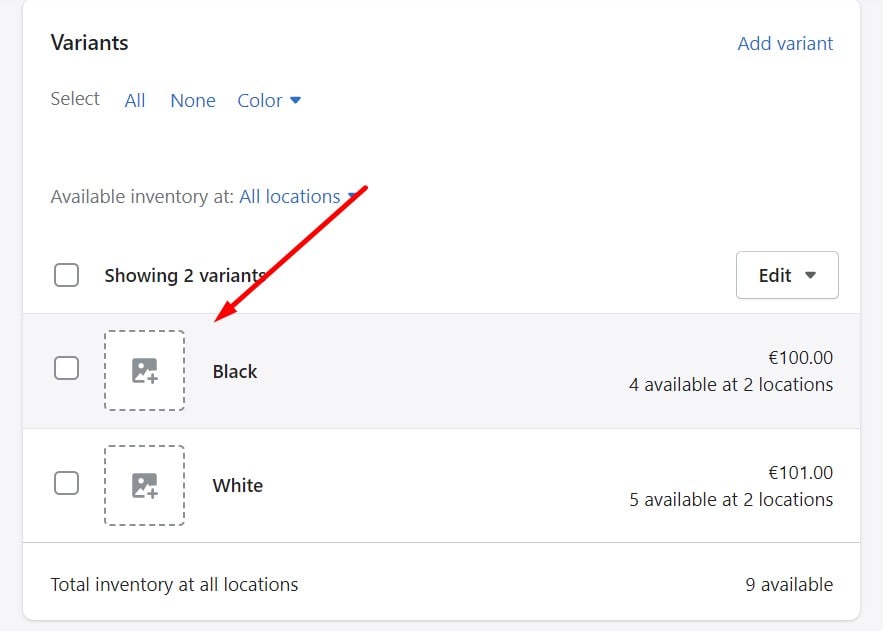
After selecting the variant that you want to track, scroll down to its inventory section, and check the Track quantity option.
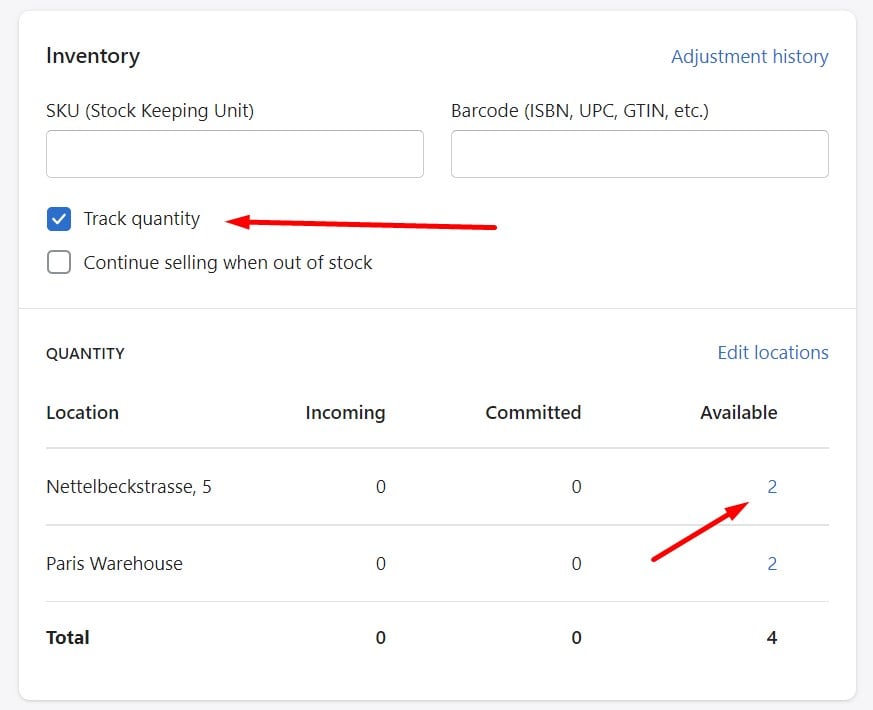
To disable the inventory tracking functionality and, as a result, Shopify transfers, uncheck the Track quantity option. You can read more information about that here: How to turn off inventory tracking in Shopify.
Your First Shopify Inventory Transfer
As we’ve already mentioned, you can keep track of incoming goods and get updates automatically by setting up inventory transfers on Shopify. Use transfers to track inventory coming from suppliers or goods that move between your locations.
Before moving on, it’s important to understand the difference between a vendor and a supplier:
- Under a supplier, we assume your product provider. It is possible to order goods from a single supplier or to team up with multiple partners.
- Under a vendor, we assume a company responsible for the product’s brand. While a product has only one vendor, it is usually available from numerous suppliers.
Let’s say you sell auto components, and you need to replenish certain Audi parts. You can get them from any website, including ones like Euro Car Parts. In this instance, Audi is the vendor, and Euro Car Parts is your supplier. Audi continues to be the vendor even though you could get the same auto components from a different website like RockAuto.
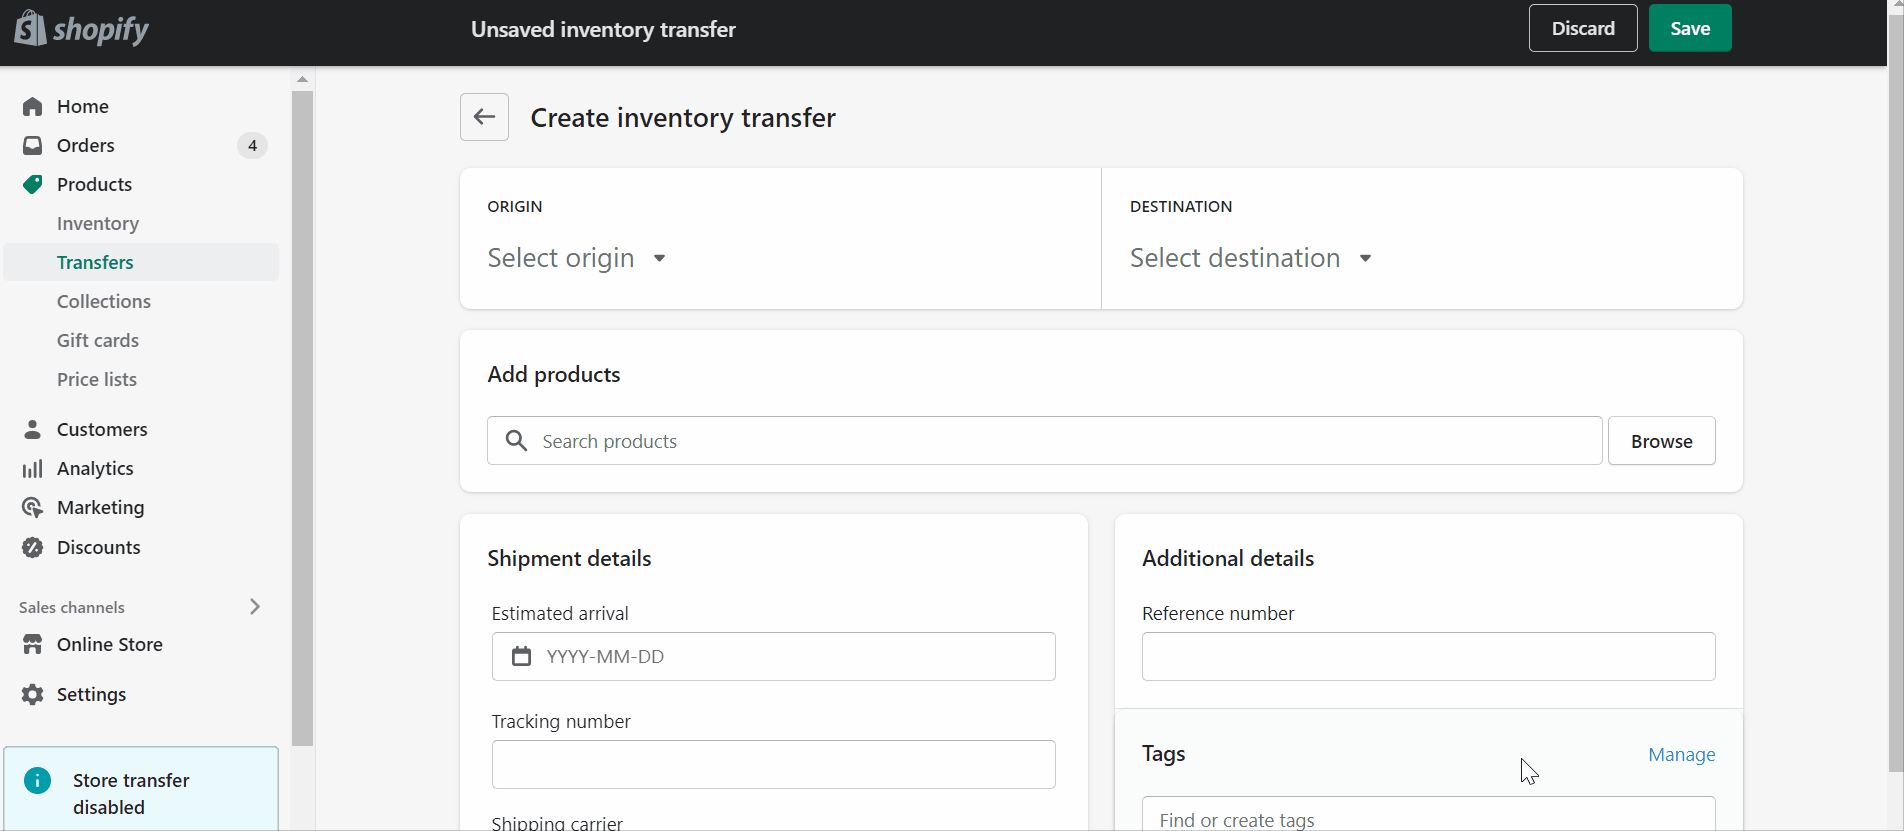
With this information in mind, you can create your first inventory transfer on Shopify. Follow these steps:
- In your Shopify admin, go to Products -> Transfers.
- Click the Create transfer button.
- Select the original location of your inventory:
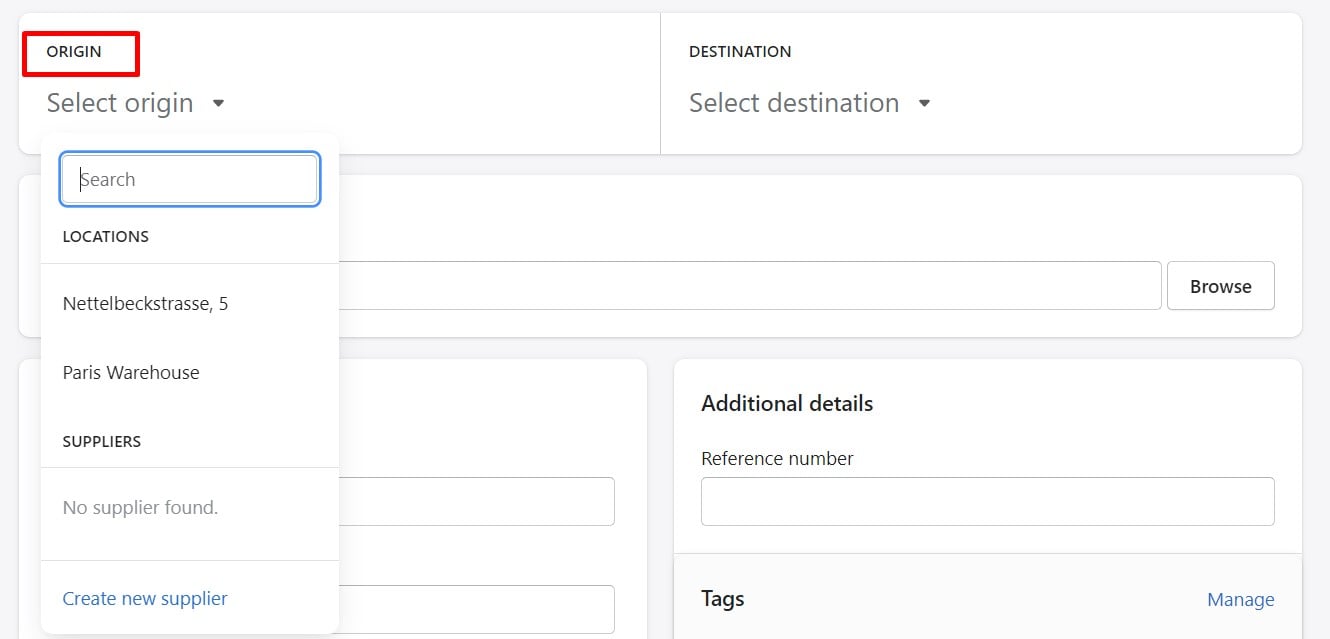
- Go to the ORIGIN column;
- clicking Select origin;
- Choose the location. Note that suppliers are listed after the list of locations in the SUPPLIERS section. Alternatively, you can create a new supplier by selecting Create new supplier and providing its details.
- Select a location to receive the inventory:
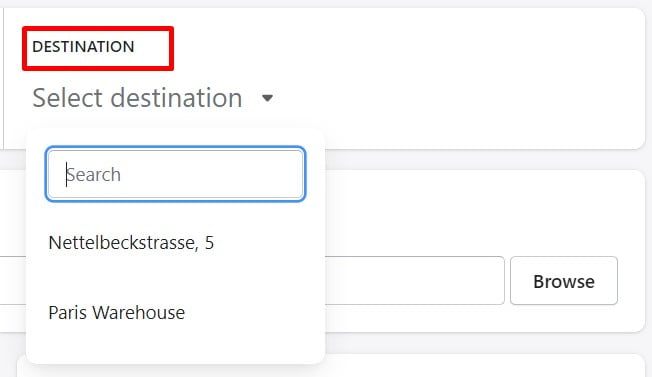
- Proceed to the DESTINATION section;
- Click Select destination;
- Choose a location to transfer the inventory to.
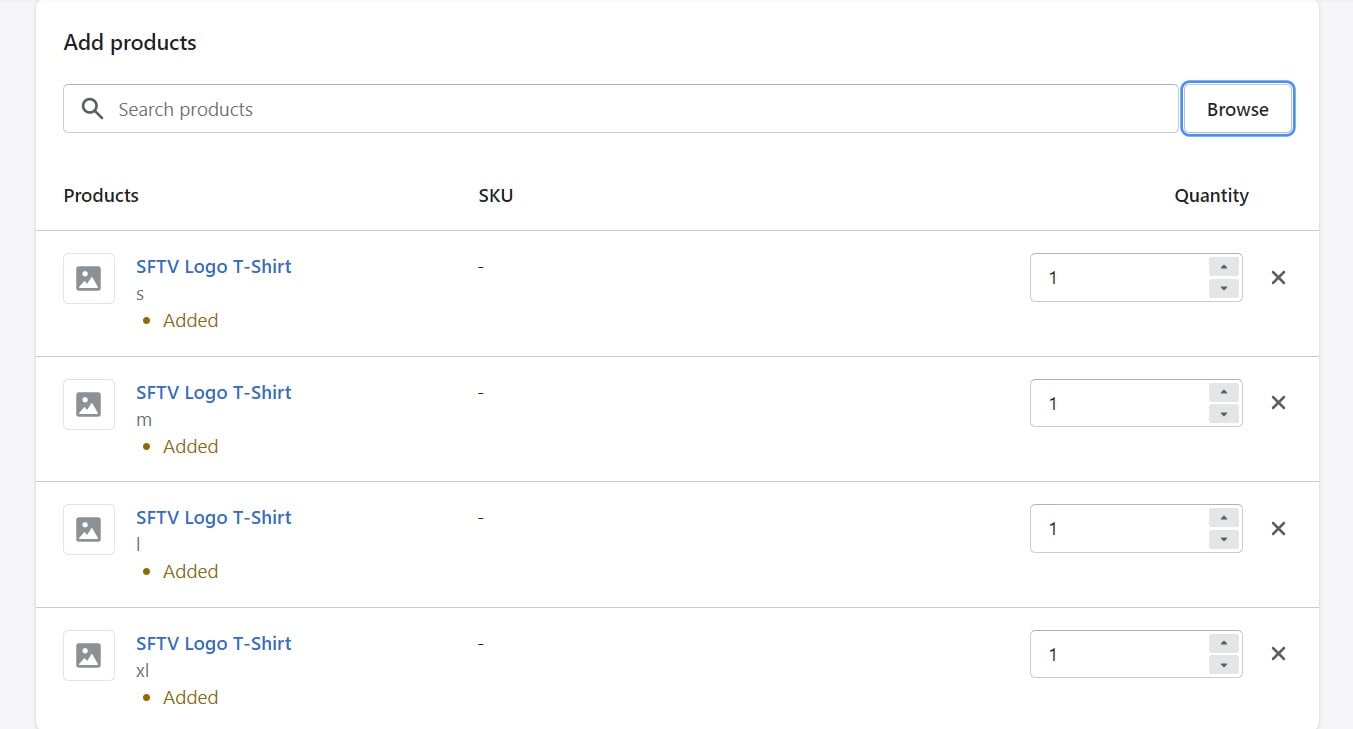
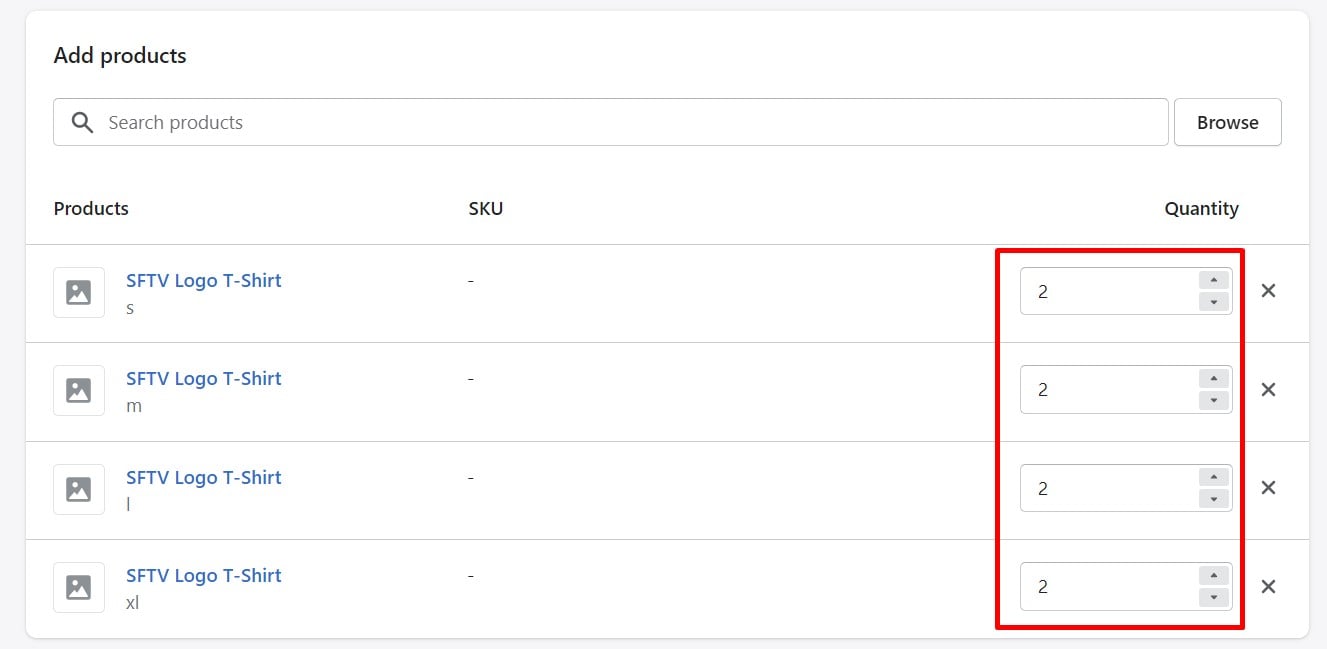
- Now, you need to add products. Scroll to the Add products section and specify the products and variants that should be added to the transfer.

- Provide the quantity for each product in your first Shopify inventory transfer. Go to the Quantity section and specify it there.
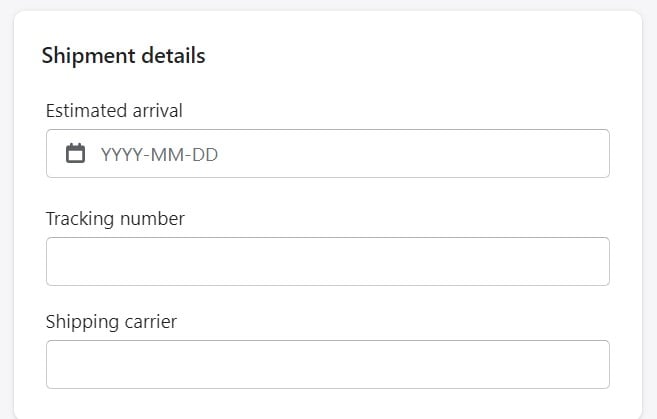
- In the Shipment details section, specify an expected arrival date, provide a shipment tracking number, and type in a shipping carrier. After receiving a tracking number, Shopify may select a shipping carrier automatically.
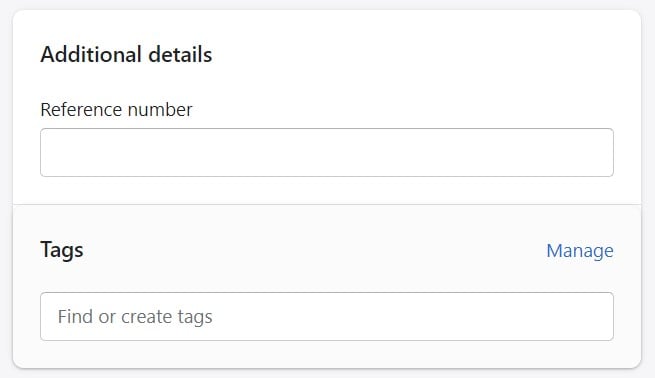
- In the Additional details section, you can assign a reference number or a tag to the transfer to find it in your admin.
- Click Save transfer when finished.
Your Second Shopify Transfer
Now, when you have the very first inventory transfer, you can duplicate it to create a new one. It is especially useful if you’re making an inventory transfer with the same items and between the same locations.
Follow these steps to duplicate an inventory transfer on Shopify:
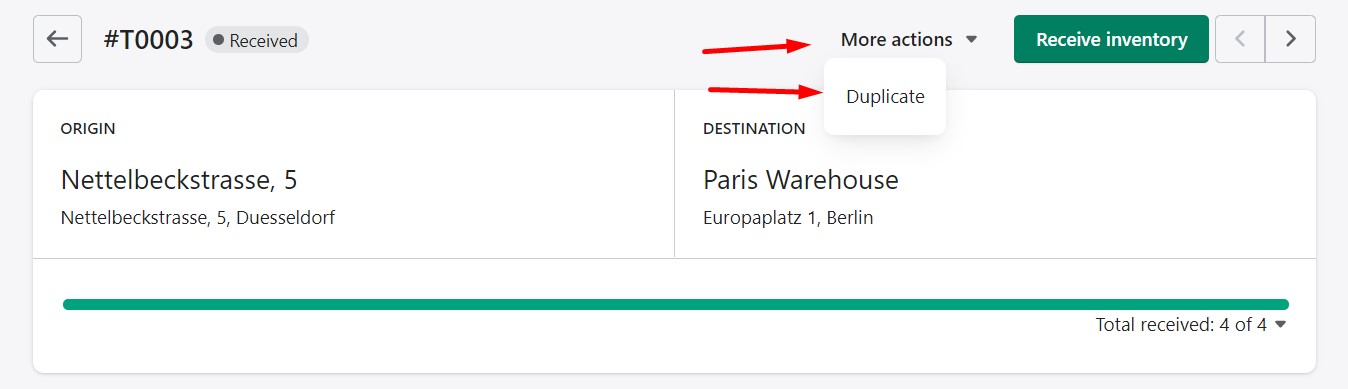
- In your Shopify admin, visit Products -> Transfers.
- Find the transfer you want to duplicate and open it.
- Click More actions and Duplicate. Shopify duplicates origin, destination, products, product quantities, and tags.
- Now, you can edit your new transfer if necessary, following the tutorial above.
- Click Save when finished.
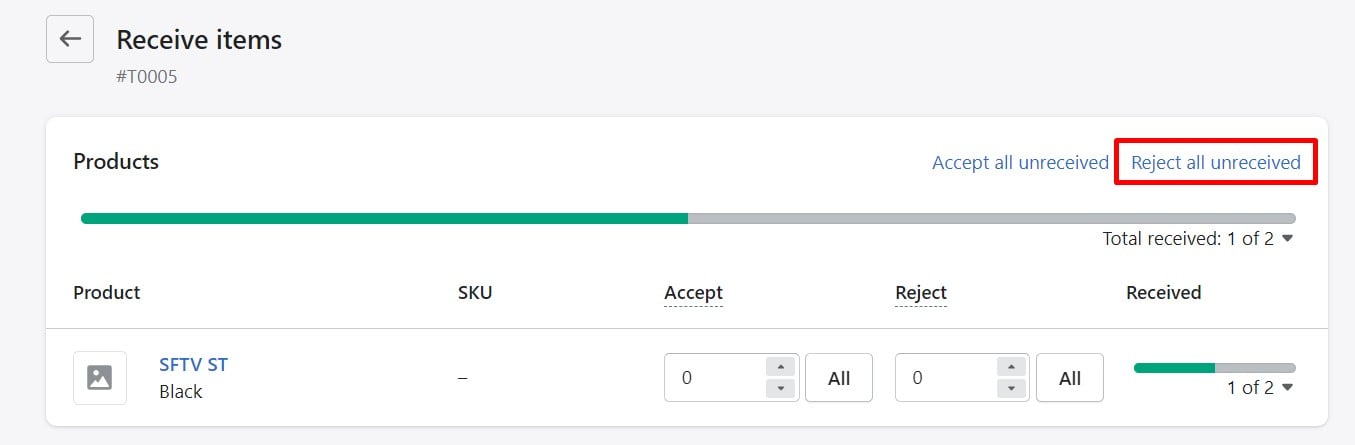
Receiving an Inventory Transfer on Shopify
After creating a Shopify inventory transfer, you need to register its arrival. You receive an inventory transfer when all goods are delivered to the location so that it is possible to calculate their actual quantities and reject ones that are damaged.
Follow these steps to receive an inventory transfer on Shopify:
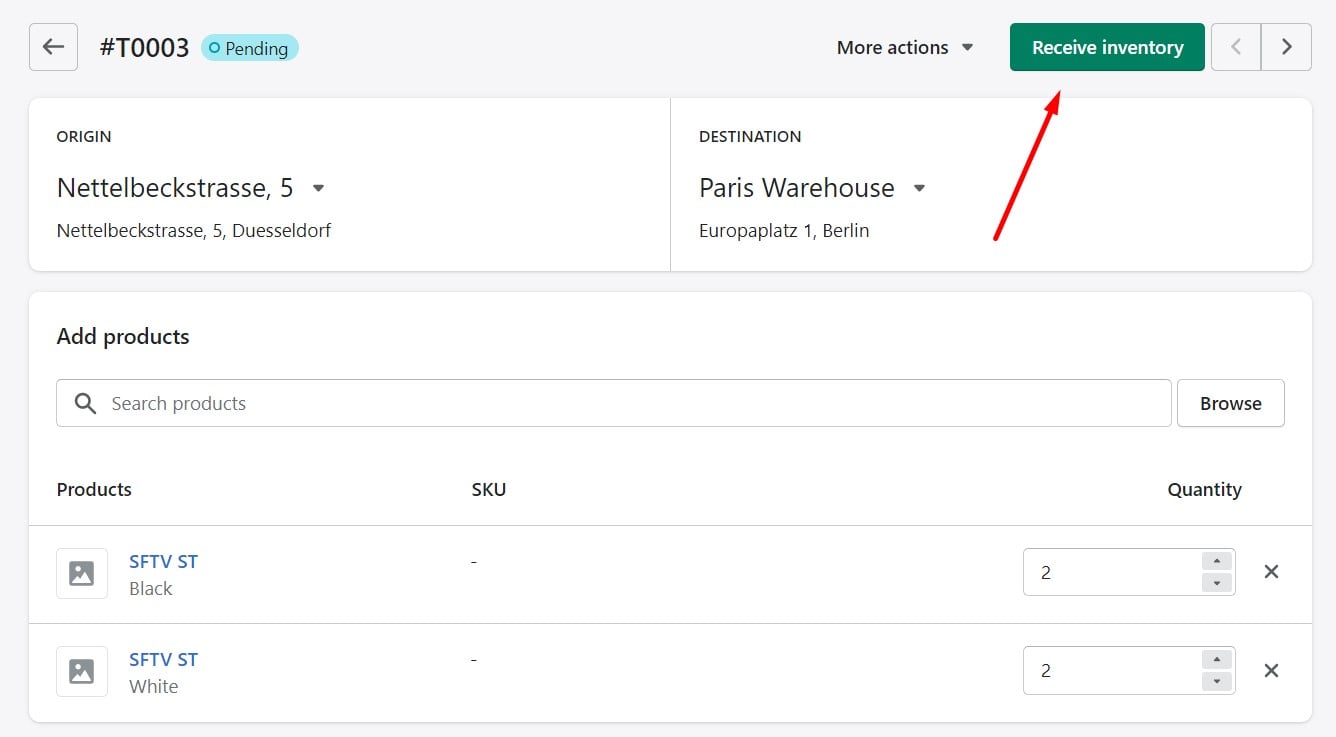
- Go to Products -> and choose the transfer that you want to receive.
- Hit the Receive inventory button.
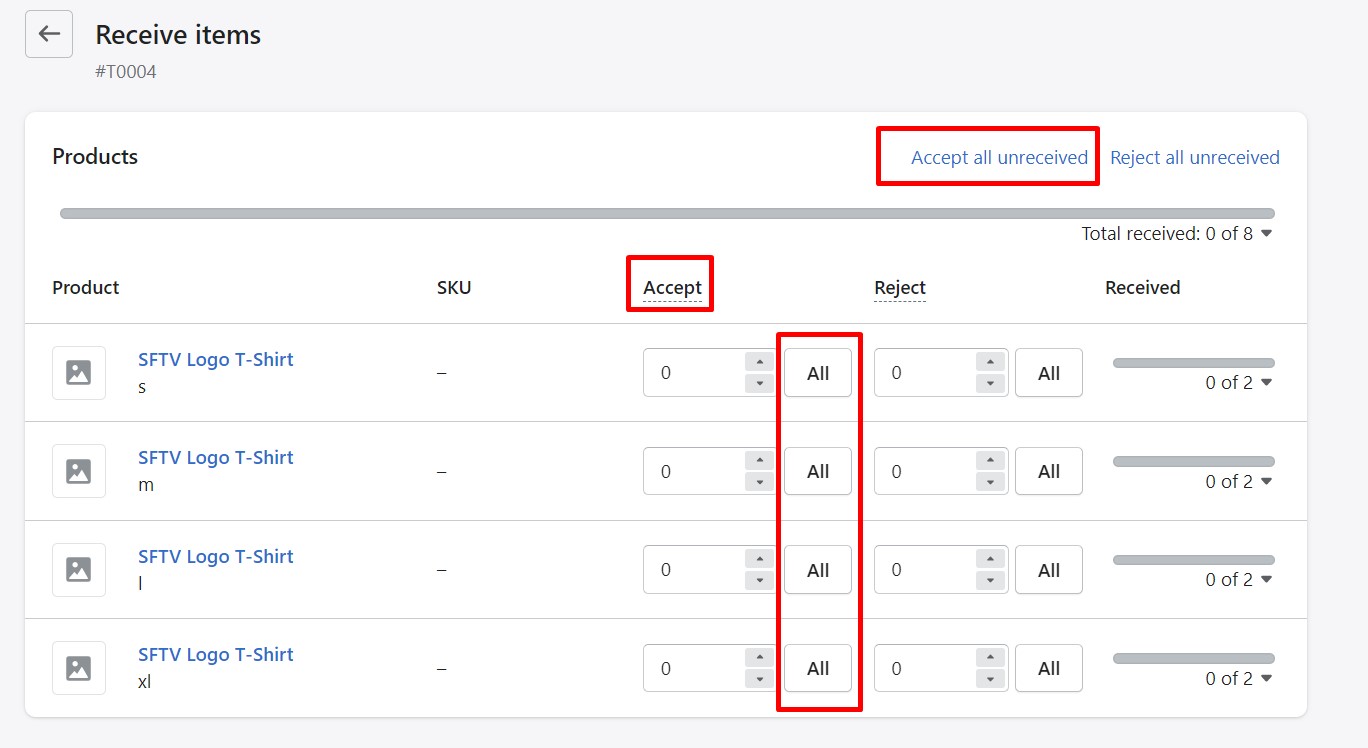
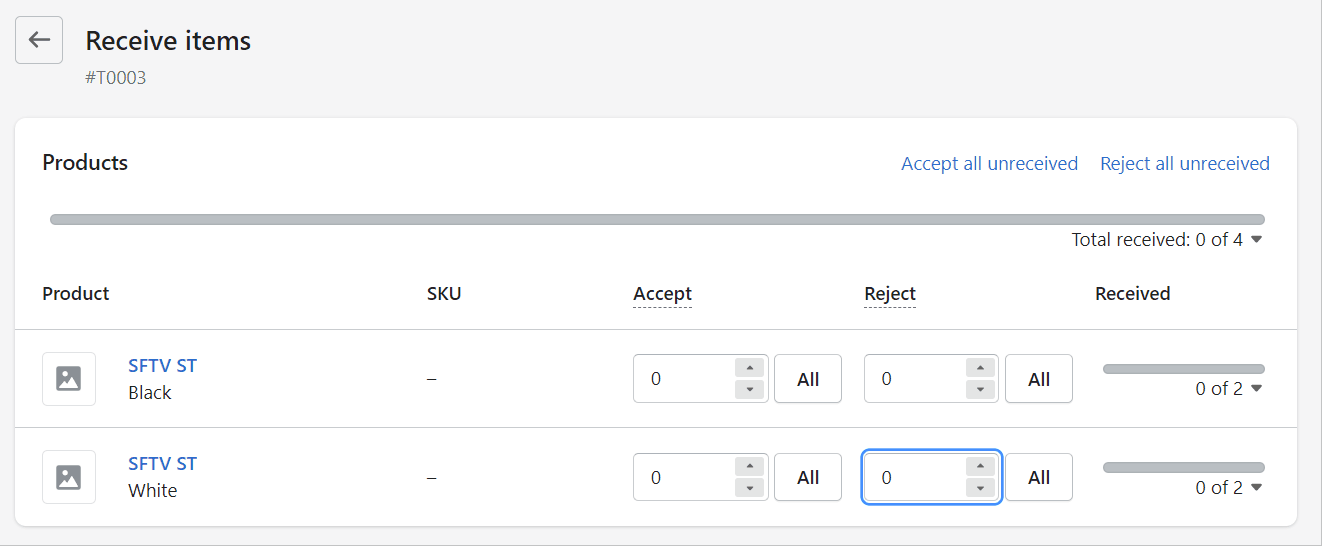
- Now, you need to accept the items that were delivered successfully:
- You can manually specify the number of items to be accepted;
- In the Accept column, click ALL to accept all units of each particular product;
- Use the Accept all unreceived command to add all products in the transfer.
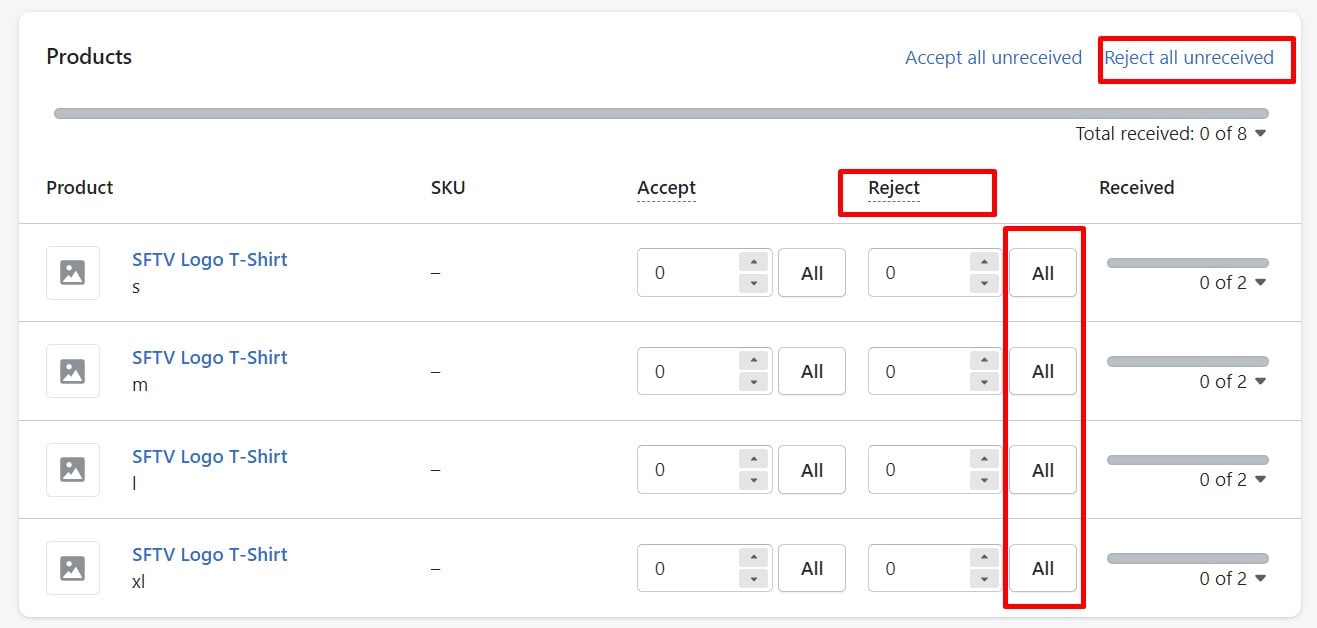
- If some of the transferred goods were damaged, reject these items:
- You can manually specify the number of items to be rejected;
- In the Reject column, click All to reject all units of each particular product;
- Use the Reject all unreceived command to reject all products in the transfer.
- Click Save.
When you get items from the supplier, be sure you know how they are numbered and tracked. Different objects arrive at various times and in various states depending on what you’ve already received. Consequently, you might need to change the amount of the Shopify inventory transfer. In the Inventory area of a product’s details page, you can still check how many inbound products are currently available.
Assume you are anticipating a Shopify inventory transfer containing 10 units of a specific product. You only get seven of them: 3 have been rejected, and 4 have been tagged as accepted. There are still 3 inbound goods. In this case, you ought to take the following actions:
- Go to Products -> and choose your transfer.
- Hit the Receive inventory button.
- Specify the number of items to be accepted – 4 items;
- Reject damaged or unreceived items:
- The number of items you’re rejecting is 3;
- Click Reject all unreceived to reject the remaining 3 items.
- Click Save.
Undoing an Inventory Transfer on Shopify
You must either erase the Shopify inventory transfer, change the amounts received in the transfer, or manually alter the inventory of your product if you create a transfer or receive items accidentally.
How to undo actions for an unreceived transfer
Follow these steps if you have yet to receive any inventory in a Shopify transfer:
- Go to the Transfers page of your admin;
- Select a Shopify inventory transfer;
- Apply changes:
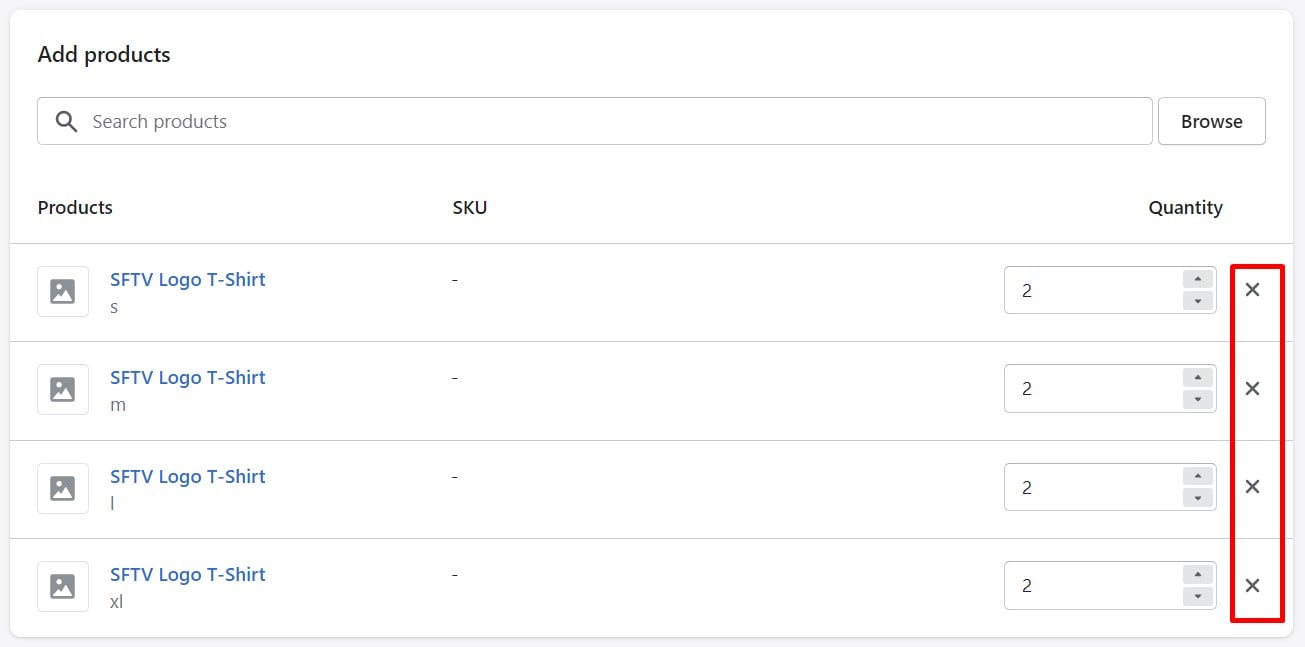
- Go to the Add products section and click the arrows or manually enter the correct quantity in the Quantity column to adjust product quantities.
- Click the X next to the product and then – Update inventory transfer to delete it.
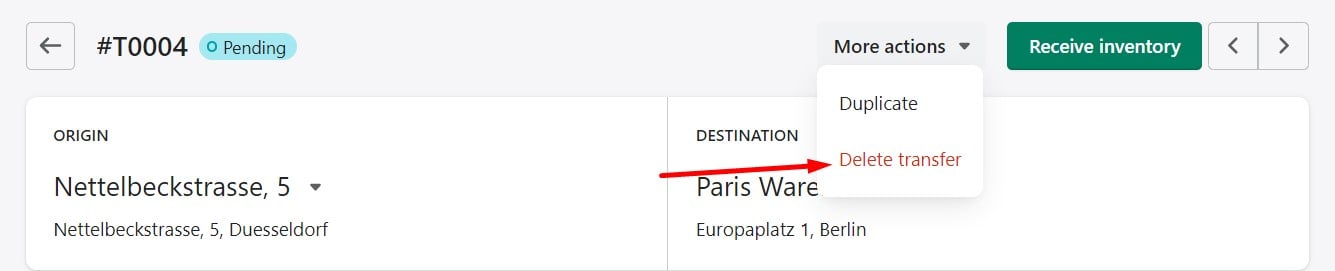
- Click More actions and choose Delete transfer to delete the transfer.
- Go to the Add products section and click the arrows or manually enter the correct quantity in the Quantity column to adjust product quantities.
How to undo actions for a received transfer
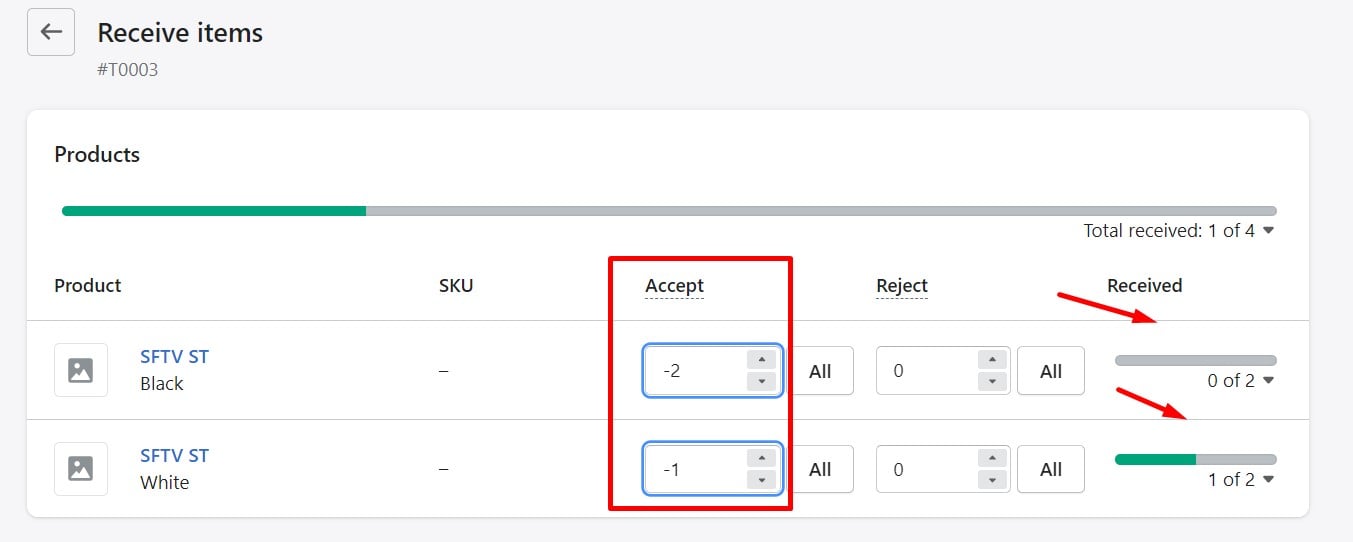
If you already received an inventory transfer, even if it is partially received, Shopify doesn’t let you delete the transfer or adjust its quantities. However, you can still undo actions for a received Shopify transfer as follows:
- You can undo the quantities that you received as follows:
- Open the transfer you want to change;
- Hit Receive inventory;
- Enter negative quantities to deduct from the amount you previously received.
- To cancel the remaining amounts, do the following:
- Open the transfer that you want to edit;
- Click Receive inventory;
- Click Reject all unreceived;
- Shopify rejects the quantities that you haven’t received, marks the transfer Completed, and adjusts the incoming quantity for products.
Also, it is recommended to adjust the inventory manually if your origin location is another active store location.
Inventory Export & Import in Shopify
You can use import processes as an alternative to Shopify Inventory transfers. Your current inventory quantities are available via an inventory CSV file upon export. Export that file, apply changes to it, and then import the new quantities. Let’s see how to sync inventory on Shopify with the help of import and export processes instead of inventory transfers.
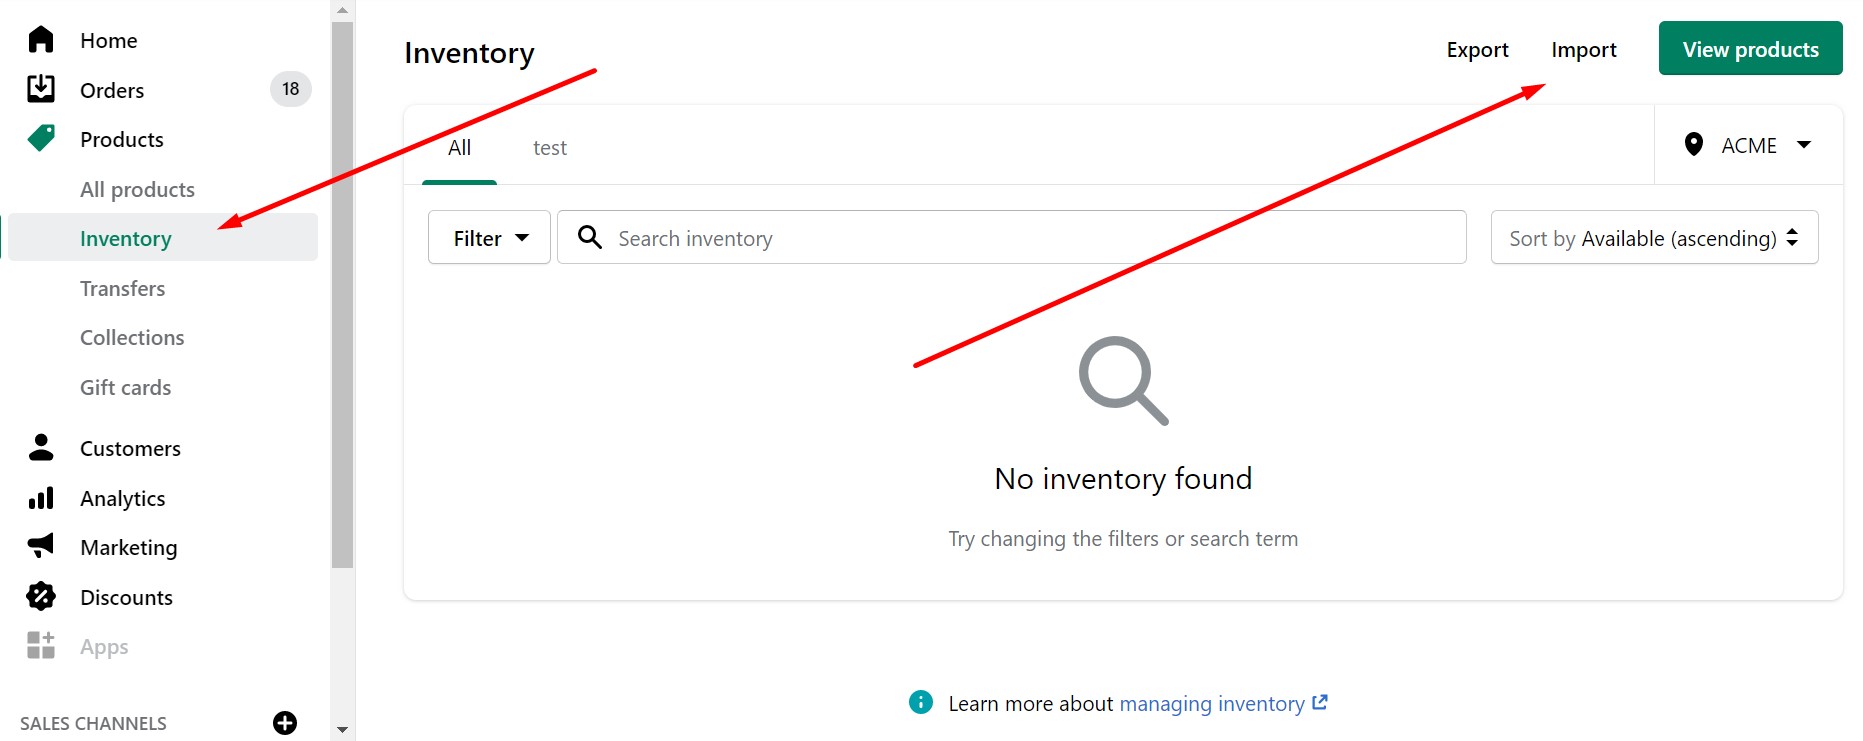
How to Export Inventory in Shopify
Utilizing the built-in Shopify inventory management system, you may export a CSV file containing the amounts of your stock. The inventory quantities can be updated using the exported CSV file as a template. Change the inventory levels for each product in each location by importing the new version back into Shopify.
If you have several locations, you may decide whether to export the data once for all of them or separately for each site.
The following is how to export the inventory in Shopify:
- Visit Products -> Inventory.
- Press Export.
- Choose rows to export.
- Decide whether you want to export from a single location or all locations.
- Click Export inventory.
We describe this procedure in more detail here: How to export inventory from Shopify.
If you need to exceed the default limit or want to automate inventory exports from Shopify, replace the standard data exporter with the Shopify Improved Import & Export application. Along with supporting large files and several data formats, it also enables you to schedule exports, and use presets to automatically conform to external standards. Contact us for more information about the tool.
How to import inventory to Shopify
In Shopify, you can individually import inventory information separately from product data. This procedure changes the inventory quantities. The system doesn’t update the additional data needed to identify products.
It is advisable to import your inventory only while no other adjustments are being made to avoid mistakes and potential issues. Inaccurate product amounts will result, for instance, from human adjustments or transferring the update during active sales.
The following is how to import inventory data into Shopify:
- In your Admin go to Products -> Inventory.
- Click Import.
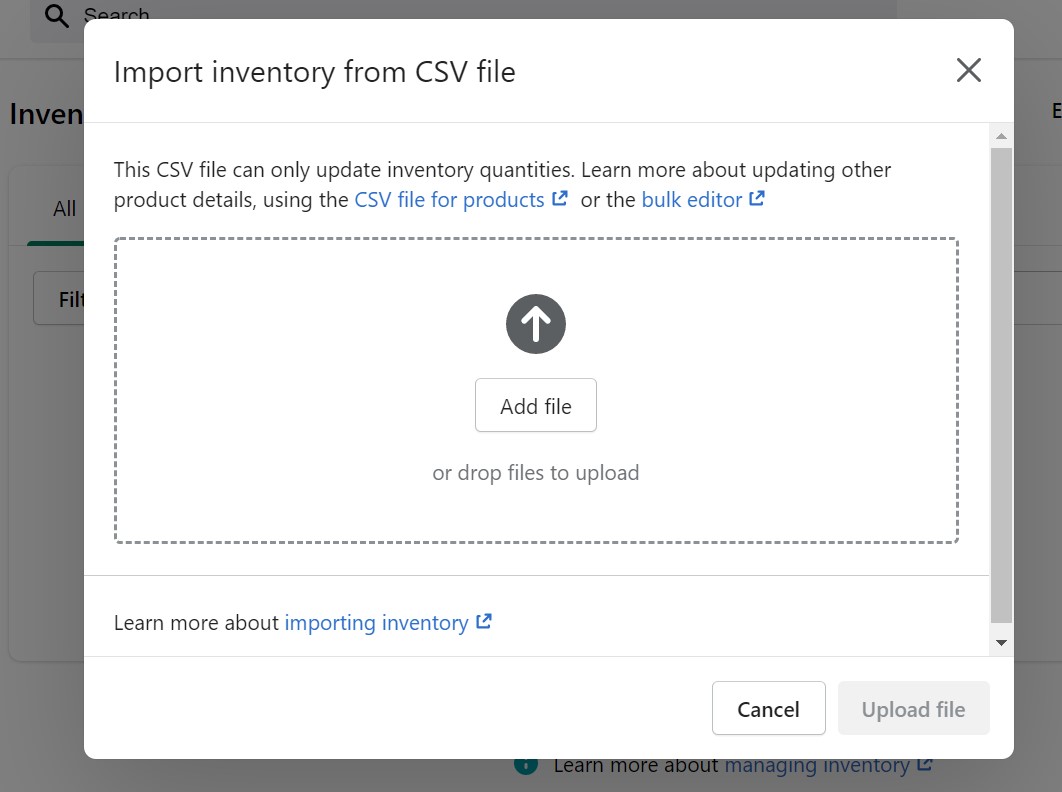
- Select your CSV file with the update.
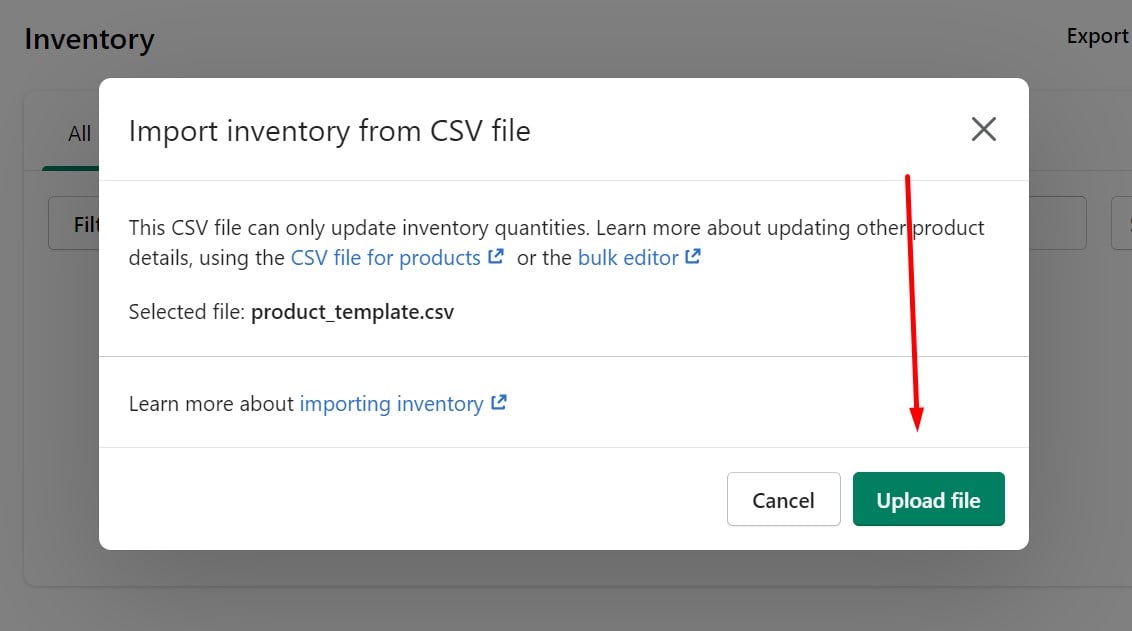
- Click Import inventory, verify what you intend to import, and hit the Start import button.
We describe this procedure in more detail here: How to import inventory to Shopify.
If you need to exceed the default limit or want to automate inventory uploads to Shopify, you can replace the standard data importer with the Shopify Improved Import & Export application. In addition to supporting large files and numerous data types, it allows you to build update schedules and apply presets to automatically match third-party data to Shopify’s needs so that inventory files are smoothly integrated. Contact us for more information about the tool.
Conclusion
Shopify provides the ability to simplify inventory transfers and automate product quantity updates. You can effectively manage either product supplies from your partners or relocate goods between your warehouses. The system is intuitive and doesn’t require any additional background. So, Shopify inventory transfers are always at your disposal under Admin -> Products -> Transfers. Don’t forget to activate inventory management for products you wish to transfer!
Shopify Inventory Transfer FAQ
Does Shopify have an inventory management system?
Yes, and it is very flexible and powerful. In Shopify’s Inventory management system, you may set up inventory tracking, monitor your inventory, and modify your inventory levels. For products and variants whose inventory is being monitored by Shopify, you may also check the history of inventory modifications. Inventory transfers are also a part of the Shopify inventory management routine.
What are Shopify transfers?
You can keep track of incoming goods and get updates automatically by setting up inventory transfers on Shopify. Use transfers to track inventory coming from suppliers or goods that move between your locations.
How do I keep track of inventory on Shopify?
You need to enable inventory tracking to keep track of inventory on Shopify. Follow these steps:
Go to your Shopify admin -> Products.
Open the product details page of a product that you want to track.
In the case of variants, click the variant that you want to track.
Check Track quantity in the Inventory section.
What is inventory policy in Shopify?
The variant inventory policy establishes a procedure for handling out-of-stock items and deciding if you should keep selling a product or variation when its inventory level drops to zero. Check Continue selling when out of stock in the Inventory section of a product or variant to enable this functionality.
How do you do inventory transfer on Shopify?
You can create a Shopify inventory transfer as follows:
In your Shopify admin, go to Products -> Transfers.
Click the Create transfer button.
Select the original location of your inventory.
Select a location to receive the inventory.
Add products.
Provide the quantity for each product.
Specify an expected arrival date, provide a shipment tracking number, and type in a shipping carrier.
Assign a reference number or a tag to the transfer.
Click Save transfer.
Related posts
 Reputon Amazon Importer Review: How to Connect Shopify to Amazon in a Few Clicks
 How To Bulk Import Products In Shopify: CSV Description & Step-By-Step Guide
 A Complete Guide to Shopify Customer Import
 Magento 2 B2B Company Guide: Revealing Company Structure & Import
 How to Import Customers & Customer Addresses to Magento 2
 Amasty ChatGPT AI Content Generator for Magento 2
 Rewind Staging: How To Duplicate Your Shopify Store
 Products Sync Master: Shopify Import & Export Tool