Exploring Shopware: How to Create Categories in Shopware 6

Categories on your Shopify e-commerce store let you define the menu structure of the website, putting products in a user-friendly and intuitive order. In the following article, we shed light on how to create categories in Shopware 6. The platform offers an intuitive way to organize all possible items in a catalog. You will discover how to find categories in the Shopware 6 administration and how to manage them. After that, we explain how to add new categories in Shopware 6, covering such aspects as layout assignment, menu settings, product assignment, SEO, custom fields, and customizable links. In addition to creating Shopware 6 categories, we also discuss how to import and export them. More materials about the platform are available here: Shopware 6 Guides.

Note that we provide Shopware integration with external platforms. Contact our support for further information or try our Improved Import & Export Extension for Shopware. We can help you import categories to Shopware 6.
Table of contents
- 1 How to find categories in Shopware 6 administration
- 2 How to manage categories in Shopware 6 backend
- 3 How to add new categories in Shopware 6
- 4 How to Import Categories to Shopware 6
- 5 Shopware 6 Essentials FAQ
- 5.1 How to create a Shopware ID?
- 5.2 How to create a Shopware account?
- 5.3 What is Shopware master data?
- 5.4 How to add a shop in Shopware?
- 5.5 How to add a payment method to your Shopware account?
- 5.6 How to create a deposit in Shopware?
- 5.7 How to purchase Shopware extensions?
- 5.8 How to get support in Shopware?
- 5.9 How to migrate to Shopware 6?
- 5.10 How to automate import and export processes in Shopware 6?
- 5.11 How to integrate Shopware 6 with external systems?
How to find categories in Shopware 6 administration
When it comes to catalog management, Shopware 6 offers quite flexible options. But before discussing them, we need to locate the main category page in your admin. You can reach your Shopware 6 category tree as follows:
- Open your main menu;
- Click on the Catalogues section;
- Choose Categories.
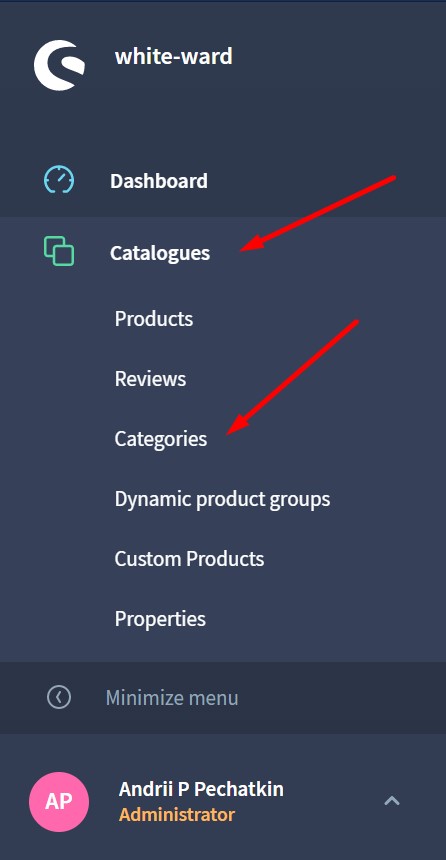
Congratulations, you’ve come to the Shopware 6 catalog page.
How to manage categories in Shopware 6 backend
Now, your screen displays a category tree. By default, it looks as follows:
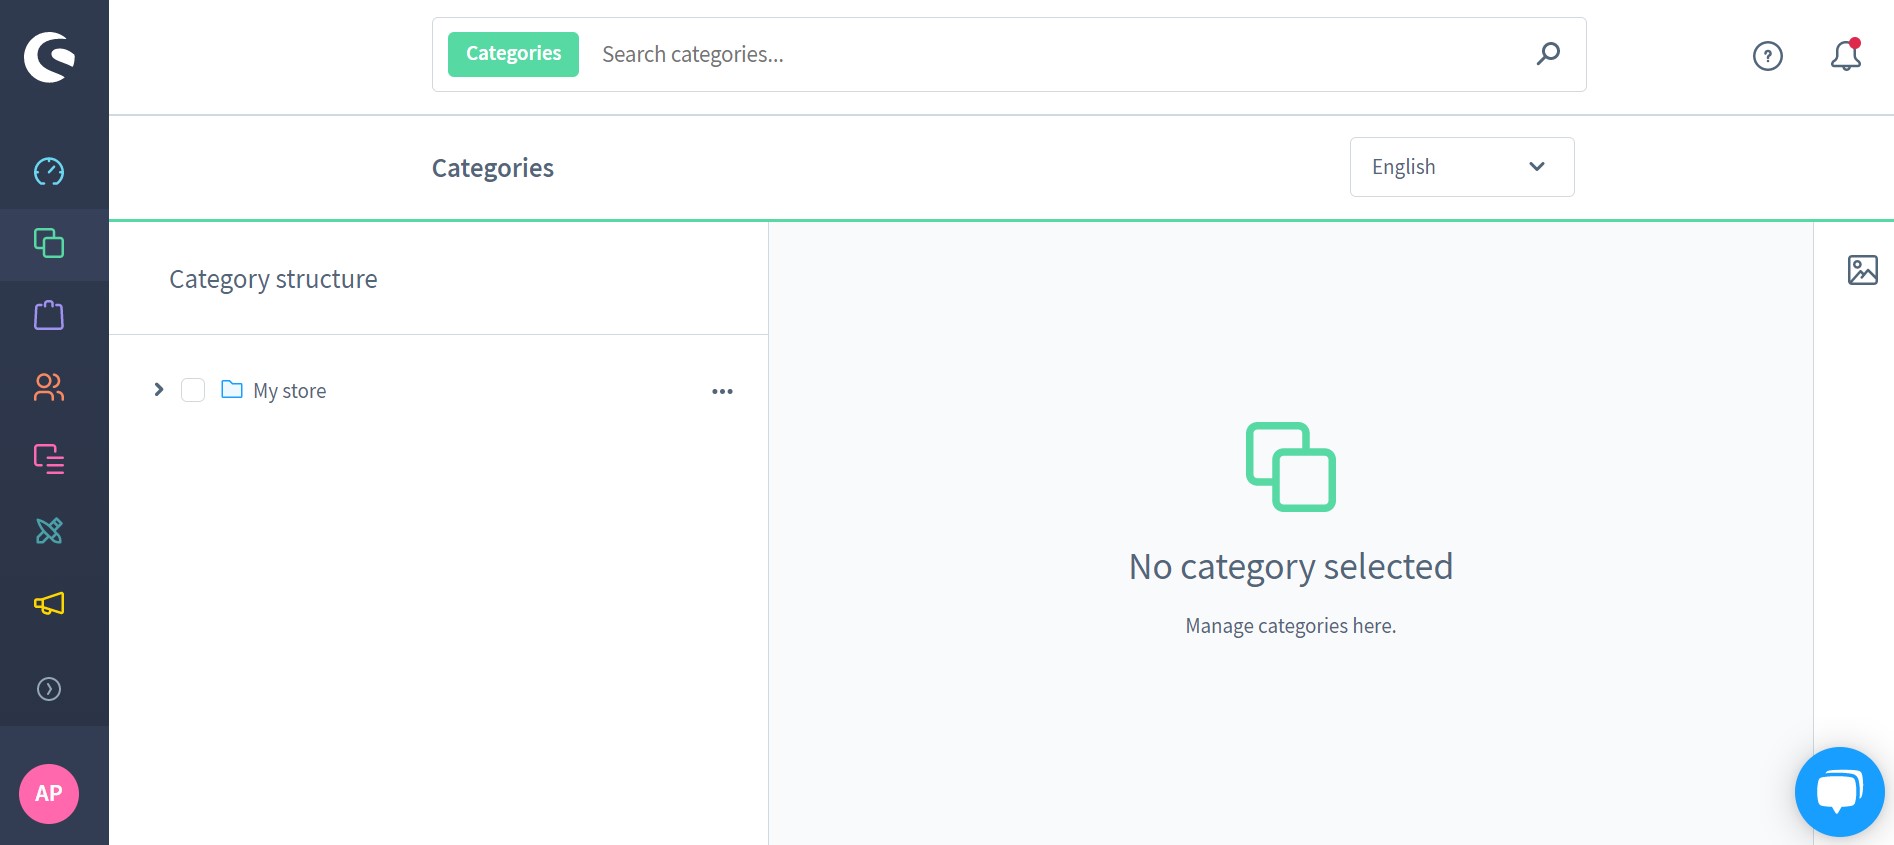
Select the top category and you will see the following transformation on the screen:
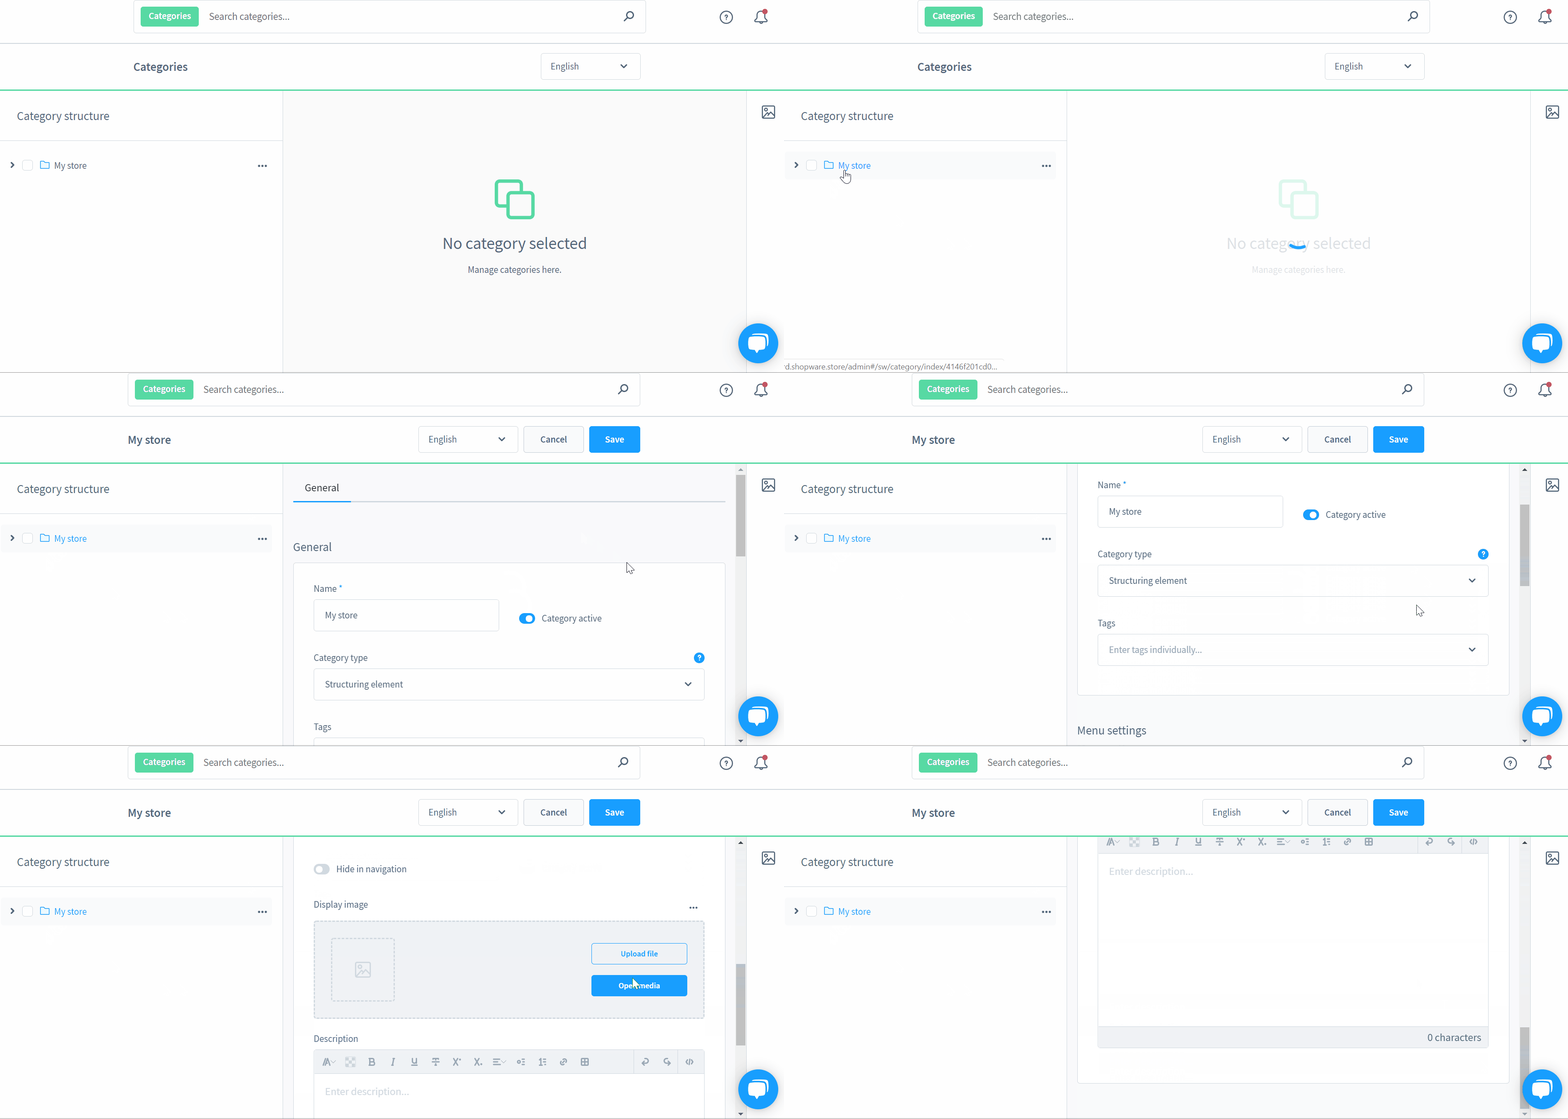
As you can see, the category section is divided into the following parts:
- General;
- Menu Settings.
Let’s see what happens in each of them.
General
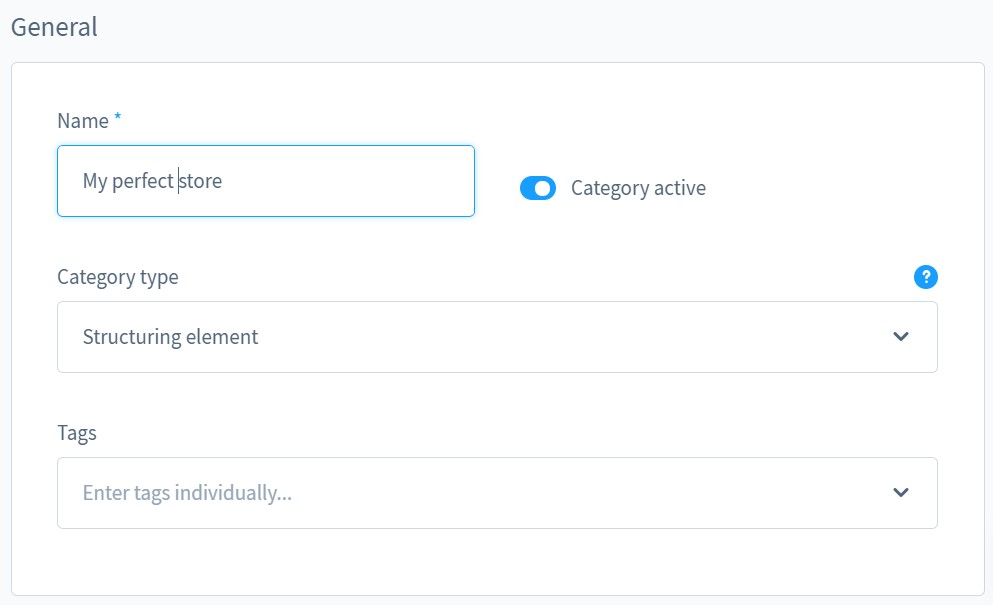
The General section lets you change your store name, enable/disable the category, choose its type (category, structuring element, or customizable link), as well as add tags.
Menu settings
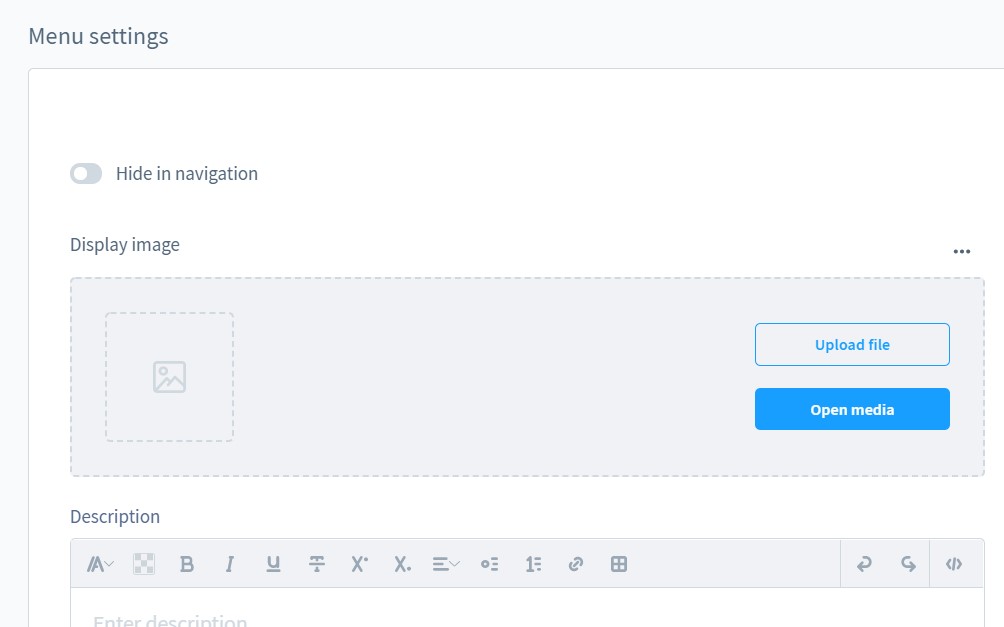
In the Manu settings, you can hide the category from navigation, upload its image, and add a description.
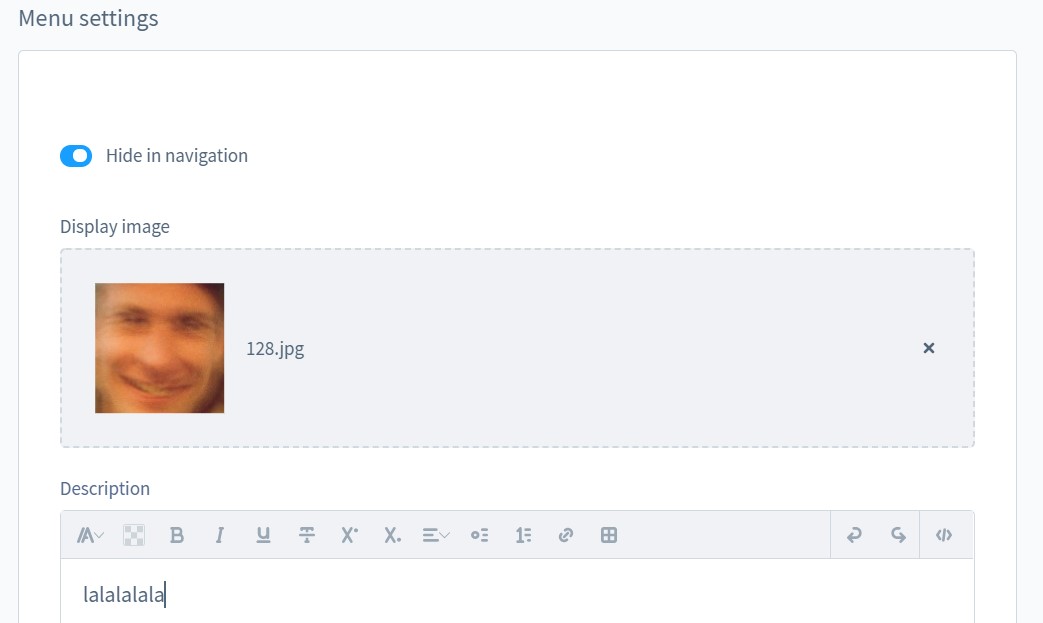
However, this structure is suitable for a particular category type. We will return to more complex categories later in this article.
Further editing
When you continue editing Shopware 6 categories, unfold your main category to see other elements: Click on the arrow on the left side of the category name.
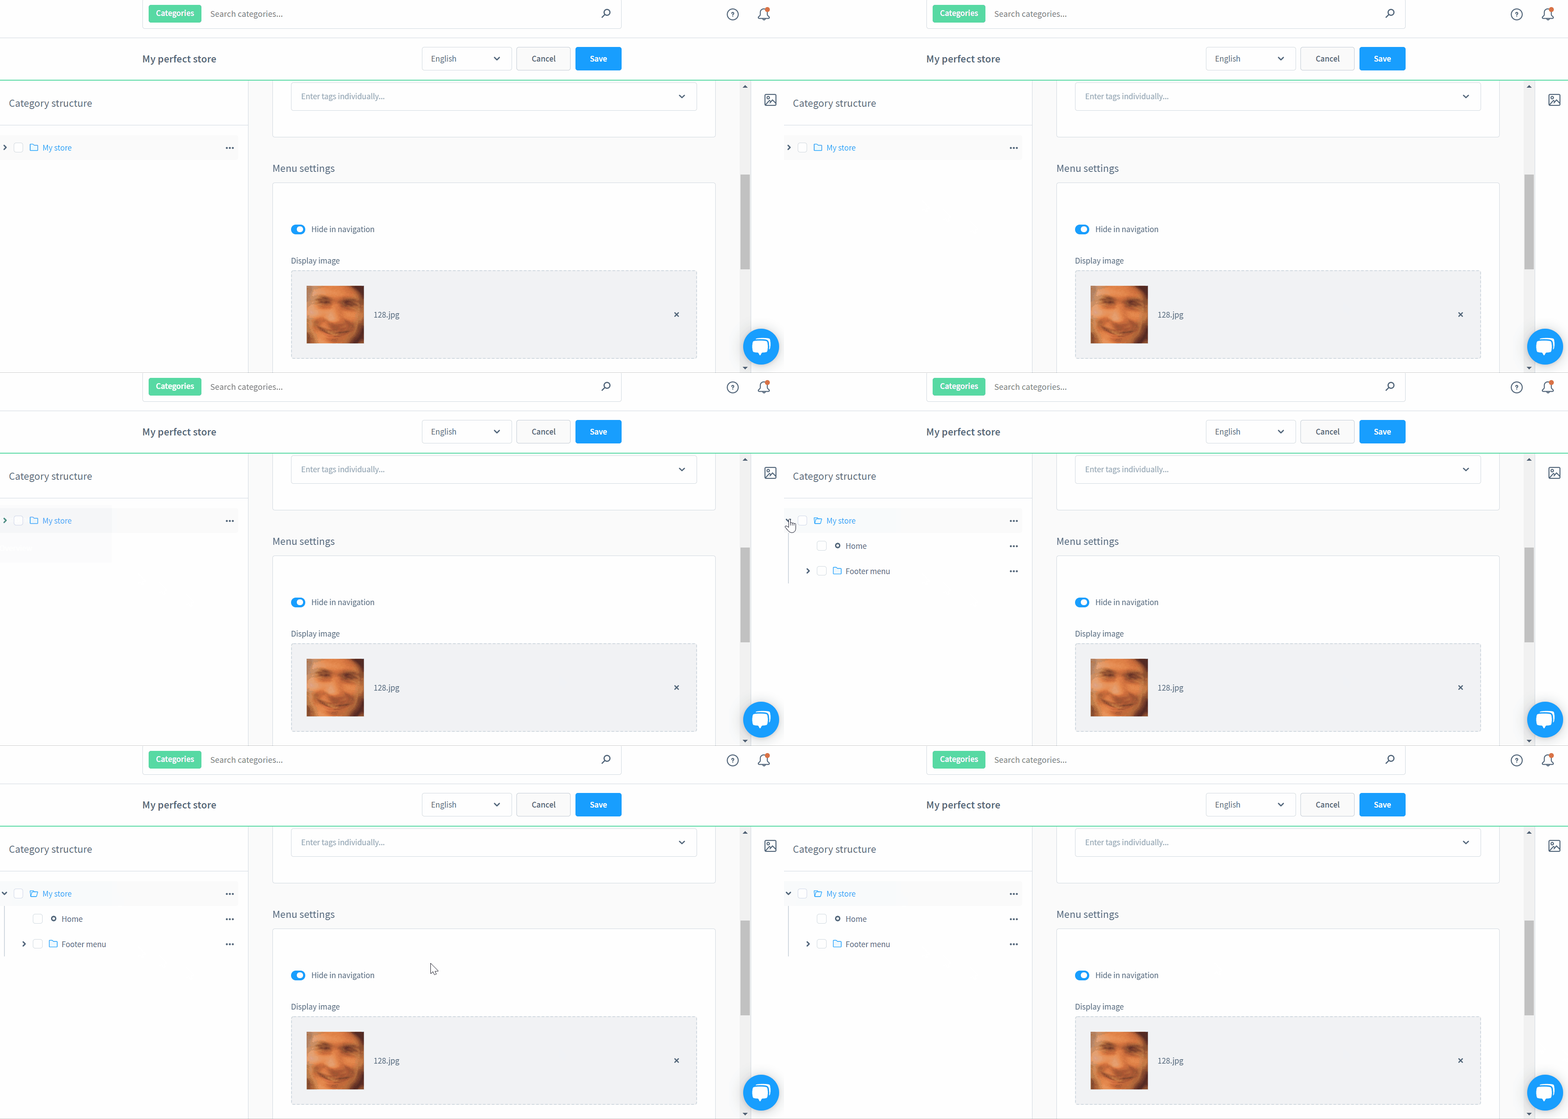
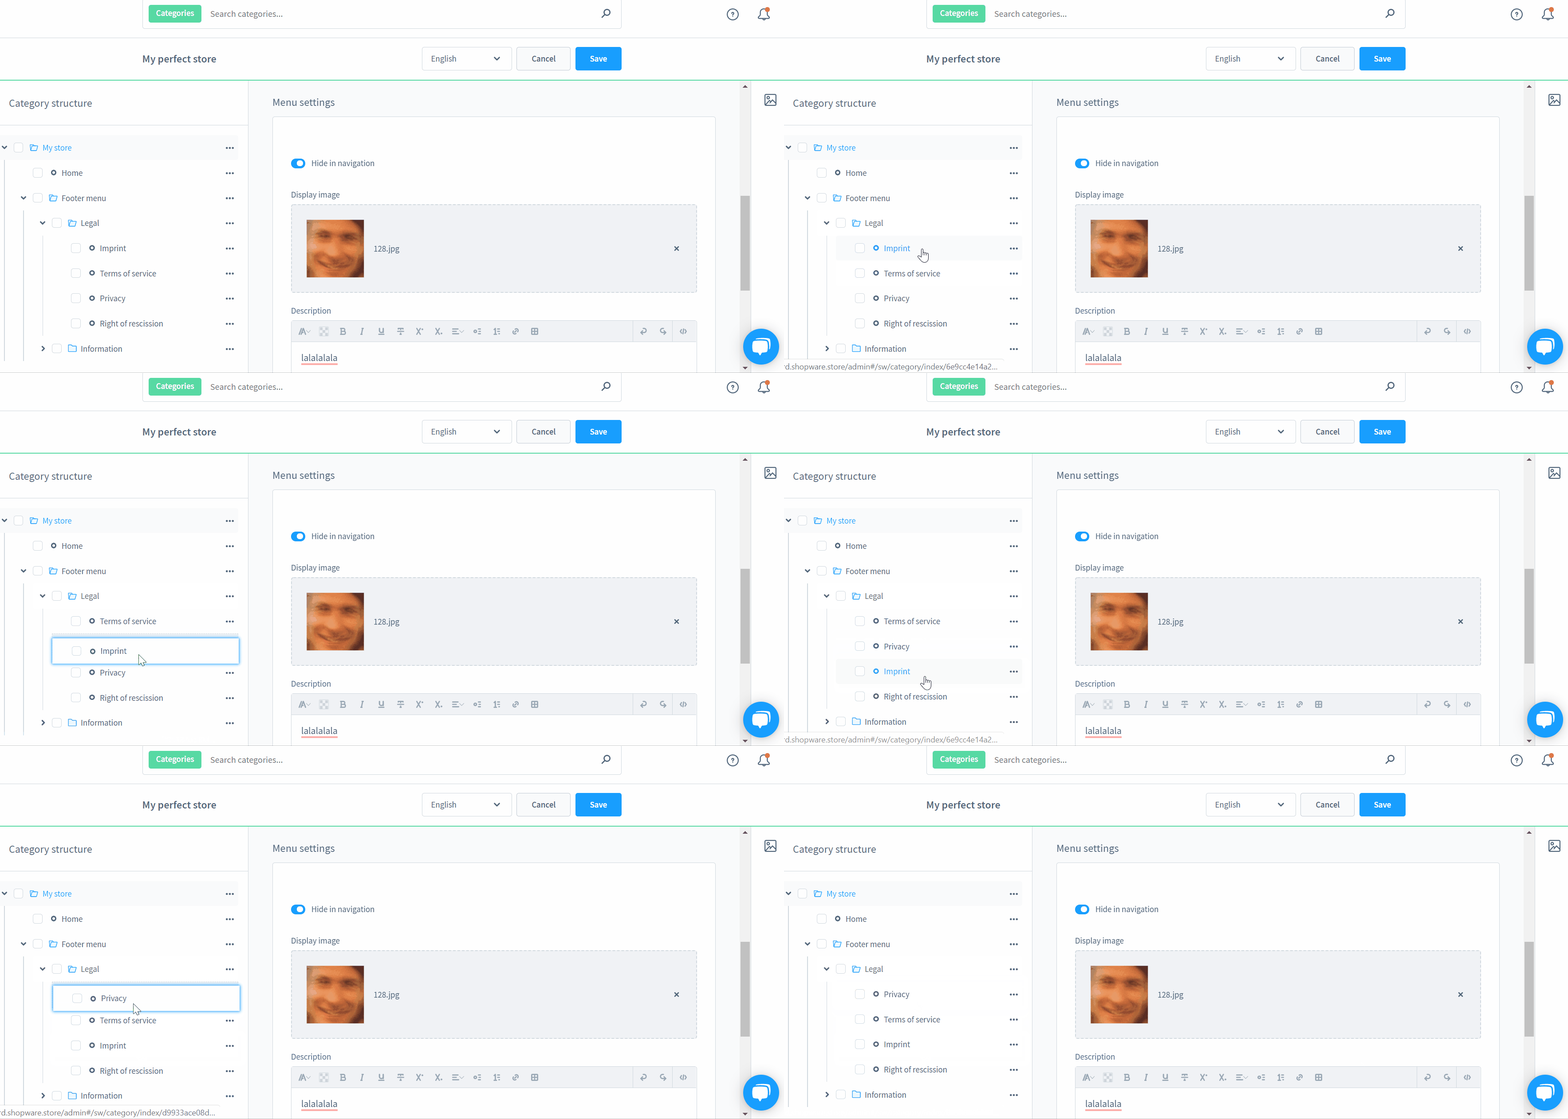
Shopware 6 empowers you with the drag & drop functionality to manage individual categories. You can add, edit, delete, and nest them using the options menu.
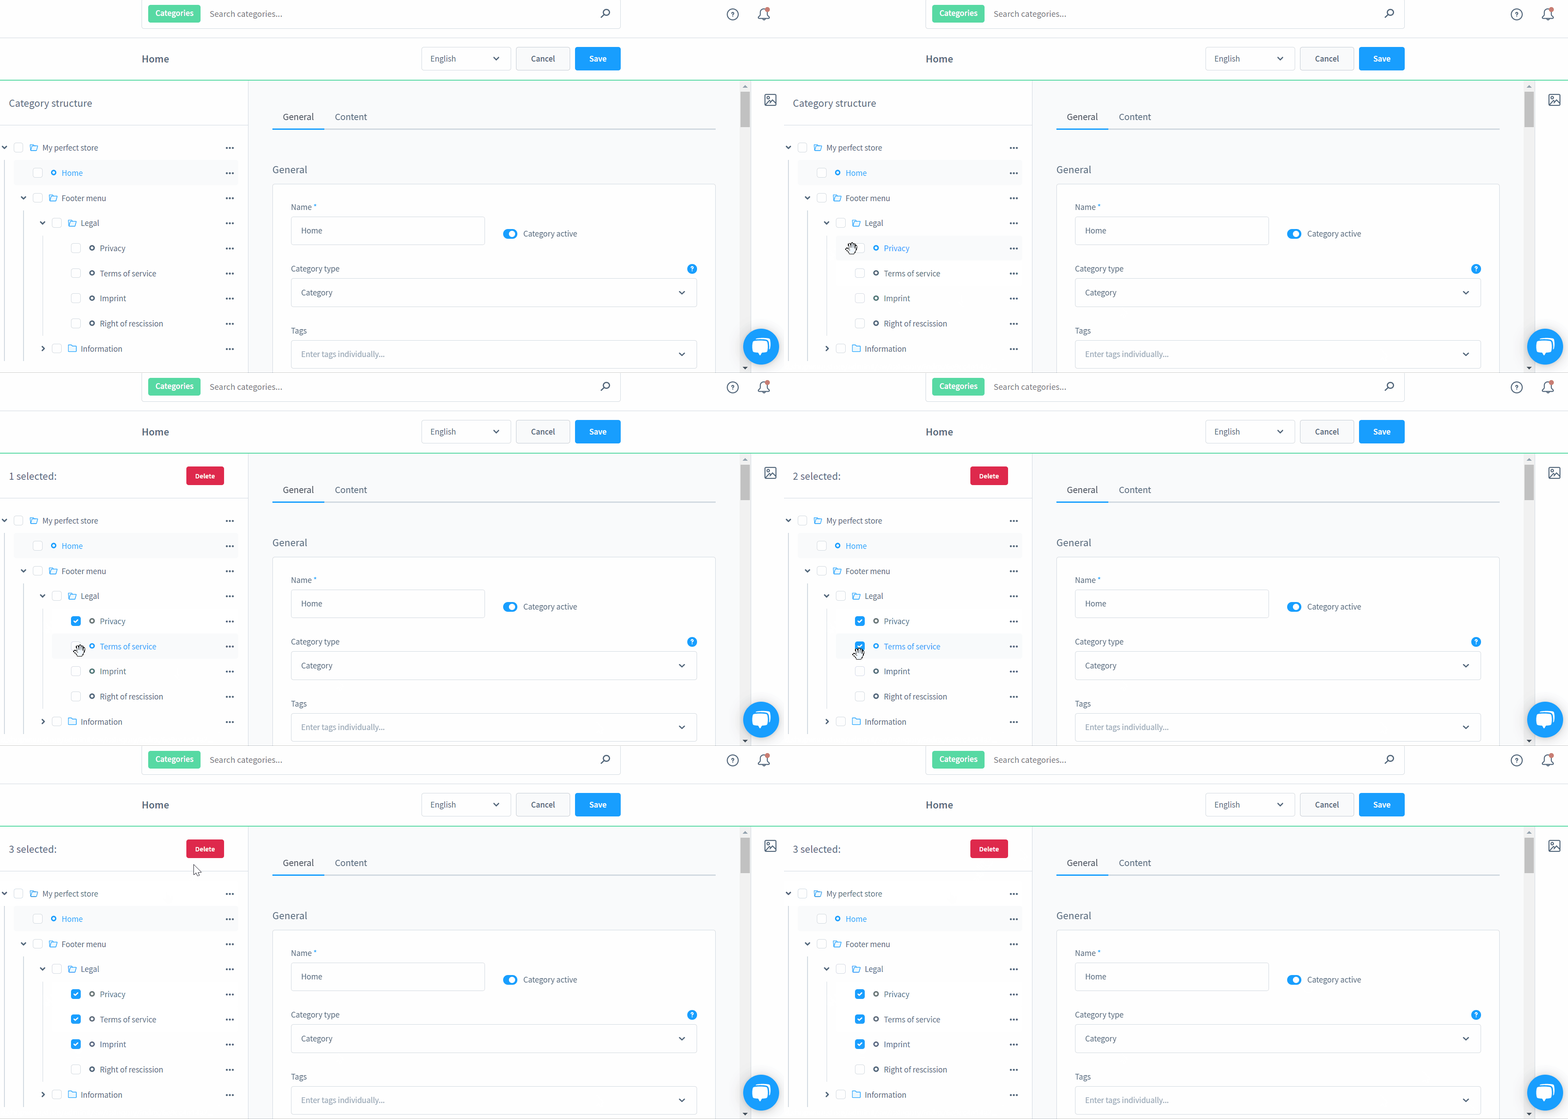
How to delete Shopware 6 categories in bulk
To delete Shopware 6 categories in bulk, select records you want to remove and hit the Delete button:
How to add new categories in Shopware 6
To add a new category in Shopware 6, use the options menu. Choose an existing category and hit three dots in front of it. You will get the following options displayed:
- New category before – adds a new category before the selected one;
- New category after – adds a new category after the selected one;
- New subcategory – adds a new subcategory for the selected category;
- Edit – opens a screen where you can edit the selected category;
- Delete – deletes the selected category.
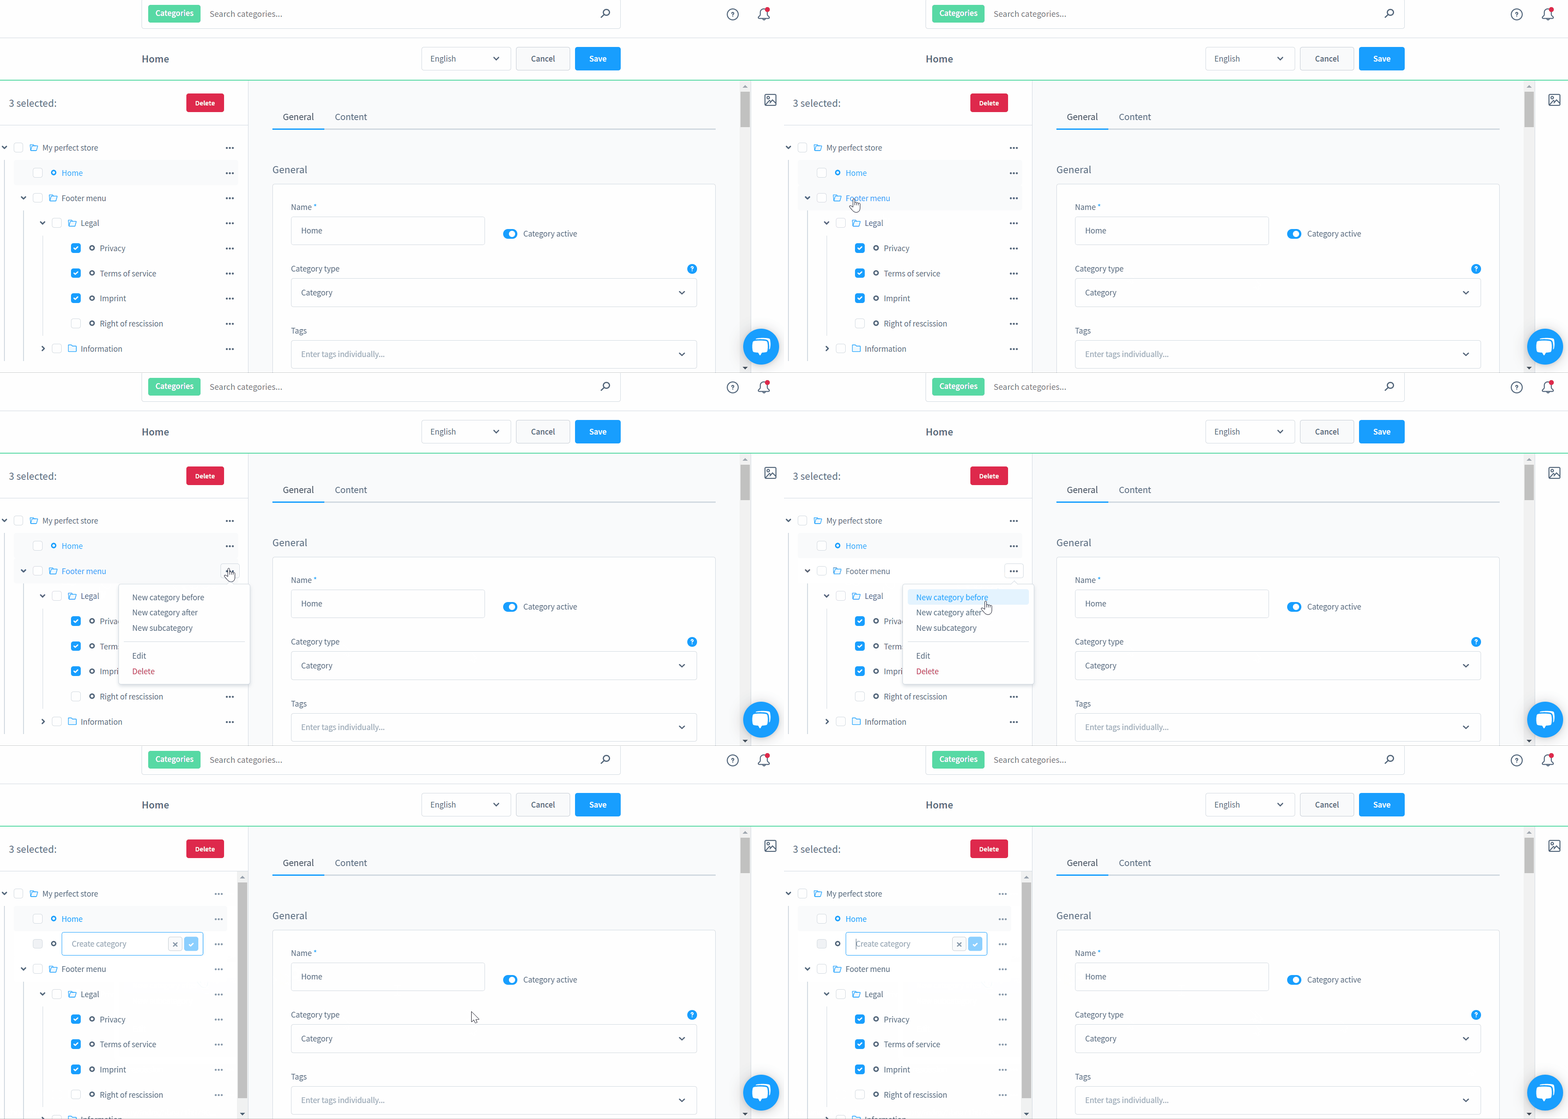
Let’s choose New category before and see what happens. The system creates a new record and asks you to name it. Specify a category title and save it.
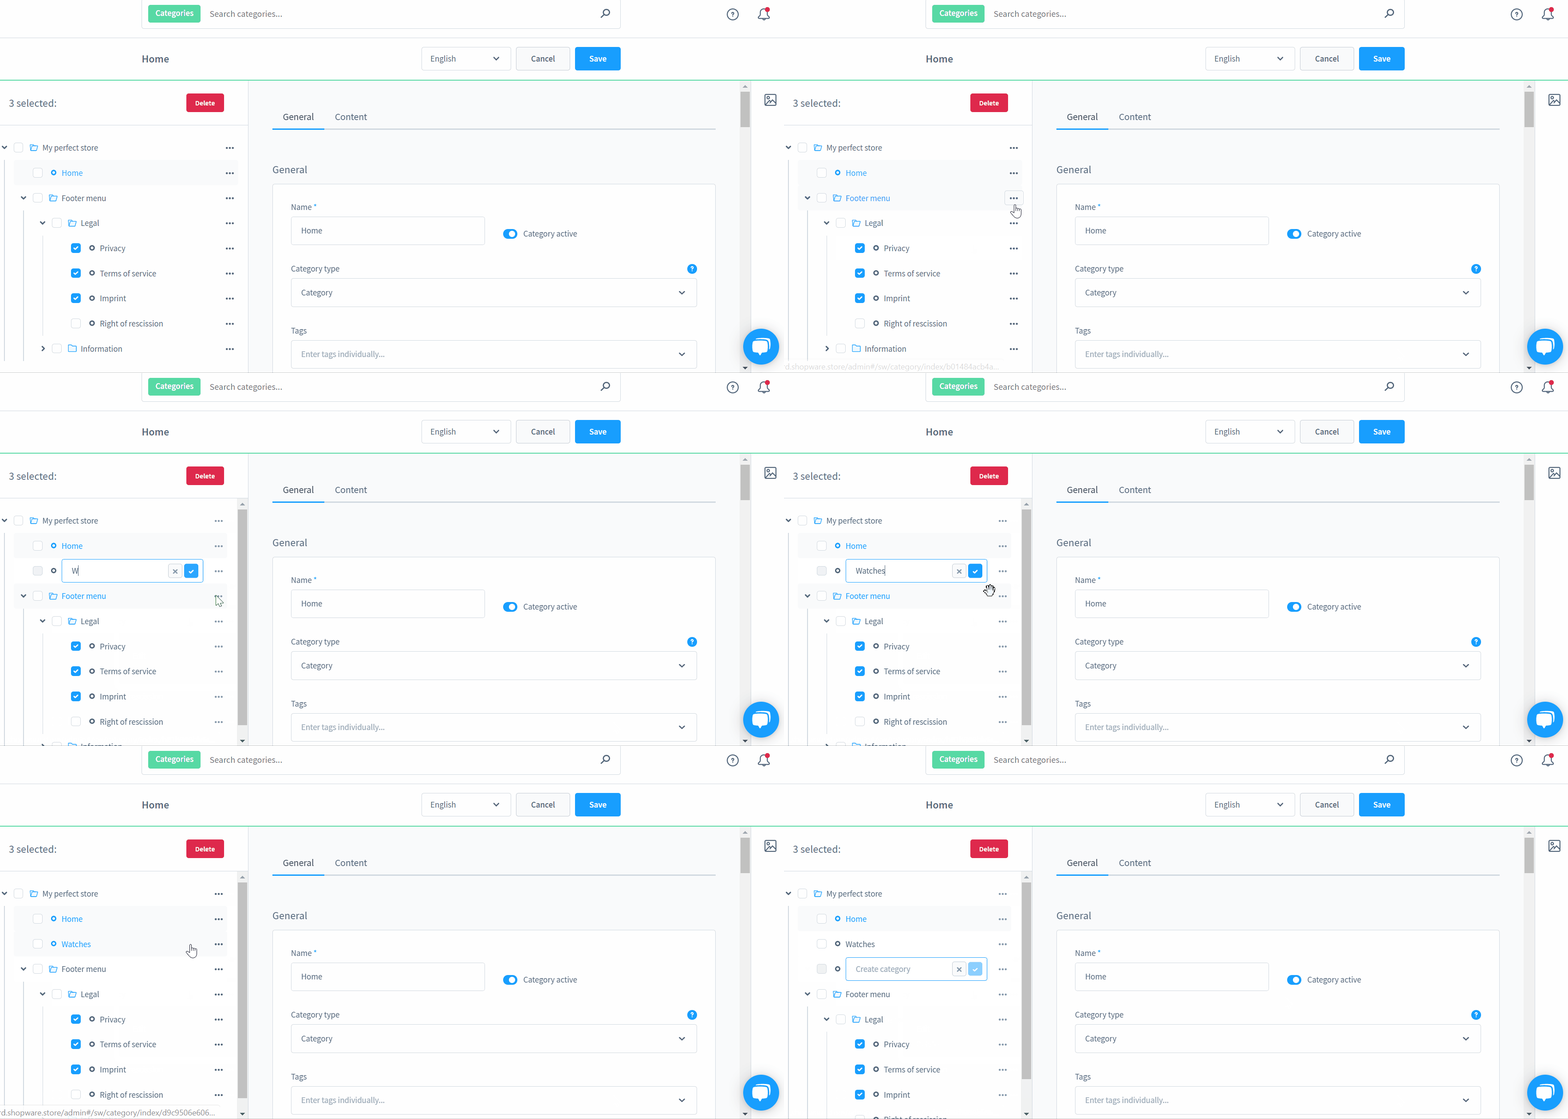
Now, you can continue creating your new Shopware 6 category. Specify information about it via the following tabs:
- General;
- Layout assignment;
- Menu settings;
- Product assignment;
- SEO;
- SEO URLs;
- Custom fields.
General
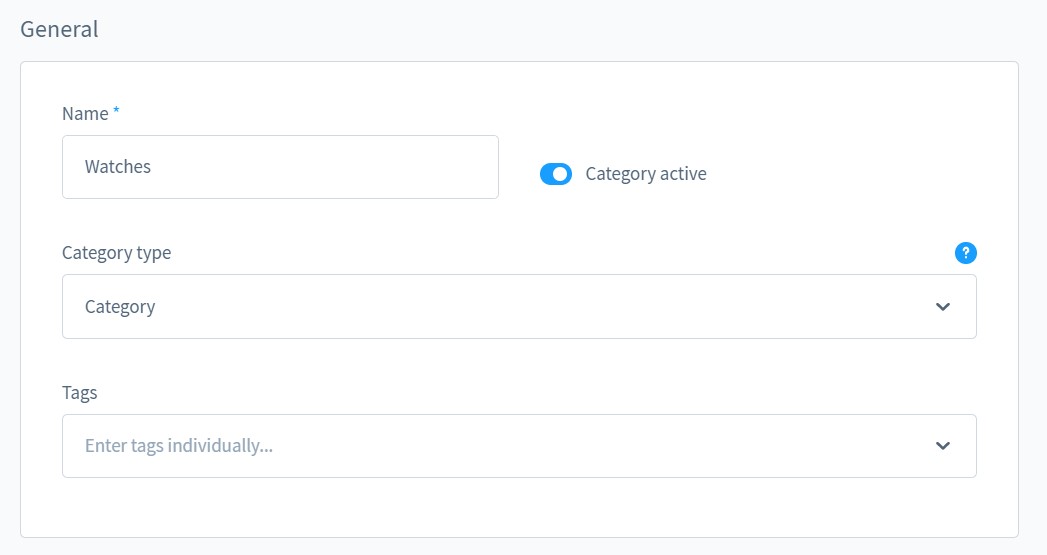
We’ve already described this section. It lets you edit the category name, switch between category types, enable/disable categories, and choose tags.
Layout assignment
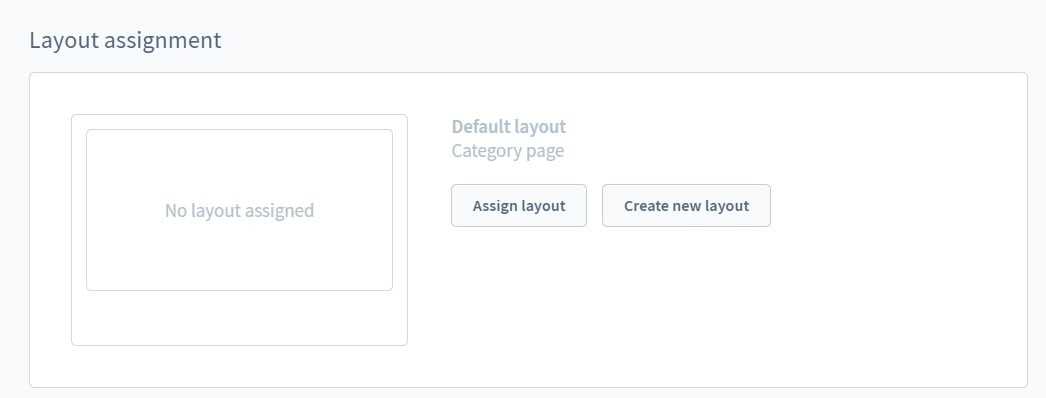
Here, you can assign an existing category page layout or create a new one.
Menu settings
The Manu settings tab lets you hide your new category page from navigation, upload a category image, and add a description.
Product assignment
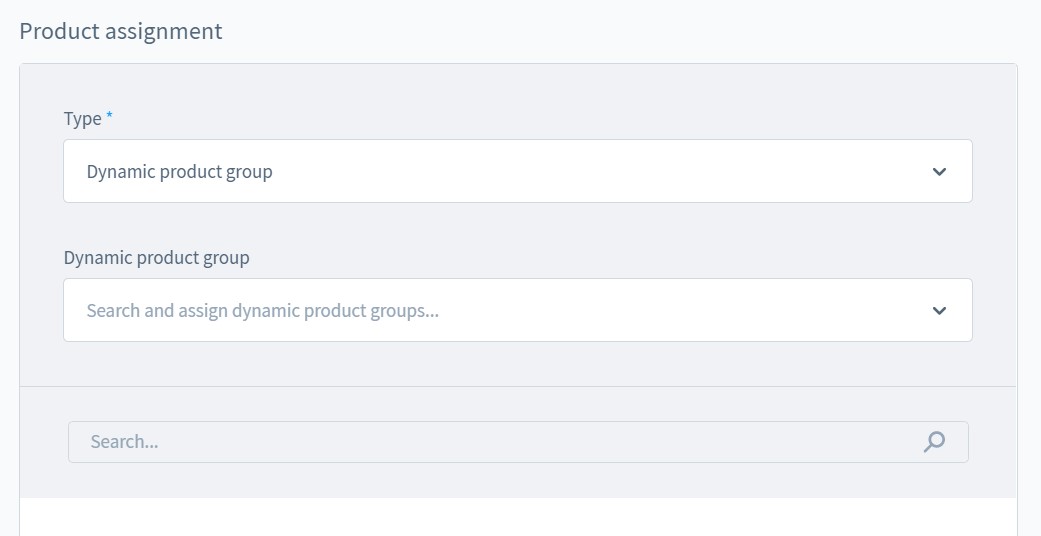
After that, you can assign products to your new Shopware 6 category. The system lets you do that manually by choosing specific items. Alternatively, you can enable dynamic product groups to automate this process.
SEO
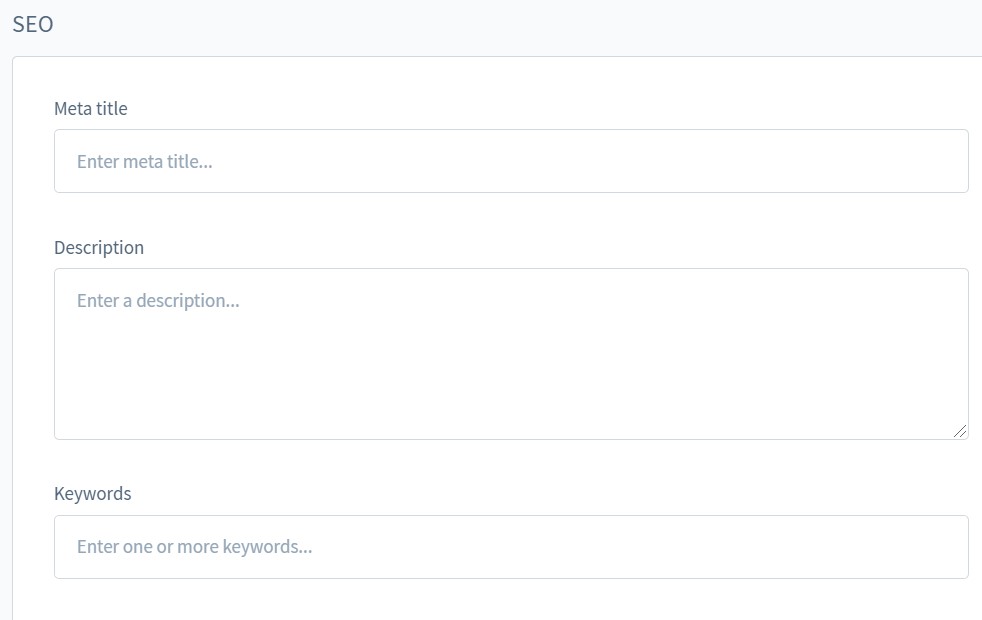
The SEO section lets you specify meta title, description, and keywords. There is nothing special here.
SEO URLs
It is also possible to create SEO-friendly URLs for your category page.

Custom fields
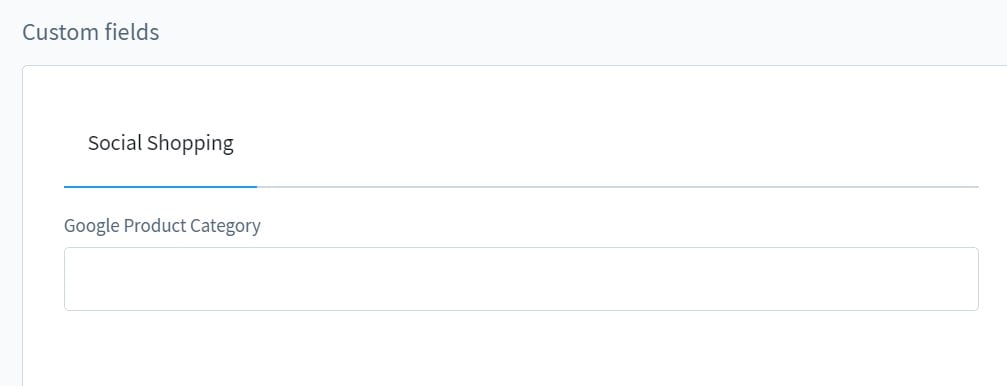
In this section, you can configure Social Shopping by specifying Google product categories.
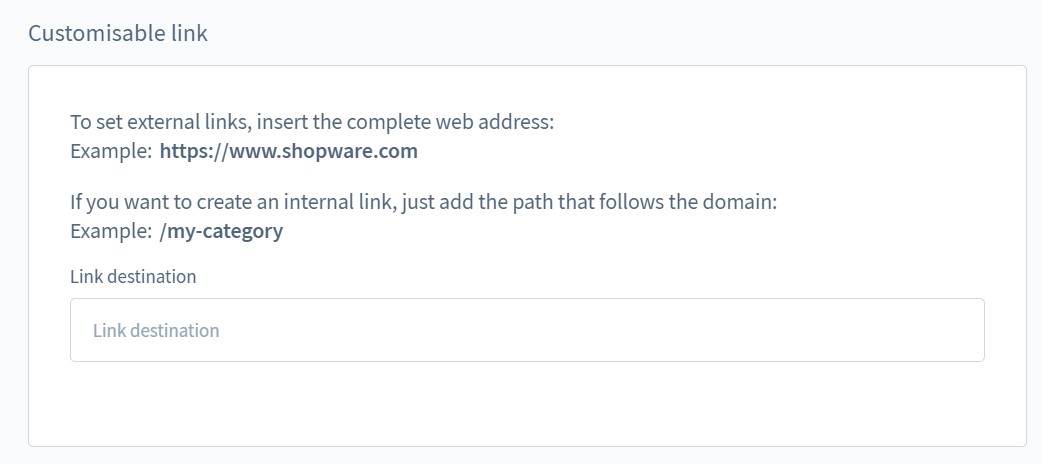
Customizable link
If you create a customizable link in Shipware 6 instead of a category, the system provides the following three sections:
- General,
- Customizable link,
- Custom fields.
As you can see, the Customizable link is the only unique section. You can set an external link by inserting the complete web address, such as . For internal links, add the path that follows the domain: /my-category.
How to Import Categories to Shopware 6
Our team lets you avoid the complex category creation routine of Shopware 6. You can import all the necessary data, including the entire category tree structure. We can help you import your existing category tree to Shopware 6. Contact our support for more details. You can also try our to import categories to Shopware 6. Please, consult our specialists before using the module. We will help you achieve the highest efficiency in this process. Also, bear in mind that the extension provides the ability to export categories. Furthermore, you can automate both import and export processes.
Shopware 6 Essentials FAQ
How to create a Shopware ID?
Before working with categories, you will need to create a Shopware ID. Shopware 6 provides it along with a new Shopware account, which is also important for creating a new e-commerce website.
How to create a Shopware account?
You can create a new Shopware account as follows:
– go to the registration page;
– click the Register Now link;
– fill in the form;
– confirm the account creation via email.
What is Shopware master data?
Shopware master data is all the information you provide upon registration about your company. Shopware 6 master data usually includes contacts and company details, such as an address, email, phone numbers, company name, etc.
How to add a shop in Shopware?
You can add a new Shopware 6 shop as follows:
– visit the start screen of your merchant area;
– hit the Add New Shop link;
– choose whether you need a cloud or on-premise website;
– fill in the form, providing information about your new Shopware shop.
How to add a payment method to your Shopware account?
Shopware 6 lets you add a payment method to your account. It is used for creating a deposit used for purchasing extensions and themes. You can add a payment method to your Shopware 6 account following these steps:
– visit Basic Information -> Accounting;
– chose PayPal, credit card, or direct debit;
– provide the required information, depending on the selected payment method;
– add a new method to your account;
– transfer money.
How to create a deposit in Shopware?
An active payment method lets you pay in advance for your further purchases. Creating a deposit in Shopware 6 looks as follows:
– visit your Merchant Area -> Shops;
– choose a shop to add funds to;
– hit Open Account Details;
– run the transfer.
How to purchase Shopware extensions?
With a deposit that covers the price of the extension you want to purchase, you can go to either the Shopware Marketplace or the Plugin Manager to buy it.
How to get support in Shopware?
The support department in Shopware is divided into two subdivisions: for the account and license inquiries (info@shopware.com or +49 2555 9288 50) and for the questions regarding accounting and financial services (financial.services@shopware.com or +49 2555 9288 510).
How to migrate to Shopware 6?
If you have an e-commerce business but want to migrate to Shopware 6, you will need a third-party extension to perform this procedure. The default Shopware instruments cannot transfer all the entities necessary for that. Thus, you can replace them with the Import & Export extension. Contact us for more information.
How to automate import and export processes in Shopware 6?
Since it is impossible to automate recurring import and export processes with the default data transfer tools of Shopware 6, you need the Improved Import & Export extension to achieve this goal. It lets you create a schedule of updates for each data transfer individually. After that, all data transfers run in the background automatically.
How to integrate Shopware 6 with external systems?
Use the Improved Import & Export extension to connect your Shopware 6 website with external systems. Our module is developed to help you integrate your Shopware storefront with any platforms outside and inside the ecosystem via API. The extension connects a database of your storefront to ERPs, CRMs, accounting systems, and other similar tools. Next, it automates import and export processes and applies changes to the transferred data according to the requirements of your Shopware store or the connected platforms, depending on the direction of the transfer.


