
Exploring Magento 2 Backend: Email Reminders

Below, we continue our exploration of the Communications section available under the Marketing tab. This time, we explore email reminders, describing what they are and how to use them. You can find other backend elements described here: Magento 2 Admin Exploration.

Table of contents
Magento 2 Email Reminders Definition
Email reminders are a tool developed to turn your buyers into returning customers. Their purpose is to encourage people who have already visited your e-commerce website. You send a reminder to them, proposing to take advantage of a promotion. As a result, some of them make a purchase. Of course, this tool is not 100% effective; however, it helps to increase sales and grow a base of loyal customers. But how do email reminders work?
When a specific (predefined) set of conditions is met, Magento 2 sends an email. Let’s imagine a situation when a store visitor has added something to their cart or wishlist but have not made a purchase. To decrease your cart abandonment rate, you need to motivate the customer to return to your store and complete the checkout. Magento 2 lets you use email reminders to do that. A suitable message enhanced with a coupon code encourages customers to return to your e-commerce website. Both codes and emails can be automatically generated and send. You just need to specify a text of your message. But what are the conditions that launch these actions?
Usually, Magento 2 triggers email reminders after a specific number of days since a cart was abandoned. However, it is possible to leverage other conditions. For instance, you can set a total cart value, specify certain goods, or choose a number of items in a cart to launch Magento 2 email reminders.
All Magento 2 email reminders are gathered in a grid that consists of 6 columns:
- ID – an internal ID number of a reminder;
- Rule – a rule that triggers an email reminder;
- Start & End – intervals when the reminder is active;
- Status – Active or Inactive;
- Website – a corresponding store view.
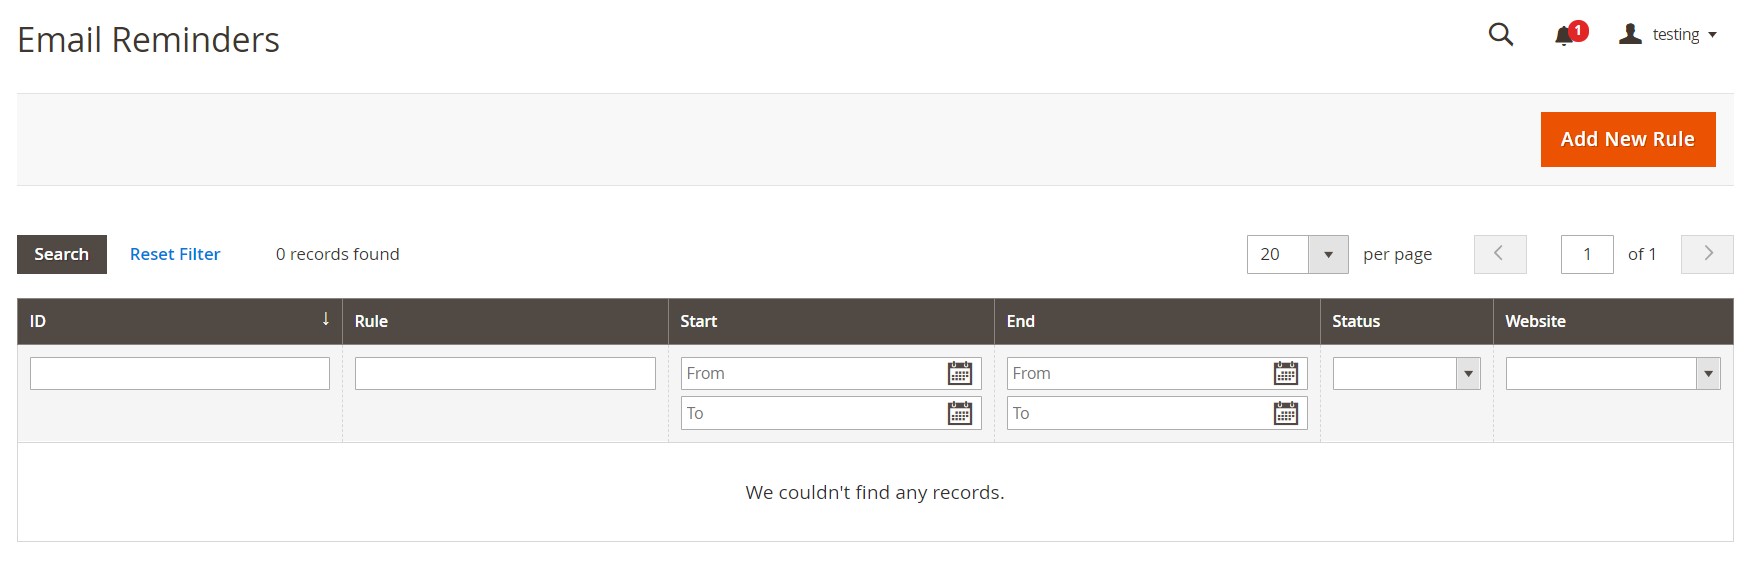
You can use filters in each column to find a specific Magento 2 newsletter reminder.
How to Create Magento 2 Email Reminders
You can set up an email reminder rule only when the corresponding promotion is defined. Email reminders are impossible without setting up a cart price rule. Note that rules that trigger an email reminder include a broad spectrum of conditions. You can leverage numerous cart and/or wishlist properties to create a flexible campaign.
A cart price rule that determines an auto-generated coupon creates a random coupon code for each recipient automatically. At the same time, an email reminder might promote a cart price rule without a coupon.
Now, when you know some essential nuances, we can continue our exploration and return to the main topic of this chapter. To create a new email reminder in Magento 2, go to Admin->Marketing->Communications->Email Reminder Rules. You can see a screen with a grid that we’ve described above. Find the Add New Rule button In the upper-right corner of the screen and click it. A new screen appears. It contains three tabs:
- Rule Information;
- Conditions;
- Emails and Labels.
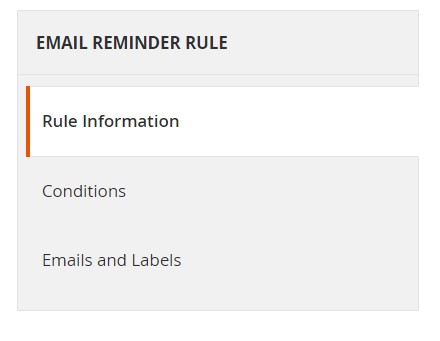
Let’s explore each one.
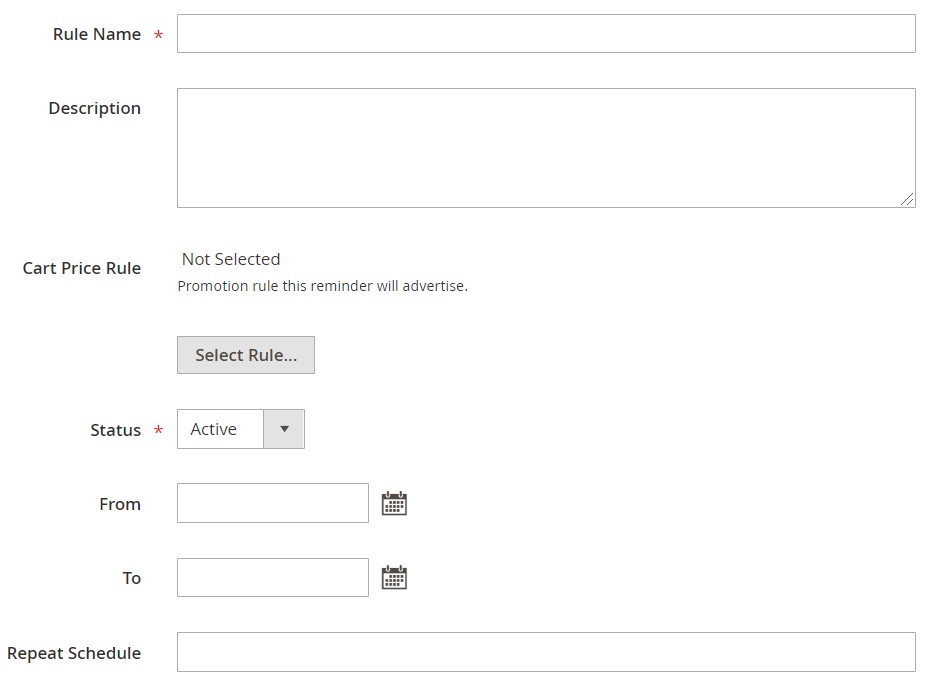
Rule Information
Follow these steps to configure the Rule Information tab:
- First of all, it is necessary to enter a Rule Name. It will help you identify the rule in the backend. This information is used for internal purposes only.
- Next, describe your rule to simplify further email reminder management.
- Now, you can choose a Cart Price Rule promotion. Note that this reminder will use it to encourage customers to return to your store and complete the purchase. Use the Select Rule button to choose the rule.
- Set Status to Active to enable the rule. It will go into effect immediately.
- You can set up a date range when the rule should be active. Enter the From and To dates, using the Calendar.
- Also, note that it is possible to send the reminder more than once. Go to the Repeat Schedule field and specify the number of days to launch the next email.
Conditions
Now, you can return to the panel on the left and choose Conditions. Note that a Magento 2 email reminder requires at least one condition. We’ve already described how to create a catalog price rule. This process is almost the same:
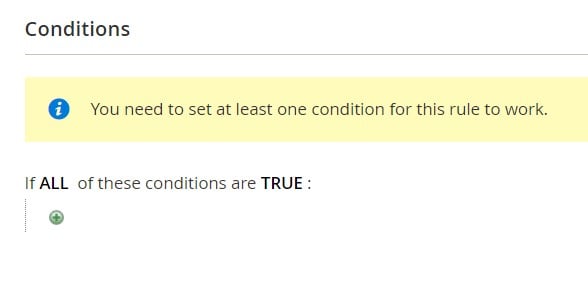
- Click Add and choose Wish List or Shopping Cart.
- Continue the condition configuration. Create a scenario to triggers the email reminder.
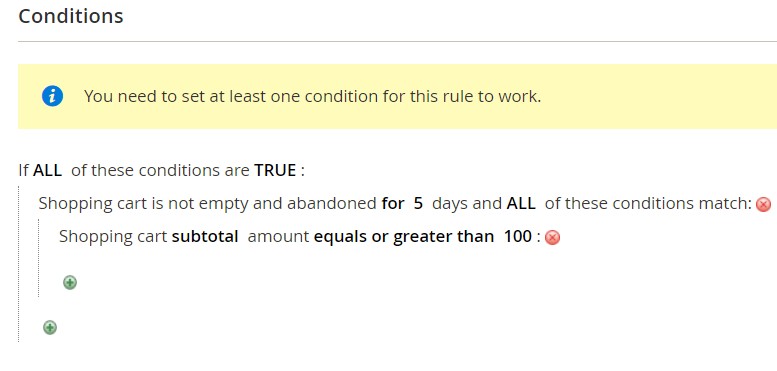
Trigger Conditions
Also, note that you can leverage the following trigger conditions for a shopping cart:
- Number of days abandoned;
- Specific coupon code applied;
- Line items quantity;
- Items quantity;
- Total;
- Virtual items;
- Specific Items.
As for a wishlist, the number of conditions is not that big. You can use only four of them:
- Number of days abandoned
- Sharing
- Number of items
- Specific items
Emails and Labels
Now, you can configure the last tab – Emails and Labels.
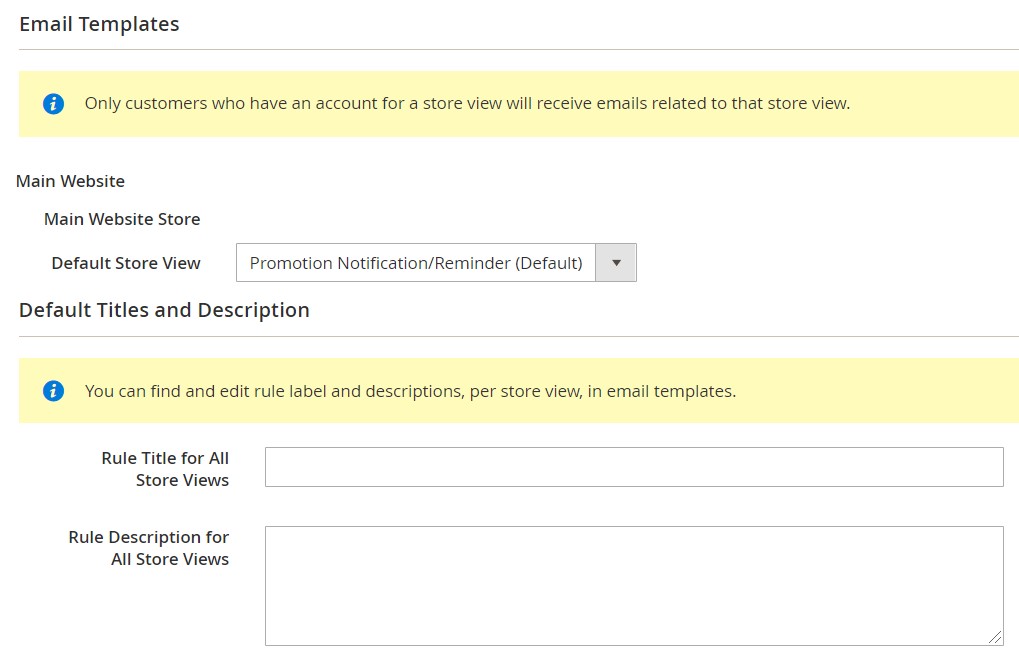
- First of all, choose an email template in the Email Templates section. You can specify different templates for each store view. At the same time, it is possible to select the Not Selected value. Thus, you won’t send the reminder to customers of a specific store view
- Now, proceed to the Default Titles and Description section. Here, you can specify the Rule Title for All Store Views and the Rule Description for All Store Views.
- Besides, you can leverage the Titles and Descriptions Per Store View section to enter the appropriate title and description for each store view.
When the configuration of these three tabs is complete, click Save.
How to Configure Magento 2 Email Reminders
Now, let’s see how to configure email reminder rules. Magento 2 can send them at regular intervals as small as minutes. You can also specify the number of emails sent in a batch. Besides, it is possible to set the store identity that appears as the reminder sender. These and other options are available under Stores->Settings->Configuration in the Automated Email Reminder Rules section. Go to Customers and choose Promotions. Expand the section and do the following:
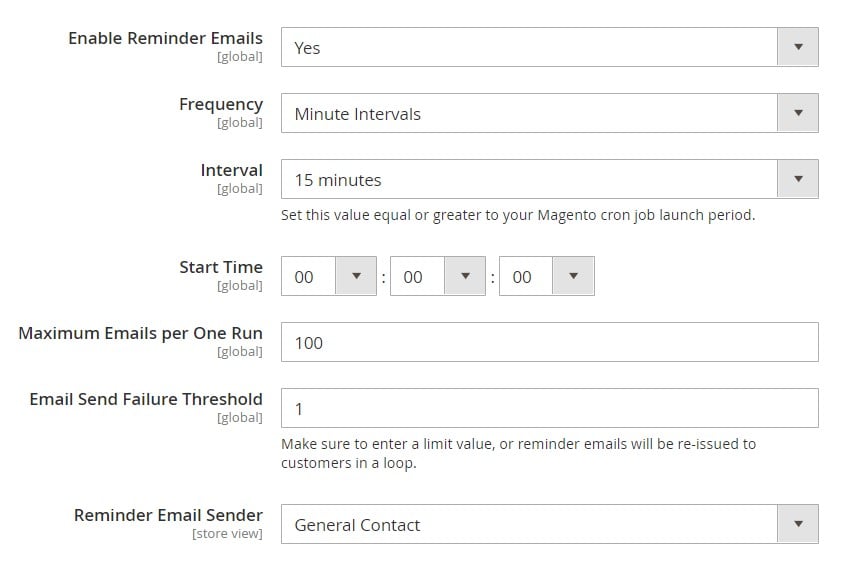
- To enable reminder emails, set the first option to Yes.
- Next, set the frequency for Magento to check whether the conditions to send automated email reminders are met. Frequency can be set to minute intervals. At the same time, you can use hourly or daily spans.
- Choose an interval, based on the previous setting.
- In Start Time, set time considering that it is a 24-hour clock.
- You can also specify a number of emails sent in a batch. Use the Maximum Emails per One Run field.
- Also, you can specify the maximum number of attempts. Use the Email Send Failure Threshold field to avoid endlessly repeated attempts to send a failed email.
- The last option lets you specify a sender of your reminder. Set a store contact in the Reminder Email Sender field.
Don’t forget to save the configuration (click Save Config) when complete.
How to Customize Magento 2 Email Reminder Templates
You can use the default email reminder template to set the reminders. However, it is possible to customize it or even create additional templates for different occasions. There is a selection of specific variables that you can add to your messages. An email reminder rule is a major factor that determines the information in variables. However, a corresponding cart price rule associated with the coupon also provides its impact.
You can customize Magento 2 email reminder templates under Marketing->Communications->Email Templates.
- Hit the Add New Template button.
- Proceed to the Template list and select the Promotion Notification/Reminder template there.
- Load the template.
- Follow instructions described in this guide: Exploring Magento 2 Backend: Email Templates.
Email Reminder Variables
To add a coupon code to your Magento 2 email reminder, use this variable:
|
1 |
{{var coupon.getCode()|escape}} |
If you want to set a coupon usage limit, utilize this one:
|
1 |
{{var coupon.getUsageLimit()|escape}} |
To arrange a coupon usage per customer in your Magento 2 email reminders, add this variable:
|
1 |
{{var coupon.getUsagePerCustomer()|escape}} |
You can also leverage a customer account URL in your reminder text with the help of the following variable:
|
1 |
{{store url="customer/account/"}} |
To personalize your message, add a customer name:
|
1 |
{{var customer.getName()|escape}} |
The Email Footer Template variable consists of the following elements:
|
1 |
{{template config_path="design/email/footer_template"}} |
As for the Email Header Template variable, it looks as follows:
|
1 |
{{template config_path="design/email/header_template"}} |
You can add Email Logo Image Alt to your Magento 2 email reminder. Use this variable:
|
1 |
{{var logo_alt}} |
The following one is the Email Logo Image URL variable:
|
1 |
{{var logo_url}} |
If you need to add a promotion description, use this variable:
|
1 |
{{var promotion_description|escape|nl2br}} |
At the same time, it is possible to add a promotion name:
|
1 |
{{var promotion_name|escape}} |
A store name is associated with the following variable:
|
1 |
{{var store.getFrontendName()}} |
As for a store URL, you can add it to your email reminders with the next variable:
|
1 |
{{store url=""}} |
How to Import & Export Email Reminder Templates
If you are going to migrate to Magento 2 or want to transfer data between the two stores within the ecosystem, you might have already faced the problem that the default platform’s tools don’t let you move the existing email reminder templates. The same is about newsletter subscribers and numerous other entities. However, it is possible to move them to Magento 2 without any obstacles. You only need to install the Improved Import & Export Magento 2 extension. This module can handle data transfers of all complexity. You can use it to connect your e-commerce store to any external system or website.
As for import and export processes between Magento 2 and Magento 1 or Magento 2 and Magento 2, it is possible to simplify data transfers even more. Use the Magento 1 to Magento 2 Migration add-on. It is based on the Improved Import & Export Magento 2 extension and offers additional data transfer capabilities and outstanding usability.
Both tools help you import/export email templates (including email reminders) right from your admin. In addition to an intuitive admin panel, you can also utilize simple CLI commands.
Also, note that the add-on applies a selective approach to the migration. It means that there is no downtime. After the necessary entity is transferred, you only need to reindex.
Don’t forget that it is necessary to install the Improved Import & Export module to use the Free Migration add-on. When the extension is purchased, you can download the add-on from your Firebear account. if Improved Import is already a tool that you use daily. We will help you get the add-on.
So, how to import email reminder templates to Magento 2? Follow these simple steps:
- Install both tools;
- specify the database connection credentials (for the source of email reminder templates: Magento 1 or Magento 2);
- Set the path to the root folder of your Magento 2 website;
- Select email templates as your import entity.
That’s it!
Also, note that our extension works with the following entities:
- Categories;
- Inventory;
- Products;
- Product reviews and ratings;
- Orders;
- Order shipping data;
- Order Quotes
- Product media (images and videos);
- Product Attributes;
- Customers and all the related data;
- Customer groups;
- Customer wishlists;
- CMS blocks and pages;
- URL rewrites;
- Store administrator accounts;
- Catalog price rules and cart price rules;
- Invoices and other documents;
- Taxes and order taxes aggregated;
- Newsletter subscribers.
The Improved Import & Export Magento 2 extension provides the ability to automate all transfers on the basis of cron schedules. Besides, it is possible to use API and Google Sheets to transfer data. Also, our module can import and export different file formats and archives. And to avoid problems caused by different data storing standards, it offers mapping presets. You can find more information on the links below:
Get Improved Import & Export Magento 2 Extension
Get Free Magento 1 to Magento 2 Migration Add-On
Related posts
 How to Import Customers & Customer Addresses to Magento 2
 Magento 2 B2B Company Guide: Revealing Company Structure & Import
 A Complete Guide to Shopify Customer Import
 Amasty ChatGPT AI Content Generator for Magento 2
 Magento 2 Release Notes
 Adobe (Magento 2) Commerce and Cloud (Enterprise Edition) Specific Features
 Reputon Amazon Importer Review: How to Connect Shopify to Amazon in a Few Clicks
 How To Bulk Import Products In Shopify: CSV Description & Step-By-Step Guide