
Magento 2 Backend Exploration: CMS Blocks
In this article, you will discover how Magento 2 backend is arranged. We continue exploring its Content section, and today our attention is drawn to CMS blocks and a corresponding screen that stores all of them. Below, we describe how the appropriate grid looks and how to manage it. We also shed light on such aspects as the creation of new CMS blocks. Their import and export to/from Magento 2 are described in separate chapters as well.

Table of contents
Magento 2 CMS Blocks
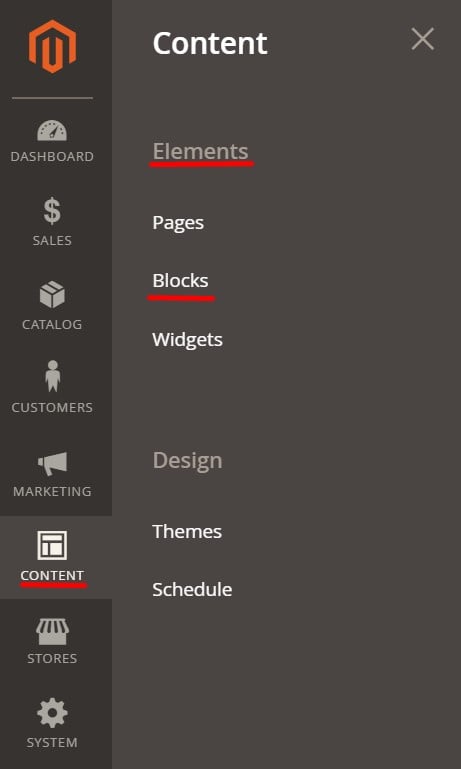
All CMS pages, blocks, and widgets are available under Content-> Elements. However, each content type has a dedicated grid. Thus, Magento 2 organizes the backend structure, making it easy to find the elements you are looking for.
Magento 2 Blocks
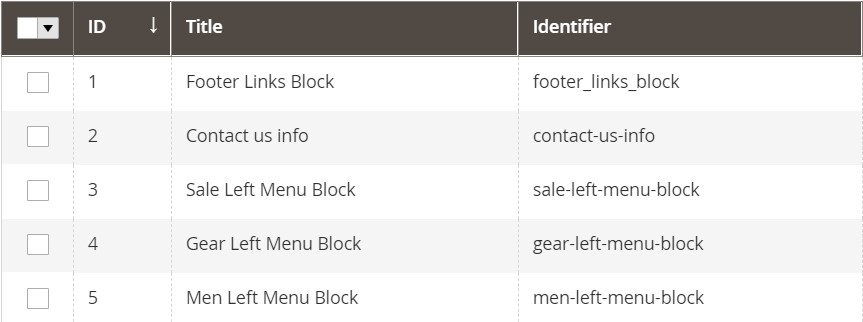
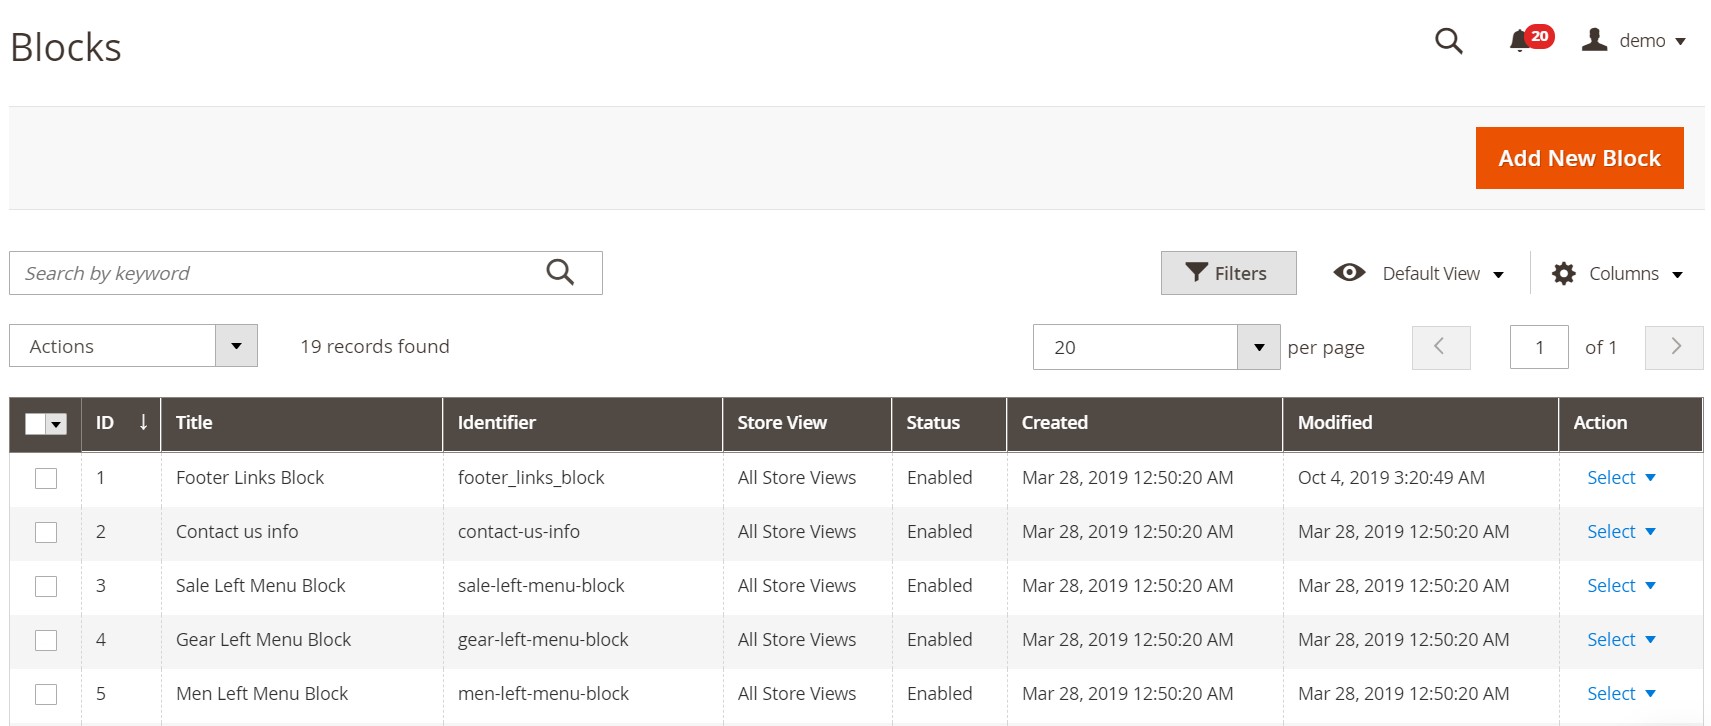
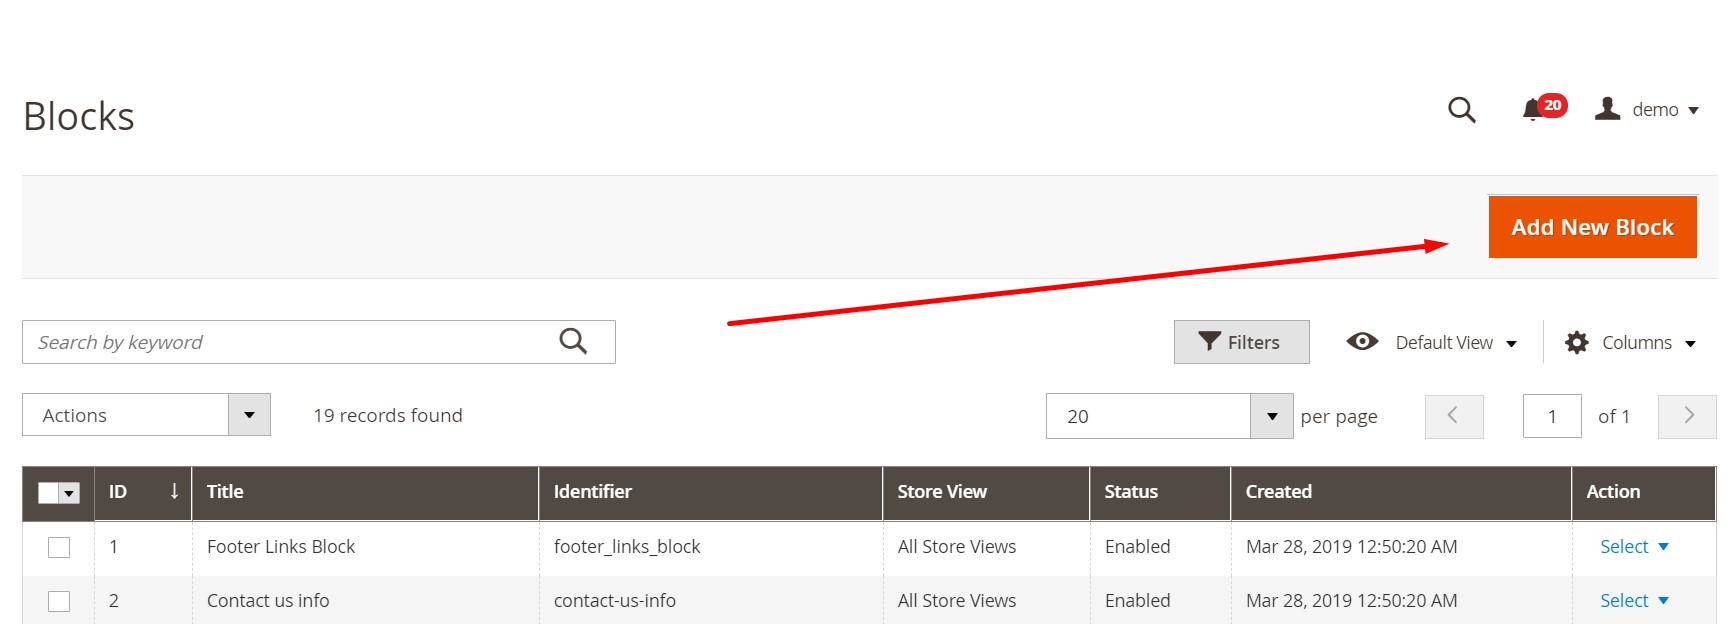
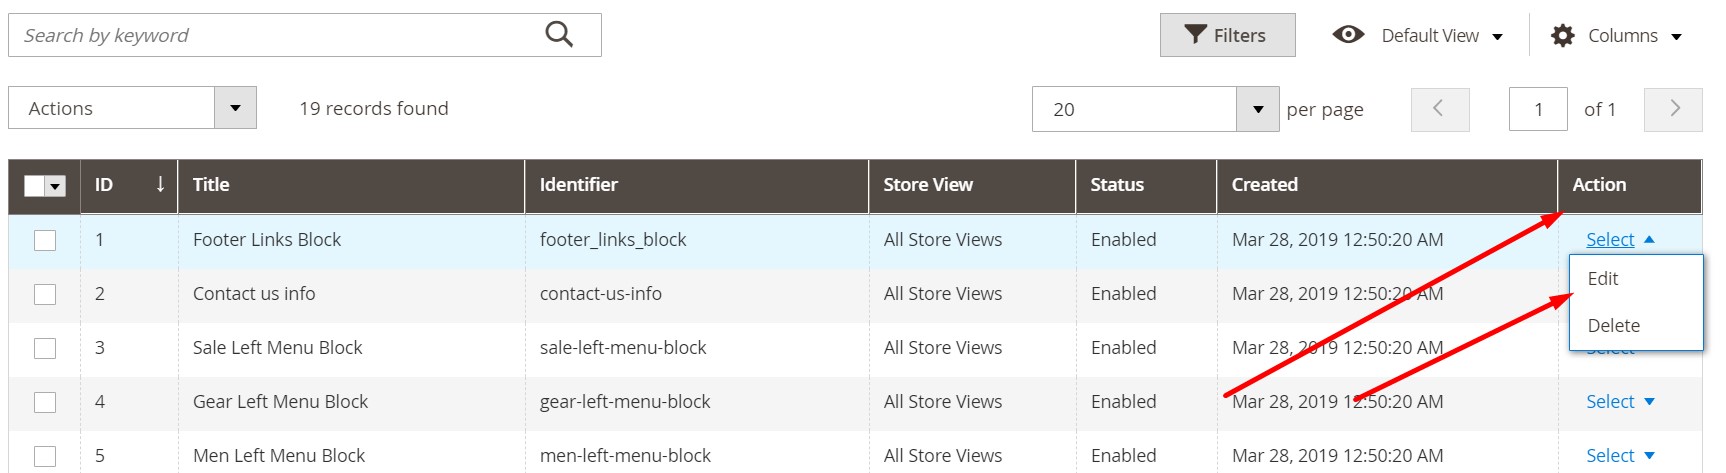
To find the section, go to Content -> Elements -> Blocks. Here, you can see a grid with all CMS blocks. All its control elements are common for most admin sections of Magento 2, but let’s take a look at the default grid view first. It includes the following nine columns:
- Checkbox – to select multiple blocks for mass actions;
- ID – each CMS block has an ID number;
- Title – and a name;
- Identifier – use this element to add a block to a page;
- Store View – a store view where a CMS block can be displayed;
- Status – shows whether a block is enabled or disabled;
- Created – creation date and time;
- Modified – modification date and time;
- Action – a column to edit or delete CMS blocks.
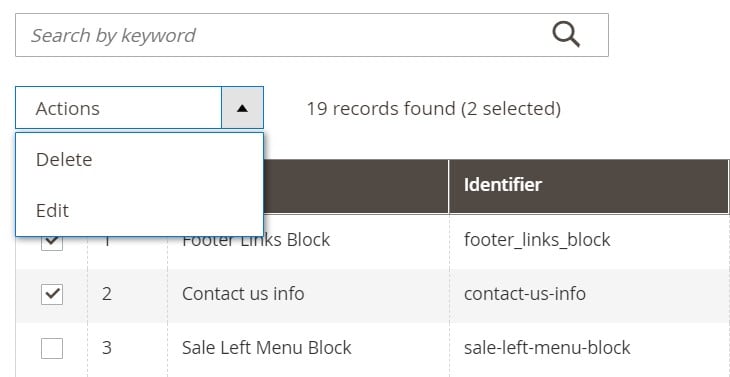
As for mass actions, they are the same as the ones available in the Action column. It means that you can quickly get rid of several CMS blocks simultaneously. At the same time, it is possible to edit them in bulk. Just tick several blocks and apply a mass action to them.
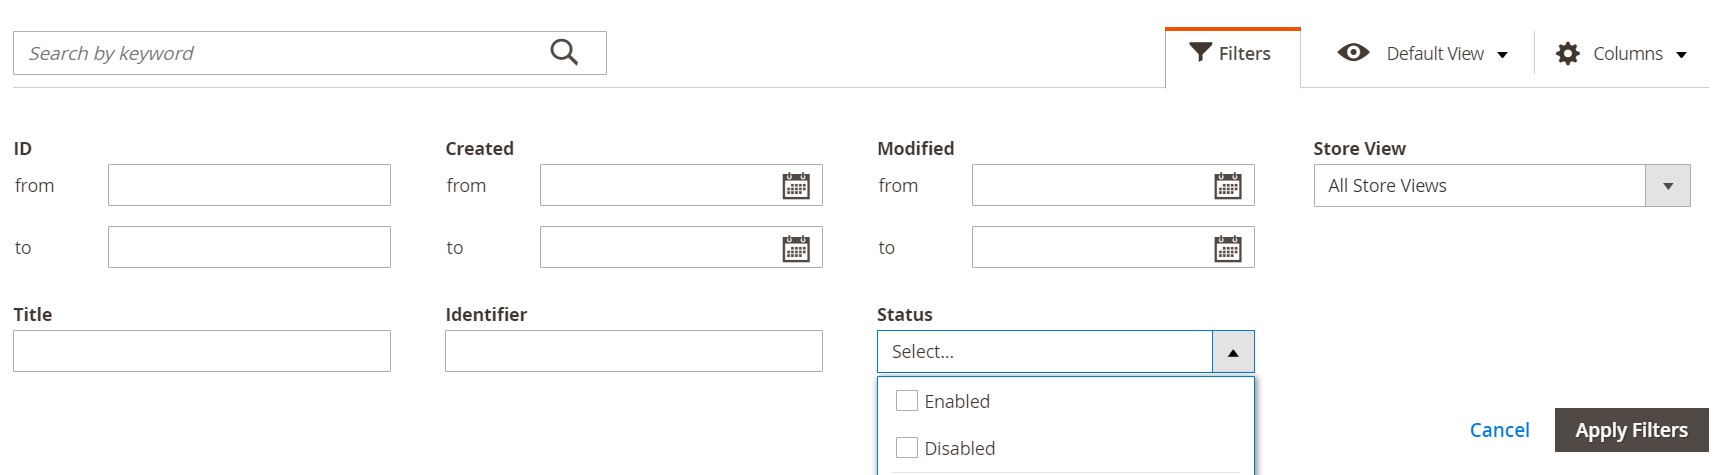
In the image above, you can also see a search field. Use it to narrow down the selection of CMS blocks. Type a keyword to display CMS elements you need.
If this feature seems limited, you can streamline filters. With Magento 2, you can filter out the grid content using each column. In the case of a dropdown list, you can select several options simultaneously, as shown below:
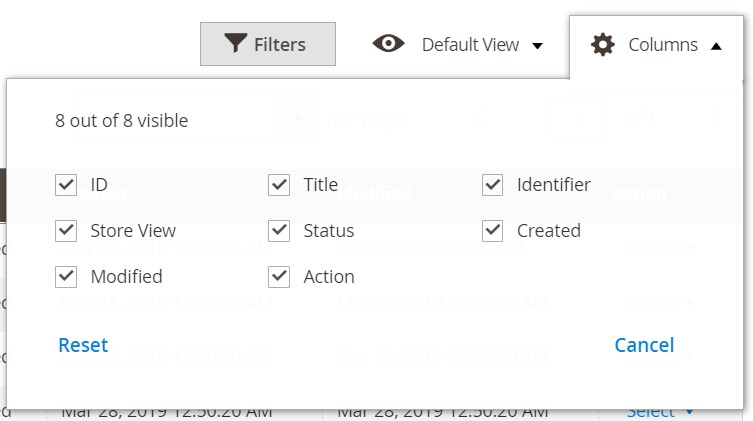
Note that it is possible to show/hide and the appropriate grid columns. Use a corresponding option that is available in the top right corner. You can show/hide all columns mentioned above except the first one.
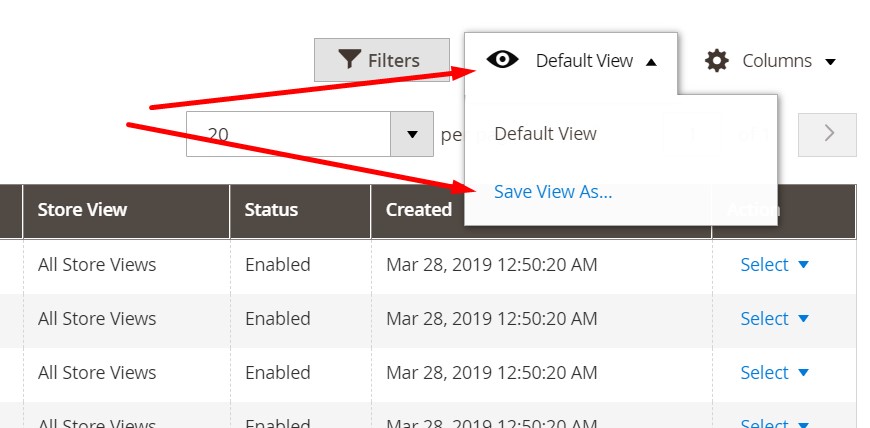
Change the default grid view and save a new one for further use. Use the following control element:
Standard pagination elements are also available where they are usually situated – above the grid.
How to add a CMS block in Magento 2
To add a new CMS block, hit the return to the main screen (Blocks) and hit ‘Add New Block.’
Enable your new CMS block, type its title and identifier, and choose a store view.
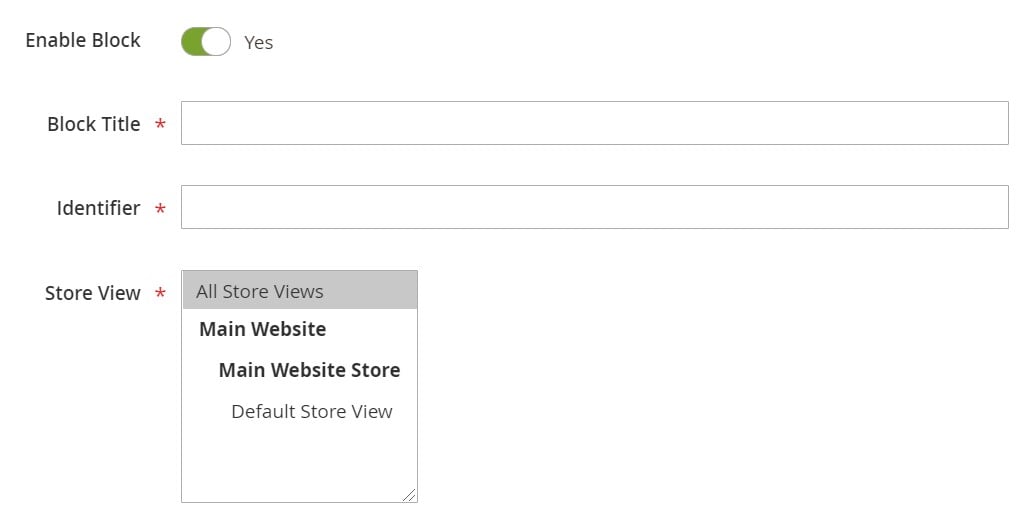
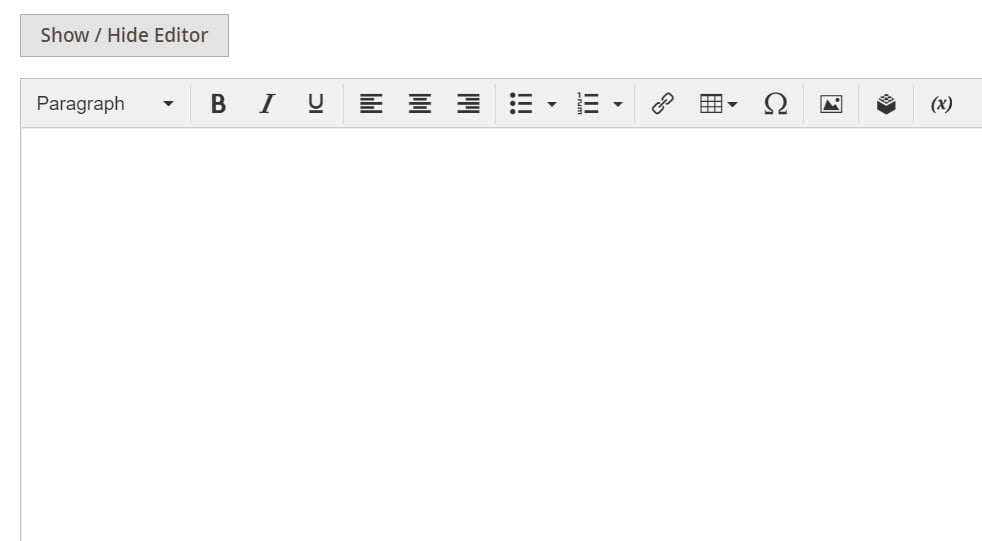
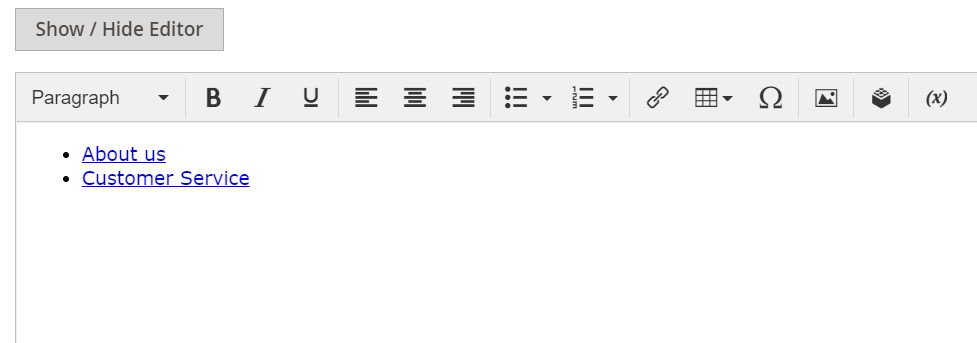
Next, you can use an editor to create a block. Add texts, tables, links, images, and other elements.
That’s it!
How to edit a CMS block in Magento 2
To edit an existing CMS block in Magento 2, go back to the Blocks screen and find an item you want to rework. In the Action column, choose Edit:
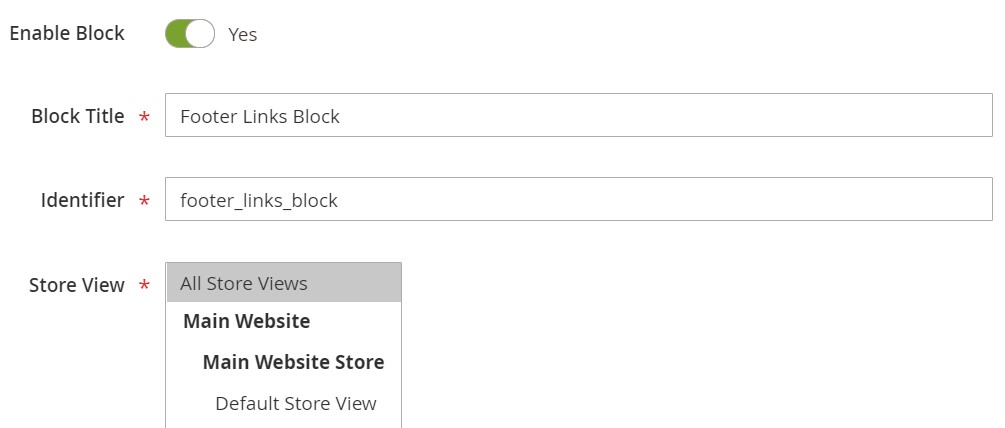
You can enable/disable the block as well as change its title, identifier, and store view.
Edit the block content using an editor.
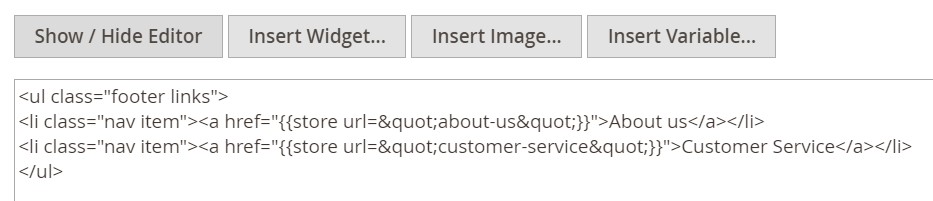
Alternatively, you can do everything with plain text and HTML.
How to Import Magento 2 CMS Blocks
Below, we shed light on how to import CMS blocks to Magento 2. The process is dramatically simplified if you use the Improved Import & Export extension. It is designed to enable the transfers of all the corresponding data from any external systems. At the same time, our plugin provides the ability to automate this process.
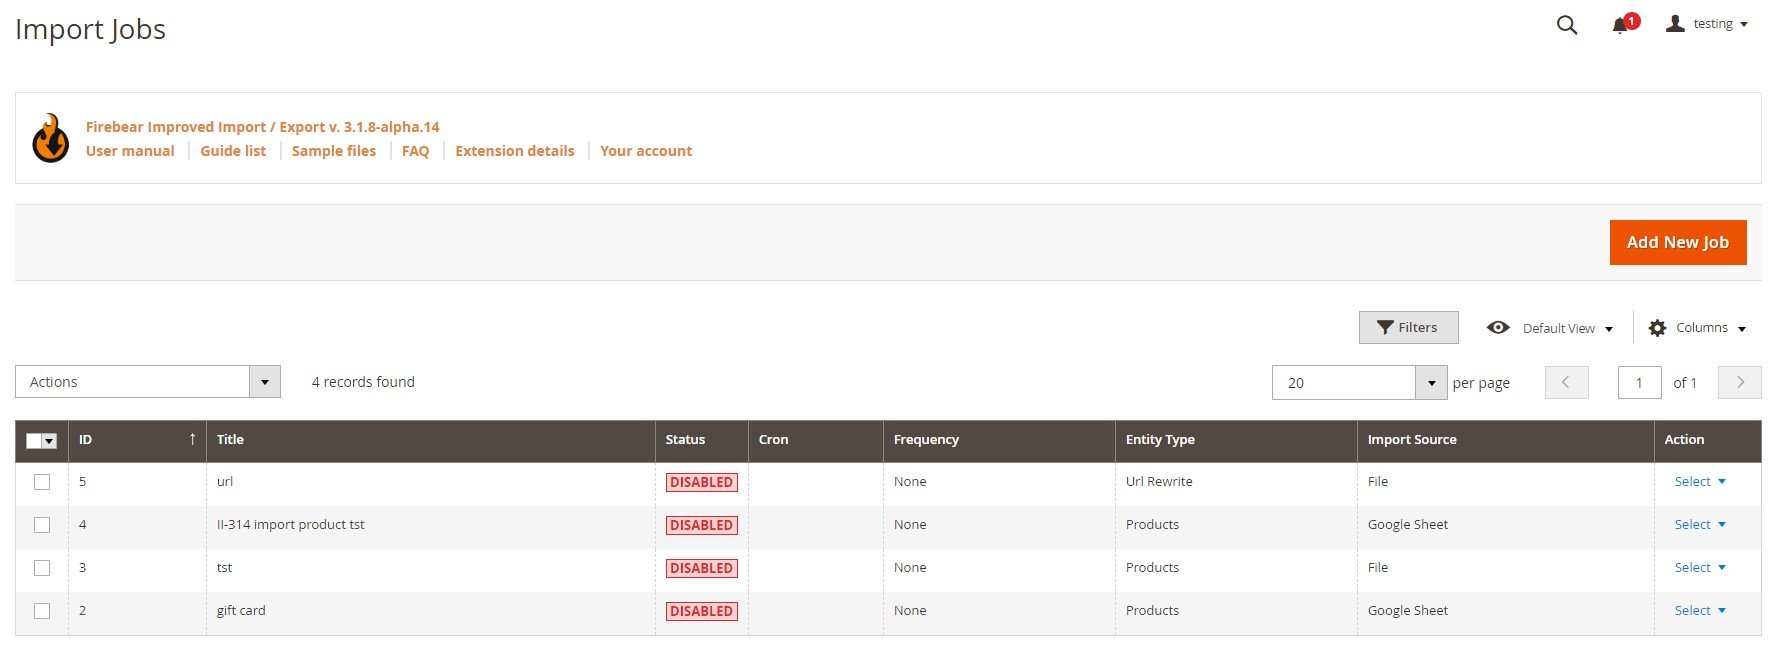
Go to System->Improved Import/Export->Import Jobs and click “Add New Job” to create a new import job.
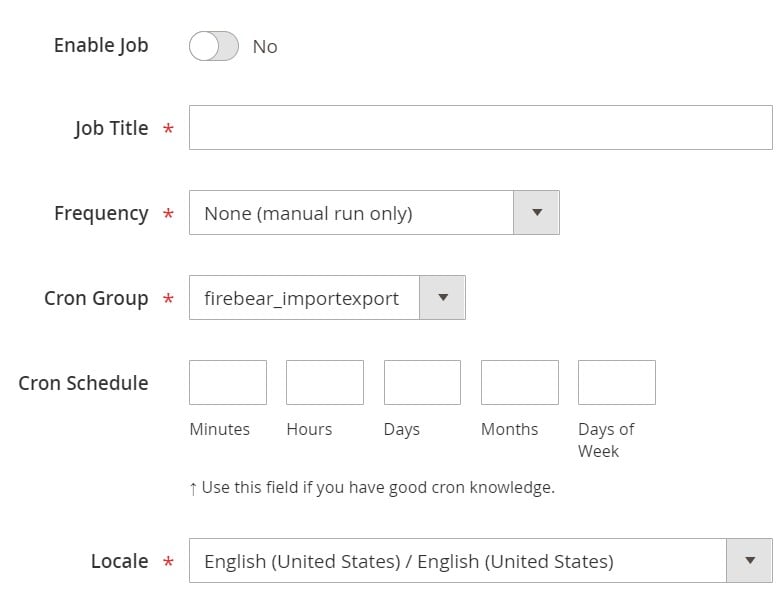
The system redirects you to a new screen with several tabs of settings. The first tab is General Settings. Here, you can enable your new import job. Next, specify its title and add a schedule of transfers. If you need to import CMS blocks to Magento 2 only once, leave this field empty. For recurring transfers, create a plan. Now, you can choose a language (locale) and enable/disable such features as unique URL generation, re-index, email notifications.
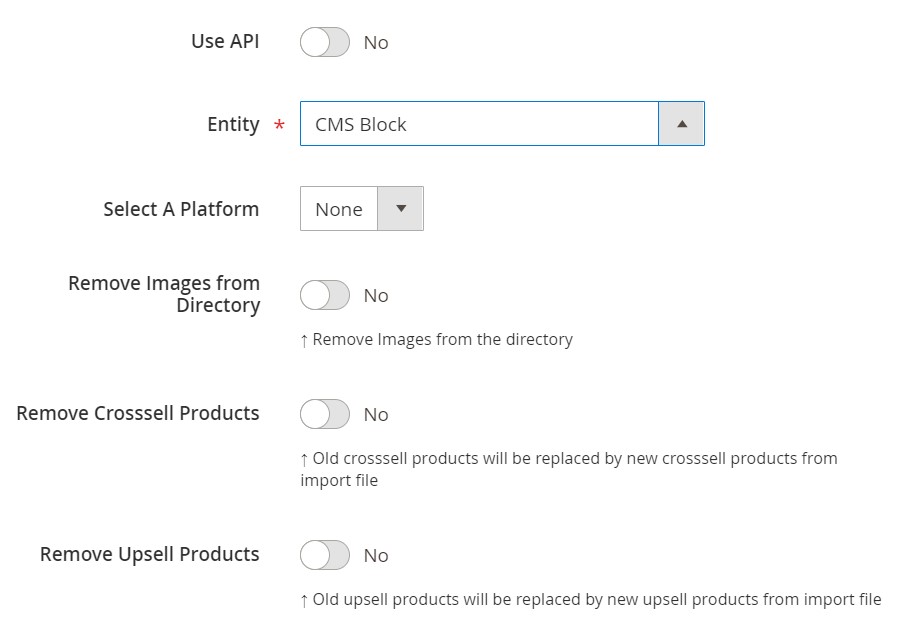
To choose CMS blocks as your import entity, go to the Import Settings section. You can also enable/disable API synchronization here. Another useful option is the ability to select a platform to import data from. In other words, you choose and apply a mapping preset, replacing third-party attributes with the ones used in Magento 2. We describe this feature below.
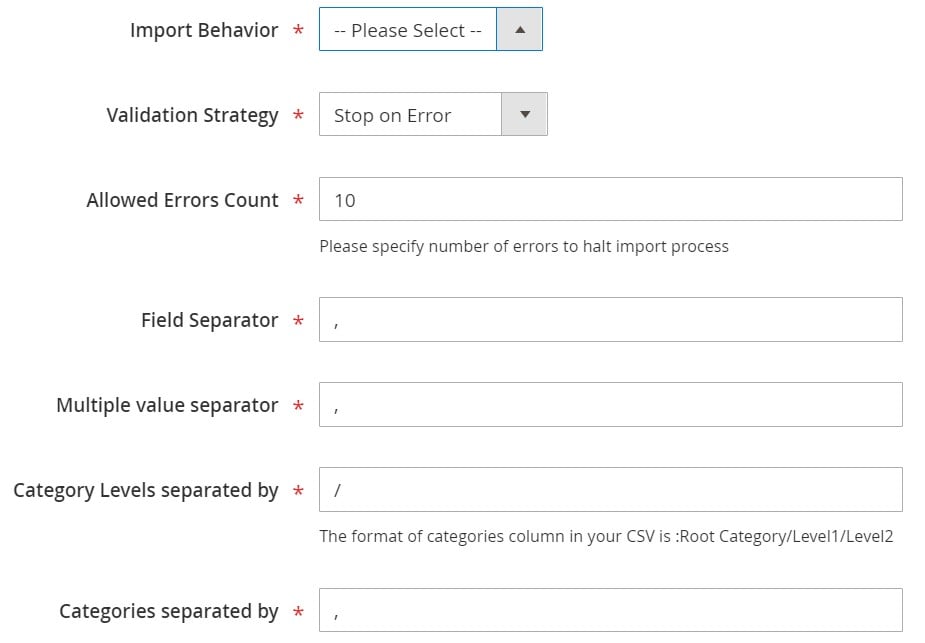
Now, proceed to the Import Behavior tab. Here, you can choose how to add new data. The extension lets you select one of the following options: Add/Update, Replace, or Delete. Next, choose a validation strategy, set a limit on errors, and provide your extension with separators from your import file.
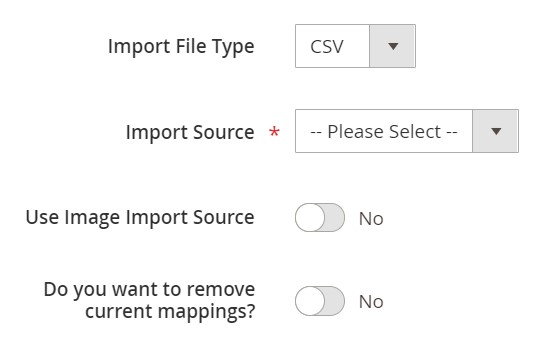
As for the Import Source section, it lets you choose the format of your import file. You can also select your import source: server, URL, Google Sheet, direct upload, or Dropbox.
When all options are configured, hit “Save & Run” in the top right corner of the screen. Now, you can import CMS blocks to Magento 2. For further information, please visit this page:
Get Improved Import & Export Magento 2 Extension
How to Export Magento 2 CMS Blocks
Now, let’s see how to export CMS blocks from Magento 2. The procedure also incorporates our extension. As for the module, it not only simplifies the process of CMS blocks export but also automates all further data transfers if necessary.
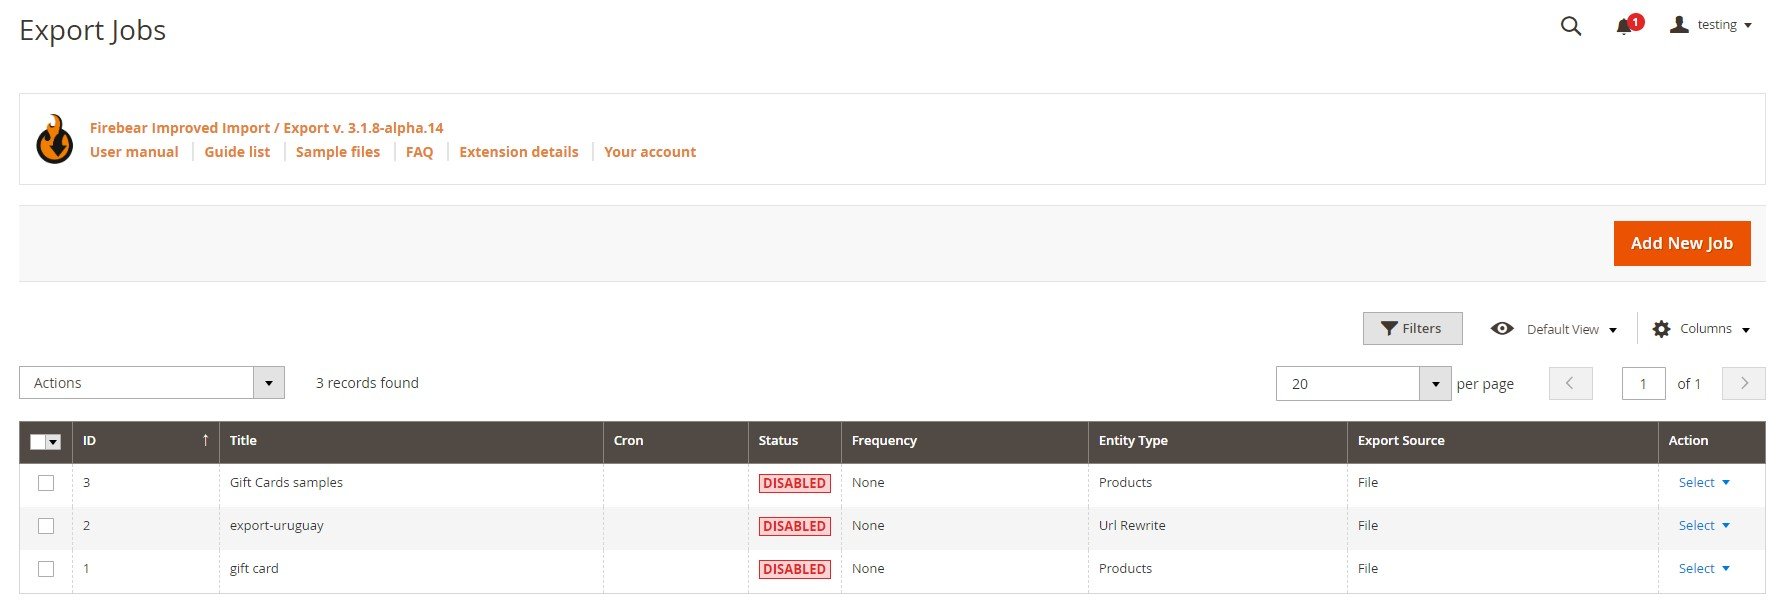
To start a new export job, click the “Add New Job” button under System->Improved Import/Export->Export Jobs.
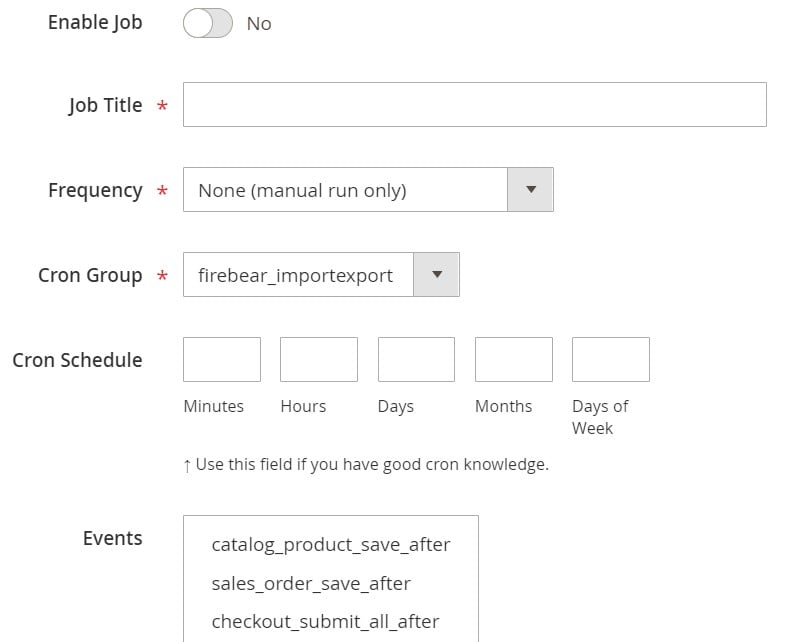
Now, you can turn on the new job. After that, specify its title and choose a frequency of export processes. If you need only one export, leave the field empty. The General Settings tab also lets you specify a file language and divide additional attributes.
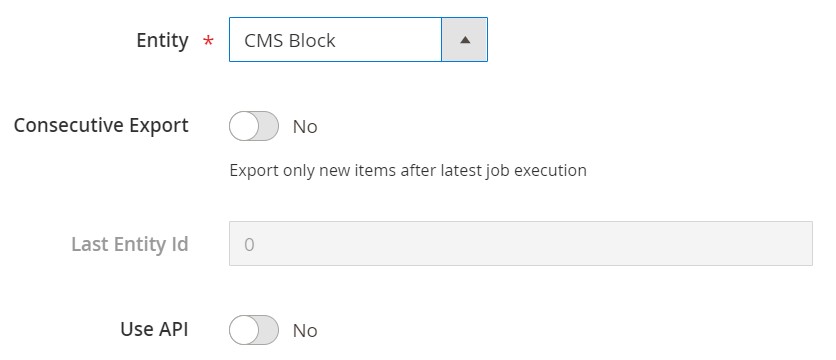
As for Export Settings, you can set Magento 2 CMS blocks as your entity here. Enable/disable ‘Consecutive Export.’
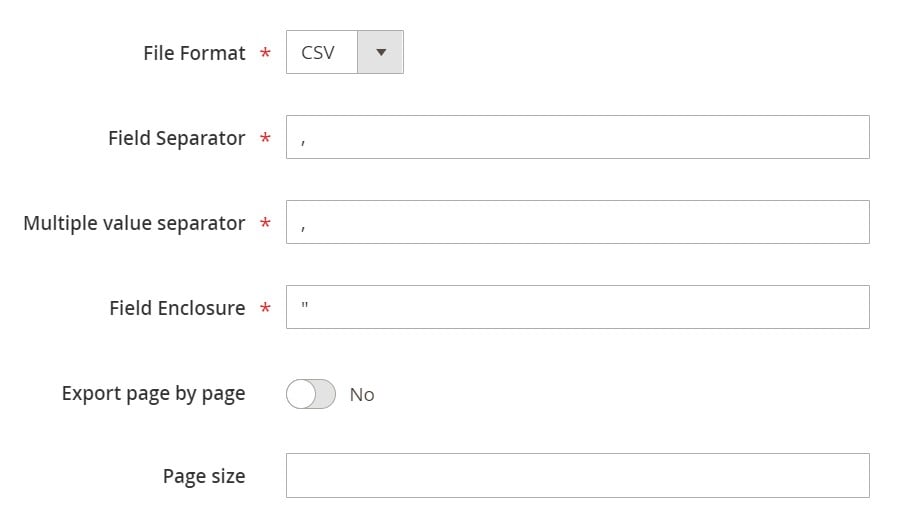
Now, you should select a file format required by an external system you want to provide data to. Also, specify separators it utilizes.
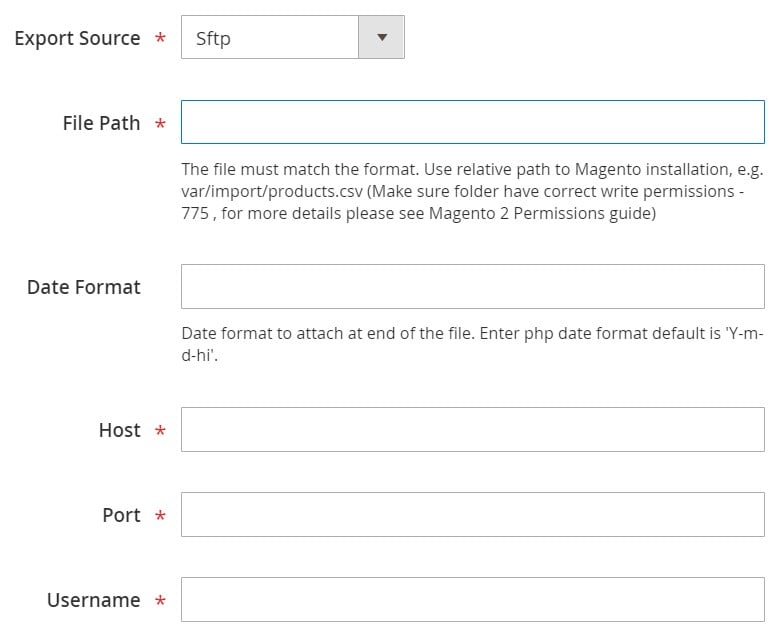
Under the Export Source tab, select FTP, SFTP, or a data file as a final destination. Check the connection if you use either the first or second option.
You can also map them and specify filters to make the data output more suitable for your partners.
When the new job is configured, click “Save & Run” in the top right corner of the screen. Now, you can export Magento 2 CMS blocks. Contact our support for further information:
Get Improved Import & Export Magento 2 Extension
Improved Import & Export Features
The Improved Import & Export extension is better than most existing import/export solutions, not to mention the default transfer tools of Magento 2 since it can transfer all possible entities to and from your e-commerce store. CMS block data exchange is only a small part of what our module can do. Below, you can see other opportunities our plugin provides.
Automated Import & Export Processes
We’ve just mentioned that our extension can automate import and export processes while you transfer CMS blocks. Other entities are not an exception. Our module offers two different ways of moving data automatically. Let’s see how both approaches are implemented.
Schedules
Schedules are the first feature that enables automation. The Improved Import & Export extension utilizes the default cron syntax for both import and export processes. As a result, you can completely automate all data transfers. Select a predefined interval or specify a custom one. Alternatively, you can create a profile with no schedule like in the example above. However, you can also leverage a manual launch any time you need to transfer data related to a job. Note that this feature works with both scheduled and unscheduled profiles.
Events
Event-based triggers are the second way to automate data transfers. With their help, you can enable real-time updates. Select a trigger that launches data transfers, synchronizing two systems right after a specific action takes place. It means that you can start the export of CMS blocks from Magento 2 right after a new block is generated. You can find more information here: How to Run Magento 2 Import or Export After Specific System Event or Process.
Advanced Mapping Features
Since most e-commerce systems and related platforms have unique standards for storing data, you cannot freely transfer information between them. Therefore, it is necessary to edit a data file before every transfer. You should do that according to the requirements of a platform you want to connect your store with. At the same time, you should edit the information provided for your Magento 2 store. Usually, this process takes lots of time unless you use Improved Import & Export. The module lets you apply all changes right in the backend section. Furthermore, you can do that in just a few clicks. Let’s see how the extension helps.
Mapping Presets
Improved Import & Export offers mapping presets – predefined schemes that let you change third-party attributes within a few clicks. You only have to select a proper solution while configuring a new job. Our module does the other work for you. It scans the input data for third-party attributes and replaces them with the internal ones. When it comes to export processes, presets are useful as well. They automatically change Magento 2 attributes to ones utilized within an external platform. From the perspective of an administrator, everything looks as follows:
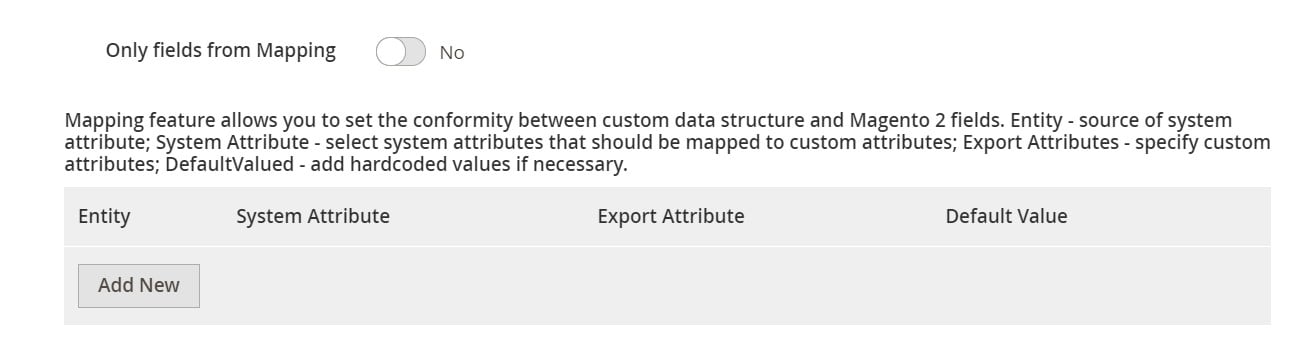
Matching Interface
If you cannot find the necessary preset, use a matching interface of the Improved Import & Export Magento 2 extension. The corresponding section is available in every import and export job. To solve the issue of different attribute standards, you have to follow these three simple steps:
- select an entity,
- choose a system attribute,
- specify a corresponding external designation.
This gif image shows how everything works:
The extension also lets you add hardcoded (default) values. Thus, you can provide all imported items with the same values for the selected attribute. For instance, you import products from different store views. Our extension lets you move them to the same store view with the help of the hardcoded values feature.
Filters
As for filters, they help you create even more suitable output. Use them to eliminate unnecessary information. Add a new filter – click ‘Add Filter.’ Next, select an entity and a system attribute. Specify filtering parameters to create the desired output that contains no unrequired data. Create as many filters as you need. Filter parameters differ depending on the selected attributes.
Attribute Values Mapping & Editing
It is also possible to map or edit attribute values in the Magento 2 backend if you use the Improved Import & Export Magento 2 extension. With its help, you can effortlessly eliminate incorrect designations that prevent import processes. For mapping purposes, it provides an interface similar to the one described above. Thus, you can choose a third-party attribute value and specify a corresponding internal one in front of it to make an import file suitable for Magento 2. You can find a more specific description of this feature here: Attribute Values Mapping.
If attribute values mapping is not enough, you can rely on editing. Our extension provides the ability to add a prefix/suffix to multiple attribute values as well as split or merge them. You can combine these rules and apply them to numerous values in bulk. Note that it is possible to create conditions to make the output more tailored for your needs. Attribute values editing is described in this article: How to Modify Attribute Values During Import and Export in Magento 2.
Category Mapping
Now, let’s say a few words about category mapping. This feature enhances the default product import by introducing the ability to replace third-party product categories with internal ones. It won’t help you with Magento 2 CMS blocks, but you may reduce headaches related to product data transfers with the feature. So, how does it work?
Category mapping lets you modify information from external catalogs right in the Magento 2 backend. You take a third-party product category and specify a replacement. From the perspective of a backend user, the feature looks as follows:
And if your store lacks necessary categories, you can create them on the fly. Choose a parent category and type a new name. That’s it! The procedure is described here: Category Mapping.
Attributes On The Fly
If your data files lack attributes, it is no longer a problem. The Improved Import & Export extension has a feature that fixes this issue. Now, you create attributes on the fly, adding missing information to data files. You only need to customize the following general form:
Attribute|attribute_property_name:attribute_property_value|…
We shed light on this procedure in the following article: Product attributes import.
Extended Connectivity Options
Below, we explain another vital aspect of Improved Import & Export. Our module introduces extended connectivity options that essentially expand the default data transfer opportunities of Magento 2.
Multiple File Standards
With our extension, you can use numerous file formats to exchange data between your e-commerce store and external systems. While Magento 2 works with CSV only, our module lets you leverage XML, JSON, ODS, and Excel. As a result, you are no longer forced to convert everything into CSV and vice versa!
Another essential improvement is related to file archives. The Improved Import & Export Magento 2 extension can unzip compressed data automatically. There is no need to extract updates before transferring them to Magento 2.
Multiple File Sources
Support for multiple file sources is another essential improvement available with our extension. To make your data transfers flawless, it lets you streamline the following sources:
- FTP/SFTP (both local or remote servers);
- Dropbox (as well as iCloud, Google Drive, Box, OneDrive, and Amazon Drive);
- URL.
Alternative Ways of Import & Export
However, file transfers are not the only way of import and export. In addition to them, our module also offers API connections and integration with intermediary services. Note that both are not available in Magento 2 by default.
Improved Import & Export lets you build direct REST API connections to transfer data between your e-commerce website and any third-party systems. The module also uses SOAP and GraphQL if necessary.
Google Sheets, Office 365 Excel, and Zoho Sheet are services that can become providers of data. Our extensions can connect to them, transferring updates. Below, you can see an example of Google Sheets integration:

Also, note that you can combine the extended connectivity options with all the extension’s features. And the Improved Import & Export plugin introduces even more enhanced opportunities with support for WSDL and WADL.
The following video displays the module in action:
Final Words
Now, you know how to add and edit Magento 2 CMS blocks. You can use them to enhance your “Meet the Team” or “Contact Us” pages. You must admit that this task is simple and intuitive. However, transferring them between Magento 2 and other systems is a little bit more complicated unless you use the Improved Import & Export extension. To find out more facts about our module, follow the link below. Contact our support to discuss your particular business case and possible customizations:
Get Improved Import & Export Magento 2 Extension