Magento 2 Backend Exploration: CMS Pages

- E-Commerce, Magento 2, Our extensions

magento 2 cms pages add edit import export

Below, we dive deep under the hood of Magento 2 backend, exploring its Content section. In this article, we describe Pages – a screen where all CMS pages are stored. Below, you can discover how the appropriate grid looks. Besides, we explain how to manage its content. The article also touches upon such aspects as the creation of new CMS pages. If you are wondering how to transfer them to your e-commerce store, you can also find the answer below.

Magento 2 CMS Pages

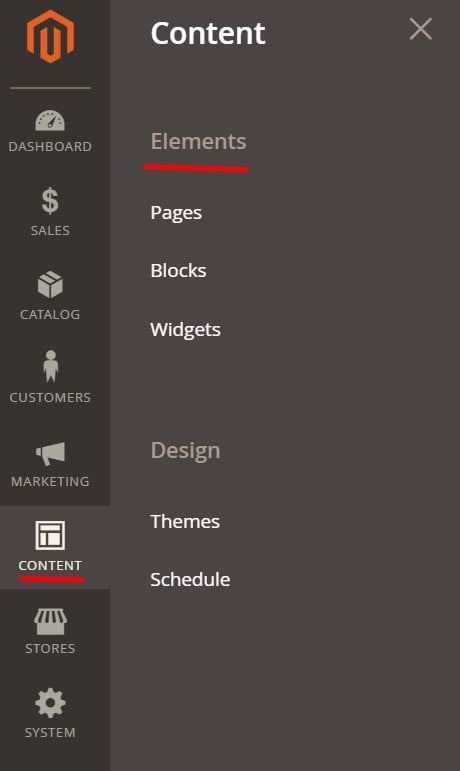
Your pages, blocks, and widgets are available under Content-> Elements. Each content type has its grid, so let’s explore them individually.

 Magento 2 cms pages

Magento 2 Pages

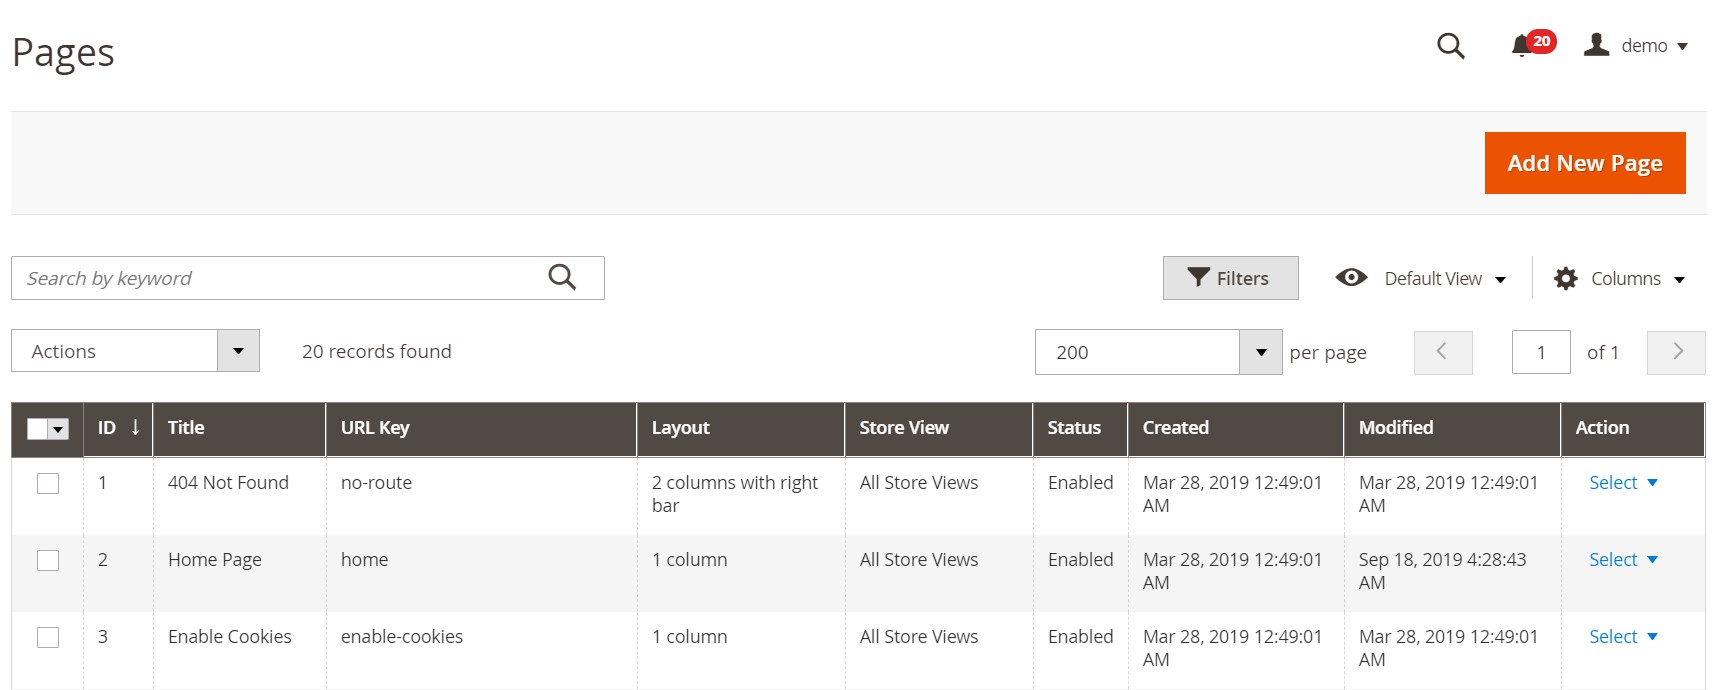
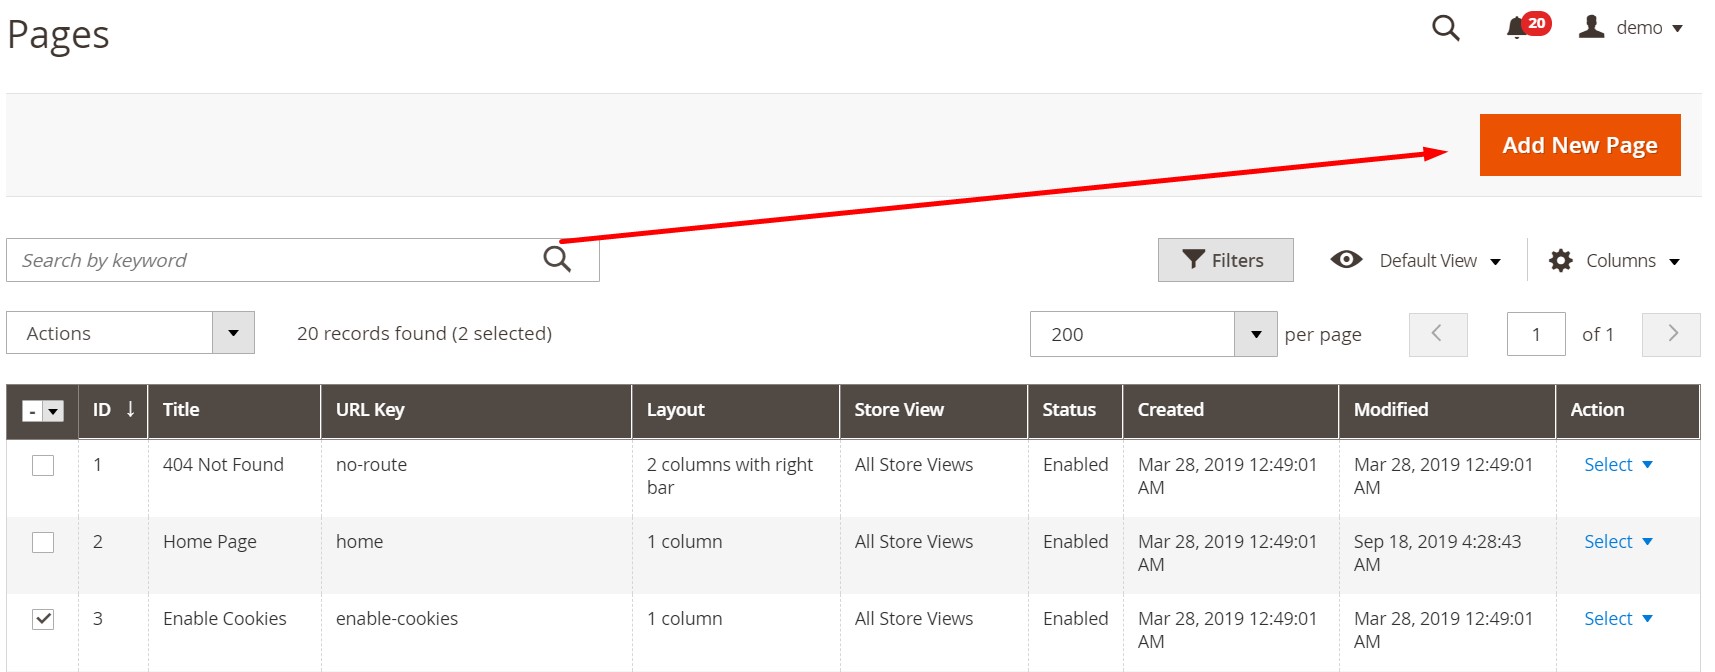
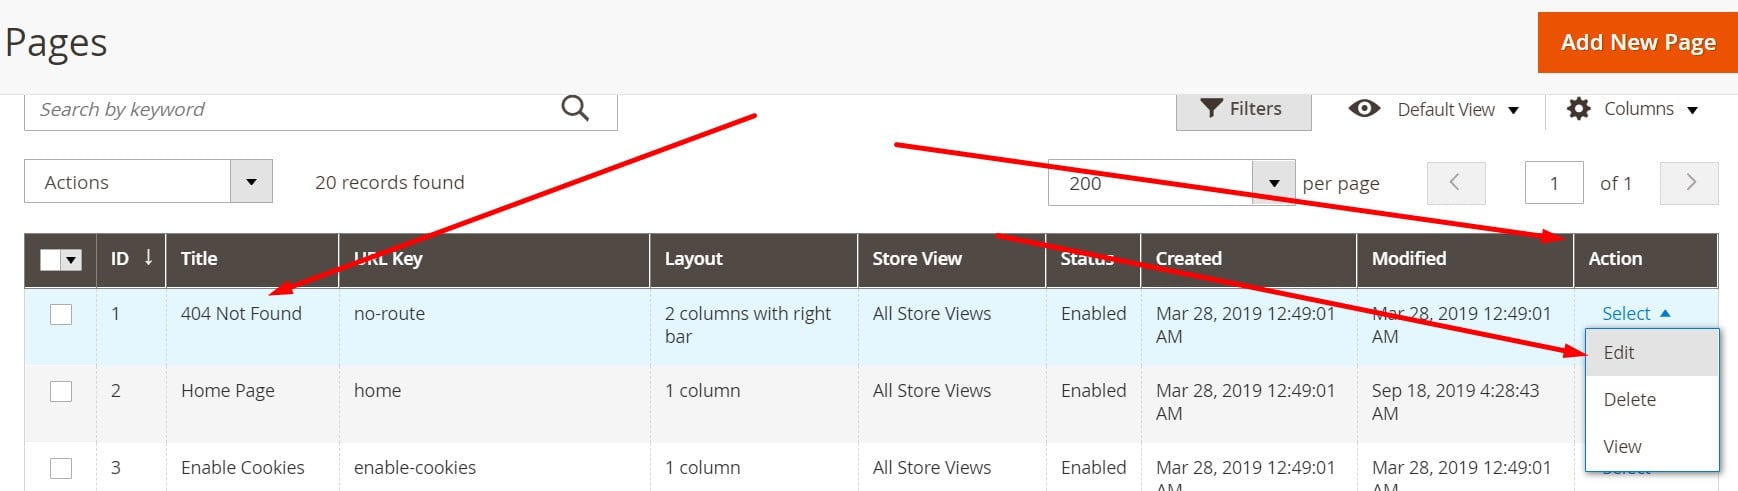
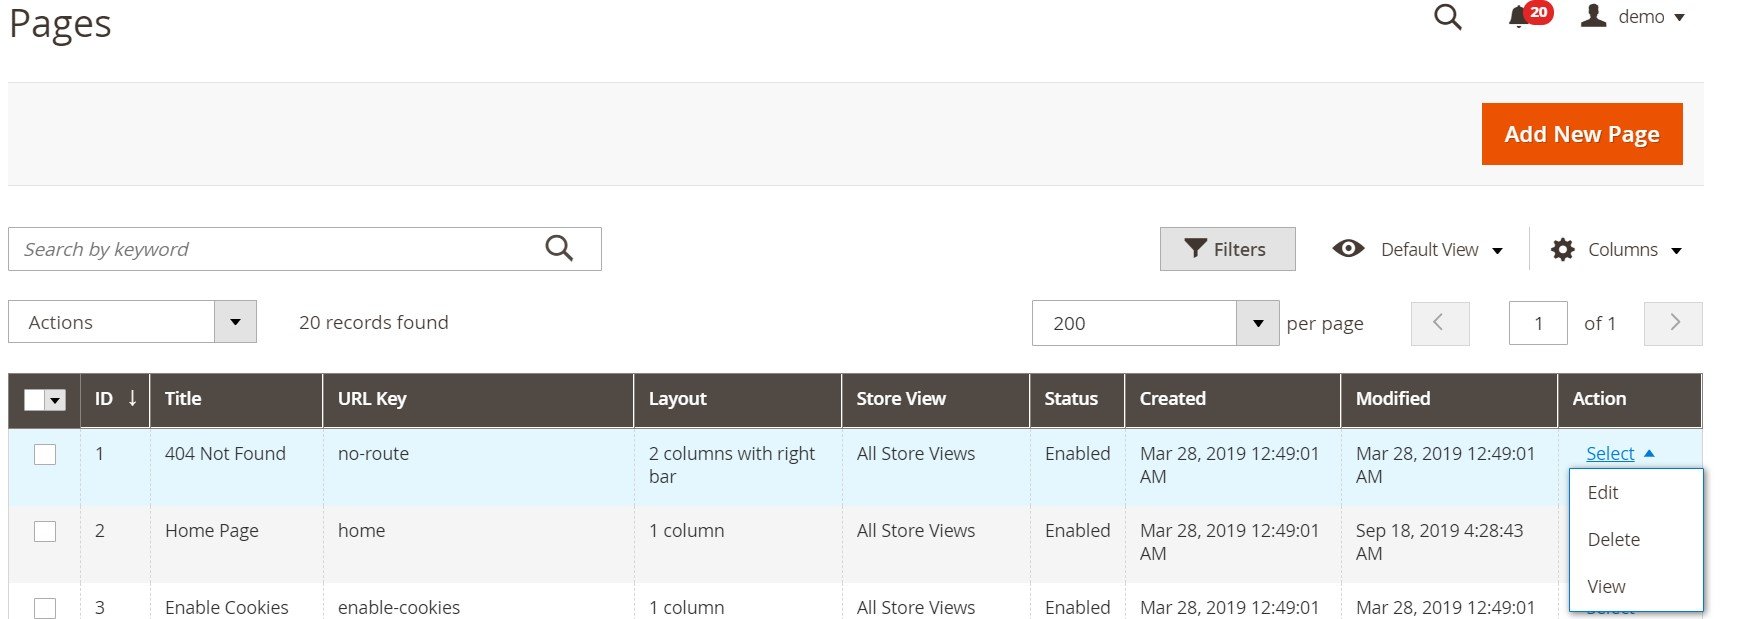
You can find this section under Content -> Elements -> Pages. It consists of a grid with CMS pages and its control elements. 

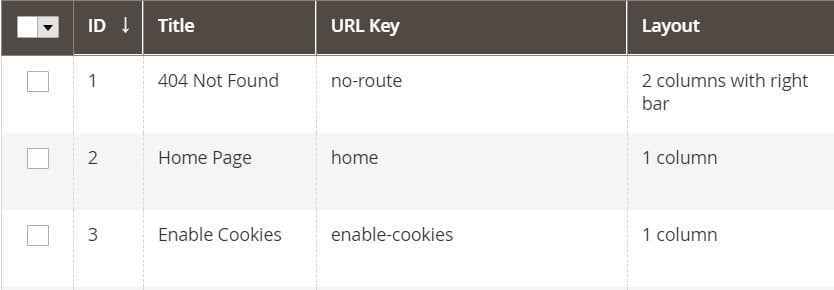
The default grid look includes the following ten columns:

  • Checkbox – check multiple items here to apply mass actions;
  • ID – each CMS page has an ID number;
  • URL Key – a URL key of each page;
  • Layout – a page structure;
  • Store View – a store view where a CMS page is available;
  • Status – Enabled or Disabled;
  • Created – date and time of creation;
  • Modified – date and time of modification;
  • Action – you can edit, delete, or view each CMS page.

 Magento 2 cms pages

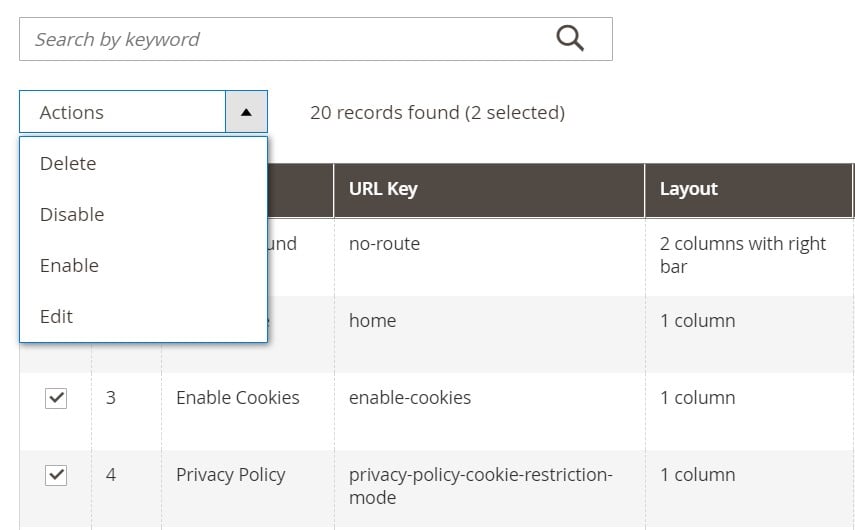
The Magento 2 CMS pages grid lets you delete, disable, enable, or edit several elements simultaneously. Just tick some pages and apply a mass action to them.

 Magento 2 cms pages

In this image, you can see a search field. It lets you narrow down the selection of CMS pages in the grid by typing a keyword.

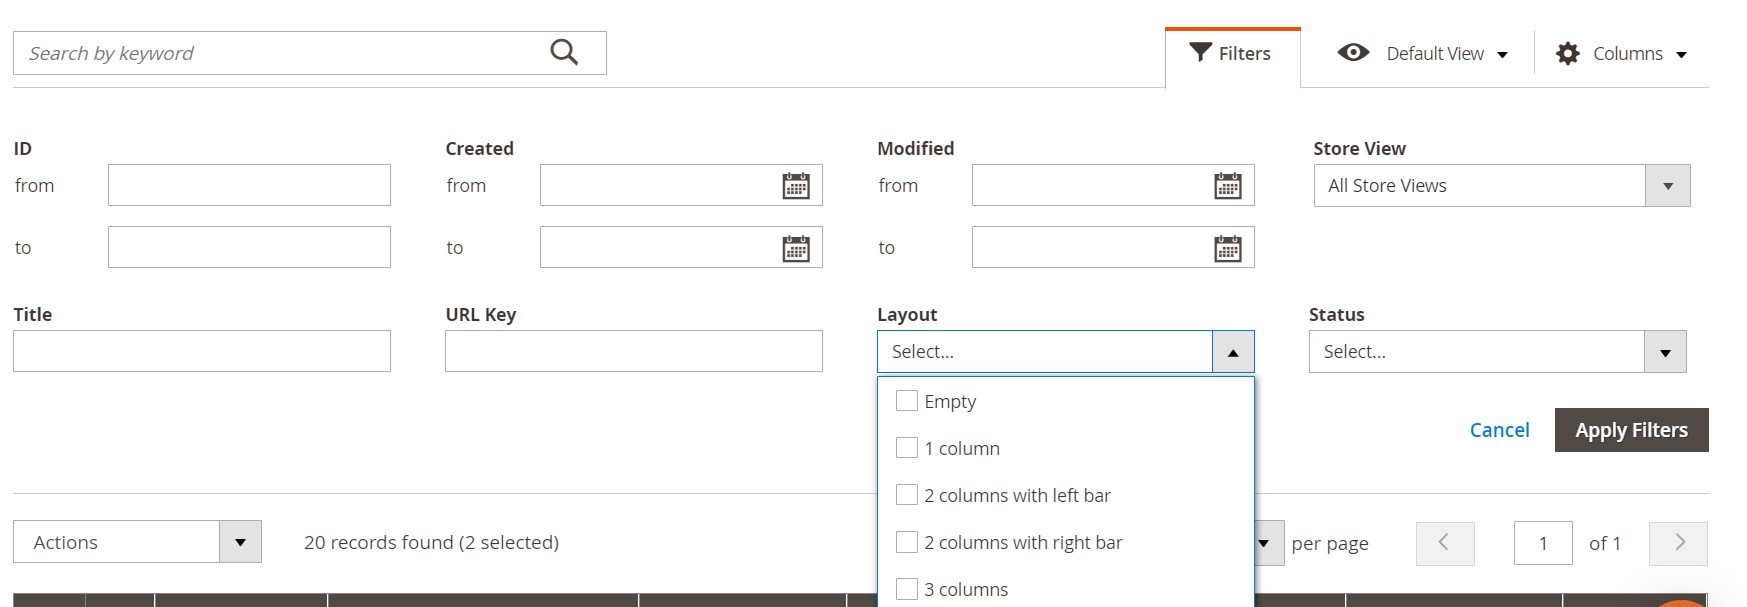
At the same time, you can use more detailed filters. The grid lets you apply a filter for each column. Note that some dropdown lists allow you to select several options. For instance, you can display CMS pages with 1 column and 3 column layout simultaneously, hiding other options. 

 Magento 2 cms pages

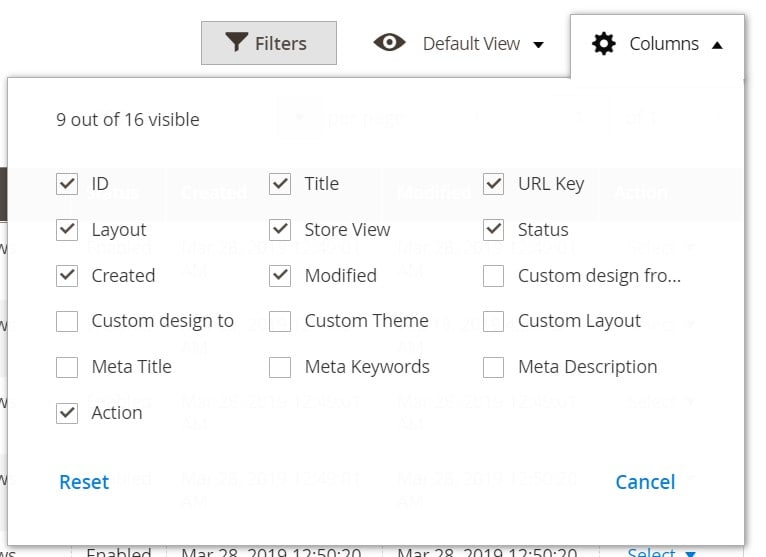
However, you can show/hide particular filters along with the grid’s columns. The corresponding option is situated in the top right corner above the grid. It lets you enable/disable the following columns: ID, Title, URL Key, Layout, Store View, Status, Created, Modified, Custom design from, Custom design to, Custom Theme, Custom Layout, Meta Title, Meta Keywords, Meta Description, Action.

 Magento 2 cms pages

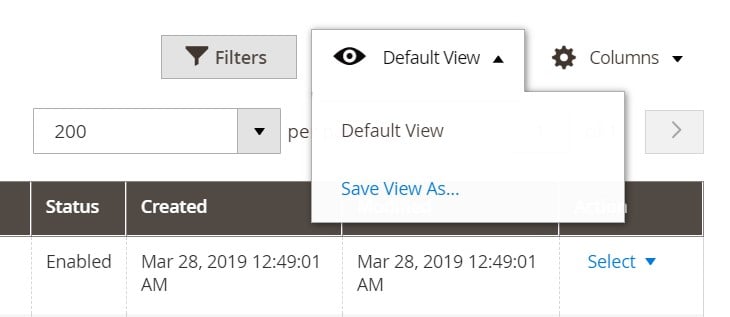
After changing the grid view, you can save it as custom, as shown below:

 Magento 2 cms pages

Of course, there are also standard pagination elements available above the grid. 

How to add a CMS page in Magento 2

To add a new CMS page in Magento 2, hit the corresponding button on the top right corner of the screen:

 Magento 2 cms pages

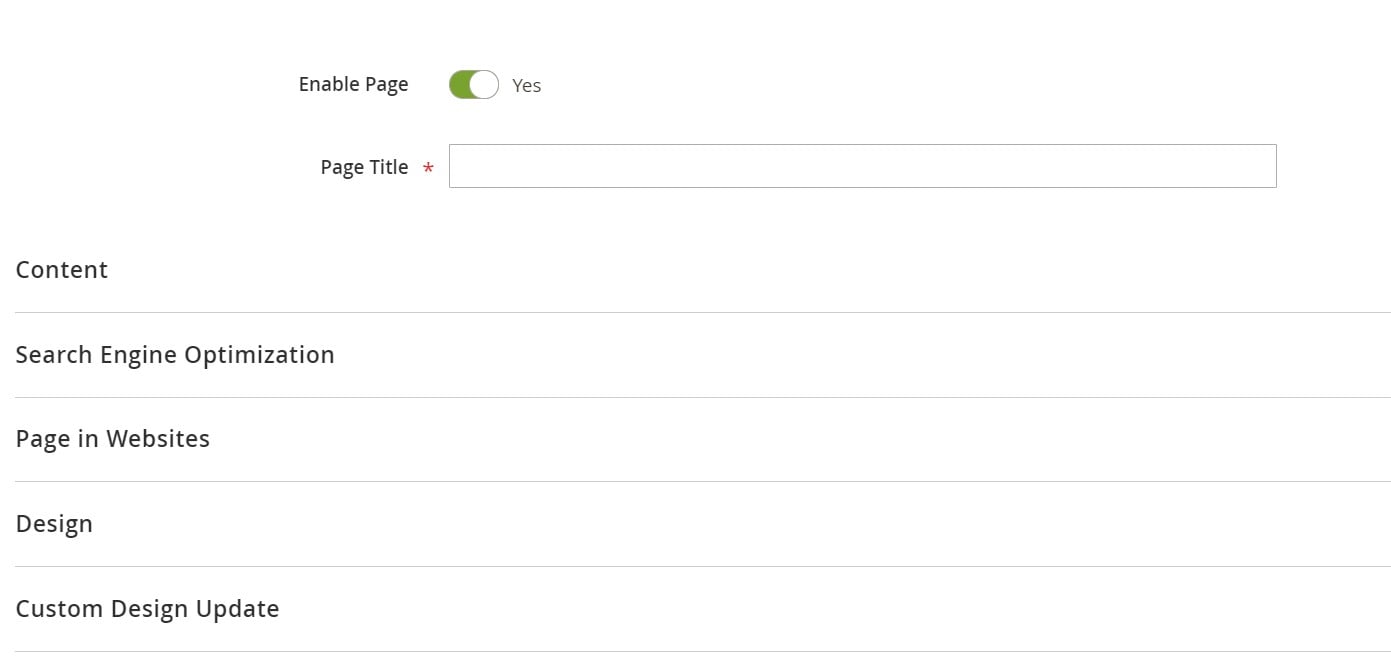
The system redirects you to a new screen where you can enable/disable your new page and add its title. Five more tabs of settings include Content, Search Engine Optimization, Page in Websites, Design, Custom Design Update. Let’s explore each one. 

 Magento 2 cms pages

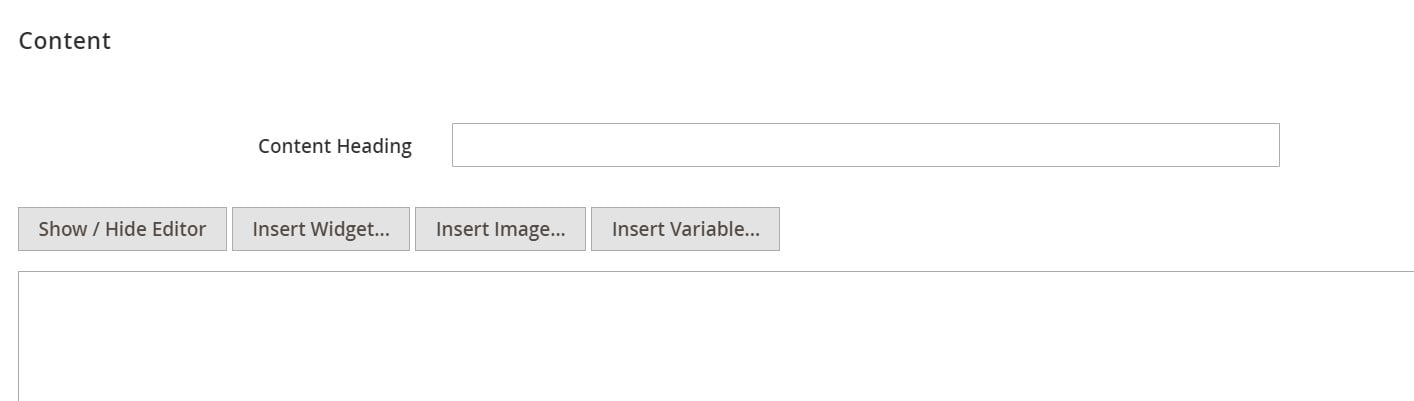
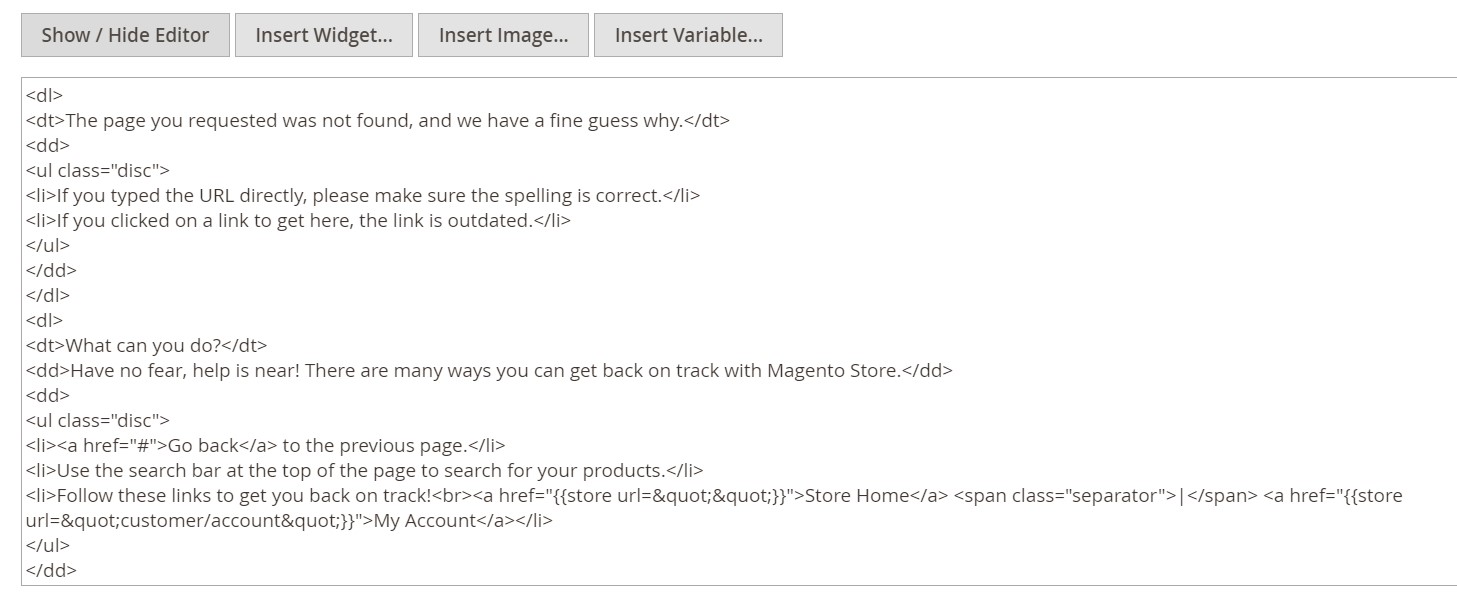
Under the content tab, you can specify its heading and insert widgets, images, and variables. It is also possible to enable/disable editor. 

 Magento 2 cms pages

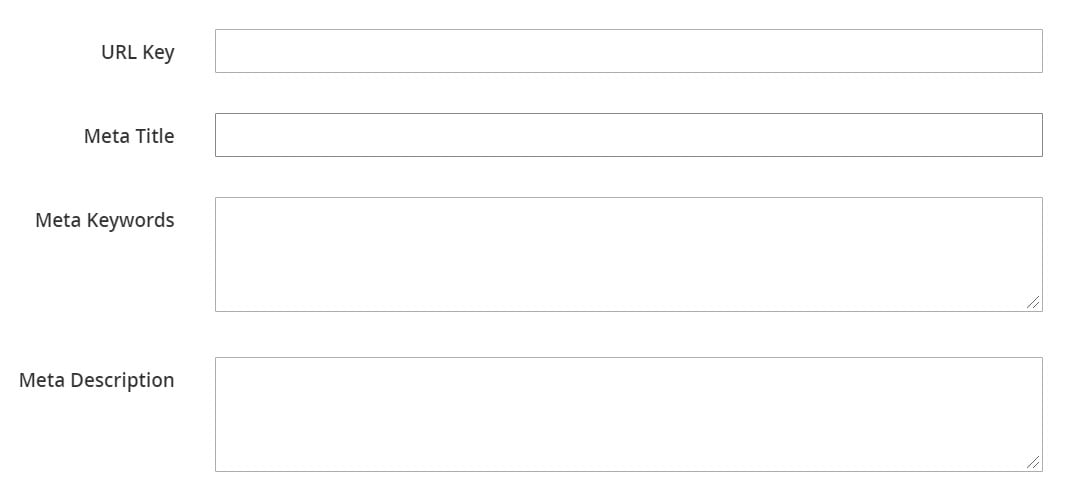
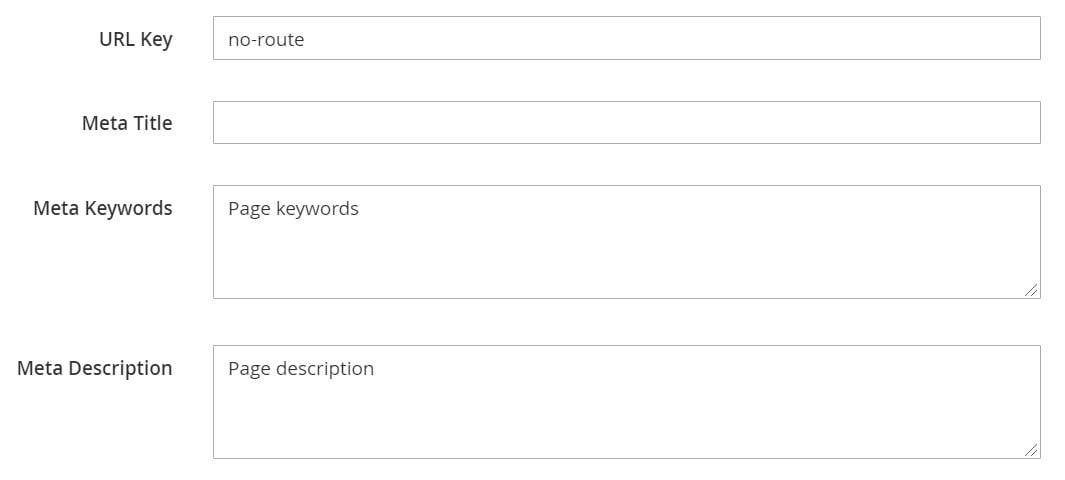
The SEO section provides the ability to specify such page elements as URL key and metadata (title, keywords, and description).

 Magento 2 cms pages

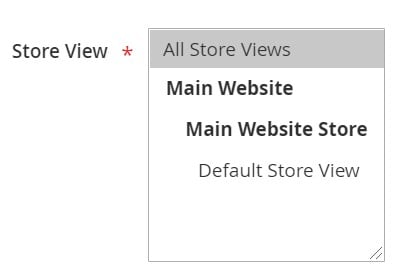
The Page in Website tabs lets you specify a website to display your new Magento 2 CMS page on.

 Magento 2 cms pages

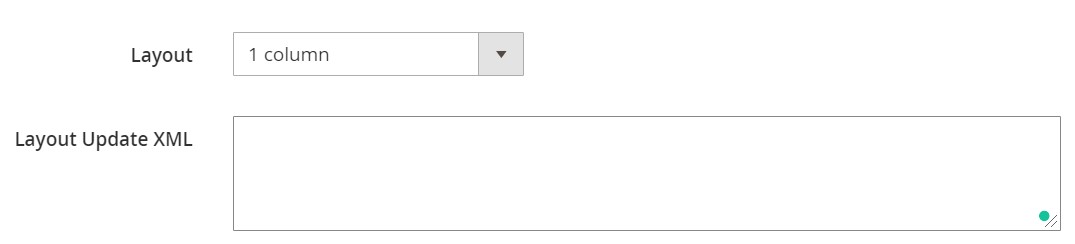
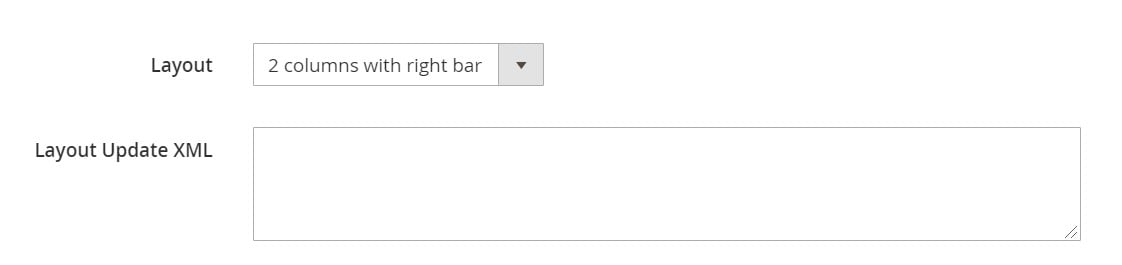
Under the Design tab, you can select a page layout (1, 2, or 3 columns) and specify a Layout Update XML.

 Magento 2 cms pages

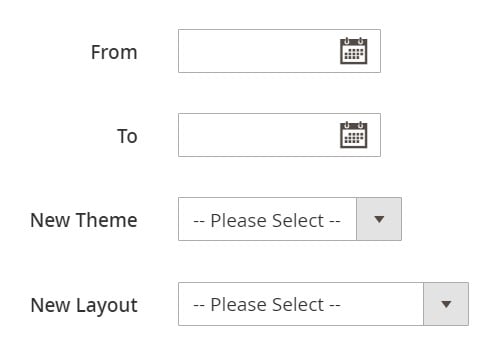
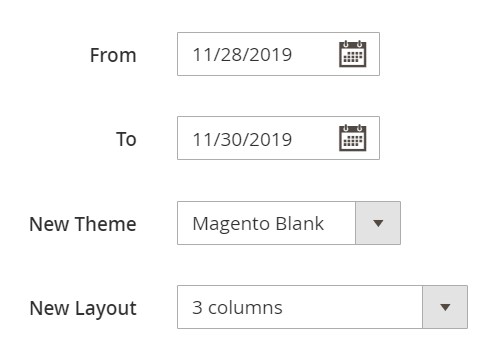
As for Custom Design Update, it provides options necessary for selectin a period to apply your new update as well as dropdowns with new themes and layouts to choose. 

 Magento 2 cms pages

How to edit a CMS page in Magento 2

If you don’t know how to edit an existing CMS page in Magento 2, here is a brief explanation. First of all, return you the Pages screen and find an item you want to rework. In the Action column, select Edit, like displayed below:

 Magento 2 cms pages

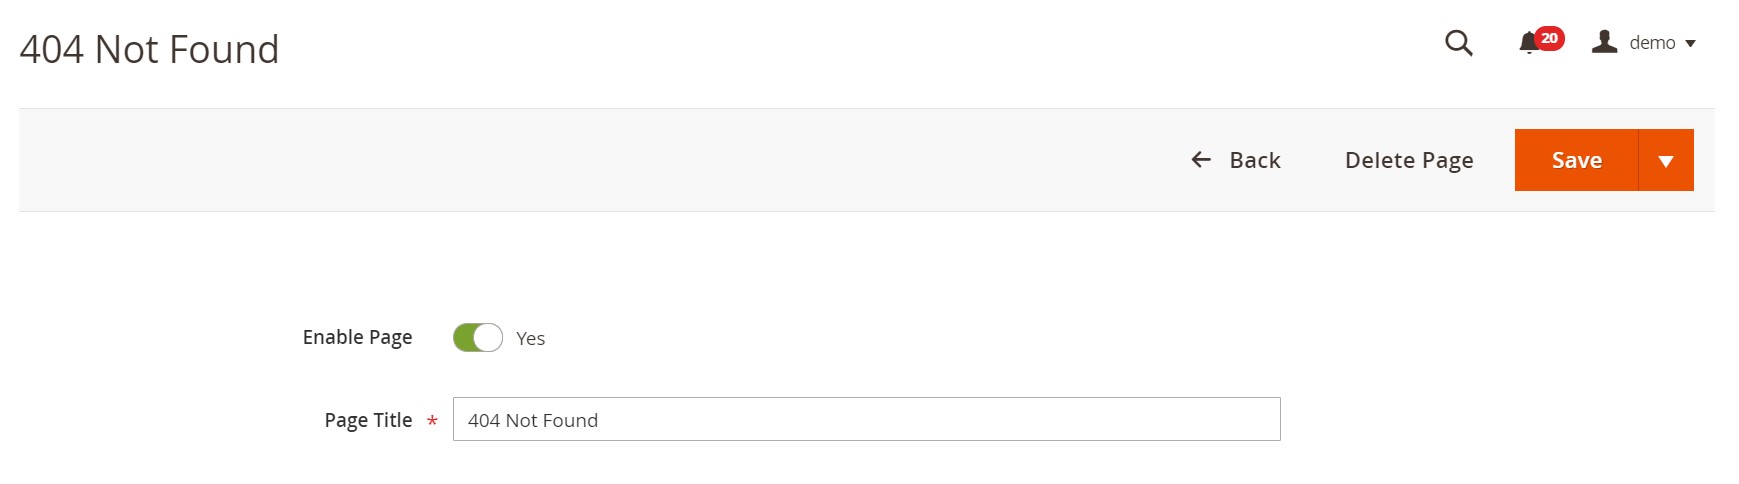
You are on the same screen as we’ve just described above. You can enable/disable the page as well as change its title.

 Magento 2 cms pages

Edit content with editor:

 Magento 2 cms pages

or without it:

 Magento 2 cms pages

Add/edit SEO parameter:
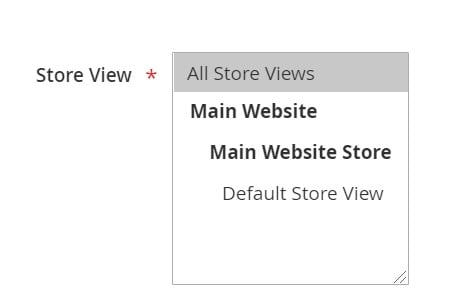
 Magento 2 cms pages

Change store views:

 Magento 2 cms pages

Apply a new layout

 Magento 2 cms pages

And add a design update
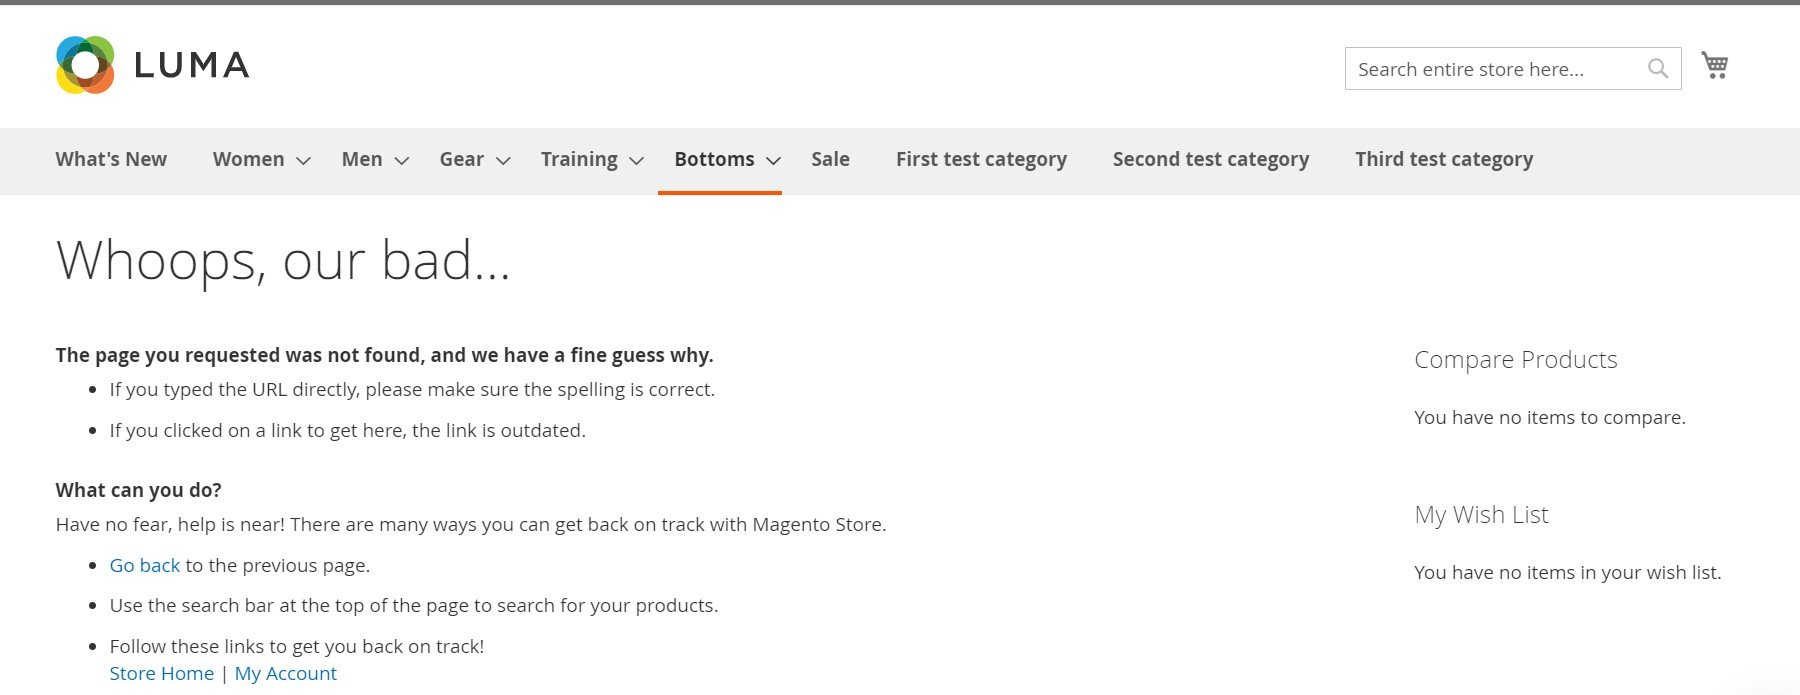
Magento 2 cms pages

How to view a CMS page in Magento 2

You also have to return to the Pages screen and find a CMS page you want to see. In the Action column, select View instead of Edit.

 Magento 2 cms pages

You are redirected to the frontend.

 Magento 2 cms pages

How to Import Magento 2 CMS Pages

Now, let’s take a look at how to import CMS pages to Magento 2. This procedure is no longer a problem if you use the Improved Import & Export extension. Our module lets you transfer all the corresponding data from any external systems as well as automate the process.

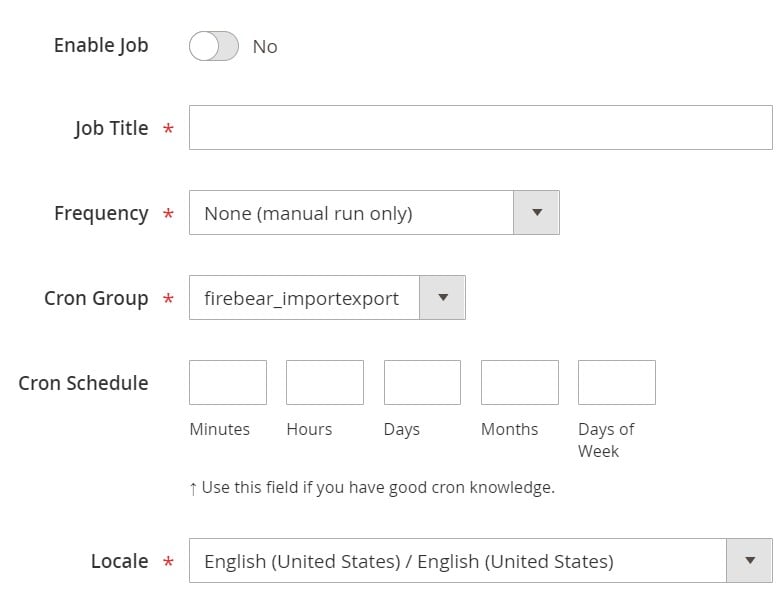
You only need to create a new import job and configure it. Go to System->Improved Import/Export->Import Jobs and click “Add New Job.”

 Magento 2 CMS Pages import

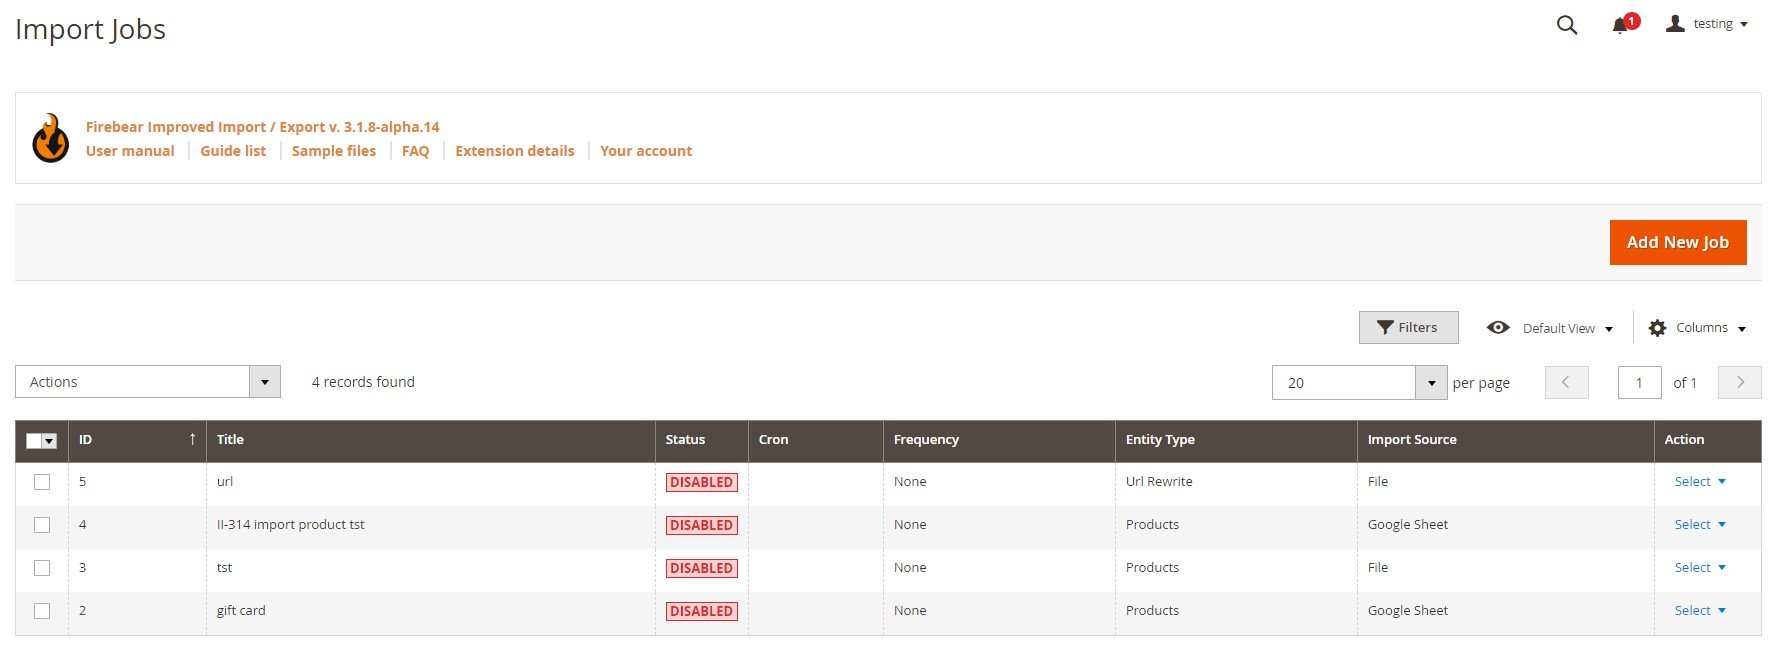
On a new screen, you can see General Settings along with several more tabs. Let’s review their content. 

Under the General Setting tab, you can enable your new import job as well as specify its title and create a schedule of transfers. If you don’t need more than one import procedure, leave this option blank. If you want to transfer CMS pages to Magento 2 regularly, create a schedule of updates. Next, choose a language (locale), and enable/disable unique URL generation, re-index, email notifications depending on your needs.

 Magento 2 CMS Pages import

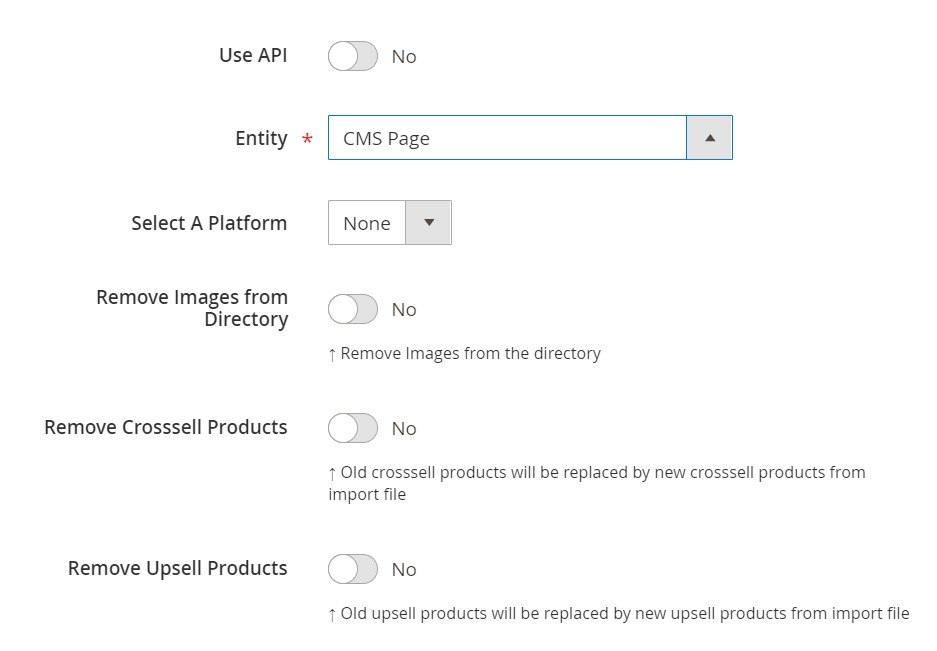
Proceed to the Import Settings section to choose CMS pages as your import entity. The tab also lets you enable/disable API synchronization and select a platform to import data from. The latter provides the ability to apply a mapping preset, replacing third-party designations with the ones used in Magento 2.

 Magento 2 cms pages import

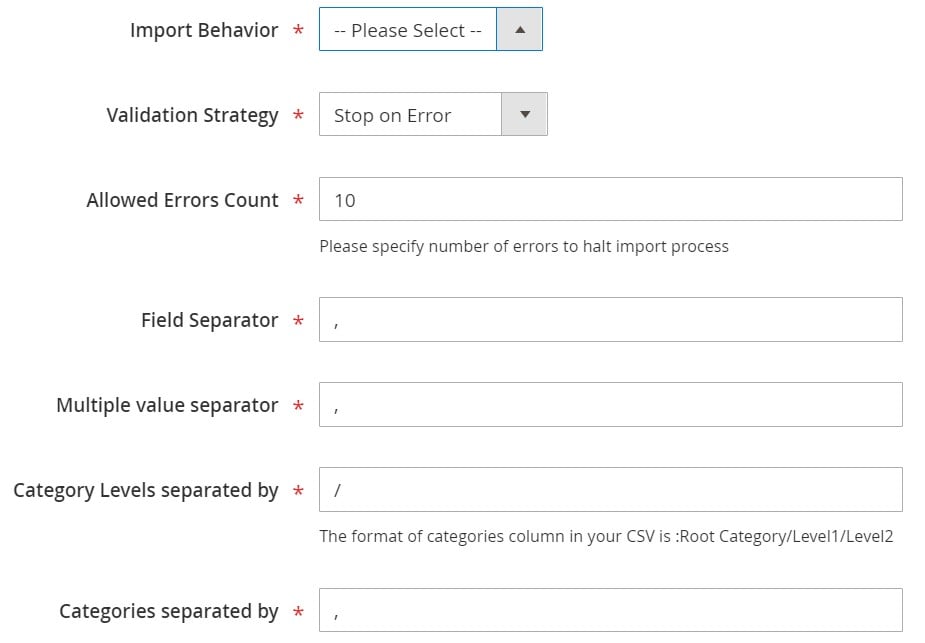
Now, go to the Import Behavior tab to select one of the following three options: Add/Update, Replace, or Delete. The extension lets you choose a validation strategy, specify a limit on errors, and type separators.

 Magento 2 CMS Pages import

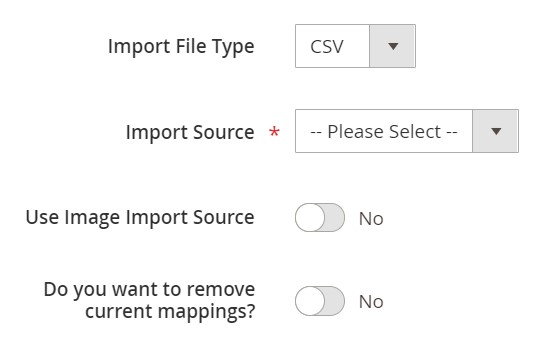
After that, you can switch to the Import Source section. Choose CSV or another standard as your import file type. Next, Specify your import source: server, URL, Google Sheet, direct upload, or Dropbox. 

 Magento 2 CMS Pages import

Hit “Save & Run” in the top right corner of the screen to import CMS pages to Magento 2. For further information, please visit this page:

Get Improved Import & Export Magento 2 Extension

How to Export Magento 2 CMS Pages

Now, let’s describe how to export CMS pages from Magento 2. As you might have already guessed, our plugin comes in handy once more. Follow these steps to achieve your goal:

Hit the “Add New Job” button Under System->Improved Import/Export->Export Jobs to create a new export job.

 Magento 2 CMS Pages export

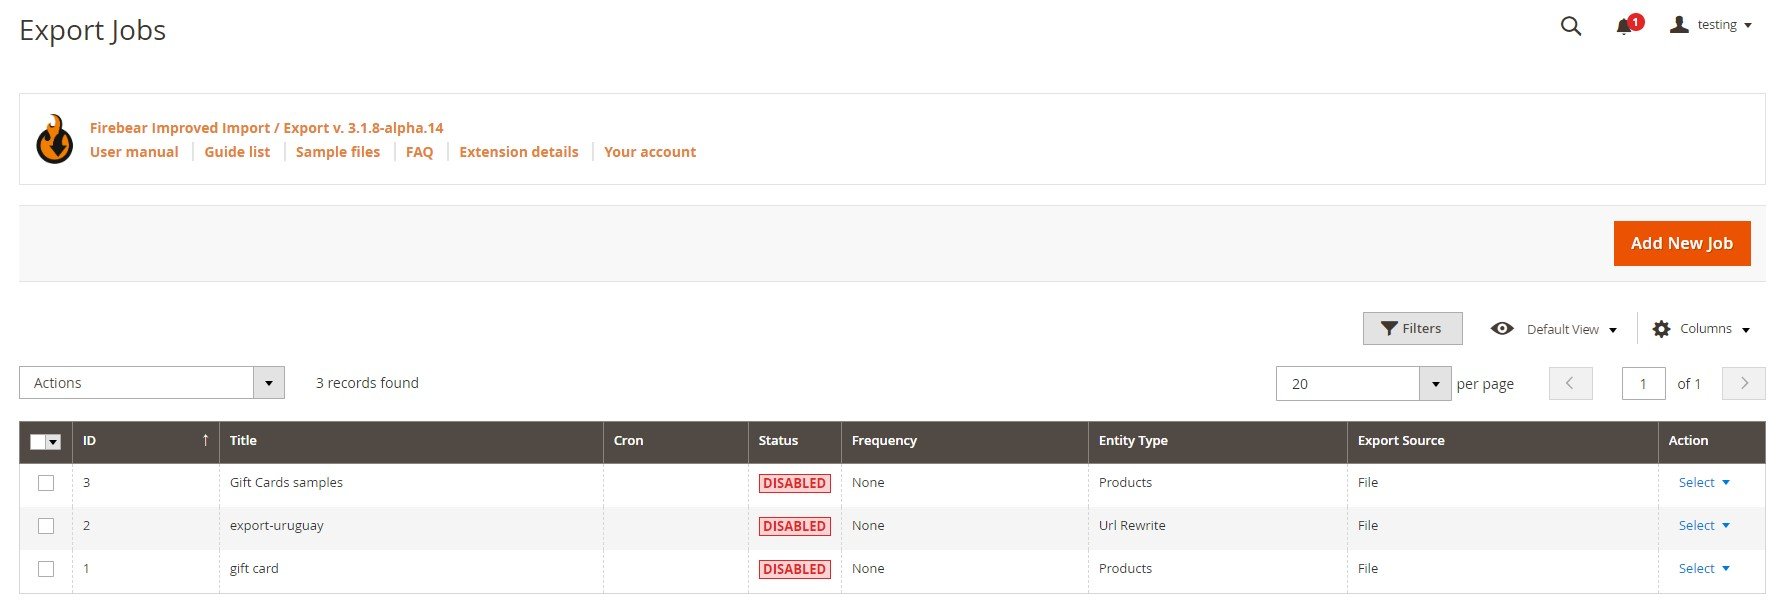
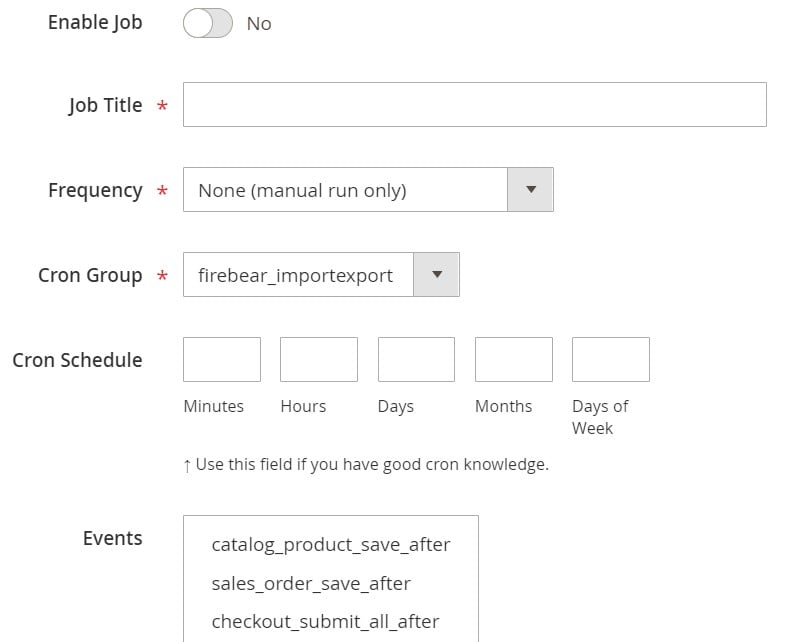
Enable the job and type its title in the General Settings. Choose a frequency of export processes or leave the field empty if it is a one-time procedure. You can also specify a file language as well as divide additional attributes. 

 Magento 2 CMS Pages export

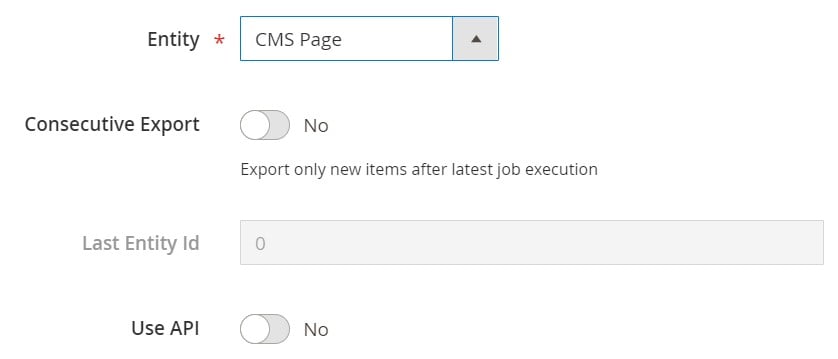
Now, proceed to Export Settings. Here, you can specify Magento 2 CMS pages as your entity. ‘Consecutive Export’ is another option available under this tab.

 Magento 2 cms pages export

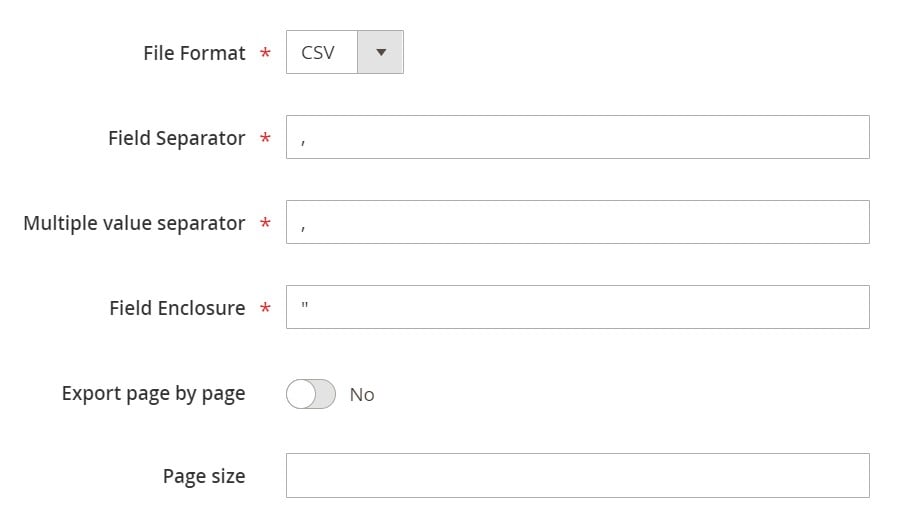
Next, select the format of your export file and specify separators under the Export Behavior tab.

 Magento 2 CMS Pages export

As for the Export Source tab, it lets you select FTP, SFTP, or a data file as a final destination. In the case of the first two options, check the connection.

 Magento 2 CMS Pages export

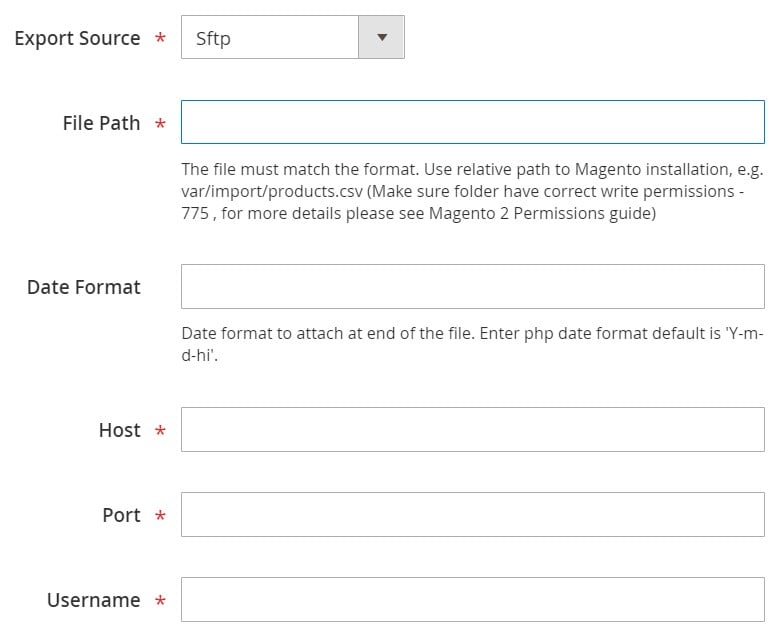
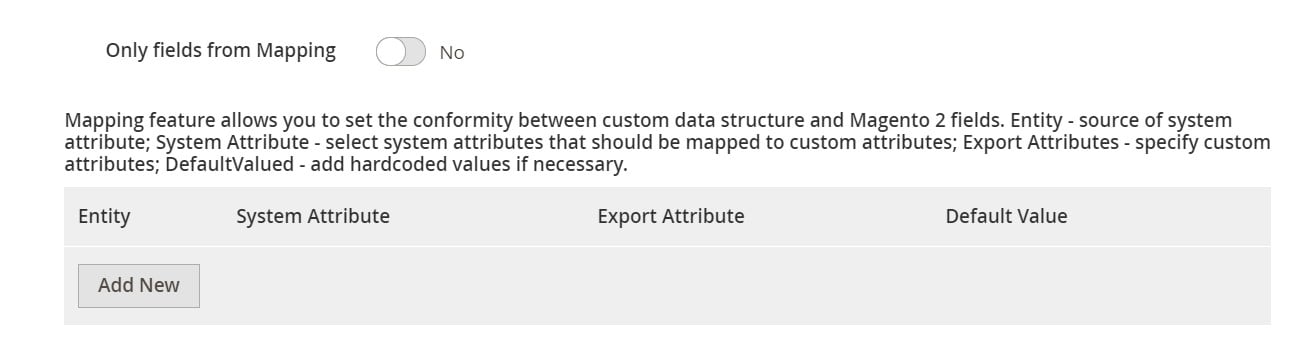
If a system – that you want to provide with Magento 2 CMS pages – has unique requirements to attributes, map them, and specify filters to make the data output suitable for it.

 Magento 2 CMS Pages export

Hit “Save & Run” in the top right corner of the screen to start Magento 2 CMS pages export. You can reach our support for further information. Just follow this link:

Get Improved Import & Export Magento 2 Extension

Improved Import & Export Features

 Magento 2 CMS Pages

The first competitive advantage of the Improved Import & Export, is that it can transfer all possible entities to and from your e-commerce website. Since CMS pages are only a small part of what our module can do, we concentrate on the extension’s features that simplify other transfers below.

Automated Import & Export Processes

We’ve just mentioned how to automate import and export processes with the help of our module. However, the Improved Import & Export extension offers an alternative solution. Let’s see how both approaches are implemented.

Schedules

Improved Import & Export utilizes the default cron syntax to enable schedules. The technology is suitable for both import and export processes and can completely automate all data transfers. You only need to choose a predefined interval or set a custom one. It is also possible to create import and export profiles with no schedule. They are suitable for one-time transfers of Magento 2 CMS pages. However, you can also leverage a manual launch. It is another option our module provides. It is suitable for all profile types.

 Magento 2 CMS Pages

Events

The second way to automate data transfers utilizes event-based triggers. They enable real-time updates. The technology uses triggers that launch data transfers and synchronizes two systems right after a specific action takes place. Thus, you can enable the export of CMS pages from Magento 2 right after a new page is generated. The same is about import processes. Follow this link to discover more nuances: How to Run Magento 2 Import or Export After Specific System Event or Process.

Advanced Mapping Features

Unfortunately, many e-commerce systems and related platforms use their standards for storing data. As a result, you cannot create a bridge between any of them. It is necessary to change a data file according to the requirements of a platform you want to transfer it to. However, Improved Import & Export may help you reduce all the related issues. The module lets you do everything right in the backend section. Let’s see what exact features it offers.

Mapping Presets

With Improved Import & Export, you get the most user-friendly way to match external attributes to ones used internally. Meet mapping presets – your number one time-saver when it comes to the diversity of data stored in different e-commerce systems. Your job is reduced to selecting a proper scheme when you create a new job. Next, our module does all the work for you. The extension analyzes the input data and matches all third-party designations to the internal ones. It also works in the opposite direction, changing Magento 2 attributes to ones utilized within a specific platform. Here is how everything works in the admin:

 Magento 2 CMS Pages

Matching Interface

If a preset for your integration is absent, the Improved Import & Export Magento 2 extension offers a matching interface, which also saves you from direct document editing. This section is available in every import and export profile. Just select an entity, choose a system attribute, and specify a corresponding external designation. This gif image illustrates the process:

 Magento 2 CMS Pages

You may have also noticed that it is possible to add hardcoded (default) values to provide the corresponding attributes with them.

Filters

Filters represent another way to make your data output suitable for all possible external platforms. With their help, you can eliminate unnecessary information. Just follow the steps below:

  • Click ‘Add Filter’;
  • Select an entity;
  • Select a system attribute;
  • Specify filtering parameters.

You can create more filters by repeating these steps. Also, note that filter parameters may differ depending on the selected attributes.

 Magento 2 CMS Pages

Attribute Values Mapping & Editing

You can also map or edit attribute values with the help of the Improved Import & Export Magento 2 extension. The module lets you eliminate incorrect designations that prevent import processes. It offers an interface similar to the one we’ve just described above. Choose a third-party designation and specify a corresponding internal one in front of it. In this article – Attribute Values Mapping – you can find more information.

As for the ability to edit attribute values, it lets you add a prefix/suffix to multiple attribute values. At the same time, you can split or merge them.

Feel free to combine these rules and apply them as bulk actions. You can also create conditions to increase the efficiency of this feature. You can read more about attribute values editing here: How to Modify Attribute Values During Import and Export in Magento 2.

Category Mapping

When it comes to product import, category mapping is a feature that dramatically simplifies this process. Although it won’t help you with Magento 2 CMS pages, category mapping can substantially reduce headaches related to product data transfers. The feature provides the ability to modify information from external catalogs right in the Magento 2 backend. You can match external product categories to ones used on your e-commerce website as follows:

 Magento 2 CMS Pages

It is possible to create new categories on the fly, as well. Choose a parent category and type the name of a new one. That’s it! Read this article for further information: Category Mapping.

Attributes On The Fly

The ability to create attributes on the fly lets you add missing information to data files. Use the following general form to specify parameters necessary to recreate missing attributes automatically:

Attribute|attribute_property_name:attribute_property_value|…

You can find additional nuances of this procedure here: Product attributes import.

Extended Connectivity Options

Now, we’d like to discuss another vital aspect of Improved Import & Export – its extended connectivity options.

Multiple File Standards

First of all, our plugin lets you use many file standards while the default platform works with CSV only. With our module, you can leverage XML, JSON, ODS, and Excel. It is no longer necessary to convert everything into CSV and vice versa! 

Furthermore, if you work with file archives, the Improved Import & Export Magento 2 extension can import them automatically. There is no need to extract data before transferring it to Magento 2.

Multiple File Sources

Another notable improvement introduced in our extension is support for multiple file sources. To make your import/export routine flawless, it lets you work with such sources as

Alternative Ways of Import & Export

API connections and integration with intermediary services are two unique import/export mechanisms of Improved Import & Export. They are not available in Magento 2, so you get unique opportunities aimed at better data transfers. 

Create direct API connections to transfer data between your Magento 2 store and any third-party systems. The module uses REST as a primary standard but also relies on SOAP and GraphQL if necessary.

The latter includes data import from different third-party tables, including Google Sheets, Office 365 Excel, and Zoho Sheet. Here is how you import product data from Google Sheets:

 Magento 2 CMS Pages

It is also necessary to highlight the fact that the extended connectivity options support all the extension’s features. And the Improved Import & Export module introduces extended opportunities with support for WSDL and WADL.

The following video displays other details of our module:

Final Words

As you can see, adding and editing CMS pages in Magento 2 is not a problem. If you use Improved Import & Export, even transferring them is a piece of cake. If you want to find out more facts about our module, follow the link below. You can also contact our support to discuss your particular business case:

Get Improved Import & Export Magento 2 Extension