
Exploring Shopware: Promotions & Discounts in Shopware 6
![]()
In the material below, we continue our exploration of the Shopware 6 administration. This time, our attention is captured by the Marketing section in general and its Promotions module in particular. Below, we explore the basic Shopware 6 marketing functionality, focussing on Shopware 6 promotions. The corresponding screen lets you create Shopware 6 discounts for sales channels, based on rules, conditions, and time frames. More articles about Shopware 6 are listed here: Getting Started With The Platform. As for the current case, we provide a brief overview of the Shopware 6 Promotions screen and explain how to create promotions in your admin. In particular, we shed light upon general settings and promotion codes, explain how to create conditions based on target groups, shopping cart content, and order parameters, as well as go into particulars of Shopware 6 discounts.

Note that we provide Shopware integration with external platforms. Contact our support for further information or try our Improved Import & Export Extension for Shopware.
Table of contents
Shopware 6 Promotions Overview
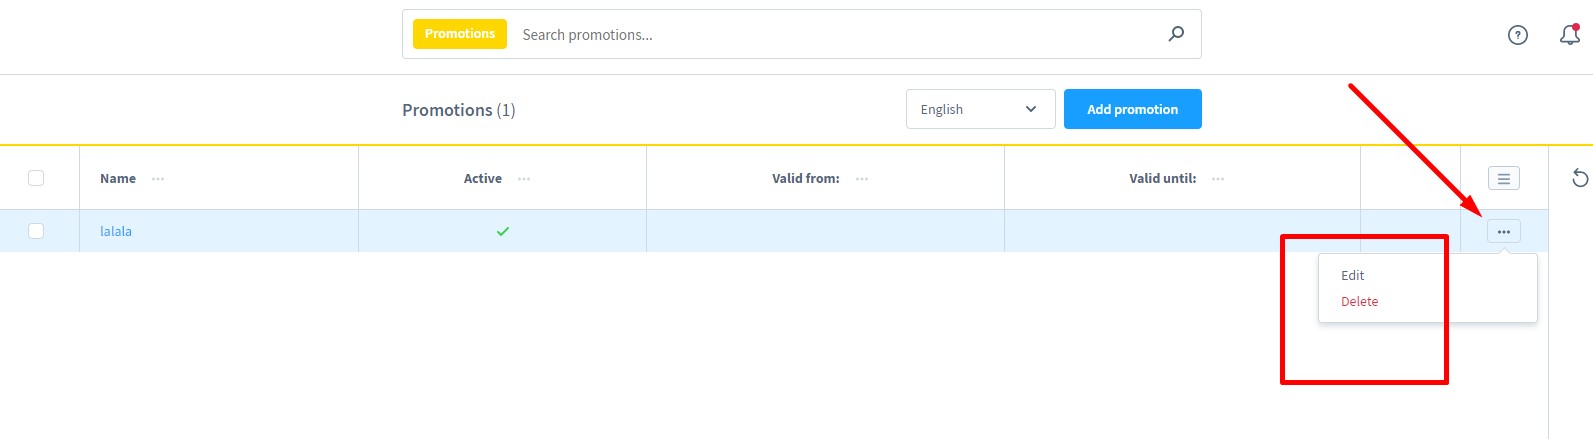
The Promotions screen of your Shopware 6 installation contains an overview of all configured promotions. You can find it under Main Menu -> Marketing -> Promotions.
The section enables you to create new promotions or manage the existing ones. The last column on the right lets you open a context menu of every promotion. It is possible to edit or delete the selected record here.
How to Create Shopware 6 Promotions (Discounts)
So, let’s see how to create a new discount promotion in Shopware 6. Go to the Promotions screen and click on the Add Promotion button. The system will redirect you to a new screen, divided into the following three tabs:
- General;
- Conditions;
- Discounts.
However, only the first tab is active. Here, you can set the basic configuration for a new discount promotion. Save your new Shopware 6 promotion to enable the Conditions and Discounts tabs.
General
The General tab, in its turn, is divided into two sections: Settings and Promotion Codes. Below, we explore both of them individually.
Settings
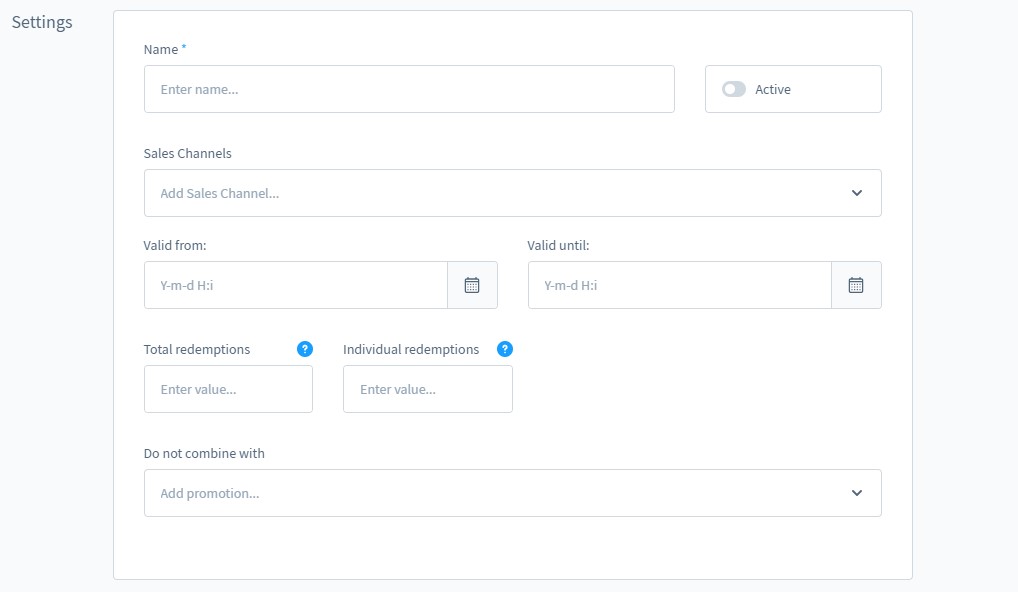
In the Settings section, you should specify the name of your promotion. It is the only mandatory field on the tab. After it is filled in, you can save the promotion.
Other settings let you activate the promotion, choose a sales channel, specify time frames when the promotion is active, set the number of uses (Total redemptions and Individual redemptions or Max. total uses and Max. uses per customer), as well as specify promotions that cannot be activated with the current one.
Promotion codes
As for the Promotion codes section, it looks as follows:
Use it when you do not want the promotion to be applied when a customer fulfills its conditions. Create a promotion code that adds a discount to the purchase. Thus, you create an additional layer of requirements. The promotion will be applied when the conditions are met and the code is redeemed.
Below, we explore three possible scenarios that you can create in the Promotion codes section:
- No code. The discount is applied only when the conditions are met.
- Fixed code. Enter a single code that every customer can apply. The discount is activated when the conditions are met and the code is redeemed. Note that general and individual promotion codes cannot be used simultaneously.
- Individual code. An individual code per order is required.
Let’s explore the third case in more detail. To enable it, activate the Use individual promotion codes toggle and hit the Manage individual promotion codes link.

Now, you need to create a custom code pattern. You can use placeholders like “%s” for characters and “%d” for digits. Also, it is possible to specify any fixed value in the code. For instance, our code pattern is tralala-%d&d&s:
Individual codes can only be redeemed once. From the code list, you can see whether a code has been redeemed and by which customer.
It is also worth mentioning that the subsequent adjustment and regeneration of the existing codes result in the inability to redeem the previous codes.
Conditions
Under the Conditions tab, you can specify when the promotion is valid by applying specific rules. The tab is divided into three sections:
- Target group;
- Qualified shopping carts;
- Qualified orders.
Target Group
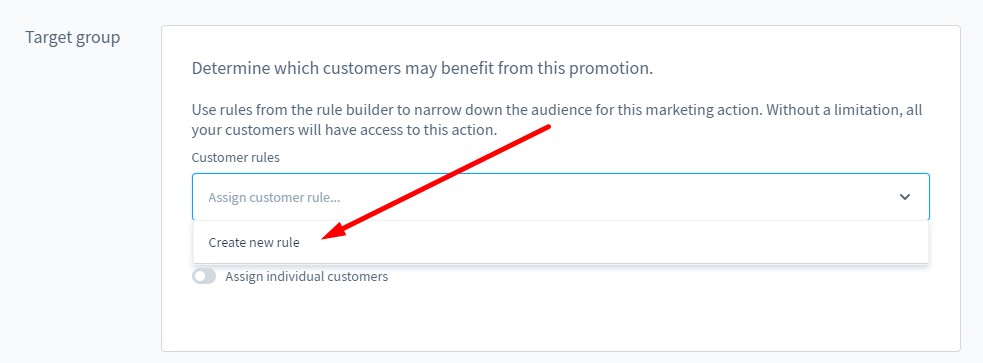
Here, you can define customers who may benefit from this promotion. It is possible to either use rules from the rule builder or specify particular customers. Without a limitation, all your buyers will get access to this action.
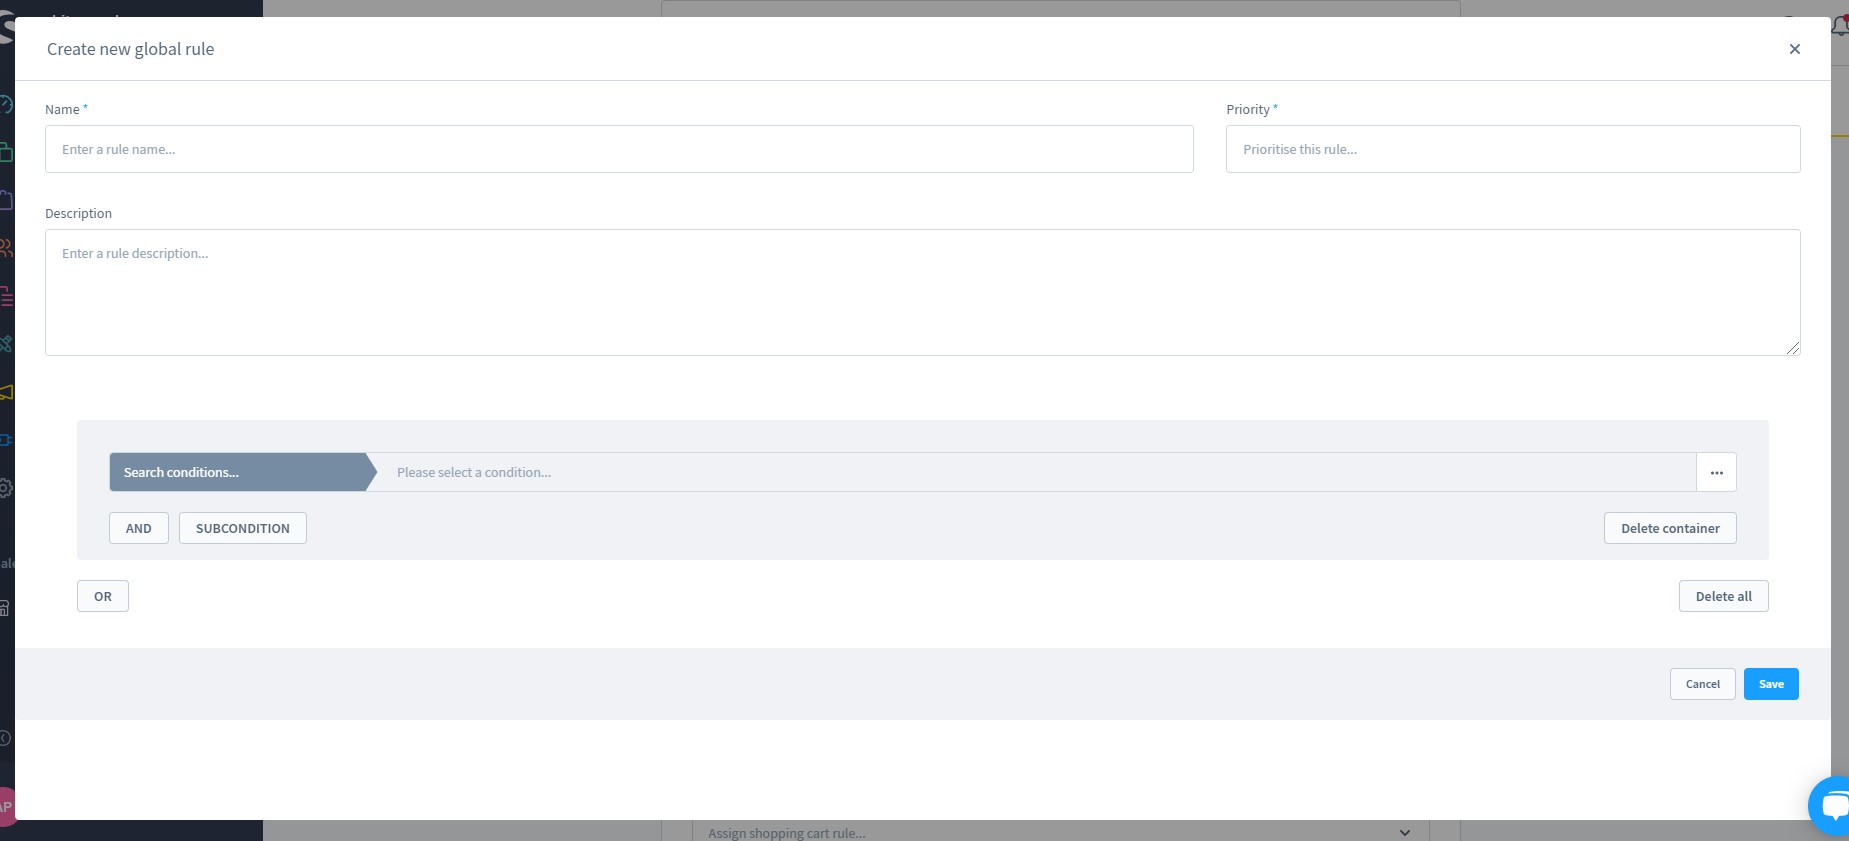
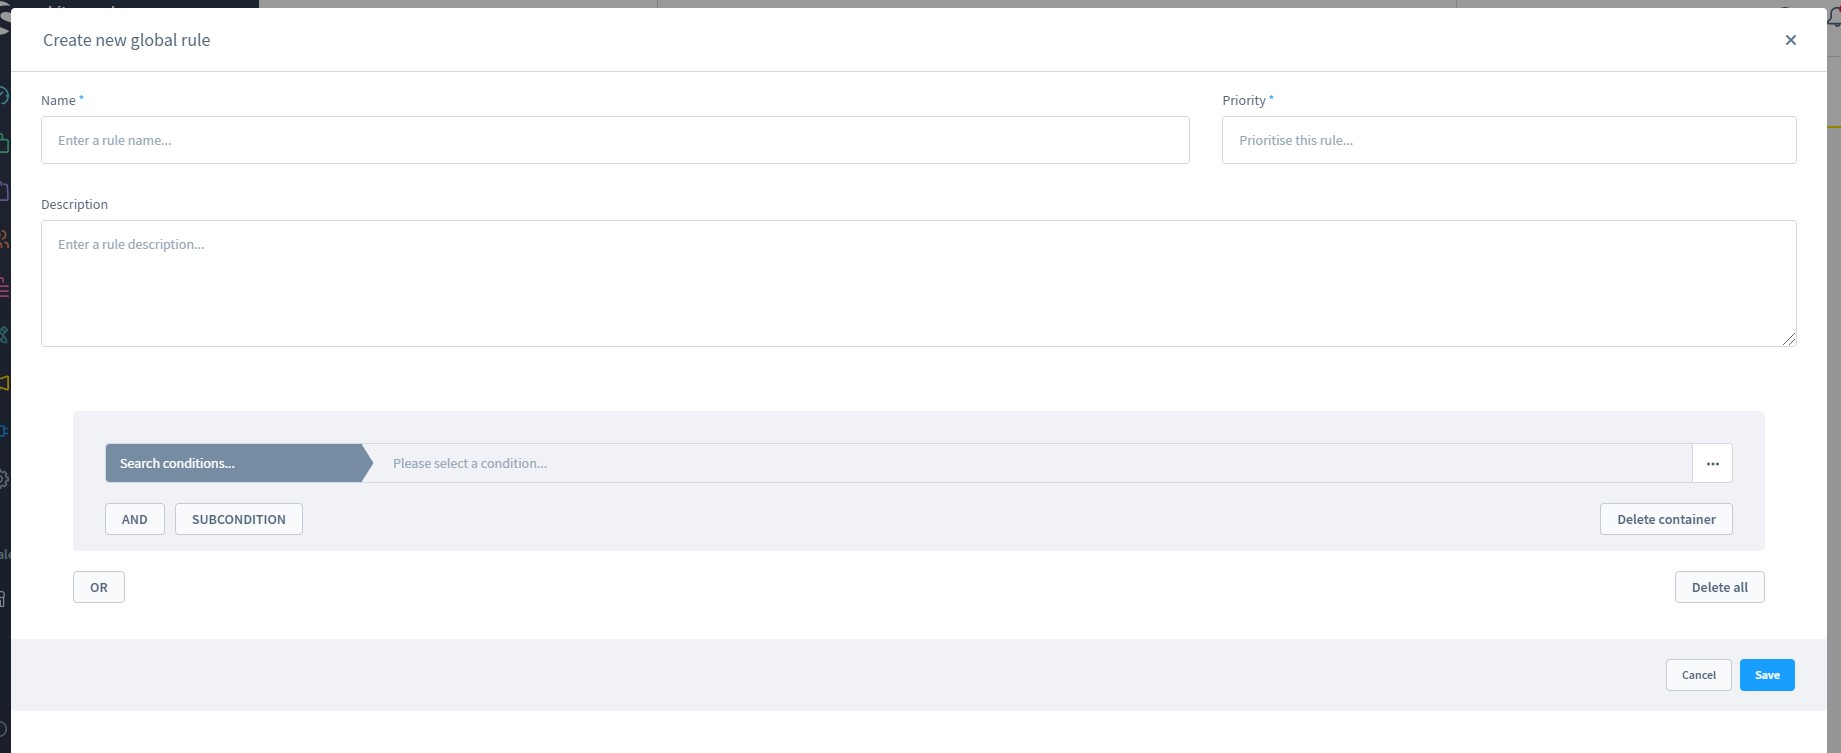
If there are no rules, the system will propose you create a new one:
The corresponding screen lets you specify a rule name, priority, and description. After that, you can create conditions and sub-conditions.
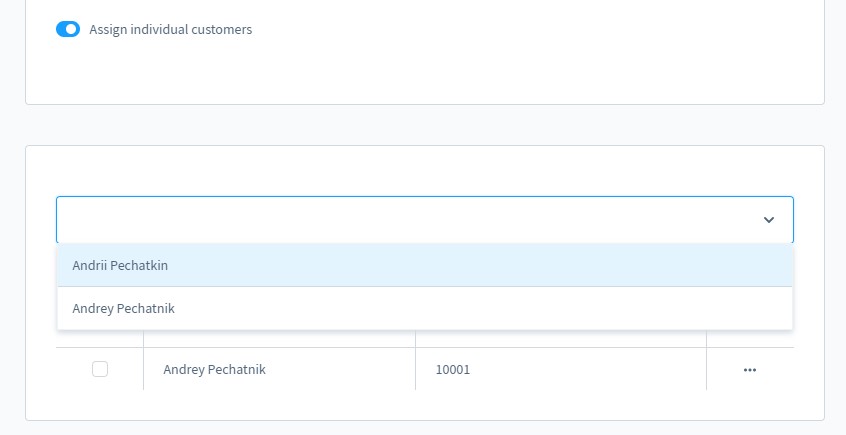
Assigning individual customers looks as follows:
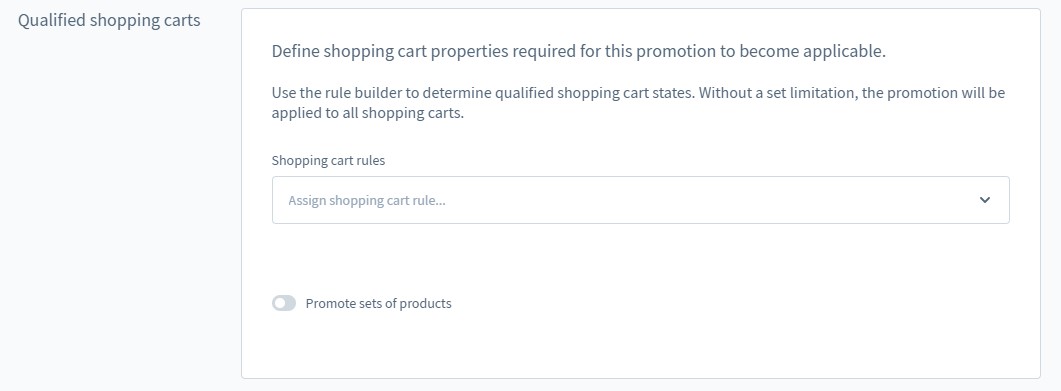
Qualified shopping carts
In this section, Shopware 6 lets you define shopping cart properties required for the promotion to become applicable. Like in the case of the previous section, you can use the rule builder to determine the shopping cart conditions. If you don’t set a limitation here, the promotion will be applied to all shopping carts.
If there are no rules, Shopware 6 lets you create one via the following screen:
Alternatively, you can promote sets of products here:
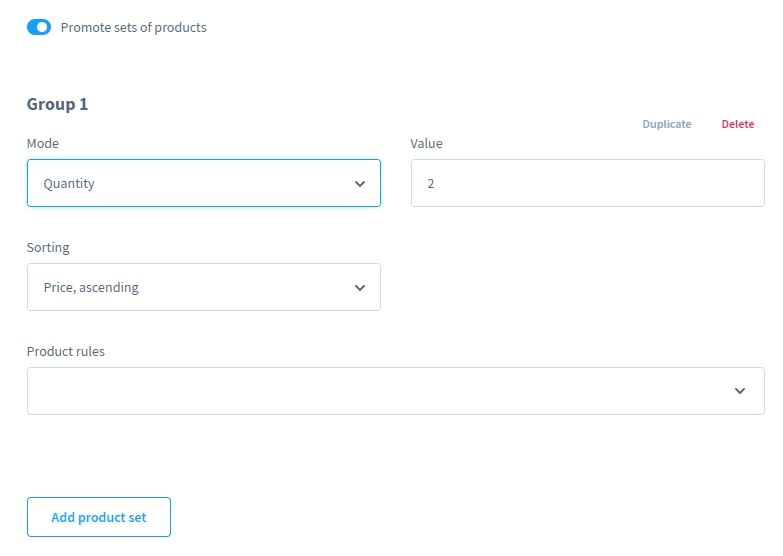
Shopware 6 promotions let you define four properties for that:
- Mode – This field indicates to which condition the entry in the Value field refers:
- Numbers – quantities in the shopping cart;
- Value (Gross) – a gross price that must be reached by this set group;
- Value (Net) – a net gross price that must be reached by this set group.
- Value – This field indicates the number or value of products that must be reached to meet the conditions;
- Sorting – Ascending or descending order depending on the product purchase price.
- Product rules – You can apply further here. The system lets you choose the existing ones or create new conditions.
Let’s assume that there is a group that contains a selection of snickers. You define Number as a Mode and 3 as a Value. It means that a customer should combine three pairs of snickers to meet the conditions. As soon as there are three pairs in the shopping cart, the group is formed. It doesn’t matter whether it is the same model or different models.
If there are four matching items, three of them are combined in the group and the remaining one is kept separated. If there are six matching items, two groups are formed.
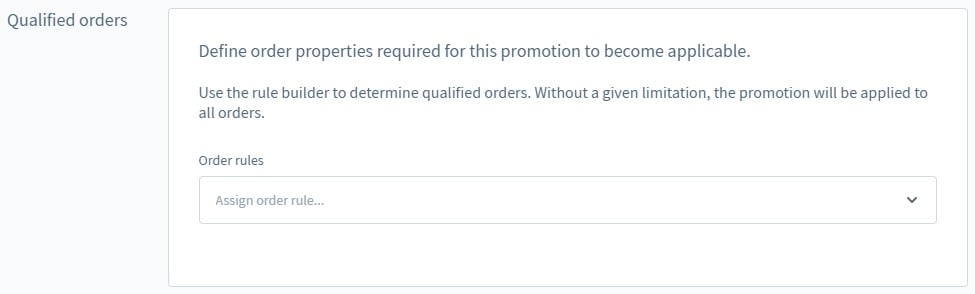
Qualified orders
In this section, you define order properties required for the promotion to become applicable. Once again, you can use the rule builder to determine conditions. It is possible to choose from the list of the existing ones as well as create new rules from scratch. If you don’t specify any limitation here, the promotion can be applied to all orders.
Discounts
The Discounts tab is empty by default.
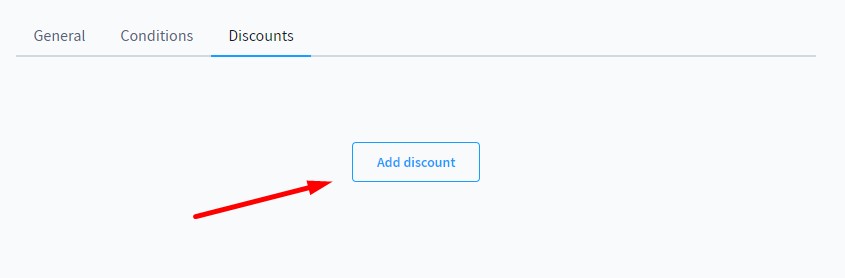
Hit the Add discount button, to create a new discount.
You can choose a discount area: Cart, Shipping costs, Entire set, and Set group. It is also possible to apply it to a specific range of products. In this case, additional configurations occur. Next, you choose a discount type and value. The former field offers three options: Absolute, Percentage, Fixed item price. Besides, it is possible to set the maximum discount value if you use a percentage discount.
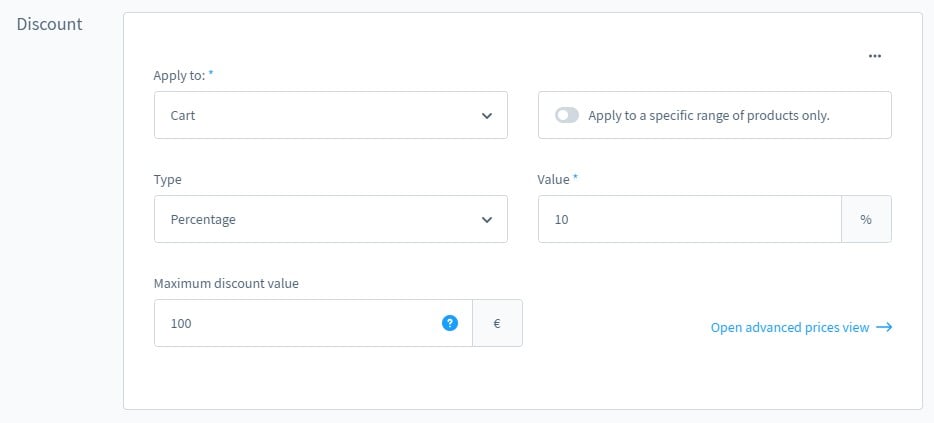
As for the advanced prices view link, it lets you set the value of the discount per currency.
You can find common examples of discounts applied in Shopware 6 here: .
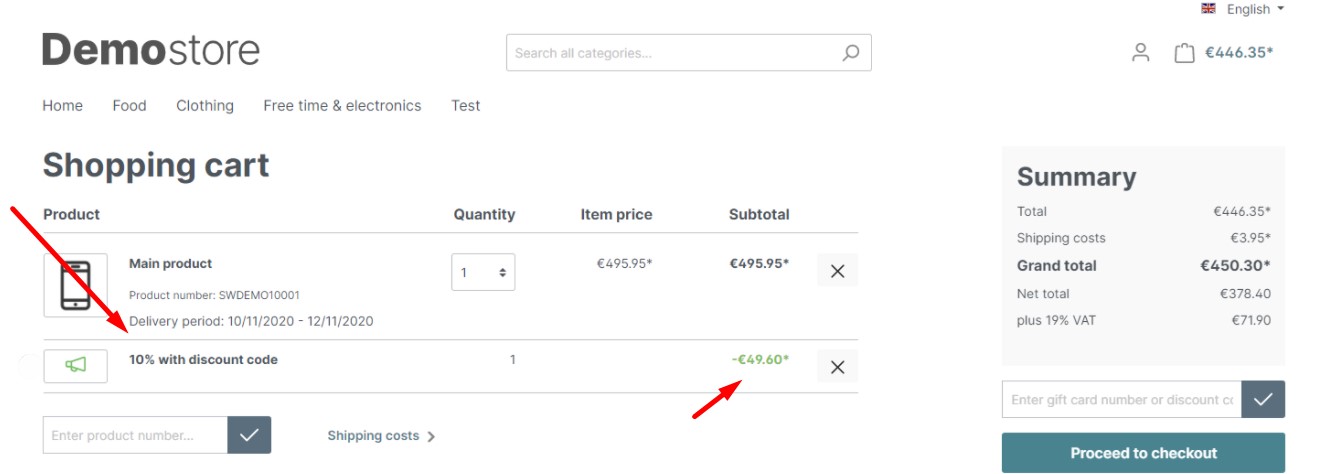
How to Apply Discounts On The Storefront in Shopware 6
As you can see, Shopware 6 provides lots of discount configuration variations. Depending on some of them, it may be necessary to activate the discount by entering a code while the others apply the discount only when specific conditions are met.
You can apply the discount code on the Shopware 6 storefront as follows:
- Add products to cart;
- Before proceeding to the checkout, entering the code in the corresponding field;
- Confirm the entry by clicking on the tick button.
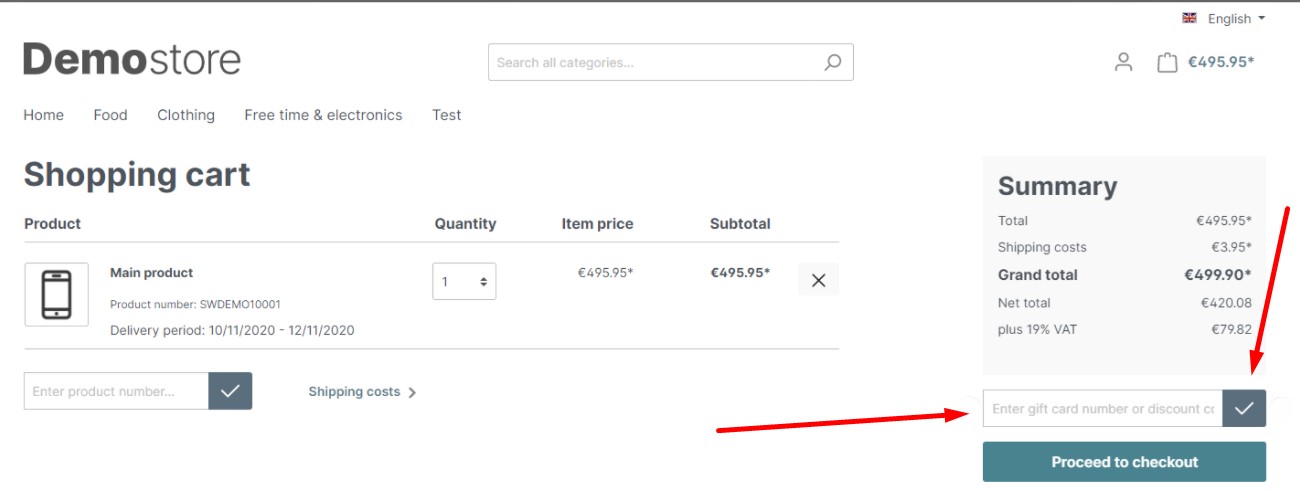
After the successful entry, the discount displays in the cart:
How to Import Promotions to Shopware 6
Our team provides the ability to simplify and automate various routine processes associated with managing your Shopware 6 backend by importing the existing data. Contact our support for more details and try our . You can use it to import any entities to Shopware 6. The module lets you create cron-based schedules for each import and export job. As a result, all the data is transferred with no interaction on the admin side. Furthermore, you can create presets to map external attributes to ones used in Shopware 6 automatically. Please, consult our specialists before using the module for transferring promotions and discounts to Shopware 6. Also, our specialists will share more information about the extension.
Shopware 6 Essentials FAQ
How to create a Shopware ID?
You should create a ShopwareID before making any initial steps within the Shopware ecosystem. Luckily, this procedure is easy to complete. You simply get your ID along with the creation of your Shopware account.
How to create a Shopware account?
Go to the registration page to create a new Shopware 6 account. Click the Register Now link and then provide the required data. Confirm the account creation via email. You will see a new message with a corresponding link there.
What is Shopware master data?
As you’ve probably already guessed, the information you provide while creating a Shopware account is called master data. It combines such details as a company address, email, phone, name, etc.
How to add a shop in Shopware?
When you have a Shopware account, it is necessary to launch a new shop. You can do that in the merchant area of Shopware 6. The corresponding link is situated on the start screen’s right part. Choose between a cloud storefront or an on-premise installation and provide information about your new shop.
How to add a payment method to your Shopware account?
Creating a payment method in Shopware 6 is required for administrative purposes. You add it to enable deposits used for purchasing extensions and themes. You can configure a payment method in Shopware 6 under Basic Information -> Accounting. Choose PayPal, credit card, or direct debit.
How to create a deposit in Shopware?
You can create a deposit in Shopware 6 as follows. Go to your Merchant Area -> Shops. Specify a shop to add money to. Click Open Account Details and transfer funds.
How to purchase Shopware extensions?
Now, when the deposit is placed, you can purchase Shopware 6 extensions and themes on the Shopware Marketplace or in the Plugin Manager. Select an instrument you want to get and complete the purchase.
How to get support in Shopware?
Inquiries regarding your account or license are accepted here: info@shopware.com or +49 2555 9288 50. Inquiries about accounting and financial services are accepted here: financial.services@shopware.com and +49 2555 9288 510.
How to migrate to Shopware 6?
As we’ve already mentioned above, you can use the Improved Import & Export tool to transfer data to Shopware 6. It also means that the extension is suitable for the Shopware 6 migration since it provides the ability to move core entities to your new website from any external platform or Shopware’s previous version. Contact us for more information.
How to automate import and export processes in Shopware 6?
Regular data updates are also among the tasks that the Improved Import & Export extension is capable of. The tool provides the ability to create a schedule per each data transfer and automatically launch the corresponding import and export processes, following the time frames you set.
How to integrate Shopware 6 with external systems?
Use our module to create integrations with external platforms and tools as it makes the Shopware connection with various external systems possible. For instance, you can synchronize your e-commerce website with ERPs, CRMs, accounting tools, etc. As we’ve just mentioned, the module automates repetitive import and export processes and modifies data according to the requirements of your Shopware store or the connected platforms, depending on the data transfer direction.
Related posts
 solution25: Your Trusted Shopware Agency in New York & Germany
 Take Full Control over Product Visibility in Shopware 6: Introducing the ‘Replace Product Sales Channels’ Feature for Import
 How to Boost Sales with Shopware 6 Cross Selling: The Ultimate 2025 Guide
 How to Import Products to Shopware 6 & Automatically Assign Them to Parent Categories: A Time-Saving Import Feature You Shouldn’t Miss
 Best AI Tools for 2025: Ultimate Guide to Paid & Free AI Tools for Copywriting, SEO & Marketing
 Etsy vs. Shopify: Which Platform Wins the Marketing and SEO Game?
 New in Shopware 6 Product Import: Control Topseller Products with the markAsTopseller Field
 How to Import & Export Shopware 6 Advanced Prices as Separate Entity