
Exploring Shopware: How to Add Product Properties in Shopware 6
![]()
If you are familiar with the product attributes of Magento, you will easily master Shopware properties. They enhance products with the ability to add filterable information. Besides, you can use Shopware 6 properties to create product variants (or configurable products if you are more familiar with Magento’s lexicon). So, the basic algorithm is quite straightforward: you add properties and link corresponding options to them. For instance, the color property can be bound to black and white options. In the following article, we dive deep under the hood of Shopware, exploring this feature. You will find out where to look for product properties in your Shopware 6 administration, how to add Shopware 6 properties, and what actions to take to assign properties to products.

Note that we provide Shopware integration with external platforms. Contact our support for further information or try our Improved Import & Export Extension for Shopware. We can help you import and export products along with properties in Shopware 6.
Table of contents
- 1 How to Find Shopware 6 Properties
- 2 How to Add New Properties in Shopware 6
- 3 How to Assign Properties to Products in Shopware 6
- 4 How to Import Product Properties to Shopware 6
- 5 Shopware 6 Essentials FAQ
- 5.1 How to create a Shopware ID?
- 5.2 How to create a Shopware account?
- 5.3 What is Shopware master data?
- 5.4 How to add a shop in Shopware?
- 5.5 How to add a payment method in Shopware?
- 5.6 How to create a deposit in Shopware?
- 5.7 How to purchase Shopware extensions?
- 5.8 How to get support in Shopware?
- 5.9 How to migrate to Shopware 6?
- 5.10 How to automate import and export processes in Shopware 6?
- 5.11 How to integrate Shopware 6 with external systems?
How to Find Shopware 6 Properties
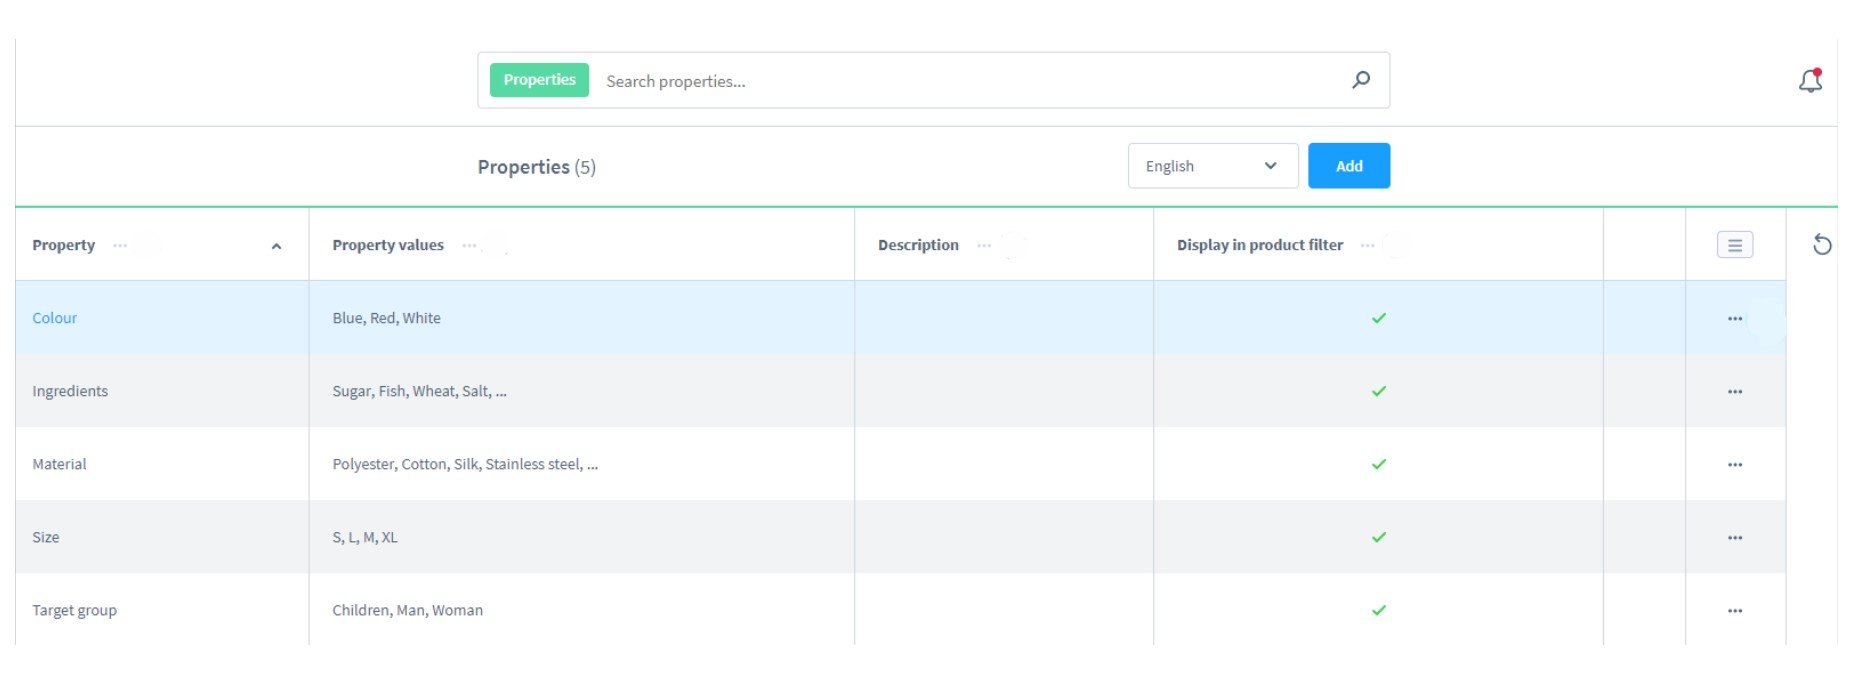
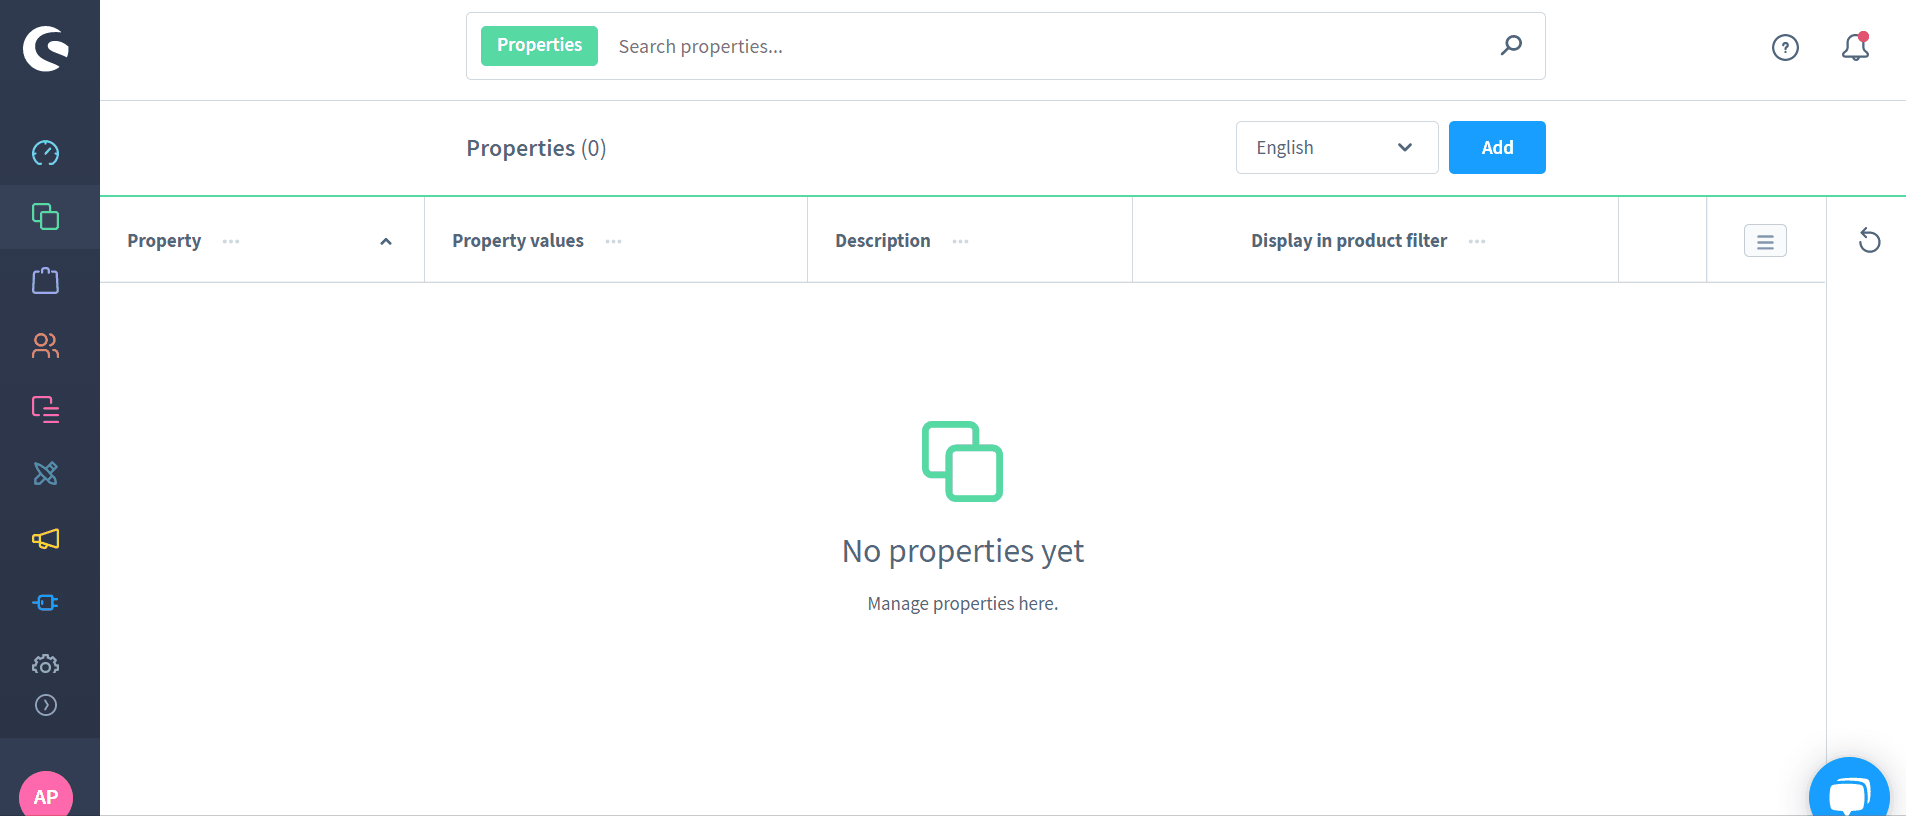
The admin screen with properties is hidden right under the surface of your administration. Open the main menu, proceed to the Catalogues section, and click on the Properties link.
Here, you can see already available properties listed in a grid. Shopware 6 displays a property per row.
Other related information includes corresponding property values or options.
Besides, optional descriptions may be displayed too.
The Properties grid also indicates whether the properties appear in the product filter or not.
The final column lets you open a context menu for the corresponding property. Hit the three dots button to open, edit, or delete the property. Bear in mind that deleting a property removes it from all products to which it is assigned.
How to Add New Properties in Shopware 6
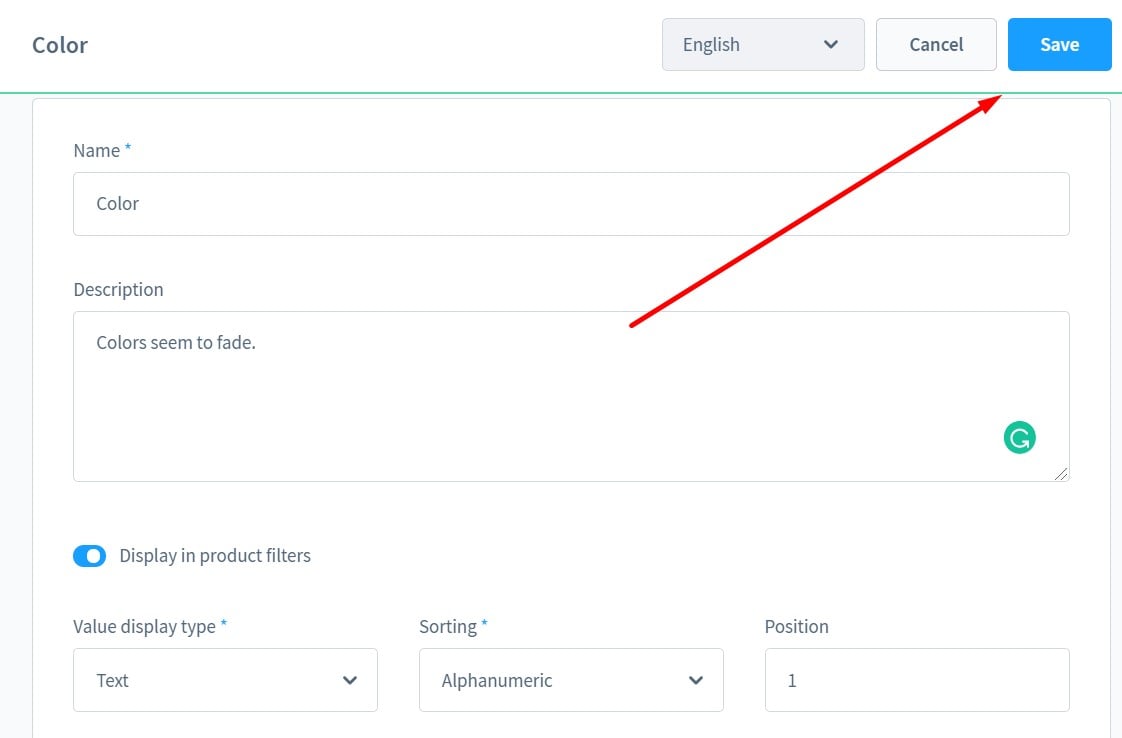
Click the Add button above the Properties screen to add a new product property in Shopware 6. The system redirects you to a new screen divided into two sections: Basic information and Property values.
Let’s explore each section individually.
Basic information
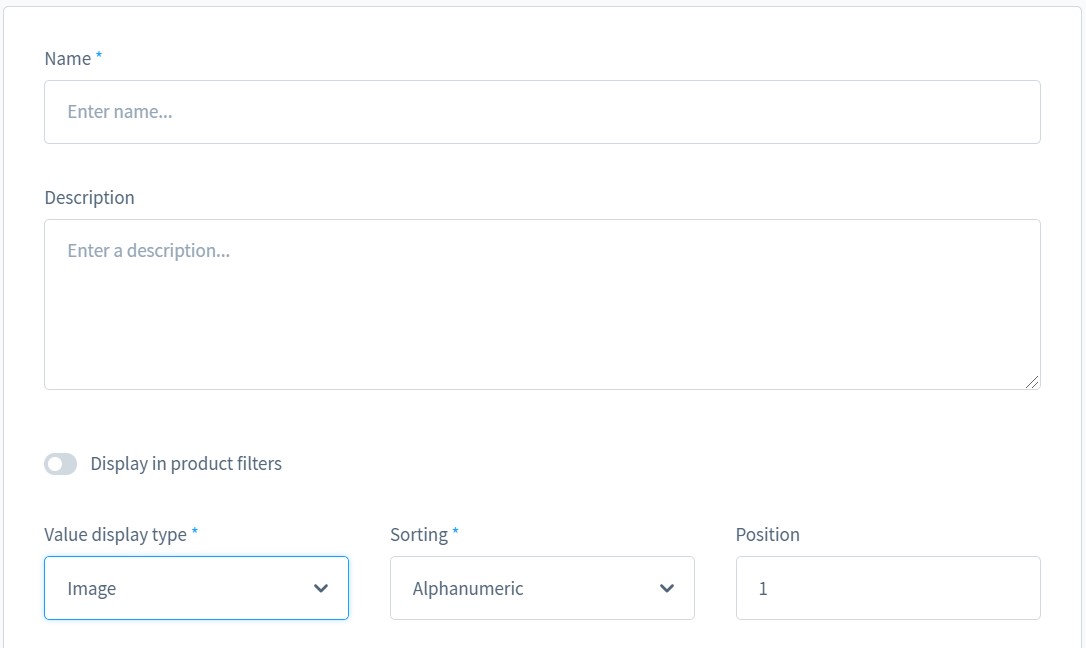
The basic information section enables you to specify the name of your new property. It will be displayed on the product detail page and in product listing filters.
Also, you can enter a description. It is an optional field, so you can leave it blank.
Next, it is possible to choose whether the property appears in the product filter of product lists or not.
Shopware 6 also provides three different views for the frontend display:
- Text. Choose this view to display the options in the filters as text;
- Color. You can highlight color in the options to display it in the filters;
- Image. Shopware 6 lets you store an image for the individual options, displaying it in the filters.
As for sorting options, they include Numerical, Alphanumerical, and Individual. If you choose the first option, the system stores letters as a, b, c, etc., and numbers as 1, 2, 3, … 10, 11, etc.
For the Alphanumeric option, letters are sorted in the same order, but numbers are treated differently: 1, 10, 11, … 2, 20, 21, … 3, etc.
The individual sorting lets you determine the order with the help of the position field in individual options. In this case, the option with the first position is at the top of the list.
After all the basic information is specified, you have to save it to activate the property values section.
Property values
Initially, this section is empty. You need to click the Add value button to add a new option.
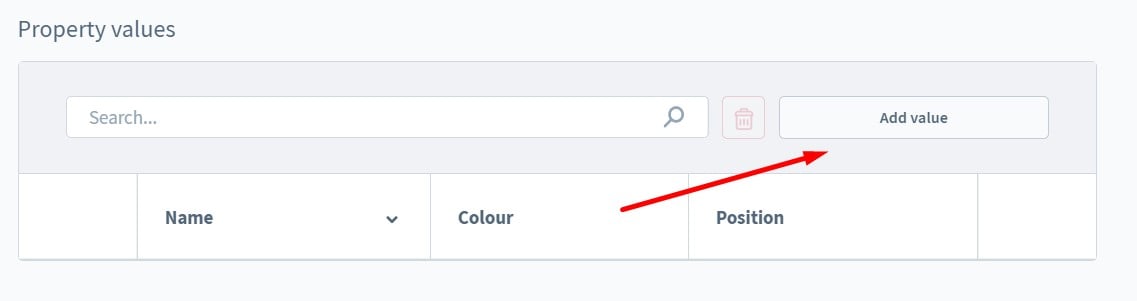
The last action triggers a new window that looks as follows:
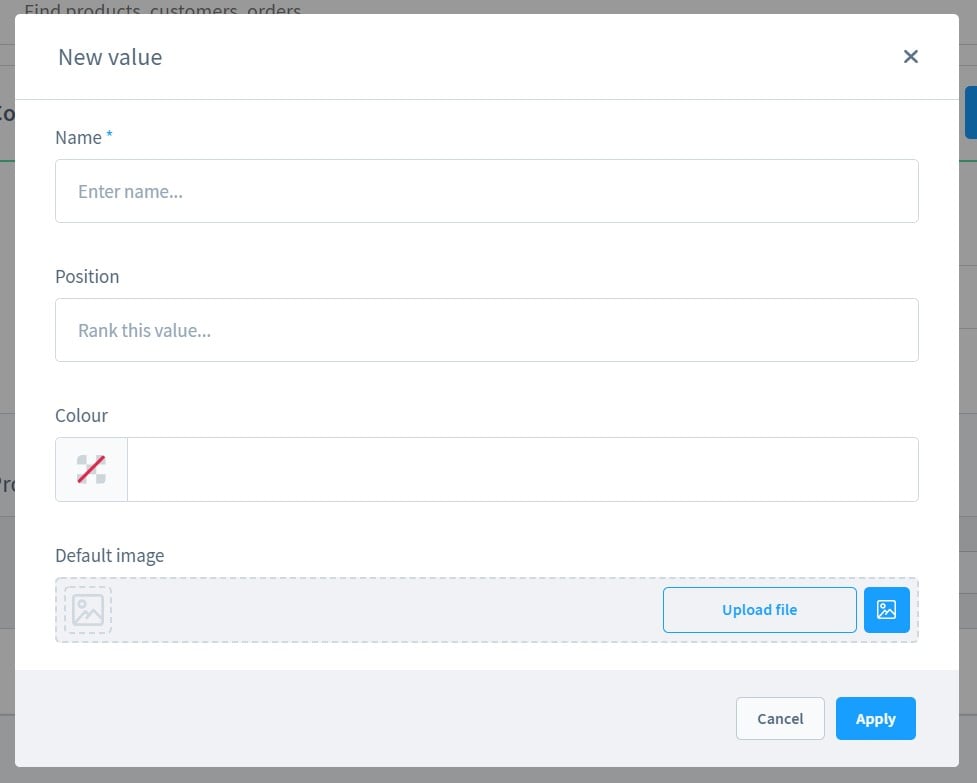
You can name your new option. The specified title will be displayed if you use the text view.
The position field lets you set the individual sorting option. This determines the order. Note that lower values are displayed higher in the list.
If you select color as representation, use the HEX color value in the color field or choose a color from the color palette.
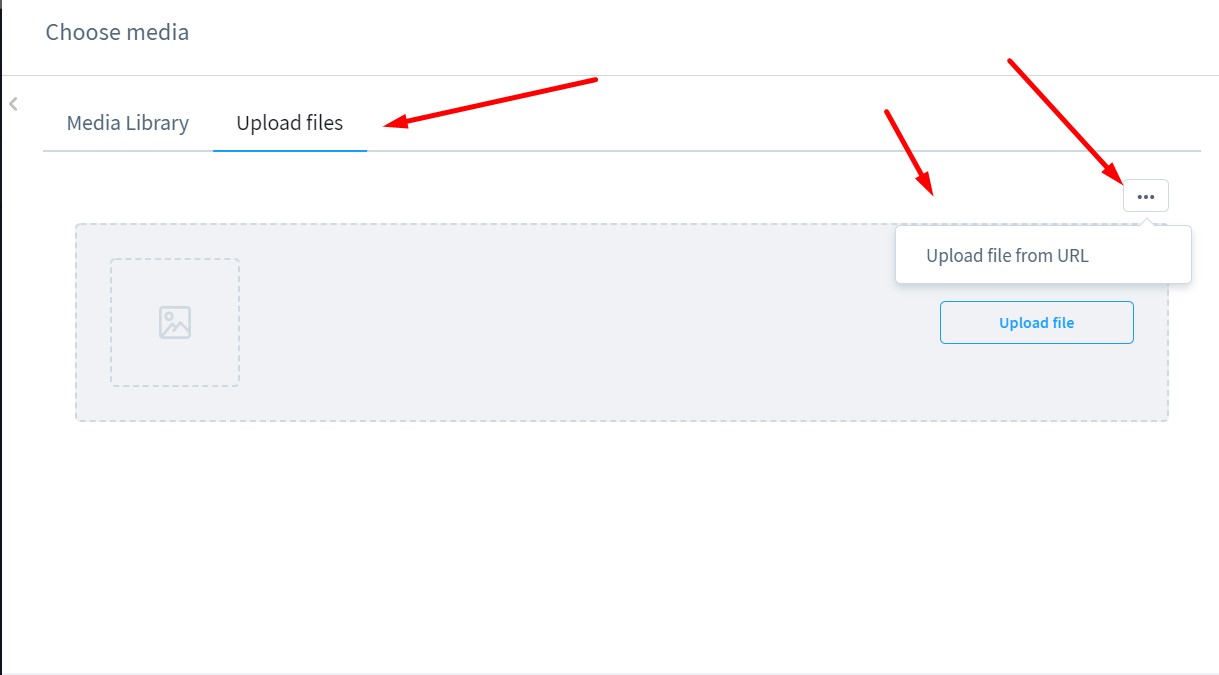
You also have an option to display a picture on a frontend. Add it via the Default image field. Note that there is a library with already uploaded images.
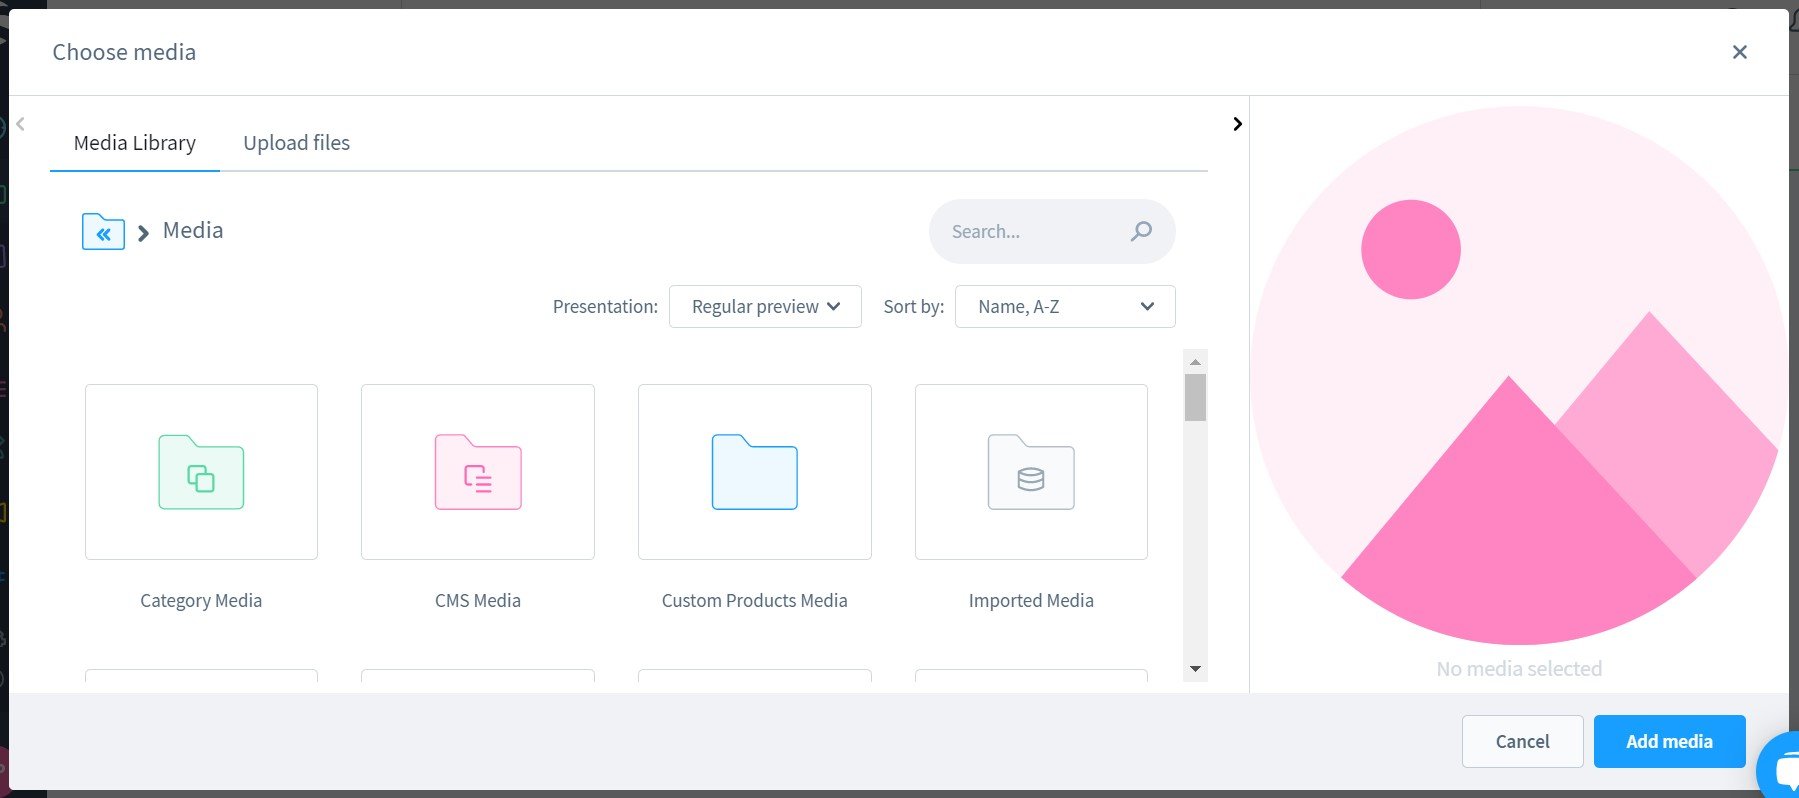
Alternatively, you can upload a new one. The “…” button lets you upload a file via URL.
How to Assign Properties to Products in Shopware 6
Now, let’s see how to assign properties to products in Shopware 6. You can do that as follows:
- Open your main menu;
- Proceed to the Products screen;
- Select a product you want to assign Shopware properties to;
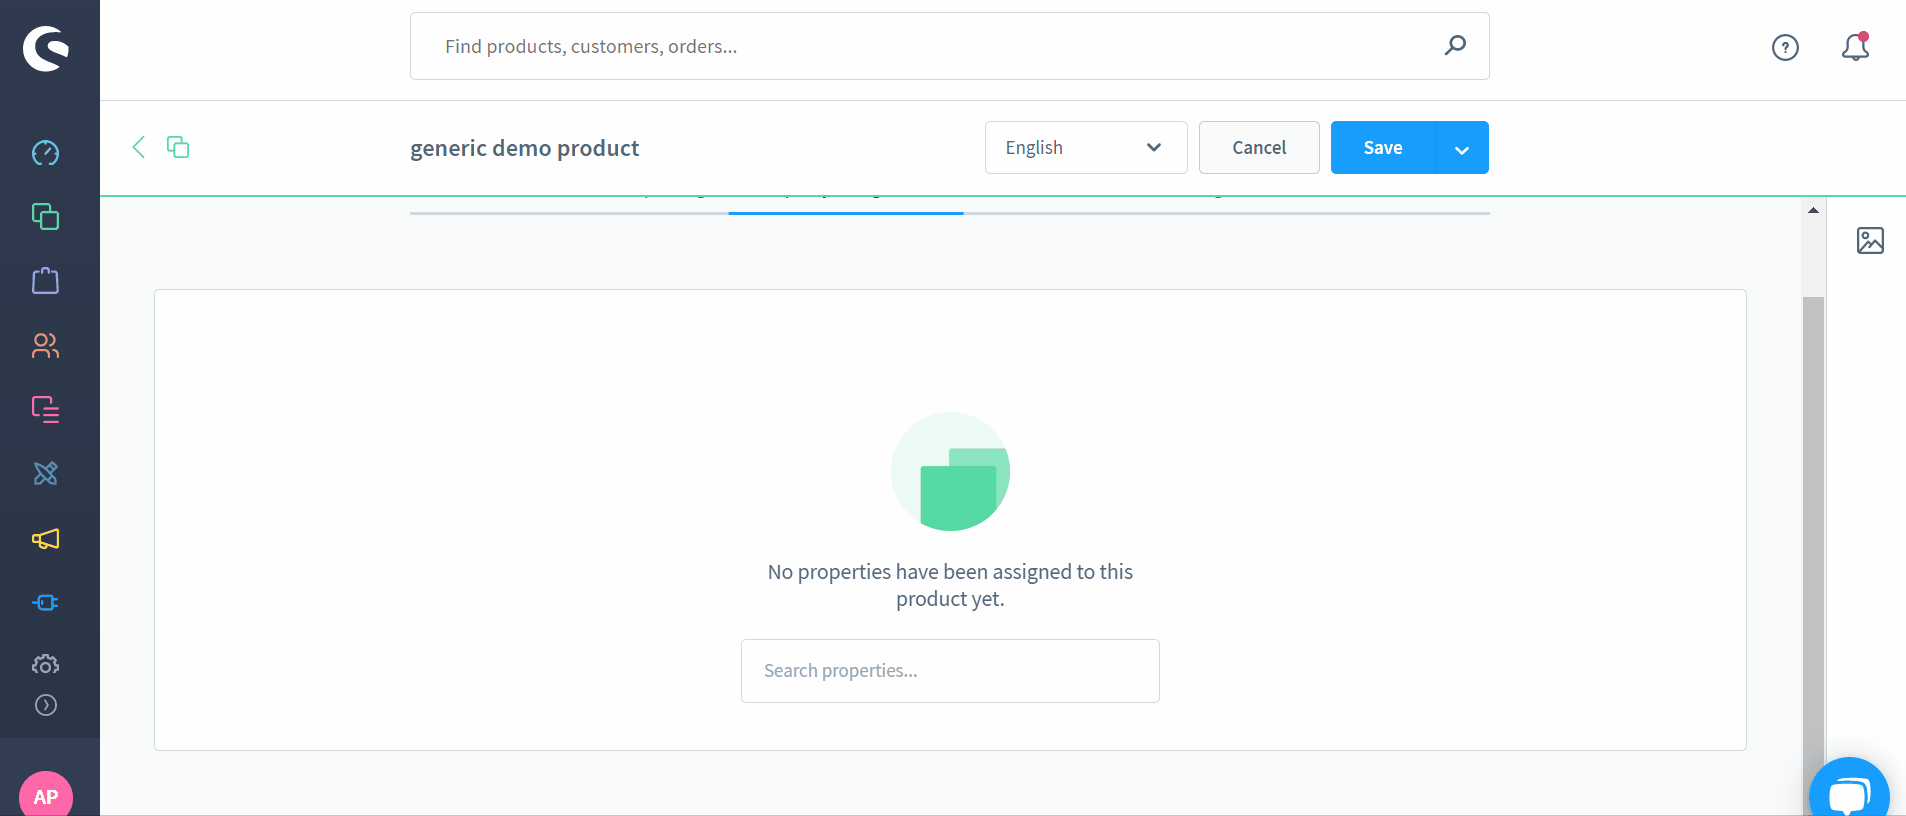
- Open its Property assignment tab;
- Click on the search field;
- Choose a property from the list of available options;
- Save your product.
That’s it. As you can see, assigning properties to products in Shopware 6 is an easy task.
How to Import Product Properties to Shopware 6
Our team lets you simplify and automate various routine processes associated with managing your Shopware 6 backend by importing the existing data. Contact our support for more details and try our . You can use this tool to import any entities to Shopware 6. Please, consult our specialists before using the module for transferring product properties to Shopware 6.
The extension provides the ability to transfer data to and from your e-commerce website following a schedule of updates. Also, you can use it to create API connections for multiple synchronizations. Mapping is another important feature you will get. The extension helps you transfer the external output, transforming it according to the requirements of Shopware 6.
Shopware 6 Essentials FAQ
How to create a Shopware ID?
One of the initial steps towards using a Shopware website is creating a Shopware ID. However, this step is tightly connected to the creation of the Shopware account that we describe below.
How to create a Shopware account?
You can take action for a Shopware account creation on a registration page. Click the Register Now link and fill in the form. Receive a confirmation email.
What is Shopware master data?
While creating your Shopware account, you provide various information. This information is called master data. It contains your contact information, such as an address, email, phone, company name, etc.
How to add a shop in Shopware?
You can add a new Shopware shop in your merchant area. Visit the start-screen page and click the corresponding link in its right section. Decide whether you want to create a cloud storefront or register an on-premise website. After that, you need to specify information about your new Shopware shop. Save the provided data.
How to add a payment method in Shopware?
You can add a payment method to your Shopware account under Basic Information -> Accounting. It is possible to use PayPal, credit card, or direct debit to add funds to your store, used to purchase extensions and themes.
How to create a deposit in Shopware?
After the payment method is added, you can use it to create a deposit for purchasing additional instruments for your Shopware store. Go to Merchant Area -> Shops, specify a shop to add funds to, click Open Account Details, and add funds.
How to purchase Shopware extensions?
With a deposit on your Shopware account, you can go to the Shopware Marketplace or Plugin Manager to purchase tools for your business.
How to get support in Shopware?
Depending on your inquiry, there are two departments you can contact. For support regarding your Shopware account and license write to info@shopware.com or call +49 2555 9288 50. Inquiries about accounting and financial services are accepted at financial.services@shopware.com or +49 2555 9288 510.
How to migrate to Shopware 6?
Migration to a new e-commerce platform is always a complex task and Shopware 6 is not an exception. Unfortunately, you cannot perform lots of complex data transfers using its default tools. Therefore, the corresponding migration procedure requires a more powerful third-party solution that automates data transfers and helps with different attribute standards, such as the Improved Import & Export tool for Shopware 6. Contact us for more information.
How to automate import and export processes in Shopware 6?
If you deal with regular data updates, you can also use the Improved Import & Export extension for Shopware 6, since it automates import and export procedures. You only need to create a schedule to run them in the background.
How to integrate Shopware 6 with external systems?
Use the Improved Import & Export extension for Shopware 6 to connect your e-commerce storefront to ERPs, CRMs, accounting tools, and complex solutions. Our module, as we’ve just mentioned, automates import and export processes and modifies data according to the requirements of your Shopware store upon import. Furthermore, it applies changes to the exported information following the standards of the connected platforms.
Related posts
 Shopware 6 Advanced Pricing Guide + Import Tutorial
 Magento 2 Release Notes
 How To Bulk Import Products In Shopify: CSV Description & Step-By-Step Guide
 Reputon Amazon Importer Review: How to Connect Shopify to Amazon in a Few Clicks
 How to generate order increment IDs automatically during Magento 2 import
 A Complete Guide to Shopify Customer Import
 Magento 2 B2B Company Guide: Revealing Company Structure & Import
- How to Import Customers & Customer Addresses to Magento 2