
Exploring Shopware: Custom Products in Shopware 6
![]()
We’ve already explored Shopware 6 products but it was a basic feature available in all Shopware plans. Besides, there is an exclusive offer delivered in the Professional plan. Meet Shopware 6 Custom Product. It is a plugin that provides an extended shopping experience. In the following article, we define this tool and shed light on how to manage custom Products in Shopware 6. You will find out how to install Shopware 6 custom products. After that, we will guide you through the structure of a custom product template. You will discover how to add templates and template options to custom products in Shopware 6. Also, there is a chapter dedicated to option-based surcharges (both absolute and relative). After that, we focus on various management chores, such as adding or excluding options and templates. The feature’s frontend representation is also a matter of this article.

Note that we provide Shopware integration with external platforms. Contact our support for further information or try our Improved Import & Export Extension for Shopware. We can import your custom products with properties to Shopware 6.
Table of contents
- Shopware 6 Custom Products Defined
- How to Install Shopware 6 Custom Products
- Custom Product Templates
- How to Configure Option-based Surcharges in Shopware 6
- How to Exclude Options in Shopware 6 Custom Products
- How to Assign a Template to a Product
- Shopware 6 Custom Products on the Frontend
- Shopware 6 Custom Product Options In Invoices
- How to Customize Order Confirmation
- How to Import Custom Products to Shopware 6
- Shopware 6 Essentials FAQ
Shopware 6 Custom Products Defined
The Custom Products plug-in for Shopware 6 provides the possibility to add individualization options to items. For instance, Custom Products are suitable for goods where individual lettering is to be used or a special color specification is desired.
So, how does the Custom Products plugin for Shopware 6 work?
In a nutshell, it empowers you to generate flexible product templates to which selectable options are applied.
Next, you link custom product templates to existing items. Consequently, the new options are visible on the frontend so that a customer gets an opportunity to individualize the product according to their preferences. Furthermore, each option can be associated with individual charges.
How to Install Shopware 6 Custom Products
First of all, you need to switch to the Professional Edition of Shopware 6 to enable Custom Products. After that, it is possible to download the extension in your administration under Settings -> System -> Plugins -> Licenses. The plugin is listed under My Plugins. Install it via the three dots button and activate it by clicking the corresponding button in the Status column. After that, Shopware 6 Custom Products module appears under Catalogues -> Custom Products of your Shopware 6 administration.
Custom Product Templates
You can find all custom product templates listed under Catalogues -> Custom Products:

You can assign any of them to your Shopware 6 products. Note that templates can be distinguished by internal names and display names as well as descriptions. Besides, the Custom Products grid of Shopware 6 displays how many options are assigned to each template.
Use the context menu from the right to edit, duplicate, or delete templates.
How to add templates to Shopware 6 Custom Products
To create a new custom product template, hit the Add template button. The system transfers you to the General Configuration section:
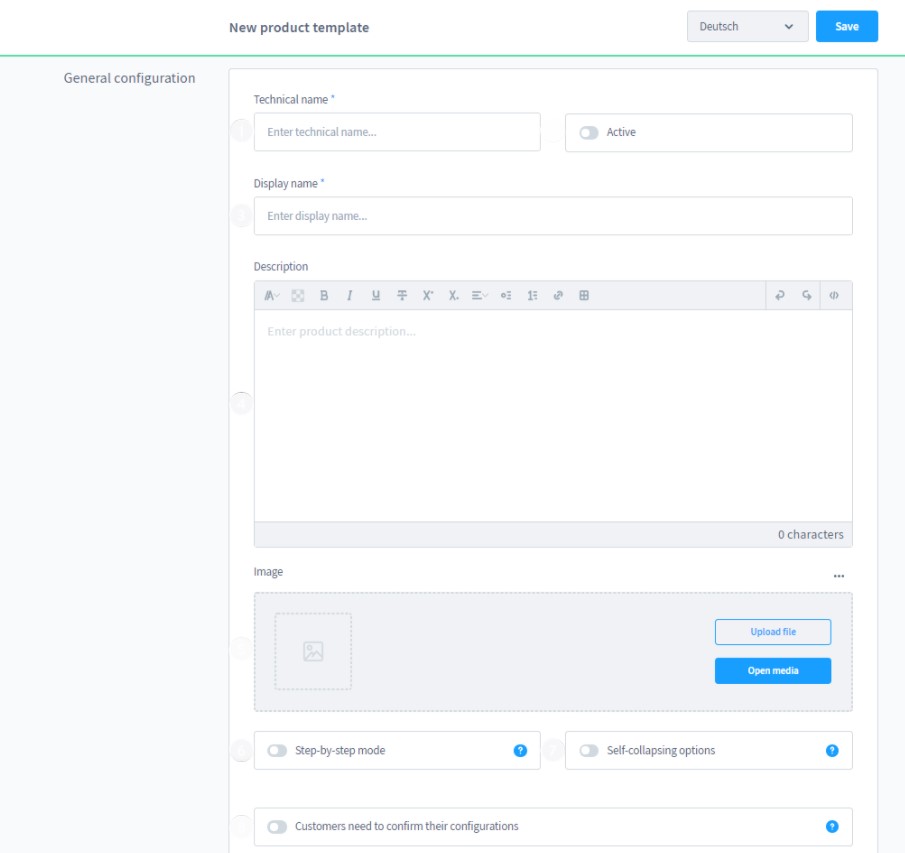
- Internal name – the designation displays internally in the template overview. Use different internal names for templates that should be named the same on the storefront.
- Active – enable/disable the product template on the frontend (the option doesn’t affect products it is assigned to – they are still available, if you deactivate the template);
- Display name – the designation displays on the frontend on a product page;
- Description – a summary for both internal and external use;
- Picture – upload a picture for the item detail page here;
- Step-by-step mode – activate the feature to guide a customer through the options step-by-step instead of displaying all at once;
- Self-collapsing options – activate this feature to collapse options on the frontend automatically as soon as the customer makes a valid entry (the step-by-step mode should be disabled);
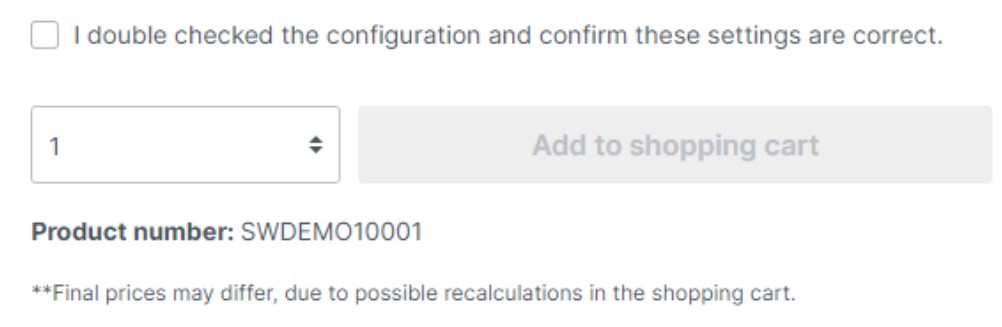
Customers need to confirm their configuration – if enabled, checking a box on a product page is required for confirming the configuration. Without confirmation, the Add to cart button is deactivated.
How to add template options to Custom Products
After you’ve created and saved your new template, the Options area displays.
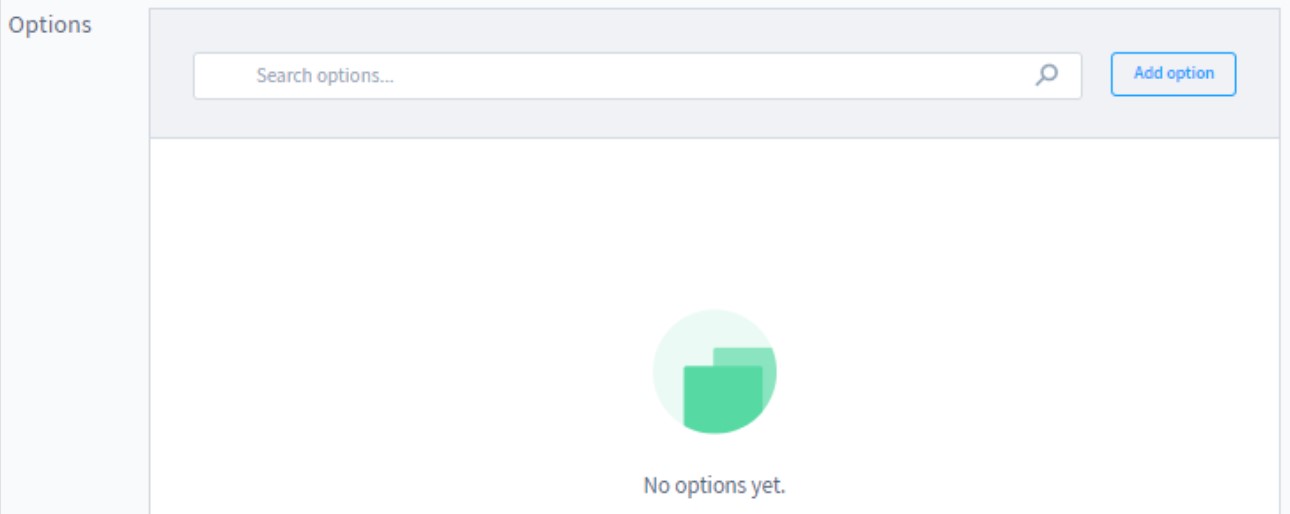
Here, you can view the options available for the selected template. Besides, it is possible to add new ones if necessary. Hit the Add option button and Shopware 6 will redirect you to a new window that looks as follows:
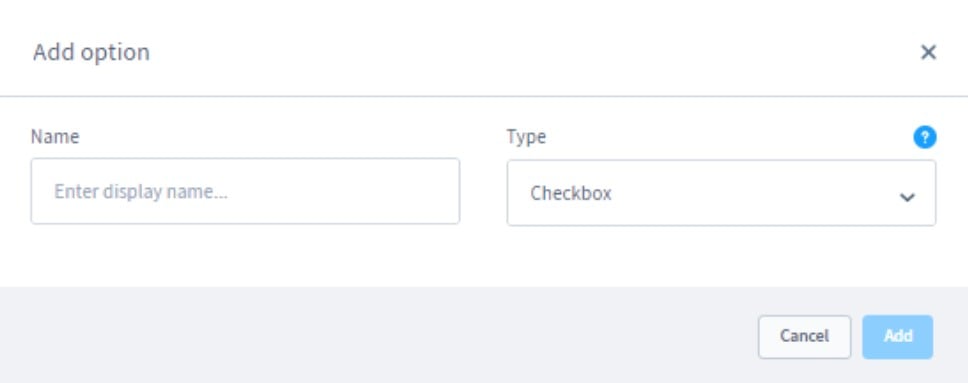
Firstly, specify the name of your new option and its type. The Shopware 6 Custom Products plugin supports the following option types:
- Section field;
- Image upload;
- Picture selection;
- Checkbox;
- File upload;
- Date filed;
- Color selection;
- HTML editor;
- Text area;
- Text field;
- Number field;
- Time field.
Note that each option is associated with a particular configuration screen. Let’s describe them.
Selection field
This option type is associated with one or more selection variabilities. They are displayed on the frontend in a separate window. A customer can select these options with a mouse click.
The configuration screen looks as follows:
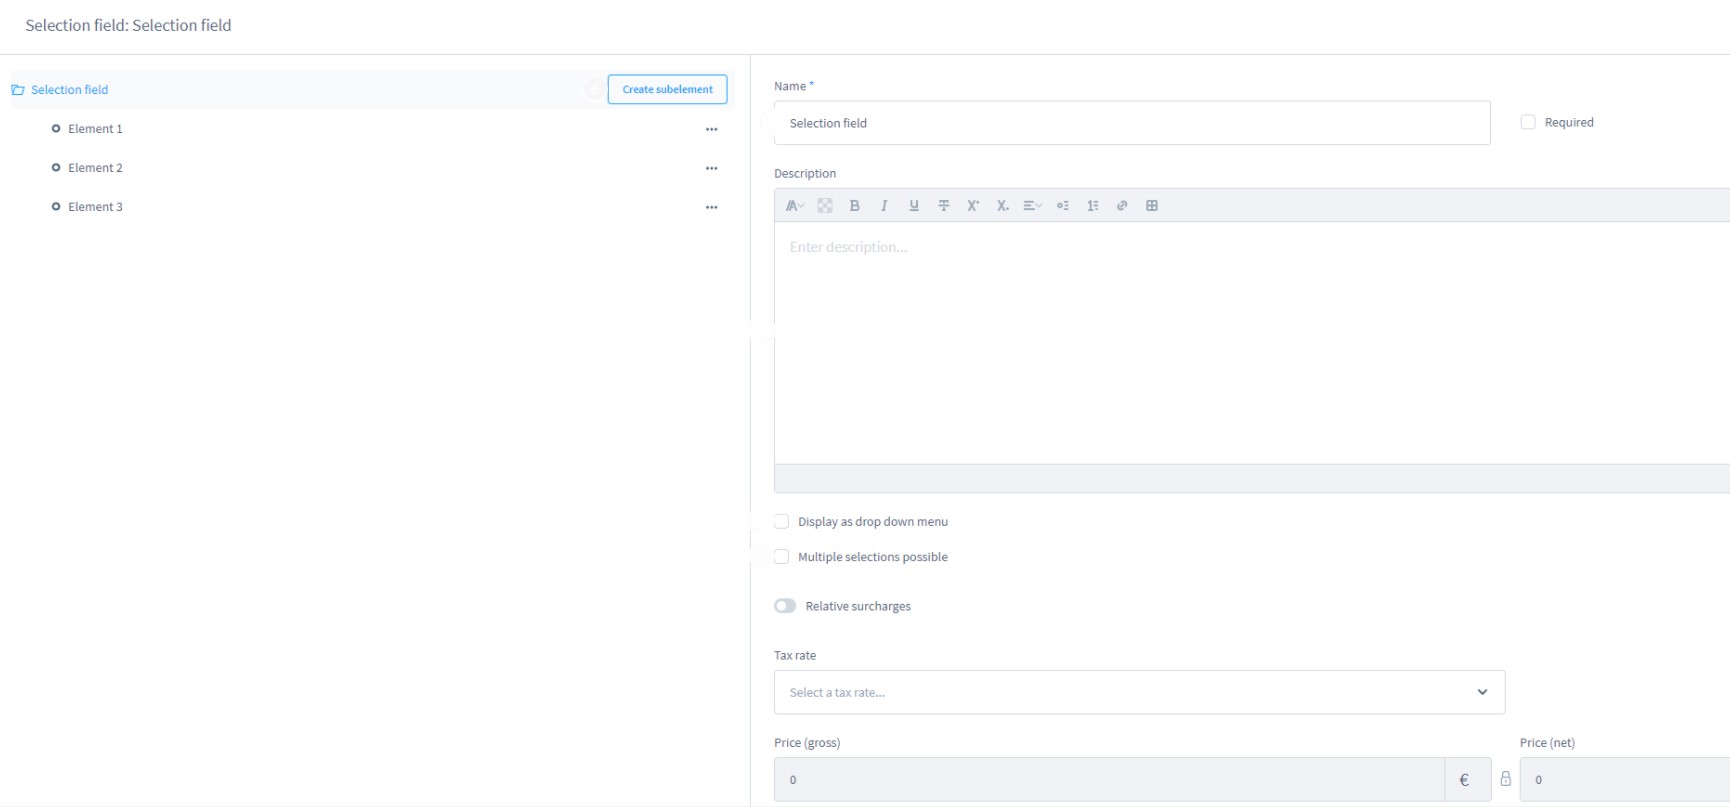
- Name – specify a name that will be displayed on the storefront and in the order documents;
- Required – check the box to make the mandatory field for customers. They will have to make a choice to activate the Add to cart button;
- Description – define your option on the storefront;
- Display as a dropdown menu – activate this option to display the selection of options as a dropdown menu on the storefront;
- Multiple selections possible – activate this option to enable multiple selections in the frontend (note that it is impossible in the dropdown menu);
- Relative Surcharges – activate this feature to add a surcharge that the customer has to pay when selecting the option.
- Selection field – here, you can view the created items that can be selected on the frontend:
- Create subelement – hit this button to add further elements;
- Elements – click on one of the elements to display further settings for it. You will see the following configuration section on the right:
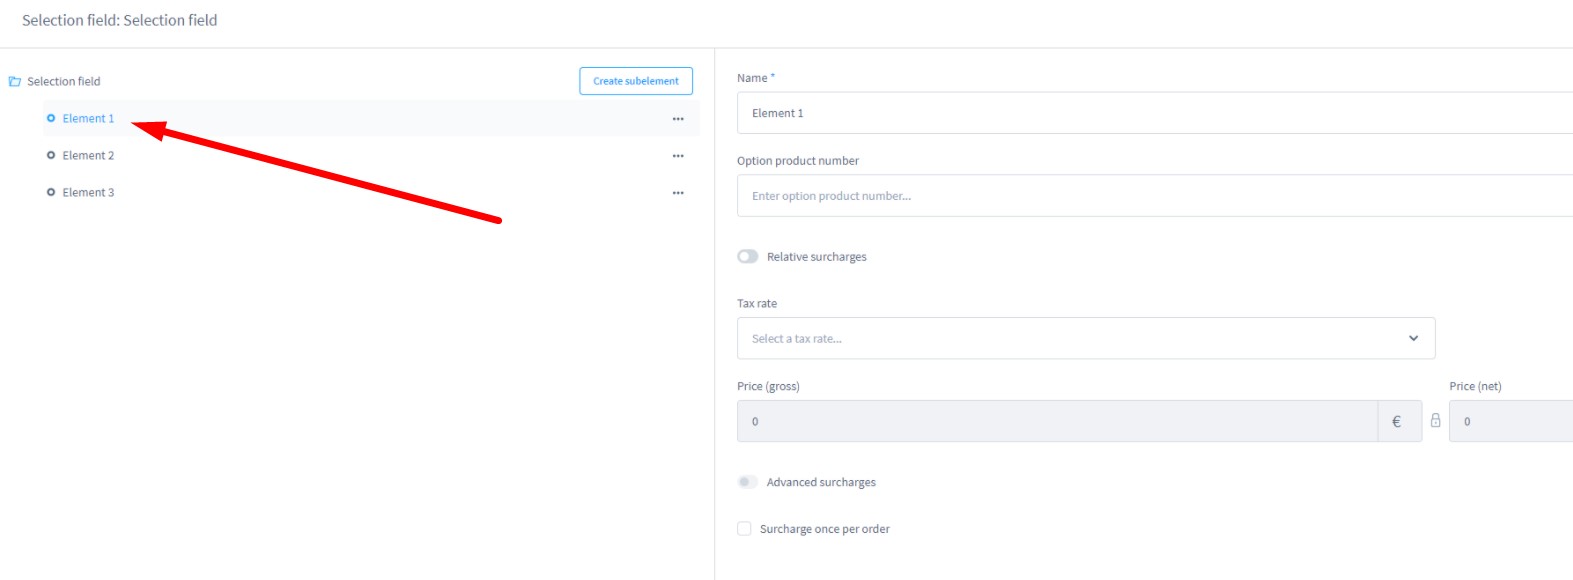
As you can see the Shopware Custom Products module lets you specify a name and an option product number. Besides you can define your own surcharge similarly to the option settings. Note that the surcharge of an element is calculated along with the option surcharge.
Now, when you configured the selection field option and all its elements are configured, you can see the following frontend appearance:
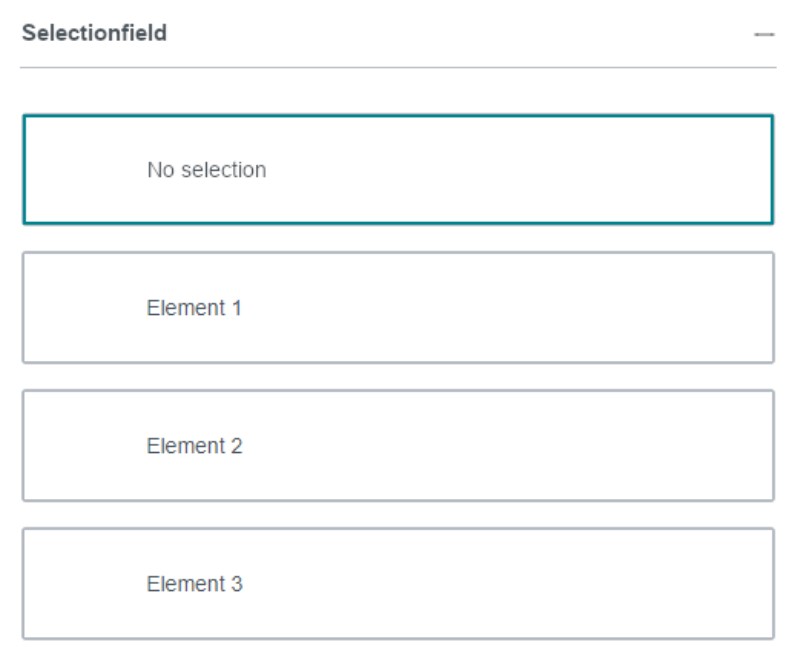
If you’ve made the option mandatory, the No selection element is not displayed. The above appearance is suitable for multiselect, while the following dropdown menu doesn’t let customers to choose several option elements simultaneously:

Image upload
The image upload option type enables customers to upload their own images. It is necessary for providing a more personalized experience and creating individualized products. For instance, you sell cups and let customers upload their images that appear on a cup surface.
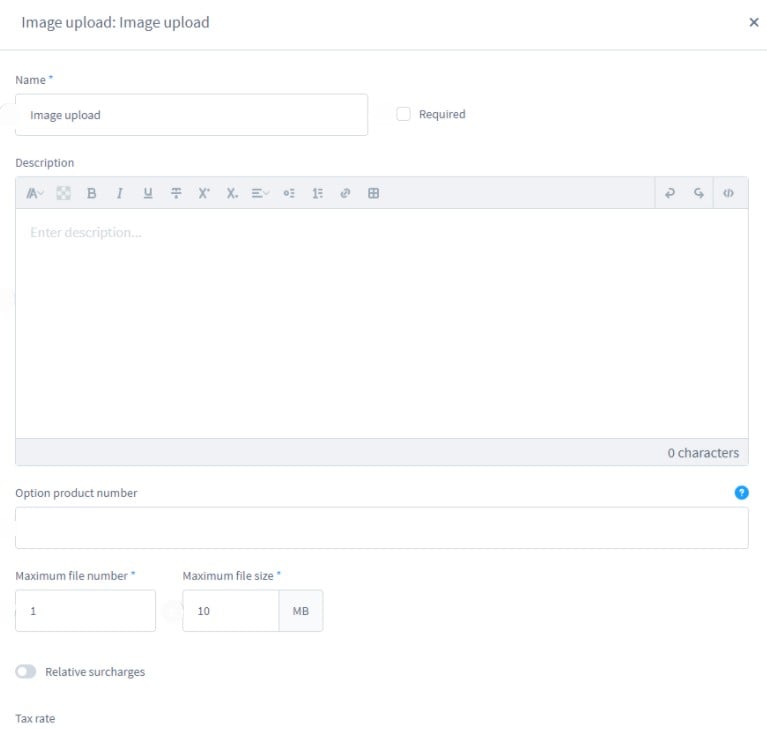
- Name – specify a name that will be displayed on the storefront and in the order documents;
- Required – check the box to make the mandatory field for customers. They will have to make a choice to activate the Add to cart button;
- Description – define your option on the storefront;
- Option product number – a priority number for the option printed on the documents;
- Maximum file number – the limit on the number of files that can be uploaded;
- Maximum file size – the limit on the file size;
- Relative Surcharges – activate this feature to add a surcharge that the customer has to pay when selecting the option.
- Tax rate – select a tax rate here.
On the frontend, your new custom product option looks as follows:
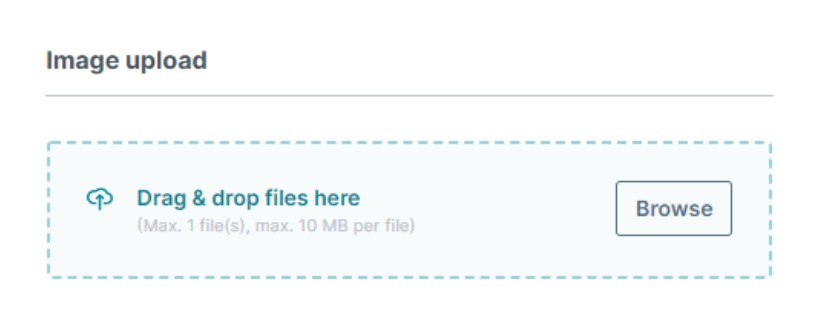
Note that Shopware 6 supports only jpg, png, and gif file types.
From the admin perspective, uploaded images are accessible in the Shopware 6 backend. You need to click the “…” button on the order screen to get to the uploaded files.
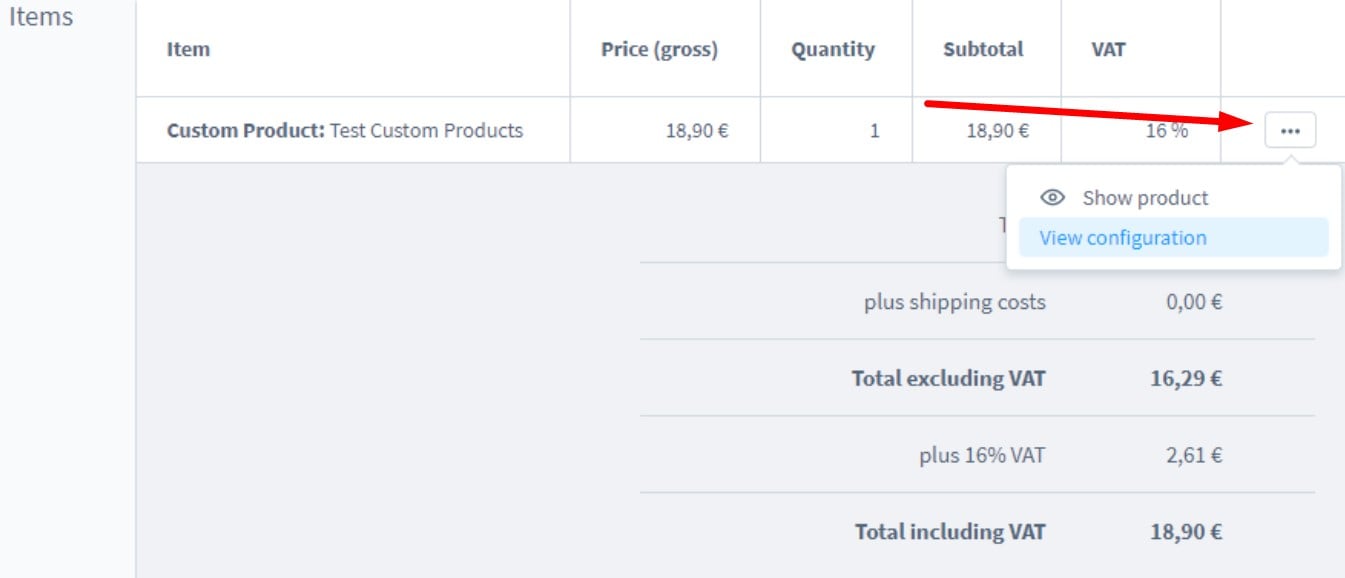
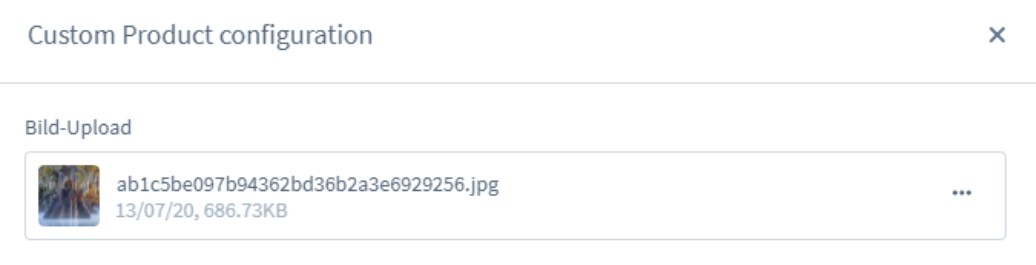
The system transfers you to a new screen where you can get configuration information and other details:
Picture selection
At first, picture selection may seem identical to the selection field option. It lets customers make a selection based on images. Although the picture selection in Shopware 6 has the exact same settings as the selection field, it cannot be displayed in a dropdown menu. Therefore, you have the following configuration fields:
- Name – specify a name that will be displayed on the storefront and in the order documents;
- Required – check the box to make the mandatory field for customers. They will have to make a choice to activate the Add to cart button;
- Description – define your option on the storefront;
- Display as a dropdown menu – activate this option to display the selection of options as a dropdown menu on the storefront;
- Multiple selections possible – activate this option to enable multiple selections in the frontend (note that it is impossible in the dropdown menu);
- Relative Surcharges – activate this feature to add a surcharge that the customer has to pay when selecting the option.
- Image selection – here, you can specify images that can be selected on the frontend:
- Create subelement – hit this button to add further elements;
- Elements – click on one of the elements to display further settings for it.
On the frontend, the picture selection looks as follows:
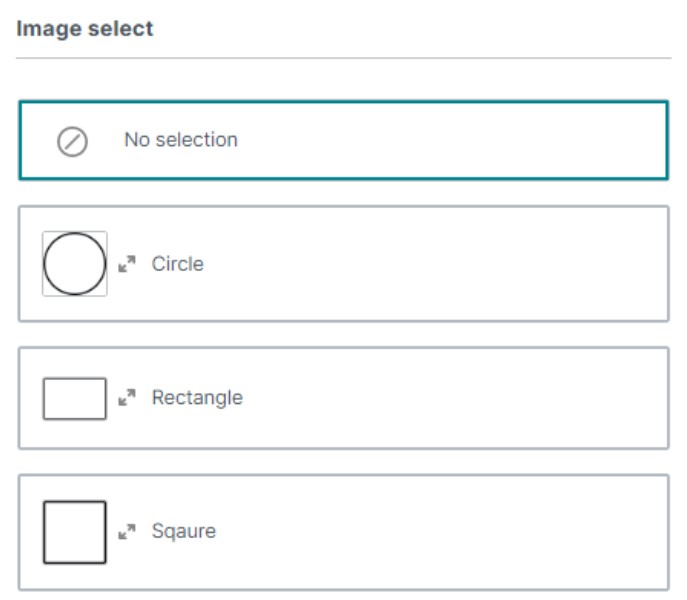
If you make the option mandatory in the administration, the No selection element doesn’t display.
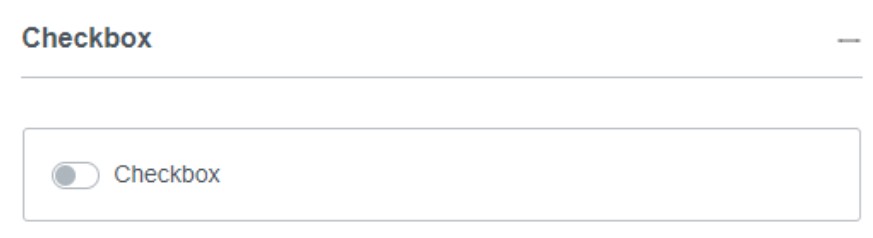
Checkbox
With the checkbox type, you provide customers with options that can be selected or deselected. The configuration section looks as follows:
It enables you to specify the following data:
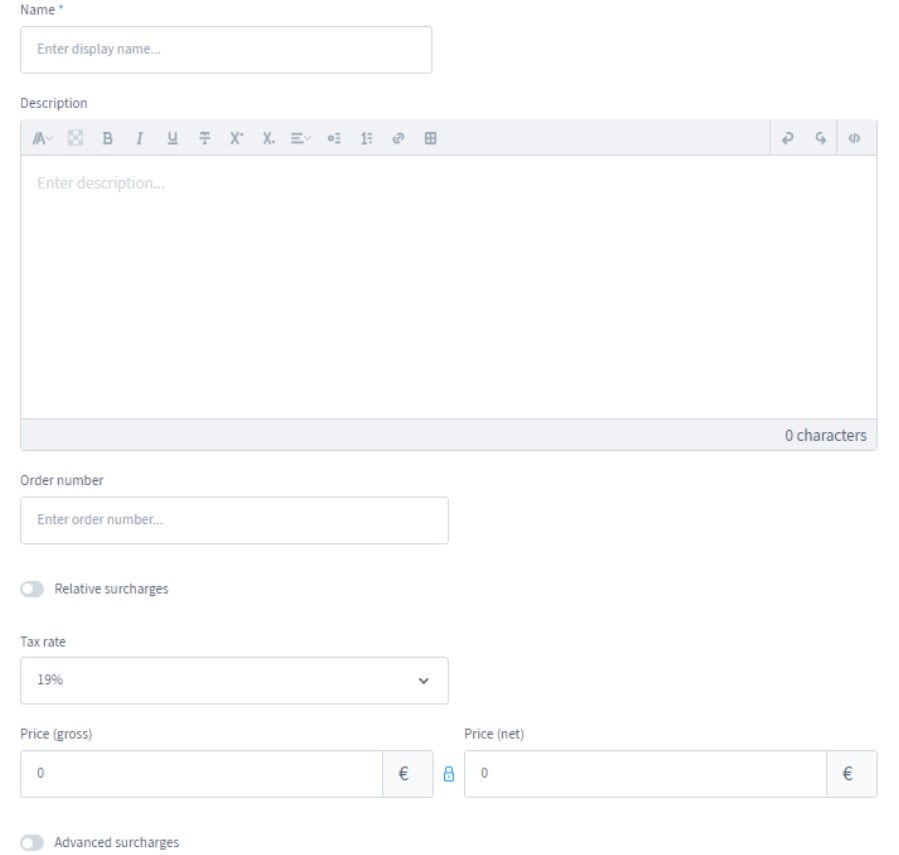
- Name – specify a name that will be displayed on the storefront and in the order documents;
- Description – define your option on the storefront;
- Option product number – a priority number for the option printed on the documents;
- Relative Surcharges – activate this feature to add a surcharge that the customer has to pay when selecting the option;
- Tax rate – select a tax rate here.
You can also specify a gross and net price, enable advanced surcharge, and activate a single surcharge per order. On the frontend, everything looks as follows:
File Upload
This option only lets your customers upload PDF files. The configuration screen is similar to the one associated with image uploads:
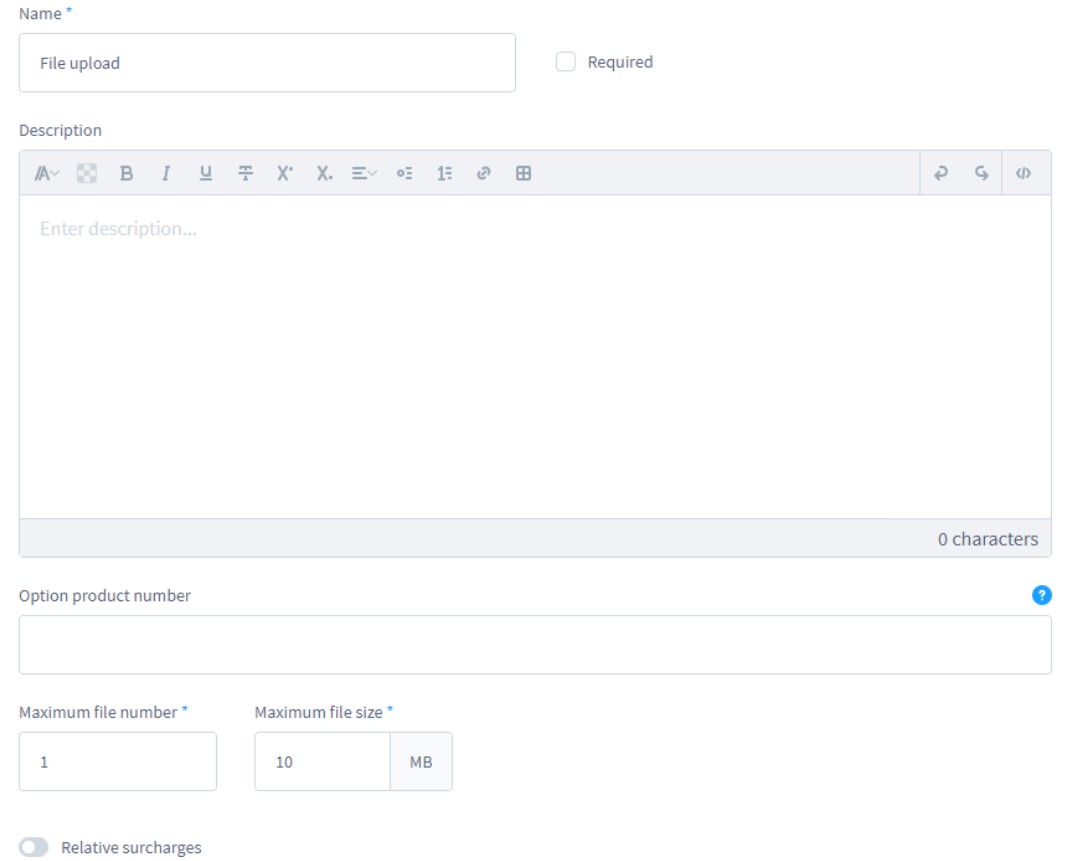
- Name – specify a name that will be displayed on the storefront and in the order documents;
- Required – check the box to make the mandatory field for customers. They will have to make a choice to activate the Add to cart button;
- Description – define your option on the storefront;
- Option product number – a priority number for the option printed on the documents;
- Maximum file number – the limit on the amount of files that can be uploaded;
- Maximum file size – the limit on the file size;
- Relative Surcharges – activate this feature to add a surcharge that the customer has to pay when selecting the option.
- Tax rate – select a tax rate here.
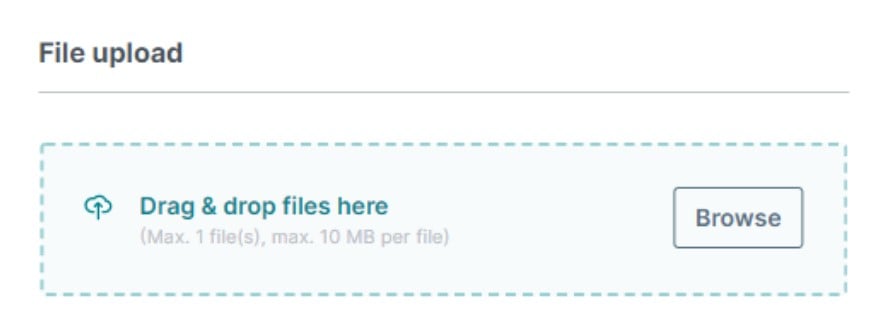
On the frontend, your new custom product option looks as follows:
Date field
Adding a date to the order is no longer a problem if you use the Shopware 6 Custom Products plugin. The module lets you add a date for an engraving or an event. The configuration screen contains lots of familiar options:
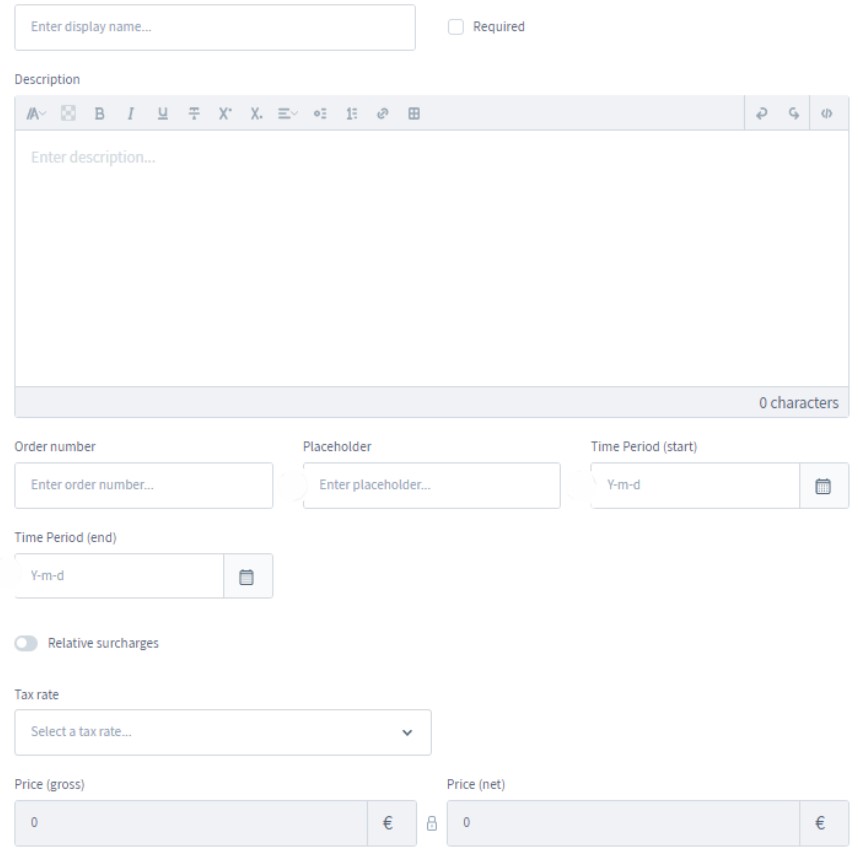
- Name – specify a name that will be displayed on the storefront and in the order documents;
- Required – check the box to make the mandatory field for customers. They will have to make a choice to activate the Add to cart button;
- Description – define your option on the storefront;
- Order number – a priority number of your option;
- Placeholder – an option displayed in the date field before the customer has selected a date;
- Time Period (start) – specify the earliest date here;
- Time Period (end) – specify the latest date in this field.
- Relative Surcharges – activate this feature to add a surcharge that the customer has to pay when selecting the option;
- Tax rate – select a tax rate here.
You can also specify a gross and net price, enable advanced surcharge, and activate a single surcharge per order. On the frontend, everything looks as follows:

Color selection
The Shopware 6 custom product color selection empowers customers to choose one or more colors for the product. The section is similar to the selection field except you add color options here. You add sub-elements to the color selection option, each of which is bound to one color as follows:
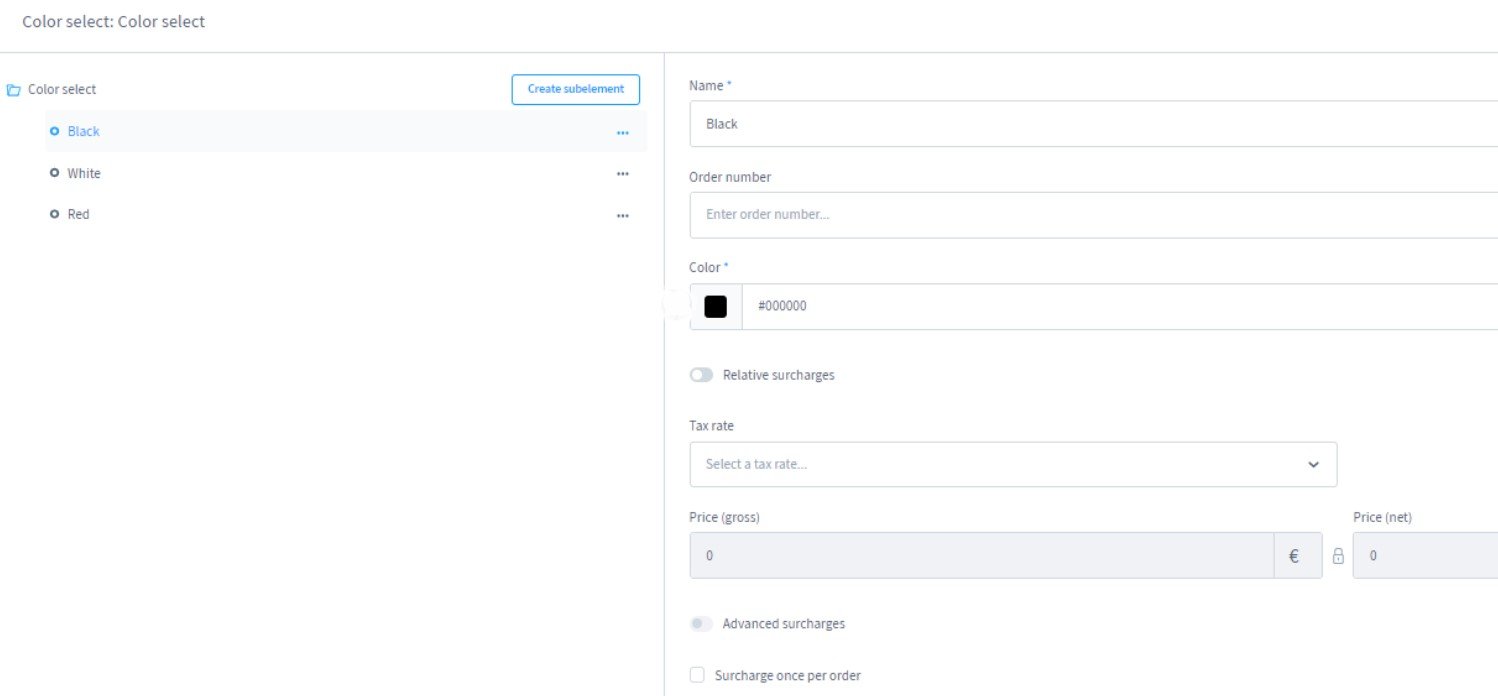
- Name – specify a name that will be displayed on the storefront and in the order documents;
- Order number – a priority number for the option ;
- Color – define a color option here;
- Relative Surcharges – activate this feature to add a surcharge that the customer has to pay when selecting the option.
- Tax rate – select a tax rate here.
You can also specify a gross and net price, enable advanced surcharge, and activate a single surcharge per order. On the frontend, everything looks as follows:
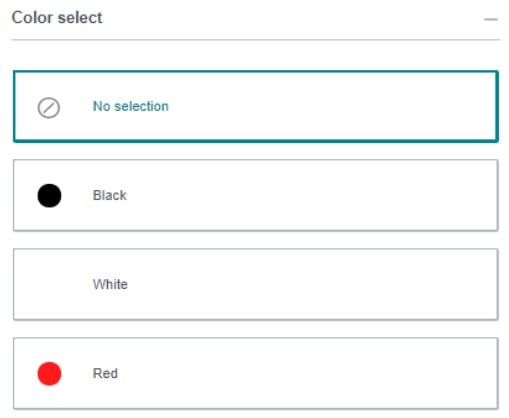
If you make the option mandatory, the No selection element doesn’t display.
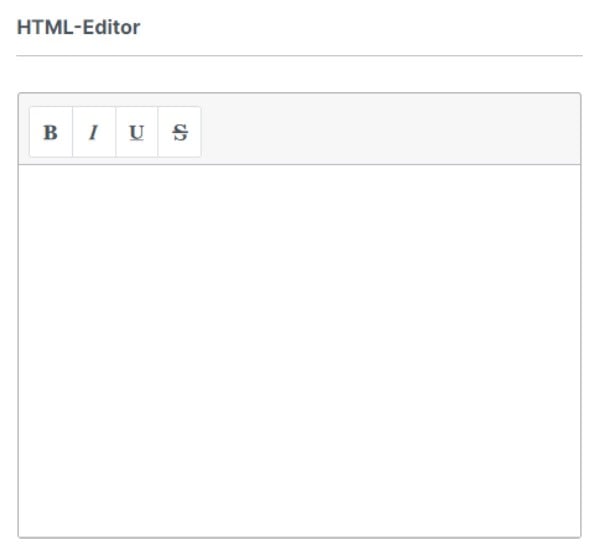
HTML editor
With the HTML editor option of the Shopware 6 Custom Products module, your customers get the ability to enter text with simple formatting functions. After the order is placed, the system transmits the text without conversion. As for the admin configuration, it looks as follows:
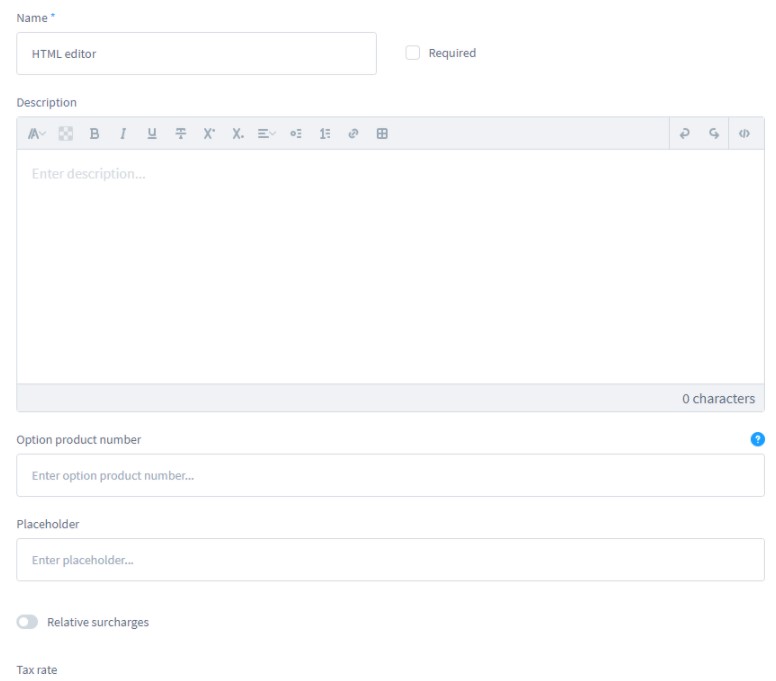
- Name – specify a name that will be displayed on the storefront and in the order documents;
- Required – check the box to make the mandatory field for customers. They will have to make a choice to activate the Add to cart button;
- Description – define your option on the storefront;
- Option product number – a priority number for the option printed on the documents;
- Placeholder – an option displayed in the HTML field before the customer applies changes;
- Relative Surcharges – activate this feature to add a surcharge that the customer has to pay when selecting the option;
- Tax rate – select a tax rate here.
On the frontend, the HTML editor displays as follows:
You can access the customer-provided data in the same way as uploaded images and PDFs. Proceed to the order page and call up the configuration using the “…” button.
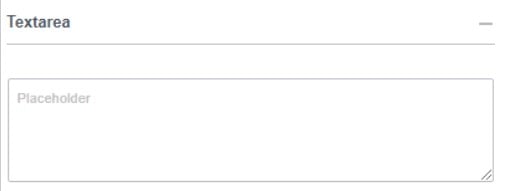
Text area
The Shopware 6 Custom Products extension lets customers add text to the products they purchase. It is possible to specify multi-line texts. The corresponding backend field looks as follows:

- Name – specify a name that will be displayed on the storefront and in the order documents;
- Required – check the box to make the mandatory field for customers. They will have to make a choice to activate the Add to cart button;
- Description – define your option on the storefront;
- Option number – a priority number for the option printed on the documents;
- Placeholder – an option displayed in the text area before the customer applies changes;
- Min. length – how short the provided text may be;
- Max. length – how long the provided text may be;
- Relative Surcharges – activate this feature to add a surcharge that the customer has to pay when selecting the option.
- Tax rate – select a tax rate here.
You can also specify a gross and net price, enable advanced surcharge, and activate a single surcharge per order. On the frontend, everything looks as follows:
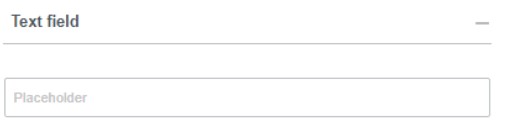
Text field
The text field option of Shopware 6 Custom Products differs from the text area in a single aspect: it lets you add only single-line texts.
The backend configuration is identical:
- Name – specify a name that will be displayed on the storefront and in the order documents;
- Required – check the box to make the mandatory field for customers. They will have to make a choice to activate the Add to cart button;
- Description – define your option on the storefront;
- Option number – a priority number for the option printed on the documents;
- Placeholder – an option displayed in the text area before the customer applies changes;
- Min. length – how short the provided text may be;
- Max. length – how long the provided text may be;
- Relative Surcharges – activate this feature to add a surcharge that the customer has to pay when selecting the option.
- Tax rate – select a tax rate here.
You can also specify a gross and net price, enable advanced surcharge, and activate a single surcharge per order. On the frontend, everything looks as follows:
Number field
With the number field option type of the Shopware 6 Custom Products extension, customers can add numbers to products.
The admin section looks as follows:
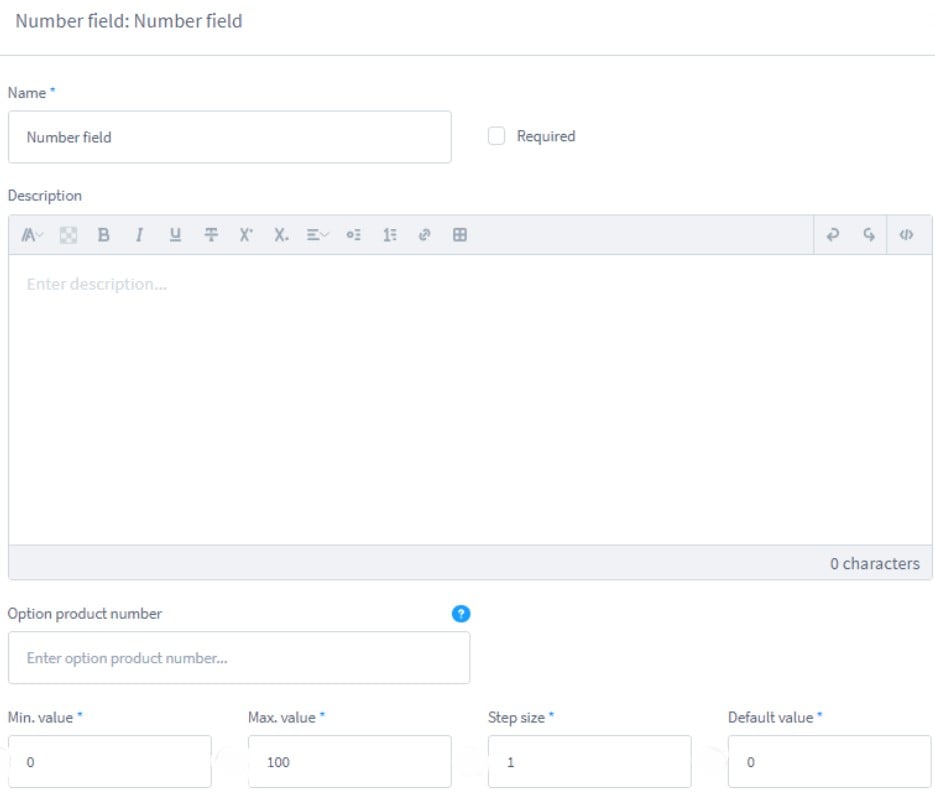
- Name – specify a name that will be displayed on the storefront and in the order documents;
- Required – check the box to make the mandatory field for customers. They will have to make a choice to activate the Add to cart button;
- Description – define your option on the storefront;
- Option product number – a priority number for the option printed on the documents;
- Min. value – the minimum value that a customer can enter;
- Max. value – – the maximum value that a customer can enter;
- Step size – the steps in which the numbers can be entered. If the step size is 0.5, decimals are possible: 0; 0.5; 1; 1.5;
- Default value – you can specify a preselected value here.
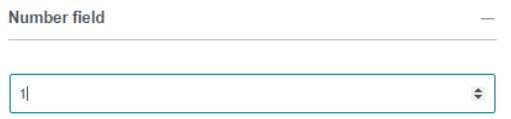
On the frontend, this option type displays in the following way:
Time field
The last option prepared in Shopware 6 Custom Products is the time field. It lets customers specify a time, such as the start time for a particular event the purchased product is associated with.
The admin configuration section is identical to the date field:
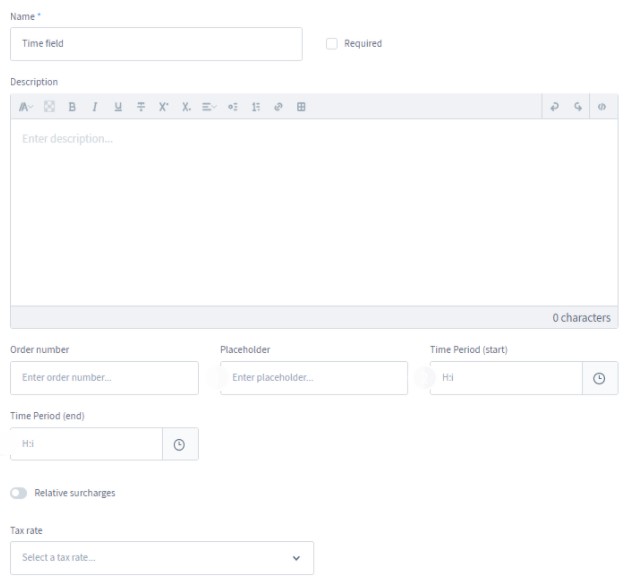
- Name – specify a name that will be displayed on the storefront and in the order documents;
- Required – check the box to make the mandatory field for customers. They will have to make a choice to activate the Add to cart button;
- Description – define your option on the storefront;
- Order number – a priority number of your option;
- Placeholder – an option displayed in the date field before the customer has selected a date;
- Time Period (start) – specify the earliest time here;
- Time Period (end) – specify the latest time in this field.
- Relative Surcharges – activate this feature to add a surcharge that the customer has to pay when selecting the option;
- Tax rate – select a tax rate here.
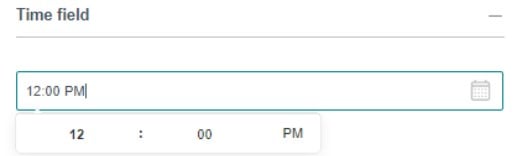
You can also specify a gross and net price, enable advanced surcharge, and activate a single surcharge per order. On the frontend, everything looks as follows:
How to Configure Option-based Surcharges in Shopware 6
As you can see, Shopware 6 lets you define additional surcharges for each option in the Custom Products module. Below, we shed light on this process.
Absolute surcharges
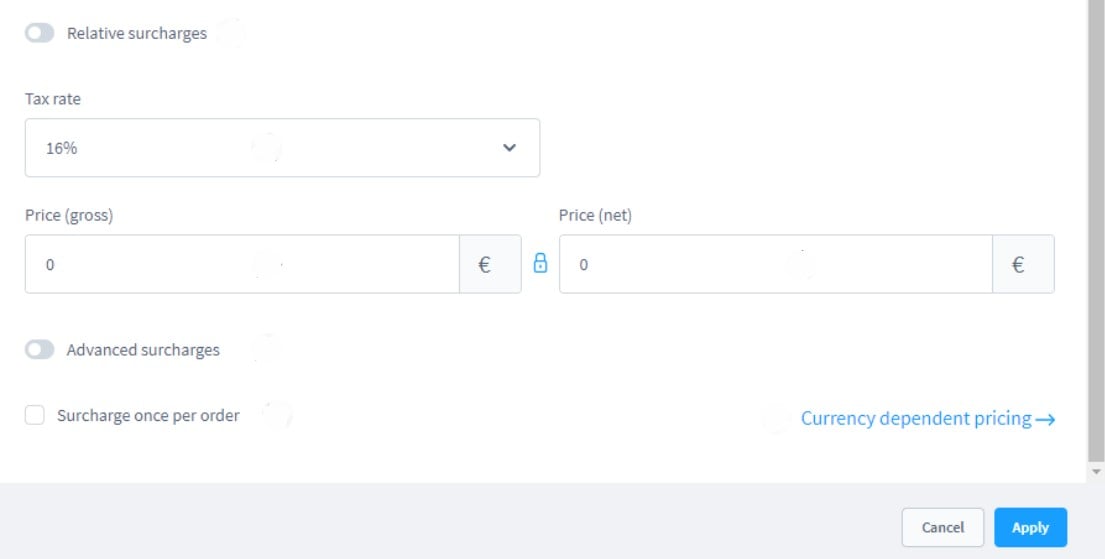
You can use the Relative surcharge switch to toggle between absolute and relative surcharges for the selected option. Thus, you can activate only one surcharge type per option.
Before entering the surcharge amount, specify the tax rate for the surcharge. You can also enter the gross price. If the lock symbol situated between the gross and net price is closed, it means that the net price will be determined automatically following the provided values. You can specify a different net price as follows:
- Click on the lock symbol;
- When it is open, you can specify the net price.
If you work with an absolute surcharge, it is also possible to configure some extended surcharge options, activating the advanced surcharge toggle. Select a tax rate and define your own surcharges for the different currencies.
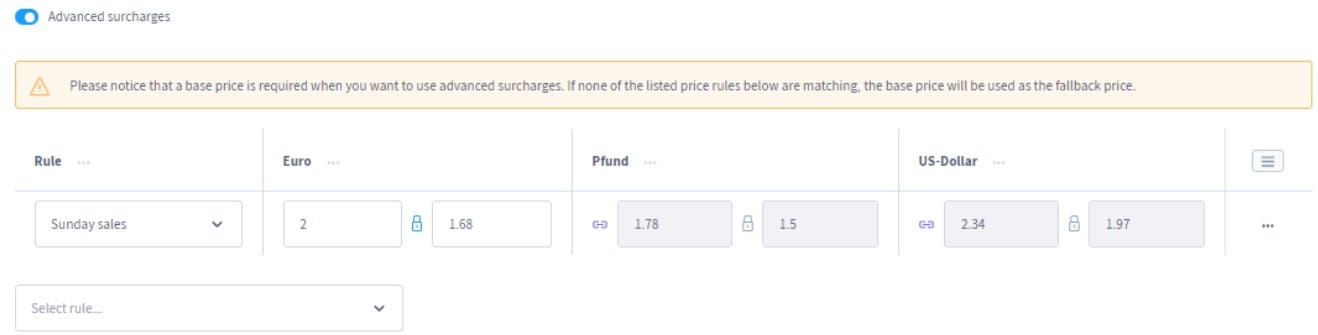
With regards to the Surcharge once per order checkbox, the Shopware 6 Custom Products plugin lets you calculate the surcharge once in order, even if a customer uses an option several times.
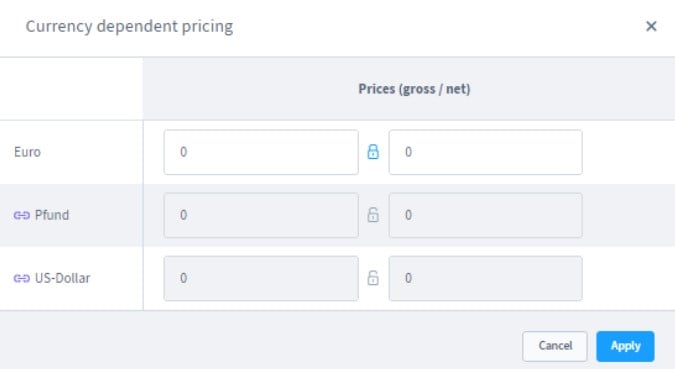
Selecting a tax rate also activates the function of currency-dependent prices. Define a separate surcharge for each stored. By default, the price of the standard currency is calculated following the initially provided conversion factor. However, Shopware 6 lets you define different surcharges for a currency by clicking on the chain symbol in front of the currency name. After that, you should enter your own surcharge.
Relative surcharges
As for the relative surcharges, Shopware 6 calculates them dynamically following such parameters as the product price and the stored surcharge percentage rate.
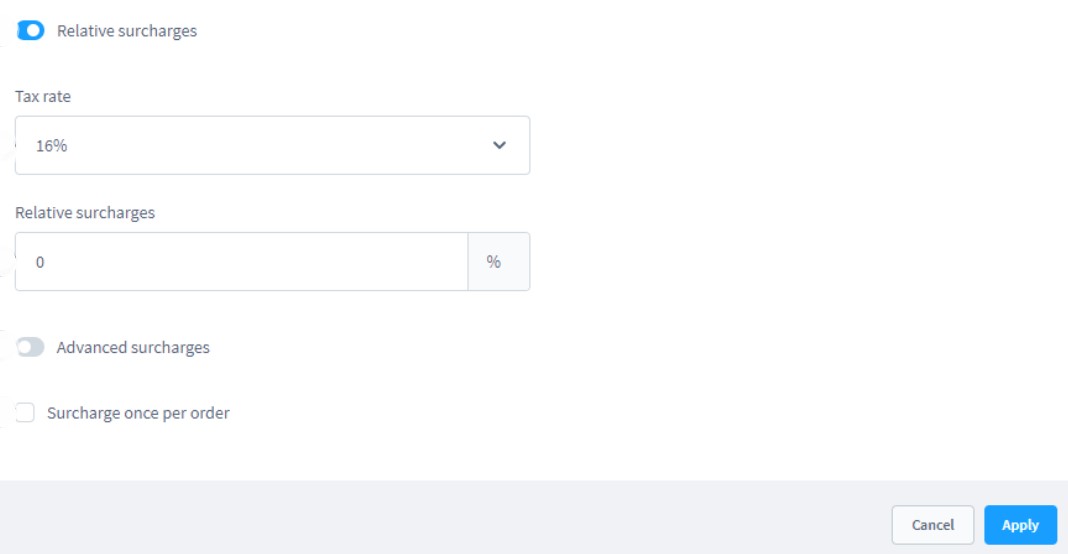
You can activate the feature via the Relative surcharges checkbox. Next, configure the surcharge calculation by specifying the tax rate and relative surcharge.
To enable more detailed configurations, toggle Advanced surcharges and define rules to determine more specific conditions per option.
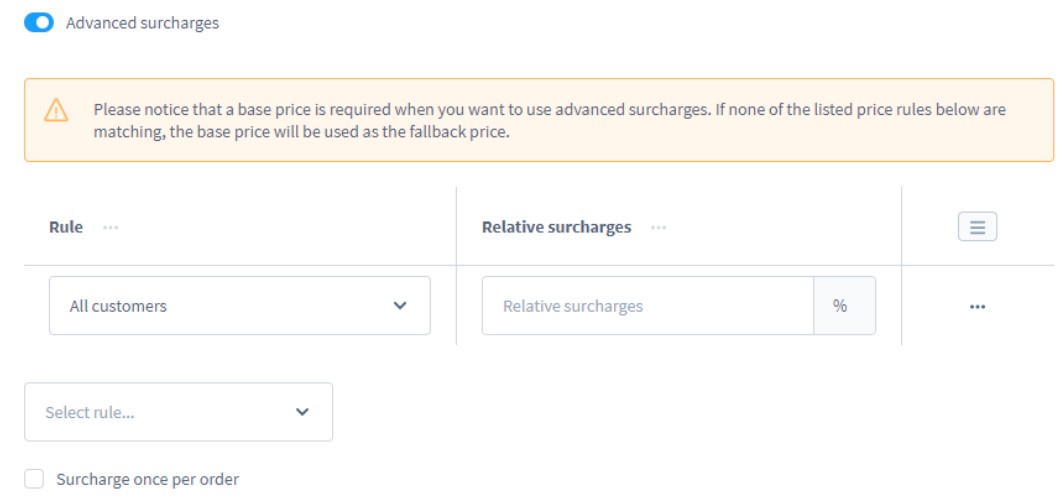
Note that the Surcharge once per order checkbox works exactly the same as the algorithm that we’ve just described.
How to Exclude Options in Shopware 6 Custom Products
For at least 2 non-mandatory options, Shopware 6 displays the possibility for mutual exclusion.
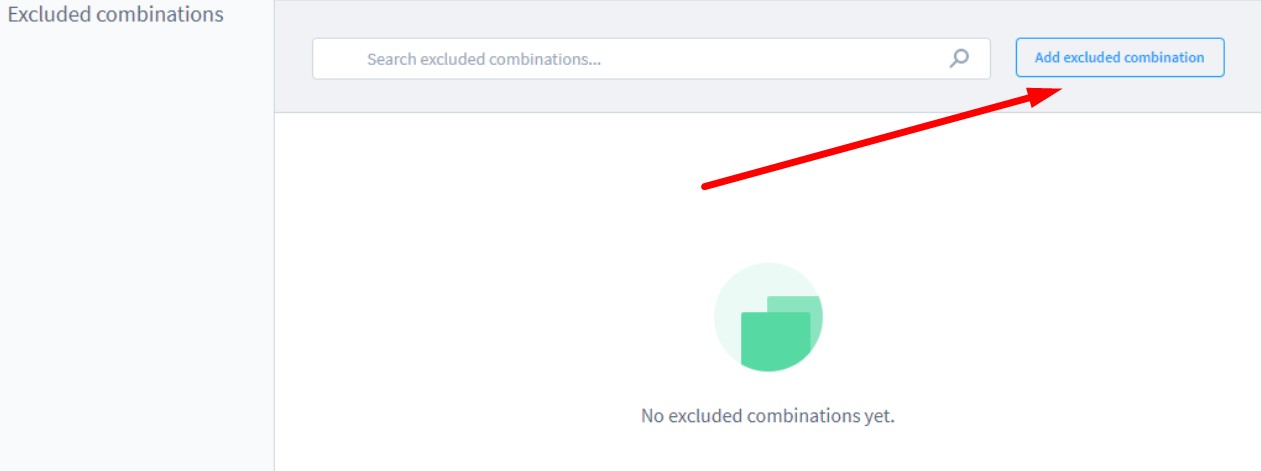
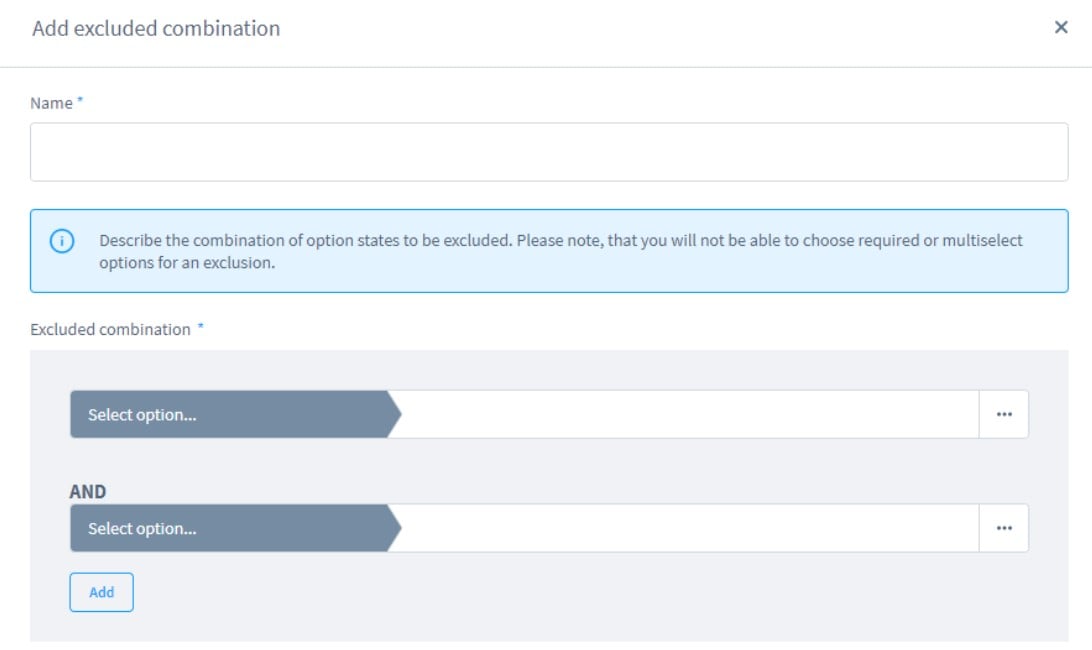
You can create an exclusion combination:
- Click the Add excluded combination button;
- Provide a combination name;
- Select options to create the combination;
- Choose whether the exclusion should take place:
- If the customer has made an entry;
- If the customer leaves the field blank.
How to Assign a Template to a Product
Now, when you know how to create a custom product template in Shopware 6, it is necessary to assign it to an existing product. After that, your customers will get the ability to individualize the item.
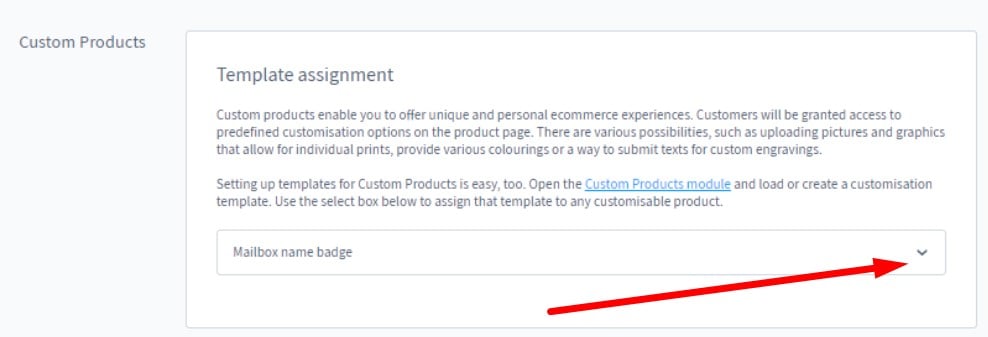
You need to open the General tab of a product configuration page. Find the Custom Products section and select a custom product template from the dropdown. That’s it! You’ve just assigned a template to a product in Shopware 6.
Shopware 6 Custom Products on the Frontend
Let’s see how custom products look on the frontend in normal and step-by-step modes.
Normal mode
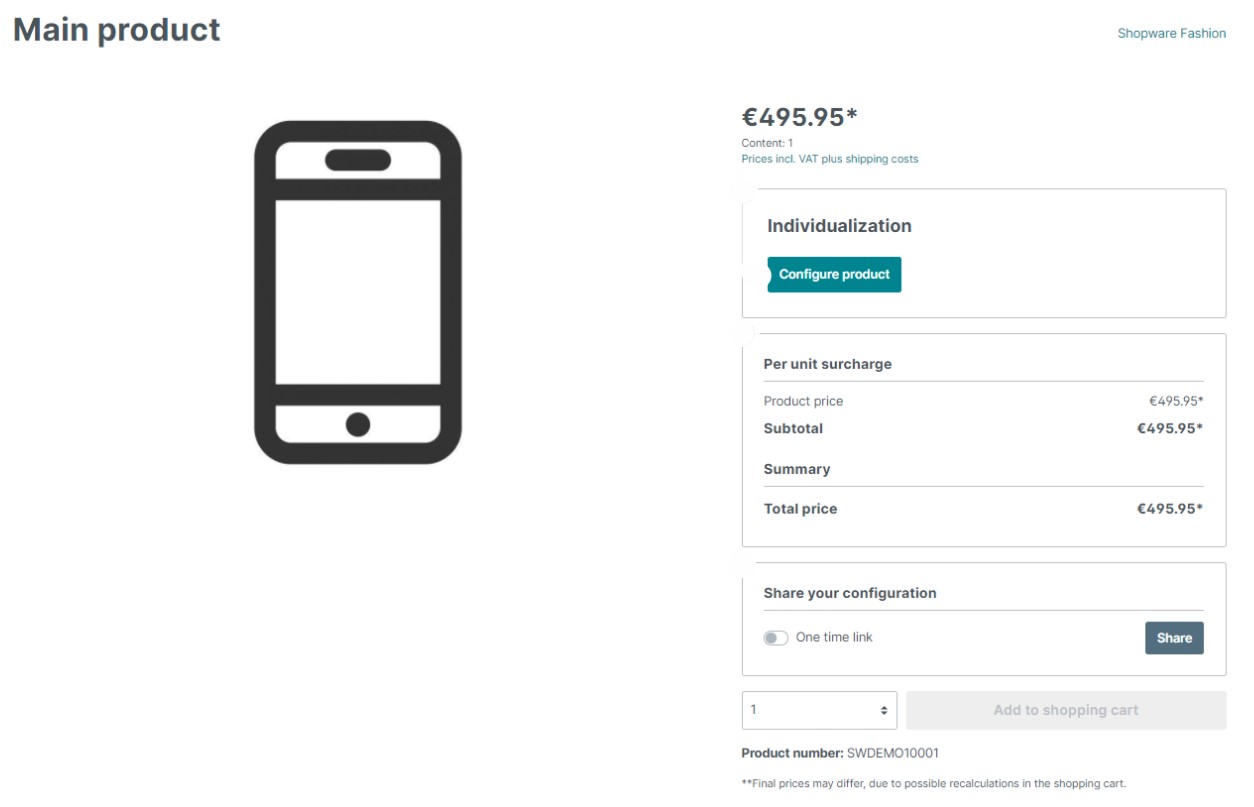
The following image illustrates the normal display mode for custom product options. They are situated above the Add to cart button in the Individualization section.
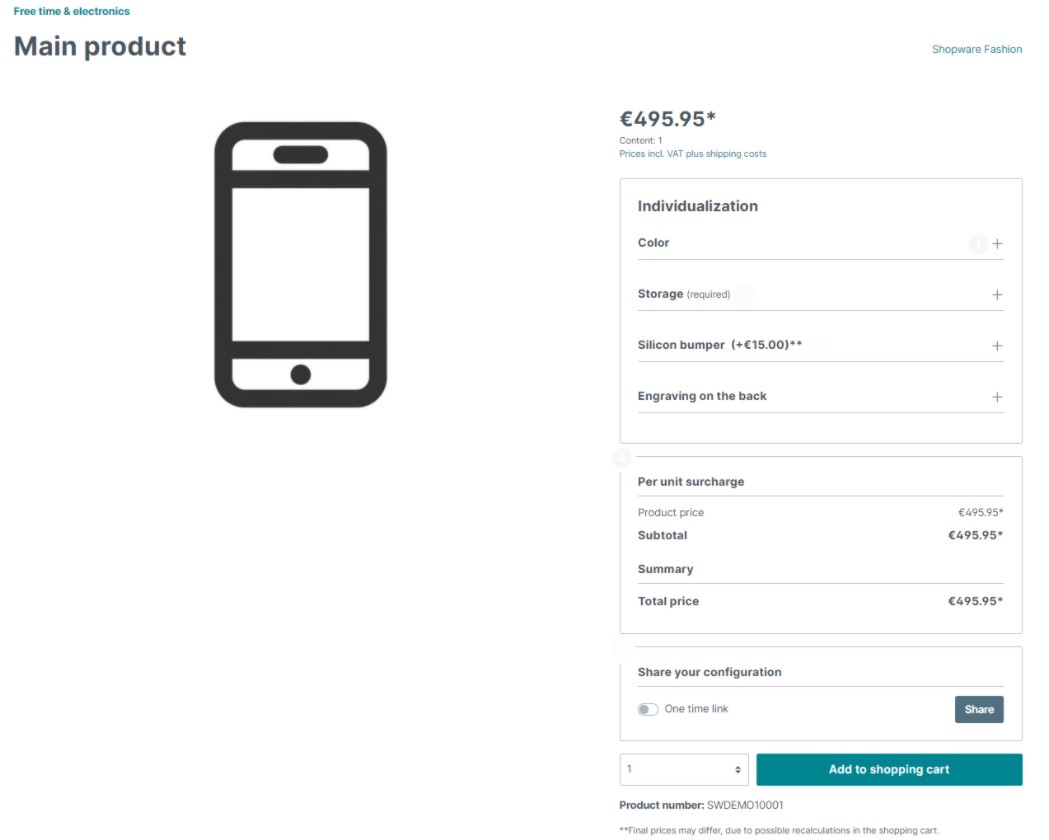
You can unfold each custom option to perform the selection. If an option is mandatory, Shopware 6 shows that it is required. Besides, the system displays all the surcharges associated with the option. Selecting an option or an element with a surcharge is summarized in the Per Unit Surcharges section.
Also, note that it is possible to share the custom product configuration via the link in the Share your configuration section. The toggle lets you create one-time links.
Step by step mode
The step-by-step mode looks differently. It prevents the available options from being displayed directly.
You should start the customization from the corresponding area below the product price. Click the Configure product button and Shopware 6 will guide you through a step-by-step customization process. Note that selecting an option or an element with a surcharge is summarized in the Per unit surcharges section. As for link sharing, it is absolutely the same as in the case of the normal mode.
It is possible to add the product to the cart only after all the mandatory options are configured.
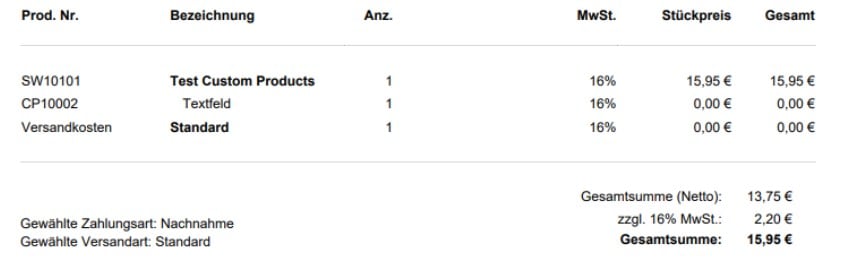
Shopware 6 Custom Product Options In Invoices
Shopware 6 lists individual custom product options as separate items in the invoice. If a separate product number for the option was assigned, the system indicates that.
How to Customize Order Confirmation
Shopware 6 sends order confirmations via email. The corresponding message lists all options, indicating which custom product options have been selected. However, the exact content is not included. Thus, the email configuration doesn’t contain texts, numbers, or selected dates. However, you can adjust the email template manually to provide this data. Add the following code to display the provided data in your order confirmation emails:
|
1 2 3 4 5 6 7 8 9 10 11 12 13 14 15 16 17 18 19 20 21 22 23 24 25 26 27 28 29 30 31 |
{% if lineItem.payload.type is defined %} {% if lineItem.payload.type == "textfield" %} {{ lineItem.payload.value }} <br/> {% elseif lineItem.payload.type == "textarea" %} {{ lineItem.payload.value }} <br/> {% elseif lineItem.payload.type == "numberfield" %} {{ lineItem.payload.value }} <br/> {% elseif lineItem.payload.type == "datetime" %} {{ lineItem.payload.value|date("Y.m.d") }} <br/> {% elseif lineItem.payload.type == "timestamp" %} {{ lineItem.payload.value|date("H:i:s") }} <br/> {% elseif lineItem.payload.type == "htmleditor" %} {{ lineItem.payload.value }} <br/> {% elseif lineItem.payload.type == "imageupload" %} {% for media in lineItem.payload.media %} {{ media.filename }} <br/> {% endfor %} <br/> {% elseif lineItem.payload.type == "fileupload" %} {% for media in lineItem.payload.media %} {{ media.filename }} <br/> {% endfor %} <br/> {% endif %} {% endif %} |
The code above incorporates separate if- or ifelse- queries per each custom product option. However, no specification is necessary for the selection field, image selection, checkbox, and color selection.
The result of the customization looks as follows:

For further information, follow this link:
How to Import Custom Products to Shopware 6
Our team lets you simplify and automate various routine processes associated with managing your Shopware 6 backend by importing the existing data. Contact our support for more details and try our . You can use it to import any entities to Shopware 6. Please, consult our specialists before using the module for transferring custom products to Shopware 6.
The extension lets you automate product import and export processes. You create a schedule and the module transfers data for you following the specified time frames. Also, it lets you create numerous API connections for connecting Shopware 6 to any system beyond the platform.
Shopware 6 Essentials FAQ
How to create a Shopware ID?
Сreating a Shopware ID is among the initial steps in using the Shopware platform. It is tightly connected to the creation of your Shopware account: you get the ID upon its registration.
How to create a Shopware account?
You can create a Shopware account on a registration page. Find the Register Now link, click it, and fill in the form, receiving a confirmation email afterward.
What is Shopware master data?
You provide various information called master data while creating a Shopware account. This information contains your contact and company details, such as address, email, phone, company name, etc.
How to add a shop in Shopware?
Go to your merchant area to add a new Shopware shop. The start-screen page contains a link that initiates the store selection. Decide whether you want to create a cloud storefront or register an on-premise website, specify information about your new Shopware shop, and save the provided data.
How to add a payment method in Shopware?
Go to Basic Information -> Accounting to add a payment method to your Shopware account. You can use PayPal, credit card, or direct debit to add funds to your store.
How to create a deposit in Shopware?
Now, when the payment method is confirmed, use it to create a deposit for purchasing themes and extensions for your Shopware store. You can do that under your Merchant Area -> Shops. Select a shop to add funds to and click Open Account Details. Now, you can create a deposit.
How to purchase Shopware extensions?
A deposit on your Shopware account lets you purchase extensions and themes. Go to the Shopware Marketplace or use the Plugin Manager to buy tools and design layouts for your e-commerce website.
How to get support in Shopware?
Support regarding your Shopware account and license is available at info@shopware.com or +49 2555 9288 50. Support regarding inquiries about accounting and financial services is available at financial.services@shopware.com or +49 2555 9288 510.
How to migrate to Shopware 6?
Migration to Shopware 6 is a complex and time-consuming process that cannot be performed with the help of the default tools only. The migration procedure requires a more powerful third-party solution that automates data transfers, helps with different attribute standards, and transfers entities that the default tools do not support. We recommend using the Improved Import & Export tool for Shopware 6 to migrate to your new website since it has all these characteristics. Contact our team for more information.
How to automate import and export processes in Shopware 6?
Нou can also use the Improved Import & Export extension for Shopware 6 to automate regular data updates. With our module, you can create a schedule of updates to run data transfer without any external interaction.
How to integrate Shopware 6 with external systems?
The Improved Import & Export extension for Shopware 6 is suitable for connecting your e-commerce storefront to ERPs, CRMs, accounting tools, and other complex solutions. It automates import and export processes and modifies data according to the Shopware requirements upon import. The extension also applies changes to the exported data following the standards of the connected platforms.
Related posts
 solution25: Your Trusted Shopware Agency in New York & Germany
 How to Import Products to Shopware 6 & Automatically Assign Them to Parent Categories: A Time-Saving Import Feature You Shouldn’t Miss
 New in Shopware 6 Product Import: Control Topseller Products with the markAsTopseller Field
 Take Full Control over Product Visibility in Shopware 6: Introducing the ‘Replace Product Sales Channels’ Feature for Import
 How to Import & Export Shopware 6 Advanced Prices as Separate Entity
 How to Boost Sales with Shopware 6 Cross Selling: The Ultimate 2025 Guide
 E-Commerce Impulse Buys Guide: Boost Your Sales with Effective Strategies and Smart Tools
 Shopify Gift Cards Explained: How to Set Up, Manage & Sell Them