Amasty Cron Scheduler Magento 2 Extension

Website performance is one of the main factors for fast and stable work of an online store, which has a direct impact on the customer shopping experience. Proper cron job configuration is an essential part of high website performance. By using an appropriate cron management tool, online merchants can quickly react to identified issues with the cron tasks running in the background and prevent problems that can have the adverse effect on a visitor’s impression from their web stores.
Today, we present you a new extension built to streamline cron jobs monitoring and management – Amasty Cron Scheduler for Magento 2. The module equips Magento admins with the tools allowing them to visualize and track all cron tasks and handle cron jobs individually or in bulk. Besides, Cron Scheduler by Amasty provides the notification system so that store owners can get timely alerts on cron errors.
Below, we shed light on the Magento 2 cron management module’s functionality.

A variety of Magento features is based on scheduled activities for which correct cron configuration is especially important. These activities include export/import, generation of Google sitemaps, email notifications, currency rates update, and more. Besides, cron job affects some Magento system functions like indexation/reindexation and others. Also, store owners should keep in mind that cron management takes lots of admin time and requires special technical skills. It means that if you fail to run cron tasks on your store properly, it will have a negative impact on the overall website performance.
By installing the Magento 2 Cron Scheduler extension by Amasty, you can solve some vital issues of cron functioning on your web store. The module enables users to track all cron jobs from one place in the admin panel, quickly change their configuration, and monitor occurring errors.
If you want to learn more about main cron task configuration on the Magento server, please refer to the .
Features
- Cron tasks display on the timeline;
- Improved usability of the cron timeline;
- Timely prevention of cron errors due to the timeline view;
- Dedicated grid for cron tasks management;
- Cron jobs listing on a separate grid;
- Re-scheduling of selected cron jobs on the grid;
- Button to manually run cron tasks and cron jobs;
- Real-time alerts on cron failure.
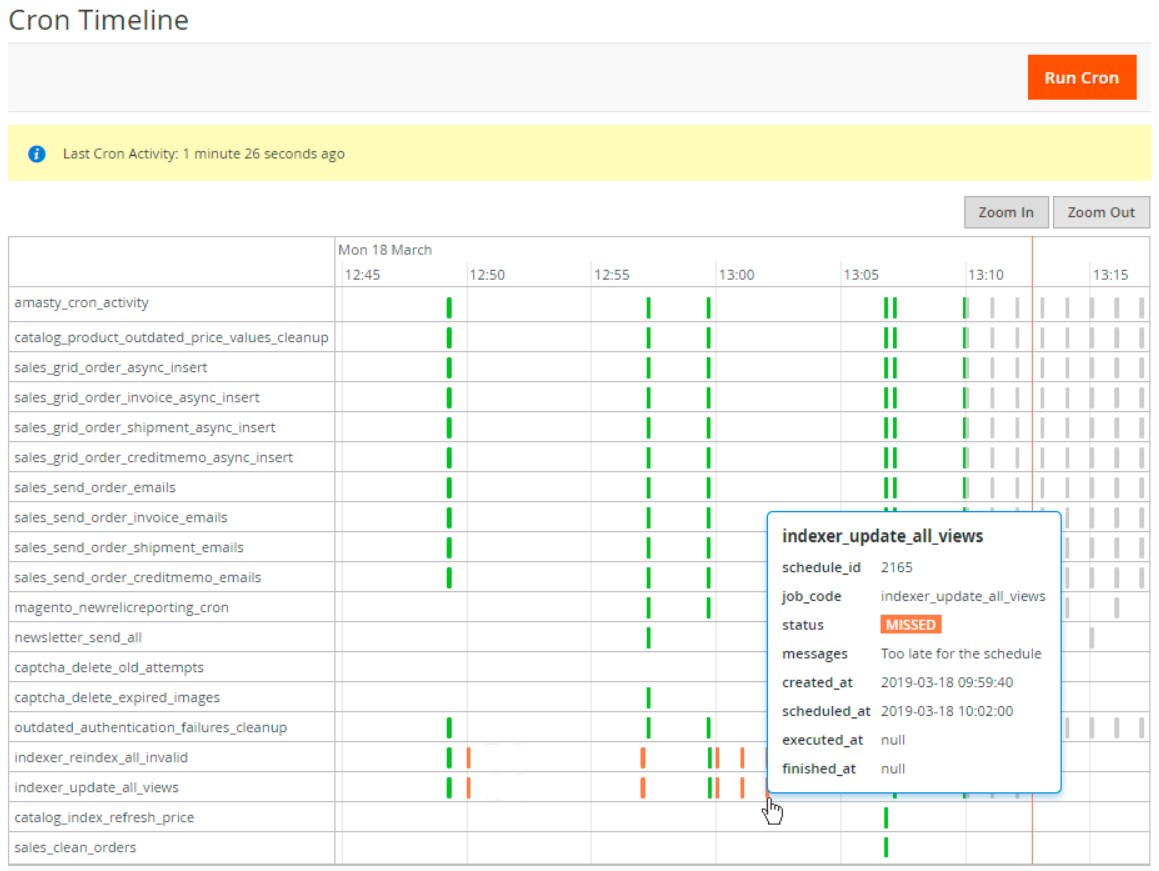
After installing Amasty Cron Scheduler, you will be able to view all cron tasks running in the background on a timeline. Existing cron tasks are displayed in the chronological order, so you can quickly check how everything works in your website’s backoffice. Cron tasks are visualized as marks of different colors, which helps to identify successful, errored, and pending tasks. Besides, the mark’s width changes depending on the task processing time, so that you can understand which tasks slow down your website and optimize relevant cron jobs’ configuration. Cron tasks visualization provided by the Magento 2 cron scheduling module helps users to detect and eliminate cron execution errors on time.
The Cron Timeline interface provides some functions for more convenient management of cron tasks. When viewing jobs, you can use “Zoom In” and “Zoom Out” buttons or “Ctrl + Scroll” hotkey to change the grid’s scale, as well as scroll down or up the page. If you hover over a task’s mark, you will see its details on the appeared window: status, ID, scheduled and finished time, and others.
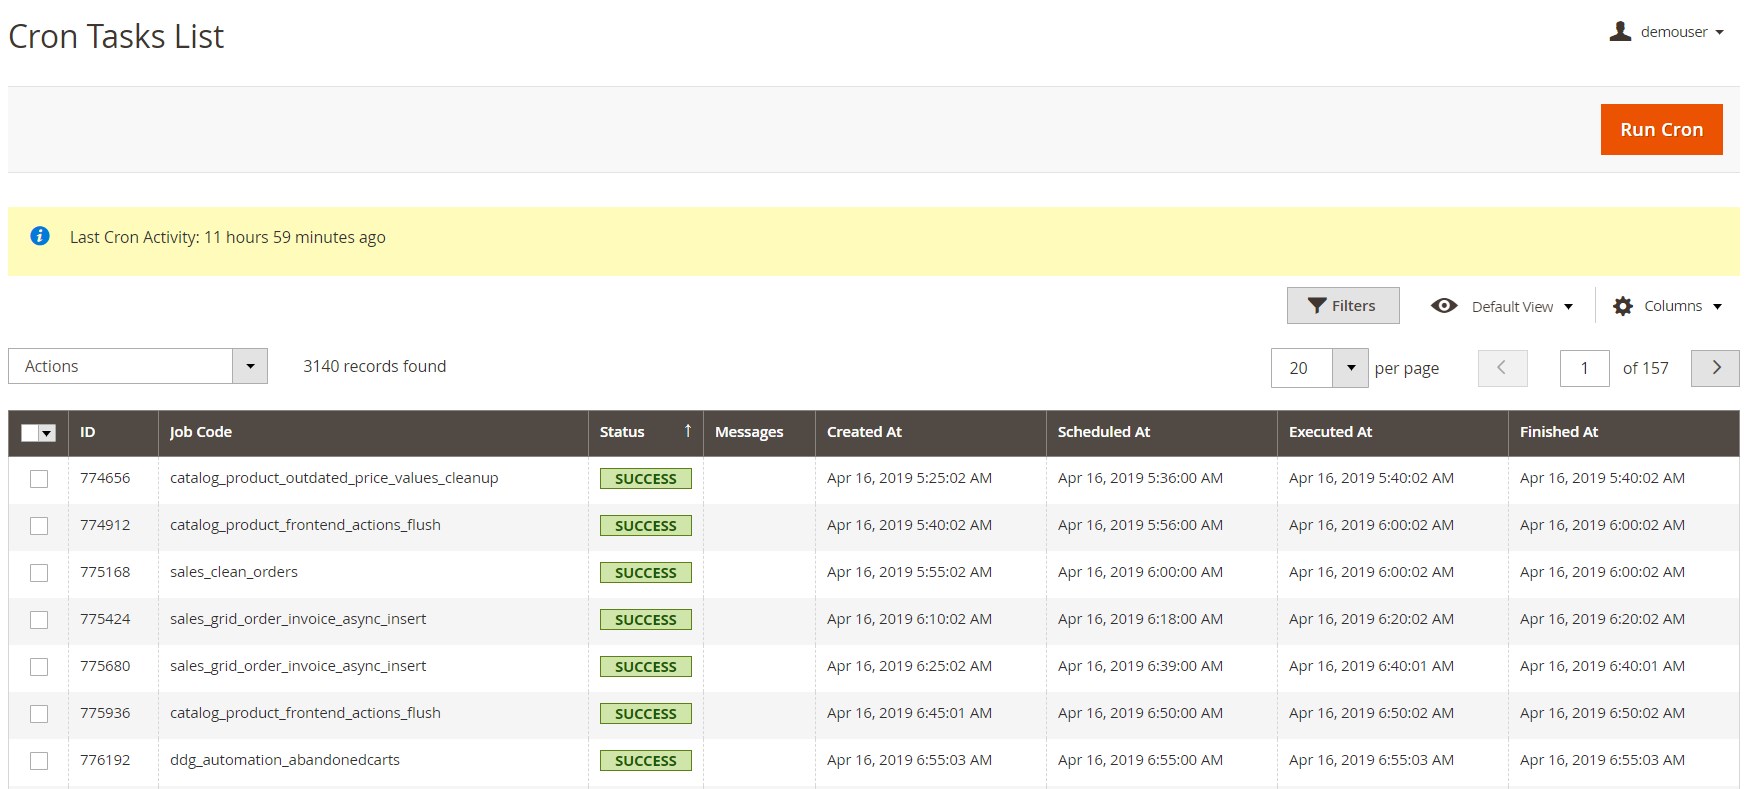
All executed and scheduled cron tasks are gathered on a separate grid in the Magento Admin. The Cron Tasks List grid shows information about both Magento and third-party modules installed on your web store. The grid lets admin users monitor how cron job works on the server, identify cron errors, and control tasks generation and processing.
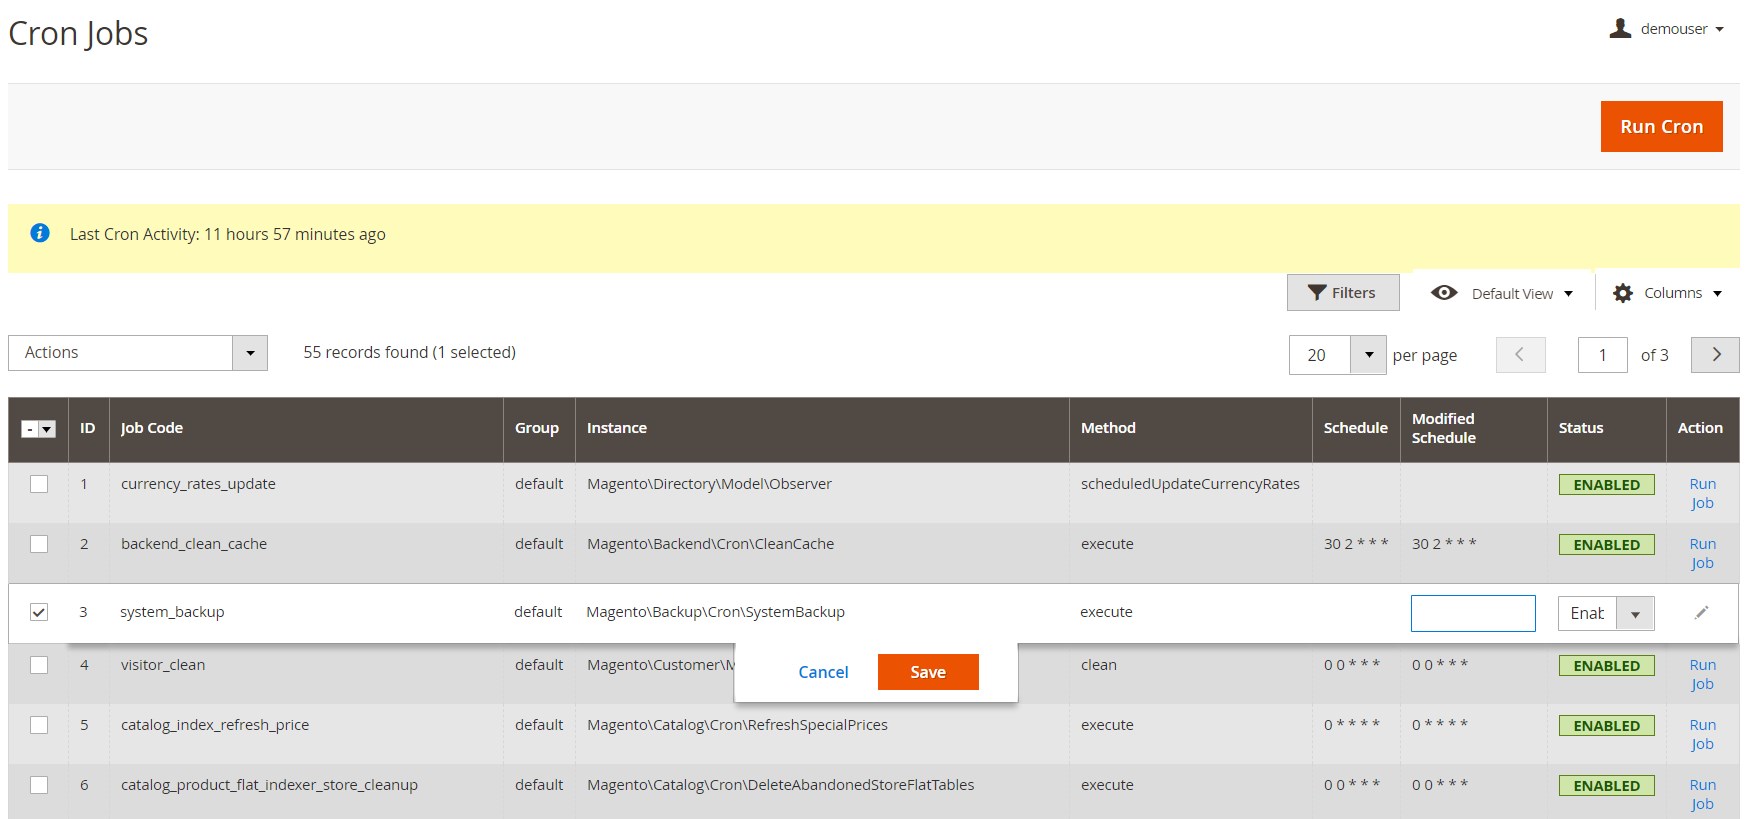
The Magento 2 cron scheduling module provides another grid for tracking and managing cron jobs. The Cron Jobs grid allows viewing detailed info on all cron jobs, including third-party extensions. Here, you can check the group, applied method, schedule, and task status of each cron job. This way, you get comprehensive information about cron operating process on your website. The cron jobs listing allows handling each record in bulk or individually. Thus, you get the ability to manually run a specific cron job and start cron tasks generation process with one click on the Action column. Furthermore, you can change the configuration of particular cron jobs right on the grid. If there are some errors or delays detected on the cron tasks list or timeline, you can quickly change the schedule of the appropriate cron job to adjust the frequency of cron tasks.
Another handy feature available with the Amasty Cron Scheduler extension is an option to run all cron jobs manually with one click. The Magento 2 module adds the “Run Cron” button to every screen of its backend interface. By clicking the button, you can also activate the generation of new cron tasks.
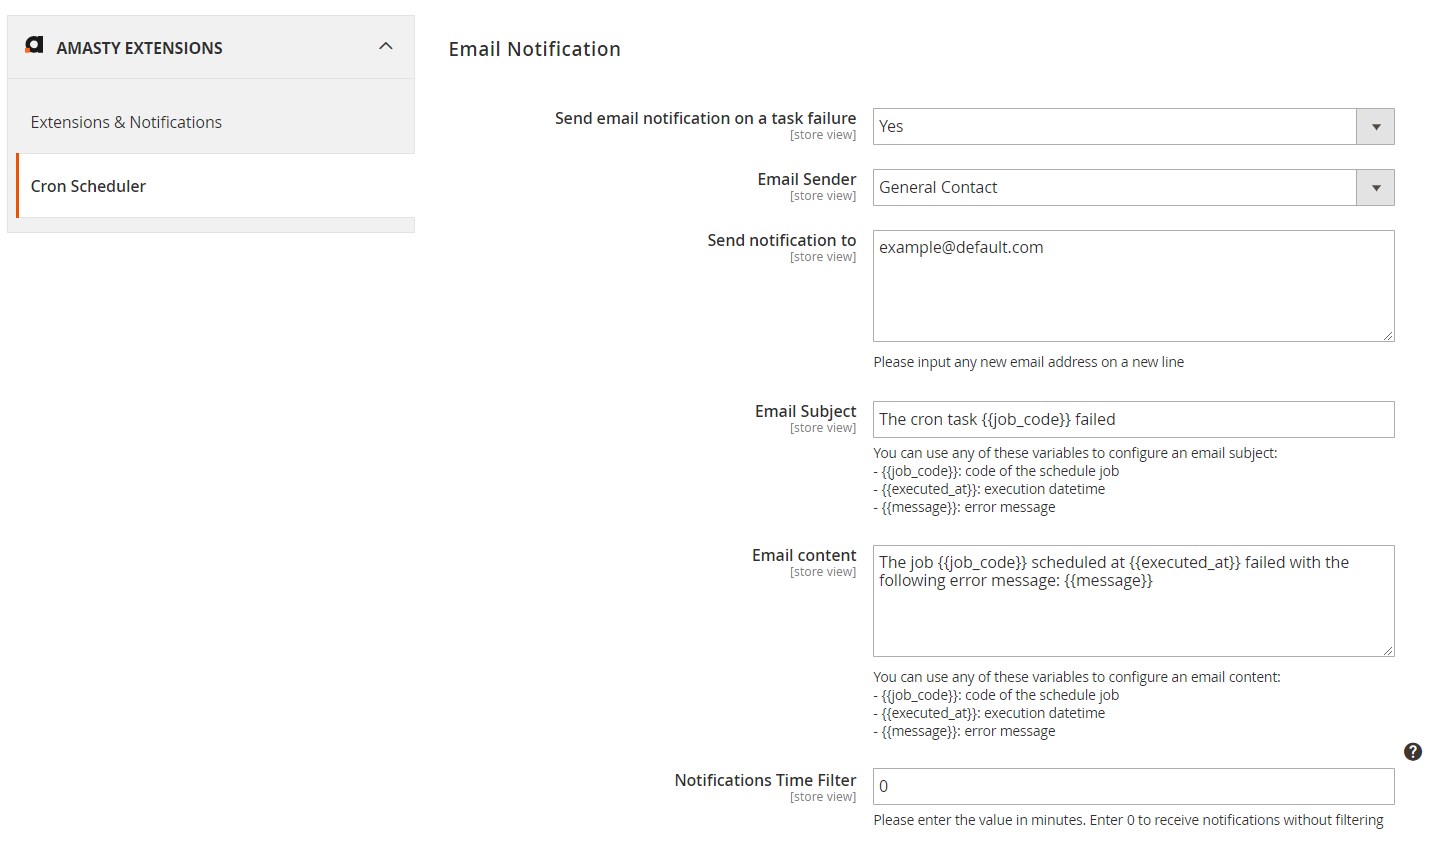
By installing Cron Scheduler for Magento 2, you also get an error notification system for quick prevention of possible issues. The module’s configuration allows you to enable email alerts on cron failure, decide who will receive them, and create custom subject and message text using variables. Email notification settings also let you set an interval between sending error alerts to avoid spam in the recipient’s mailbox.
Backend
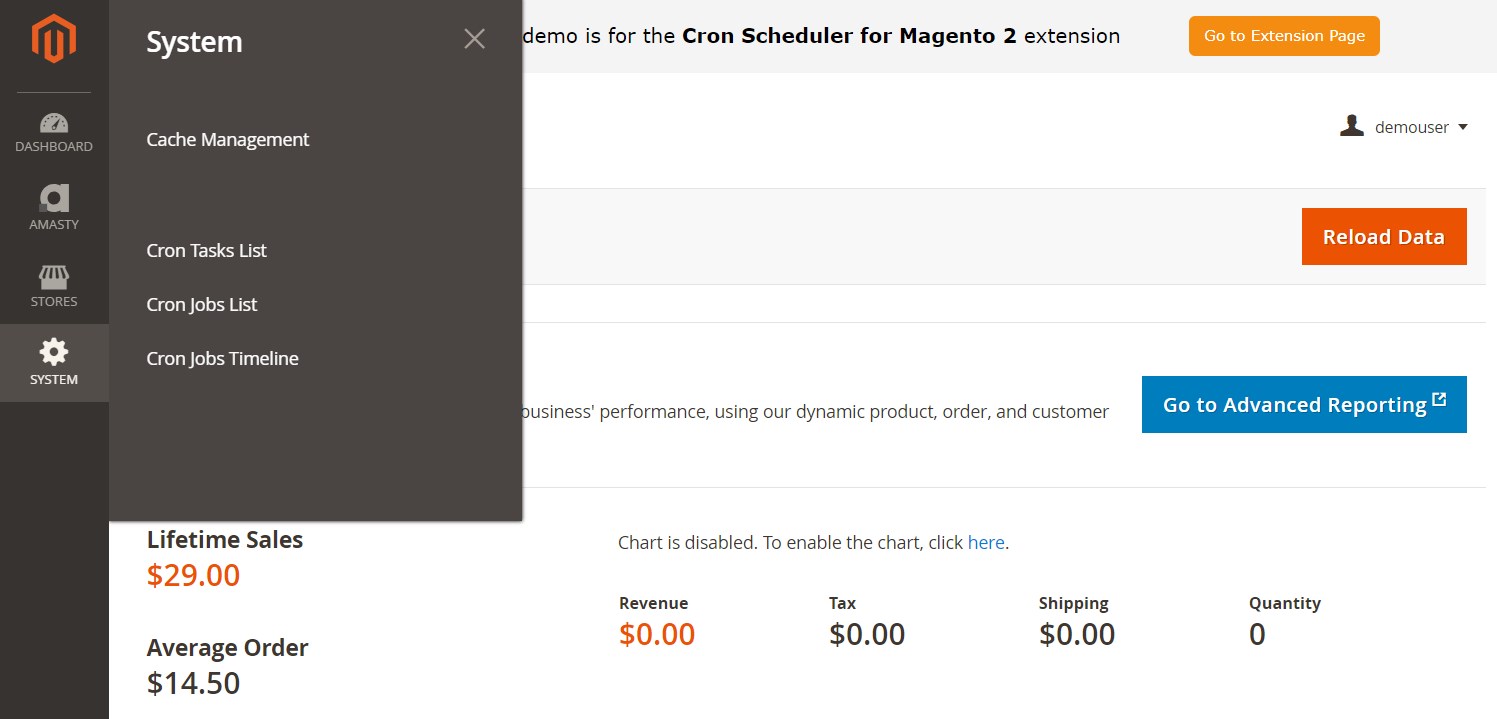
All Cron Scheduler settings are available under System → Cron Tasks List / Cron Jobs List / Cron Jobs Timeline.
The Cron Tasks List grid shows each task’s ID, job code, status (Success, Pending, Running, Error, or Missed), messages, and date and time when it was created, scheduled, executed, and finished. The grid supports filtering and sorting for improved convenience and allows deleting selected task records in bulk. It is also possible to run all cron tasks and generate their schedule by clicking the “Run Cron” button at the top right corner of the screen.
All current cron jobs are gathered on another grid that includes the following columns:
- Checkbox;
- ID;
- Job Code;
- Group;
- Instance;
- Method;
- Schedule;
- Modified Schedule;
- Status (Enabled or Disabled);
- Action (Run Job).
The extension allows admins to modify the schedule and status of a particular cron job right on the grid by clicking on its record line. If you want to run a selected cron job manually and generate its tasks, click the “Run Job” button in the Action column. Here, it is also possible to create new tasks for all cron jobs by clicking the “Run Cron” button. This grid also let you apply filters and sort the grid columns, as well as delete, enable, or disable selected cron jobs via mass actions.
The Cron Timeline interface displays all running and scheduled tasks in the chronological order. Successful, errored, and pending tasks are visualized as marks of different colors. Besides, marks have different width depending on the task processing time. If you hover over a mark, a new window with detailed info on a cron task will pop up. “Zoom In” and “Zoom Out” buttons allow you to scale the grid for a more convenient view. This screen also has the “Run Cron” button for running cron jobs at once whenever required.
As for the general configuration of the Magento 2 Cron Scheduler module, here you can enable email notifications on the failed cron tasks. If you activate the function, select an email sender, specify a recipient email address (multiple recipients are allowed), enter the subject and content for the alert message (variables are supported), and set an interval in minutes for sending emails. Note that the last setting concerns a single job performing multiple functions to avoid receiving too many messages about the same error.
Final Words
Cron Scheduler by Amasty extends the default functionality of Magento 2 and streamlines cron tasks processing. Due to the straightforward backend interface of the extension, admin users have a clear overview of how cron job works in the website’s backend and get an ability to quickly modify cron job schedule when necessary. Also, Magento admins can easily monitor cron execution and timely prevent cron task errors. This way, the module helps to improve website performance that has a direct impact on user experience on your storefront.
The price of the M2 extension is $99, and you can buy it here:


