Aheadworks Blog for Magento 2 and 1

Blog is a reliable marketing tool that not only attracts more visitors but also increases sales and improves SEO. Therefore, adding a blog to a Magento website is always a good idea. Today, we want to draw your attention to the Aheadworks Blog extension available for both Magento 2 and Magento 1. By installing this module, you will get a content editor with all the important writing and design tools and a bunch of SEO improvements (SEO friendly URLs, XML sitemap, metadata). Besides, the Magento 2 advanced blog module by Aheadworks provides user-friendly content navigation based on categories, tags, and sidebar blocks, and allows DISQUS integration for more efficient comment management.

Table of contents
Features
- Wide choice of customization options;
- WYSIWYG content editor;
- Separate customizable pages for blog authors;
- DISQUS integration;
- Tools for improving SEO;
- Convenient frontend navigation;
- Seamless UX on any device with a ready-made PWA solution;
- Tool for migration from M1 to M2;
- Migration from WordPress to Magento 2.
After you install the Aheadworks Blog extension, it will add a blog tab to your website. When arranging a blog for your store, you can use lots of customization options. Aheadworks Blog for Magento 2 and 1 lets you customize such parameters as the number of posts per page, sidebar composition, and more. When it comes to text content creation, Aheadworks Blog offers a WYSIWYG editor with all necessary writing and editing tools, so you can easily provide your readers with stunning content. You can include product widgets, rich text, videos, images, and other media files in your blog posts. Moreover, you can leverage the post preview feature.
As for the mentioned DISQUS integration, it requires your blog to be connected to the Disqus service that provides advanced comment management features. DISQUS allows store visitors to log in via their social network profiles and leave comments.
The Blog module equips store owners with essential search engine optimization tools. All your blog posts will be listed in the XML sitemap, making them visible for web crawlers. The extension enables users to specify meta data and title affixes for every post and author page, as well as create SEO friendly URLs, add page separators, and eliminate duplicate content with canonical tags set for the blog pages.
On the frontend, web store visitors can view categories, latest blog posts, and tags related to a post in a convenient sidebar. Due to the Open Graph and Twitter Cards markup support, customers can leverage social media sharing functionality. Moreover, the Related Products block can be added to any blog post so that you can promote specific goods. A the same time, it is possible to display related blog posts on a product page.
Also, note that the Aheadworks blog supports a PWA-based storefront, allowing store owners to deliver a seamless user experience on smartphones and tablets. By making your blog mobile-friendly with the PWA solution, you can reach wider audiences and ensure stable performance and frictionless shopping across all devices.
Furthermore, you can use the Magento data migration tool to move your posts created on the Magento 1 platform to Magento 2 and keep their URL structure. With the Aheadworks extension, it is also possible to easily import posts from a WordPress blog to a Magento 2 website.
Backend
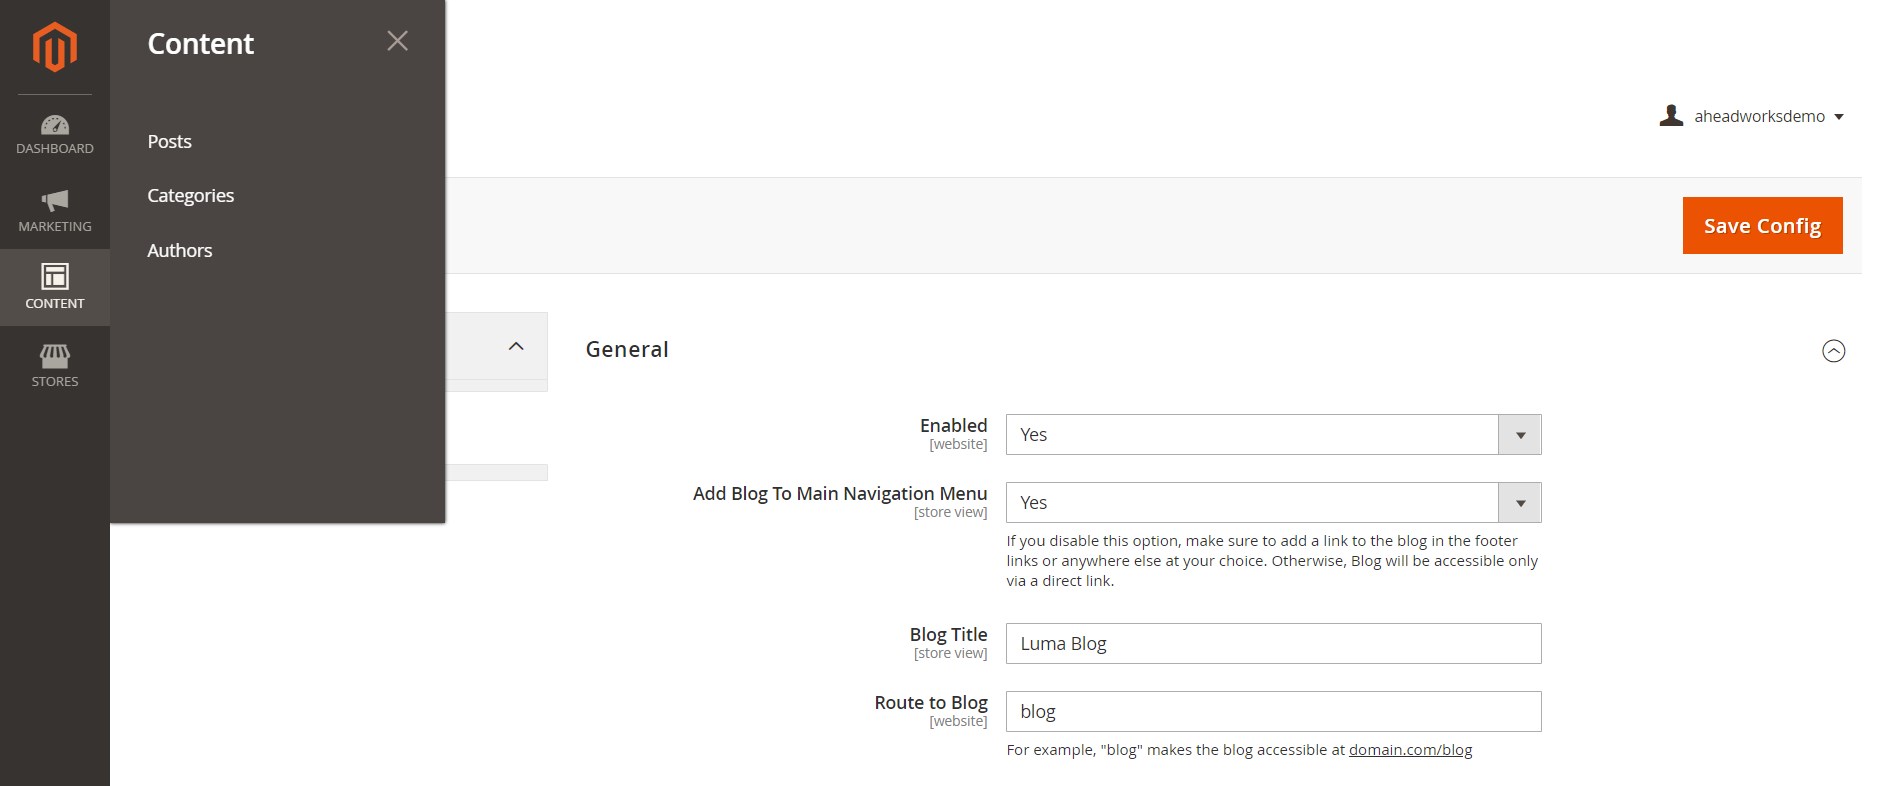
You will find the extension settings under Content -> Blog by Aheadworks.
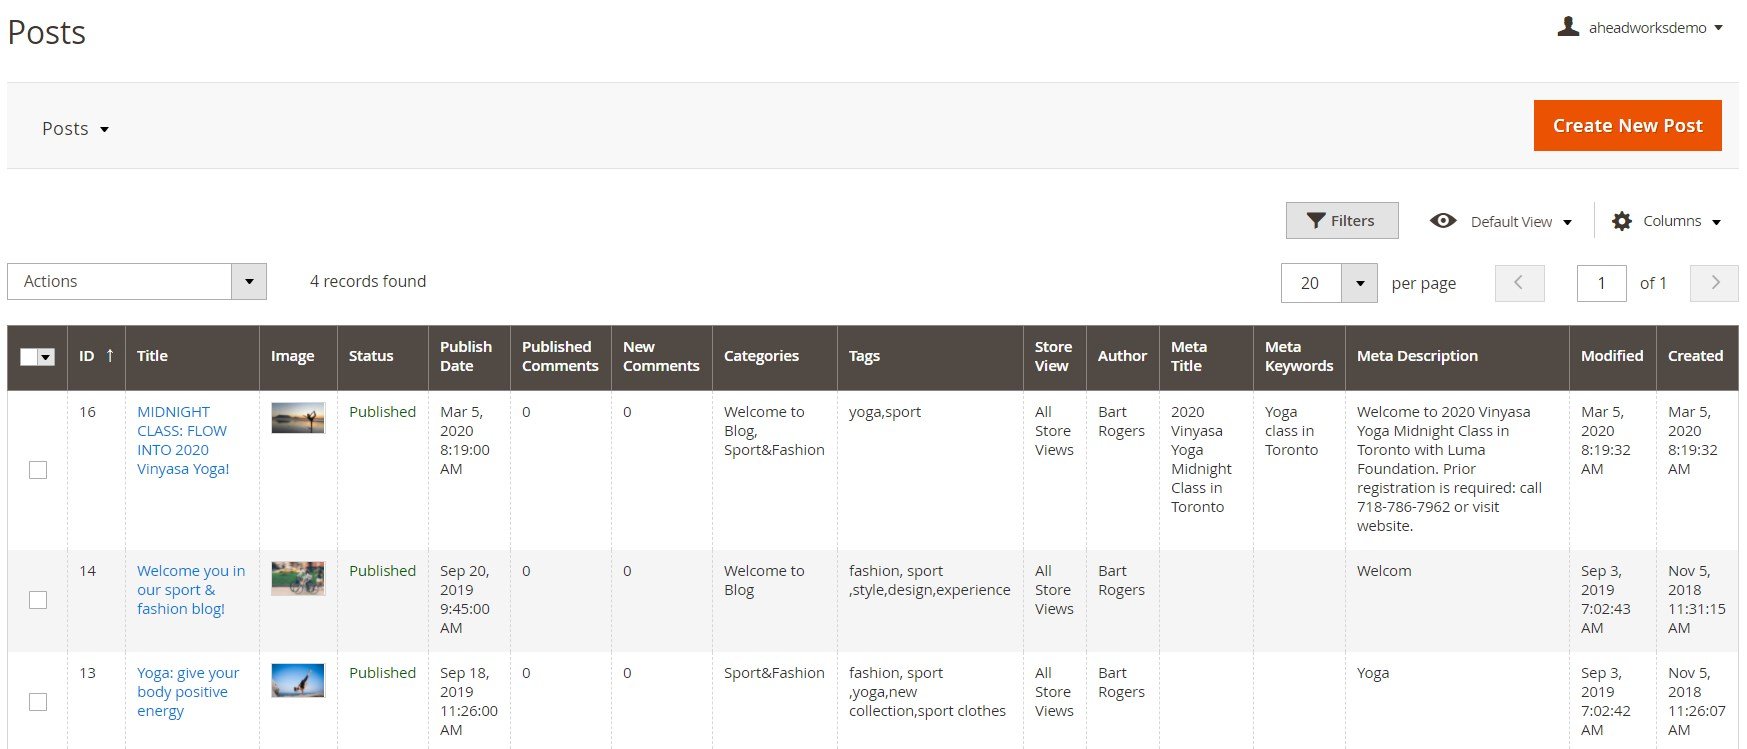
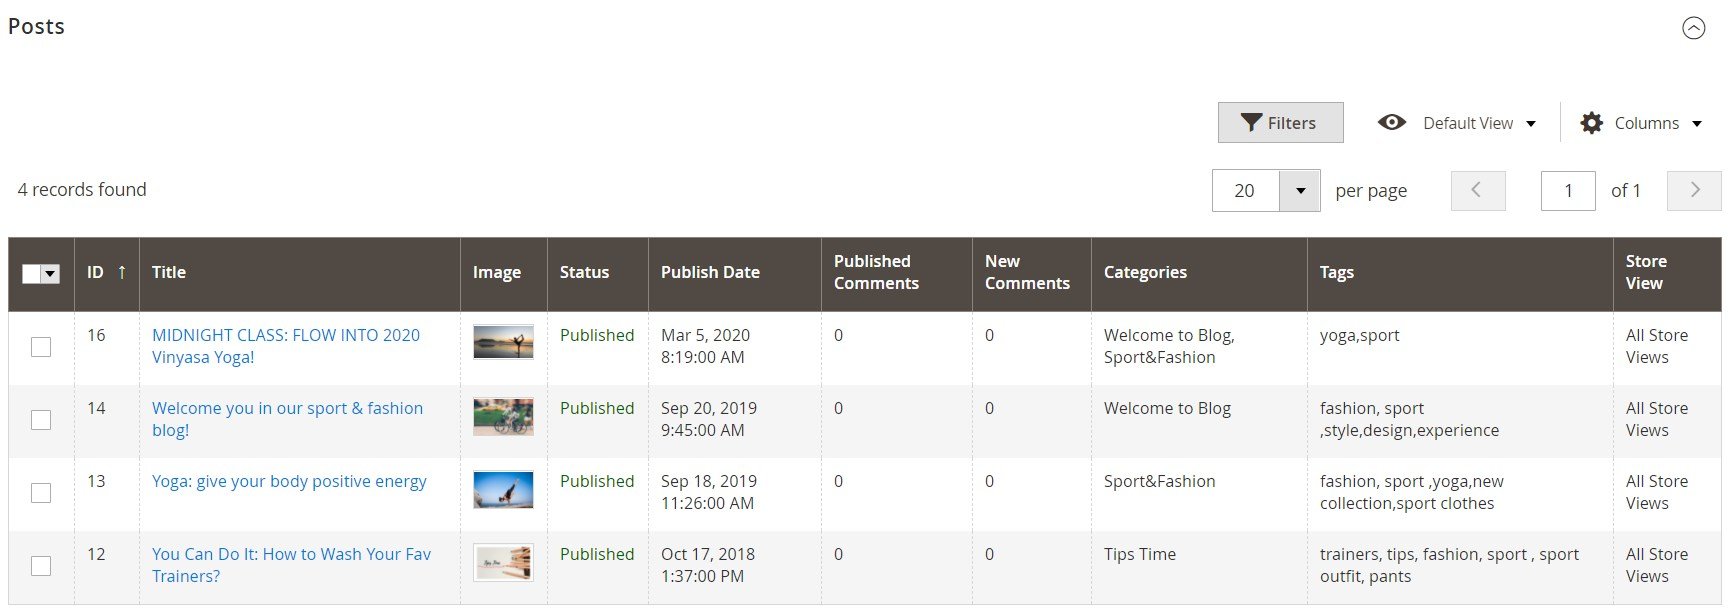
All posts are gathered in a customizable grid. You can rearrange the order of columns and hide some of them (use Columns drop-down menu). Besides, there are filters available for quick content search. As for the grid’s columns, they are:
- ID (each post gets a unique ID);
- Title (a title of a post);
- Image (an image assigned to a blog post);
- Status (post status: draft, published, etc.);
- Publish Date (date and time when a post was published);
- Published Comments (quantity of published comments);
- New Comments (the number of new comments);
- Categories (one or several categories where a post is available);
- Tags (tags related to each post);
- Store View (store views where a post is available);
- Author (author of a post);
- Meta Title (a title of the post page as it is shown in the search results);
- Meta Keywords (keywords that help search engines understand what your post is about);
- Meta Description (also shown in the search results);
- Last Modified (date and time of last modification);
- Created (date and time a post was created).
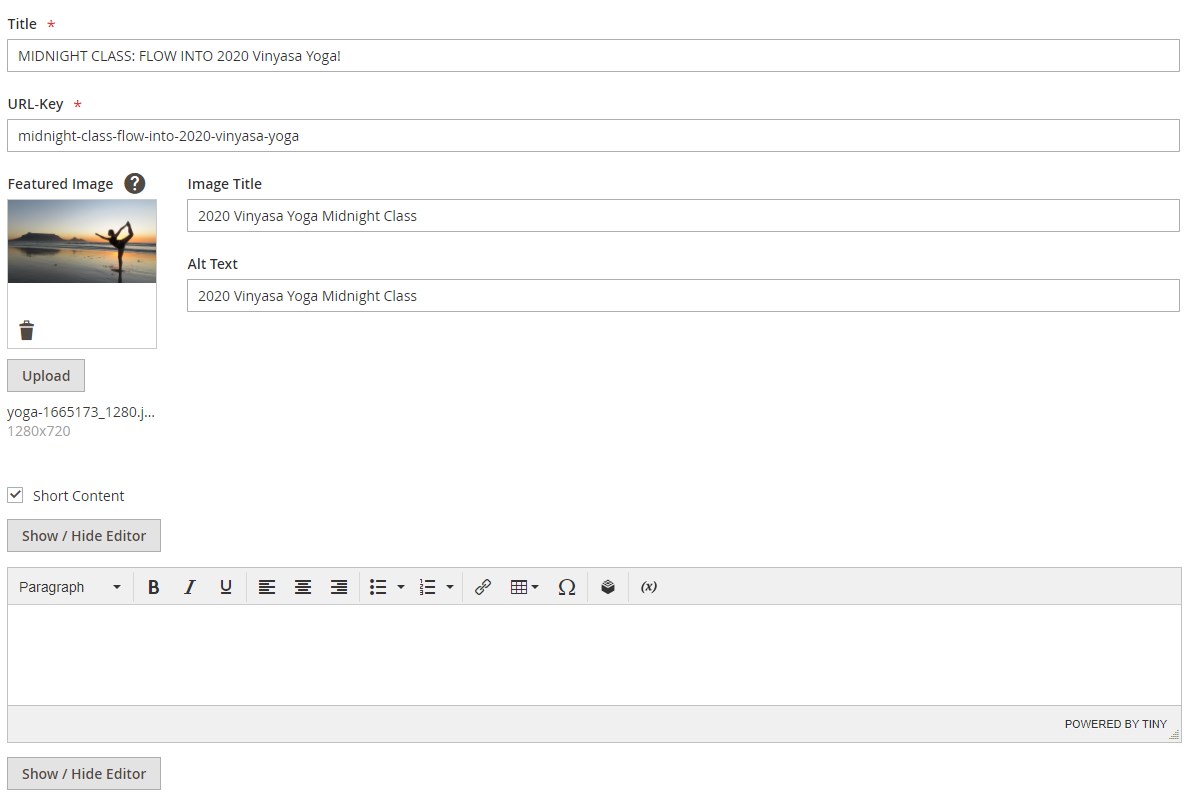
To create a new post, you should specify its title and URL key and create a body of the post using an editor. It is also possible to add an article’s summary using the short content field. Both fields can be edited and formatted with the help of the WYSIWYG editor. Note that you can hide the editor. You can also add images to each blog post and specify their title and alt text.
In the right side bar of the post view page, you can select an author of the article, categories to which you want to assign your post, and a category to use in the canonical URL. Besides, it is possible to create an unlimited number of tags.
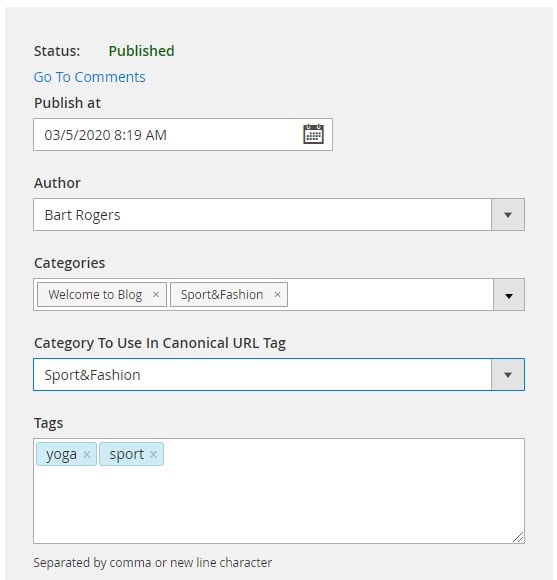
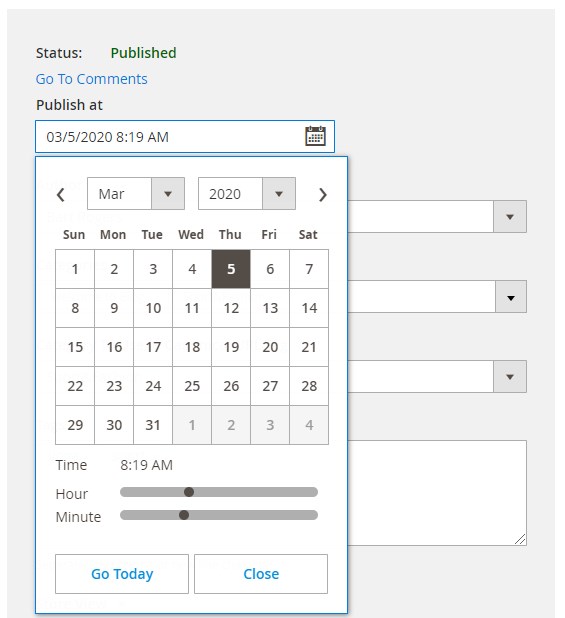
Note that the module also allows scheduling each post by selecting an appropriate date and time of publishing.
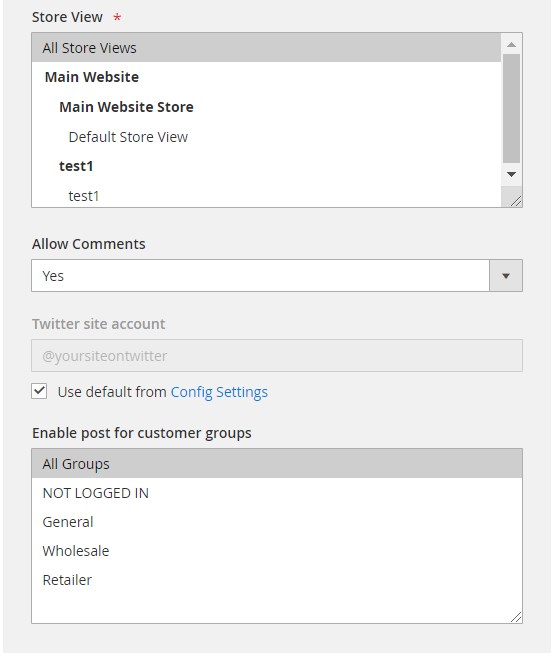
In the same bar menu, you should select store views, decide whether to allow or restrict comments, configure Twitter Cards options, and select customer groups that will have access to this post.
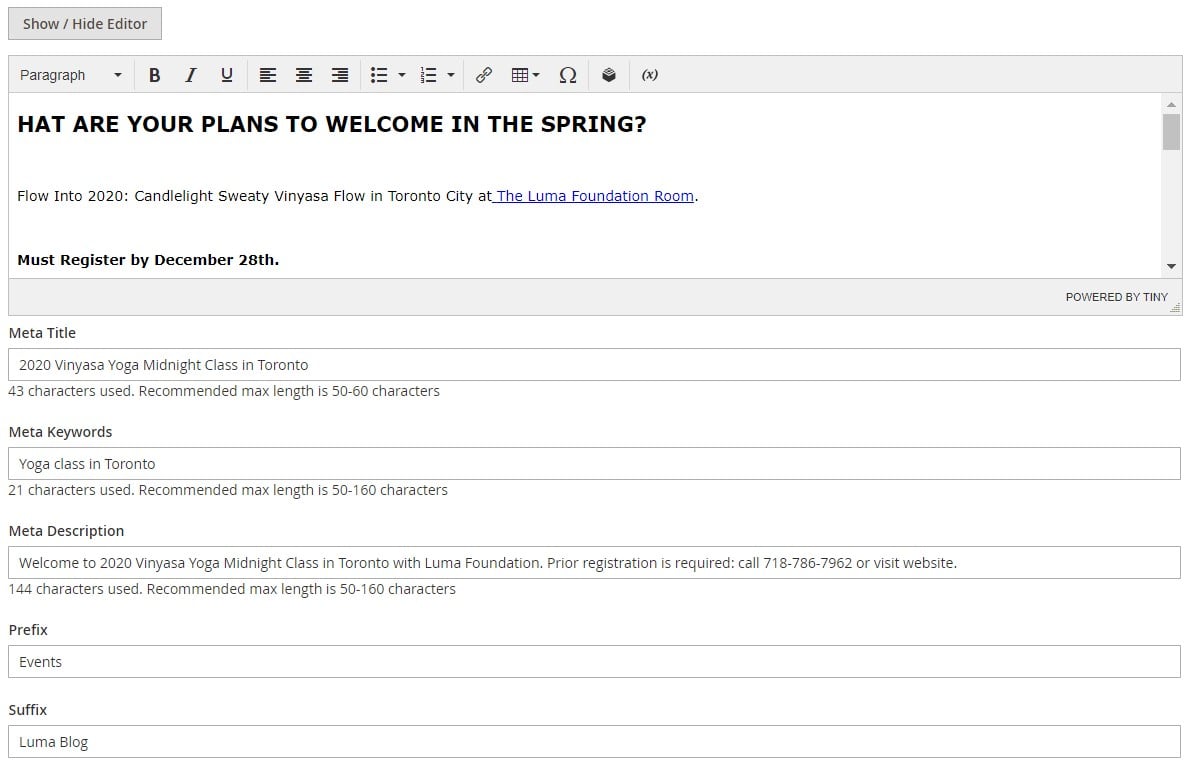
Next, you can add meta data to the post page and create a custom prefix and suffix for the title.
The Aheadworks Blog extension also allows assigning related products to a post based on the specified conditions.

The same options are available when you edit a post.
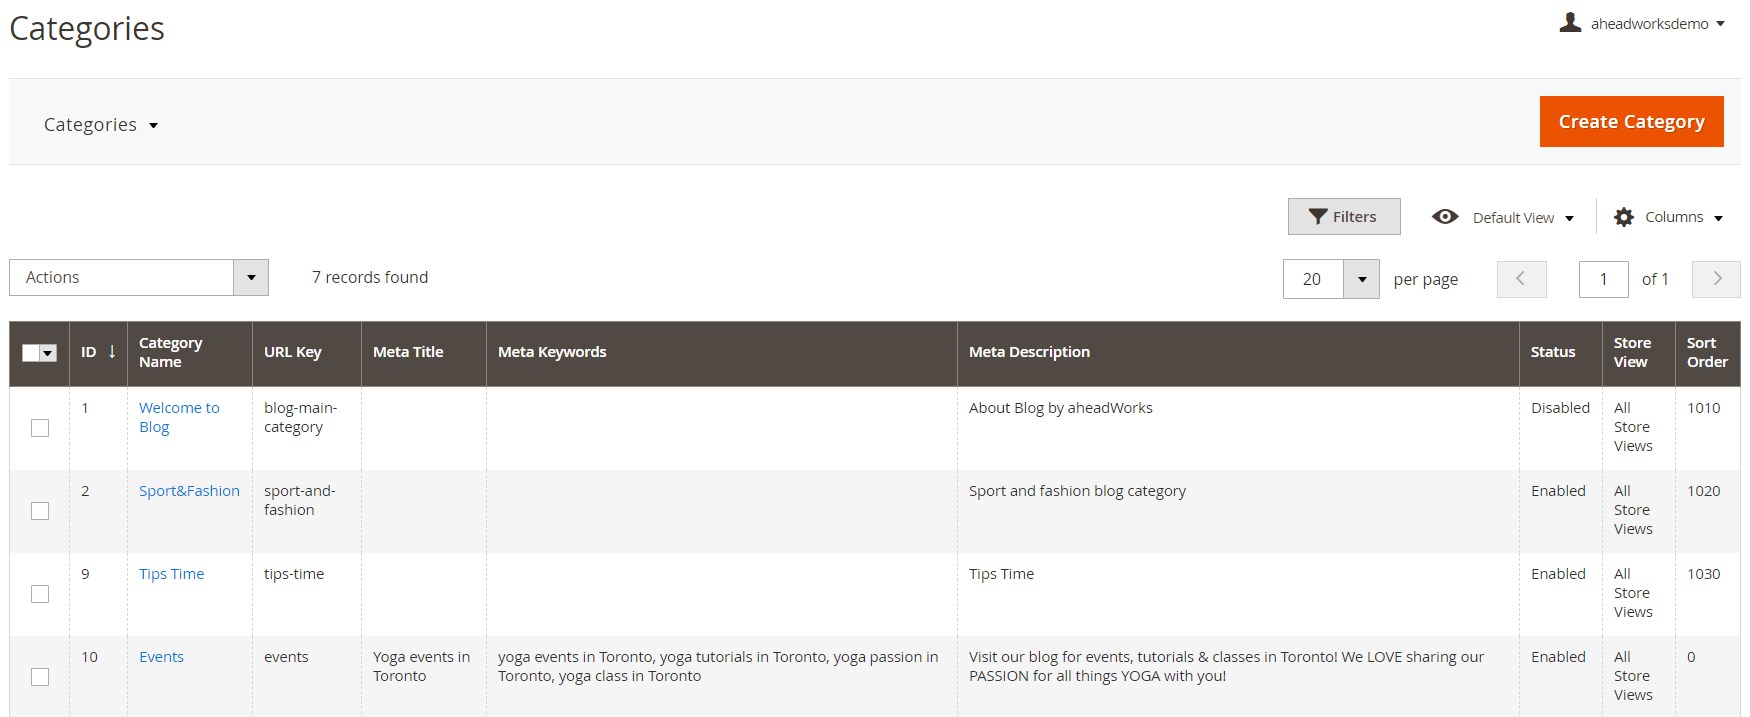
As for categories, they are gathered in a grid as well. You can apply filters to each column, rearrange the order of the columns, and arrange everything in alphabetical/ascending/descending order. Available columns are:
- ID;
- Category Name;
- URL Key;
- Meta Title;
- Meta Keywords;
- Meta Description;
- Status (Enabled or Disabled);
- Store View;
- Sort Order.
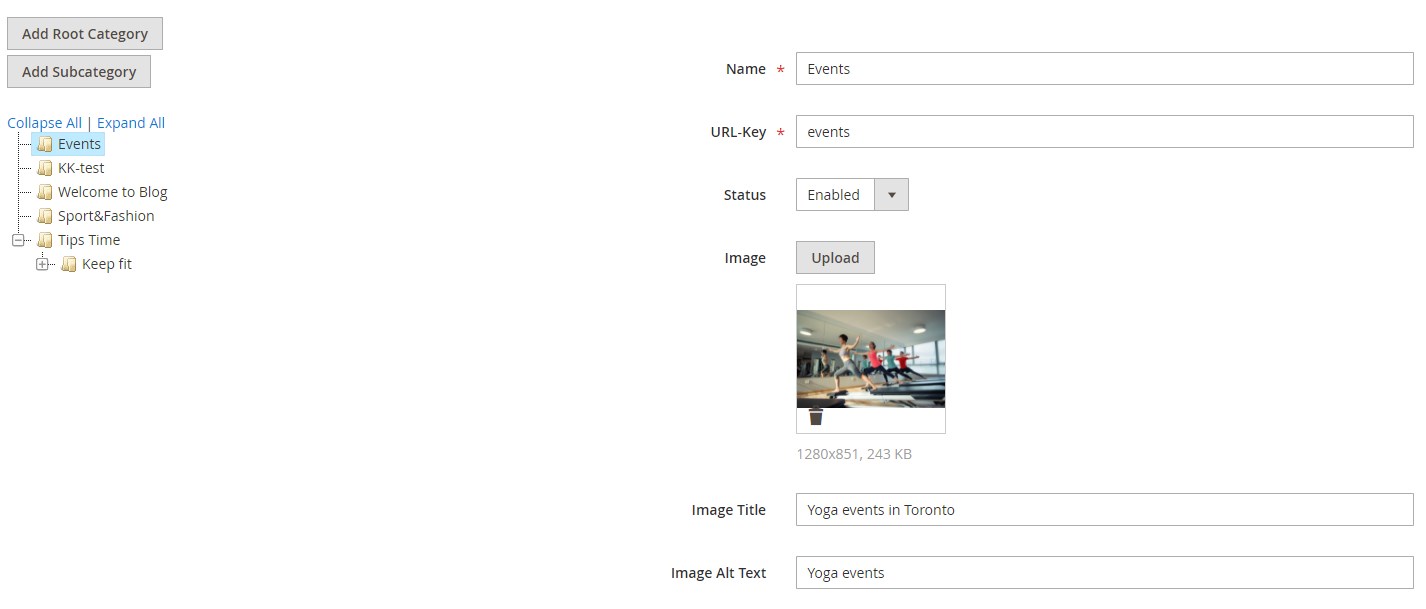
While creating a new category or editing an existing one, first, define its position in the category tree in the left block of the category edit page. Then, specify a category name, URL key, and status. The Magento 2 advanced blog module by Aheadworks allows uploading an image and adding its title and alt text.
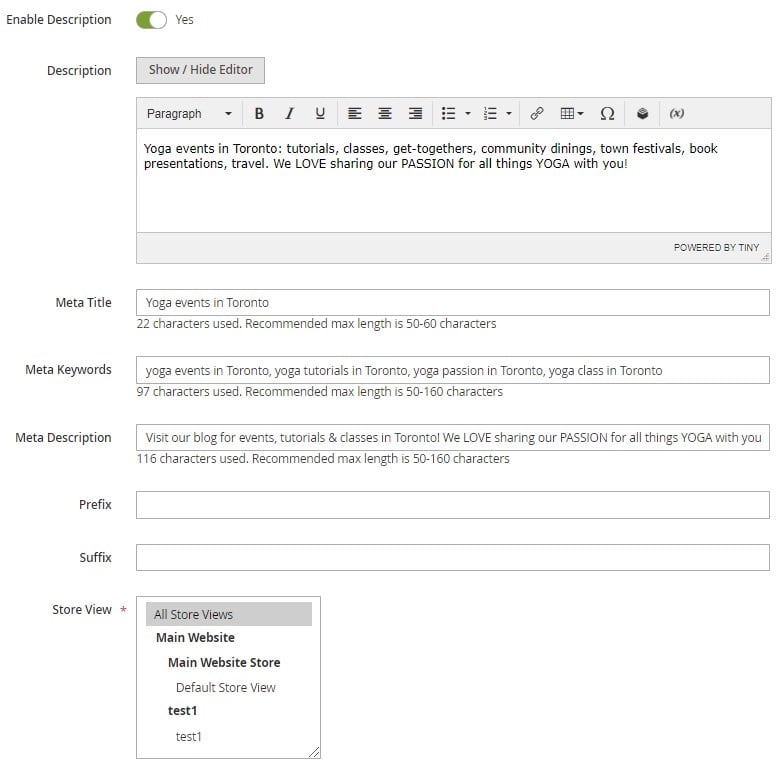
Next, you can create a description of the category to provide customers with more information, specify meta data (title, keywords, description, and title affixes), and select store views.
The Aheadworks Blog extension also provides a separate grid for managing authors that collects information about them in the following columns:
- ID;
- Image;
- Name;
- Meta Title;
- Meta Keywords;
- Meta Description;
- Job Position;
- Twitter ID;
- Facebook ID;
- LinkedIn ID;
- Qty of Posts.
You can edit and delete selected authors individually from the Action column or apply the Delete mass action.

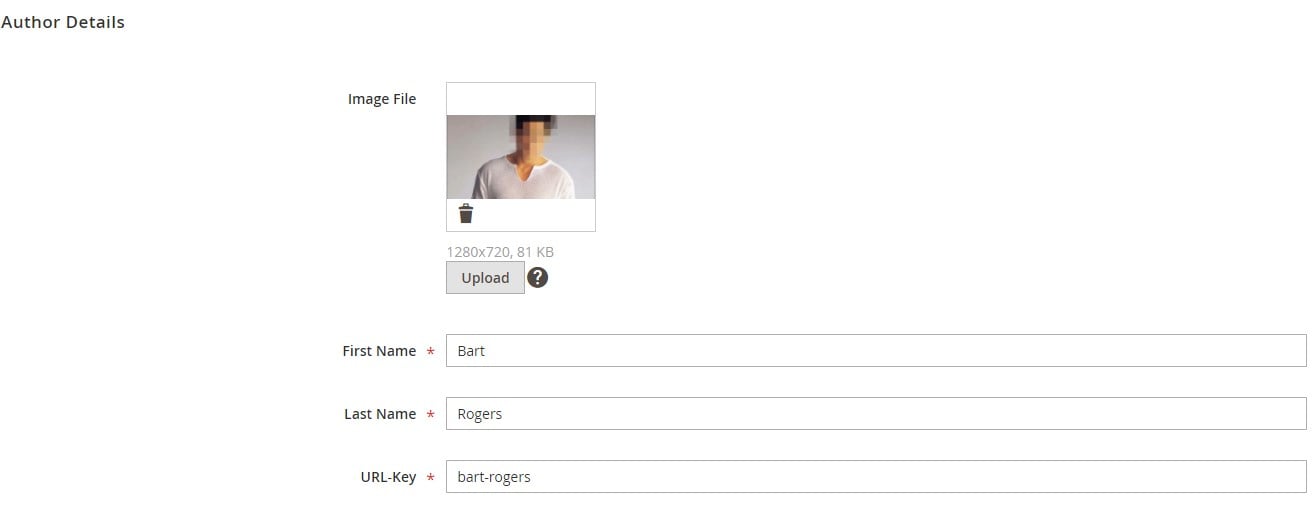
When creating a new author profile, first, fill in the general details – upload an avatar image, enter an author’s name and surname, and insert an appropriate URL key.
You can also add meta data to make the author page more SEO friendly.

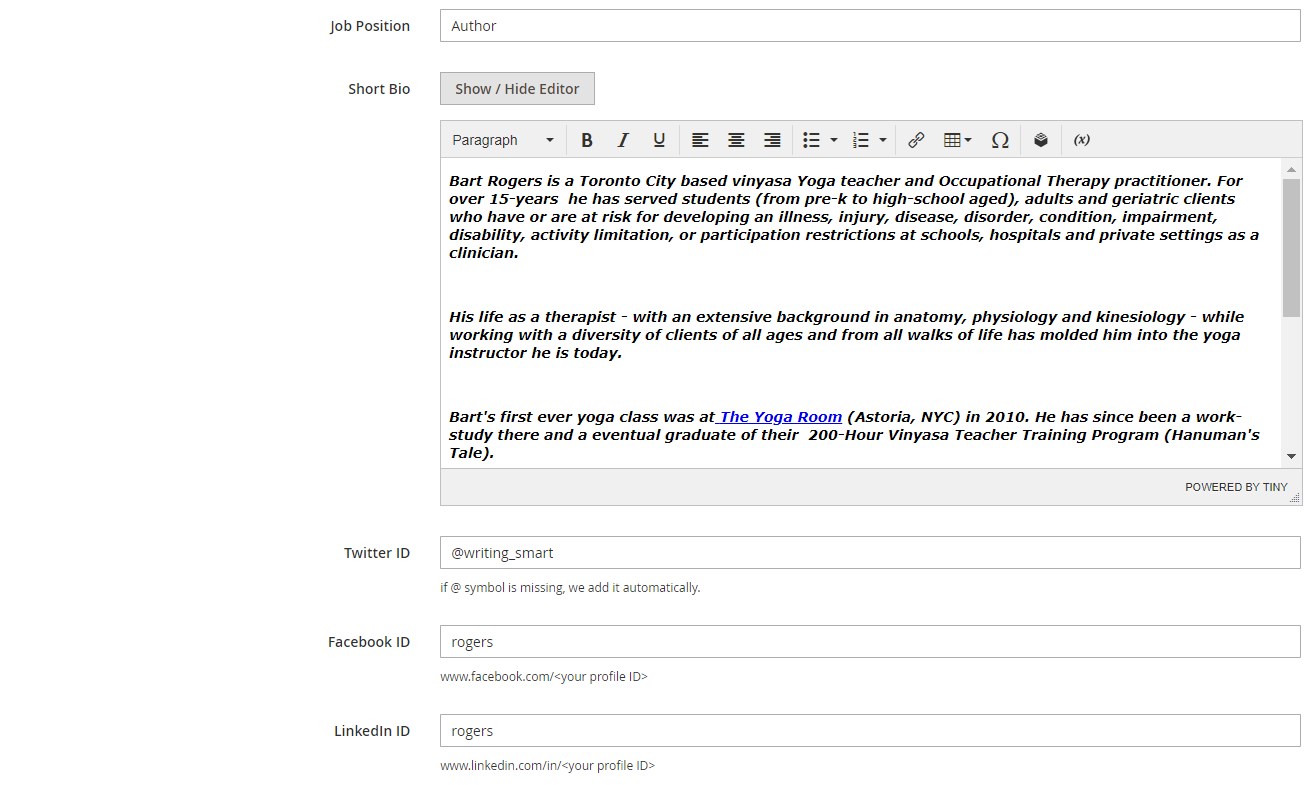
Besides, you can specify your authors’ job positions, give more information about them by creating a short bio using the editor, and add their social media profiles on Twitter, Facebook, and LinkedIn.
On the edit author page, you can also check all articles written by an author. The posts grid here includes clickable links leading to the post edit page.
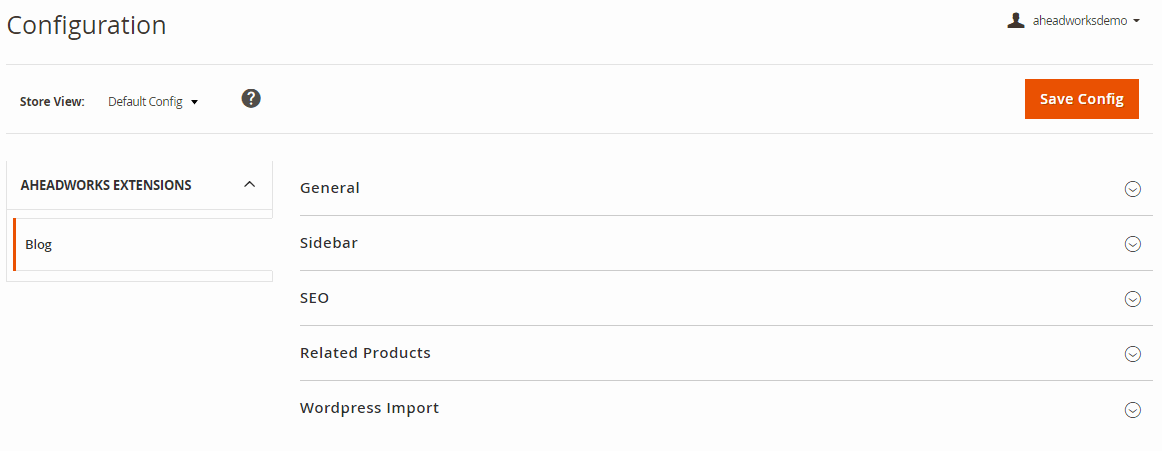
Next, we will describe the Aheadworks Blog general settings. The configuration screen is divided into 5 sections: General, Sidebar, SEO, Related Products, and WordPress Import.
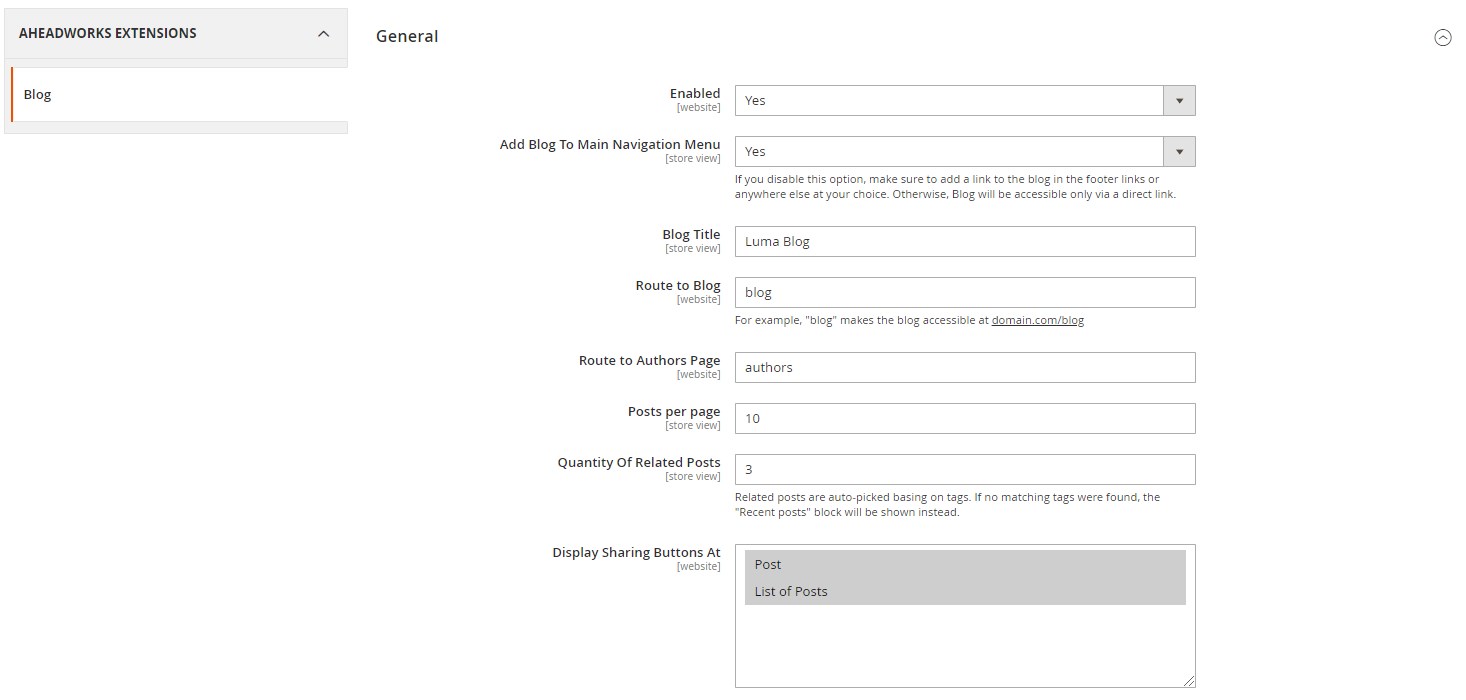
In the General tab, you enable/disable the extension and decide whether to add a link to the blog to the main navigation menu. Here, you also create a blog title and specify a route (direct links) to your blog (e.g., yourdomain.com/routetoblog/) and the authors page. Then, define the number of posts per page and the number of related posts displayed on the page and choose where to display sharing buttons.
In the same tab, you can allow/restrict comments; set Disqus Forum Code and Secret Key; add Facebook App ID (to use Facebook Insights and track the traffic); specify Twitter Cards settings.

The Sidebar section lets you determine the number of recent posts and the most popular tags to be displayed, decide whether to highlight popular tags or not, and choose a CMS block for your sidebar (the feature can be disabled). You can also include the list of categories in the sidebar and set their maximum number to be shown.

In the SEO settings, you can enable/disable meta tags and specify blog meta description, meta keywords, and URL structure. Note that the recommended max length of description is 156 characters.
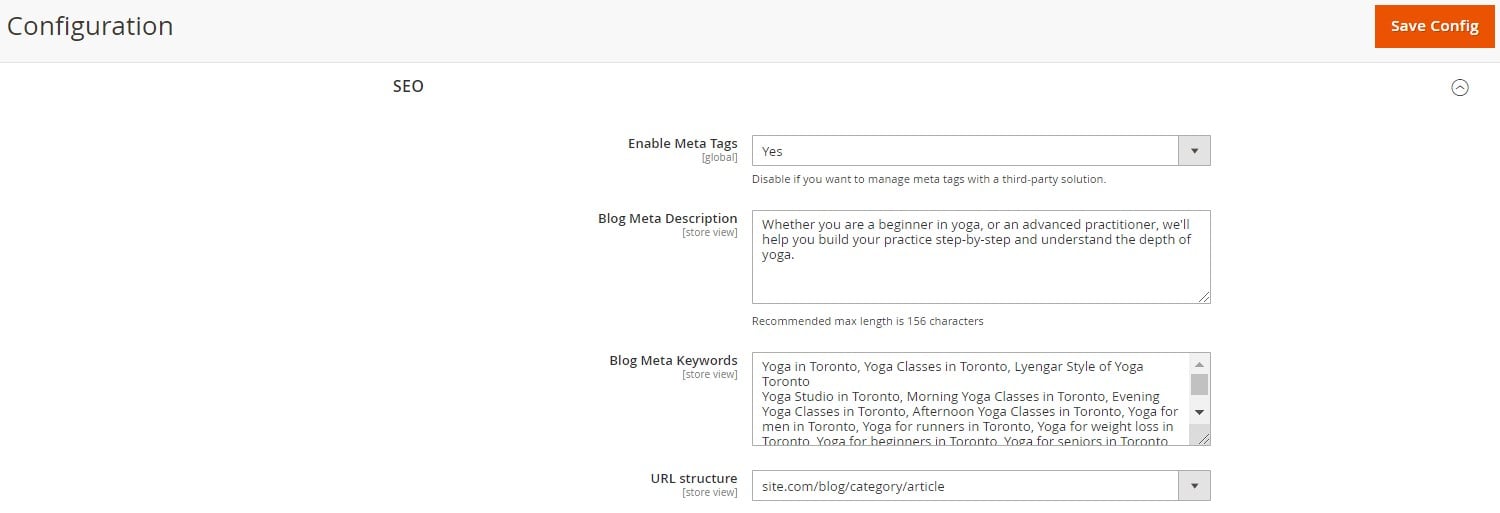
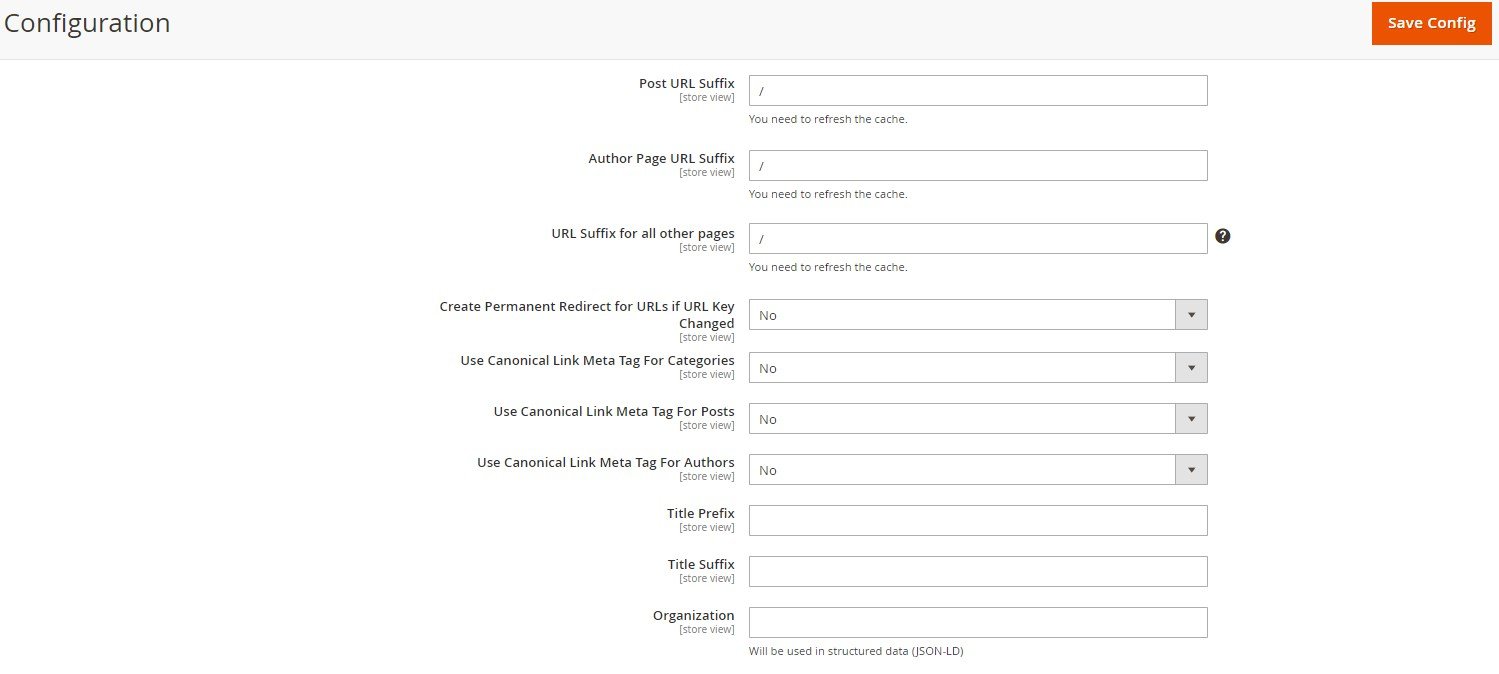
The following SEO settings of the Aheadworks Magento 2 blog module let admins specify suffixes for the blog post and other blog-related pages and set up a permanent page redirect to the preferred URL for the cases when an URL key has changed. Besides, the extension allows using canonical link meta tags for categories, posts, and authors, and specifying the title prefix and suffix and company name.
In Related Products, you enable/disable the blog posts tab on a product page and the related products tab on a blog page and choose a position of the latter. Then, you should select related products block layout and activate/deactivate the “Add to Cart” button on the blog pages.

The last tab allows overriding the Magento 2 posts with the same URL and uploading an XML file with existing posts from a WordPress blog. To start the import process, click the “Import Posts” button.

Now, let’s see how the Magento 2 blog looks on the frontend.
Frontend
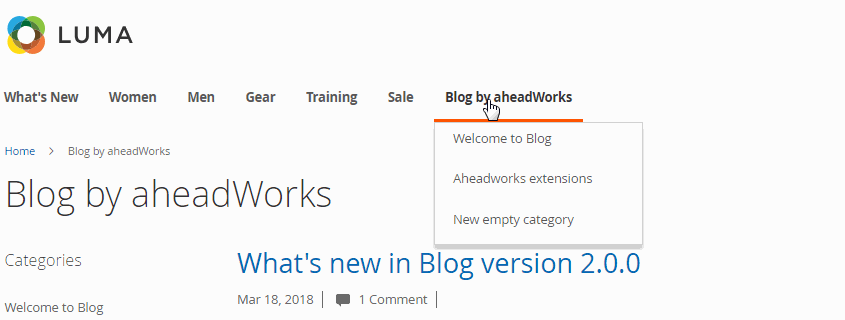
Upon hovering over the Blog by aheadWorks link, a website visitor will see available categories as they are configured in the backend.
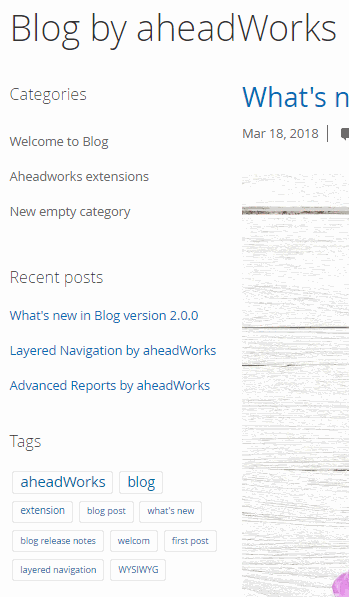
The left sidebar displays categories, recent posts, and most popular tags. No CMS blocks are included (just like it is specified in general settings).
In the example below, you can check how a post appears on the blog page. It includes the following elements: a title, an author’s name, date when it was published, number of comments, social sharing buttons, an image, short content, and category where it is posted.

The same elements are available in each post.

Below the post body, there are tags, social media icons, a category of the post, and blocks with Previous/Next post links and related posts.
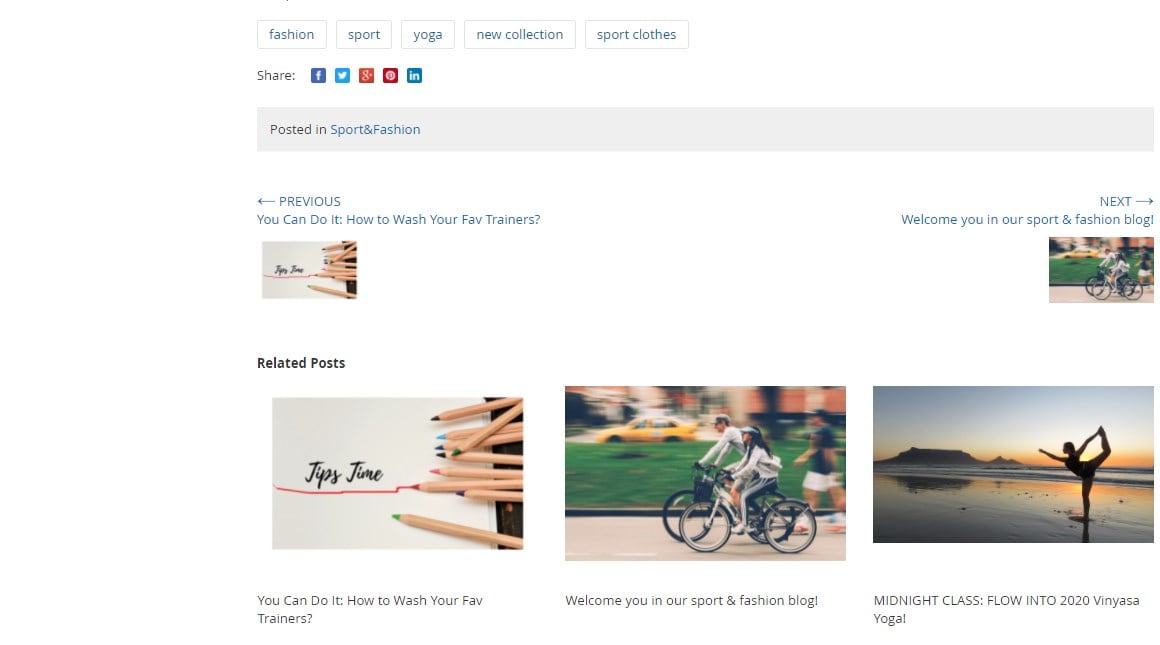
Besides, the post page includes a block with related items and a Disqus section. As we have already mentioned, you can manage all blog comments with the help of DISQUS. Disqus tutorial and comment management how-to are available here: .

In the following screenshot, you can see how the module inserts the related blog posts block on a product page. A corresponding tab lists all relevant posts about the specified item on your store.
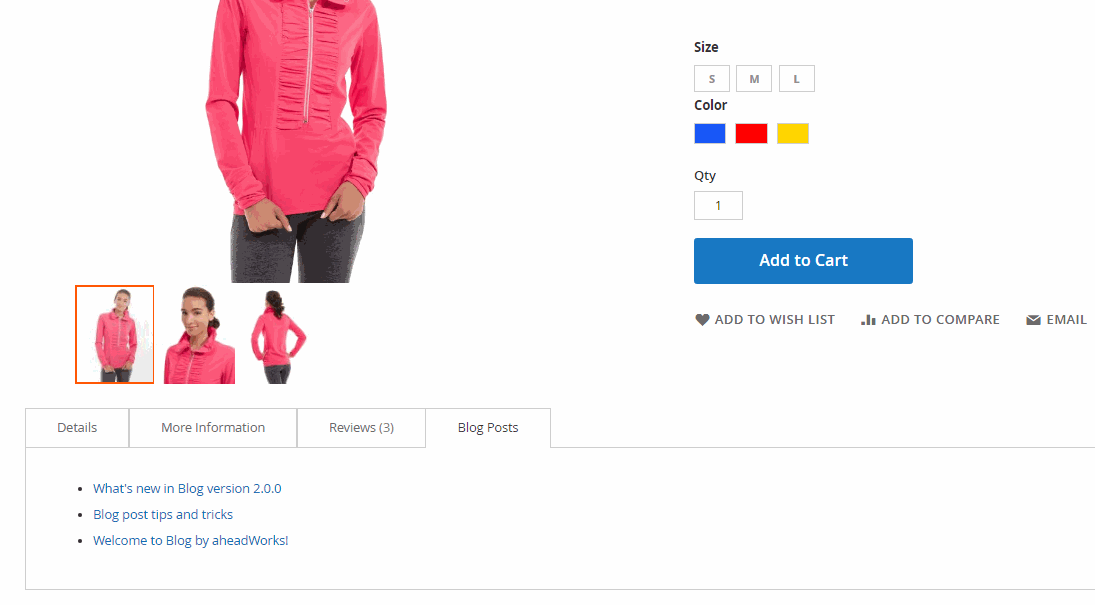
Recent Updates
Blog 2.8.0
- PWA Studio support was introduced.
Blog 2.7.4
- The post preview feature was added to the backend interface.
- Now it is possible to add an image and specify its title and alternative text on the category edit page.
Blog 2.6.4
- Now it is possible to set up a hierarchy of categories and subcategories in the categories tree on the category edit page.
- Author pages were introduced.
- New mass action in the Posts grid – Assign to Author.
- Now it is possible to insert the Previous/Next links in the blog post pages.
- A new configuration setting was added that allows admins to disable a link to the blog in the main navigation menu.
Blog 2.5.0
- Now it is possible to configure thumbnails for Recent Posts and Blog Posts.
- Now the module supports GraphQL, Page Builder, and RSS.
Blog 2.4.7
- Category filter was added to the Posts grid.
Blog 2.4.4
- Images in the blog. Admin users can add images along with a title and alt text to their posts.
- Categories added to a sidebar. Ability to add a list with the specified number of categories to the blog sidebar.
- Open Graph and Twitter Cards support. The updated extension improves social media sharing options with the Open Graph and Twitter Cards markups.
- Option to include/remove a category from the URL structure. Extended functionality for changing URLs structure.
- Canonical URL and tag implementation. Possibility to define a canonical URL for the posts assigned to multiple categories.
- Restriction of access to blog posts. The feature to restrict access to some blog articles based on a customer group can be enabled.
- Integration with Bluefoot Magento. Bluefoot for Magento Commerce is now available within the extension’s WYSIWYG editor.
Blog 2.3.2
- Scheduling and updating blog posts. It is possible to set a date for scheduling, updating, or publishing posts automatically.
Blog 2.2.0
- Migration of WordPress blog posts to Magento 2. The new feature allows importing posts from a WordPress website to a Magento blog.
- Additional mass actions. The extension adds mass action options to the Posts and Categories grids.
- A new structure of blog post URLs. The new structure includes categories from a URL for search engines, making it more SEO friendly.
Blog 2.1.0
- Recent Blog Posts widget added to sidebars.
Blog 2.0.0
- Related blog posts and related products. The module allows Magento admins to create related products blocks on blog pages and vice versa. In the first case, customers can easily reach additional information on the viewed extensions from blog posts, while in the second case, store managers can promote products right on the blog pages.
- Blog Migration Tool. The module has its own migration service that makes the transition process from Magento 1 to Magento 2 more simple due to the Aheadworks Blog Migration Distributive support.
Final Words
As you can see, Aheadworks offers a simple yet powerful blog that will become an excellent addition to every Magento website. With the Blog module installed on your ecommerce site, you can significantly improve your content marketing strategy, reach out to the target audience, and promote your products in the blog posts.
Note that the Magento 1 and Magento 2 extensions have different price tags. You can purchase Blog by Aheadworks for Magento 1 for just $99. If you are a Magento 2 user, get ready to spend $329. For this cost, you get free installation, 90 days of support, and a personal account manager.


