
Magento 2 Backend Exploration: Dispatches

In the following post, we continue our exploration of the Magento 2 backend. The admin part of your online storefront consists of numerous sections. However, all of them are intuitive and user-friendly. Therefore, you can easily master them, and we are here to help you. This article sheds light on Magento 2 dispatches and the related backend subsections.

Table of contents
Magento 2 Dispatches Explained
To enable Magento 2 dispatches, you need to turn on Magento Shipping in the configuration section of your backend. After that, the Dispatches grid starts accumulating shipments that can be shipped. If there is a scheduled pickup, you can create a dispatch. Besides, the Magento 2 lets you print a manifest that includes each package you should include. Note that it is possible to divide this content per carrier.
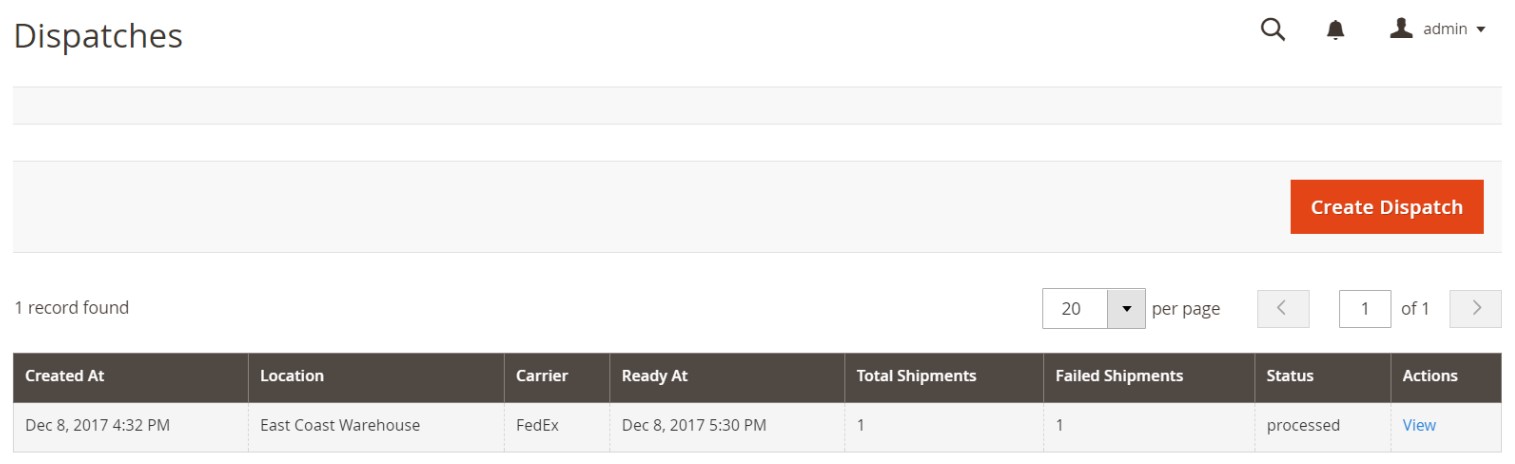
The Dispatches grid consists of 8 columns:
- Created At – time and date a dispatch was generated;
- Location – a corresponding warehouse;
- Carrier – a carrier related to a dispatch;
- Ready At – time and date a dispatch is ready;
- Total Shipments – a number of shipments associated with a dispatch;
- Failed Shipments – a number of failed shipments associated with a dispatch;
- Status – a dispatch status;
- Action – you can view dispatches in this column.
How to create a dispatch in Magento 2
Now, let’s explore how to generate dispatches in Magento 2. You need to get to the grid described above. It is situated under Admin-> Sales-> Dispatches. Follow these steps to create a dispatch:
- Click the Create Dispatch button.
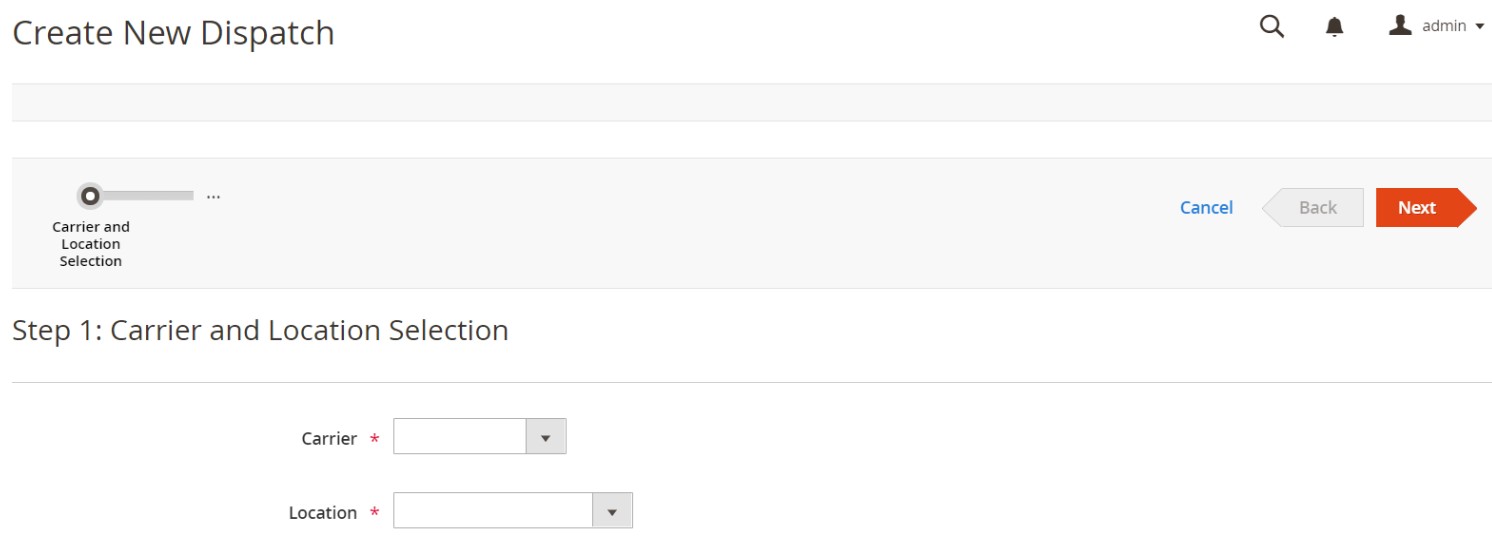
- Next, select a carrier.
- After that, you have to specify a location where the packages specified in the manifest have to be picked up. Click Next to continue.
- During the second step, you have to specify the date and time of the scheduled pick up. Use the Ready At field to choose the date. Note that it must be at least 30 minutes in the future.
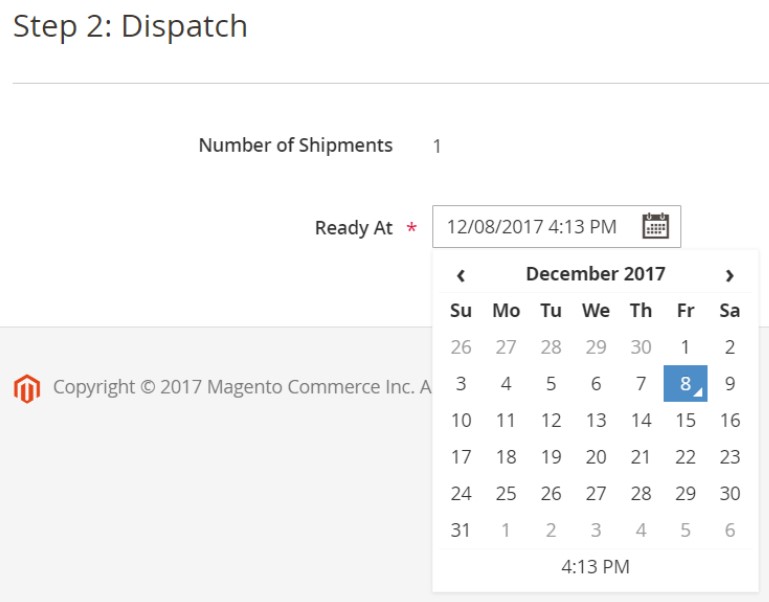
You can schedule the dispatch by clicking the Finish button.
How to view dispatch details in Magento 2
As we’ve mentioned above, the Dispatches grid contains the Action column. The View link is available for each dispatch. Find a dispatch you need and click View. You will be redirected to a dispatch screen like the one displayed below:
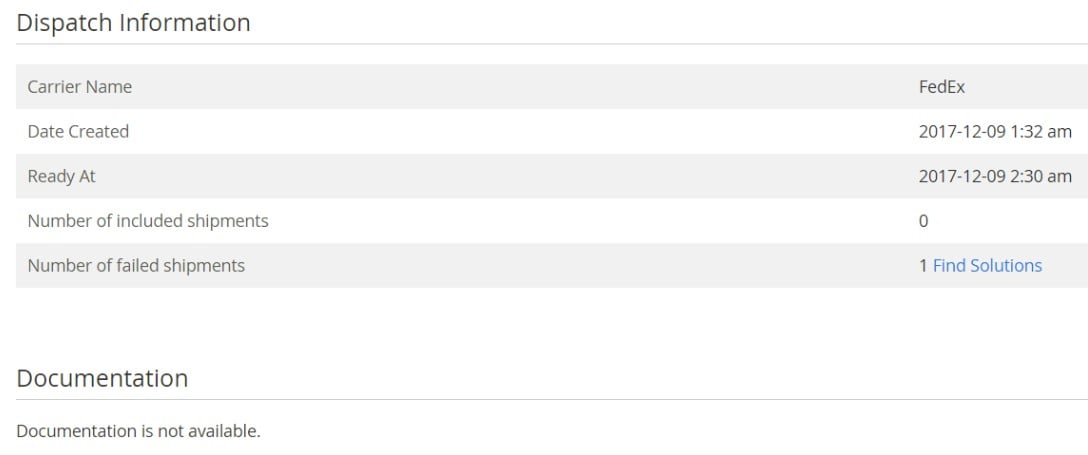
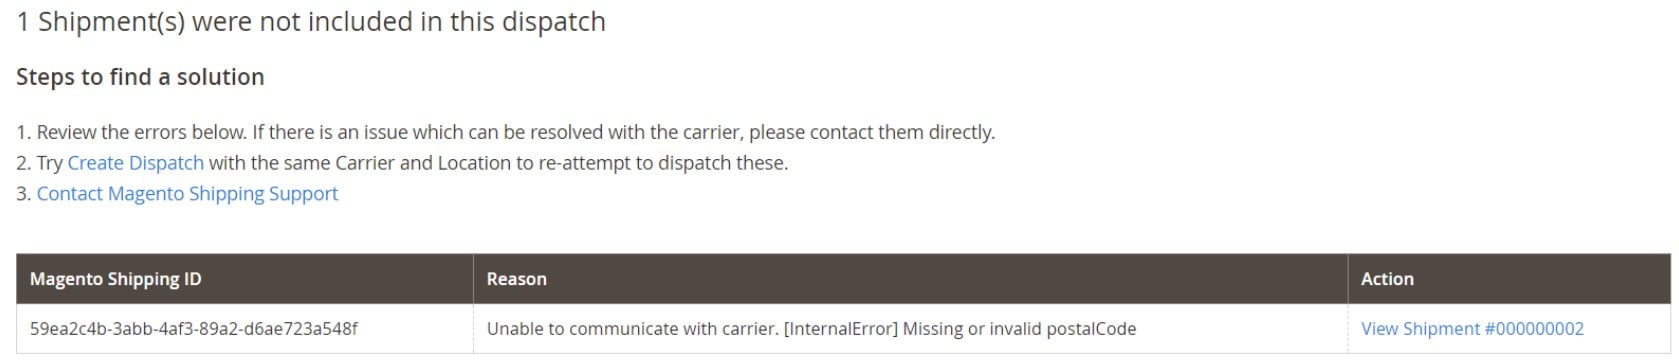
If there is a problem in communication with the carrier, you will see a failed shipment. However, there is also the Find Solutions link like the one above. Click it to get help resolving dispatch problems.
The example below illustrates a problem that was caused by a missing or invalid postal code. You have to fix it and try again.
How to Import & Export Magento 2 Dispatches
Now, when you know how to create and view Magento 2 dispatches, let’s concentrate on how to import and export them. If you already have a new e-commerce store and want to migrate to it, you’ve come to the right place. We know for sure how to help you. First of all, it is necessary to mention that the default import and export tools of the platform are very limited, so some operations are impossible if you use them. However, you can replace them with the Improved Import & Export Magento 2 extension. This tool can transfer all core Magento 2 entities. It also uses different connection types and file formats. As a result, you can use the extension to integrate your e-commerce store with any external system.
We also offer a free tool that simplifies the data migration between the first and second versions of Magento (Magento 2 to Magento 2 migration is possible as well). Meet the free Magento 1 to Magento 2 Migration add-on. It works on top of the Improved Import & Export Magento 2 extension providing additional data transfer capabilities. Besides, it automates import and export processes and helps to edit data according to the Magento 2 requirements.
Use both tools to import Magento 2 entities right in your admin or via simple CLI commands. Both solutions offer selective migration. It means that you can move entity after entity, eliminating downtime. Don’t forget to reindex when finished.
The Free Migration add-on requires the Improved Import & Export module to be installed first. You can get the add-on in your Firebear account after purchasing the module. if any questions occur.
To import a Magento entity, you need to:
- Create a new import job under System-> Improved Import/Export-> Import Jobs.
- Enable the job, specify its title, and configure other General Settings;
- Proceed to Import Settings and choose an entity you are going to transfer
- Configure Import Behavior and determine Import Source.
- Save & Run the job.
That’s it!
Also, note that you can automate both import and export processes with the help of the Improved Import & Export Magento 2 extension. With our module, you get the ability to create cron schedules. Its other benefits include the support for API and Google Sheets in import/export processes. Besides, it works with different file formats and archives and offers mapping presets that edit attributes automatically. Both the extension and its add-on are described here:
Get Improved Import & Export Magento 2 Extension
Get Free Magento 1 to Magento 2 Migration Add-On
Please, regarding the ability to import and export batches to and from Magento 2.
Related posts
 How to Import Customers & Customer Addresses to Magento 2
 Magento 2 B2B Company Guide: Revealing Company Structure & Import
 How To Bulk Import Products In Shopify: CSV Description & Step-By-Step Guide
 Magento 2 Release Notes
 Adobe (Magento 2) Commerce and Cloud (Enterprise Edition) Specific Features
 Amasty ChatGPT AI Content Generator for Magento 2
 Magento Open Source and Adobe Commerce 2.4.7 Release Notes
 A Complete Guide to Shopify Customer Import