
Exploring Magento 2 Backend: Stores/Settings

In the article below, we explore the possibilities of the Settings subsection situated under the Stores section of the Magento 2 admin. This area consists of four different screens: All Stores, Configuration, Terms and Conditions, and Order Status. Let’s explore each one to discover more details of hidden possibilities dug deep in your Magento 2 website. We also throw daylight upon how to import/export store data to/from your e-commerce website.

Table of contents
All Stores
Every Magento 2 installation may be based on a hierarchy of multiple websites, each of which can have numerous stores and store views. All of them may have one-to-many parent/child relationships.
However, every Magento installation begins with a single website. By default, it is always the main one. Every new site for a single installation gets its own IP address and domain.
A website can be a pool of multiple stores. Although all of them share one catalog, checkout, and admin, each one contains such unique elements as the main menu, selection of products, and design.
It is also worth mentioning that each store may have several views displayed following a customer’s location, showing a corresponding language and currency. Initially, there is a single default view, but you can add more if applicable, satisfying the demands of international prospects.
To determine where in the hierarchy a database entity, content element, or configuration setting is applied, the official documentation uses the term scope. Thus, you can set the context for a configuration setting to refer to a specific part of the installation.
The hierarchy of websites, stores, and views is available under Stores -> Settings -> All Stores. You can see a grid that contains the corresponding elements there:
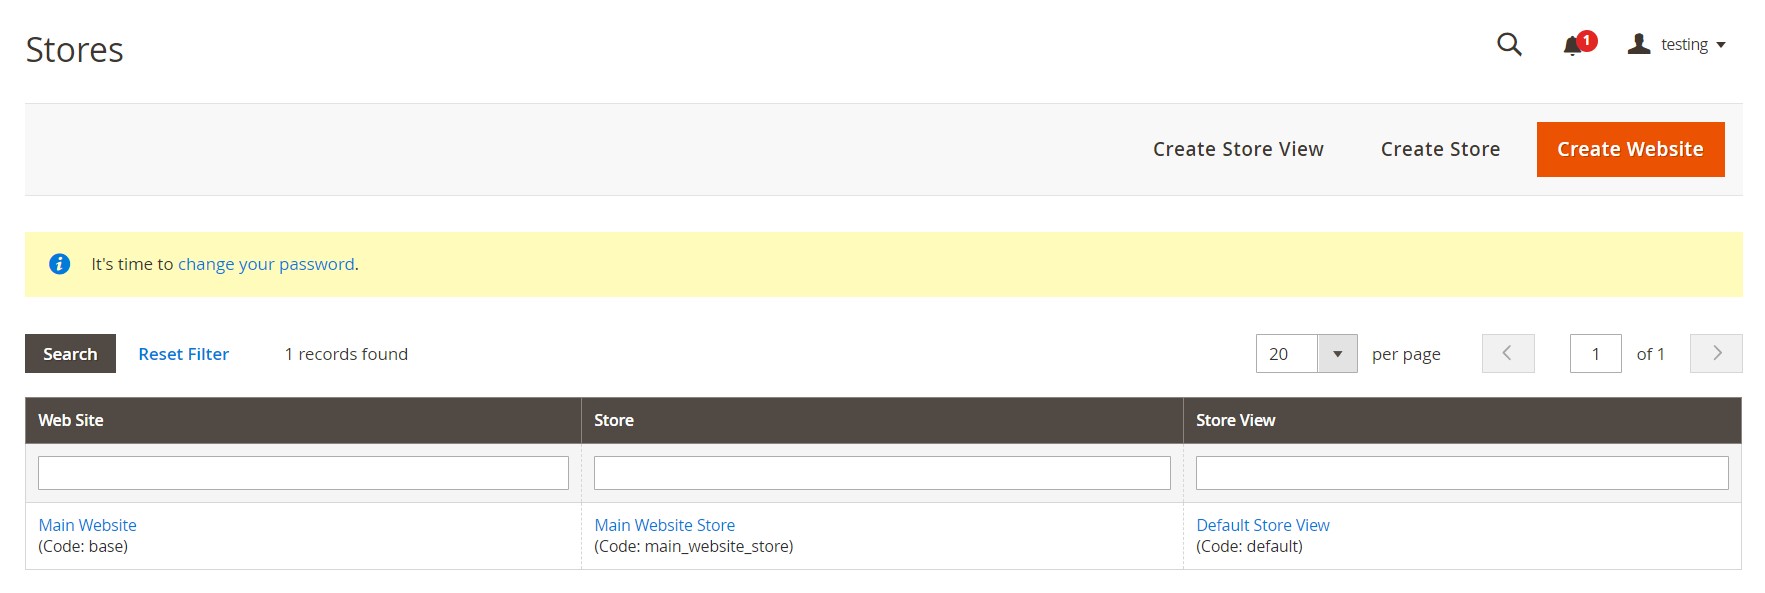
Click on each element to apply changes.
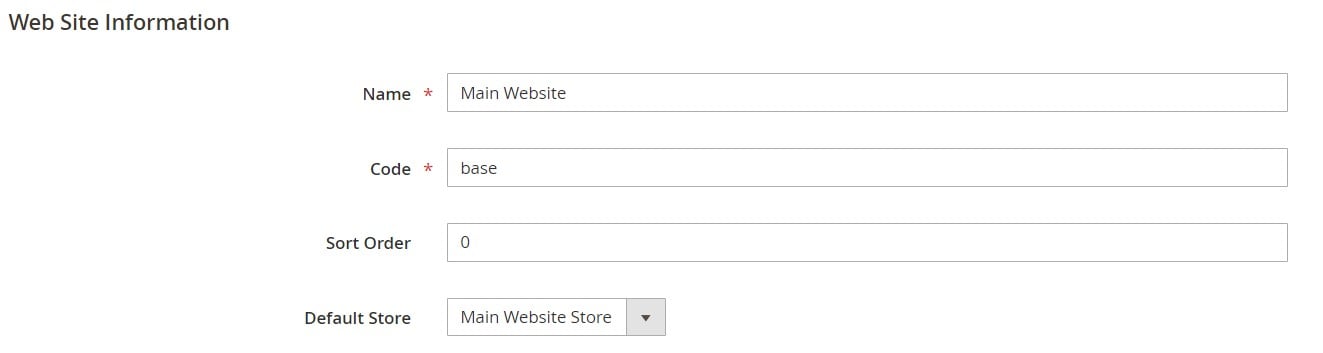
A website configuration page lets you change the name of your website, its code, and sort order. You can also select a default store there:
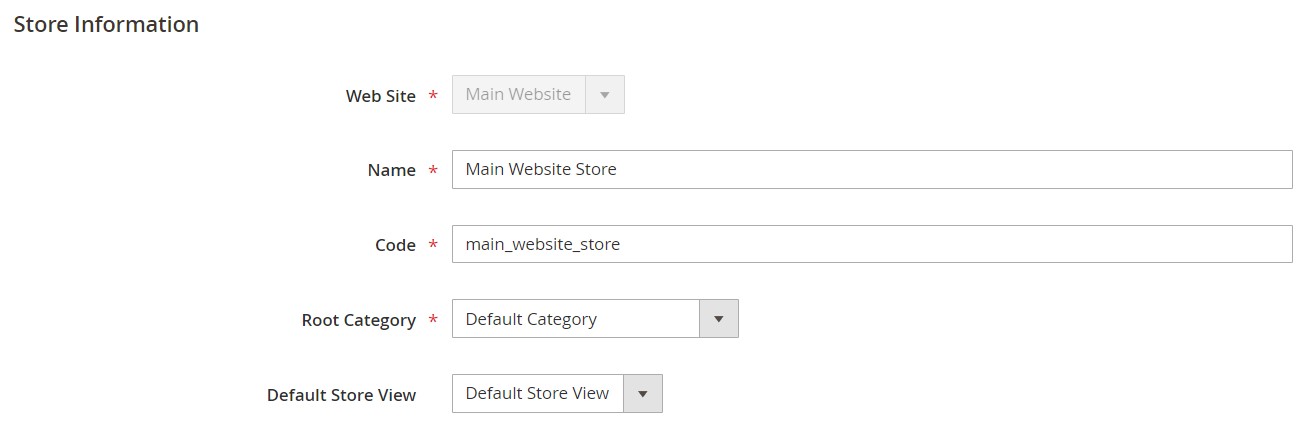
A website store configuration page contains a locked Web Site option. However, you can change its name and code. At the same time, it is possible to select a root category and a default store view.
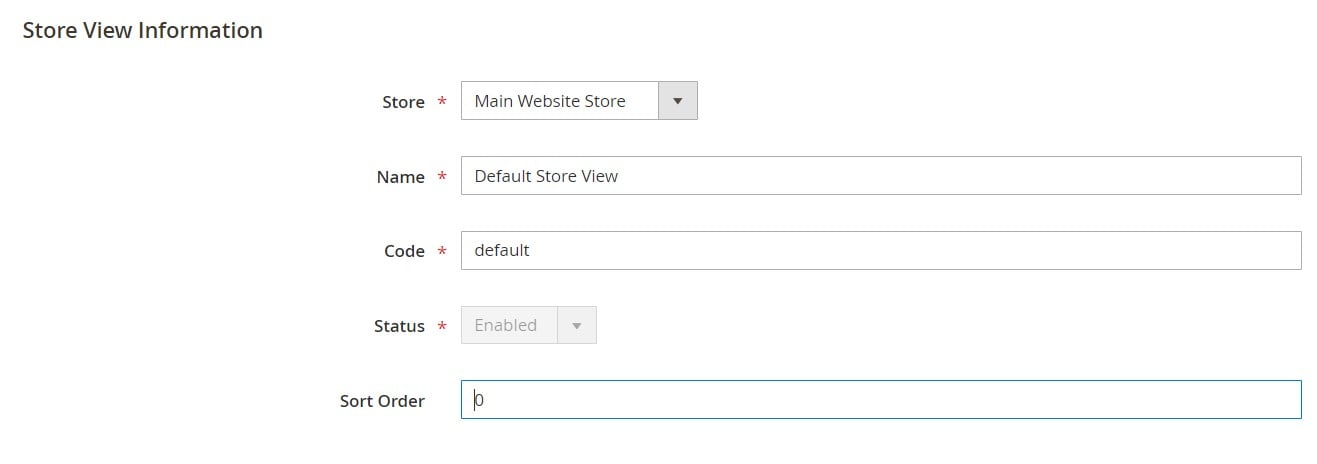
A store view information section provides the ability to specify a corresponding store, change the view’s name and code, and set sort order. The status dropdown may be locked.
Configuration
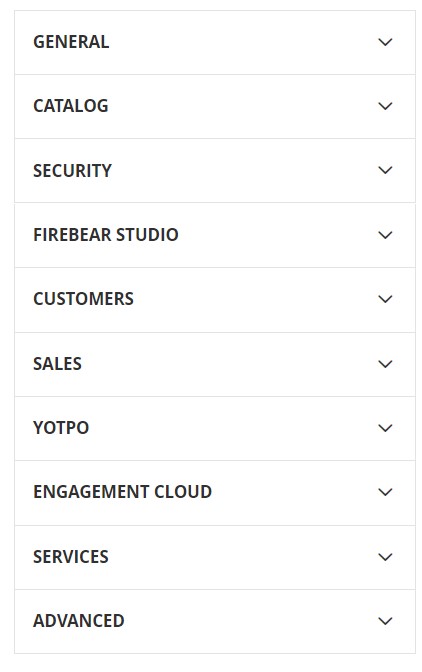
The Configuration screen contains a management framework of your Magento 2 installation. You can apply various changes to your websites through the following tabs:
- General;
- Catalog;
- Security;
- Customers;
- Sales;
- Sales Channels;
- Yotpo;
- dotdigital;
- Services;
- Advanced.
Note that each tab is divided into sections, each of which contains numerous subsections. For instance, the General tab is divided into the following sections:
- General;
- B2B Features;
- Web;
- Currency Setup;
- Store Email Addresses;
- Contacts;
- Reports;
- Content Management;
- New Relic Reporting;
- Advanced Reporting.

In its turn, the General section consists of the following subsections:
- Country Options;
- State Options;
- Locale Options;
- Website Restrictions;
- Store Information;
- Single-Store Mode.
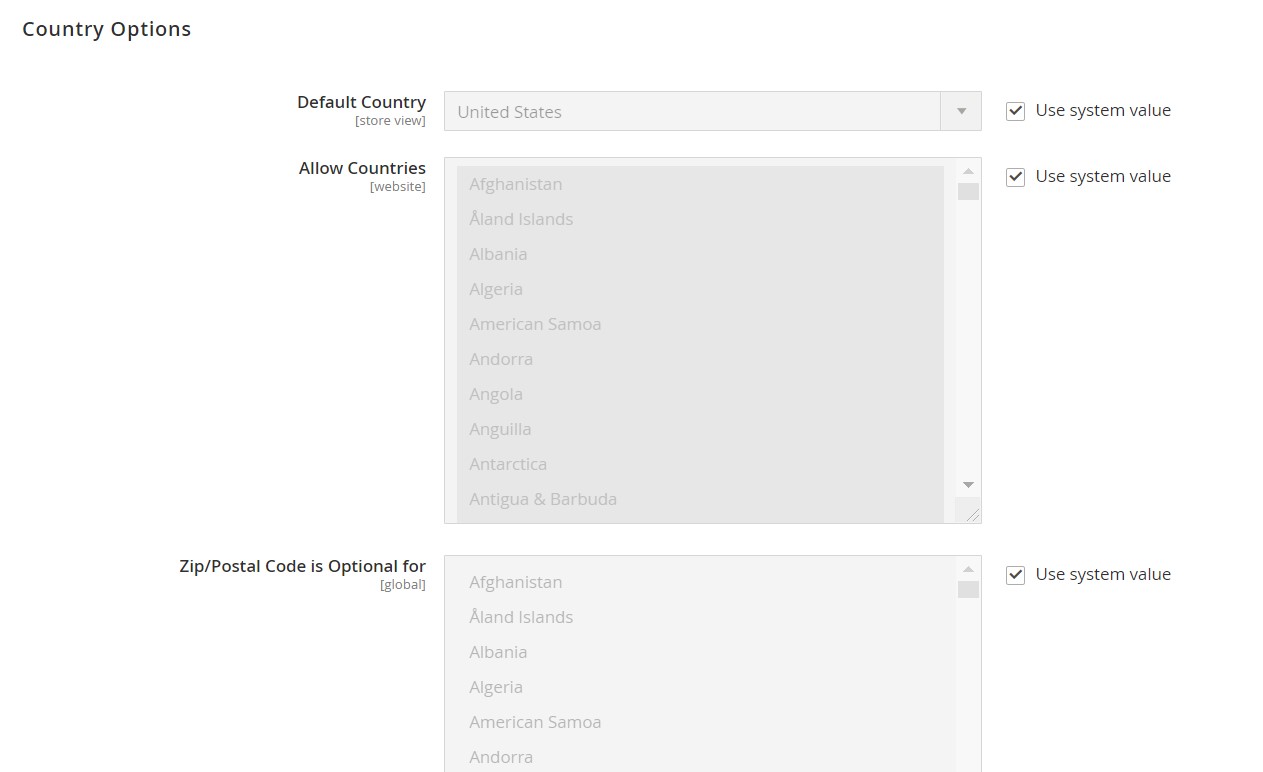
And you can discover the following configurations under Country Options:
- Default Countries;
- Allow Countries;
- Zip/Postal Code is Optional for;
- European Union Countries;
- Top destinations.
Check the official for further description of each option available in the Configuration section of the Magento 2 admin.
Terms and Conditions
When the Terms and Conditions section is enabled (you can do that under Stores -> Settings -> Configuration -> Sales -> Checkout -> Checkout Options), customers are required to agree to the terms and conditions before finalizing the purchase.
The section usually includes information required by law that outlines the rights of the buyer and seller. The corresponding message displays between the payment information and the Place Order button.
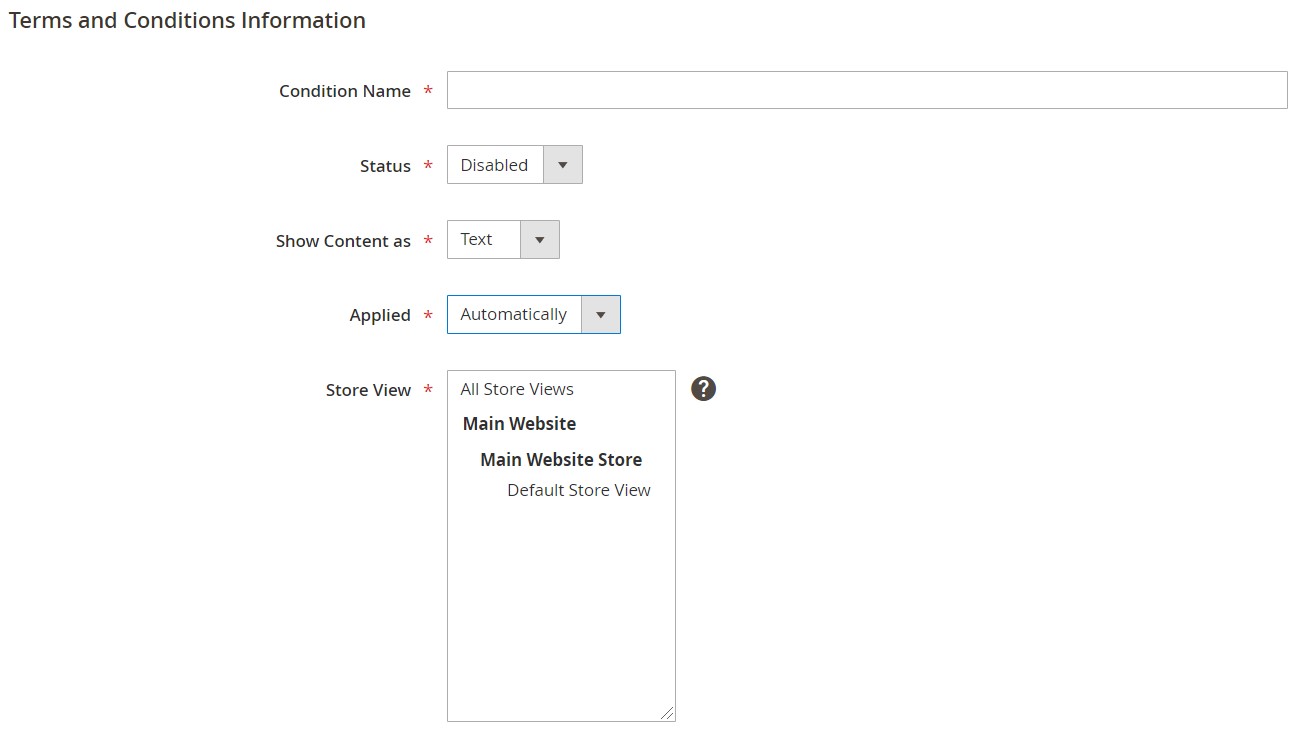
You can find a corresponding screen under Stores -> Settings -> Terms and Conditions. The grid displays such information as ID, condition, store view, and status.

Hit Add New Condition to create a new set of terms. Magento 2 lets you specify a condition name, status, display type (Show Content as Text or HTML), application type (Automatically or Manually), store view, checkbox text, content type, and content height.
Order Status
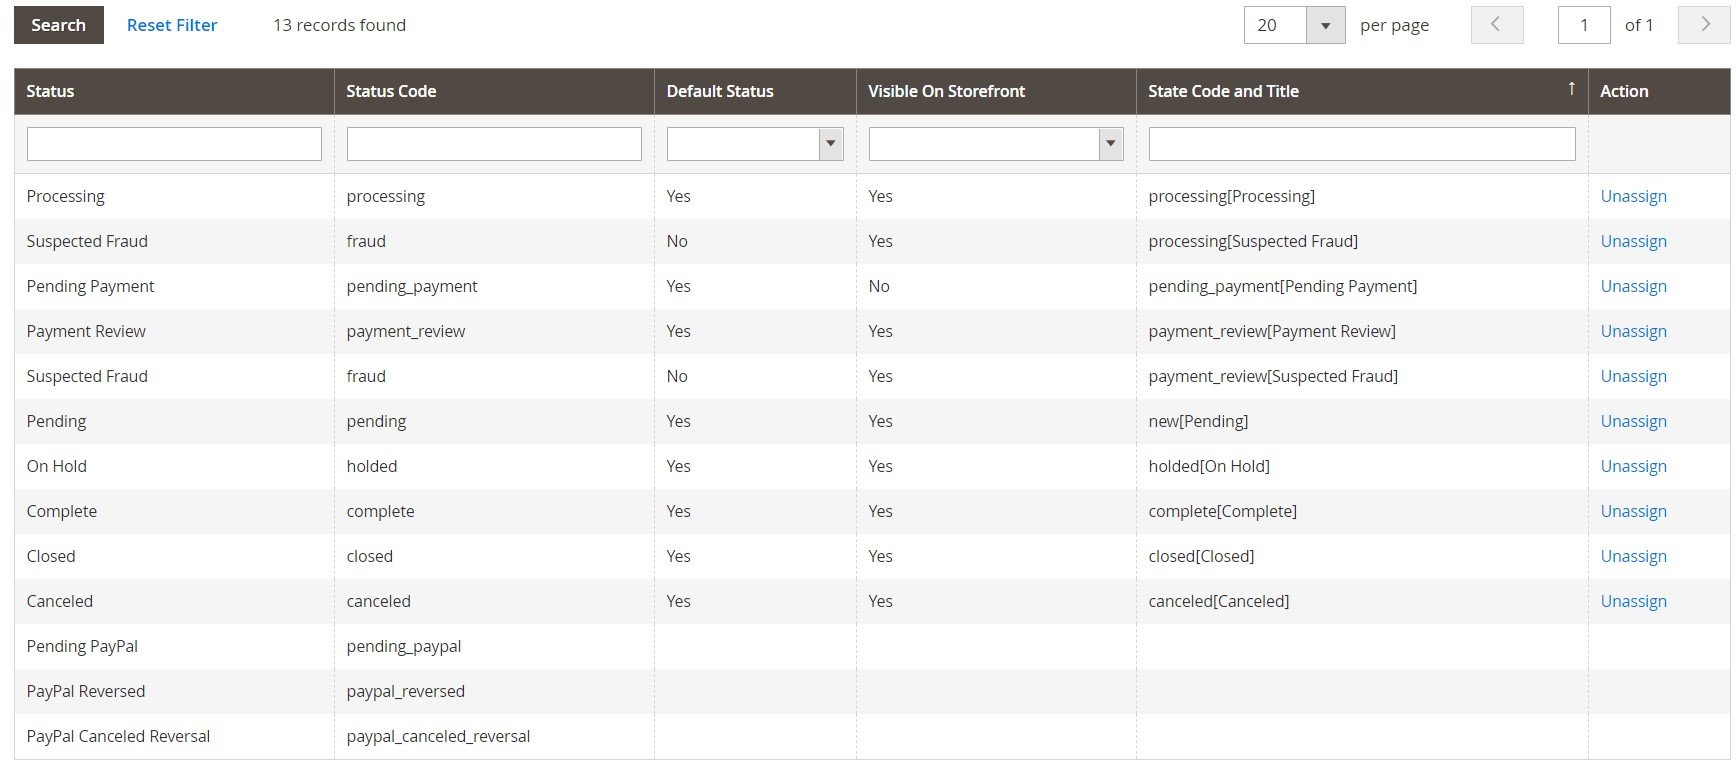
Every order has a set of statuses associated with each stage of the order processing workflow. You can see the corresponding information in the Orders grid’s Status column. The predefined order statuses are available under Stores -> Settings -> Order Status. They include:
- Processing;
- Suspected Fraud;
- Pending Payment;
- Payment Review;
- Pending;
- On Hold;
- Open;
- Complete;
- Closed;
- Canceled;
- PayPal Canceled Reversal;
- Pending PayPal;
- PayPal Reversed.
You can also create custom order statuses specific to your needs, assigning them to order states.
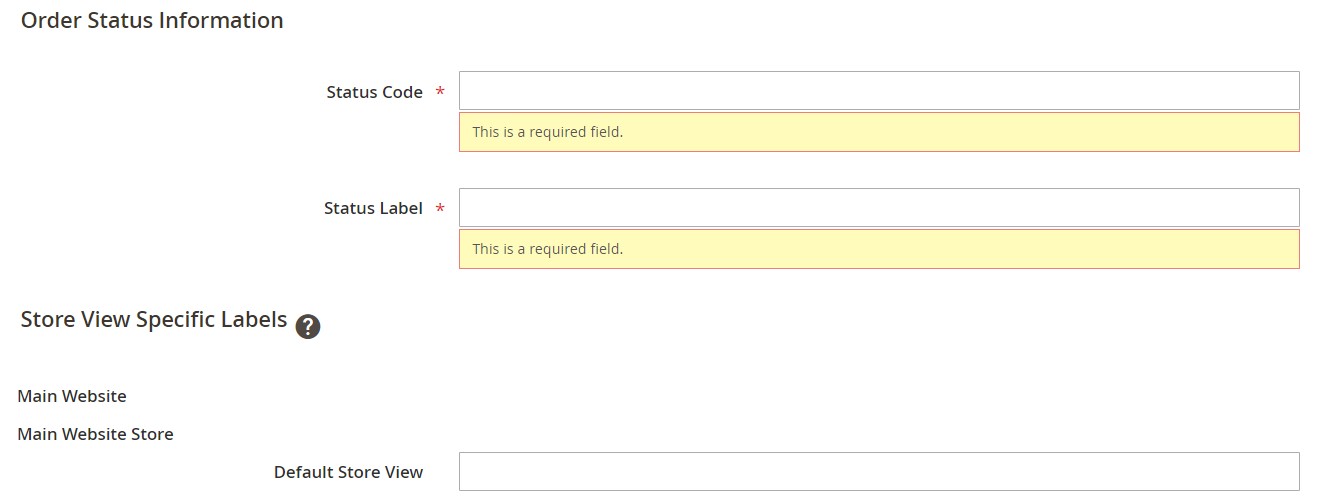
- Click Create New Status in the upper-right corner of the Order Status screen.
- In the Order Status Information section, specify a Status Code for internal reference and a Status Label to identify it in the admin and storefront.
- Type labels necessary for different store views in the Store View Specific Labels section.
- Save the new status.
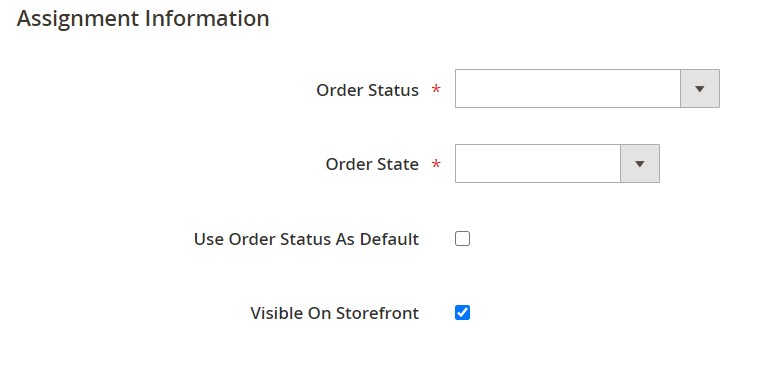
Now, you can assign your new order status to a state. Return to the Order Status screen and hit Assign Status to State. Select the Order Status you want to assign and specify a corresponding Order State. You can make this status default for the order state (the Use Order Status as Default checkbox) and visible from the storefront (the Visible On Storefront checkbox). Save Changes.
How to Import & Export Store Data in Magento 2
You can effortlessly import and export store data to and from Magento 2 with the help of the Improved Import & Export extension and its Magento 2 Migration add-on. The tandem provides the ability to transfer all core entities with zero downtime, unlike the default migration solution or native import/export instruments.
Without our solutions, you have to transfer and recreate store data manually. However, the Improved Import & Export extension becomes a robust game changer. Let’s see how the module works to enable data synchronization between Magento 2 and other systems.
Automated Data Transfers
The Improved Import & Export module provides the ability to automate data synchronization. It offers two different ways to implement this strategy. You can either use update schedules or create a system of triggers. In the first case, choose a predefined interval or specify a custom one. In the second case, define rules and conditions to initiate the import/export processes. Below, you can see the first approach in action:
Mapping
Besides, the Improved Import & Export Magento 2 extension provides the ability to address issues caused by different attribute standards. Our tool delivers the following enhancements:
- Presets – our module introduces a bunch of predefined schemes to map attributes automatically;
- Manual Matching – it is also possible to edit attributes manually right in the admin section of your Magento 2 website;
- Attribute Values Mapping – you can map attribute values too;
- Attribute Values Editing – modifying them in bulk is another available option;
- Filters – the extension enables additional export parameters designed to narrow down the selection of data you transfer from your website;
- Category Mapping – you can also link imported products to the existing categories of your catalog;
- Attributes On The Fly – and it is possible to generate missing attributes and corresponding values automatically.
Below, you can see the illustration of mapping presets in combat:
Extended Connectivity Options
While Magento 2 offers a scarce selection of file formats to transfer, the Improved Import & Export module provides support for CSV, XML, ODS, JSON, and Excel files. Furthermore, you can move them in a compressed state since the plugin works with several archive types.
It is possible to transfer data files via a local or remote server, cloud storage, or direct URL.
For various complex connections, Improved Import & Export lets you transfer data via API. Besides, the module supports Google Sheets import if your partners store information in this service.

As for the Magento 2 Migration add-on for Improved Import and Export extension, it lets you effortlessly move your Magento 1 data to Magento 2 right from one database to another, using a command line or admin panel. Its core features include:
- Selective Migration. Feel free to specify what entities to migrate. You can transfer only products or just orders. Note that the native Magento 2 migration tool handles only a complete migration procedure with no exceptions.
- Direct SQL Connection. As we’ve already mentioned, you have to deal with a direct connection between Magento 1 and Magento 2 databases. It results in a much faster and user-friendly migration process.
- No Downtime. The two previous features eliminate the downtime associated with the migration. It is only necessary to reindex data after the transfer is complete.
- M2-M2 Migration. Migrate any store data between the two Magento 2 websites.
- Core Entities. Freely move any core data without recreating it manually on a new website.
For further information about the extension and its add-on, follow these links:
Get Improved Import & Export Magento 2 Extension
Get Magento 2 Migration Add-on
Related posts
 How to Import Customers & Customer Addresses to Magento 2
 Magento 2 B2B Company Guide: Revealing Company Structure & Import
 A Complete Guide to Shopify Customer Import
 Adobe (Magento 2) Commerce and Cloud (Enterprise Edition) Specific Features
 Reputon Amazon Importer Review: How to Connect Shopify to Amazon in a Few Clicks
 Amasty ChatGPT AI Content Generator for Magento 2
 Magento 2 Release Notes
 How To Bulk Import Products In Shopify: CSV Description & Step-By-Step Guide