Exploring Magento 2 Backend: Stores/Inventory
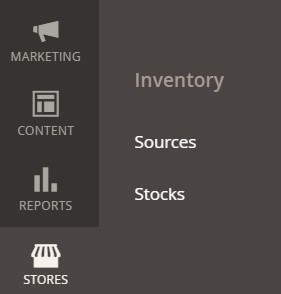
Below, we explore Sources and Stocks screens of the Inventory section situated in the Magento 2 admin. The article continues our series dedicated to the backend section of our favorite e-commerce platform. It describes how to manage Sources and Stocks. Besides, you will find out how to import and export source and stock data related to both screens.

Sources
The Sources screen of Magento 2 contains all locations that store and ship your product stock. You can add any place with available products capable of order fulfillment as a source. What exact location can become a source?
Depending on your business model, you can rely on warehouses, offline stores, distribution centers, and drop shippers as sources. It is only necessary to allocate inventory quantities to them to let Magento aggregate the total salable products for the stocks you own.
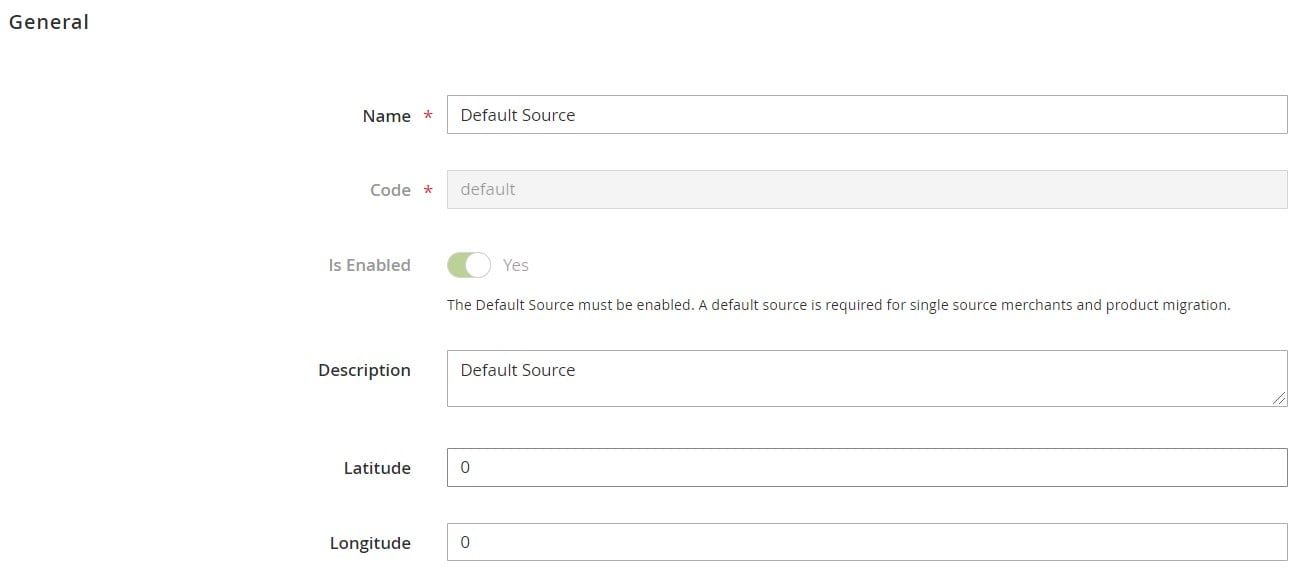
Magento 2 offers a default source out of the box. Although it cannot be disabled, it is possible to update this storing point, using it for a single source merchant. Besides, the default location is utilized for product migrations.
Each source includes such location information as name, country, physical address, point of contact, etc. Besides, you can view quantity, quantity for notification, and salable quantity. The latter is a result of subtracting the second designation from the first one. For instance, the current quantity in your NY warehouse is 975. The quantity that triggers a notification is 100. Consequently, the current salable quantity is 875 (975-100). As a Magento 2 administrator, you can assign and update inventory quantities as well as enable and disable sources as needed.

How to add and edit sources in Magento 2
Magento 2 provides the ability to update the source name, address, GPS location, and point of contact. However, the source’s code is protected since it acts as a unique ID used to link the source with product quantities and stocks.
In the case of the default source, you cannot edit its code or disable it. Other configurations are available under Stores -> Inventory –> Sources of your admin. Here, you can choose and edit an existing source or add a new one. Both procedures incorporate the same set of options. To add a new source, hit the Add New Source button. To modify an existing location, find one you want to update and open it in the Edit mode.
The General tab lets you specify a new source name and description. Besides, you can change its latitude and longitude.
The Contact Info tab provides such fields as Contact Name, Email, Phone, and Fax.

As for Address Data, this tab lets you select a country, state, city, street, and postcode.

Depending on the operation you perform, change the existing values, or specify the missing data.
Stocks
When it comes to stocks, Magento inventory management also shines. Stocks are a virtual, aggregated inventory representation of products for sources. You can assign a single stock to one or more sales channels. However, each sales channel can have a single stock attached to it (if it is not an external marketplace).
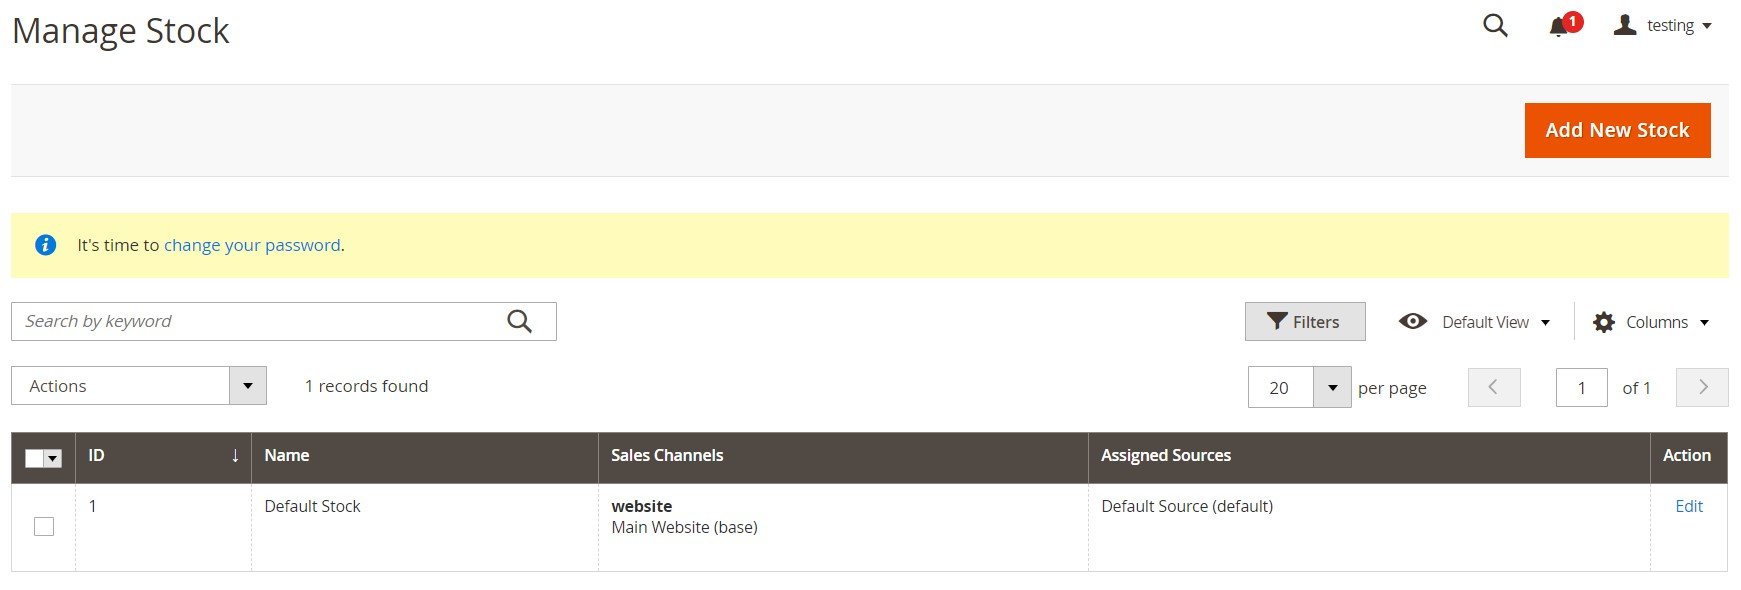
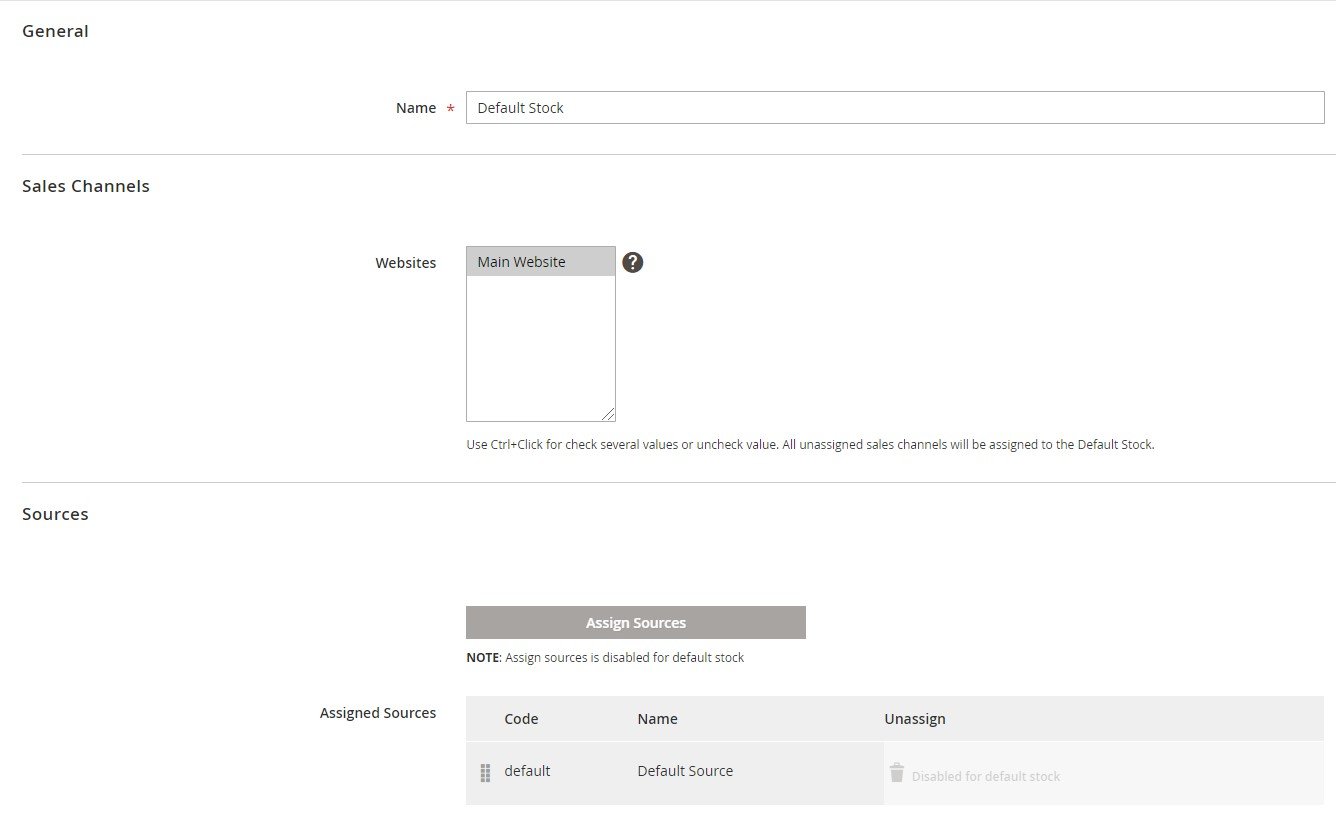
The situation with stocks is similar to sources: you get a default stock that cannot be removed or disabled. Although it is quite flexible in terms of what additional sales channels you can link it to, there is the only assigned source – the default one. Thus, the default stock is suitable for Single Source Merchants, imported products, and integrations with external systems.
All stocks are available under Stores -> Inventory -> Stocks. The following Manage Stock page provides the ability to edit the existing stocks as well as add new ones.
How to add/edit stocks in Magento 2
Use the Add New Stock button to place an additional stock item or open an existing one in the Edit mode to apply changes.
While adding or editing a new stock, you can specify its name, sales channels, and sources.
How to Import & Export Source & Stock Data in Magento 2
You can effortlessly import and export source and stock data to and from Magento 2 with the help of the Improved Import & Export extension and its Magento 2 Migration add-on. Both tools fully support Magento 2 MSI, providing the ability to create a flow of its data between your e-commerce website and any external system. You can transfer all core entities with zero downtime, while the default migration solution requires shutting down your storefront for a while.
Since native tools and most third-party alternatives don’t support all entities, you have to transfer and recreate store data manually, unless you use the Improved Import & Export extension. Let’s illustrate the core module’s features to ensure that it enables seamless data synchronization between Magento 2 and other systems.
Automated Data Transfers
With the Improved Import & Export module, you can automate data transfers entirely. The extension offers two approaches for implementing this strategy. Firstly, you can use update schedules. Secondly, it is possible to create a system of triggers. In the first case, you set one of the predefined intervals. Alternatively, it is possible to specify a custom one, as shown below:
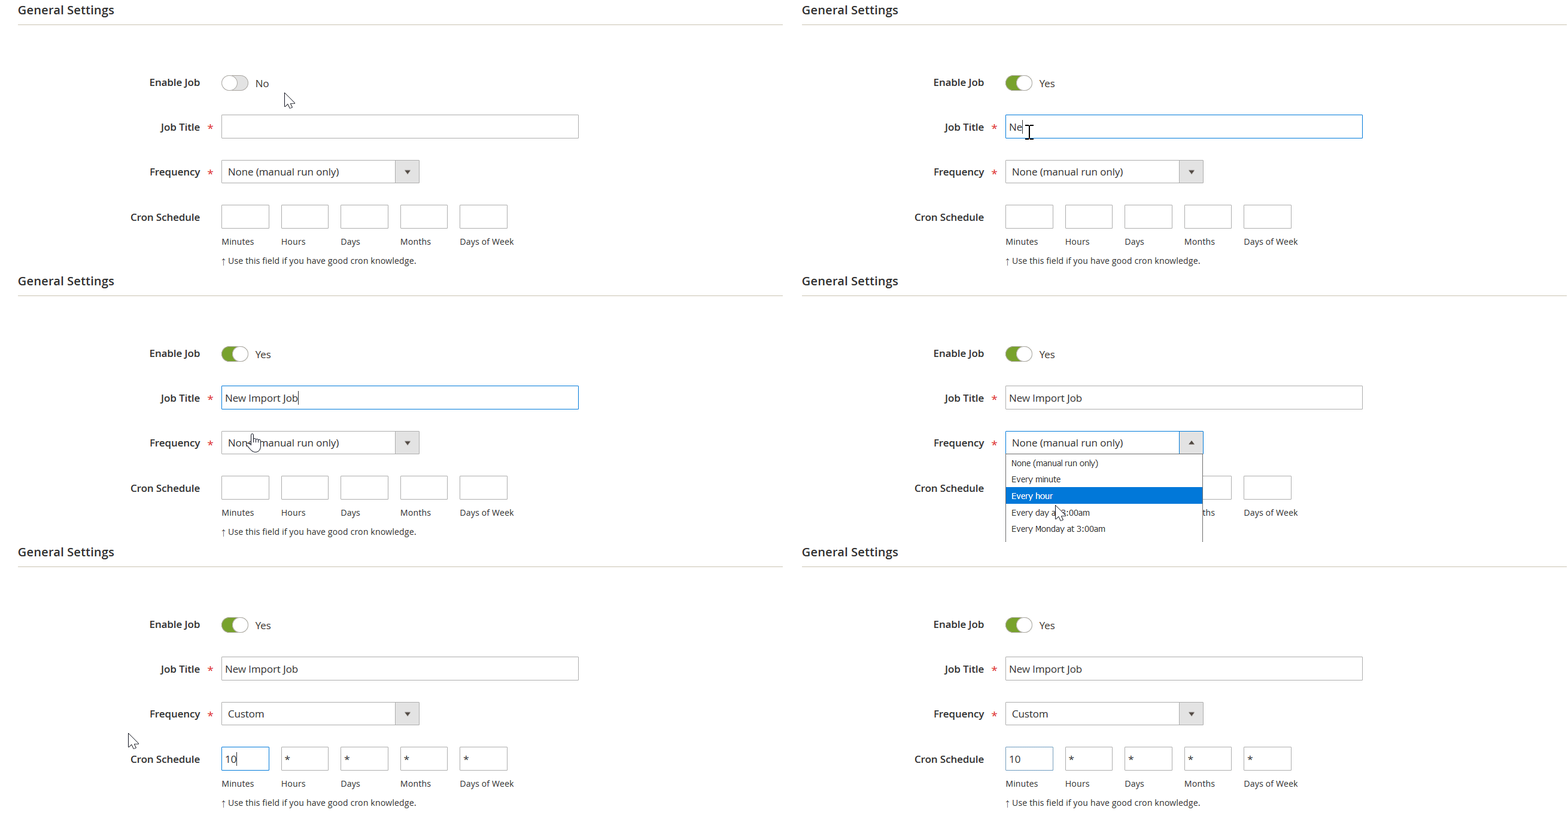
In the second case, the module enables you to define rules and conditions to initiate the import/export processes.
Mapping
When it comes to issues associated with different data storing standards, the Improved Import & Export Magento 2 extension addresses them via the following enhancements:
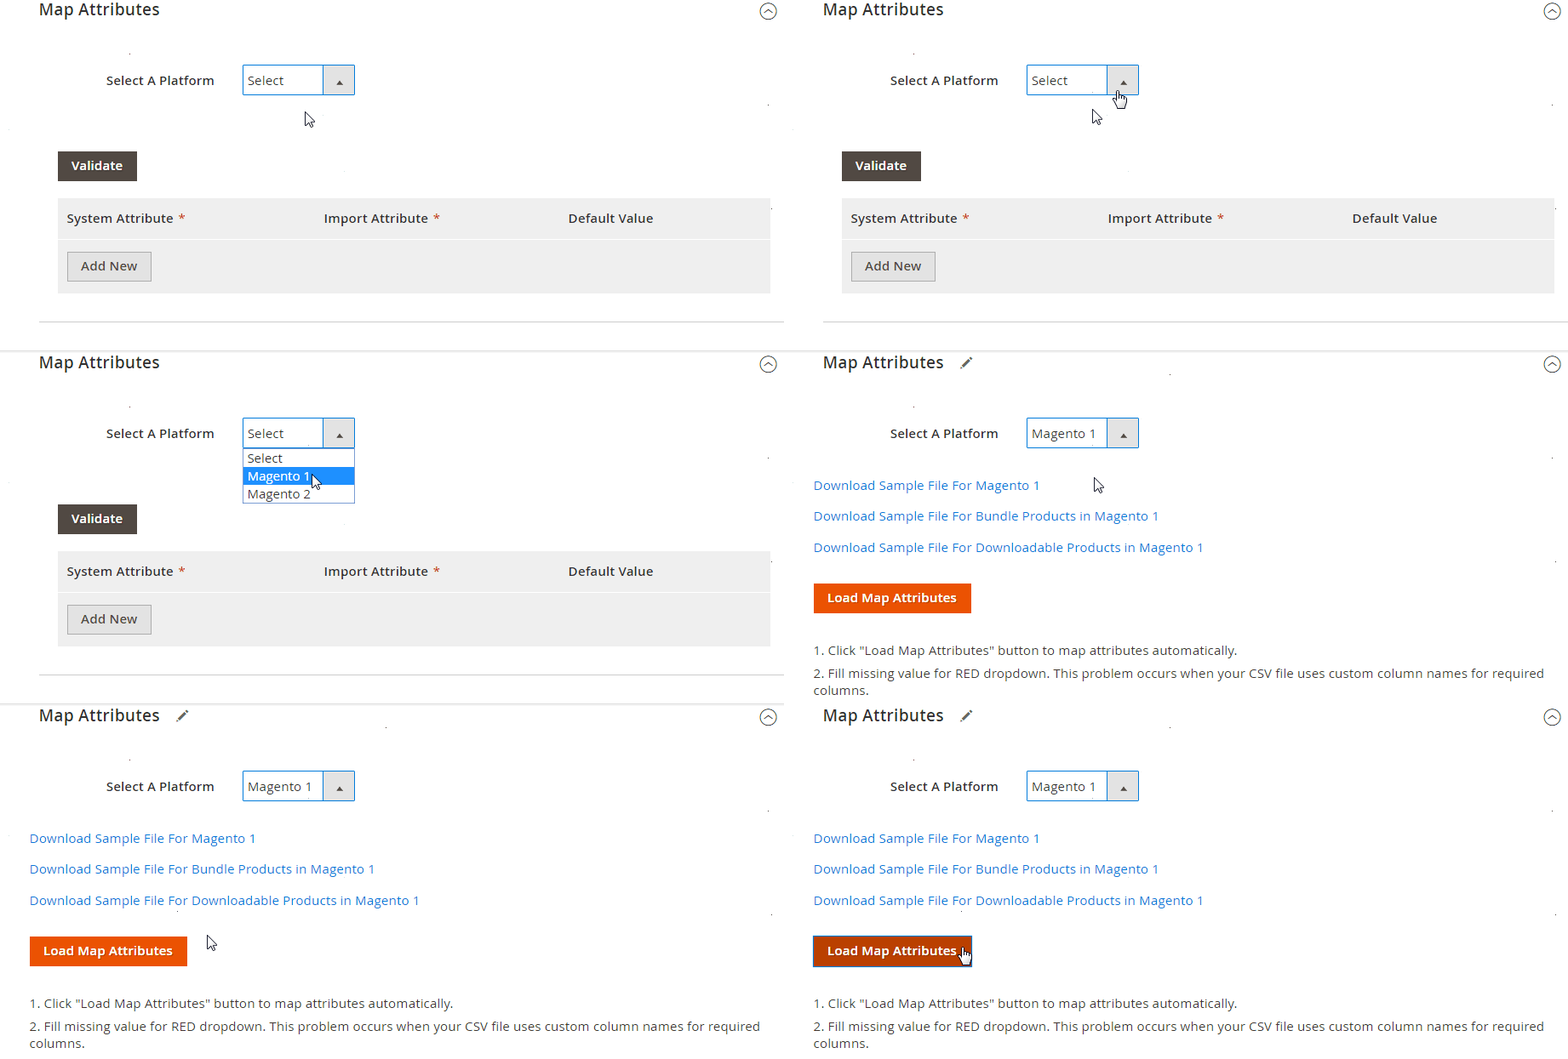
- Presets – you get a set of predefined schemes responsible for fully automated attributes mapping;
- Manual Matching – alternatively, you can do everything manually: the plugin lets you edit attributes right in the Magento 2 admin area;
- Attribute Values Mapping – attribute values mapping is also possible;
- Attribute Values Editing – you can even edit them in bulk;
- Filters – additional export parameters are another handy feature: the extension provides the ability to narrow down the selection of exported data;
- Category Mapping – importing products right to the specified categories of your catalog is possible too;
- Attributes On The Fly – if some attributes or their values are not provided, you can generate the missing data automatically.
Mapping presets act as follows:
Extended Connectivity Options
Magento 2 sets a strict constraint on file formats that can be transferred between your e-commerce website and external systems. However, you can overcome the limitations with Improved Import & Export. Our extension supports CSV, XML, ODS, JSON, and Excel files and lets you move them in a compressed state – several archive types are supported!
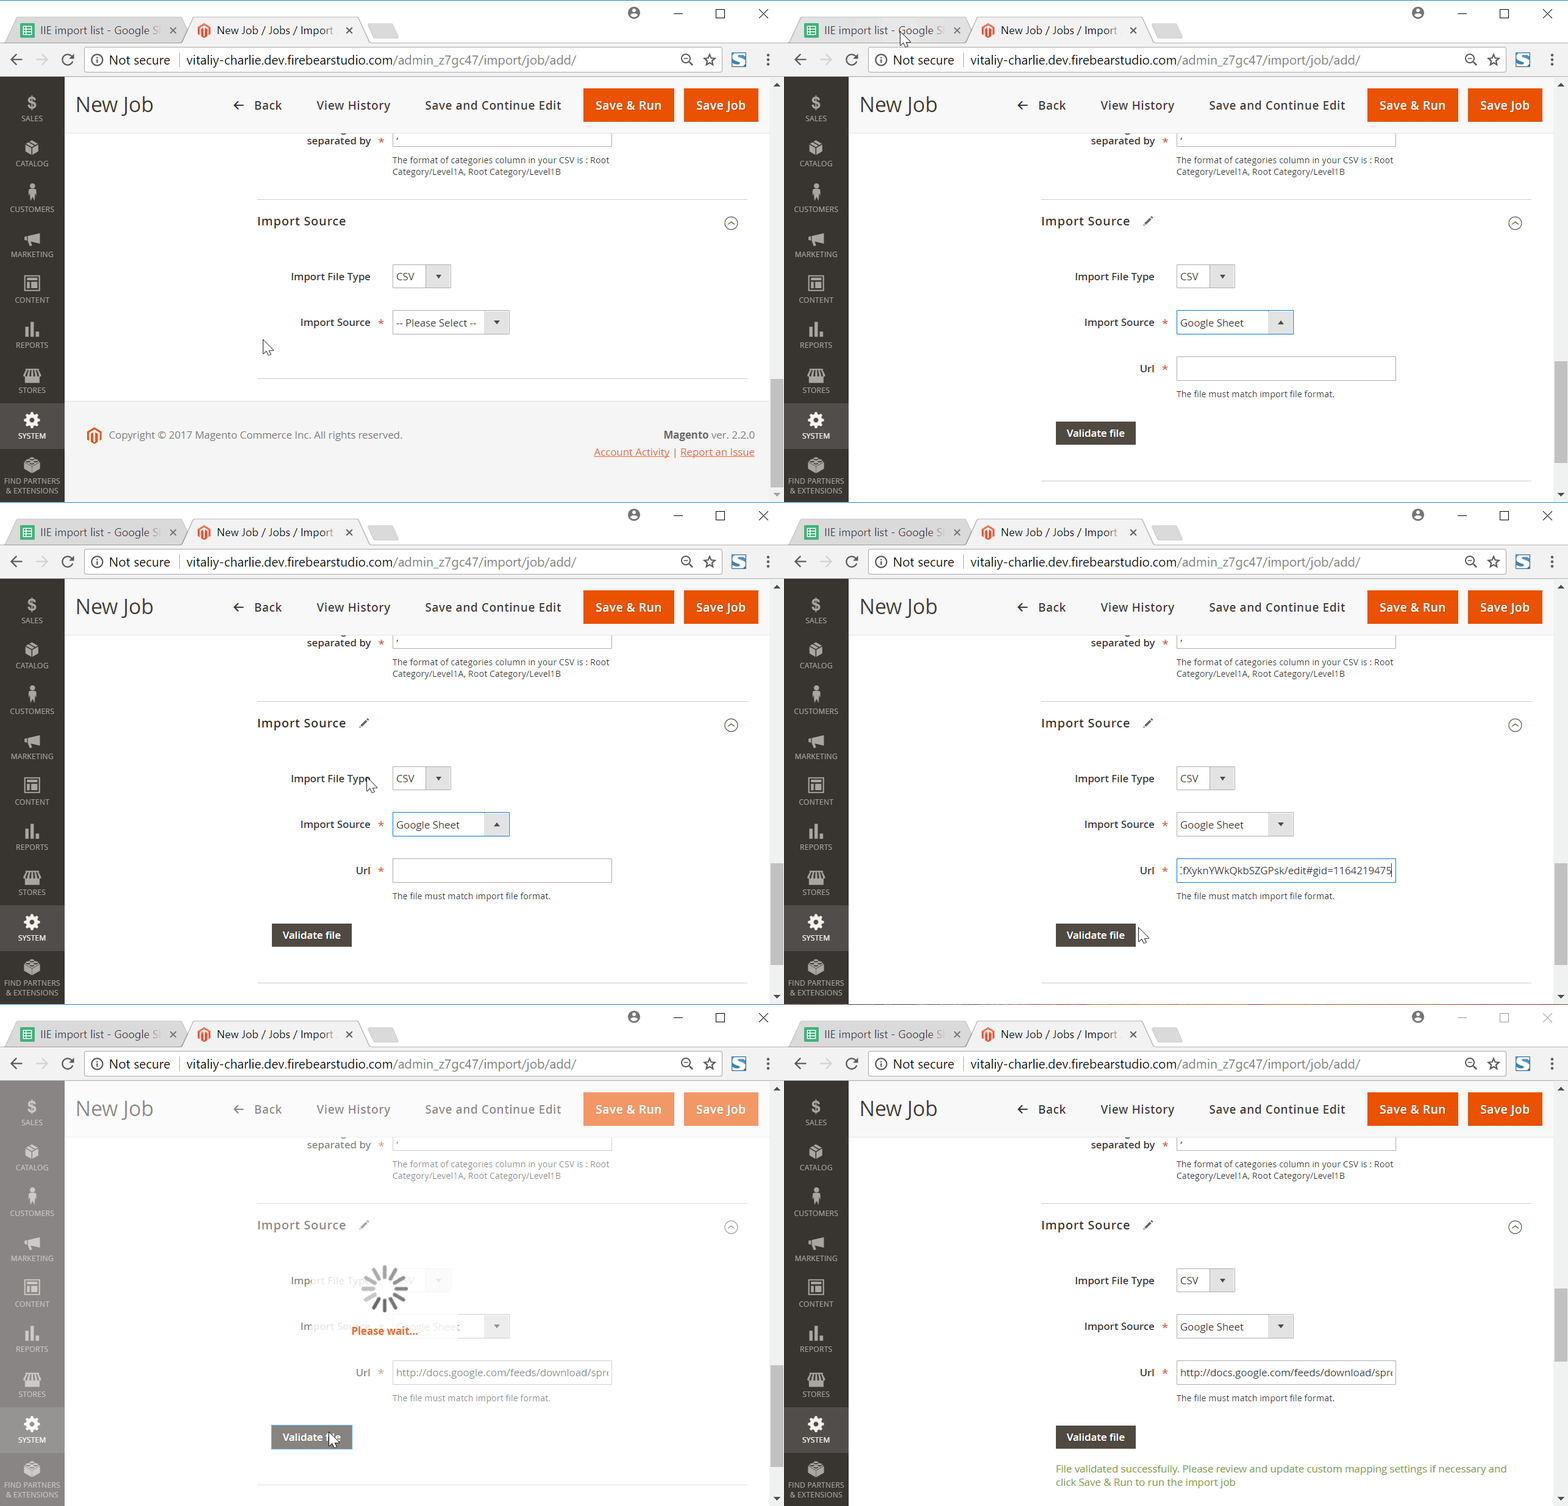
When it comes to data sources, you can synchronize data using a local or remote server, cloud storage, or direct file URL. Various complex connections can incorporate API transfers. Besides, the Improved Import & Export extension supports Google Sheets as an import source.
Now, let’s pay attention to the Magento 2 Migration add-on for Improved Import and Export extension. Its main goal is to move your Magento 1 data to Magento 2, connecting them through databases. You can control the process using a command line or admin panel. The add-ons core features include:
- Selective Migration. You always choose what entities to move, while the native Magento 2 migration tool transfers all objects it supports.
- Direct SQL Connection. The tool establishes a direct connection between Magento 1 and Magento 2 databases, leading to a much faster and user-friendly migration procedure.
- No Downtime. The downtime associated with the migration is eliminated. You only have to reindex data in the end.
- M2-M2 Migration. Migration between Magento 2 websites is possible as well.
- Core Entities. The add-on supports all core entities.
You can find more facts about the extension and its add-on as well as their support for MSI here:
Get Improved Import & Export Magento 2 Extension
Get Magento 2 Migration Add-on


