
How to get default billing and shipping address by customer in Magento 2

The following article sheds light on how to get default billing and shipping address by a customer in Magento 2. This action is required if it is necessary to create a new customer or update an existing one programmatically. To find more tips about Magento 2, follow this link: Magento 2 Developer’s Cookbook.

Table of contents
How to get default billing and shipping address by a customer in Magento 2
Although Magento 2 enables customers to have many addresses stored in an address book, only one can be a default billing and one – default shipping address. And it is quite easy to get or set billing or shipping address by a customer object.
The sample code below leverages customerFactory to get a customer object. Besides, it utilizes addressFactory to get an address by its ID. Thus, it is possible to get a default billing or shipping address ID from a customer by calling its getDefaultBilling() or getDefaultShipping() functions.
|
1 2 3 4 5 6 7 8 9 10 11 12 13 14 15 16 17 18 19 20 21 22 23 24 25 26 27 |
class SetCustomer { protected $_customerFactory; protected $_addressFactory; public function __construct(\Magento\Customer\Model\CustomerFactory $customerFactory, \Magento\Customer\Model\AddressFactory $addressFactory ) { $this->_customerFactory = $customerFactory; $this->_addressFactory = $addressFactory; } //get customer model before you can get its address data $customer = $customerFactory->create()->load(1); //insert customer id //billing $billingAddressId = $customer->getDefaultBilling(); $billingAddress = $this->_addressFactory->create()->load($billingAddressId); //now you can update your address here and don't forget to save $billingAddress->save(); //shipping $shippingAddressId = $customer->getDefaultShipping(); $shippingAddress = $this->_addressFactory->create()->load($shippingAddressId); //now you can update your address here and don't forget to save $shippingAddress->save(); |
Use this code snippet to get address data. You can also change and save it, updating your database.
How to create a new address and set it as default
Below, we shed light on how to create a new address and set it as default in Magento 2. You can do that for both shipping and billing addresses. To achieve this goal, it is only necessary to create a new address object from addressFactory, as shown below:
|
1 |
$address = $this->_addressFactory->create(); |
Now, it is required to set its data. Now, you have to decide which type it is. Note that it is possible to set the same address as shipping and billing so that a customer has the same information for both. Use the following code to do that or choose its corresponding part for a particular type:
|
1 2 3 4 |
if($type == "shipping") $address->setIsDefaultShipping('1'); if($type == "billing") $address->setIsDefaultBilling('1'); |
How to import customer address to Magento 2
To expand the initial topic of this article, we’d also like to draw your attention to another action that you can apply to customer addresses. The Magento 2 lets you import them. Do that if there are no billing/shipping addresses in your database.
Note that you need Improved Import & Export to be installed to import customer addresses and automate this process.
Create a new import job
Create a new import job under System > Improved Import / Export. On the import job grid page, click ‘Add New Job’ button.
At the new job screen, configure the general job settings:
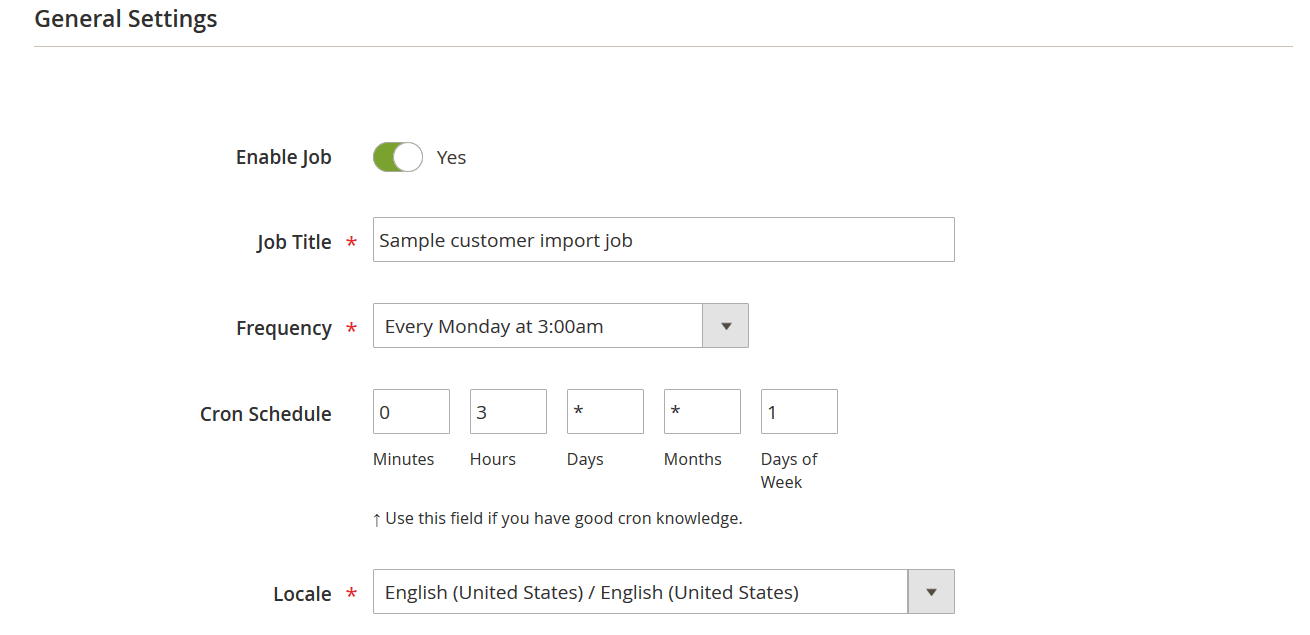
As you can see from the picture above, it is possible to name the job, set the job schedule, and specify the locale of the store you will be importing to.
Select entity and behavior
Select the entity you are going to import. The Improved Import & Export Magento 2 extension provides the following options:
- Customers Main File;
- Customer Addresses;
- Customers and Addresses.
Choose ‘Customer Addresses.’
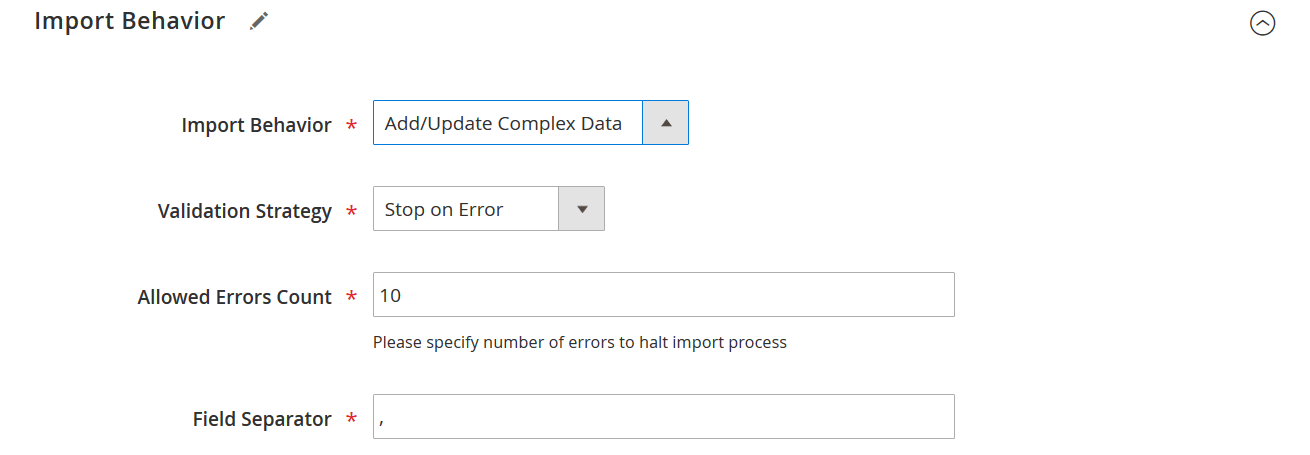
Next, it is possible to configure import behavior. Select one of the following options:
- Add/Update – add new customer addresses and update the existing ones;
- Replace – replace customer addresses with new ones;
- Delete – delete old customer addresses.
Then, you can choose one of two options: Stop on Error and Skip Error Entries. Specify the number of errors to halt import process. Enter the field and multi-value separator. Don’t forget to enable the Magento 2 fields enclosure if it is used in your import CSV file.
Specify source
The Improved Import and Export extension lets you specify different import sources:
- File;
- FTP/SFTP;
- Direct URL;
- API;
- Google Sheet.
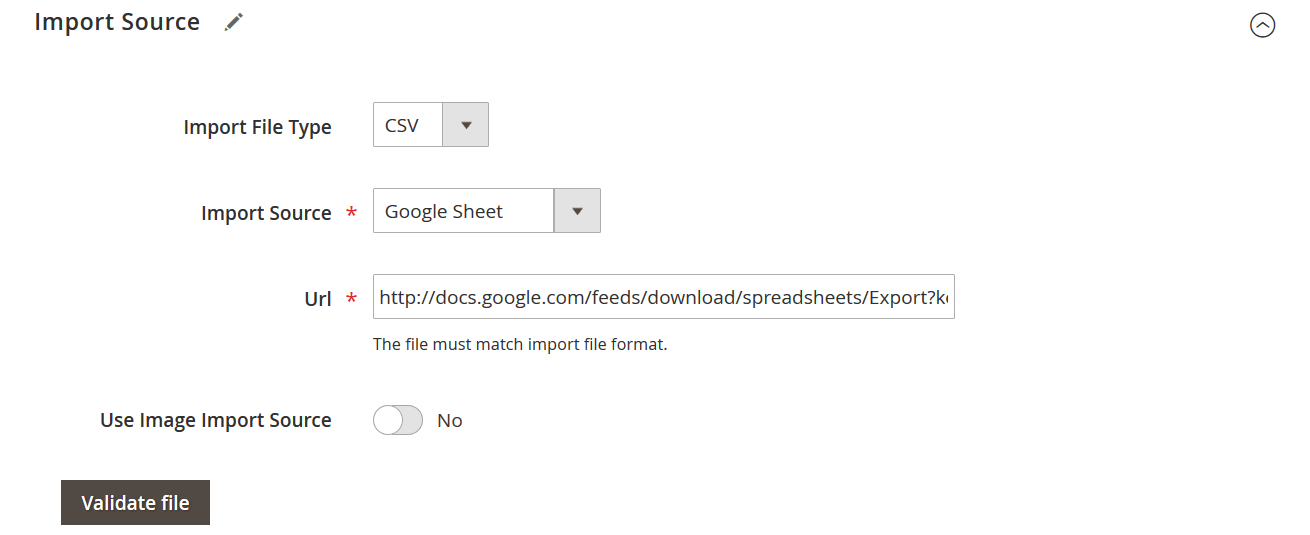
With Google Sheets, you can only paste a link to your data file with customer addresses. If you specified a weekly update, it is possible to edit the sheet every week to let the extension import it automatically, providing updates and speeding up your import management process.
When the file is uploaded, you have to validate it. Click the ‘Validate file’ button to let the extension make sure the table is formatted correctly.
Map attributes
If your import file or table originates from a different e-commerce platform or a third-party system, such as CRM, you can always take advantage of attribute mapping. The process is illustrated below:
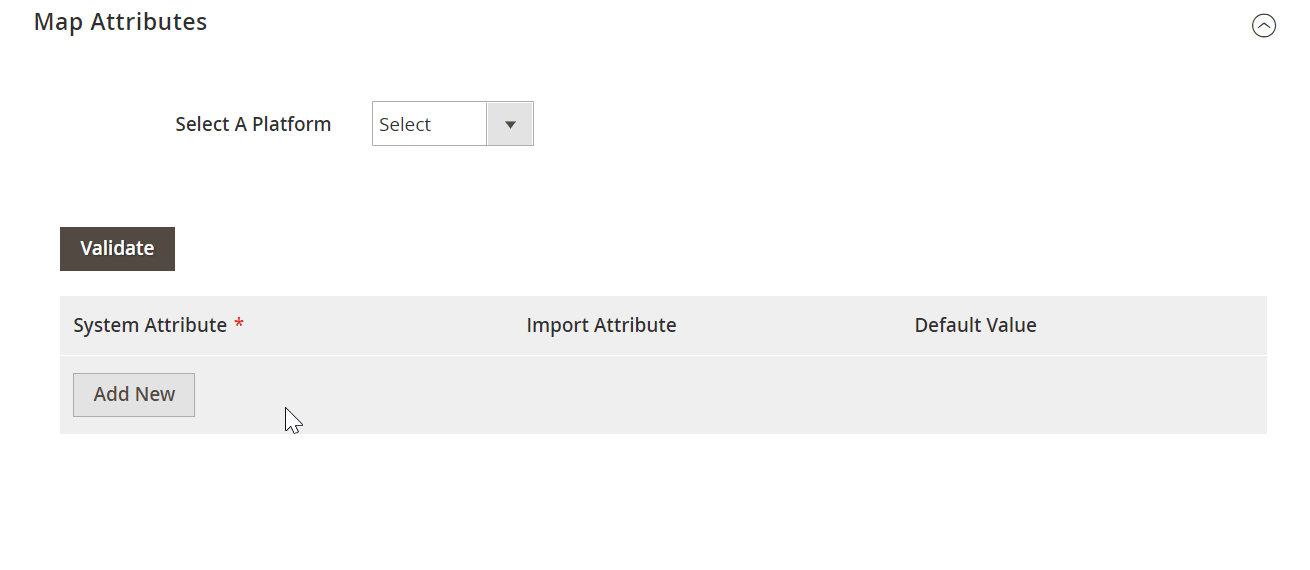
You can either select the platform you are importing from and let the Improved Import & Export module do the rest of the mapping process. At the same time, your extension enables you to map all the attributes manually.
Now, when everything is configured, click the ‘Save & Run’ button to start the import process. You will see the import log that illustrates the success of your customer addresses import.
That’s how you import customer addresses without any line of code. Due to schedules, you can automate that process. And with the help of mapping presets, it is possible to transfer data from any external system. Now, when your database contains the missing information, you can get default billing and shipping address by a customer as described above.
Get Improved Import & Export Magento 2 Extension
Final Words
As you can see, it is not a problem to set or get default billing and shipping addresses from a customer by code. Furthermore, you can seamlessly import the corresponding information to your Magento 2 website with the help of Improved Import & Export. For further information, check this article: . Also, check this import guide: How to Import Customers & Customer Addresses to Magento 2.
Related posts
 How to Import Customers & Customer Addresses to Magento 2
- How to generate order increment IDs automatically during Magento 2 import
- How to update products that are not listed in a product table during Magento 2 import
 A Complete Guide to Shopify Customer Import
 How To Bulk Import Products In Shopify: CSV Description & Step-By-Step Guide
 Magento 2 Release Notes
 Adobe (Magento 2) Commerce and Cloud (Enterprise Edition) Specific Features
 Magento Open Source and Adobe Commerce 2.4.7 Release Notes