
Exploring Shopware: Email Templates in Shopware 6
![]()
You can easily reach your customers via email. It is the most obvious but yet efficient way to connect your prospects. Therefore, you need to be serious about it. And Shopware 6 lets you do that. In the following article, you will find a detailed guide to email templates in Shopware 6. The platform lets you automate your communication with customers. It offers email templates that can be connected to business events. As a result, Showare 6 notifies your prospects every time specific conditions are met. As a store administrator, you can create email templates with separate headers and footers. At the same time, the system lets you use variables to personalize your email messages. Below, you will learn how to add new email templates in Shopware 6 as well as edit and delete the existing ones.

Note that we provide Shopware integration with external platforms. Contact our support for further information or try our Improved Import & Export Extension for Shopware.
Table of contents
- 1 Email Templates in Shopware 6 Admin
- 2 Variables in the mail text
- 3 How to Import Email Templates to Shopware 6
- 4 Shopware 6 Email Templates FAQ
- 5 Shopware 6 Essentials FAQ
- 5.1 How to create a Shopware ID?
- 5.2 How to create a Shopware account?
- 5.3 What is Shopware master data?
- 5.4 How to add a shop in Shopware?
- 5.5 How to add a payment method to your Shopware account?
- 5.6 How to create a deposit in Shopware?
- 5.7 How to purchase Shopware extensions?
- 5.8 How to get support in Shopware?
- 5.9 How to migrate to Shopware 6?
- 5.10 How to automate import and export processes in Shopware 6?
- 5.11 How to integrate Shopware 6 with external systems?
Email Templates in Shopware 6 Admin
The Email Templates screen is situated in the primary settings section of your administration. You can find it as follows:
- Go to your Shopware 6 administration;
- Open its main menu;
- Proceed to the Settings section;
- Open the Shop subsection;
- Hit the Email Templates button.

Here, you can maintain both the templates for the various mails and the headers/footers integrated into the messages. As we’ve already mentioned, it is possible to define which emails are sent in which situations in Shopware 6. You can find the corresponding guide here: Business Events in Shopware 6 Settings.
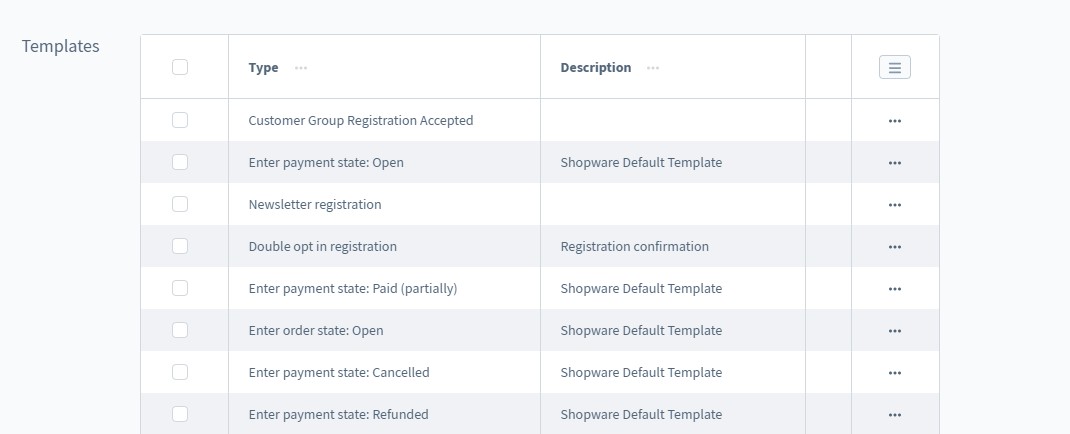
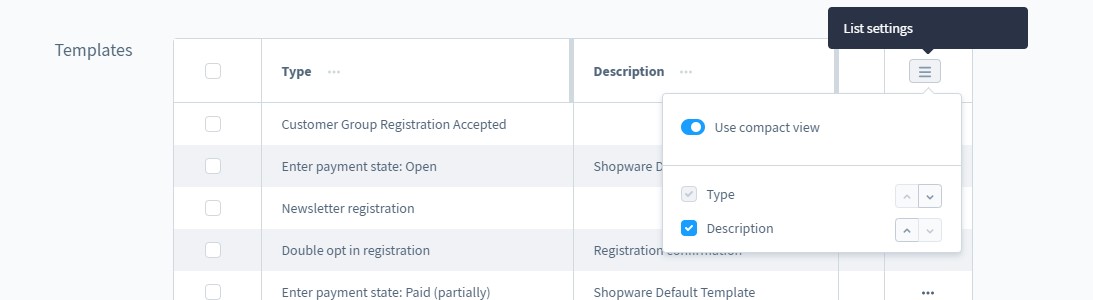
As you can see, the overview screen is divided into the sections: Templates and Header and Footer. However, each grid is customizable: just click on the symbol in the top right-hand corner of the header.
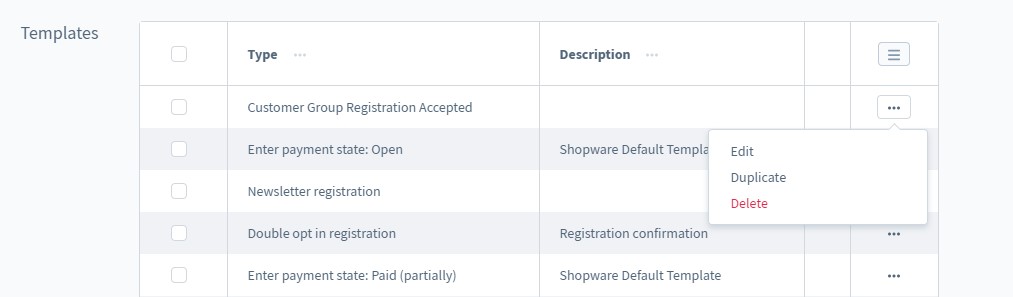
Also, use the context menu to edit, delete, or duplicate templates.
Hit the Create button to open the editor for adding a new data record. A sub-menu displays proposing you choose whether an email template or header & footer should be created.
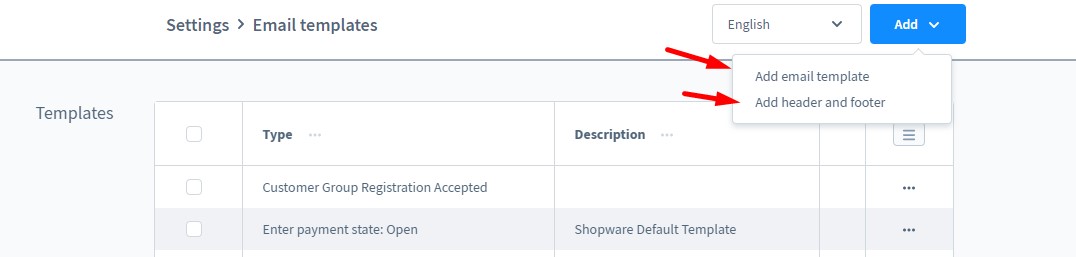
Email templates
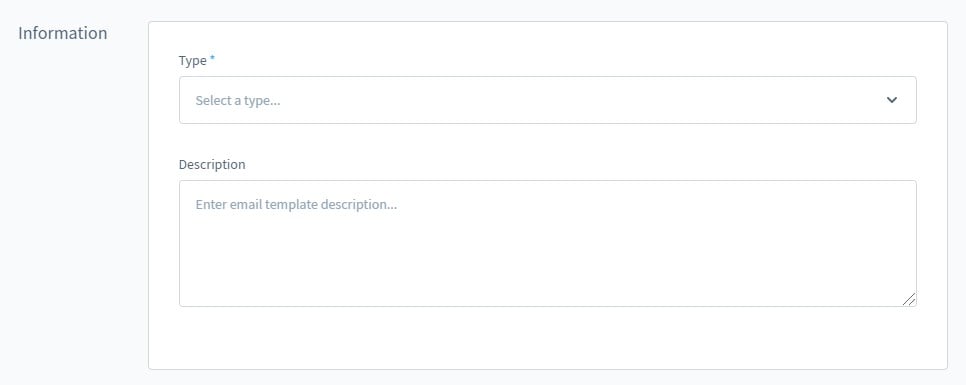
The email template editor is divided into the following three sections: Information, Options, and Mail Text. Also, there is a menu on the right-hand side of the screen that lets you send a test email and choose media files.
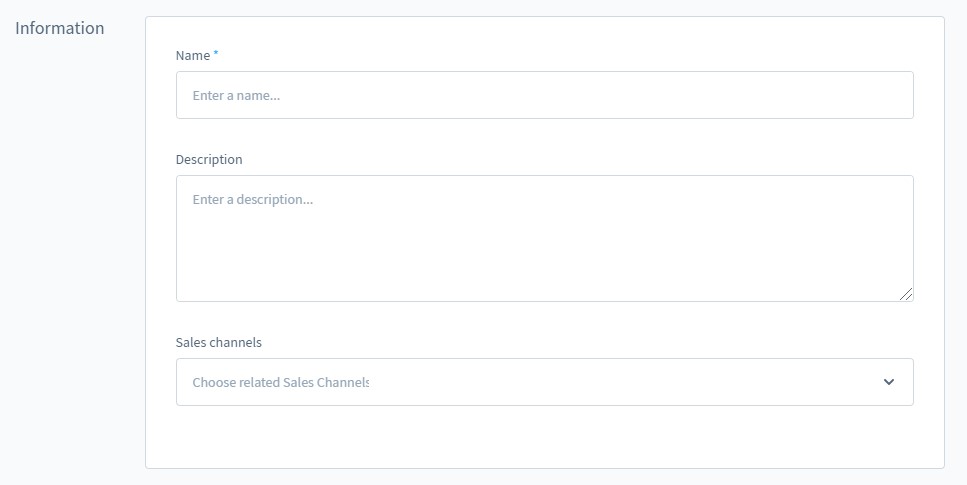
The Information section lets you define the basic data of the template. First of all, you define its type or the functions for which this email template is to be used: customer registration, order status change, order confirmation, etc. After that, you add a description to see the template’s purpose from the admin.
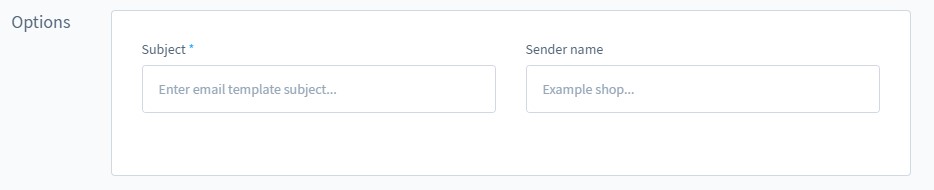
The Options section lets you add the subject and the sender. If you want to enter the email address used for the dispatch, proceed to Settings -> Shop -> Basic information.
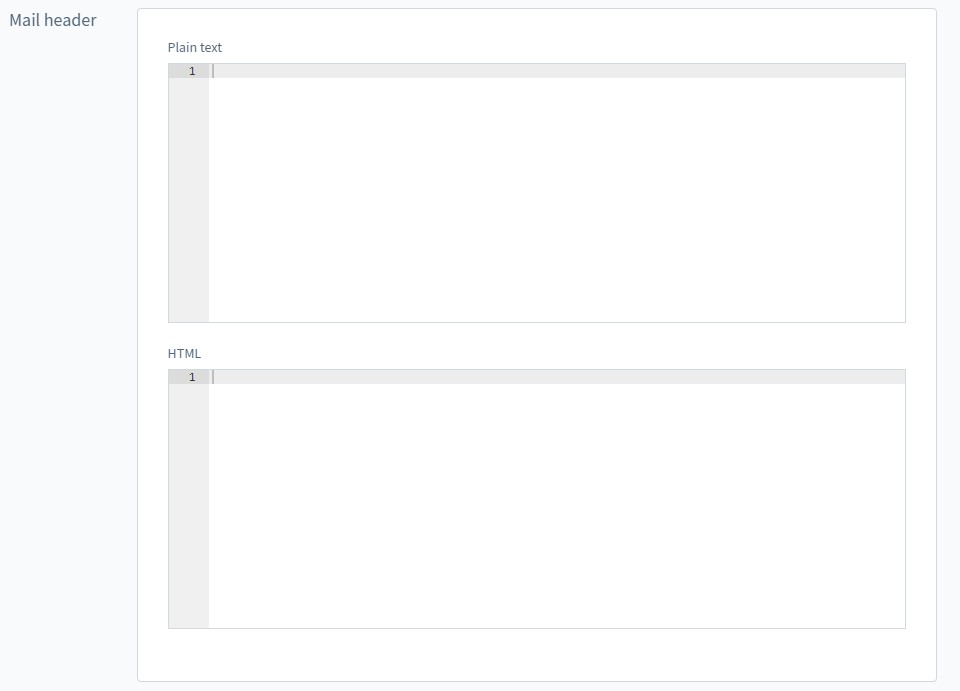
The Mail text section lets you store both HTML and plain text versions of your template. Note that you don’t need to enter content that should be inserted at the beginning. It is possible to manage logo, greeting, and other information as a part of Header & Footer.
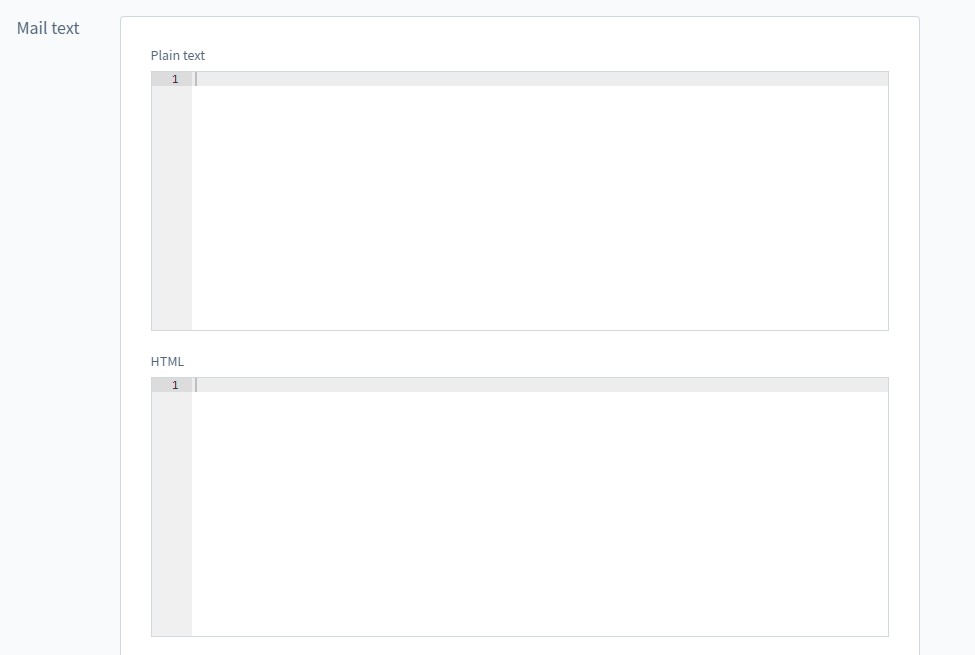
You may also add files via the Attachments section. Shopware 6 lets you upload them from your computer, the system’s media section, or from a URL.
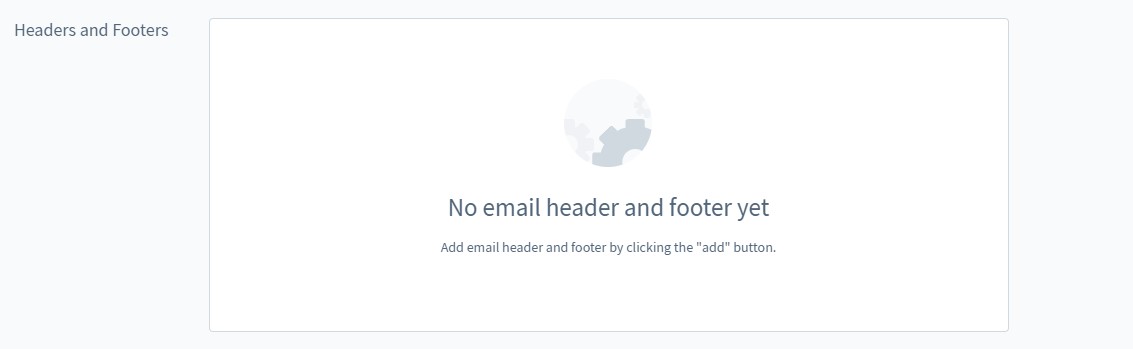
As we’ve just mentioned, there is no need to maintain the information for headers and footers in every mail. Instead, you can create general headers and footers and assign them to one or more sales channels.
The corresponding editor is divided into the following three sections: Information, Mail Header, Mail Footer.
The first one lets you specify the name of your new record. It is used in the Shopware 6 Email Templates overview. Next, you add a description and define sales channels to apply the header and footer to.
In the email header and footer sections, add information in plain text and HTML format.
You can integrate a logo into a header as follows:
|
1 |
<img src="https://meinshop.de/media/00/a1/2b/12345678/logo.png" alt="Logo" /> |
Variables in the mail text
Shopware 6 lets you enhance your emails with the help of variables. You can add them to the mail text to access customer information or data from your shop.
In Shopware 6, variables include one or more arrays, followed by the actual variable. Two curly brackets are used to separate variables from other texts.
Within a variable, the array points to the area or sub-area from which a variable is used. It is separated from the actual variable by a dot, like shown below:
|
1 |
{{order.orderCustomer.firstName}} |
With the help of this variable, you display a customer name in the email template. It consists of the following three elements:
- firstName – the variable;
- orderCustomer – the arrey where the variable is located;
- order – an arrey where the above array is located.
You can find more information about variables here: .
How to Import Email Templates to Shopware 6
If you need to move data to Shopware 6, you’ve come to the right place. With the help of our team, you can simplify and automate this process. We enhance everything related to data transfers to your e-commerce website. Contact our support for more details and try our . You can use it to import any entity to Shopware 6. The module provides the ability to automate all data transfers as well as use mapping presets to apply changes to transferred data with no interaction from your administrators. Please, consult our specialists regarding email templates as import entities.
Shopware 6 Email Templates FAQ
How to find email templates in Shopware 6?
You can find Shopware 6 email templates under Settings -> Shop -> Email Templates.
How to add new email templates in Shopware 6?
Hit the Add button under Settings -> Shop -> Email Templates and choose Email Template to create a new email template in Shopware 6. Next, provide the necessary information as shown above. You can also add a template for the header and footer in the same way.
How to edit an email template in Shopware 6?
Go to Settings -> Shop -> Email Templates and use the context menu to edit an email template.
How to delete email templates in Shopware 6?
Go to Settings -> Shop -> Email Templates and use the context menu to delete an email template.
How to automate email sending in Shopware 6?
You need to assign your email templates to business events to automate the email sending in Shopware 6.
Shopware 6 Essentials FAQ
How to create a Shopware ID?
You are provided with a Shopware ID automatically while creating a Shopware account.
How to create a Shopware account?
Click the Register Now link on the registration page to create a Shopware account. Fill in the form and follow the instructions from a confirmation email.
What is Shopware master data?
All the information in your contains is called master data. It usually consists of various company details, such as physical and email addresses, phone numbers, etc.
How to add a shop in Shopware?
Proceed to your merchant area to add a Shopware shop. Click a link situated on the start screen’s right part. Next, it is necessary to select a type of your new shop: a cloud storefront or an on-premise installation. After providing additional information, save changes.
How to add a payment method to your Shopware account?
You can add a payment method under Basic Information -> Accounting. It is possible to use PayPal, credit card, or direct debit. You can utilize one of these payment methods to add a deposit necessary to purchase extensions and themes for your e-commerce website.
How to create a deposit in Shopware?
You can add a deposit in your Merchant Area -> Shops. Choose a shop to provide funds to and click Open Account Details. Now, you can add a deposit that will cover your future purchase.
How to purchase Shopware extensions?
It is possible to purchase Shopware extensions and themes on the Shopware Marketplace or within the Plugin Manager. As we’ve just mentioned above, you need to create a deposit that covers the purchase amount. After, it is possible to choose all the necessary tools and complete the procedure.
How to get support in Shopware?
Provide inquiries regarding accounting and financial services to financial.services@shopware.com or via this phone number +49 2555 9288 510. You can contact Shopware regarding account or license issues at info@shopware.com or via +49 2555 9288 50.
How to migrate to Shopware 6?
You can use the Improved Import & Export module to run the migration to Shopware 6. The module lets you leverage cron-based schedules and mapping schemes to transfer core entities from any external system or Shopware’s previous versions. We also offer export solutions for other e-commerce platforms to let you transfer data from Magento, Shopify, and other systems to Shopware 6. Contact us for more information.
How to automate import and export processes in Shopware 6?
Use the Improved Import & Export extension for Shopware 6 to automate recurring data transfers. It simplifies regular data updates with the help of schedules that launch the corresponding import and export processes according to the specified time frames. Consequently, no interaction on the admin side is necessary.
How to integrate Shopware 6 with external systems?
Integration with ERPs, CRMs, accounting tools, and other external systems can be based on the Improved Import & Export extension. The module automates repetitive import and export processes with the help of schedules and modifies data with the help of mapping presets. As a result, all the information is synced automatically.
Related posts
 How To Bulk Import Products In Shopify: CSV Description & Step-By-Step Guide
 Shopware 6 Advanced Pricing Guide + Import Tutorial
 A Complete Guide to Shopify Customer Import
 Magento Open Source and Adobe Commerce 2.4.7 Release Notes
 Magento 2 B2B Company Guide: Revealing Company Structure & Import
 Reputon Amazon Importer Review: How to Connect Shopify to Amazon in a Few Clicks
 How to Import Customers & Customer Addresses to Magento 2
 CopyAI Review 2023