
Aheadworks Countdown Timer Magento 2 Extension

Competition in the online business pushes ecommerce merchants to create lucrative offers that motivate customers for shopping on their sites. Appealing to the online shoppers’ fear of missing out and creating a sense of urgency are vital aspects of an effective marketing strategy.
Luckily, there is a solution for Magento 2 stores that allows creating exclusive deals with time-limited offers – the Aheadworks Countdown Timer extension. The module enables store managers to create countdown timers based on the specified rules and place them on any website page. The Aheadworks countdown timer can be used for a great variety of promotions, like seasonal sales, flash sales, regular discounts, holiday sales, daily deals, and more.
In this post, we describe the features of the Magento 2 countdown module and show how it can be configured in the Magento Admin.

Table of contents
Features
- Ability to create promo offers limited in time;
- Dynamic display of time left until a special deal expires in the timer;
- No limitation on the number of created countdown timers;
- Various placement options for the promo timer;
- Option to include a redirect URL in the timer block;
- Precise display of countdown offers based on rule conditions;
- Customizable timer design;
- Selection of ready-made layout templates for the countdown block;
- Image upload for the promo icon;
- One-time and recurring promotions;
- Scheduled countdown display.
After installing the Countdown Timer extension by Aheadworks, you will be able to offer your website visitor time-limited special deals. To add incentives to buying a promoted product, you can display how much time is left until the end of an offer or provide extra services with an expiration date. The sense of urgency drastically increases the effectiveness of store promotions and motivates online shoppers to make a purchase.
The Magento 2 module allows creating an unlimited number of countdown timers and displaying them in various places on a web store. It is possible to add a promo timer to the product description and category pages. Besides, you can insert a URL link in the timer upon clicking on which a customer will be forwarded to a particular page. One more option that is available with the countdown Magento 2 extension is creating a countdown widget and placing it on a required page. This way, you will never miss a chance to attract customers’ attention to promoted products. Moreover, you can set specific rule conditions based on product attributes that will define how timer offers will be displayed.
As for the appearance of countdown timers, the Aheadworks extension offers flexible display settings and design variations. You can choose one of the 5 pre-configured layout templates for the countdown block, add custom text, and include eye-catching images. Note that it is possible to use custom CSS styles to create appealing call-to-action messages. Also, you decide how the time will be displayed in the countdown block.
Furthermore, the Magento 2 Countdown Timer extension enables users to set up both one-time and recurring deals. In case of both options, you can schedule the beginning of promotions on your store by specifying their start and end dates. For the repetitive campaigns limited in time, you can define time intervals to trigger the timer’s display on your storefront automatically. The recurring mode is suitable for promotions on various occasions, including daily deals, seasonal sales, special events, and more.
Backend
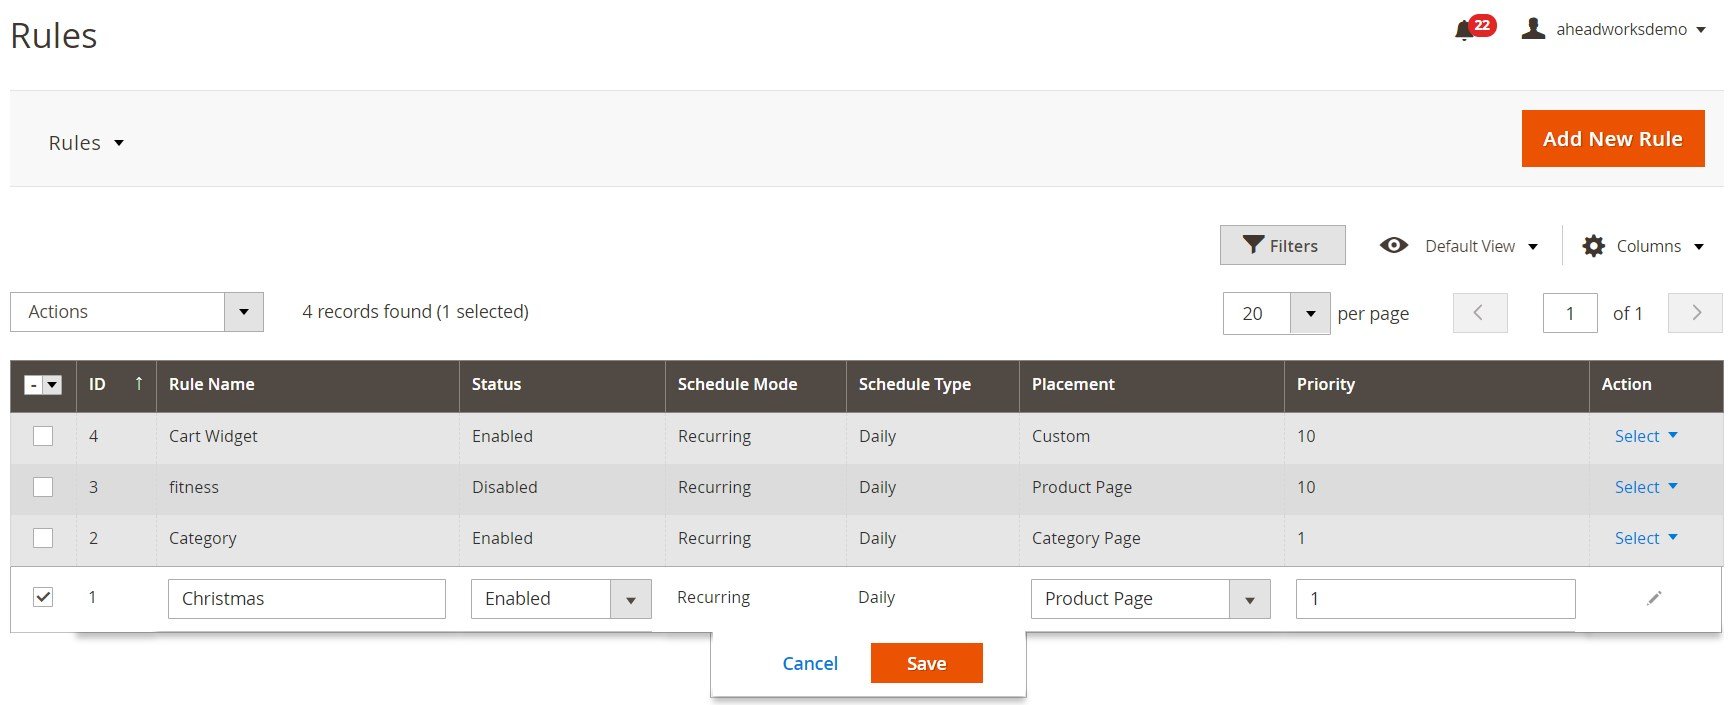
Magento 2 admins can view and manage the rules created for countdown timers on a separate grid under Content -> Countdown by Aheadworks -> Countdown Rules. The grid shows an ID, name, status, mode, schedule type, placement on the webstore pages, and priority of each existing promo rule. It is possible to edit or delete a particular rule from the Action column, as well as enable, disable, and delete selected rules in bulk via mass actions. You can apply filters to all grid columns to find a specific promo timer faster and change the sorting of columns. Besides, the Aheadworks module allows modifying general details of the rules right on the grid. To create a new countdown timer, click the “Add New Rule” button.
The New Rule screen is divided into 5 sections: General Information, Product Conditions, Display, Countdown Text, and Schedule.

In General Information, first, you should create a name for a new promotion, set its status as enabled or disabled, specify priority, select customer groups for which a countdown timer will be available, and choose one of the placement options (category page, product page, or custom position). Here, you can also enter a URL of a page where customers will be redirected after clicking on a timer.
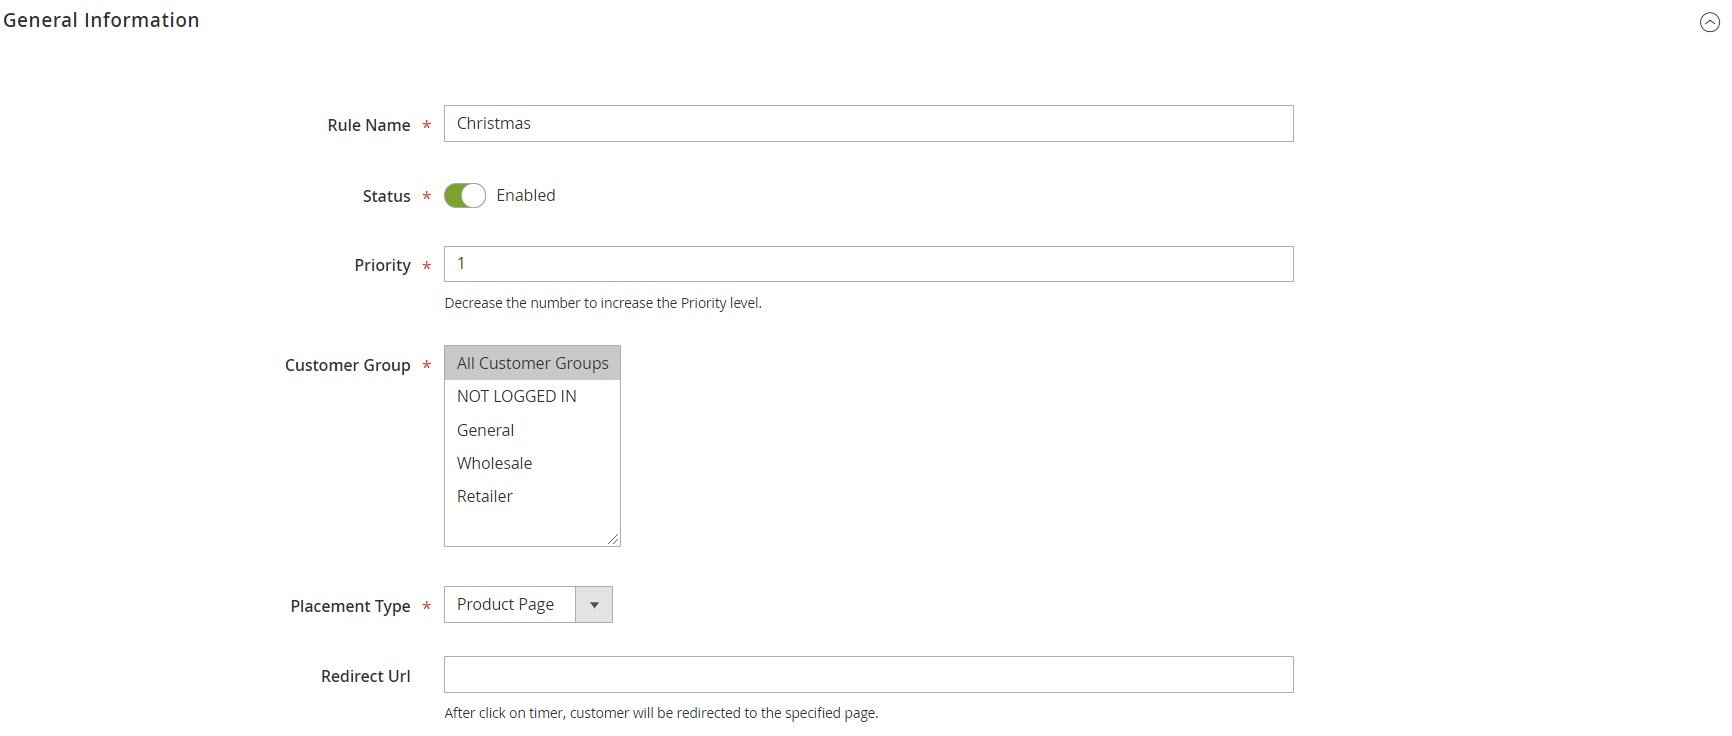
If you decide to place the countdown timer on product or category pages, you can set precise conditions based on product attributes for the related promo rule.

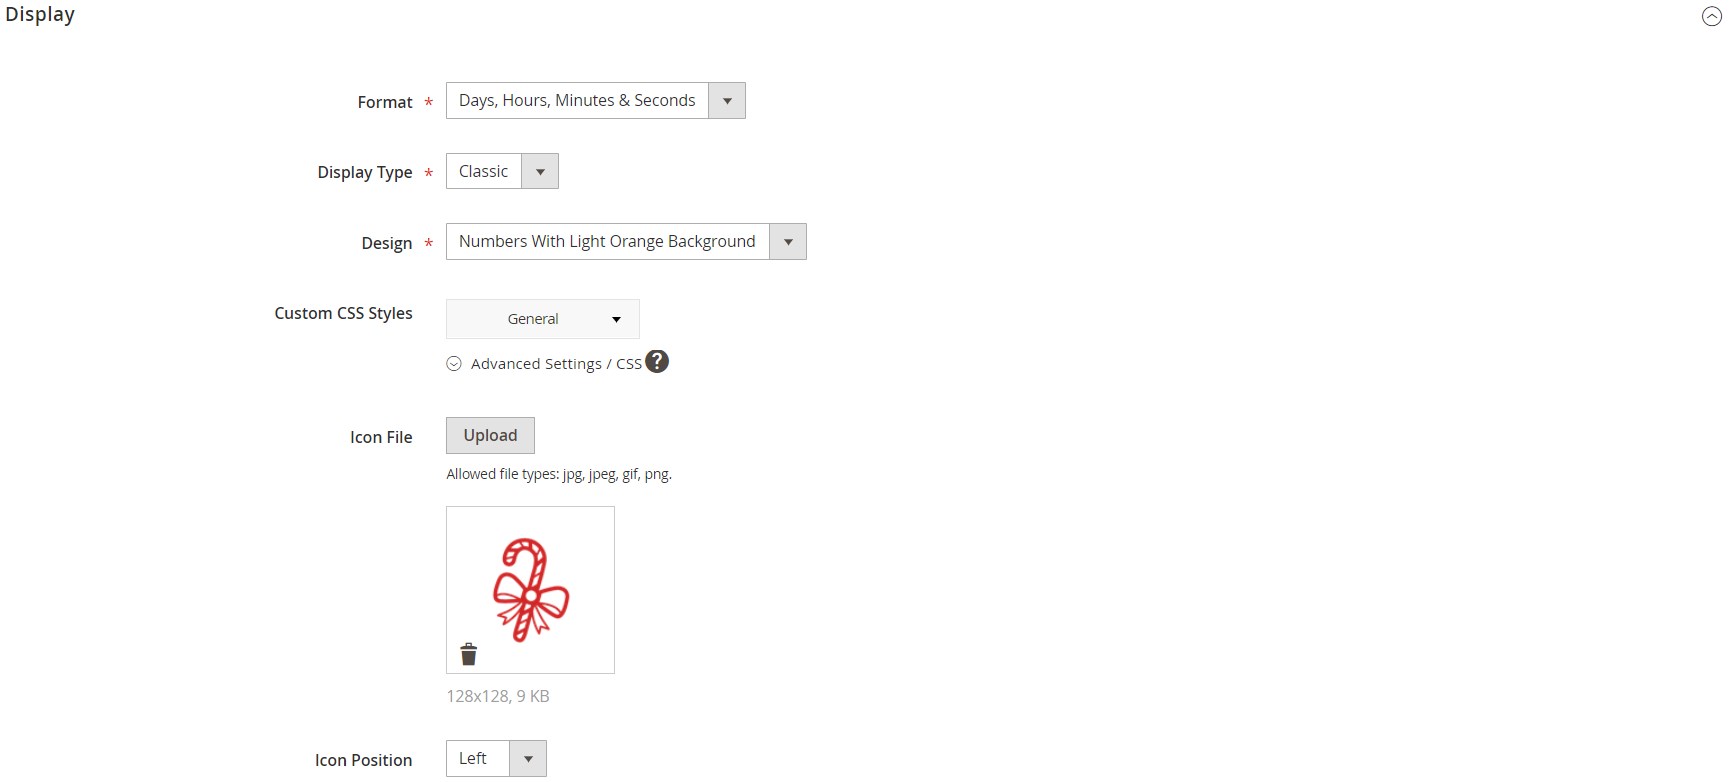
In the Display section, you select a format for the countdown timer: Days, Hours, Minutes & Seconds; Days, Hours & Minutes; Days & Hours; or Days Only. Here, you also choose a display type: Classic (places a countdown timer in the block) or Text (will show only a specified text).
There are 5 design options for the countdown display:
- bold numbers;
- thin numbers;
- bold numbers with outline;
- numbers with the light gray background;
- numbers with the light orange background.
It is also possible to specify CSS parameters for the rich text design. Besides, the Magento 2 extension allows uploading an image for the timer icon and setting its position (right or left).
Next, enter a text that will be displayed above the countdown timer. It is possible to use variables here.

In the Schedule section, select which mode you want to use for the timer: one-time or recurring. The one-time mode requires setting only start and end date and time of the promotion.

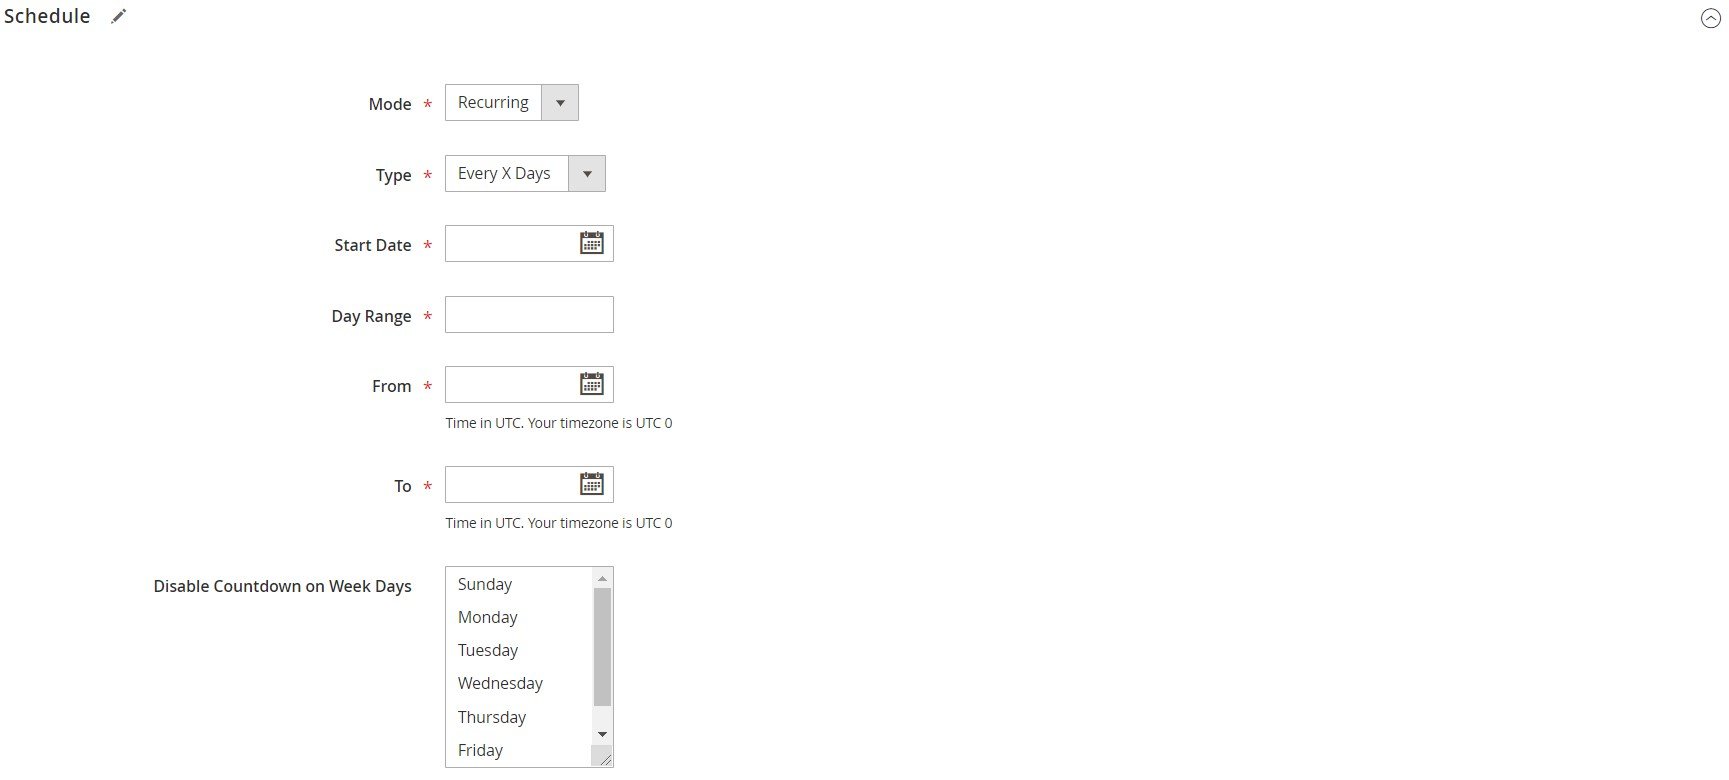
If you want to show the countdown block on a recurring basis, you should select its type: Daily, Every X Days, or Defined Days. For the daily type, you choose a start date and specify a period when the timer will appear. It is also possible to define on which days the countdown timer will be disabled.
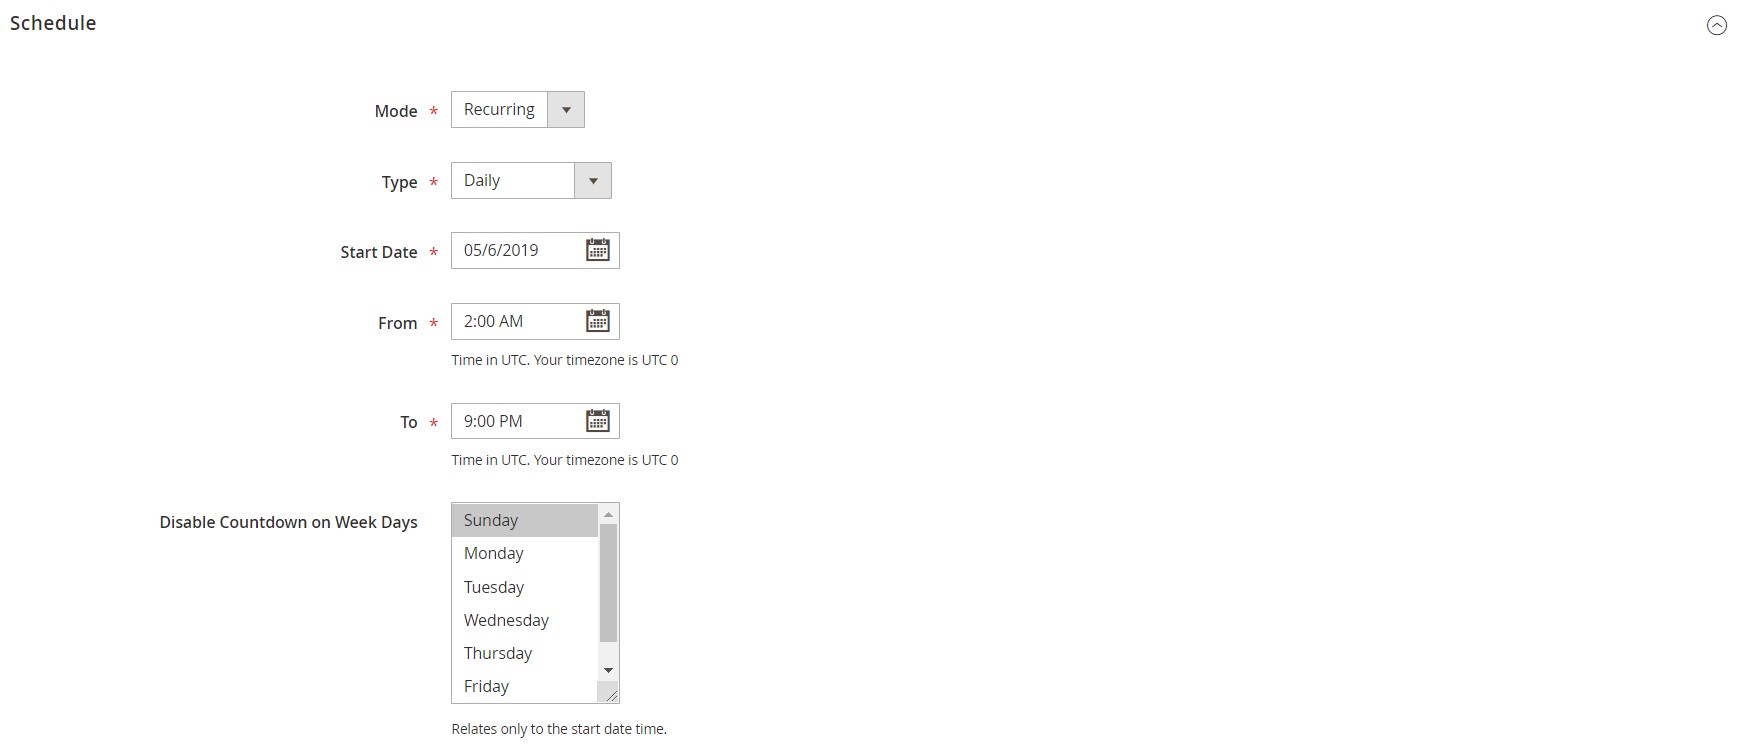
For the Every X Days type, you should also specify a day range.
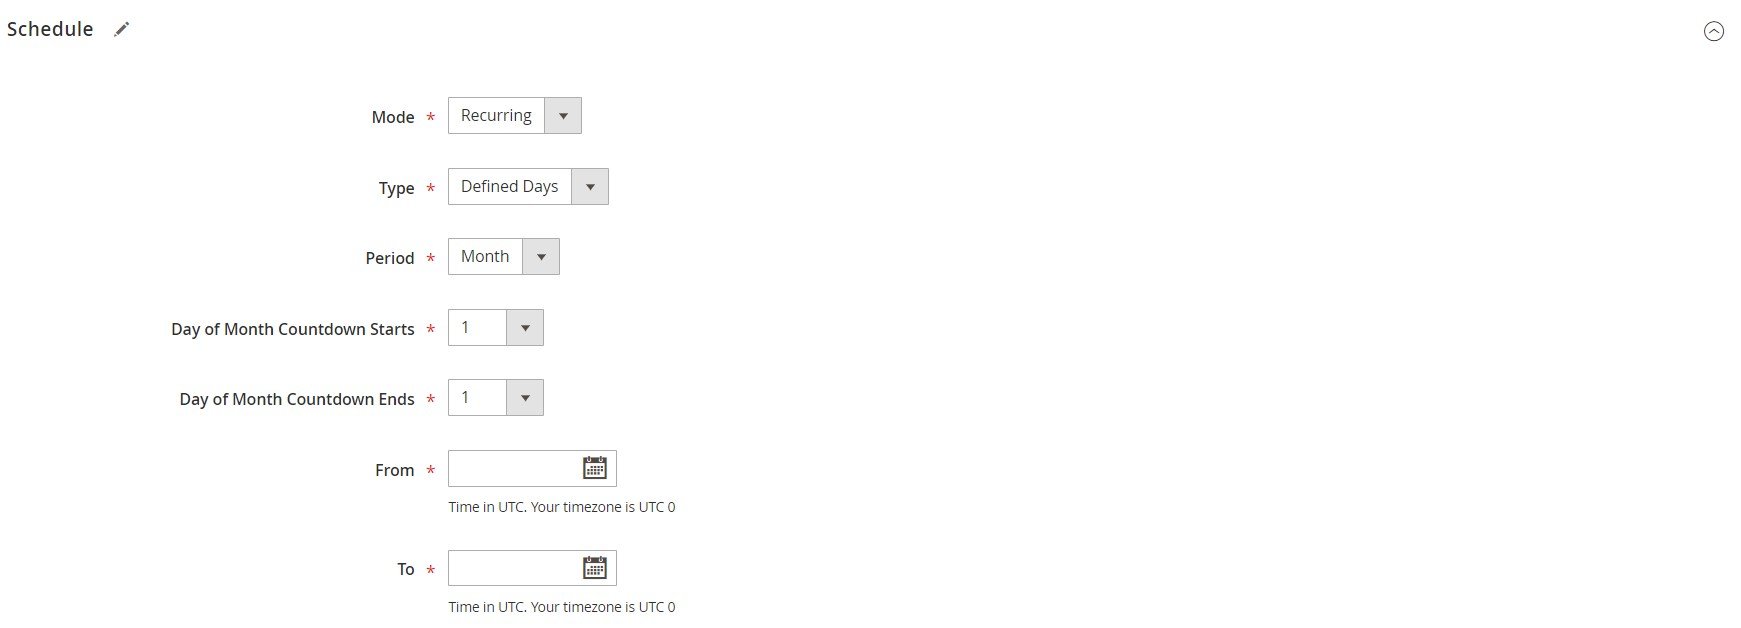
In case of the countdown display on defined days, it is necessary to choose a relevant period (week, month, or year) and set the dates when a promo rule starts and ends to be active.
If you want to use countdown timer as a widget, you should select “Countdown Widget by Aheadworks” as its type and configure its settings in the same way you would do for a native Magento 2 widget.

Now, when you are familiar with the backend functionality of the Countdown Timer Magento 2 extension, we want to show you a few examples of the frontend display.
Frontend
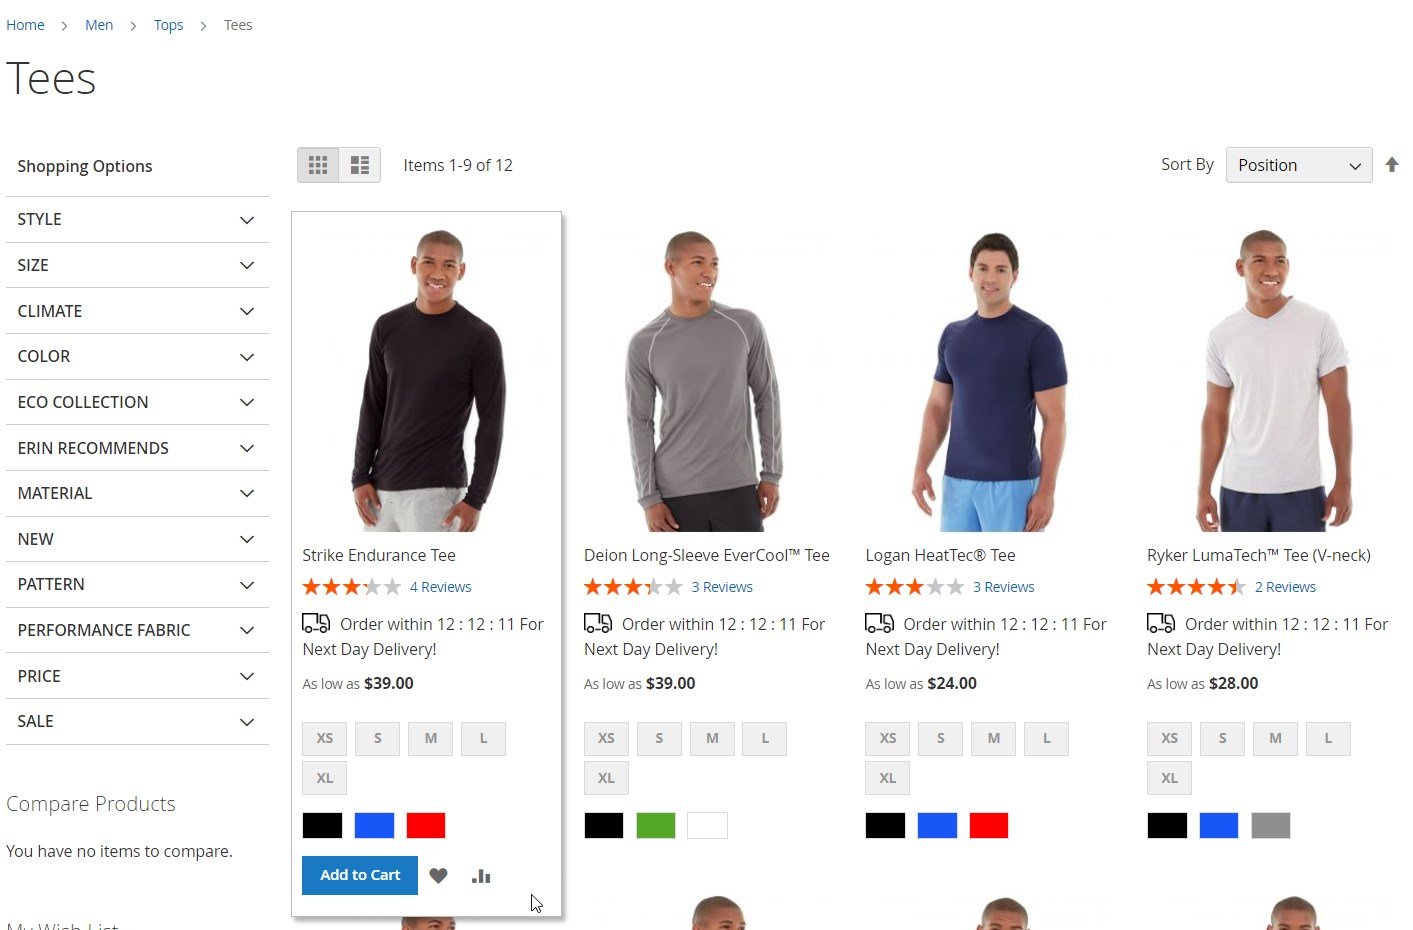
The first example shows how the Aheadworks module adds a countdown timer block to the category page.
In the image below, you can see a limited-time offer for the Christmas sale displayed on a product page:

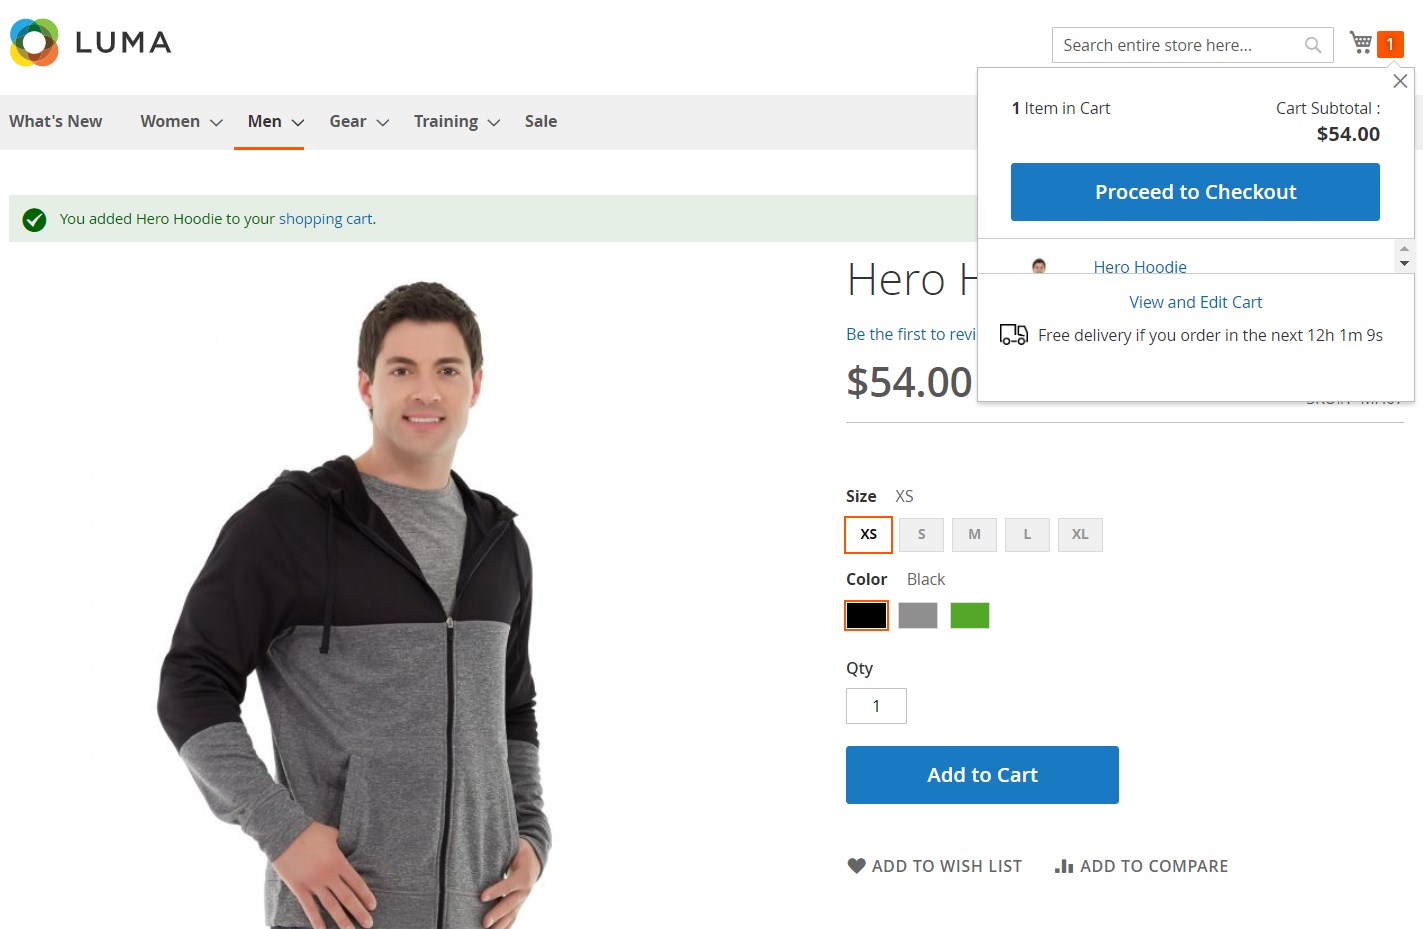
Another possibility you get with the extension is placing a widget with the countdown anywhere on your store. In the following example, the countdown widget is displayed in the mini cart:
Final Words
The Aheadworks Countdown Timer extension offers all necessary settings for setting up promotional campaigns with an expiration date. By showing countdown next to the promoted products, you can quickly inform website visitors about special offers available on your store and motivate them to act fast not to miss a beneficial deal. User-friendly backend interface lets store admins create custom promotions adjusted to your particular marketing goals. Thus, by installing the Magento 2 module, you will drastically increase customer engagement, improve conversion rates, and boost your sales. As for the price, you can buy the Magento 2 Countdown Timer extension for $119.
Related posts
 How to generate order increment IDs automatically during Magento 2 import
 Adobe (Magento 2) Commerce and Cloud (Enterprise Edition) Specific Features
 Reputon Amazon Importer Review: How to Connect Shopify to Amazon in a Few Clicks
- How to update products that are not listed in a product table during Magento 2 import
 Shopware 6 Advanced Pricing Guide + Import Tutorial
 Amasty ChatGPT AI Content Generator for Magento 2
 Adobe Customer Journey Analytics: Revolutionizing E-commerce
 CopyAI Review 2023