Aheadworks Event Tickets Magento 2 Extension

Although Aheadworks Event Tickets for Magento 2 seems to be a very specific solution, it has a broad sphere of application. If you’ve thought that this Magento 2 extension is designed to create an online booking office on the basis of your store, you are mistaken. First of all, it introduces an efficient way to promote your business, and below we shed light on the core concepts of the Aheadworks Event Tickets Magento 2 Extension.

Table of contents
Features
- Highly configurable backend settings for tickets you sell;
- Ticket confirmation emails;
- Customizable PDF templates and ticket numbers;
- Broad location configuration: VIP, fan zone, regular, etc;
- Event creation and management;
- Tickets personalization;
- Attendees tracking and management.
So, the core aim of the Aheadworks Event Tickets Magento 2 extension is to create a loyal community around your brand. Organize offline promotions, lectures, and seminars attracting new buyers and making the existing customers more loyal. The module allows you manage all possible aspects of events by customizing tickets. For instance, it is possible to limit the number of attendees by creating a limited quantity of tickets. Thus, you can increase the sense of urgency of the promoted event.
Besides, Aheadworks Event Tickets Magento 2 extension allows creating several layers of motivation attracting customers to your events. You can either offer prises to some attendees or provide everyone with free stuff. Also, note that the participant data can be used for further marketing campaigns and promo activities.
Since the Magento 2 Event Tickets extension by Aheadworks allows not only selling tickets but fully managing events, let’s take a look at how to create one. First of all, you have to plan the event. The extension is not necessary for this step. For instance, you sell clothes online and going to open a showroom. Plan the showroom presentation. Depending on your demands, you can apply different features of the Magento 2 Event Tickets extension by Aheadworks.

First of all, you should create an event product in the Magento 2 backend. Set up the date of your event and configure multiple other options. The extension lets you specify adult or children tickets as well as create various event sectors. In case of the showroom presentation, you can use this option to provide VIP attendees with additional bonuses. Besides, you can organize a concert dedicated to the presentation and sell separate tickets for it. Other options allow:
- Setting start and end time as well as a selling deadline;
- Defining properties of the event venue;
- Configuring email templates using variables;
- Applying ticket personalization;
- Duplicating events.
We will discuss these features lately. Now, let’s proceed to the third step. When the event is properly configured, you can start selling tickets. The Aheadworks Event Tickets Magento 2 extension provides a customer with a purchased ticket via email. The attached PDF file contains various event data including QR and barcodes. In addition to digital tickets, you can provide attendees with their physical copies. As a store administrator, you get an opportunity to send emails with tickets as well as create orders with tickets manually. By scanning a QR code, a customer receives an event description and further ticket info.
Now, when all tickets are sold out, it’s time to get ready to run the event. Your attendees will present either printed PDF documents or their digital versions. Be prepared to scan QR or barcodes – you will need a frontend account on your Magento 2 storefront to register all visitors for the event.
Next, let attendees interact with the items in your showroom, provide all the necessary assistance, and never forget that there is no better advertising than word-of-mouth. Thus, it’s up to you how to run the event, but the Aheadworks Event Tickets Magento 2 extension provides all the necessary features for achieving maximum results. Let’s see the module in action to get a deeper insight into the benefits it offers.
Backend
Configuration
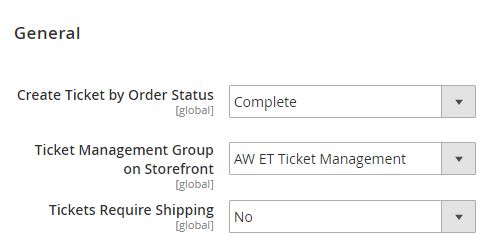
First of all, we should configure the extension. Go to Stores -> Configuration -> Aheadworks Extensions -> Event Tickets. Here, you can see three sections: General, Email Settings, and Ticket Number Pattern.
The first one allows specifying the order status to trigger the ticket creation. Next, you should select a customer group that will be able to scan QR codes and managing tickets. The third option here allows enabling/disabling shipping for tickets.
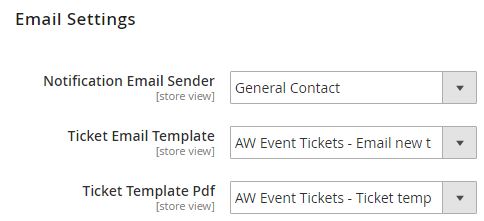
In Email Settings, specify a sender address for notification emails and choose templates for emails and ticket PDFs.
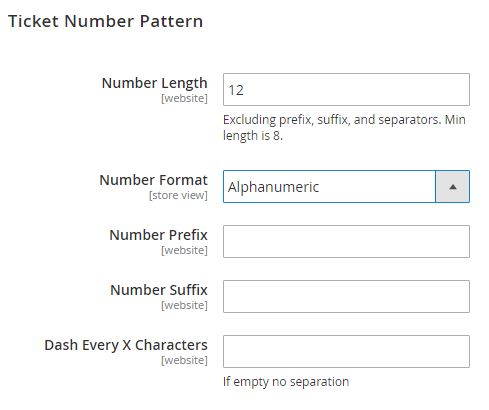
In Ticket Number Pattern, configure the length of the ticket number (not less than 8), select the number format (alphabetic, numeric, or alphanumeric), specify prefix and suffix and set the pattern for the dash use.
Venues
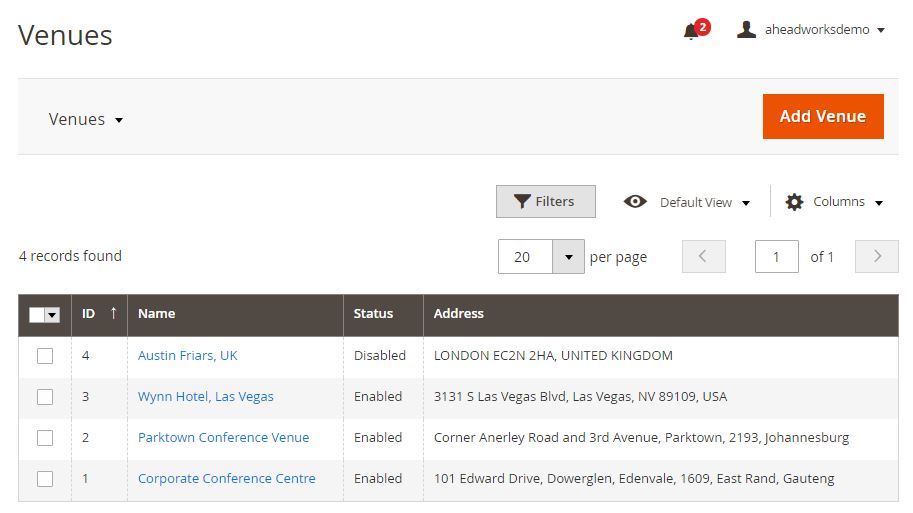
Now, we’d like to draw your attention to the Venues grid. It is available under Catalog -> Event Tickets by Aheadworks -> Venues. The Venues grid is relatively small: it consists of only 5 columns. The first one allows selecting grid rows. Next, you can view a venue IDs. Then, there is a column of venue names. The fourth column show venue statuses (enabled or disabled). The fifth one display addresses.
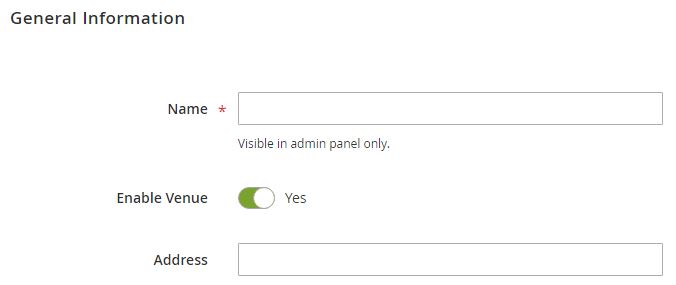
While adding a new venue, you can manage 3 tabs of settings: General Information, Storefront Description, and Assigned Spaces.
The first one provides the ability to specify the venue name and address as well as enable or disable it.
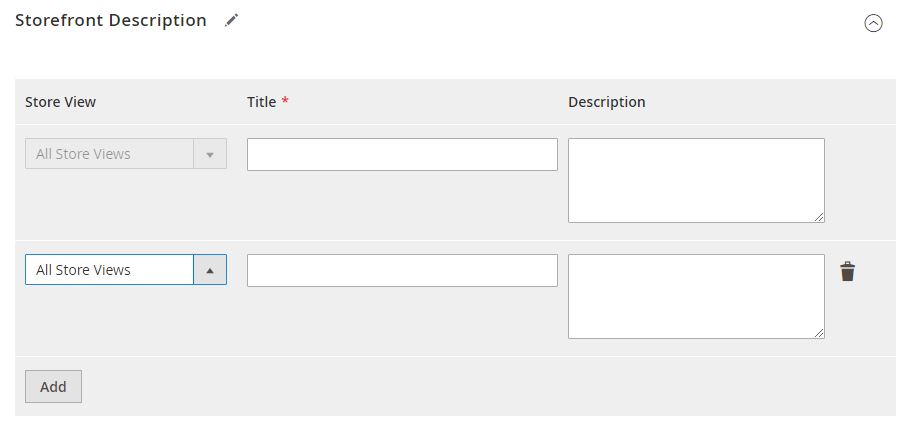
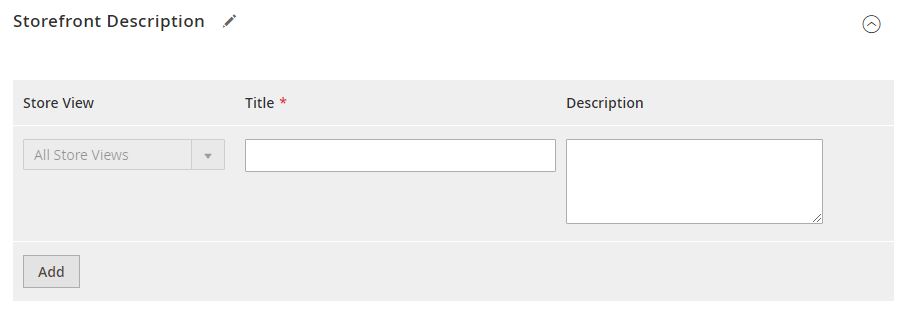
Under the Storefront Description tab, select a store view, type a title, and add a description of your new venue. Note that you can add different titles and descriptions for different store views which is especially useful for multilingual storefronts.
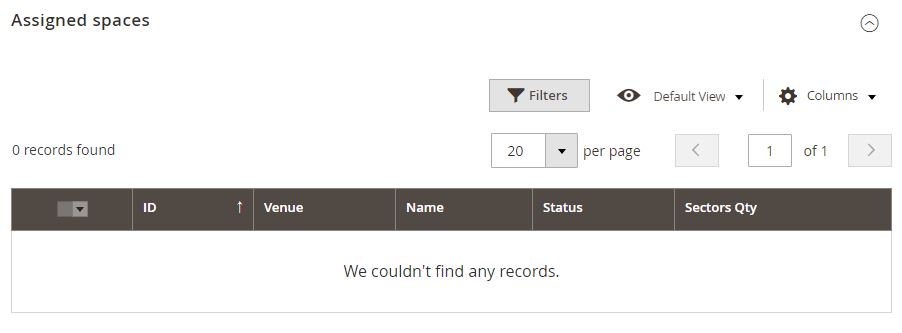
In Assigned Spaces, you can view and manage spaces available in the venue.Below, we describe the appropriate grid of the Magento 2 Event Tickets extension by Aheadworks.
Spaces
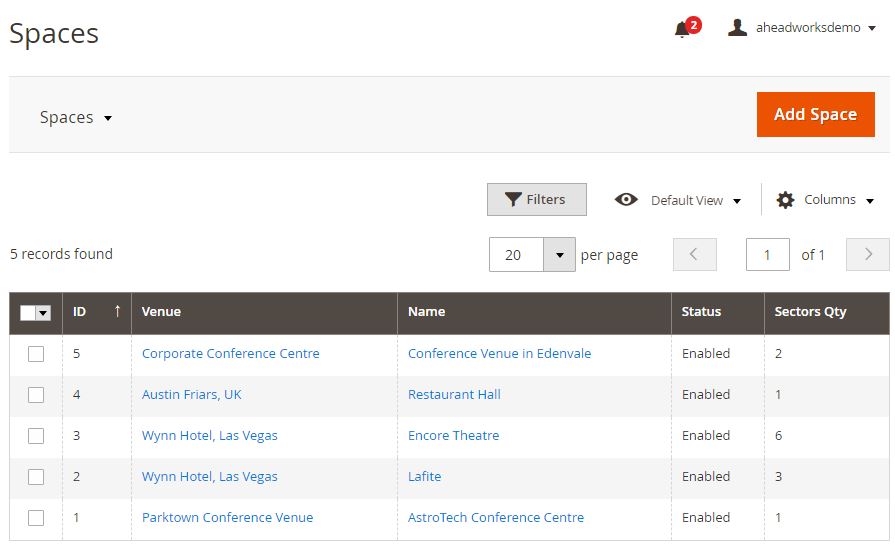
The Spaces grid is available under Catalog -> Event Tickets by Aheadworks -> Spaces and consists of 6 columns:
- Checkbox allows you to select multiple rows;
- ID displays the ID number of each space;
- Venue shows a venue where space is available;
- Name displays the name of the space;
- Status shows whether space is enabled or disabled;
- Sectors Qty provides information about the number of sectors in the space.
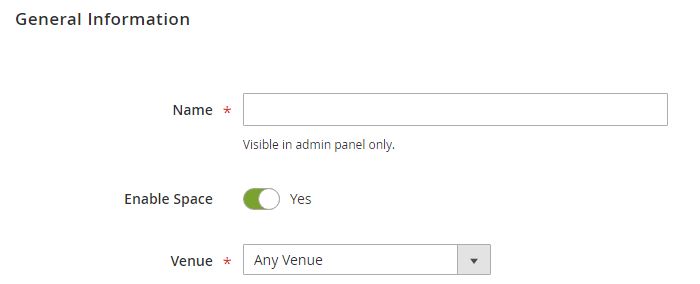
To add a new space, you should configure 3 tabs of settings: General Information, Storefront Description, and Sectors.
The first tab allows specifying the name of the space, enabling/disabling the space, and linking it to a venue.
The Storefront Description tab is the same as in case of venues: you can select a store view and specify name/description that will be displayed on it.
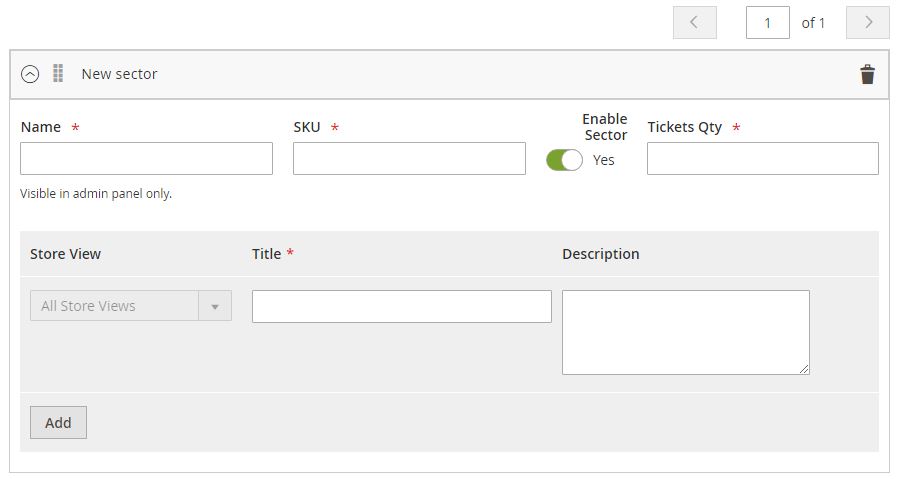
As for the Sectors tab, it combines the two previous tabs: you can specify both backend and frontend information here. The tab allows typing a sector name and SKU. Next, you can enable/disable it as well as specify tickets quantity for the sector. A specific title and a description can be added for each store view separately.
Ticket Types
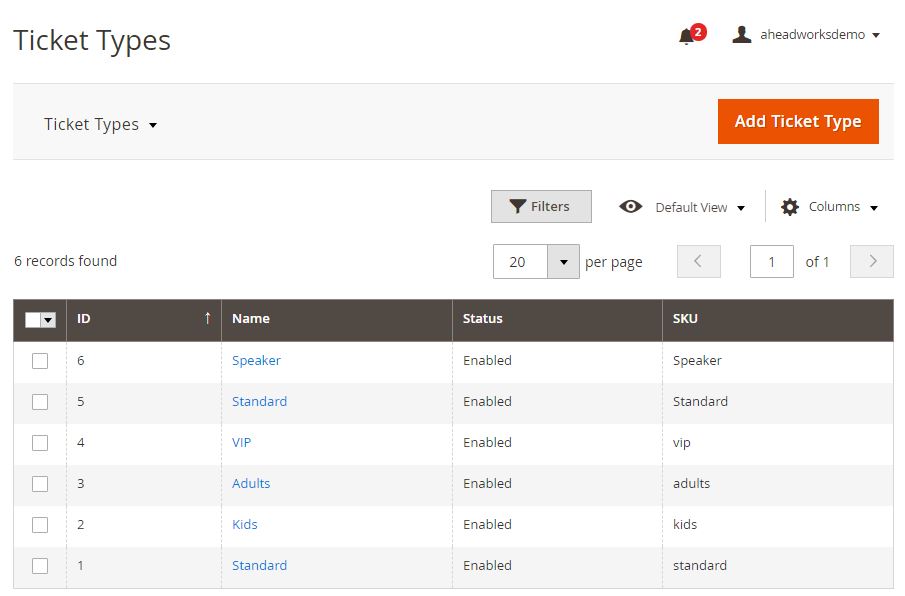
The Magento 2 Event Tickets extension by Aheadworks allows adding multiple ticket types. The corresponding grid is available under Catalog -> Event Tickets by Aheadworks -> Ticket Types. It displays such parameters as a ticket type ID, name, status, and SKU.
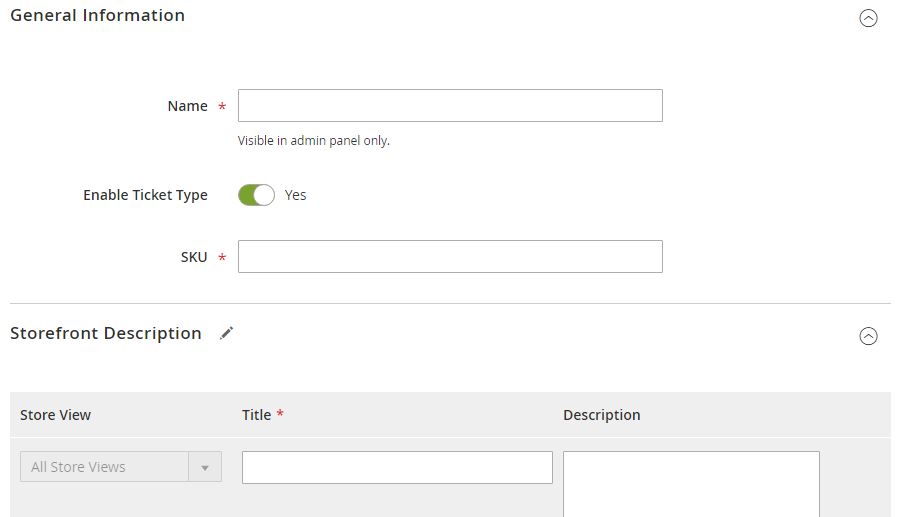
While adding or editing a ticket type, you should manage two tabs of settings: General Information and Storefront Description.
The first one allows specifying a ticket type name and SKU as well as enabling/disabling the type. The second tab is designed to add a store view-specific title and description.
Events & Tickets
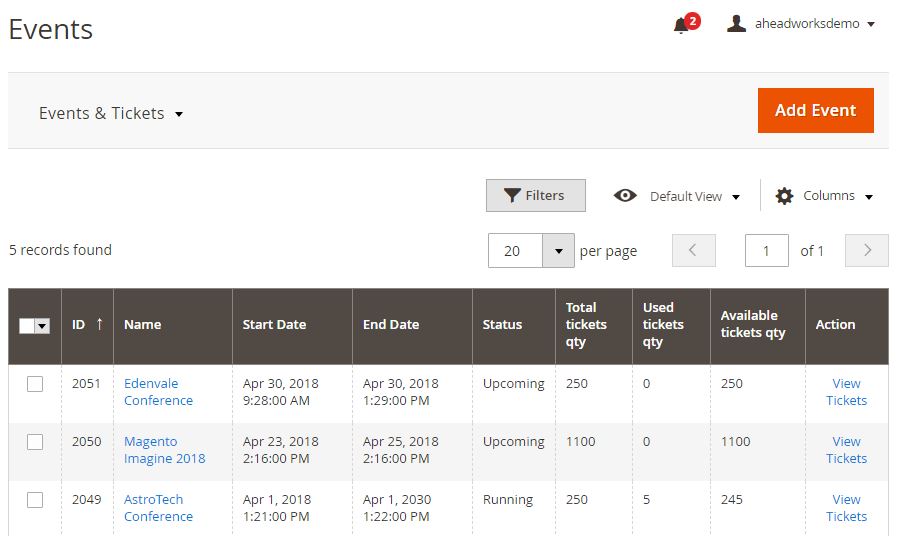
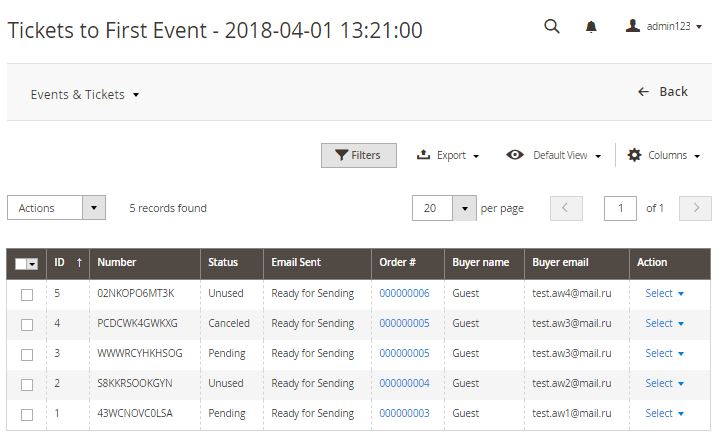
Now, let’s explore the main section of the Aheadworks Event Tickets Magento 2 extension – the Events grid. Available under Catalog -> Event Tickets by Aheadworks -> Events & Tickets, it shows the information about your events and allows viewing tickets related to each event. The grid shows an event ID, name, start and end date, status (upcoming or running), as well as a total, used, and available quantity of tickets. Besides, you can view tickets related to each event from the Action column.
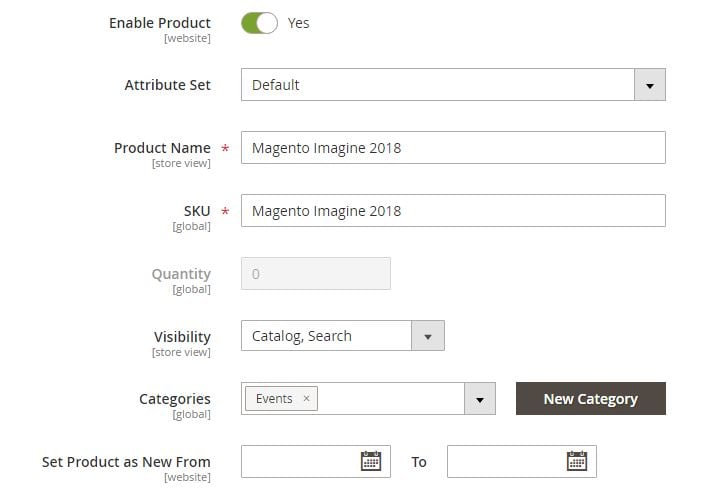
While adding a new event, you have to configure a standard product section. Enable the product, specify its name and SKU, select visibility, choose a category (Events), and specify other parameters.
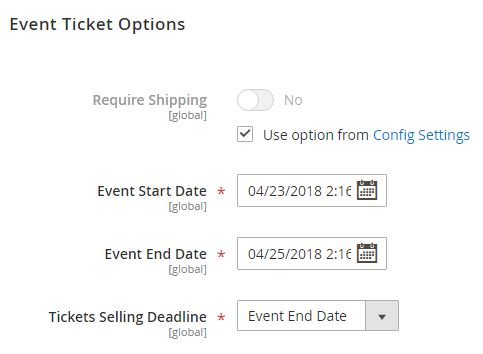
Next, configure event ticket options: enable/disable shipping, specify the event start and end date, and set a deadline for selling tickets.
To add a new space, select a venue/space and save the configuration. Next, you can add multiple ticket types and specify prices for each sector of the venue space.
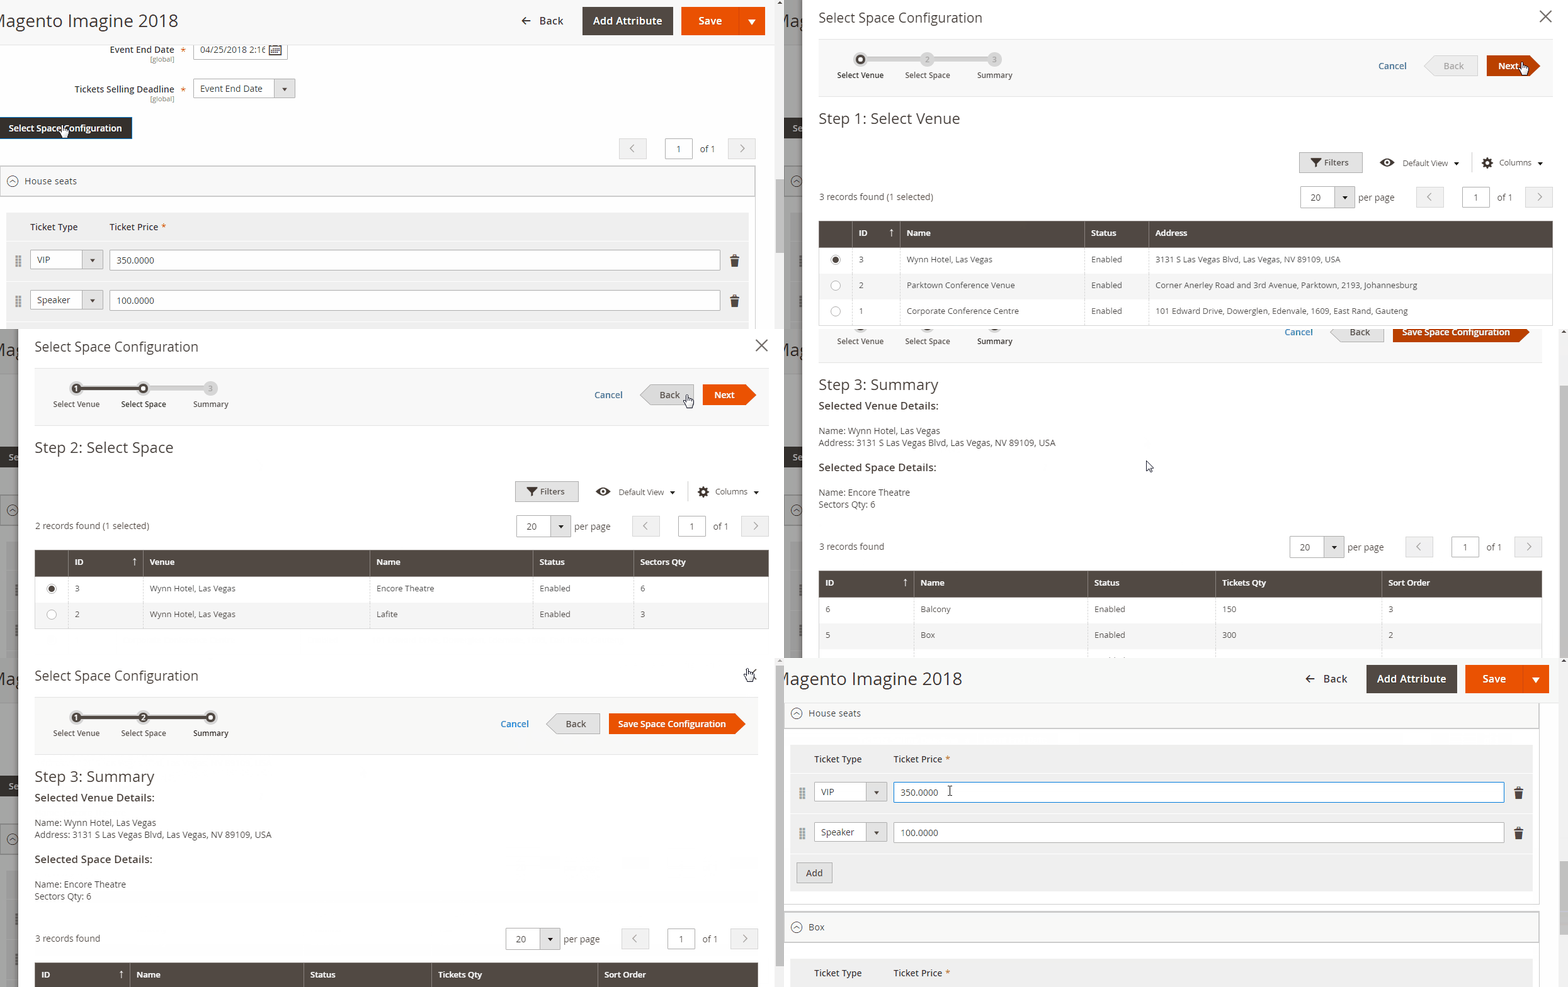
Next, apply event ticket personalization by adding multiple options.

As for the event-related tickets, they are gathered in the following grid:
Frontend
On the frontend of the Magento 2 Event Ticket extension by Aheadworks, all events are united under the corresponding category page. A customer can narrow down the selection by applying price and event venue filters.
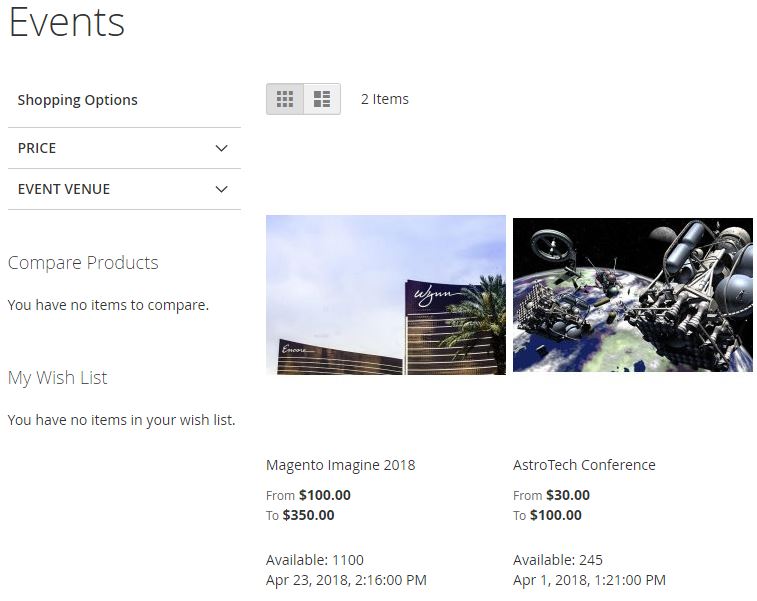
As for the event products on the category page, they display a product image, name, ticket price and availability, as well as a start date.
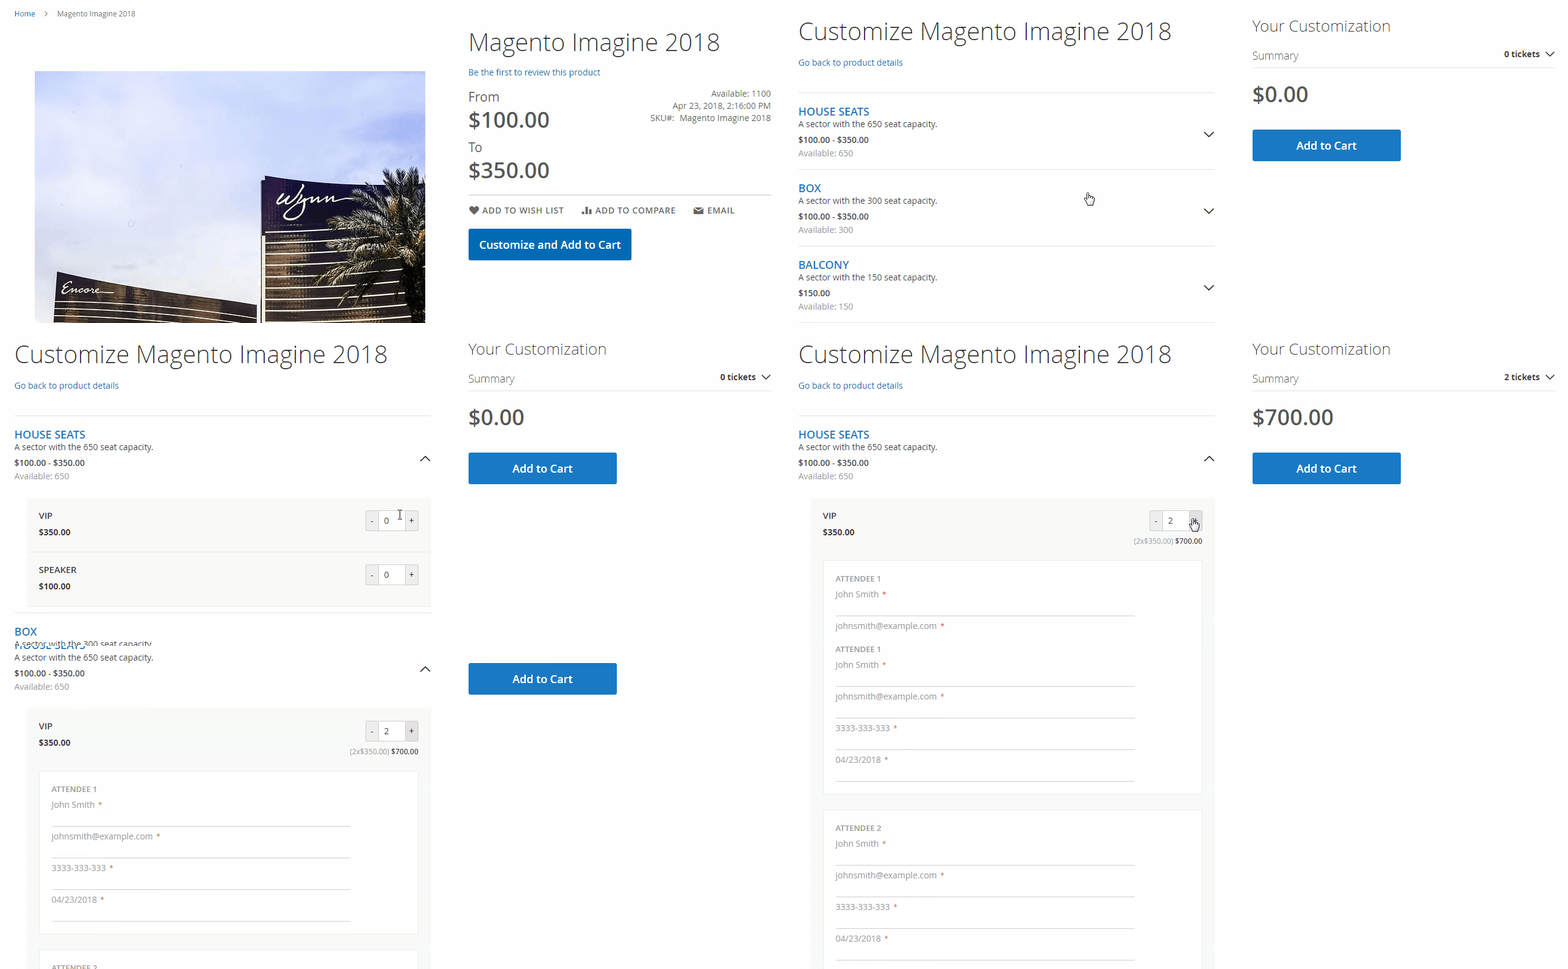
Similar information is available on a ticket product page:
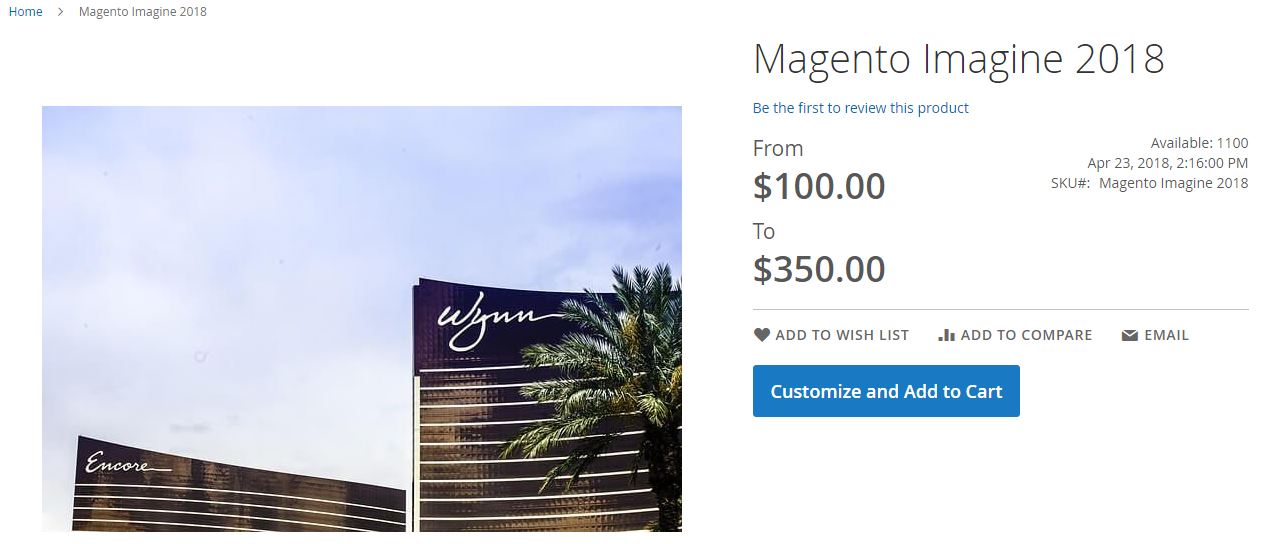
Before adding a ticket to cart, you should select a sector and a ticket type. After specifying the number of tickets, provide such data as a first and last name, email, telephone, and date of all attendees.
Final Words
The Magento 2 Event Tickets extension provides all features necessary to create an event and sell tickets. Furthermore, the robust management capabilities are not the only benefit you get after installing the module. The Magento 2 Event Tickets plugin can be used for collecting customers’ data – just enable the corresponding frontend functionality.
The Aheadworks Event Tickets Magento 2 extension costs only $299. Do you know any similar modules for a relatively low price? If yes, let us know in comments. For any further information about the Magento 2 ticket extension, follow the link below:


