Magento 2 Product Custom Options Extension by Mageplaza
Including custom product options is among the best methods to gain more profit for stores and serve shoppers more professionally. However, in Magento 2 default, store admins only can assign options to products by utilizing the Import option or include options manually. There is no other way which can create better efficiency.
Understanding that, Mageplaza has launched its Magento 2 Customer Product Options extension, supporting admins to quickly assign options to many products through templates. That can enhance the admin experience and boost site performance significantly.

Table of contents
Why should you opt for the Mageplaza Product Custom Options for Magento 2?
Upgrade customizable options
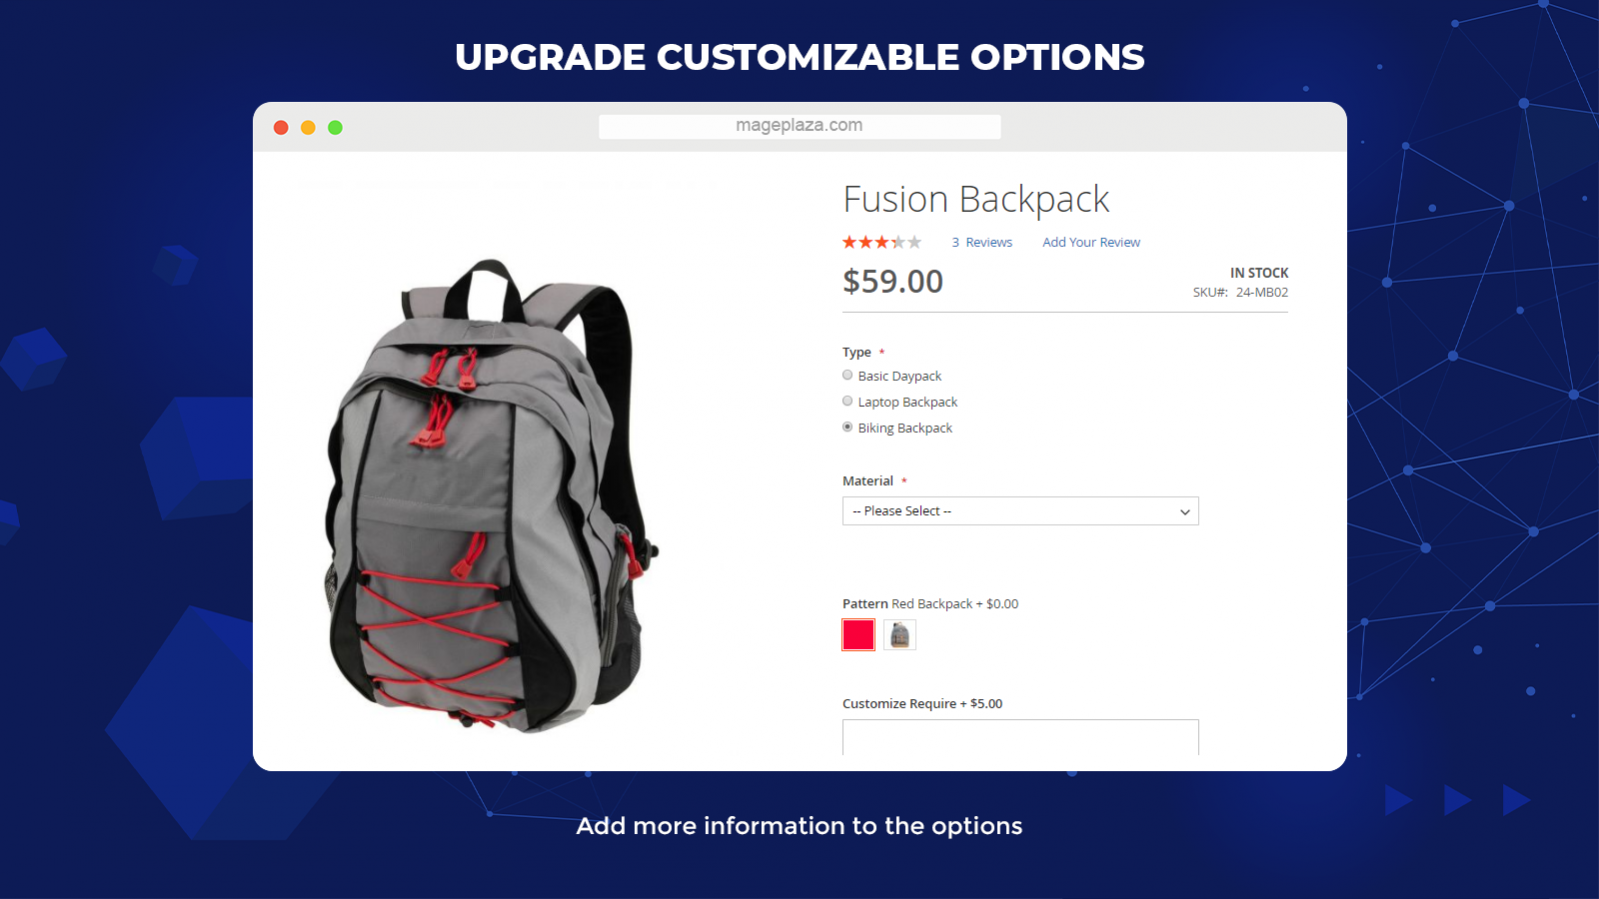
The most notable feature of the extension is including more specifications for the customizable options. Store admins can include more information in the options to make them informative and appealing to shoppers:
- Visual Swatch and Text Swatch: Display swatch as images or text of an option
- Option Quantity: Enter stock quantity for an option
- Option Weight: Enter weight for an option
- Option Tooltip: Enter tooltip note/ description for an option
- Option Dependency: Create an option based on others
Provide advanced price for product options

Store owners can drive sales for specific product options by including special price and tier price. The advanced prices will be presented directly (special price) or through tooltip (tier price), so shoppers can easily notice. Every tier price can be assigned according to:
- Website
- Customer groups
- Quantity
Add options for a product via templates
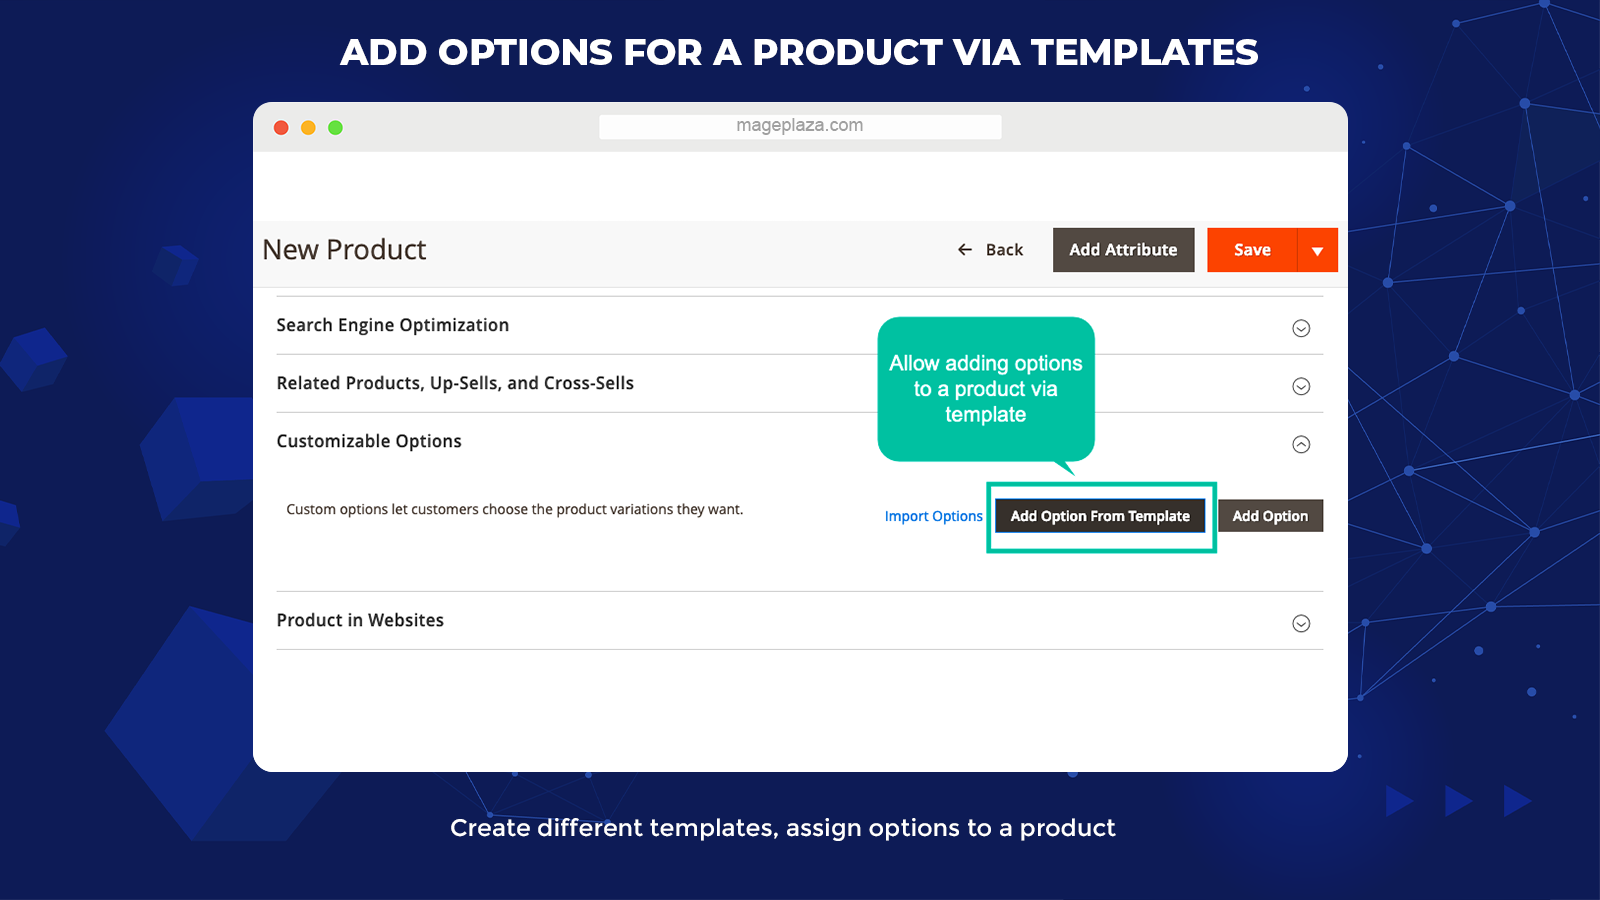
With Product Custom Options, store admins can include options in products via ready-made templates.
Before assigning options to an item, admins can generate various templates. A template can be considered a group of options with information like option type, option title, option price, option SKU, and price type.
As the templates are available, admins can link the favorite templates to any items they want. Using templates can help remove all repeated actions when admins add the same options to various items. That contributes to a better admin experience in the backend.
Offer ways to mass-assign product options
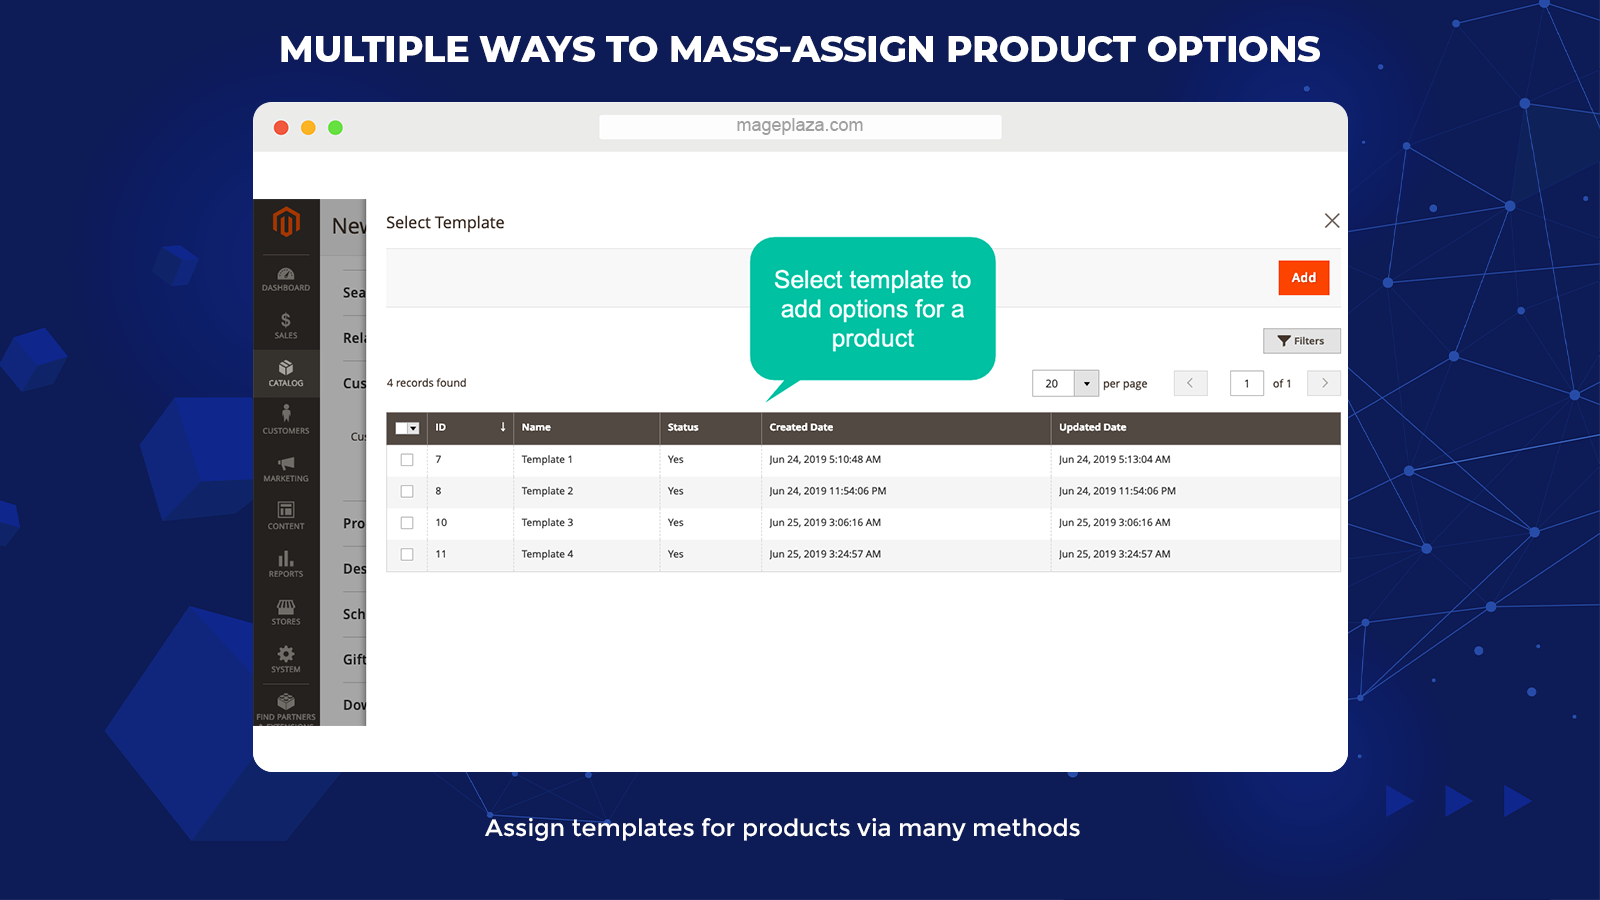
When you generate options for a template, there are multiple assignment methods to assign that template to items.
The first method allows you to assign templates by Product IDs. The second one is using Product SKUs. Both methods are executed at the template edit page, and you can fill in one or several IDs or SKUs of products. Moreover, store admins can apply templates for many items from the Product Grid.
Edit template onsite
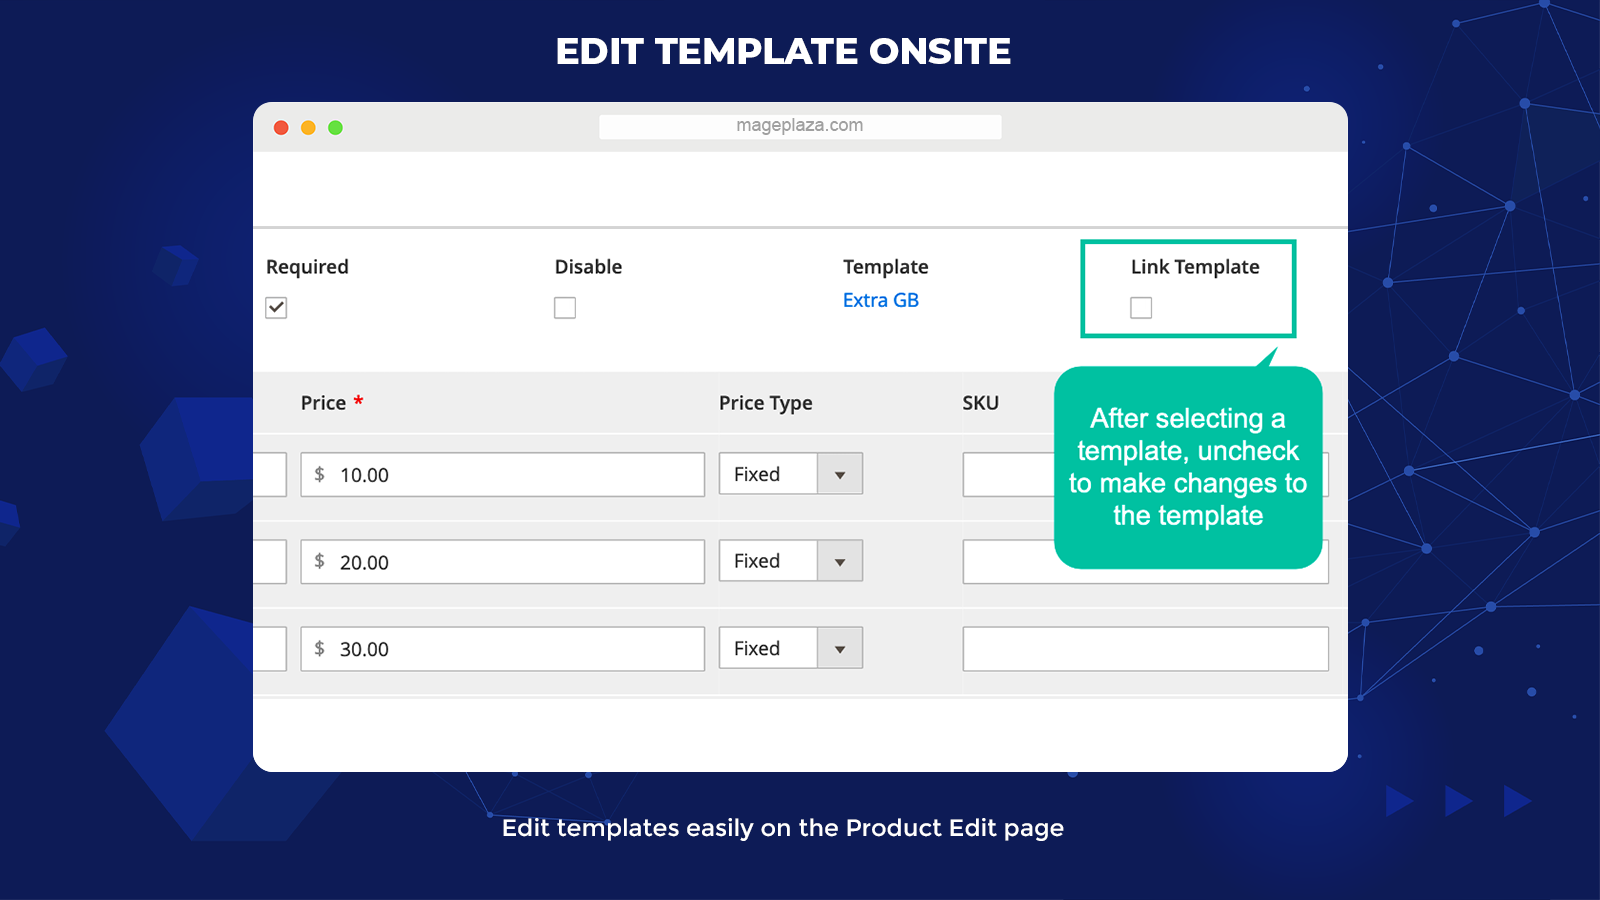
On the Product Edit Page, after choosing a template, if store admins want to make some adjustments, the template can be edited with ease. After the template is loaded, if the Link template checkbox is not clicked, the values of the template can be changed.
Additional features
Import/ Export templates
The extension supports importing and exporting the templates through XML files.
Support default value
Users can choose the default value for each option.
Mass-assign templates
Store admins can assign templates for mass products via the Actions box at the Product Grid.
Choose templates via a popup
The module allows selecting templates via a popup.
Link/ Unlink after template removal
The product options linked with a template can be eliminated or unlinked after the template is cleared.
One time price (coming soon)
A custom option will cost only one time without regard to the quantity of that option added to the cart.
Backend
General configuration
Log into the Admin Panel, navigate to Stores > Configuration > Mageplaza Extensions > Better Product options > General Configuration
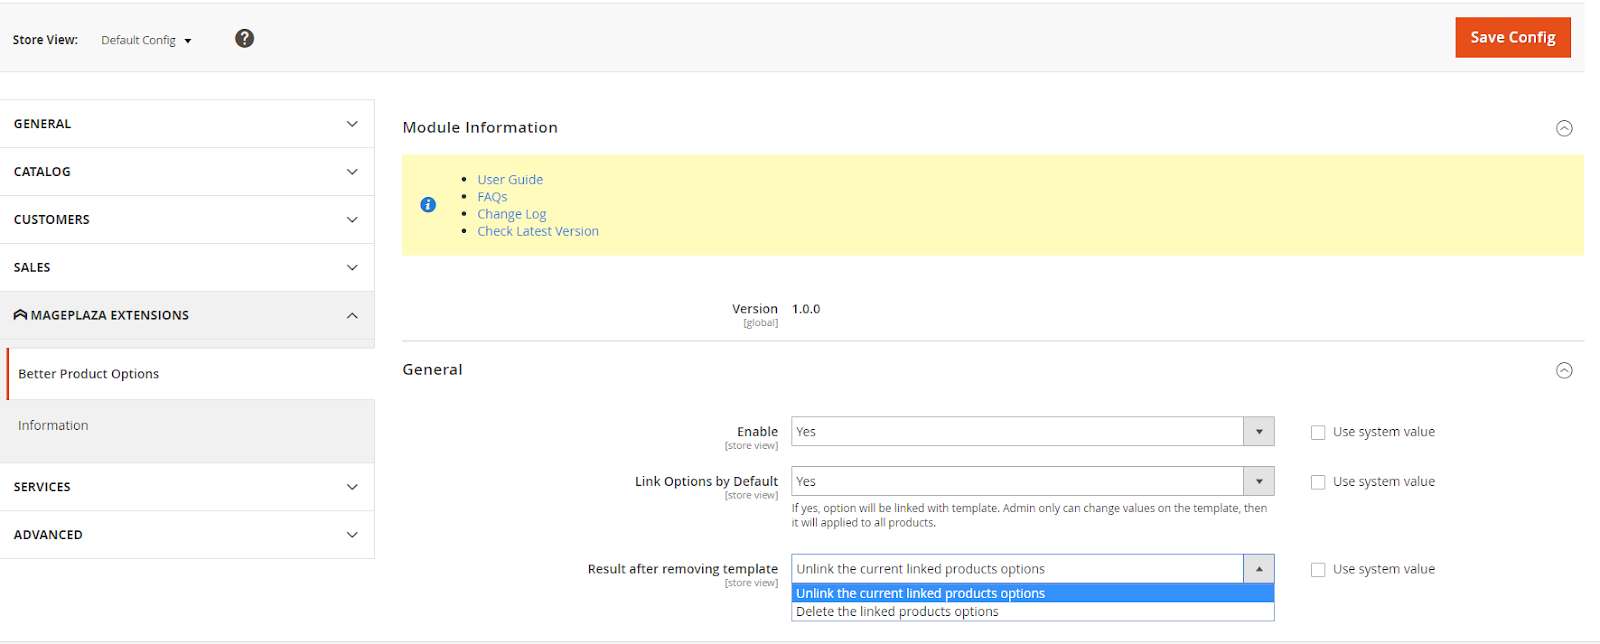
- Enable: Choose Yes to turn on the module
- Link Options by Default:
- If you choose Yes, the options will be linked to the template as default. The store admin can only change the option on the template; then it will apply to all items assigned with these options.
- If you select No, the options will not be linked to the template as default.
- Result after removing template:
- If you select Delete the linked products options, when the template is removed, the options in the items linked to this template are also removed.
- If you choose Unlink the current linked products options, when the template is removed, the options in the items linked to this template will no longer be linked to that template.
Product Option Templates Grid
From the Admin Panel, navigate to Stores > Product Options > Manage Product Options Templates


- This is the place displaying all the Product Options Templates
- From the Product Options Templates grid, the store admin can get the fundamental information of Product Options Templates, including ID, Name, Status, Number of Products, Number of Options, Created Date, and Action.
- Action:
- Delete: Remove Product Options Templates created
- Change Status: Edit the status of Product Options Template: Enable or Disable
- Edit: Go to the Product Options Templates information page generated before
- Besides, the admin can Filter, Sort, and Search for Product Options Templates.
Create New/ Edit Template
Within the Admin Panel, navigate to Stores > Product Options > Manage Product Options Templates > Creates New Template/ Edit Template
Generate Tab

- Name: Create a name for the template. This is a compulsory field.
- Description: Write a description for the template
- Status:
- Yes: Activate the template
- No: Inactivate the template, then the options for this template will be concealed at the frontend/ cart.
Customizable Tab Options

- The store admin can generate various options in the same template by choose Add Option
- Option Title: Write a title for the option. This is a compulsory field.
- Option Type: Choose an option type. This is a compulsory field. There are various option types as below:

- Option Type = Text (Field/ Area)

- Option Type = File

- Option Type = Date (Date & Time/ Date/ Time)

- Option Type = Select (Drop-down/ Radio Buttons/ Multiple Select/ Checkbox/ Visual Swatch/ Text Swatch)

Sort Order: Show the priority of displaying options of an item. The option with smaller sort order will be shown first. This is a compulsory field.
- Required: Put a tick on the checkbox so that the option is required.
- Disable:
- If you choose Disable, the option will be disabled and hidden at the frontend/ cart.
- If you don’t choose Disable, the option is used and shown as normal.
- Default Value: Only apply for Option Type = Select. The field is to choose the default value for this option when the product detail page is loaded. Each option has only one default value.
- Title: Create a title for the values in each option
- Price: Create a price for each value. There are two different price types: Fixed and Percent. This price will be included in the original price when customers add the product to the cart.
- SKU: Decide the SKU for each option/ value of the option
- Qty: Decide the limit number for each value in the option
- Weight: Decide the weight for each value in the option

- Visual Swatch: You can select a color or an image to show the value in the option. This field only applied to Option Type = Visual Swatch.

- Text Swatch: This field only applies to Option Type = Text Swatch. You can select a text label to show the option value under the swatch style at the frontend.
- After entering the fields above, click on the Settings icon at the right side of each option to go to Popup Configuration. This popup includes all the information you need to configure for that option.
- Visibility Tab:

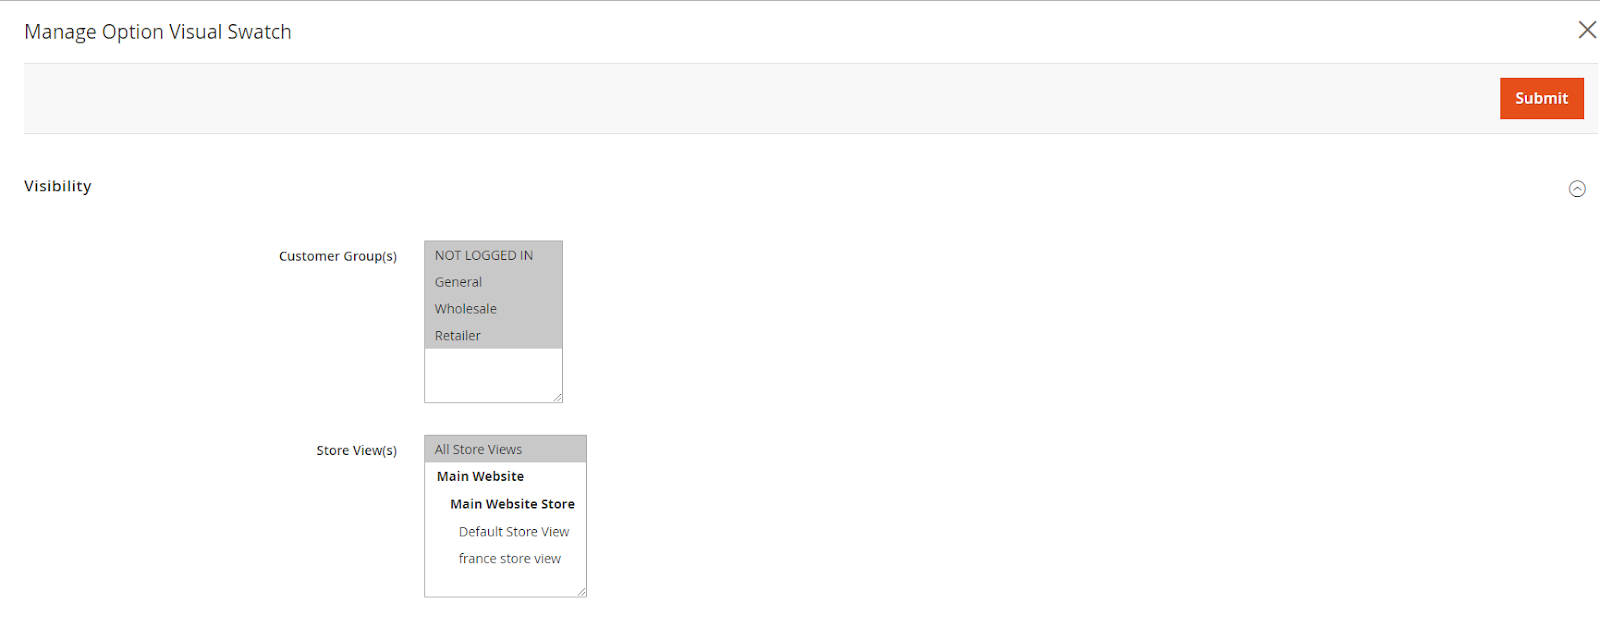
- Customer Group(s): Only chosen customer groups can see this option.
- Store View (s): Only selected Store Views can show this option.
- Title Tab:

- This tap only shows up when the popup template is activated.
- Create a title for the option in each store view. If the field is left blank, the default title will be presented.
- Tooltip Description Tab:
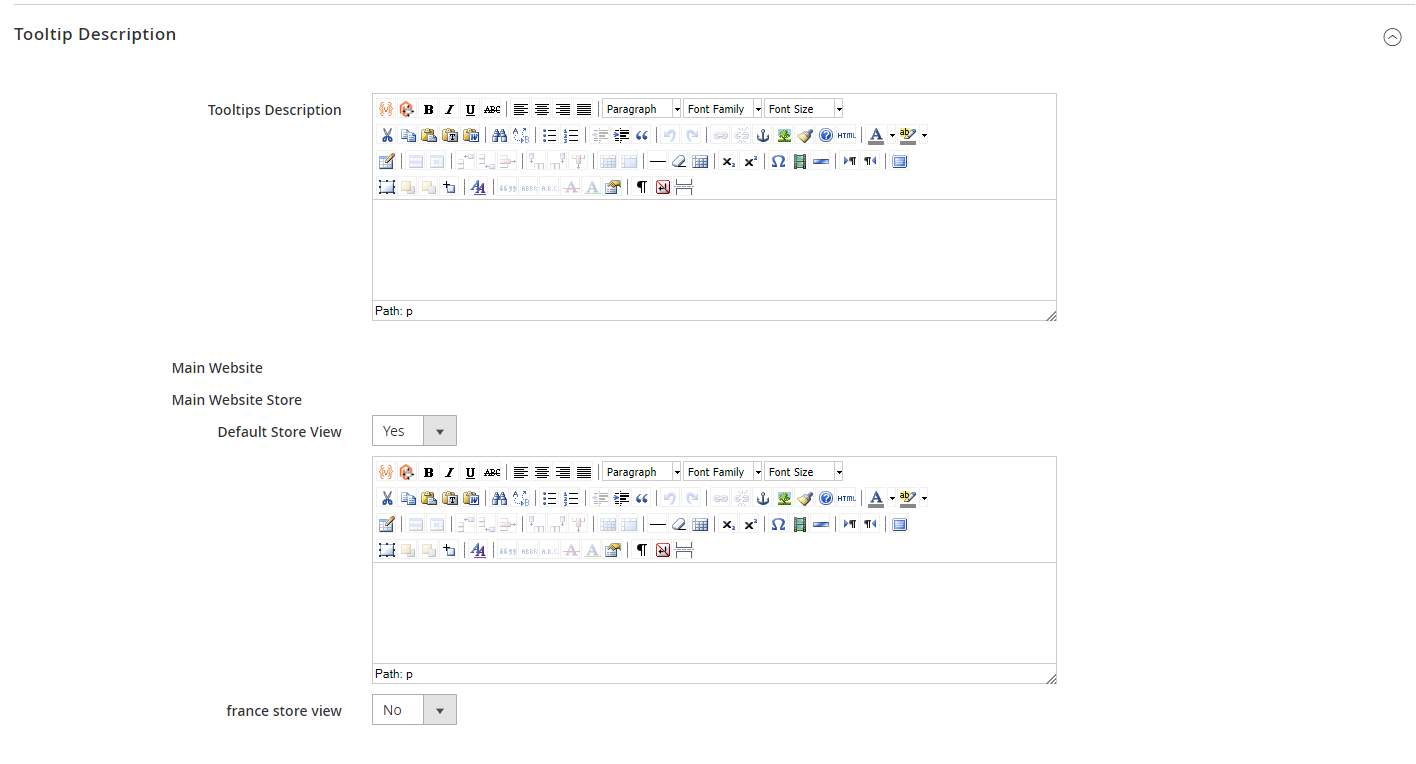
- Tooltips Description: This is the tool for admins to write the description for the tooltip of this option.
- Store View: Choose Yes to decide the Tooltips Description for specific store views. If you choose No, it will show Tooltips Description by default.
- Dependency Tab:

- Dependency Type: Choose the dependency type for this option. There are two options:
- OR Filter: Support showing options if one of the conditions is qualified
- AND Filter: Support displaying options if all the conditions are qualified
- Dependency Options: The display of this option will be based on the Options, Operation and Values configured.
- For options with Type = Select Option (Drop-down/ Radio Buttons/ Multiple Select/ Checkbox, Visual Swatch/ Text Swatch), you can choose the Settings icon at the right side of each option to go to Popup Configuration, which includes all the information you need to configure for that option.

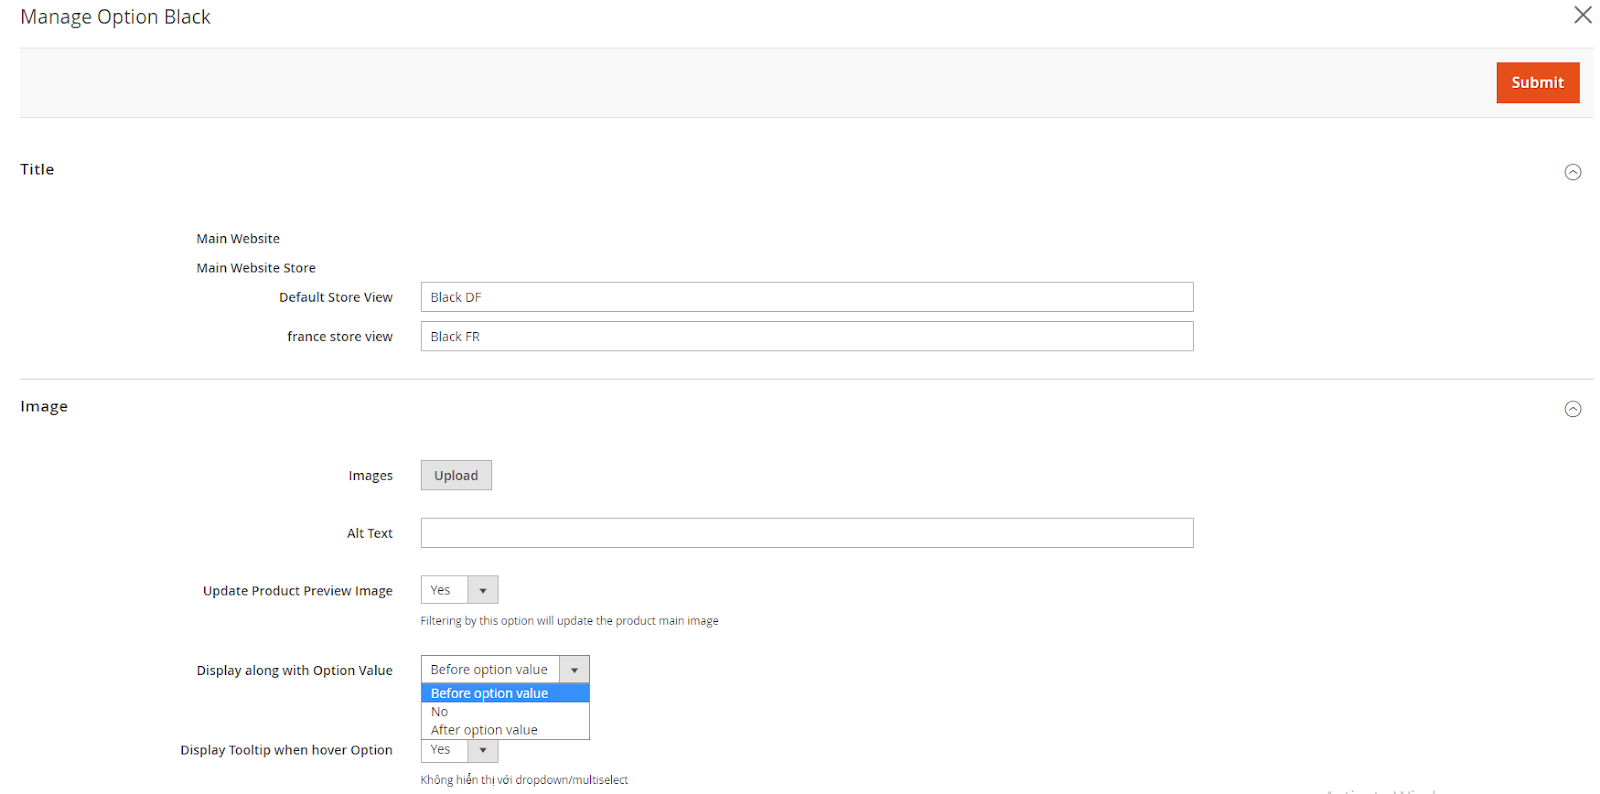
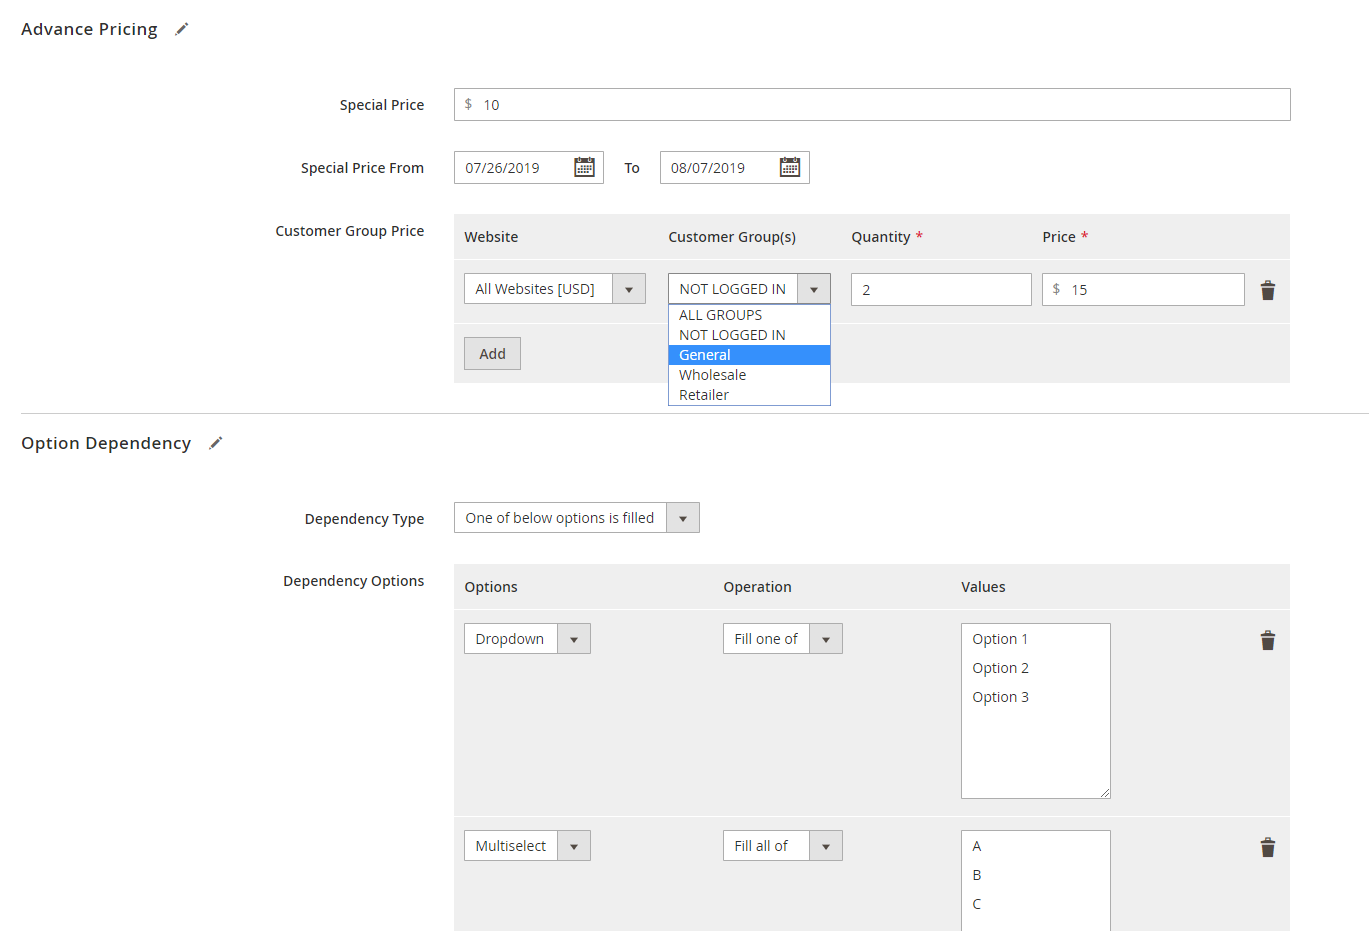
- Title Tab: Create a title by each store view for each option. If the field is left blank, it will show the default title.
- Image Tab: This is where you customize images for each option.
- Alt Text: Add Alt Text for the image
- Update Product Preview Image: Choose Yes to update the image of the item when choosing this option. If you do not want to update images, let’s choose No.
- Display along with Option Value: Choose the display position of the image associated with the Option Value. This field is only shown when Option Type = Radio Buttons/ Checkbox.
- Display Tooltip when hover Option: Choose Yes to display the tooltip image when hovering over this option. This field only shows up when Option Type = Radio Buttons/ Checkbox/ Visual Swatch/ Text Swatch.
- Advanced Pricing: Admins can create a special price for the option, and decide the applying date as well as assign the option price for certain customer groups.
- Option Dependency: This tab is utilized to set up the dependency of this sub-option on other options. This display of this option will be based on the Options, Operation and Values configured.
Manage Assign Products Tab
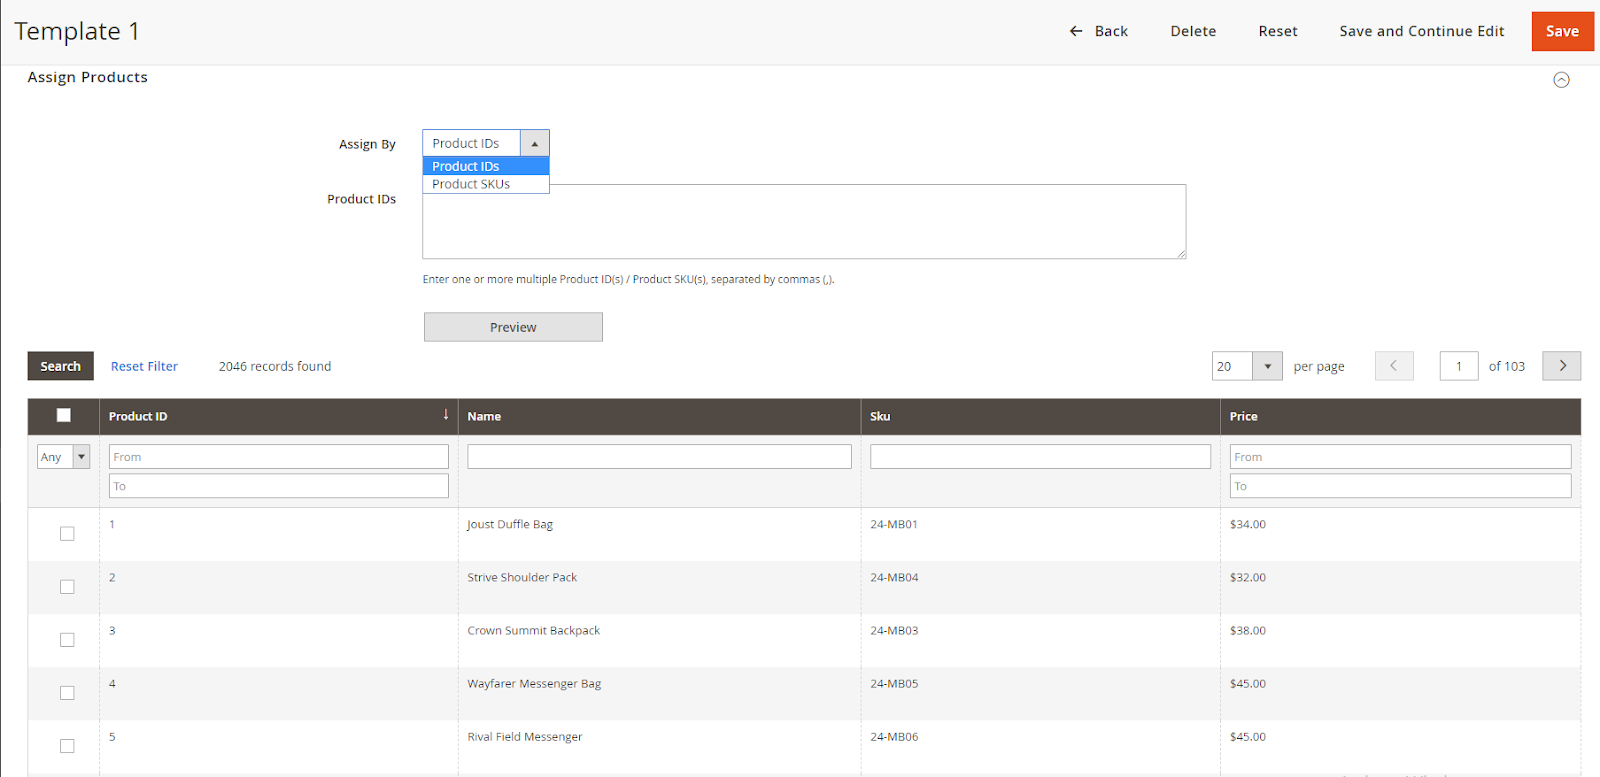
- Assign By: Choose one of the two assignment types: Product SKUs or Product IDs
- Product SKUs/ Product IDs: The Assign By field will decide the name of this field. Add one or more Product SKUs/ IDs, separated by commas. Then click on Preview to view the list of products to assign.
Edit Product Form
Log in to the Admin Panel, go to Products > Catalog > Choose a Product > Customizable Tab Options

- Import Options: This link will direct you to a new page to import options from other products into the current item.

- Add Option: When you click here, you’ll find a form to generate a new option.
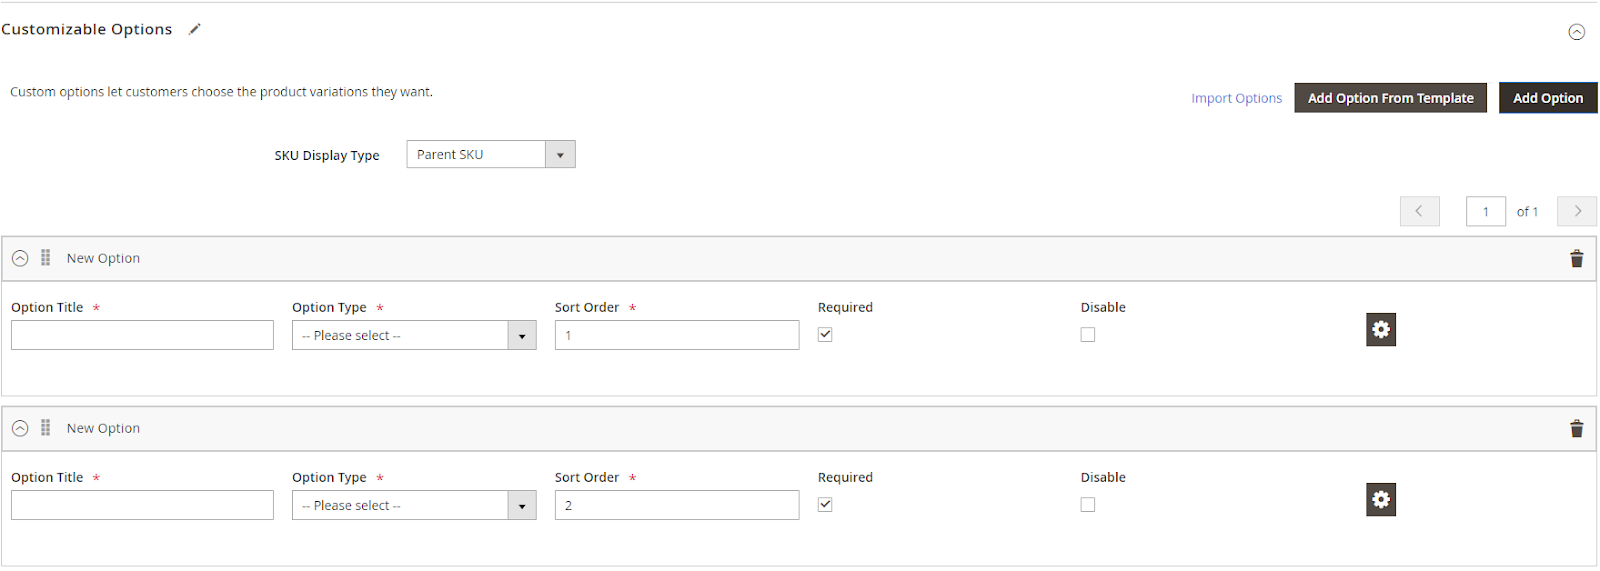
- Add Option From Template: When you click here, a popup will appear to add options from the selected product options template to this item.
- In the options taken from the Product Options Template, there are several differences compared to the options generated at the Product page as below:
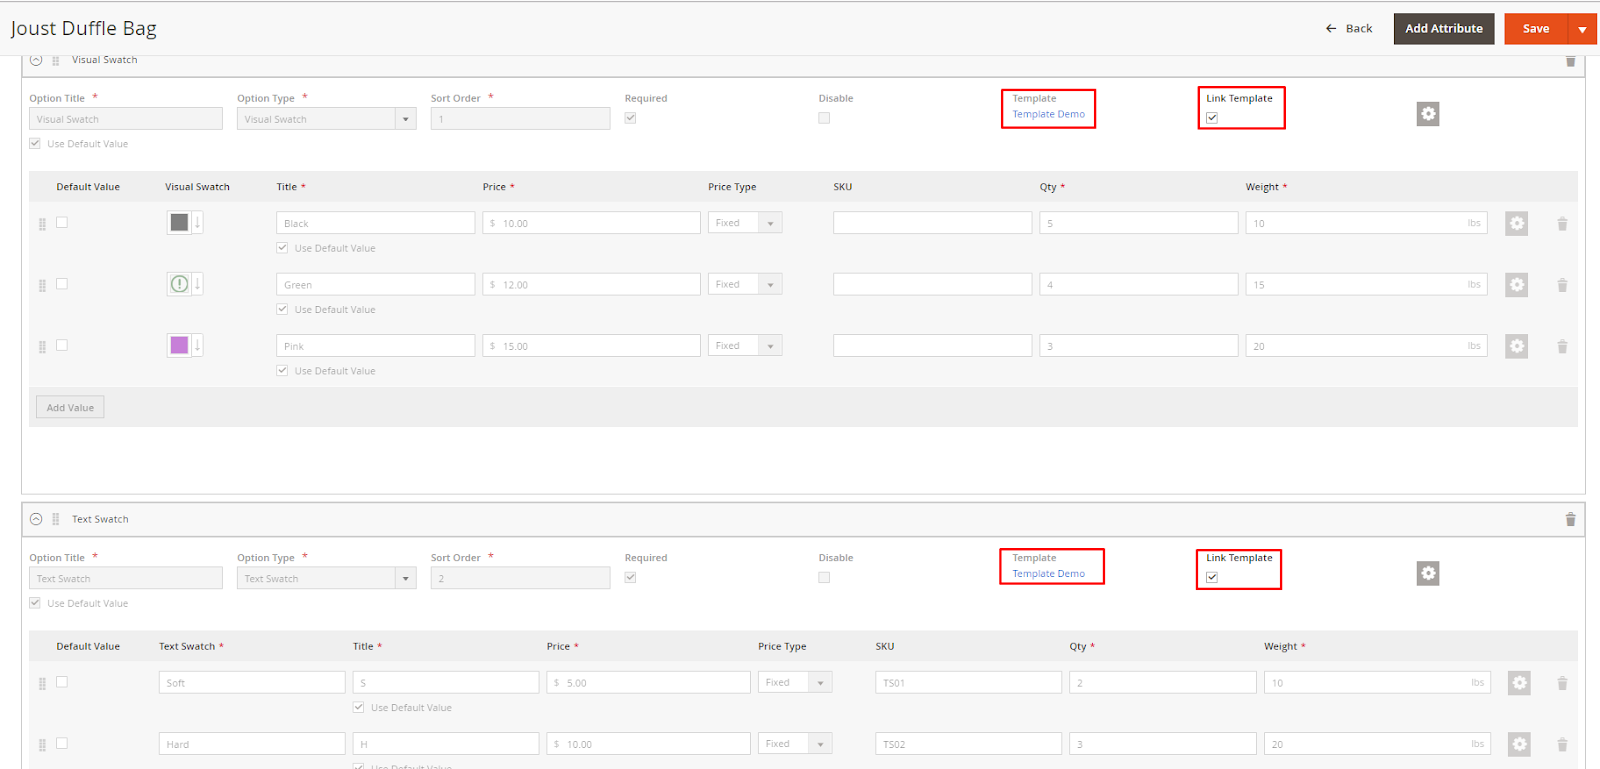
- Template: This is the name of the template which will be set to this option.
- Link Template: Link this option to the template selected from Better Options Template
- If the template has multiple options, all options will be linked to the template and reverse.
- If you put a tick on the Link Template checkbox, all fields of this option will be inactivated and unedited.
- If the checkbox is unticked, those fields can be edited as normal.
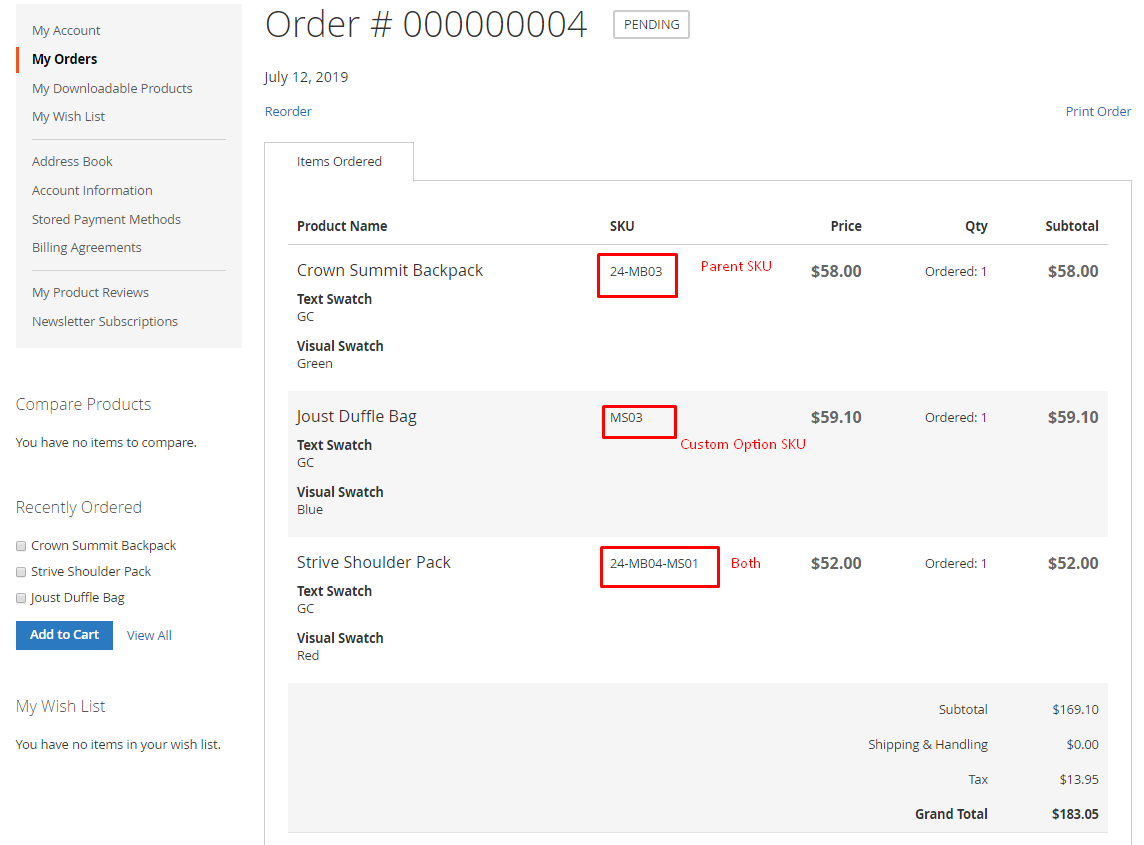
- SKU Display Type: Choose the display type of the product SKU when viewing order details. There are three different options.
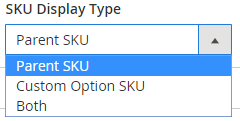
- Parent SKU: Only show the SKU of the product, not the SKU of the option
- Custom Option SKU: Only show SKUs configured for each option
- Both: Show the selected SKUs of the item and the selected SKUs of the option
Mass action at the Product Grid
- Besides assigning the Product Options Template to products after editing/ creating the template, you can implement the assignment of templates for the product at the Product Grid as below:
- Within the Admin Panel, navigate to Products > Catalog, then choose one or more products, then click on Actions > Assign Product Options Templates


Frontend
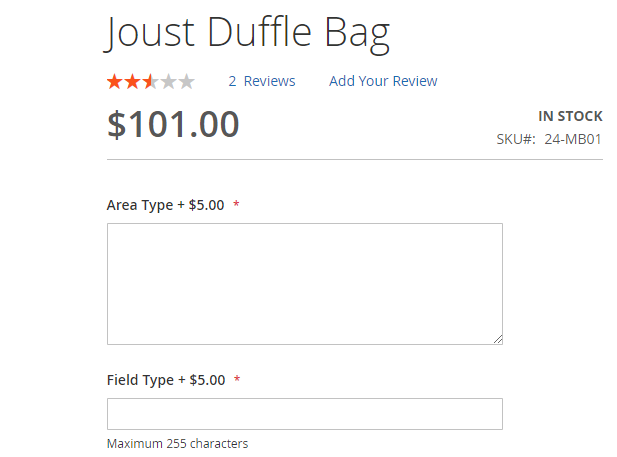
- The image of Option Type = Text on the Product View Detail page will look like:
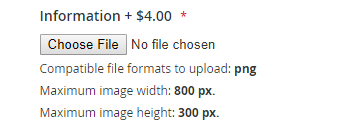
- The image of Option Type = File on the Product View Detail page will look like:

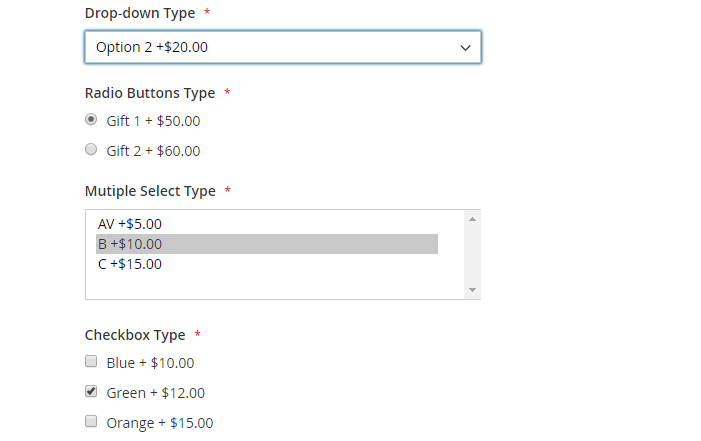
- The image of Option Type = Select on the Product View Detail page will look like:
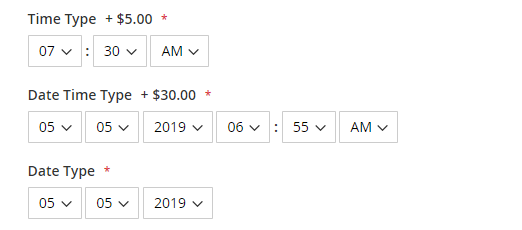
- The image of Option Type = Date Time on the Product View Detail page will look like:
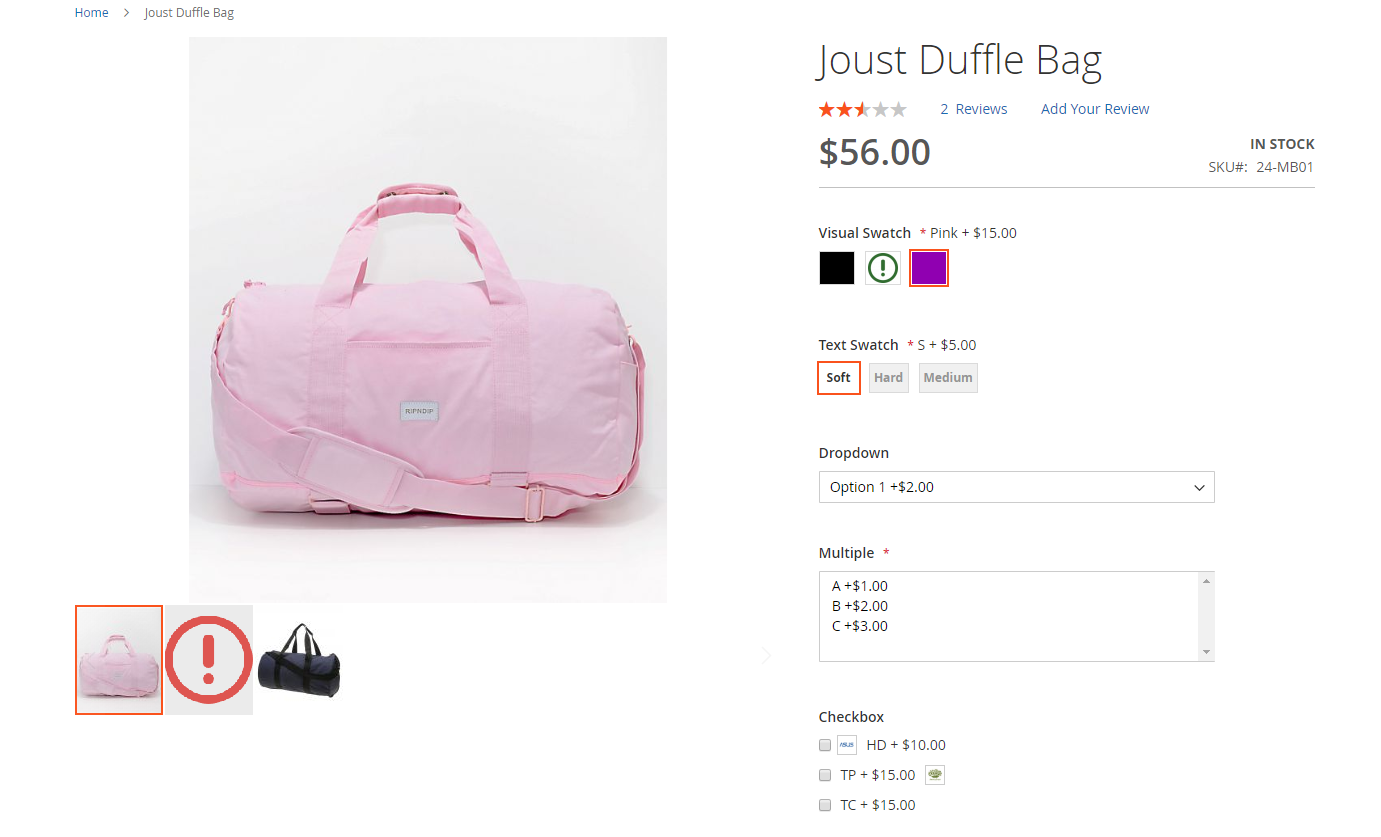
- Display the image with option value
Summary
With Magento 2 Product Custom Options by Mageplaza, store admins can use templates to assign options to various products simultaneously. This makes the process more precise, time-saving, and useful.
So why don’t you give this extension a try to run your shopping site more seamlessly! Bet that it will not let you down.
HOT DISCOUNT: Use coupon code FIREBEAR to receive a 10% discount when purchasing.


