
Magento 2 Backend Exploration: Customer Segments
Magento 2 Commerce provides a feature that allows you to display content and promotions to specific customers more precisely. Meet Magento 2 customer segments! This tool leverages such properties as customer address, order history, shopping cart contents, and others to optimize the way you interact with store visitors. You can use targeted segments to implement various marketing initiatives, including shopping cart price rules and banners. Besides, Magento 2 provides the ability to generate corresponding reports. In the following article, we shed light on how the appropriate Magento 2 section looks and what you can do there.

Table of contents
Magento 2 customer segment attributes
You can define customer segments in Magento 2, like catalog price rules. Set the Use in Customer Segment property to Yes for an attribute. After that, you can use it in a customer segment condition. Magento 2 lets you create customer segment conditions based on the following attributes:
- Customer Address Fields. The system enables you to use any of the address fields to create customer segment conditions. For instance, it is possible to utilize a city or country. Furthermore, the system relies upon any address in a customer’s address book to identify what condition they match. It is also possible to implement a restriction, specifying that only the default billing or shipping addresses can be utilized. Note that Magento 2 can apply such conditions to logged-in customers only.
- Customer Information Fields. At the same time, Magento 2 lets you define miscellaneous customer information to create customer segments. For instance, it is possible to utilize a customer group, email, newsletter subscription status, name, or store credit balance to create new conditions. Only logged-in customers are a target of customer information-based rules.
- Cart Fields. You can also utilize such cart properties as quantity or value to create new customer segments. Your buyers don’t have to be logged in to see the targeted content.
- Products. Products in a shopping cart/wish list or previously viewed or ordered ones are also under your disposal. Leverage this information to create customer segments. Magento 2 lets you use product attributes and set a date range to make your display more precise.
- Order Fields. The system lets you leverage information about past orders to create customer segments. You can use addresses, order total or average amount or quantity, the total number of orders, etc. It is possible to set a date range for order data to be utilized. Besides, you can specify the order status to make the selection more precise. As you might have already guessed, such conditions suit customers who are logged in.
How to create a customer segment in Magento 2
As we’ve mentioned above, creating a customer segment is a piece of cake since the process is similar to building a cart price rule. The only huge difference is that you have to work with customer-specific attributes. Below, we explore how to create a new customer segment that targets zoomers – shoppers born between 1995–2009.
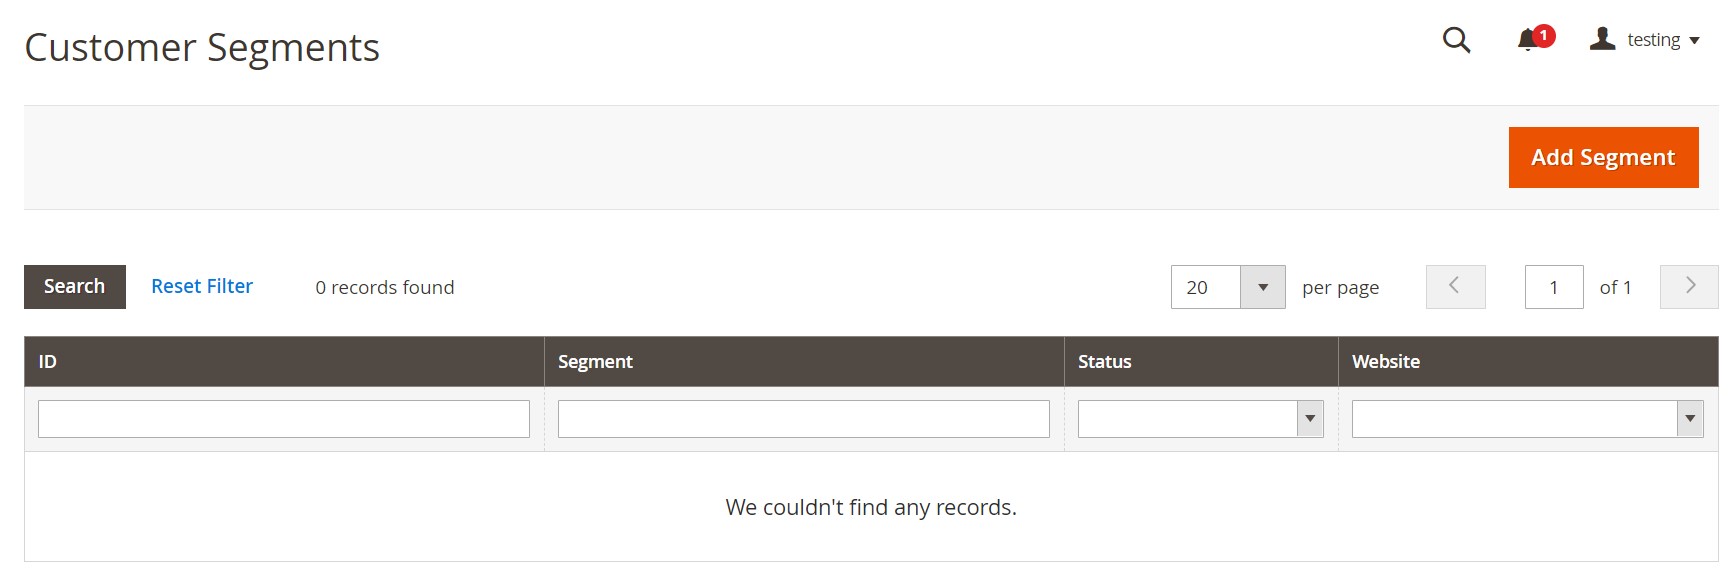
Before going any further, let’s explore the main Customer Segments screen. It is the starting point for all key operations explained below. The Customer Segments grid contains the following information:
- ID – an ID number of a segment;
- Segment – a name of a segment;
- Status – Active or Inactive;
- Website – a corresponding website where a segment is used.
As you can see, there is a button that lets you add a new segment above the grid. But before clicking it, you have to enable customer segments.
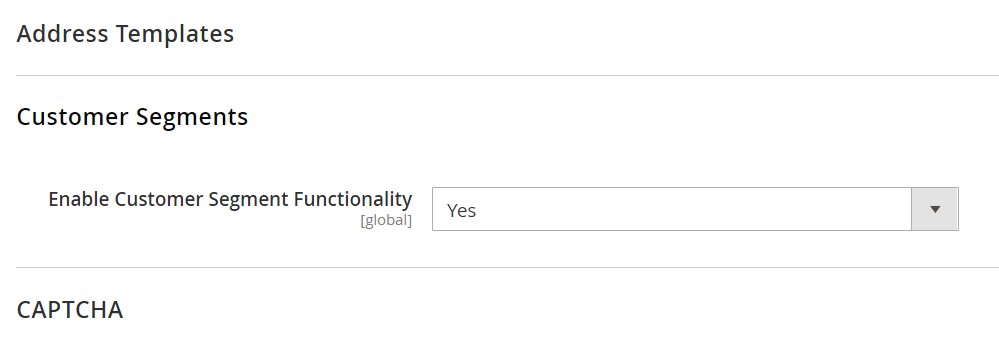
How to enable customer segments
You can enable customer segments under Stores-> Settings–> Configuration. Expand Customers in the left panel and choose Customer Configuration. Find the Customer Segments section and expand it. Set Enable Customer Segment Functionality to Yes and save the configuration.
How to add a customer segment
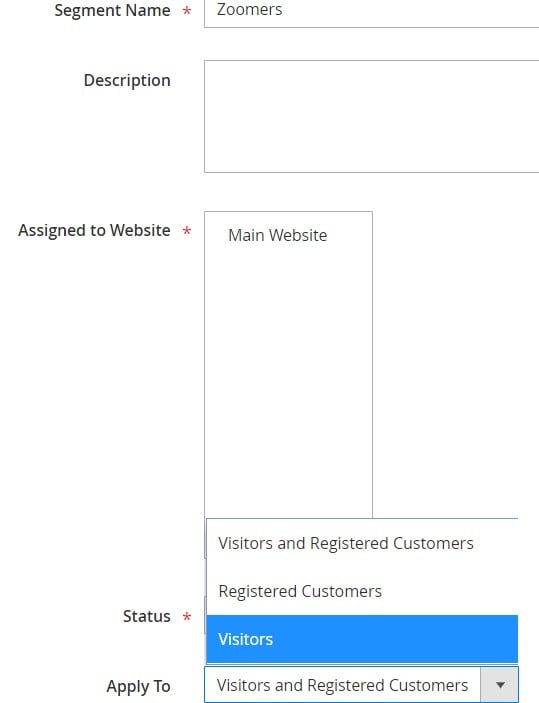
Now, we can return to the main Customer Segments screen. Click the Add Segment button and complete the Segment Information.
- Enter a Segment Name.
- Add a brief Description to explains the segment purpose.
- Choose a website to use the customer segment.
- Identify customers that this segment applies to (visitors, registered customers, or both).
How to define conditions for a customer segment
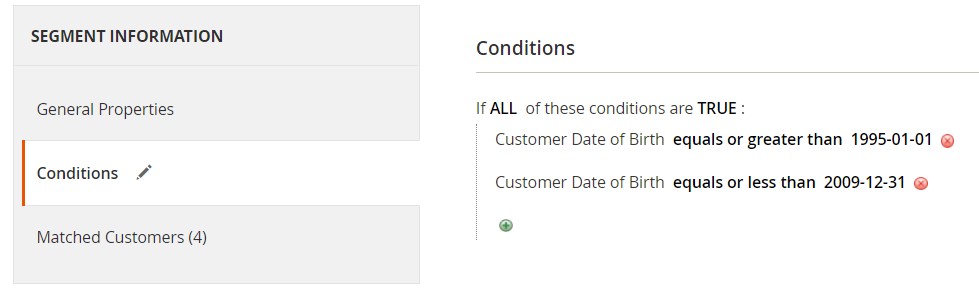
After you’ve finished with the previous tab, switch to Conditions. As we’ve mentioned above, we have to create a condition that targets Zoomers who were born between 1995 and 2009.
- Click Add to expand the list of conditions. Select Date Of Birth there.
- Choose is and then equals or greater than.
- Replace the default value with 1995-01-01.
- Save the condition setting.
- Now, add the upper rage. Click Add and choose Date of Birth.
- Click is and select equals or less than.
- Replace the default date with 2009-12-31.
- Save the condition setting.
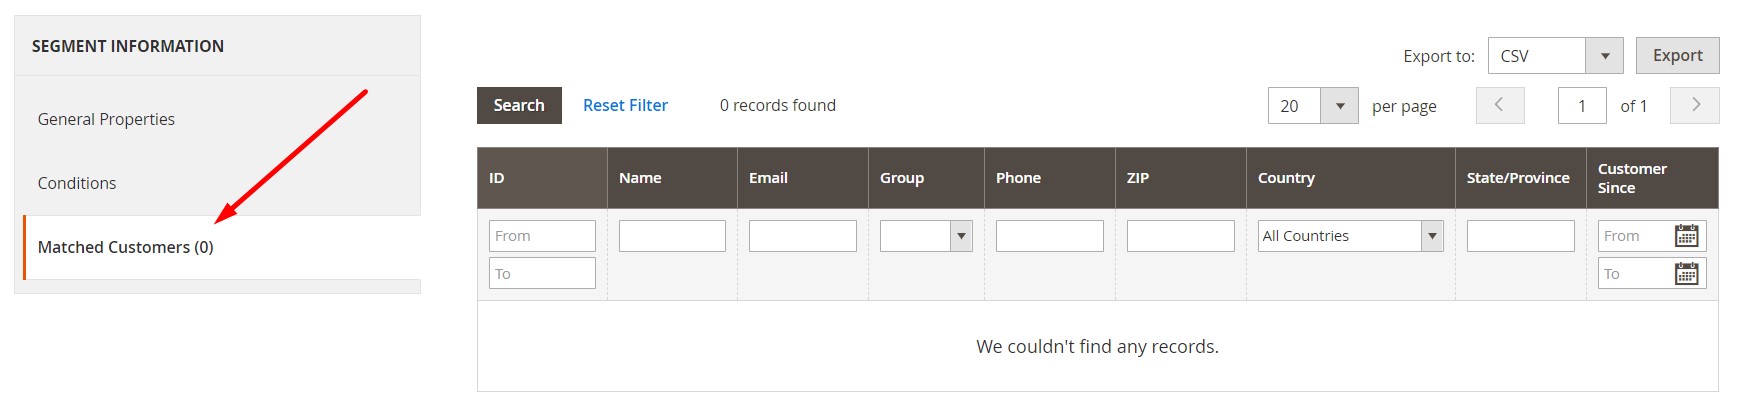
How to view matched customers
Now, when the condition is created, you can view all customers who match it. Click Matched Customers in the left pane to see them.
Use your new Magento 2 customer segment for targeting promotions, content, and mailings.
How to apply customer segments in price rules
You can associate a customer segment with a cart price rule or a banner.
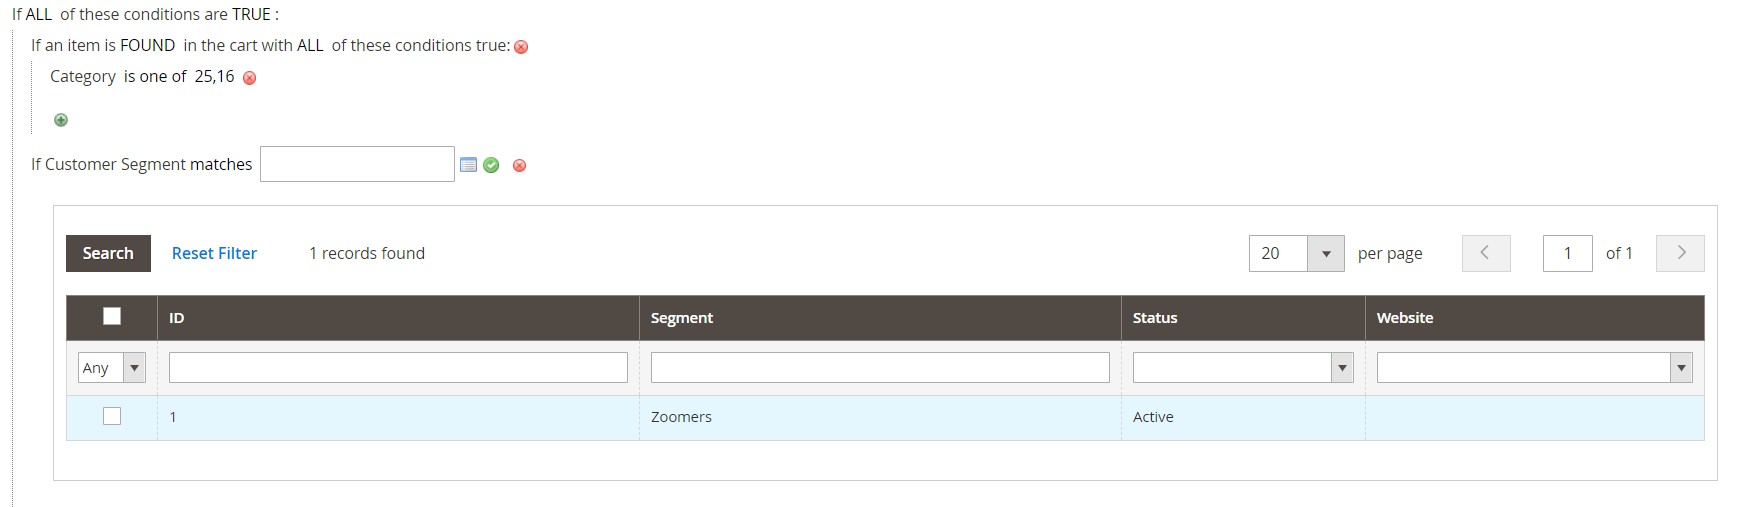
To target a segment with a cart price rule, go to Marketing > Promotions > Cart Price Rules and open a new or existing rule. Scroll down to the Conditions section and expand it. You can add a customer segment as a condition here:
- Click Add and choose Customer Segment from the list of conditions.
- Use matches or another condition operator (does not match, is one of, or is not one of).
- Click the More ( … ) and then Chooser to view the list of customer segments.
- Select segments you want to target with the condition.
- Continue the configuration and save the rule.
As for using customer segments in banners, Magento 2 lets you do the following:
- Open a new or an existing banner under Content-> Elements-> Banners.
- Find the Set Customer Segments option and set it to Specified.
- Select a customer segment to target it with the banner.
- Update the other banner settings if necessary.
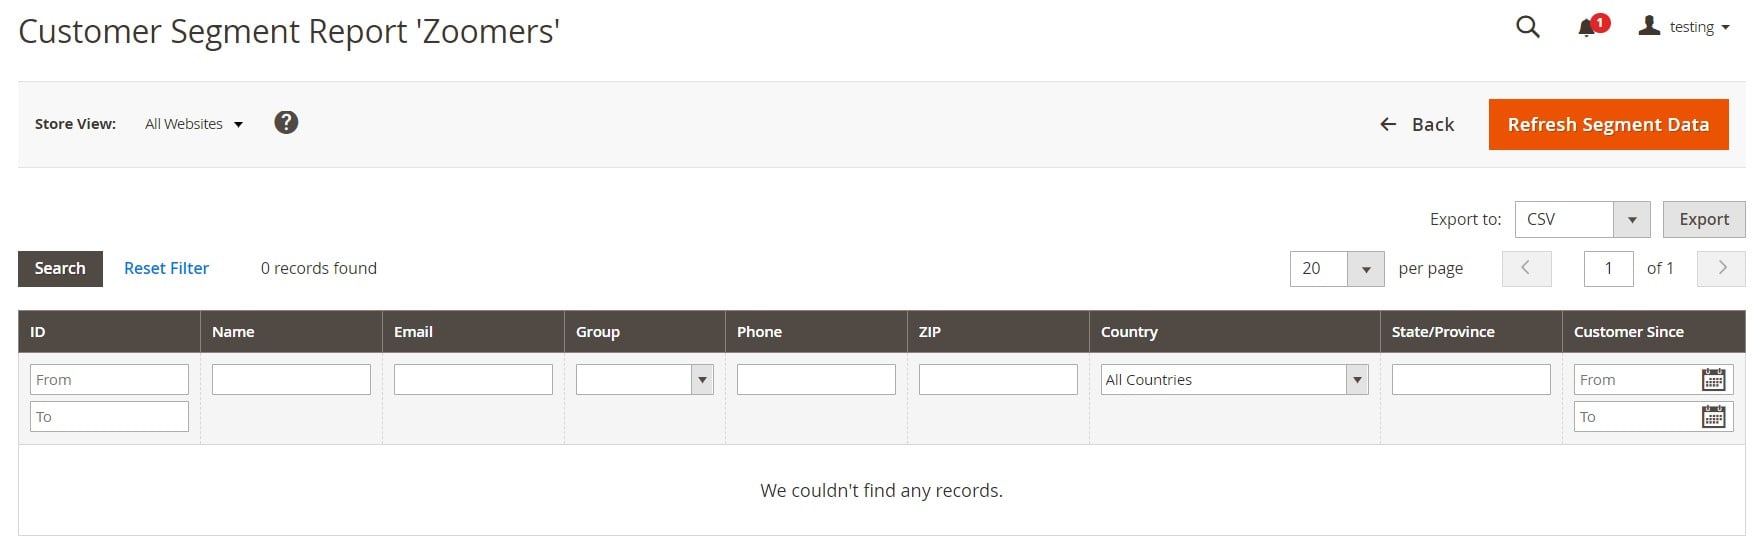
How to view customer segment reports
There is a section among Magento 2 reports that provides information about the number of customers in each segment. You can find it under Reports-> Customers-> Segments. The grid contains all customer segments and shows the number of customers for each one.

Magento 2 lets you view each segment and drill down to a list of customers in it.
How to import & export Magento 2 customer segments
Now, when you know how to work with customer segments in Magento 2, we’d like to draw your attention to their import and export. As shown above, it is possible to export customers from each segment from the Reports section. However, you cannot transfer the corresponding information between your e-commerce website and other systems. It means that the migration of customer segments to another Magento 2 store becomes impossible. You have to follow the guide above to recreate everything manually.
However, you may rely on a third-party import/export solution, such as the Improved Import & Export Magento 2 extension to transfer Magento 2 customer segments. Our solution extends the default data transfer capabilities dramatically. It supports the core Magento 2 entities and provides extended connection possibilities. As a result, Improved Import & Export becomes helpful in both migration to Magento 2 and integration with other platforms.
Along with the module, we also offer the free add-on for Magento 1 to Magento 2 Migration that simplifies data transfers. Note that the add-on works on top of the extension. The two solutions let you import and export Magento 2 entities without headaches. You can launch transfers from a user-friendly admin interface. At the same time, we offer a list of CLI commands to control data transfers.
Also, note that our tool introduces a selective approach to migration so that you can move entity by entity (reindex is required). As a result, downtime is eliminated.
The workflow introduced in Improved Import & Export consists of the following steps:
- You create a new job (import or export depending on your needs);
- Next, turn it on and specify general details (for instance, configure a cron schedule);
- Select an entity you want to transfer (for example, customers or customer segments).
- Configure other parameters, save the job, launch the transfer.
As for other extension features, The Improved Import & Export Magento 2 extension lets you automate both import and export processes with the help of cron schedules. Since it offers the ability to leverage APIs, you can integrate Magento 2 with various complex external platforms, such as different ERPs. You can also import data from intermediary services, such as Google Sheets.
The support for different file formats and archive types allows reducing the time necessary for data transfers. There is no need to convert data to CSV or unpack compressed tables.
Another vital improvement that makes our module better than any solution is the ability to edit attributes automatically. The Improved Import & Export extension provides the ability to apply presets to integrate Magento 2 with external systems. You can find more information here:
Improved Import & Export Magento 2 Extension
Magento 1 to Magento 2 Migration Add-On
regarding the transfer of customer segments between Magento 2 and external systems.
Related posts
 Magento 2 Release Notes
 Shopware 6 Advanced Pricing Guide + Import Tutorial
 How to Import Customers & Customer Addresses to Magento 2
 Magento 2 B2B Company Guide: Revealing Company Structure & Import
 Amasty ChatGPT AI Content Generator for Magento 2
 Adobe (Magento 2) Commerce and Cloud (Enterprise Edition) Specific Features
 How To Bulk Import Products In Shopify: CSV Description & Step-By-Step Guide
 CopyAI Review 2023