
Exploring Shopware: Document Settings in Shopware 6
![]()
Personalized appearance provides you with a strong competitive advantage over other e-commerce shops. The more unique your brand is, the more people can recognize it. Therefore, it is necessary to customize even such small nuances as the design of your documents. Below, we explore the document settings of Shopware 6. The platform lets you tweak your documents, creating templates that suit your business demands. As a store administrator, you get the ability to add new documents as well as edit and delete the existing templates. Let’s see what Shopware 6 document settings are and where to find them.

Note that we provide Shopware integration with external platforms. Contact our support for further information or try our Improved Import & Export Extension for Shopware.
Table of contents
Shopware 6 Document Settings Explained
The Shopware 6 document settings enable you to configure the templates for the documents generated by Shopware. For instance, you can individualize templates for invoices and delivery notes. The corresponding section of settings lets you place your company logo and bank details on the existing templates.
Documents in Shopware 6 Admin
The Document Settings screen is situated in the primary settings section of your administration. You can find it as follows:
- Go to your Shopware 6 administration;
- Open its main menu;
- Proceed to the Settings section;
- Open the Shop subsection;
- Hit the Documents button.
The corresponding screen looks as follows:
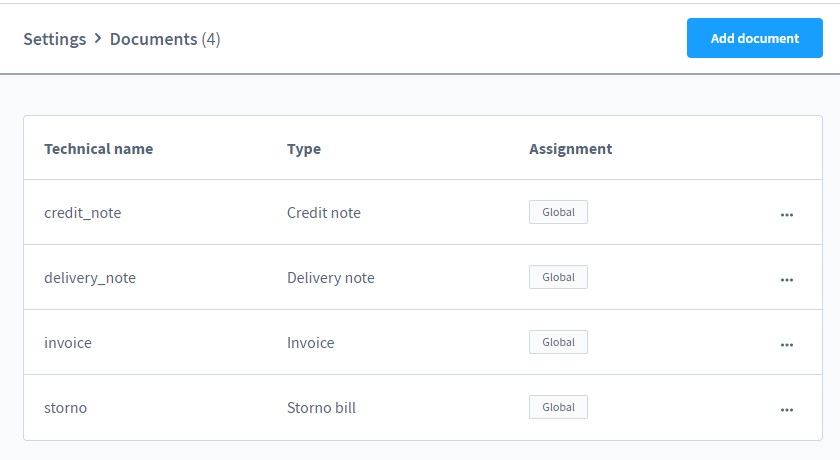
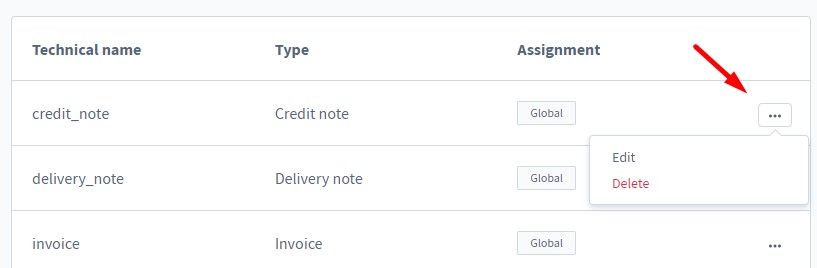
As you can see, it contains an overview of the existing templates. Some of them are available by default in Shopware 6. Thus, you can find global templates for delivery notes, invoices, credit notes, and cancellation invoices. To edit or delete them, use the context menu.
Creating Document Templates in Shopware 6
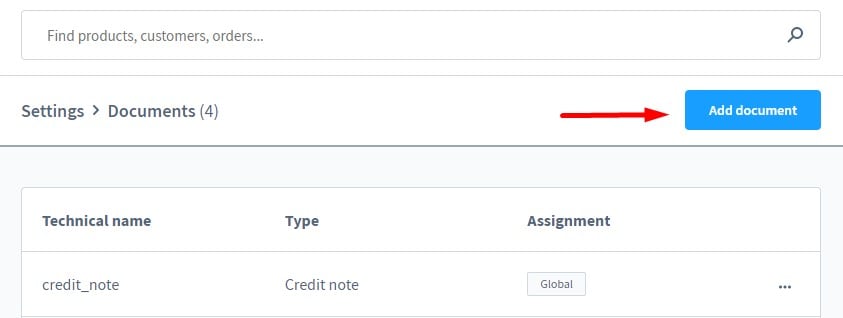
As for creating new templates in Shopware 6, the system lets you individualize them and assign them to multiple sales channels. Click on the Create document button to add a new template.
Note that Shopware 6 offers the same basic setting options for the 4 different document types. The following three sections are at your disposal: Settings, Company Settings, and Assignment.
Settings
The Settings section contains a file name of the generated PDF files, general document styling, displayed order information available in a document.
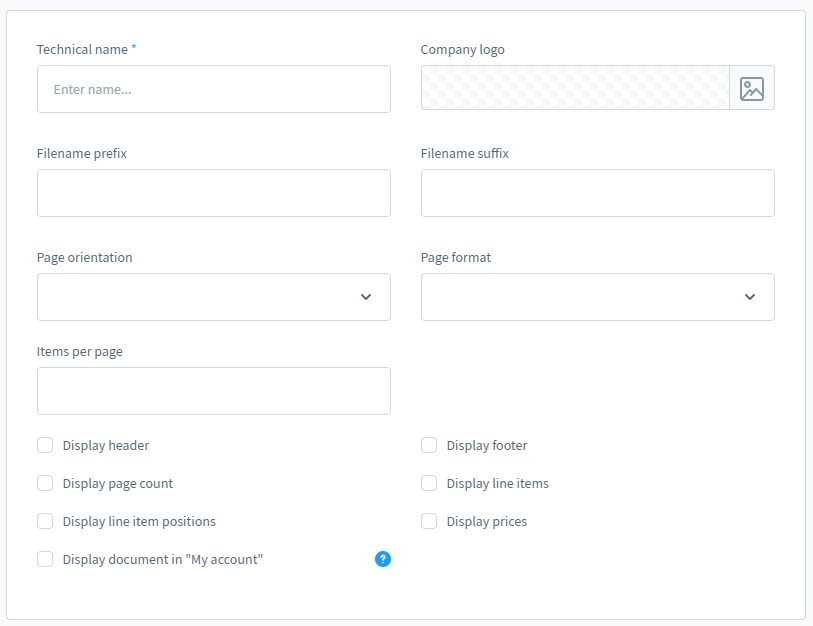
- Technical name – the template name that displays in the template overview;
- Company logo – your company integrated at the top of the document;
- Filename prefix – the value placed before the document number of a PDF document;
- Filename suffix – the value placed behind the document number of a PDF document;
- Page orientation – a portrait or landscape format;
- Page format – a document size;
- Items per page – the number of items after which the page break occurs;
- Display header – enable/disable the document header;
- Display footer – enable/disable the document footer;
- Display page count – enable/disable page numbers at the document bottom.
- Display line items – enable/disable the entire range of ordered items;
- Display line item positions – enable a column for numbering in the document’s product area.
- Display prices – show/hide VAT, product unit price, and total product price;
- Display document in “My Account” – show/hide all documents of this type in the customer’s “My Account” area when they are sent to the prospect. Note that the feature doesn’t work with already existing documents.
In addition to that, you can also display different delivery addresses for invoices. Besides, the system lets you enable the intra-community delivery label and the corresponding Member Countries selection box. Thus, you determine the countries to print the corresponding VAT code for.
Company settings
The Company settings section looks as follows:
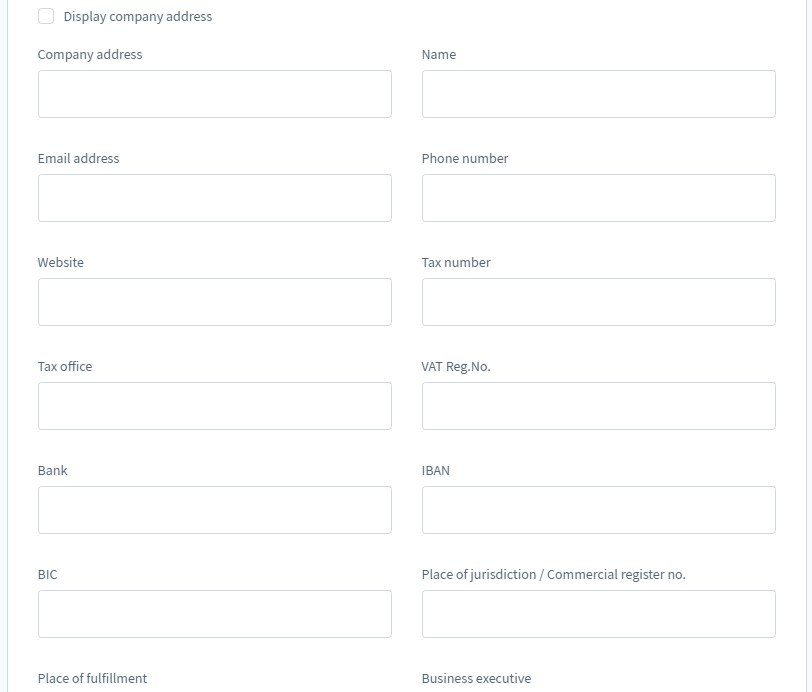
- Display company address – enable/disable the display of the company address above the customer contact information:
- Company address;
- Company name;
- Company email;
- Company URL;
- Company website;
- Company tax number;
- Tax office;
- Company VAT ID;
- Bank name;
- IBAN;
- BIC (12);
- Place of jurisdiction;
- Place of fulfillment;
- Executive director.
Assignment
The Assignment section looks as follows:
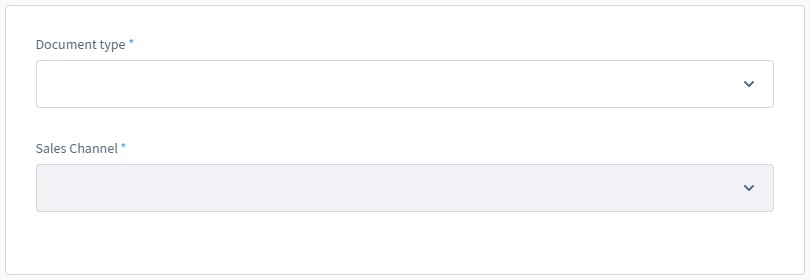
It lets you specify a document type for your new template. You can select one of the following: delivery note, invoice, credit note, or cancellation invoice.
Besides, you can determine for which sales channels the template is applied. Note that Shopware 6 lets you select multiple channels here.
Note that you can change these parameters for custom document templates only.
How to Import Documents to Shopware 6
If you need to import documents to your Shopware 6 website, our team can help you simplify and automate this process. We enhance everything related to data transfers to your e-commerce website. Contact our support for more details and try our to import documents. You can use it to import any entity to Shopware 6. The module provides the ability to create a schedule of updates per each job. It lets you automate import and export processes. Furthermore, it is also possible to match any external data to the corresponding Shopware 6 designation. The extension lets you create schemes used to map the content of imported files to a particular place in your database in accordance with Shopware requirements. Please, consult our specialists regarding documents and document templates as import entities.
Shopware 6 Document Templates FAQ
How to find document templates in Shopware 6?
You can find Shopware 6 document templates under Settings -> Shop -> Documents.
How to add new document templates in Shopware 6?
Hit the Add document button under Settings -> Shop -> Documents to create a new document template in Shopware 6. Next, provide the necessary information as shown above.
How to edit a document template in Shopware 6?
Go to Settings -> Shop -> Documents and use the context menu to edit a document template.
How to delete document templates in Shopware 6?
Go to Settings -> Shop -> Documents and use the context menu to delete a document template.
How to assign document templates to sales channels in Shopware 6?
Use the Assignment section of a document template to assign it to a particular sales channel.
Shopware 6 Essentials FAQ
How to create a Shopware ID?
You get a Shopware ID while creating a Shopware account. The account creation procedure is described below.
How to create a Shopware account?
Hit the Register Now link from the registration page and fill in the form. Next, follow the instructions provided in a confirmation email to create a Shopware account.
What is Shopware master data?
All the information from your Shopware account is called Shopware master data, including physical and digital addresses, phone numbers, etc.
How to add a shop in Shopware?
You can add a Shopware shop in a merchant area as follows. Click a link that initiates this process, choose your shop type (a cloud storefront or an on-premise installation), and provide more information.
How to add a payment method to your Shopware account?
It is possible to configure a payment method – PayPal, credit card, or direct debit – for internal purposes, such as purchases of extensions and themes, under Basic Information -> Accounting. Use it to add a deposit to buy various tools for your e-commerce website.
How to create a deposit in Shopware?
Proceed to Merchant Area -> Shops, and choose a storefront to provide funds to to add a deposit to your Shopware shop. Click Open Account Details and add a deposit that covers the amount of your future purchase.
How to purchase Shopware extensions?
You can purchase extensions for Shopware 6 on the Shopware Marketplace. Alternatively, it is possible to use the Plugin Manager. In both cases, you need to create a deposit equal to the purchase amount. Choose all the necessary tools and complete the purchase.
How to get support in Shopware?
Use financial.services@shopware.com and +49 2555 9288 510 to send inquiries regarding accounting and financial services. Reach Shopware at info@shopware.com and +49 2555 9288 50 with account or license issues.
How to migrate to Shopware 6?
The Improved Import & Export extension provides lots of benefits over the default tools, therefore, it can help you with the migration to Shopware 6. For instance, schedules and mapping schemes are at your disposal for transferring core entities from any external system or Shopware’s previous versions. Since we also offer export solutions for other e-commerce platforms, youcan easily transfer data from Magento, Shopify, and other systems to Shopware 6. Contact our team for more information.
How to automate import and export processes in Shopware 6?
Automation of recurring data transfers is also ampng the benefits of the Improved Import & Export extension for Shopware 6. The module simplifies regular data updates due to schedules of import and export processes. You can launch the corresponding transfers according to the specified time frames with no interaction on the admin side.
How to integrate Shopware 6 with external systems?
The Improved Import & Export extension is also good atsynchronizing Shopware 6 with ERPs, CRMs, accounting tools, and similar tools. The module automates repetitive import and export processes with cron-based schedules and modifies data with mapping presets according to the requirements of your Shopware store or the connected system.
Related posts
 solution25: Your Trusted Shopware Agency in New York & Germany
 How to Import & Export Shopware 6 Advanced Prices as Separate Entity
 How to Import Products to Shopware 6 & Automatically Assign Them to Parent Categories: A Time-Saving Import Feature You Shouldn’t Miss
 Take Full Control over Product Visibility in Shopware 6: Introducing the ‘Replace Product Sales Channels’ Feature for Import
 New in Shopware 6 Product Import: Control Topseller Products with the markAsTopseller Field
 How to Boost Sales with Shopware 6 Cross Selling: The Ultimate 2025 Guide
 E-Commerce Impulse Buys Guide: Boost Your Sales with Effective Strategies and Smart Tools
 Shopify Gift Cards Explained: How to Set Up, Manage & Sell Them