
Exploring Magento 2 Backend: Tools (Cache Management, Index Management, Backups)
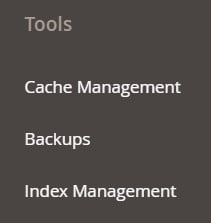
You can find numerous useful tools in the Magento 2 backend. However, there is a separate section called Tools under Admin -> System. It contains the following three subsections: Cache Management, Index Management, and Backups. Below, we travel over these screens and describe the opportunities they provide.

Table of contents
- 1 Magento 2 Cache Management
- 1.1 How to Access Cache Management in Magento 2
- 1.2 How to Refresh Specific Caches in Magento 2
- 1.3 How to Flush the Product Image Cache in Magento 2
- 1.4 How to Flush the JavaScript/CSS Cache in Magento 2
- 1.5 How to Flush Static Files Cache in Magento 2
- 1.6 How to Flush Magento 2 Cache Using the Command Line
- 2 Index Management
- 3 Magento 2 Backups
Magento 2 Cache Management
You can use the Magento 2 cache management system to get the maximum out of the performance of your e-commerce storefront. Every time your Magento installation is about to experience a slowdown, a notice about the necessity to refresh cache appears at the top of the workspace, guiding you through the process.
The Cache Management page itself looks as follows:
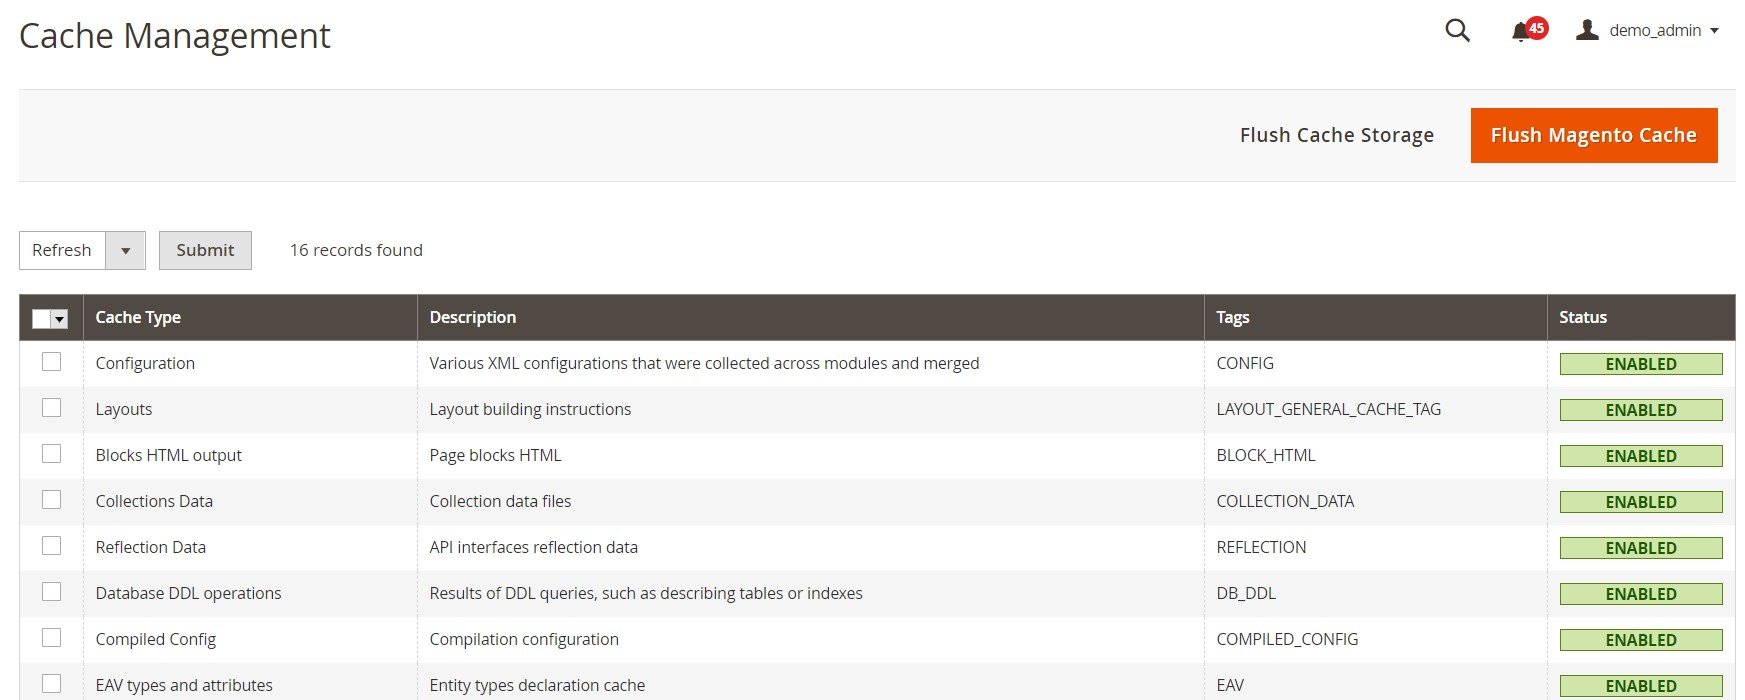
As you can see, it displays the status of each primary cache as well as associated tags. You can flush the Magento Cache or the all-inclusive Cache Storage (The large buttons in the upper-right corner). Additional buttons are situated below the grid:
- Flush Catalog Images Cache – this button is responsible for pre-generated product images files;
- Flush JavaScript/CSS Cache – this one impacts JavaScript and CSS files;
- Flush Static Files Cache – click it to refresh preprocessed view files and static files.

Note that it is recommended to refresh the browser after clearing a cache. Thus, you can see the most recent files. Also, bear in mind that clearing the Magento cache and clearing the web browser cache are unrelated procedures. Therefore, it is also a good idea to clear the browser cache to make the updated content visible.
Since Magento 2 cache management has a considerable impact on the system, it can be restricted due to security concerns. Your backend section provides the ability to implement role-based access to specific cache maintenance. Depending on who an admin user is, you can provide them with options to view, toggle, or flush caches.
Other best practices for cache management in Magento 2 include:
- Flush the cache after installing extensions.
- Flush the cache after installing Magento or upgrading to a new version.
- Don’t clear the cache during peak times.
- Don’t flush the cache when reindexing.
How to Access Cache Management in Magento 2
There are two ways to access cache management in Magento 2. When a message about the necessity to refresh the cache appears, you can access the Cache Management page by clicking the Cache Management link in it.
At the same time, it is possible to get to the Magento 2 cache management page in your Admin. It is situated under System -> Tools -> Cache Management.
How to Refresh Specific Caches in Magento 2
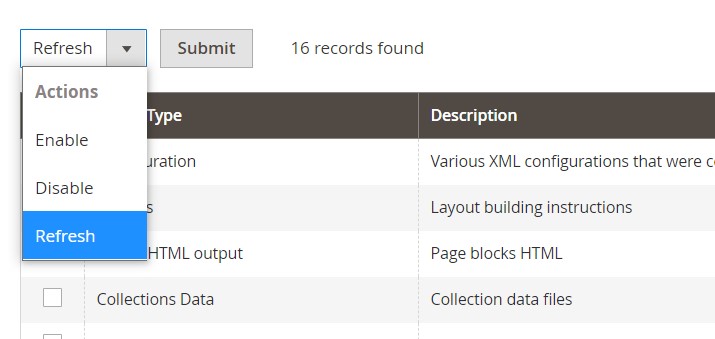
Go to a cache management page and select a checkbox in the first column for each cache to be refreshed. Next, click the Actions dropdown and choose Refresh. Click Submit to refresh the selected Magento 2 caches.
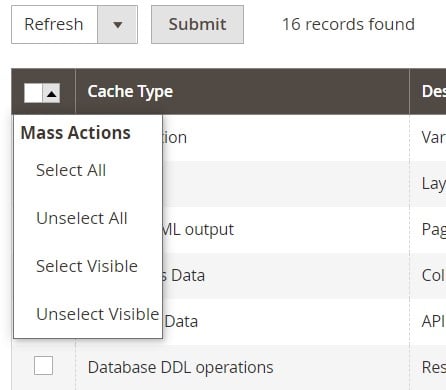
Note that you can select either several caches manually or choose a group of caches via Mass Actions (Select All or Select Visible). Next, follow the steps mentioned above.
How to Flush the Product Image Cache in Magento 2
Scroll down to the end of the Cache Management grid. Here, you will find the Additional Cache Management section. Click the Flush Catalog Images Cache button to clear pre-generated product image cache. The system should notify you that the image cache was cleaned successfully. The corresponding message appears at the top of the workspace. Also, don’t forget to clear the browser cache.
How to Flush the JavaScript/CSS Cache in Magento 2
You can flush JS and CSS cache in the same section of the Magento 2 Cache Management screen, as we’ve just described. By clicking the Flush JavaScript/CSS Cache button, you clear all JavaScript and CSS merged into a single file. The corresponding message displays if the procedure is successful. And it is recommended to check up on the cache of your browser.
How to Flush Static Files Cache in Magento 2
The third button that appears in the section mentioned above provides the ability to flush static files cache in Magento 2. The procedure is absolutely the same, including a success message and browser cache.
How to Flush Magento 2 Cache Using the Command Line
Use the following command to flush cache in Magento 2 with the help of the command line:
|
1 |
bin/magento cache:flush [type] ... [type] |
Replace [type] with a space-separated list of cache types or omit it to flush all cache types at the same time. For further information, follow this link: .
Index Management
Now, let’s take a look at index management opportunities provided in Magento 2. Reindexing and caching have different purposes. Up-to-date indexes are a foundation for increased search performance as well as faster data retrieval for storefronts since they help to track database information. Caches, in their turn, are a backbone for loaded data, images, formats, etc. They are responsible for increased performance while loading and accessing the storefront.
And if you have to flush cache manually, Magento reindexes automatically whenever specific conditions are met. Price changes, new shopping cart price rules, catalog modifications are actions that trigger reindexing.
The system optimizes its performance by accumulating data into special tables. This process heavily relies on indexers. Every time a reindex is required, Magento 2 displays a notification at the top of the page.
The indexed tables must be updated (reindexed) upon data changes. Magento does everything for you, launching background processes so that your store remains accessible. However, it is possible to set indexers to either update on save or on schedule, except Customer Grid – it can be updated on save only.
To avoid issues related to multiple Admin users, who update objects causing automatic reindexing, it is recommended to set all indexers to run on schedule. Thus, you will eliminate a deadlock caused by objects with interdependencies. Other best practices for reindexing include:
- Reindex when updating data in Magento.
- Set indexers like category and products to reindex on schedule due to potential reindex looping. Run this process during non-peak hours.
- Do not flush the cache when reindexing. However, you need to flush the cache and reindex for fresh Magento installations.
- Flush the browser cache after applying updates to your e-commerce website.
How to Access Index Management in Magento 2
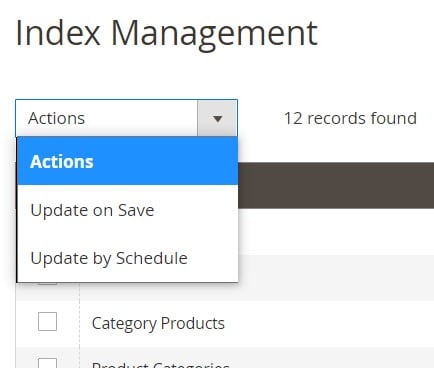
You can access the index management page in Magento 2 under System -> Tools -> Index Management. The corresponding grid lets you configure the index mode.

How to Change the Index Mode in Magento 2
Go to the Index Management screen and select a checkbox for each indexer that you want to change. Next, choose Update on Save or Update by Schedule from the Actions dropdown. Don’t forget that Customer Grid can be reindexed via Update on Save. Click Submit to apply changes.
Magento 2 Backups
With Magento 2, you get the ability to create backups of different parts of your e-commerce website, including its file system, database, and media files. Besides, Magento 2 lets you roll back automatically. You can find records for all backups in the grid on the Backups page. Note that when you delete a record from the list, you also eliminate the archived file.
Magento 2 compresses database backup files into the GZ format. It also utilizes the TGZ format for the system, database, and media backups.
Bear in mind that you should restrict access to backup tools providing different admins with different access levels. Also, note that it is recommended to create backups before installing extensions and applying updates.
Another important notice is that Magento backup features are deprecated as of v2.3.0. Therefore, you need to use third-party services.

How to Create a Backup in Magento 2
If you still use older Magento 2 versions, it is possible to create a backup under System -> Tools -> Backups. The system lets you create one of the following backup types:
- System Backup – a complete backup of the database and the file system + media folder (select the Include Media folder to System Backup checkbox);
- Database and Media Backup – a backup of the database and media folder;
- Database Backup – a backup of the database.
You can put the store into maintenance mode during the backup. It is only necessary to select the corresponding checkbox. Note that maintenance mode is disabled automatically
when the procedure is complete.
How to Schedule Backups in Magento 2
You can schedule backups in Magento 2 under Stores -> Settings -> Configuration. Expand Advanced in the left panel and select System. Find the Backup Settings section and expand it. You can enable schedules for backups as well as specify several other parameters, such as Scheduled Backup Type, Start Time, Frequency, and Maintenance Mode. Don’t forget to save your work.
Related posts
 Magento 2 B2B Company Guide: Revealing Company Structure & Import
 Amasty ChatGPT AI Content Generator for Magento 2
 How to Import Customers & Customer Addresses to Magento 2
 Adobe (Magento 2) Commerce and Cloud (Enterprise Edition) Specific Features
 How To Bulk Import Products In Shopify: CSV Description & Step-By-Step Guide
 Magento 2 Release Notes
 A Complete Guide to Shopify Customer Import
 Shopware 6 Advanced Pricing Guide + Import Tutorial