
Exploring Shopware: Language Packs & Migration Assistant in Shopware 6 Settings
![]()
A Shopware 6 website offers separate settings for different sections of your e-commerce website. Among them, you can find a screen dedicated to extensions. Below, we explore what’s situated on it. The following article sheds light on how to find Extensions in the Shopware 6 settings. We guide you through the admin interface to show the fastest way to the available tools. Besides, you will learn how to manage Shopware 6 language packs. We explain how to extend the availability of languages on your e-commerce website. Shopware 6 migration assistance is another topic covered in the article below. Also, check this article: How To Set Up A Shopware Store In A Foreign Language.

Note that we provide Shopware integration with external platforms. Contact our support for further information or try our Improved Import & Export Extension for Shopware.
Table of contents
- 1 How to Find Extensions in The Shopware 6 Settings
- 2 Shopware 6 Language Packs
- 3 Shopware 6 Migration Assistant
- 4 How to Import Data from Shopware 5 and other platforms to Shopware 6
- 5 Shopware 6 Essentials FAQ
- 5.1 How to create a Shopware ID?
- 5.2 How to create a Shopware account?
- 5.3 What is Shopware master data?
- 5.4 How to add a shop in Shopware?
- 5.5 How to add a payment method to your Shopware account?
- 5.6 How to create a deposit in Shopware?
- 5.7 How to purchase Shopware extensions?
- 5.8 How to get support in Shopware?
- 5.9 How to migrate to Shopware 6?
- 5.10 How to automate import and export processes in Shopware 6?
- 5.11 How to integrate Shopware 6 with external systems?
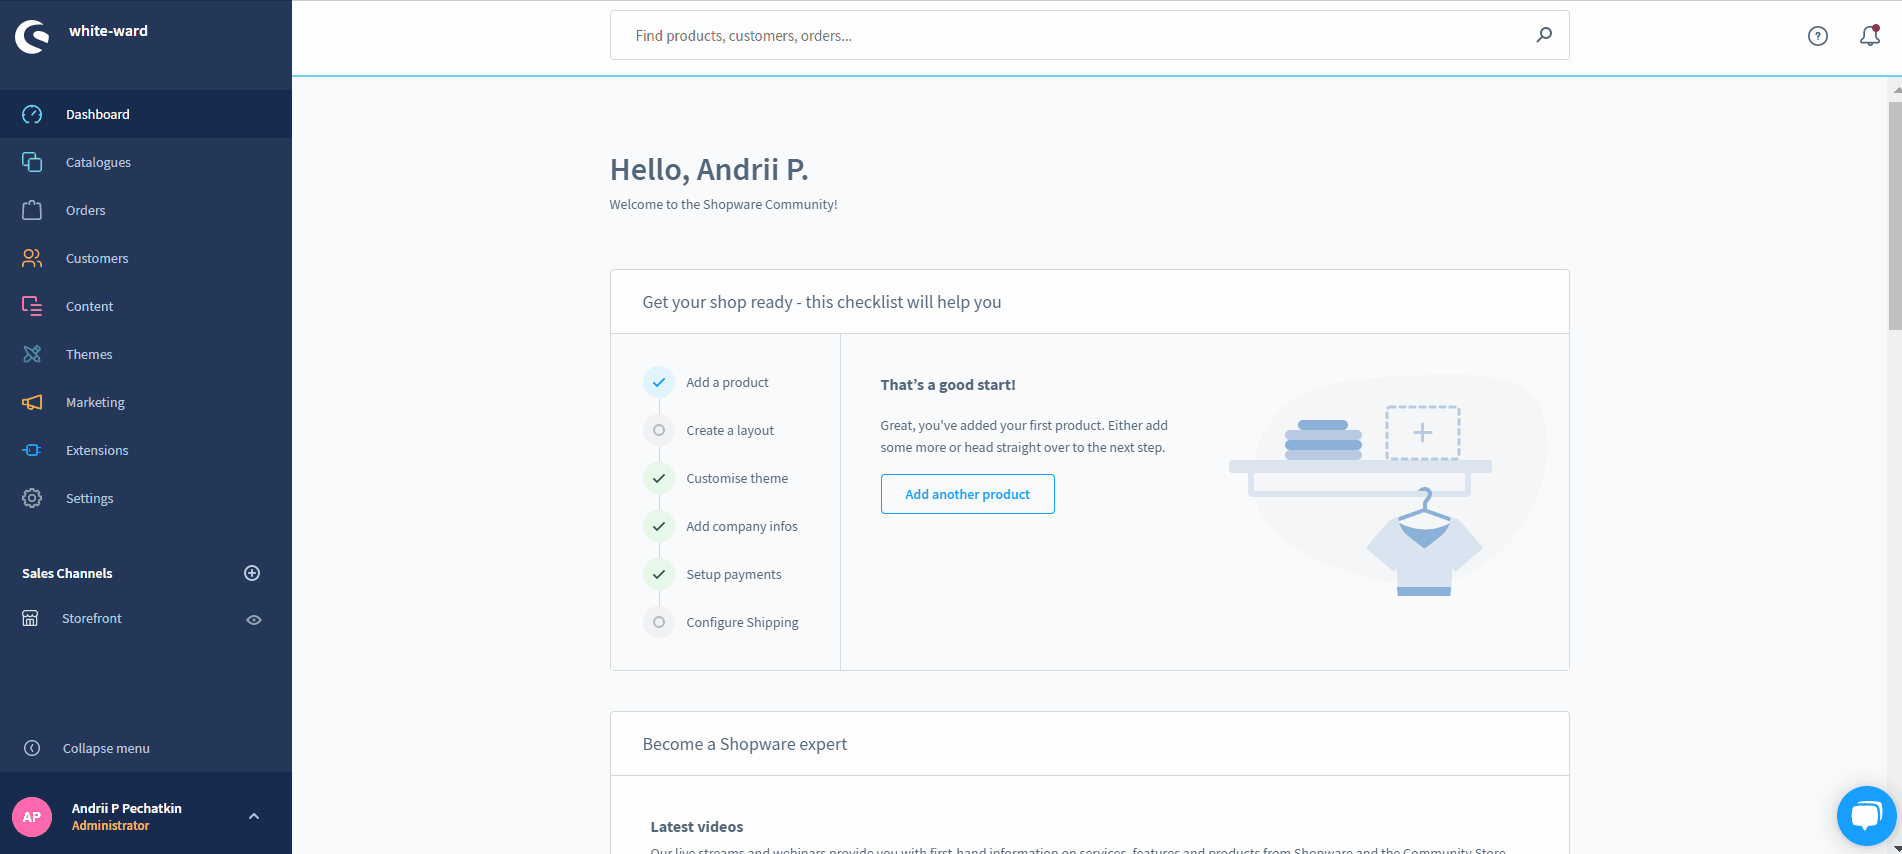
How to Find Extensions in The Shopware 6 Settings
From your main menu, go to Settings -> Extensions. Here, you can find two links: Language Packs and Migration Assistant.
Let’s take a closer look at what’s hidden behind both sections.
Shopware 6 Language Packs
The following languages are at your disposal in Shopware 6:
- Bahasa Indonesia (id-ID);
- Bosanski (bs-BA);
- Čeština (cs-CZ);
- Dansk (da-DK);
- Español (es-ES);
- Français (fr-FR);
- Italiano (it-IT);
- Latviešu (lv-LV);
- Magyar (hu-HU);
- Nederlands (nl-NL);
- Norsk (nn-NO);
- Polski (pl-PL);
- Português (pt-PT);
- Română (ro-MD);
- Suomi (fi-FI);
- Svenska (sv-SE);
- Tiếng Việt Nam (vi-VN);
- Russian (ru-RU).
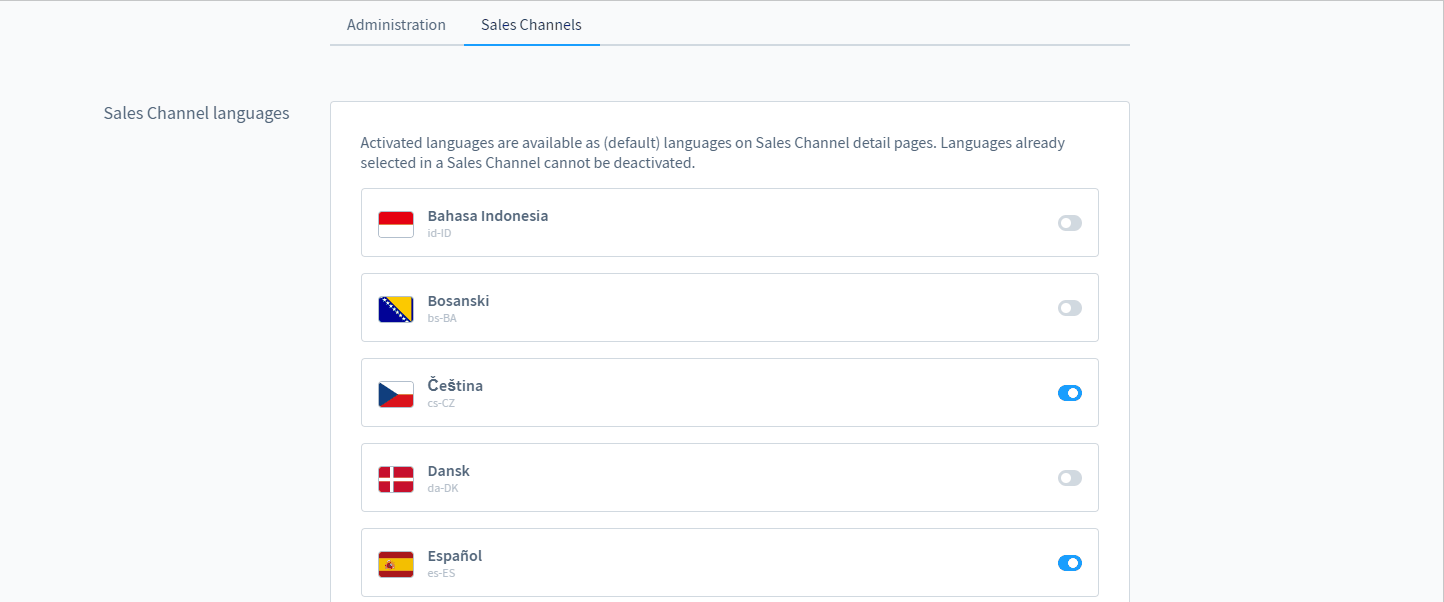
The good thing is that you can separately configure language packs for your admin and storefront in Shopware 6:
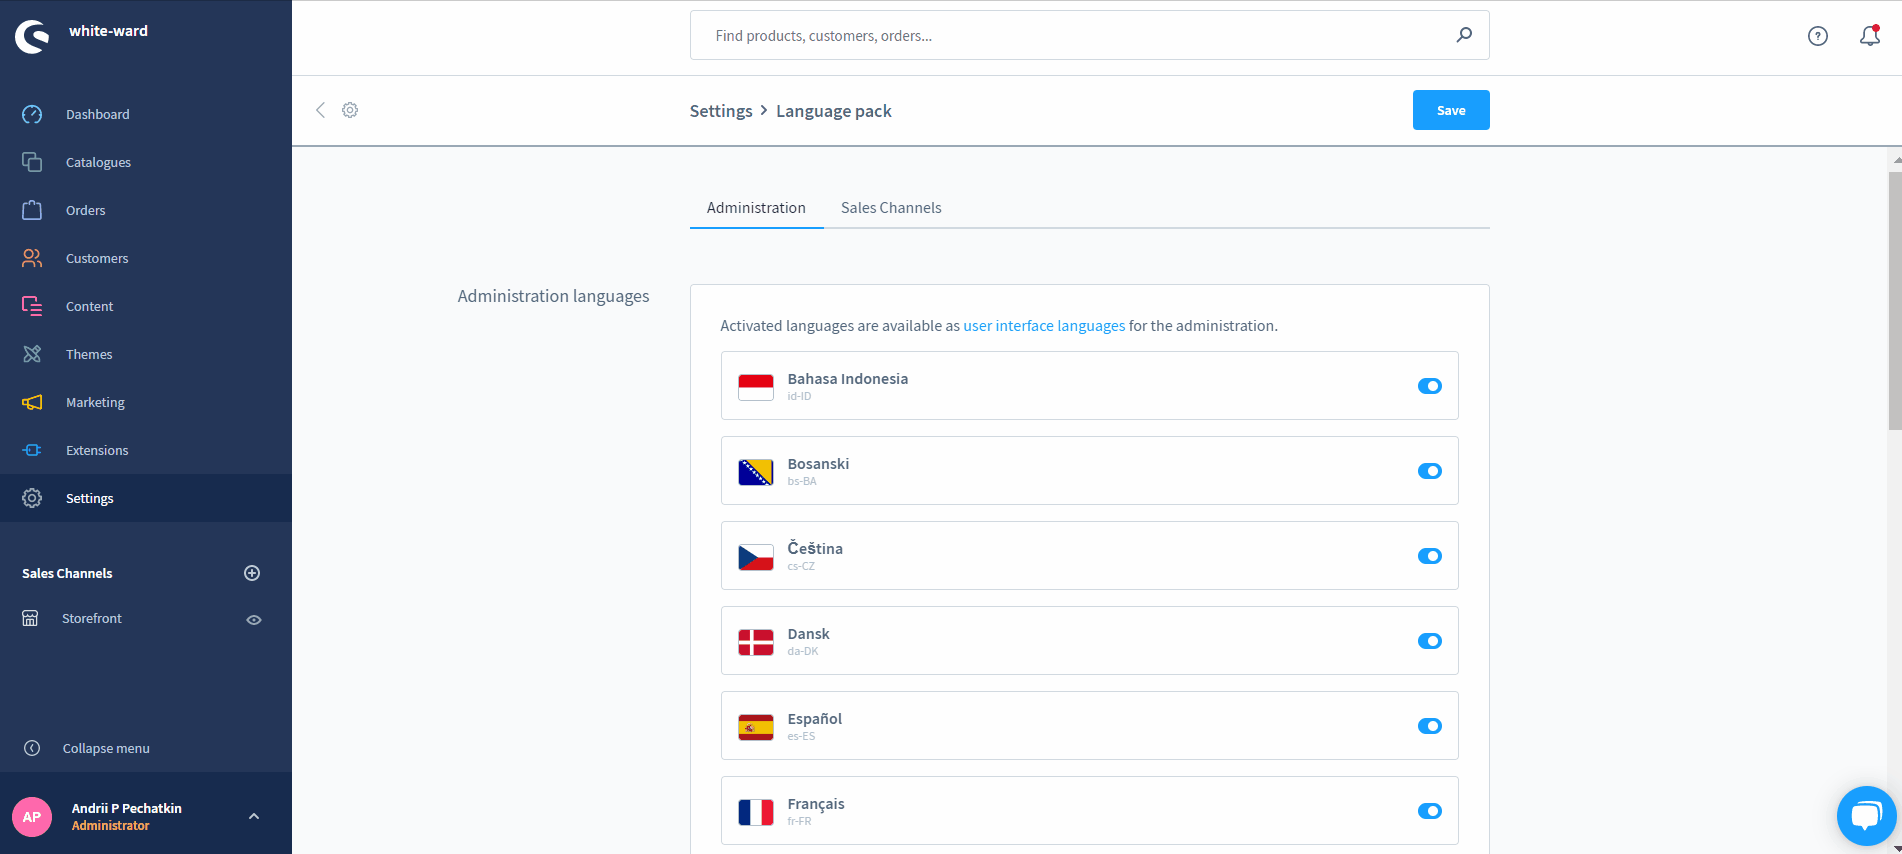
In the first case, activated packs are available as user interface languages for the administration. In the second case, they are available as default languages on Sales Channel detail pages. Note that it is impossible to disable languages already selected in the Sales Channel settings.
How to add a new language in Shopware 6
To enable a language in Shopware 6, do the following:
- Go to the language pack screen;
- Choose whether you want to activate a new language for your Shopware 6 admin or storefront: Proceed to Administration or Sales Channels accordingly;
- On a corresponding tab, find the language you want to add;
- Switch the toggle situated on the right to the active positions – it turns blue.
That’s it! Now, you know where Shopware 6 language packs are situated and how to enable them for the administration and storefront.
Shopware 6 Migration Assistant
Migration Assistant is another section available under the Extensions screen of Shopware 6 settings. This instrument is developed to help you connect your existing shop to Shopware 6. It moves your data step by step from one platform to another.
The Migration Assistant welcomes you with the following message:
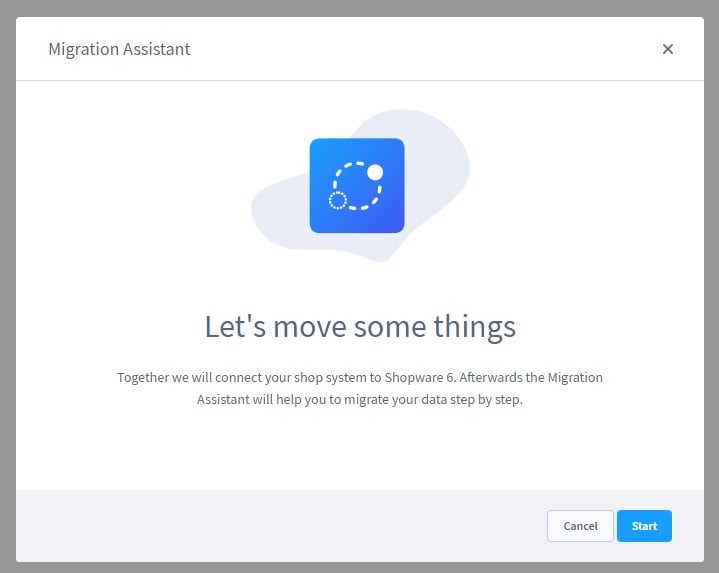
You can start the data transfer to Shopware 6 or skip it.
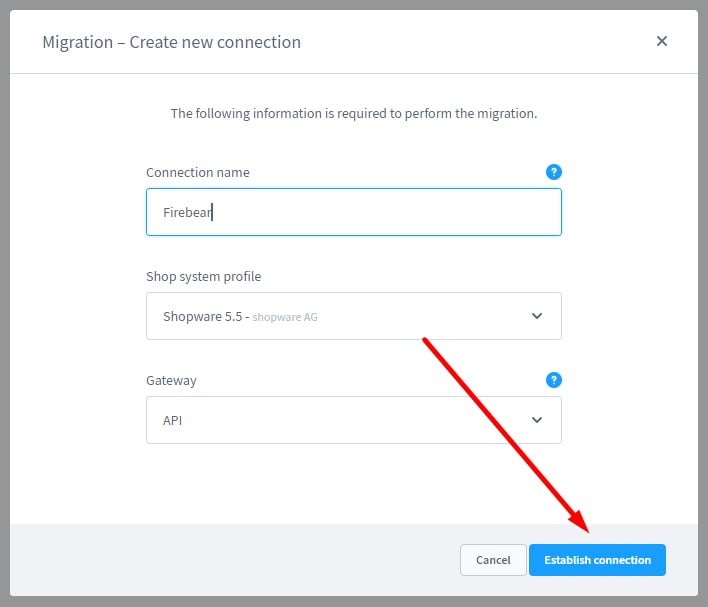
In the first case, name your connection, choose the software version of your existing website, and select a gateway.

While all is clear with the connection name, we should be more specific with the remaining two fields. In Shop System Profile, you can only choose from the following Shopware versions: 5.4, 5.5, and 5.6. Unfortunately, neither older versions nor other platforms are supported in the Shopware 6 Migration Assistant.
As for the Gateway field, it only provides the ability to rely upon the API connection. Other integrations are not supported.
However, you can address both issues with the help of the Improved Import & Export app for Shopware 6. The tool lets you migrate data to Shopware 6 from all external systems using several connection types. We focus on the application in the last chapter of this article.
So, when your new connection is named and the other two parameters are configured, you can establish the new connection. Hit the corresponding button:
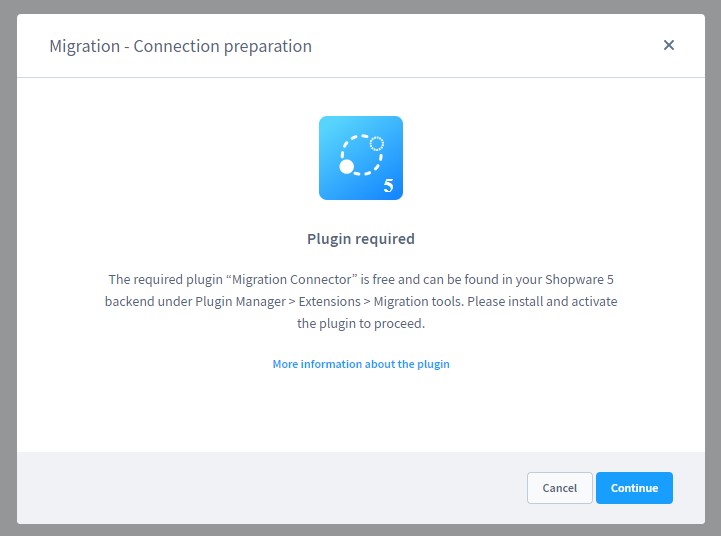
If you haven’t installed the Migration Connector plugin yet, the system will notify you as follows:
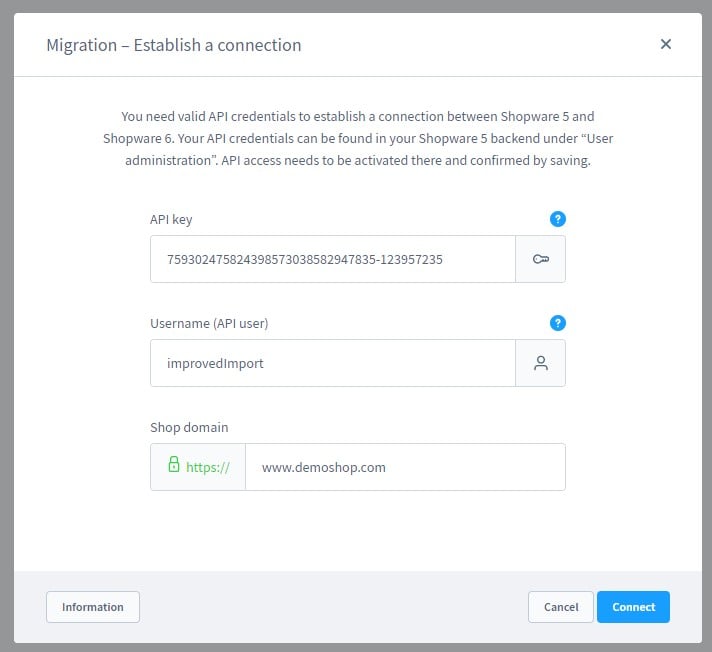
Also, you need valid API credentials to establish a connection between your Shopware 5 and Shopware 6 stores. You can find all the necessary information in your Shopware 5 backend under “User administration”. Activate API access there and confirm it by saving.
As for the Shopware 6 Migration Assistant, it requires your API key, API user, and shop domain. After specifying all these parameters, you can connect your two stores to import data from Shopware 5 to Shopware 6.
If anything goes wrong, you will see the following message:
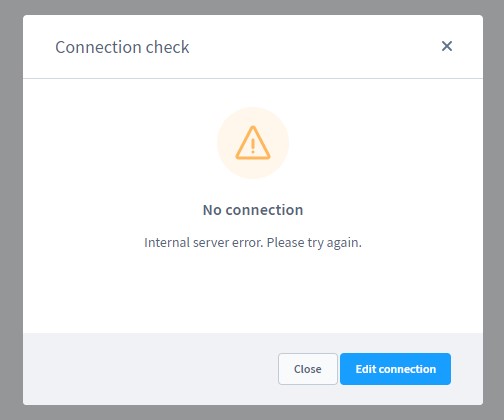
However, you can return to the previous stage. Use the Edit Connection button to address possible issues and recreate the connection successfully.
The successful migration is highlighted with the corresponding alert.
How to Import Data from Shopware 5 and other platforms to Shopware 6
Our team lets you simplify and automate various processes associated with data migration to Shopware 6. Contact our support for more details and try our . The module provides the ability to automate transfers using cron-based schedules. Besides, you can utilize it to apply different schemes to map attributes to one another. For instance, if you migrate from Magento 2 to Shopware 6, it is necessary to edit the content of the tables you transfer manually to make Magento 2 data suitable for Shopware 6. With our extension, you create and apply a mapping scheme that does all the work for you. Thus, you can seamlessly migrate to Shopware 6. Please, consult our specialists before using the module for doing that. The migration procedure is complicated and involves numerous steps. Therefore, our consultancy will be helpful.
Shopware 6 Essentials FAQ
How to create a Shopware ID?
With ShopwareID, you get access to an entirely new ecosystem. Your e-commerce journey starts here. Shopware provides your ID when you create your account. How to do that, you will ask?
How to create a Shopware account?
Go to a registration page to create a new Shopware account. Hit the Register Now link and fill in the form. Next, follow the instructions from a confirmation email.
What is Shopware master data?
When you go through the registration procedure and configure your account afterward, you provide information gathered under the moniker of Shopware master data. This information combines company address, email, phone, name, and other details.
How to add a shop in Shopware?
After your Shopware account is configured, you can proceed to the next essential step – the creation of a Shopware shop. Go to your merchant area and click the link situated on the start screen’s right part. Choose either a cloud storefront or an on-premise installation and provide information about your new shop.
How to add a payment method to your Shopware account?
Now, it is necessary to add a payment method to be able to buy extensions and themes for your new Shopware shop. Go to Basic Information -> Accounting and choose whether it should be PayPal, credit card, or direct debit.
How to create a deposit in Shopware?
With an active payment method, you create a deposit and then spend it for purchasing themes and extensions. You can transfer funds to your e-commerce website as follows. Go to your Merchant Area -> Shops, specify a shop to provide funds to, click Open Account Details, and initiate the transaction. That’s it!
How to purchase Shopware extensions?
Now, you can purchase extensions and themes on the Shopware Marketplace or in the Plugin Manager. Select a tool you want to buy and complete the purchase.
How to get support in Shopware?
Shopware kindly asks to divide inquiries into several categories and use a corresponding support channel per each type. Send questions regarding your account or license should to info@shopware.com or +49 2555 9288 50. Provide inquiries regarding accounting and financial services to financial.services@shopware.com and +49 2555 9288 510.
How to migrate to Shopware 6?
Since the default tools are not enough for migrating to Shopware, we recommend using third-party extensions to achieve seamless data transfers. For instance, you may rely on the Improved Import & Export tool. The module provides the ability to move core entities to your new website from any external platform. Furthermore, you can also transfer data from Shopware’s previous versions. Since we offer extensions for other e-commerce platforms, you can leverage them to create the output on your current storefront to automate and simplify all the related synchronizations. Contact us for more information.
How to automate import and export processes in Shopware 6?
The Improved Import & Export extension is also suitable for regular data updates. The module provides the ability to create a schedule per each data transfer, automating the updates. The extension launches the corresponding import and export processes, following the time frames you set. No interaction on the admin side is required.
How to integrate Shopware 6 with external systems?
Since the Improved Import & Export extension can connect to any system beyond Shopware, you can use it to integrate your store with ERPs, CRMs, accounting tools, and other similar systems. Automate repetitive import and export processes, saving tons of time daily. Also, note that the module modifies data according to the requirements of your Shopware store upon import and the connected platforms upon export.
Related posts
 Shopware 6 Advanced Pricing Guide + Import Tutorial
 A Complete Guide to Shopify Customer Import
 How To Bulk Import Products In Shopify: CSV Description & Step-By-Step Guide
 Magento 2 B2B Company Guide: Revealing Company Structure & Import
 How to Import Customers & Customer Addresses to Magento 2
 Amasty ChatGPT AI Content Generator for Magento 2
 Reputon Amazon Importer Review: How to Connect Shopify to Amazon in a Few Clicks
 CopyAI Review 2023