Exploring Shopware: Account Settings in Shopware 6

A Shopware 6 website offers separate settings for your account in the administration. Below, we explore the corresponding admin screen. This article will teach you where to look for Shopware 6 account settings and what configurations to apply there. We explore such Shopware 6 account settings screens as Billing, Company, Plans, and Cancellation. Of course, there is also a chapter dedicated to the corresponding import and export processes.

Note that we provide Shopware integration with external platforms. Contact our support for further information or try our Improved Import & Export Extension for Shopware.
Table of contents
- 1 How to Find Shopware 6 Account Settings
- 2 Shopware 6 Account Settings: Billing
- 3 Shopware 6 Account Settings: Company
- 4 Shopware 6 Account Settings: Plans
- 5 Shopware 6 Account Settings: Cancellation
- 6 How to Import Data to Shopware 6
- 7 Shopware 6 Essentials FAQ
- 7.1 How to create a Shopware ID?
- 7.2 How to create a Shopware account?
- 7.3 What is Shopware master data?
- 7.4 How to add a shop in Shopware?
- 7.5 How to add a payment method to your Shopware account?
- 7.6 How to create a deposit in Shopware?
- 7.7 How to purchase Shopware extensions?
- 7.8 How to get support in Shopware?
- 7.9 How to migrate to Shopware 6?
- 7.10 How to automate import and export processes in Shopware 6?
- 7.11 How to integrate Shopware 6 with external systems?
How to Find Shopware 6 Account Settings
Your Shopware 6 account settings are situated in the main menu under Settings -> Account.
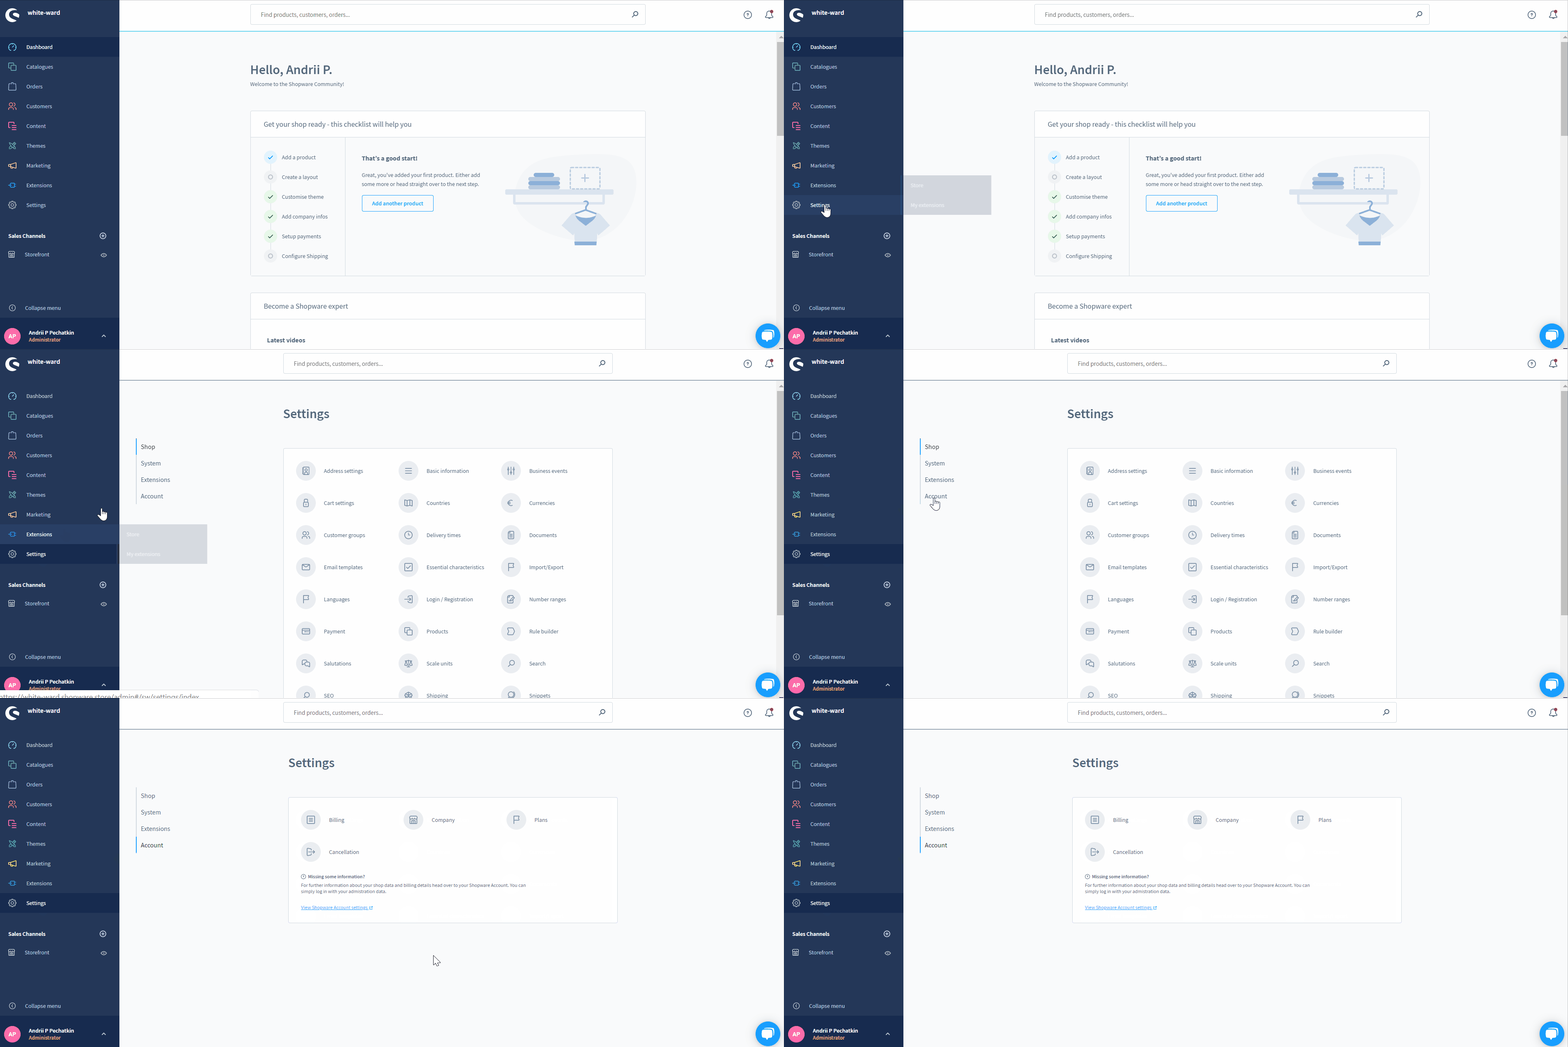
The section is divided into the following four screens:
- Billing;
- Company;
- Plans;
- Cancellation.
Also, you can proceed to your Shopware account and further information about your shop data and billing details.
Shopware 6 Account Settings: Billing
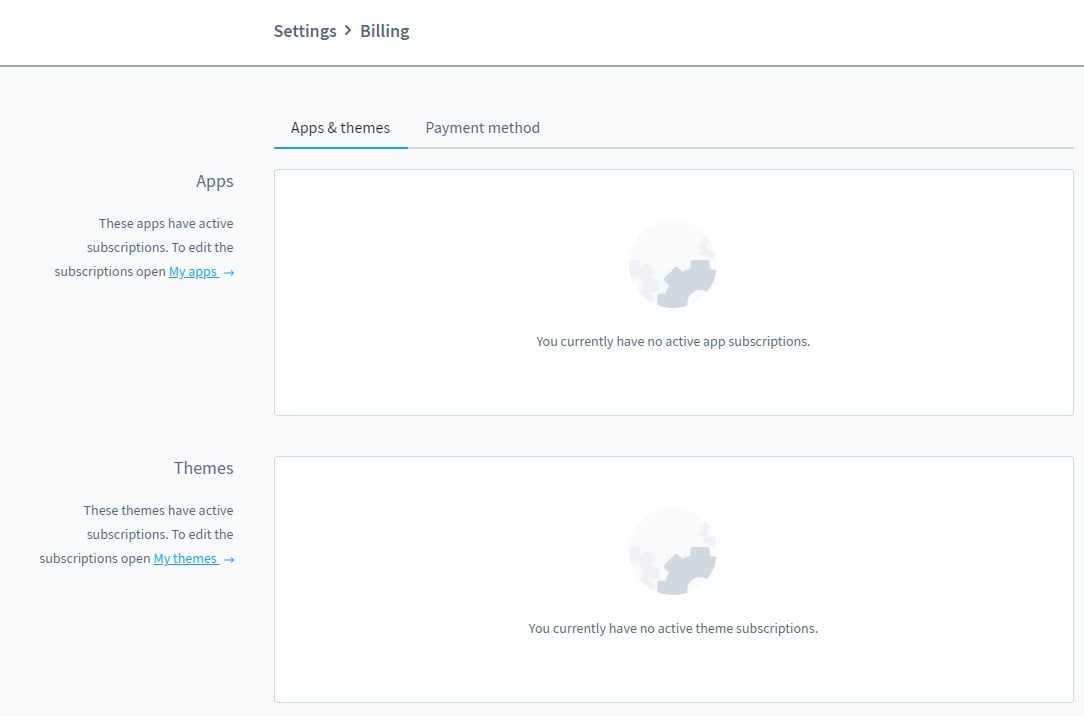
This section, in its turn, is divided between the two tabs: Apps & themes and Payment methods.
The first one lists all applications and themes that have active subscriptions. Shopware 6 lets you edit all the billing details there. In our demo shop, we have no apps and themes that have subscriptions, so the tab looks as follows:
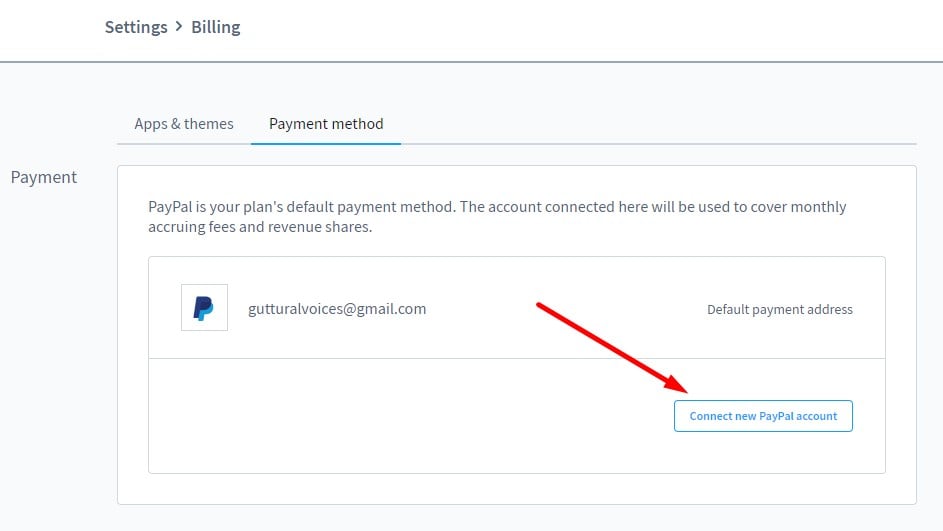
As for the Payment method tab, it contains your plan’s default payment method. The account connected here is used to cover monthly accruing fees and revenue shares. You can connect a new PayPal account on this page.
Shopware 6 Account Settings: Company
The Company Settings page of your Shopware 6 website is divided into the following three sections:
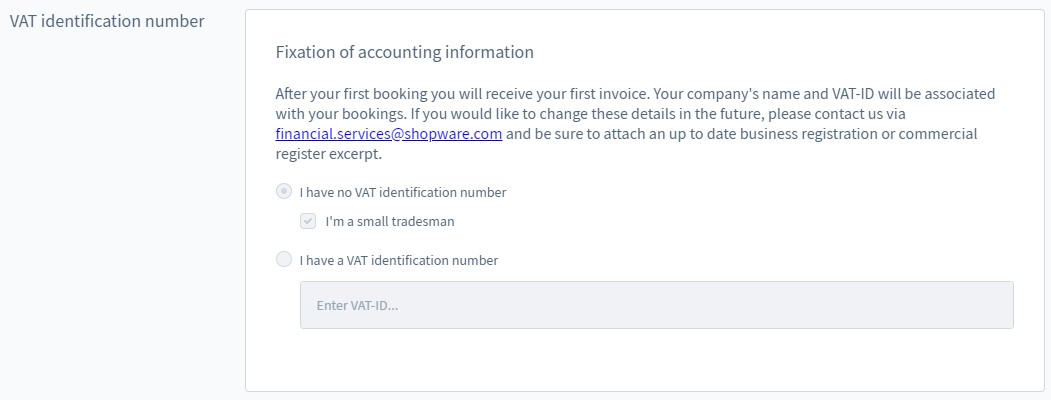
- VAT identification number;
- Contact information;
- Billing information.
You may have no VAT identification number if you are a small trader. In another case, specify the corresponding data here:
In Contact information, specify title, name, email, phone, and country.
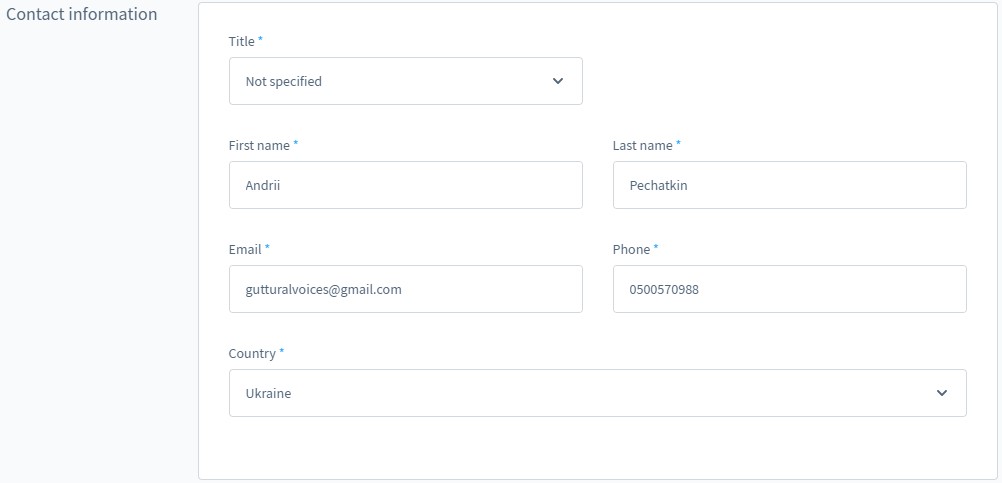
In Billing information, specify company name, industry sector, email, and address.
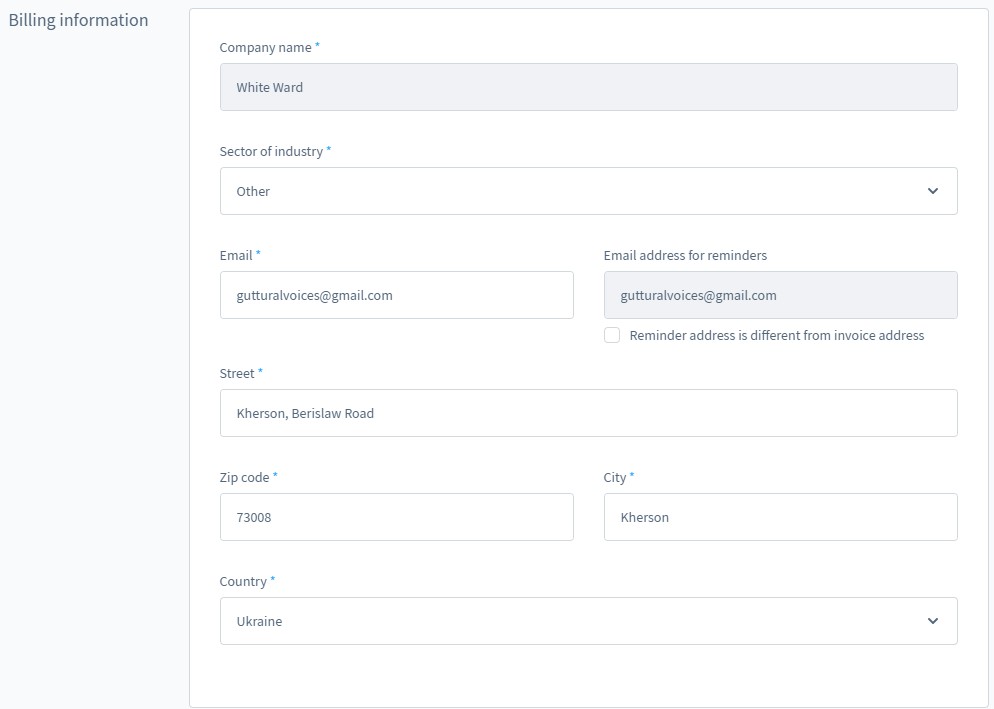
Shopware 6 Account Settings: Plans
Under Plans, you can view your current plan and upgrade.

Shopware 6 Account Settings: Cancellation
In the Cancellation section, you can delete your shop permanently.

How to Import Data to Shopware 6
Our team lets you simplify and automate various backend processes associated with managing your Shopware 6 administration. We offer tools that let you replace various default procedures with imports and exports. For instance, you can automate product price import from a dropshipping platform instead of manual updates. Or it is possible to synchronize your e-commerce website with a CRM system. Contact our support for more details and try our to experience true automation. You can use it to import any entities to Shopware 6. Although it is impossible to import account settings, you may need to transfer the data related to other activities. Please, consult our specialists before using the module for your particular business needs.
Shopware 6 Essentials FAQ
How to create a Shopware ID?
A ShopwareID is associated with the beginning of your e-commerce journey on the platform. You can easily get it while creating a Shopware account.
How to create a Shopware account?
You can create a Shopware account on a registration page. Click the Register Now link, fill in the registration form and follow the instructions in the confirmation message sent to your email.
What is Shopware master data?
Under the term Shopware master data we assume all the information you provide while creating and configuring a Shopware account. It combines company address, email, phone, name, and numerous other details.
How to add a shop in Shopware?
You can add a new Shopware shop in your merchant area. Look at the start screen’s right part – it contains a link that initiates this process. Click the link and proceed to the next step. You need to choose between a cloud storefront or an on-premise installation. After that, it is necessary to specify information about your new shop and save changes.
How to add a payment method to your Shopware account?
You need to add a payment method for the internal purposes of your Shopware installation. Go to Basic Information -> Accounting to configure a payment method there. Choose PayPal, credit card, or direct debit. You will need it to create deposits to purchase extensions and themes.
How to create a deposit in Shopware?
You can create a deposit for purchasing themes and extensions under Merchant Area -> Shops. Select a shop to provide funds to, click Open Account Details, and transfer funds.
How to purchase Shopware extensions?
Now, when a certain amount of money is transferred to your Shopware account, you can purchase extensions and themes on the Shopware Marketplace or in the Plugin Manager. Choose a tool you want to install and complete the purchase.
How to get support in Shopware?
Shopware lets you get help with two types of inquiries. Questions regarding your account or license are accepted here: info@shopware.com or +49 2555 9288 50. Questions about accounting and financial services are accepted here: financial.services@shopware.com and +49 2555 9288 510.
How to migrate to Shopware 6?
We recommend using third-party tools, such as the Improved Import & Export extension, to migrate to Shopware 6. The module provides the ability to move core entities to your new website from any external system. No matter whether it is a remote platform or Shopware’s previous version. The module automates and simplifies all the related synchronizations. Contact us for more information.
How to automate import and export processes in Shopware 6?
When it comes to regular data updates, the Improved Import & Export extension automates them as well. It provides the ability to create a schedule of updates per each data transfer so that you get the ability to launch the corresponding import and export processes, following the specified time frames.
How to integrate Shopware 6 with external systems?
Integration with external systems is another ability of the Improved Import & Export extension. The tool lets you integrate your e-commerce store with ERPs, CRMs, accounting tools, and any services that exist beyond your e-commerce website. The module automates repetitive imports and exports, modifying data according to the requirements of your Shopware store upon import and the connected platforms upon export.


