
Amasty Google Map Magento 2 Extension

If you want to provide customers with more information on your business, displaying your store location on an interactive map is a great idea. By allowing your website visitors to find your physical location, you drastically improve their shopping experience. Display of your business address is vital if you offer a pick up in store delivery option or run a brick-and-mortar store. The Amasty Google Map Magento 2 extension enables ecommerce merchants to show their offline location on a Google Map. The Magento 2 module allows placing the map on any page of a website and provides simple configuration settings.
Below, we highlight the main features of the Magento 2 navigation map module and show how to configure it in the backend.

Table of contents
Features
- Ability to add Google Map to the “Contact Us” page;
- Option to display a map as a widget on any CMS page;
- Auto-location of a store on the Google map;
- Adjustable position of the map on a page;
- A few types of map view;
- Simple backend configuration;
- Mobile-friendly design.
The Amasty Google Map Magento 2 extension allows ecommerce store owners to make their “Contact Us” page more appealing to online shoppers by enriching it with the map. By displaying your store location on the Google Map, you also provide customers with more information about your business, which increases trust. Besides, you can insert a map as a widget on any CMS page and specify its settings for each page individually. This way, you can provide your website visitors with quick access to the store locator from any place.
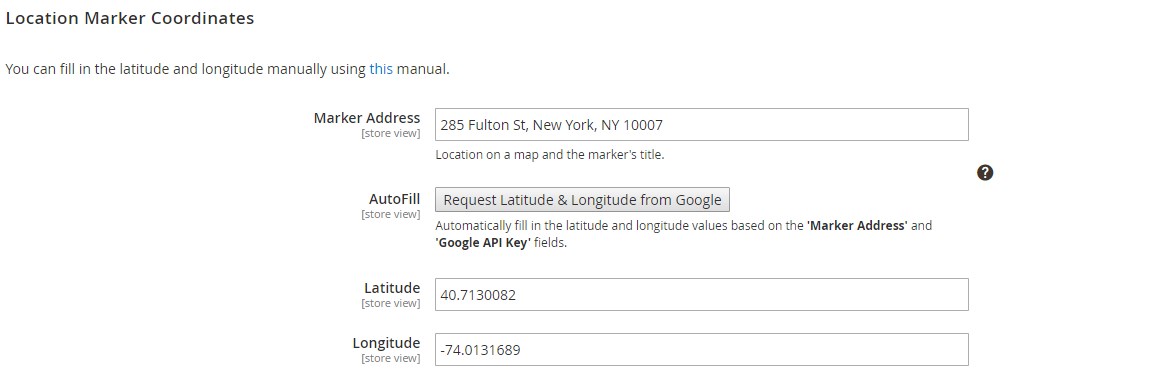
As for the admin side, the module’s settings can be configured in a few minutes. To locate your store on the map, you only need to specify the address of your physical shop or office and set its coordinates. Latitude and longitude values can be filled in automatically in one button click. The extension utilizes the Google Maps API to compare a specified address with the appropriate location. If you are looking for maximum accuracy, it is also possible to set accurate geo coordinates manually.
Moreover, you can customize the look, size, and position of the store locator map on a page. You can place your map at the top or bottom of a page, depending on how you want it to be positioned relative to the contact form. Also, it is possible to set the width and height of the navigation block to fit the page content in the best way. Besides, the Magento 2 Google Maps module allows choosing roadmap, satellite, hybrid, or terrain view for the map display and set its default resolution.
Backend
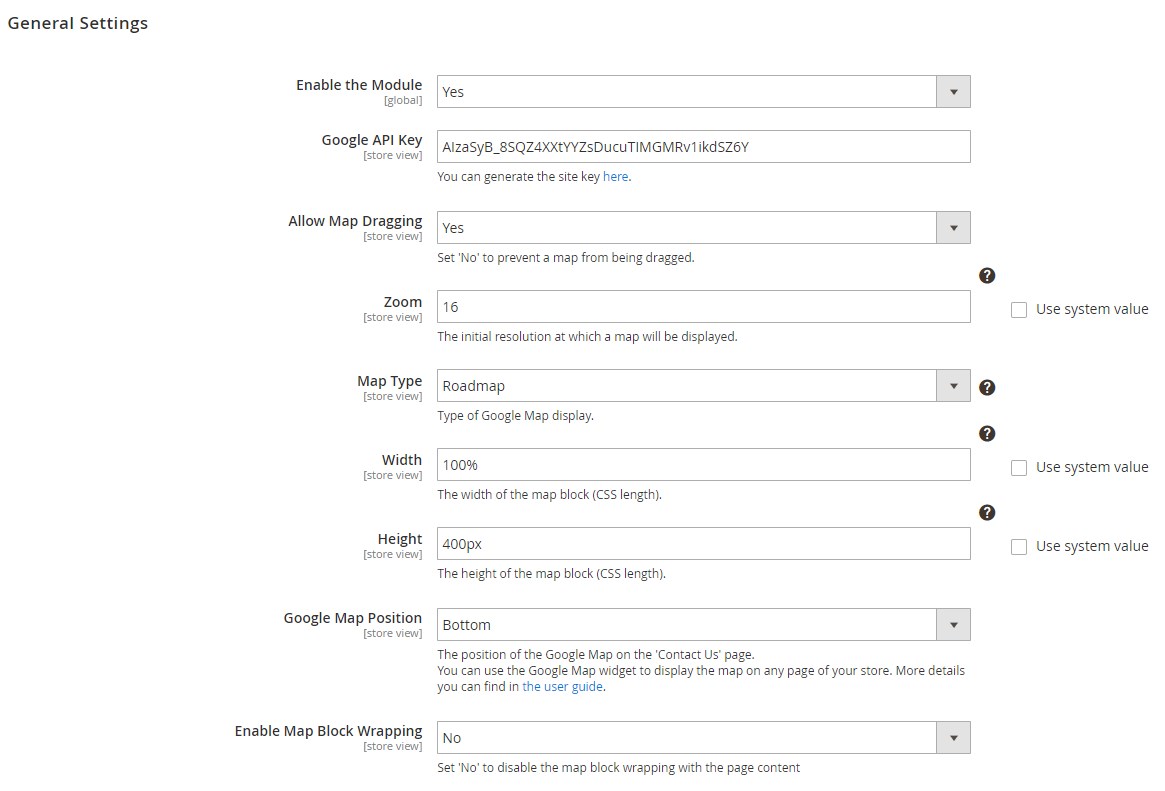
The configuration settings of the Amasty Google Map Magento 2 extension are located under Stores -> Settings -> Configuration -> Amasty Extensions -> Google Map. The configuration page is divided into two sections: General Settings and Location Marker Coordinates.
In the first section, you enable/disable the module and enter your Google API Key. Next, you can allow or disallow map dragging on the frontend, specify a default zoom for the initial map resolution, and choose a map type (Roadmap, Sattelite, Hybrid, or Terrain). Then, set the width and height of the map block (using the CSS-length values) and select a position of the map on the “Contact Us” page (top or bottom). It is also possible to use Google Map as a widget and configure its display on any website page. Here, you can also enable wrapping of the map block with the page content.
In Location Marker Coordinates, you should specify the full address of your store in the Marker Address field and set the latitude and longitude values. It is possible to request these values from Google to fill in the appropriate fields automatically or specify them manually.
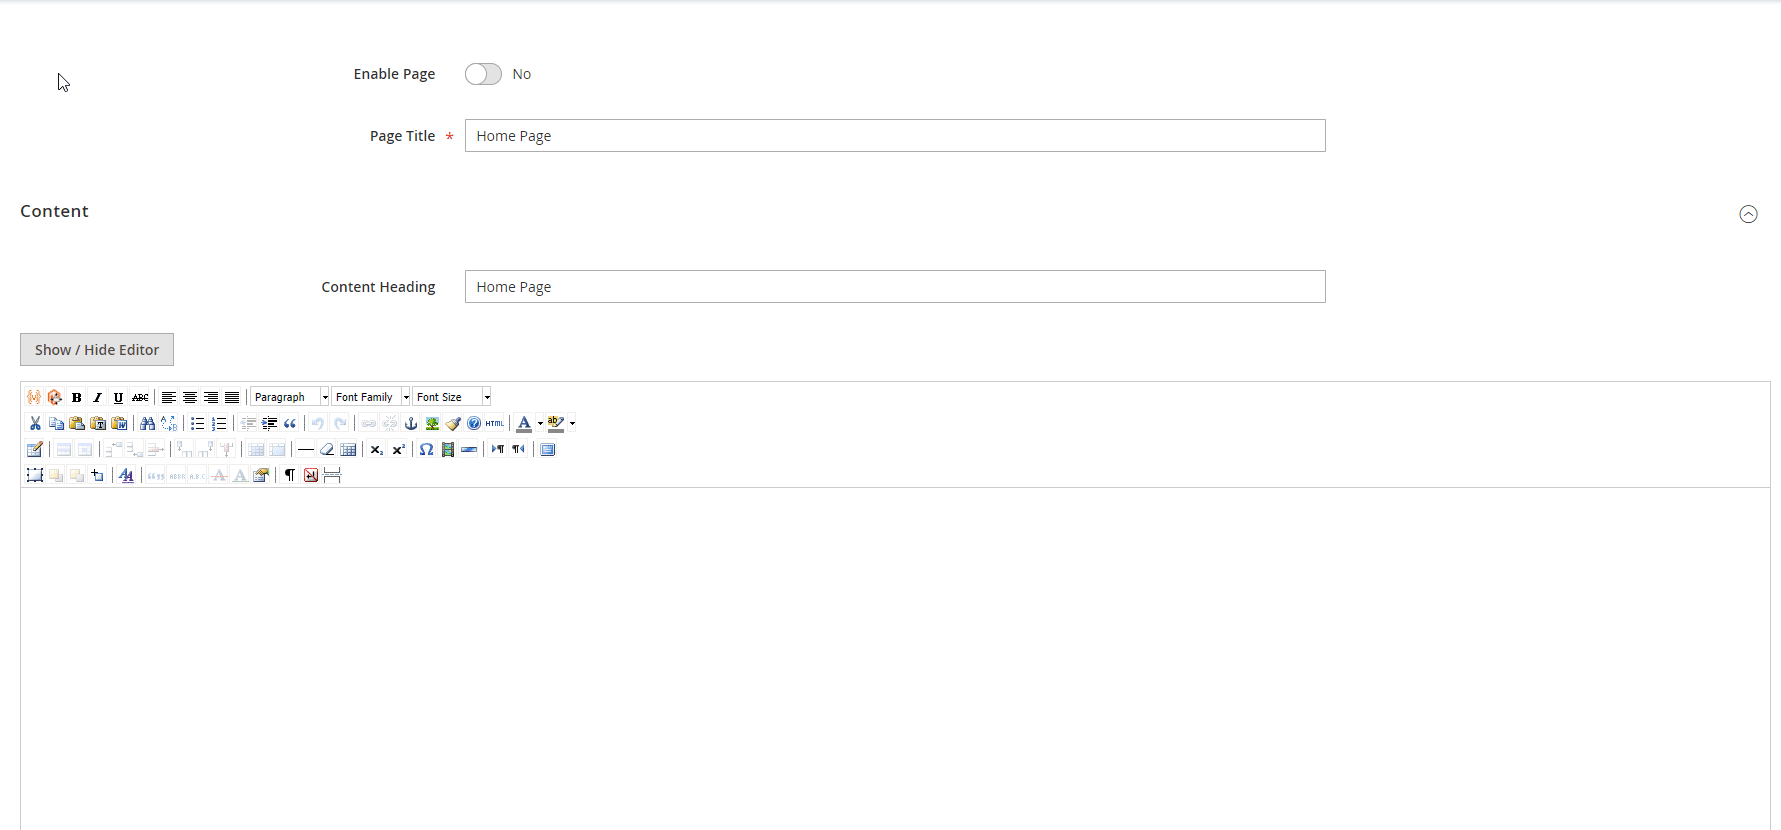
As mentioned above, you can insert Google Map on a page as a widget. To configure its display, navigate to Content -> Pages. On the Pages grid, select a CMS page where you want to display the map widget.

On the page edit screen, click the “Show / Hide Editor” button and then press “Insert Widget…”. In the opened window, select Amasty Google Map as a widget type and configure its options.
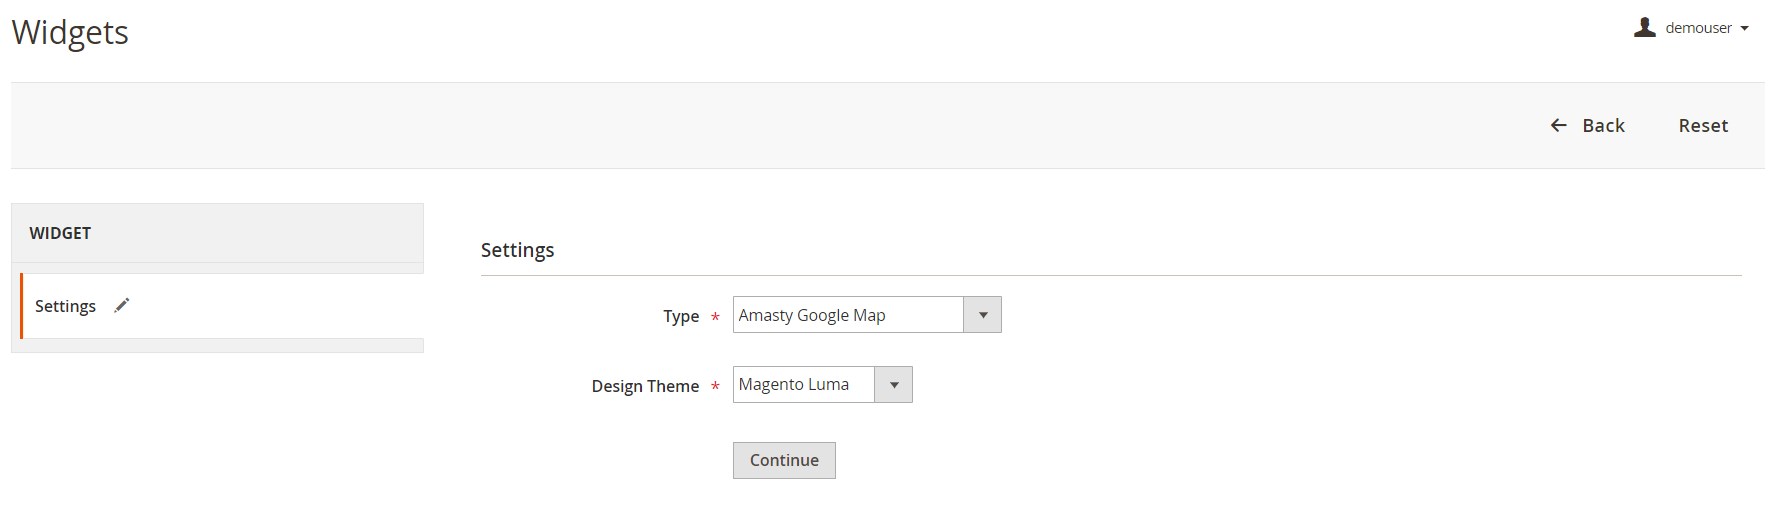
Besides, you can add the map widget to a website layout. The relevant settings can be found under Content -> Widgets. To insert the widget in the page layout, press the “Add Widget” button.
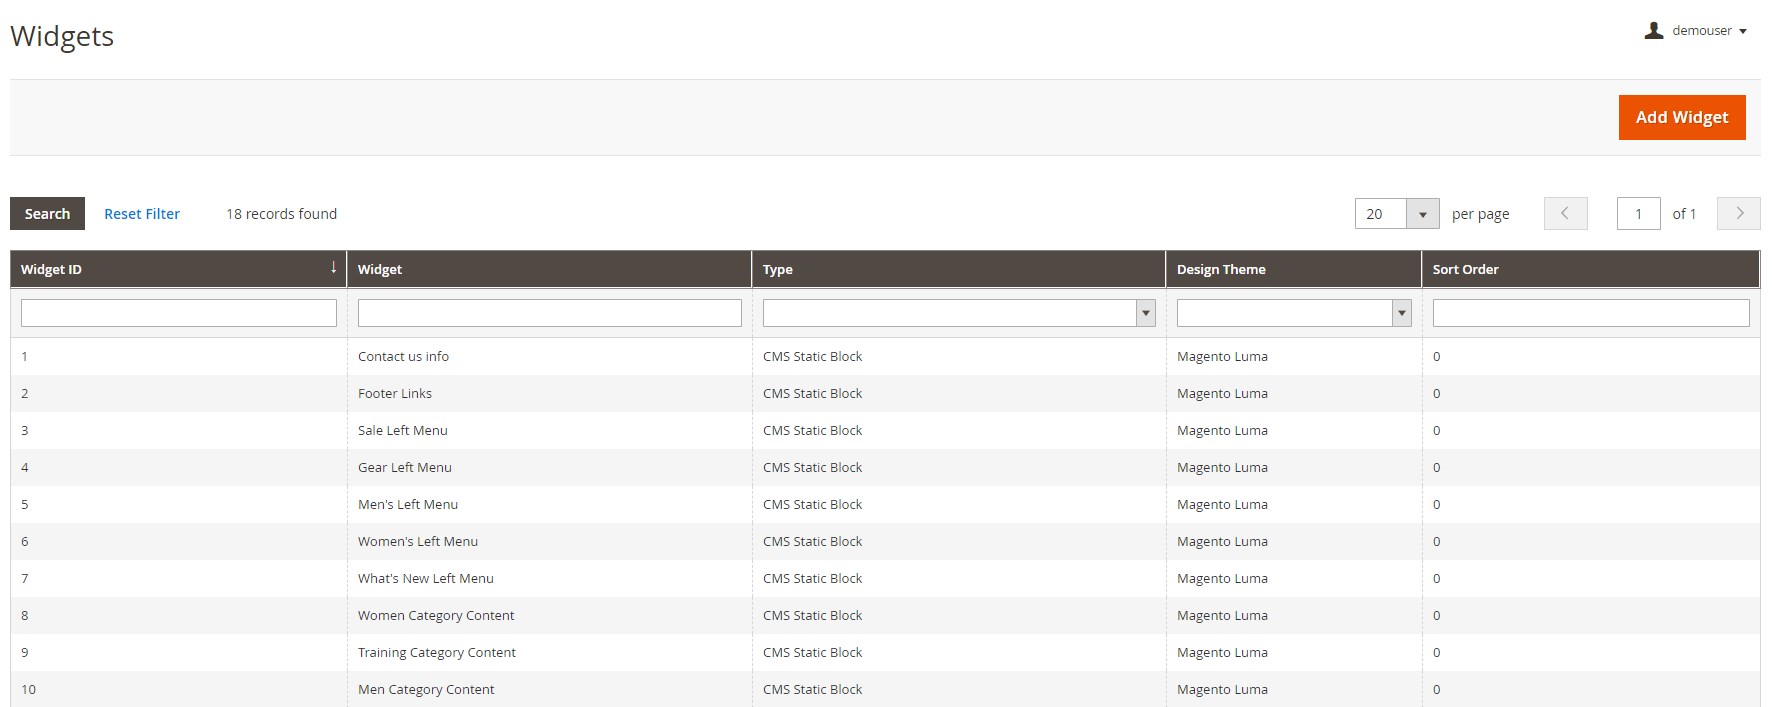
Then, select Amasty Google Map from the Type drop-down options, choose a design theme for placing the widget, and click “Continue”.
Next, you should create a title for the widget, select store views, and set the sort order.
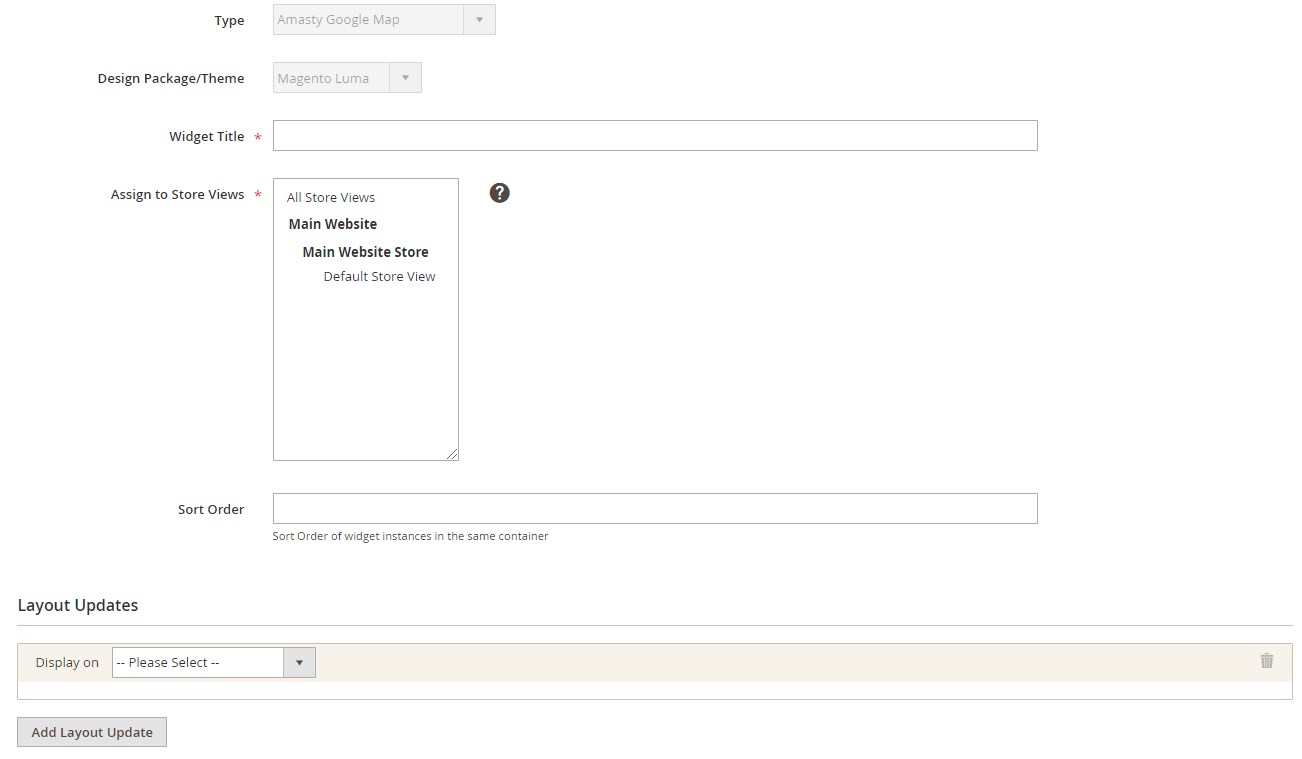
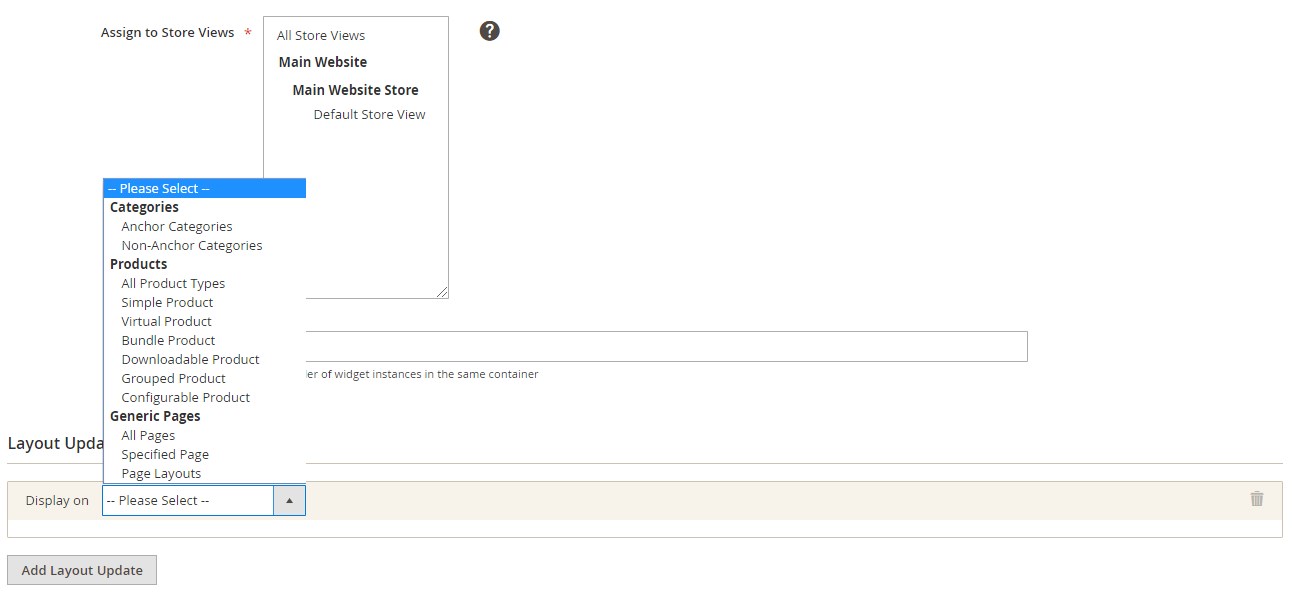
In Layout Updates, you can choose an exact location for the widget display.
Now, when you understand how to configure the Google Map display in the backend, let’s see how it appears on the frontend.
Frontend
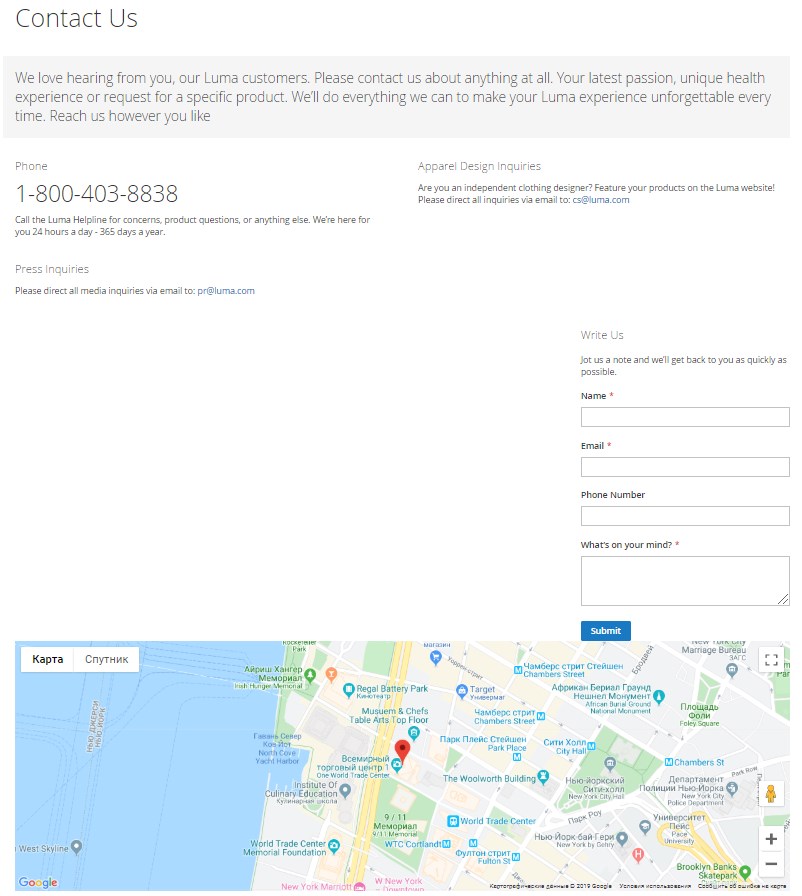
Below, you can see how Google Map looks on the “Contact Us” page. In this example, the map is positioned at the bottom of the page.
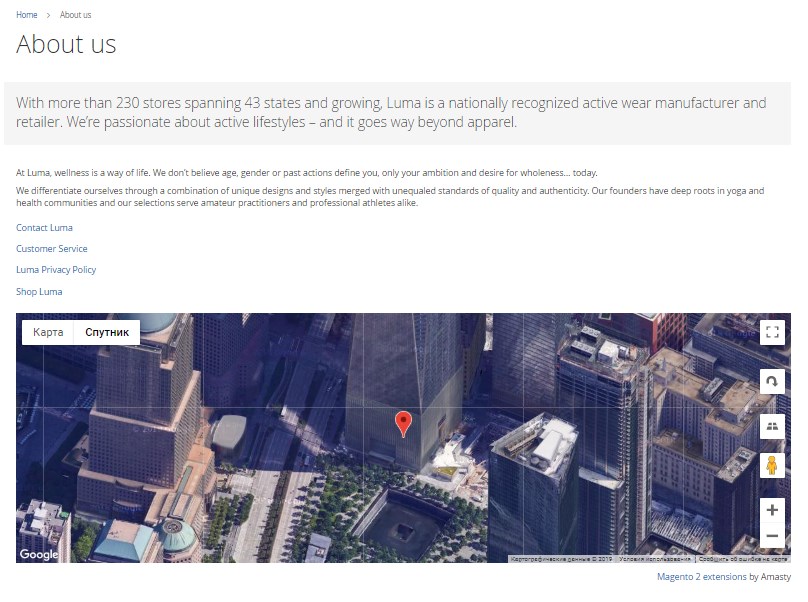
As we’ve mentioned before, the Amasty Google Map extension allows displaying a store location on the map as a widget on any website page. Here is an example of the map appearance on the “About Us” page:
Final Words
The Google Map Magento 2 extension by Amasty is a useful tool for online merchants who want to provide their store visitors with the information of their physical shop or office location. The module is a must-have for business owners who run brick-and-mortar stores and want to offer their clients an option to buy products offline. By enriching your website pages with the Google Map, you help customers quickly find your location and contact your store in the most convenient way. The price of the Magento module is only $49, so don’t hesitate to give it a go.
Related posts
 Magento AI Extensions to Unlock Smarter Search, Support & Content Creation
 What is Magento AR? Exploring Augmented Reality & Top Magento 2 AR Extensions
 Magento 2 Bundle Product with Custom Options: Complete Guide to Benefits, Limits & Import
 Magento SEO in 2026: Proven Strategies to Rank Higher and Boost Sales (50+ Tips)
 How to Import Customers & Customer Addresses to Magento 2: Complete Tutorial, CSV Samples & Tips
 How to Cancel Shopify Subscription in 2025 — Your Extensive Walkthrough
 Export Products from Magento 1 to Magento 2 Easily: Full Migration Tutorial for 2025
 Shopify or Etsy: Branding Freedom vs. Uniformity