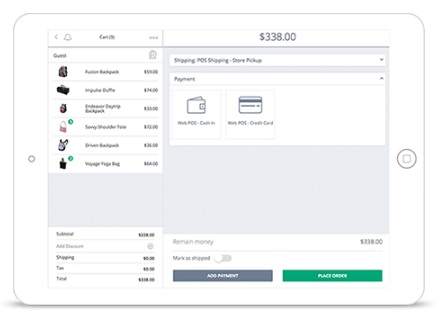
Magestore Web POS for Magento 2 and 1
You might have already seen our review of Wyomind Point of Sale Extension for Magento 2 and today we shed light on its closest competitor – Magestore Web POS for Magento 2. So, if you already have a Magento storefront but also want to conquer offline, you’ve come to the right place. Below, we provide a review of the strongest Magento 2 POS extension for the most reasonable price. We describe its frontend functionality as well as share a Magento extension tutorial related to the backend.

Now, WebPOS is included in a Starter Package in the Omnichannel Solution provided by Magestore. To become the perfect solution for Omnichannel, WebPOS was strengthened by the “Stock Control” feature. For any further information, check the official page of the module. Below, you can find the description of its core functionality.
The Magestore Magento 2 Web POS extension is rapid, powerful and easy to use. Since the module utilizes such technologies as knockout.js, it lets you serve clients incredibly fast. The whole checkout procedure is accurate and user-friendly. Payment processing is quick, secure, and flexible. Note that Magento 2 Web POS supports multiple payment methods (both online and offline). Besides, it can be easily connected to other Magento extensions making inventory management or such marketing features as reward points and gift cards available for your offline buyers. Let’s figure out core user-oriented features of the Magestore Magento 2 POS extension:
- Add Items Without Headaches. There are two ways how a product can be added to cart: by scanning barcodes or by clicking on product thumbnails. Both approaches offer a fast and user-friendly way of product processing.
- Out-Of-Stock Notifications. Another important feature is related to out-of-stock products: the Magento 2 POS extension adds a warning icon essentially reducing chances that an unavailable item will be added to cart.
- Further Purchasing. Each transaction can be put on hold and recalled for further status update and purchasing.
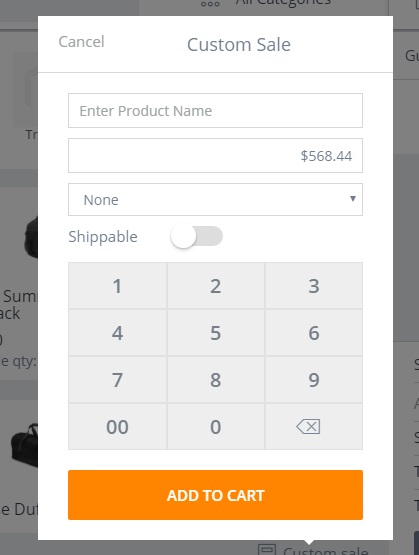
- Custom Sales. The Magento 2 POS extension adds the “Custom Sales” button to the interface, so it is possible to create orders with items that are not available i the system (or were not updated).
- Offline Orders. If you have no Internet connection, it is not a problem for Magestore Magento 2 Web POS. Due to the IndexedDB storage, all operations are kept within the system and synchronized with the online database when the connection is available.
- Payment Methods. As mentioned above, Magento 2 Web POS by Magestore supports both online and offline payment methods. Thus, you can equally use credit card processing by Authorize.net or Stripe; cash in; cash on delivery; and of course integrate a credit card swiper to provide customers with the fastest payment solution. Furthermore, it is possible to use both split and partial payments. It means that a customer can use multiple payment methods simultaneously as well as split order total into several parts to pay them later.
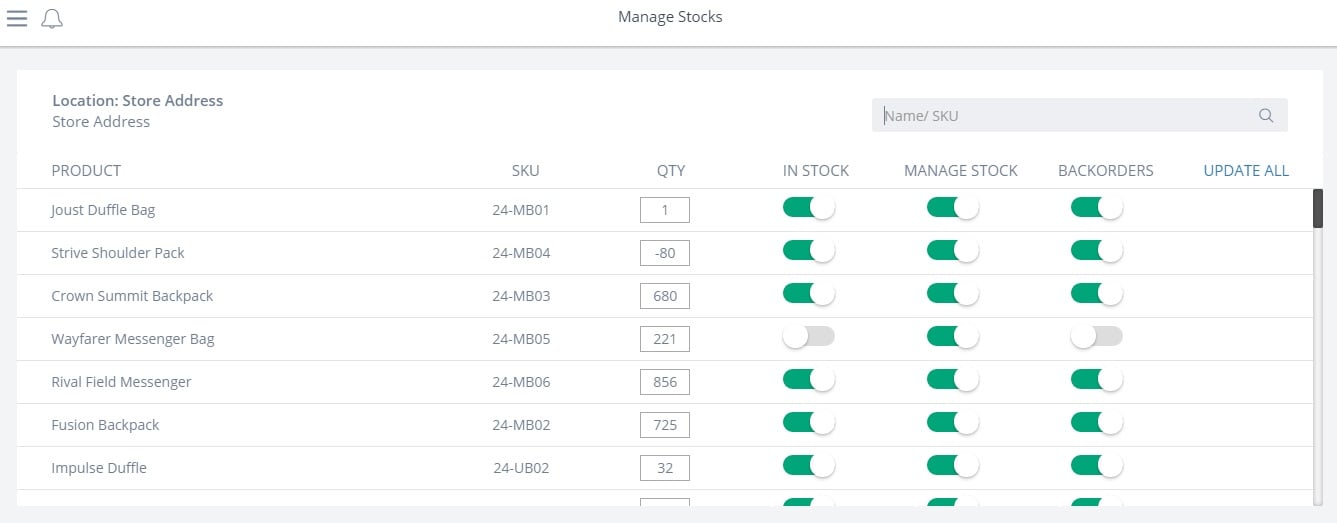
- Inventory Management. Due to the integration with the Inventory Management extension, Magento 2 Web POS provides such advanced capabilities as synchronization of all sale locations and a warehouse. As a result, it offers real-time inventory tracking and rapid updates.
- Integrations. Other useful integrations are related to such extensions as Reward Points, Gift Card, and Store Credit. All three can be connected to your POS system, so coupon codes or points can be processed right on a POS screen.
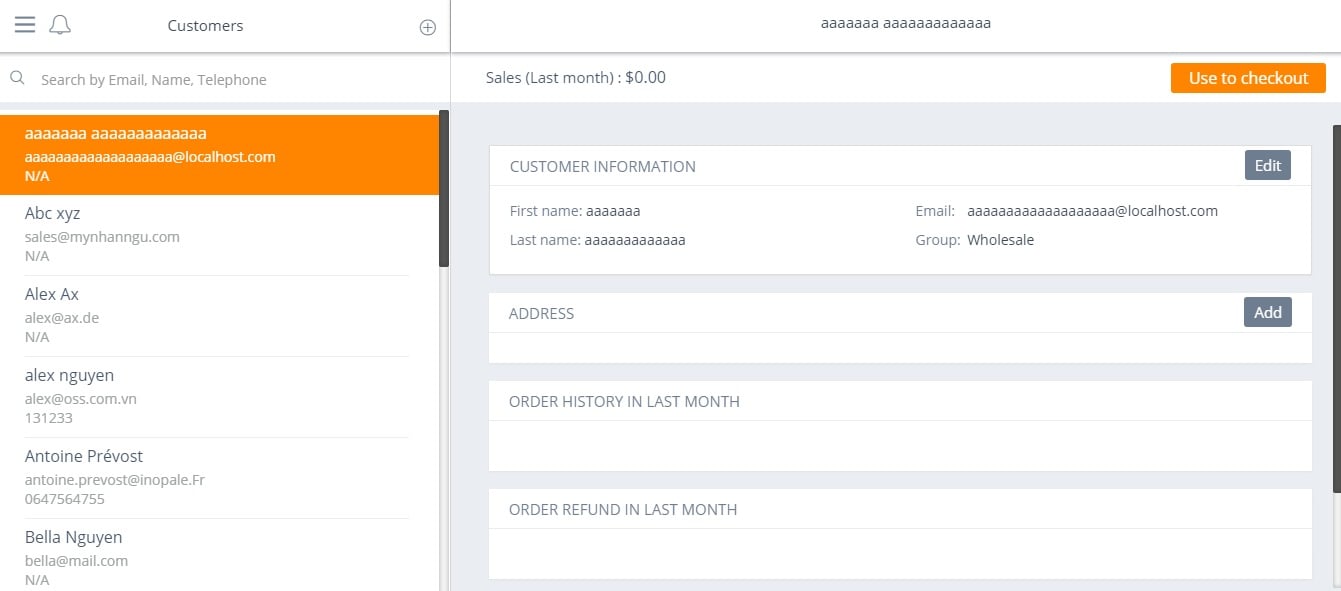
- Customer Management. Although Magento 2 Web POS by Magestore supports two ways of checking out – as a guest or as a registered user, it also collects customer data that can be used for further customer management. Thus, all orders and refund history are recorded and synchronized.
- Invoices. There are also several approaches to invoicing available with the Magento 2 POS extension. First of all, it is possible to create invoices by items. Besides, you can provide a document based on the paid order amount. Invoices can be printed or send via email.
- Refunds. Refunds are possible by both a single item and whole paid amount. Besides, the Magestore Magento 2 Web POS module provides the ability to use reward points in each situation stimulating new purchases.
- Permissions. If you have several sales managers, the Magento 2 POS extension allows you to set limits on discounts each manager can offer, so only the most reliable sellers will be able to offer the highest discounts.
- Working Shifts. Another important aspect of Magento 2 Web POS by Magestore is shift management. It is possible to create a new shift, add all events, and get a Z-report that describes each shift. Besides, there are 10 report types available with the module.
Note that Magestore offers installation, configuration, and customization services. The installation is totally free: you get all necessary support via an account manager. As a result, the Magento 2 POS extension will be ready to use in 62 hours. To configure it correctly, the company offers 2 hours of training for free. Besides, you can share your ideas on customization.
Table of contents
Backend
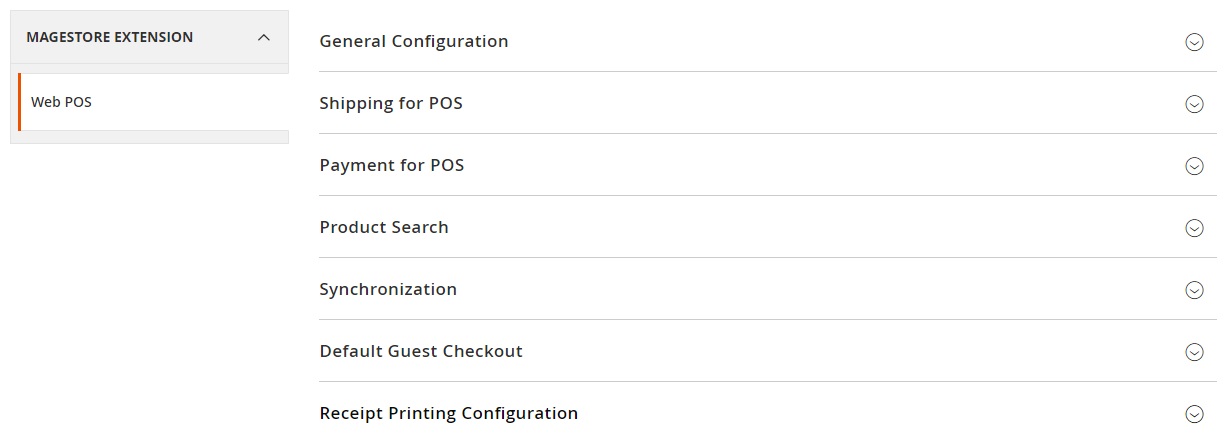
Let’s configure the Magento 2 POS extension first. Go to Stores -> Settings -> Configuration -> Magestore Extensions -> Web POS. Here, you will find 7 sections of settings: General Configuration, Shipping for POS Payment for POS, Product Search, Synchronization, Default Guest Checkout, and Receipt Printing Configuration.
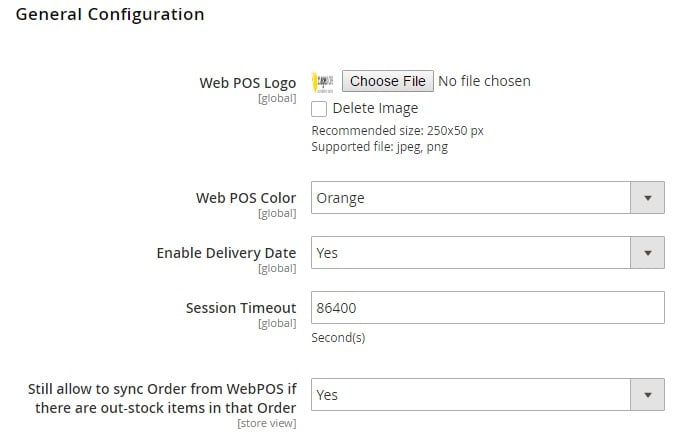
Under General Configuration, you can upload your custom Web POS logo, choose a Web POS color, enable/disable delivery date, set session timeout, and allow sync orders from WebPOS if there are out-stock items in these orders.
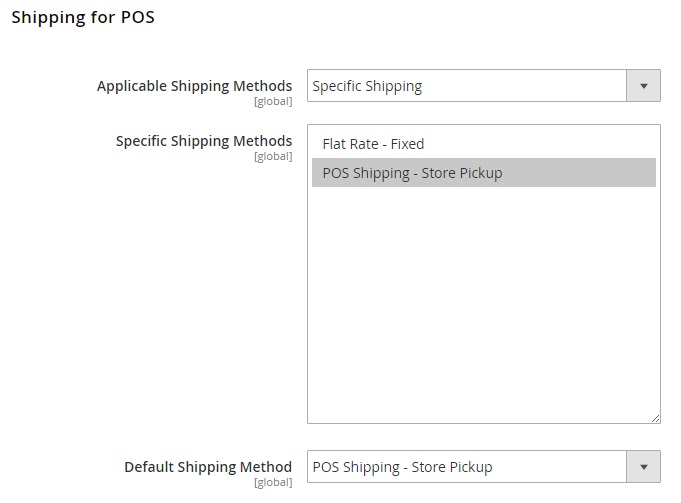
In Shipping for POS, you choose applicable shipping methods. If Specific Shipping is chosen, you should specify methods that will be available via POS. Next, you set a default shipping method.
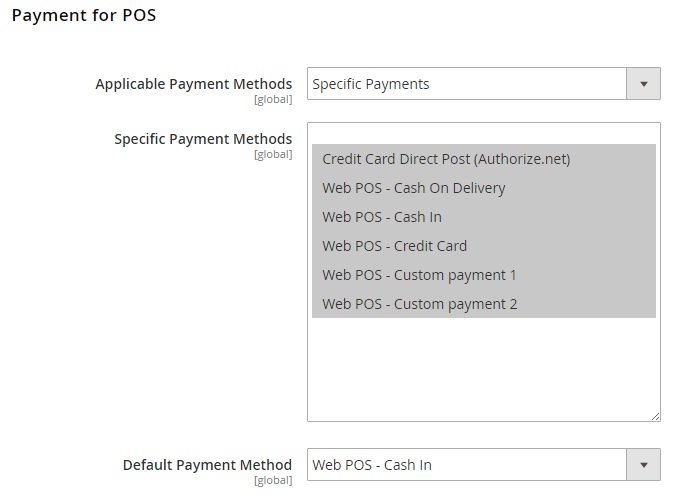
Similar options are available in case of Payment for POS: Applicable Payment Methods; Specific Payment Methods, Default Payment Method.
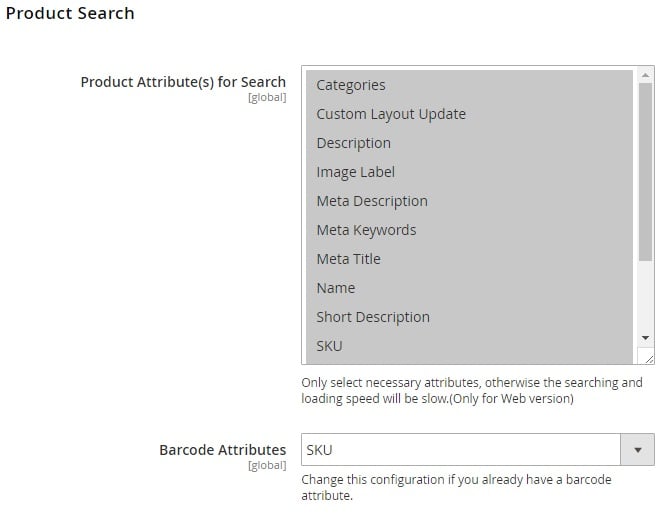
Under the Product Search section, you specify product attributes that will be used for the search. Next, there is the Barcode Attributes option. Change it in case there is a specific barcode attribute.
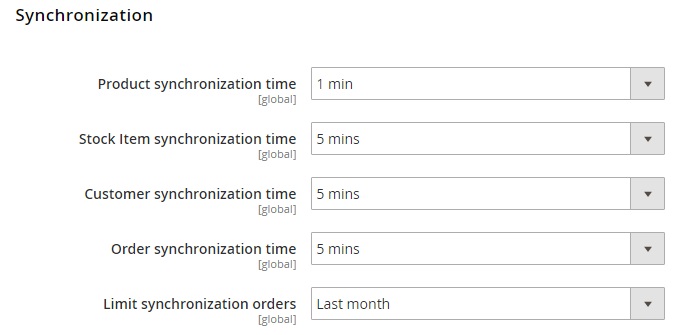
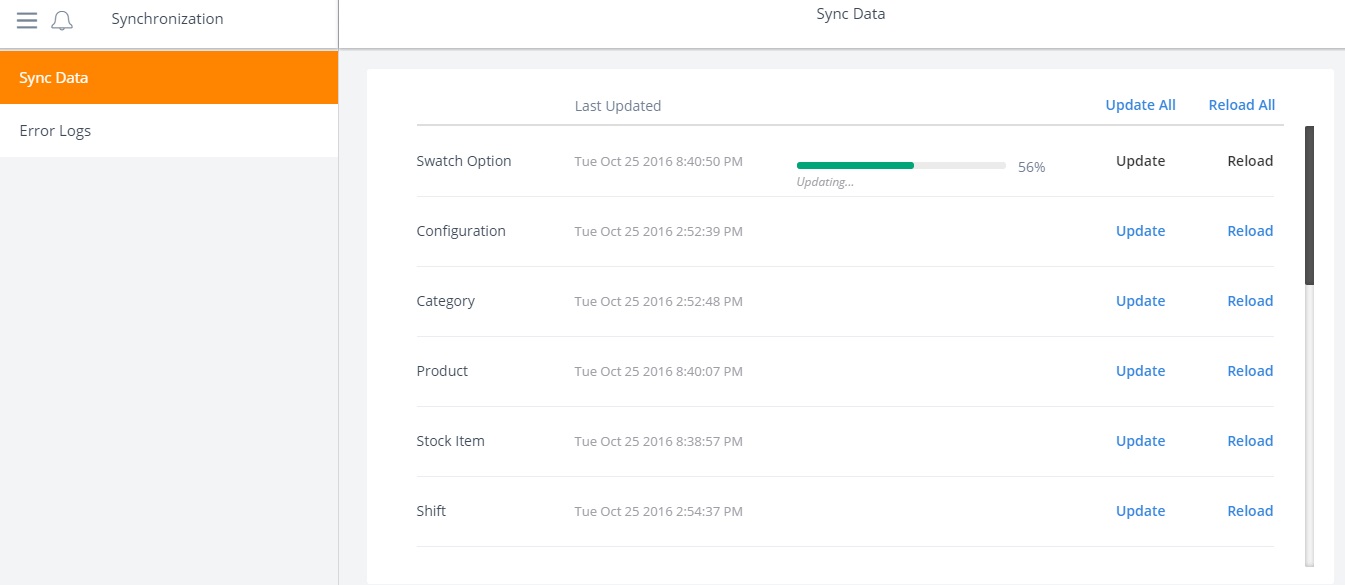
The Synchronization section provides the ability to set time intervals for synchronizing products, stock items, customers, and orders. Besides, there is Limit Synchronization Orders (from a week up to a year).
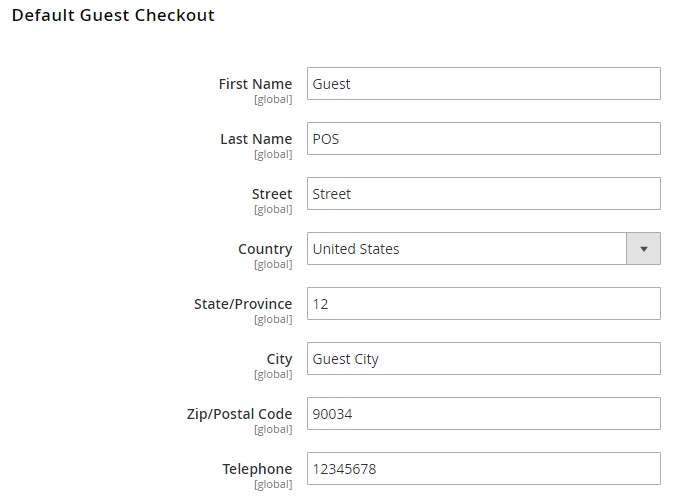
As for the Default Guest Checkout section, it allows specifying default values for such fields as First Name, Last Name, Street, Country, State/Province, City, Zip/Postal Code, Telephone, and Email.
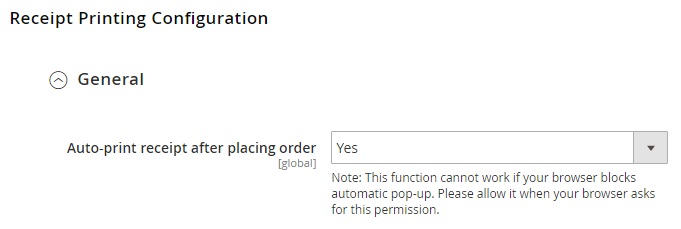
Receipt Printing Configuration is divided into 3 subsections: General, Content, and Optional Fields. The first one lets you enable receipt auto-printing after an order is placed.
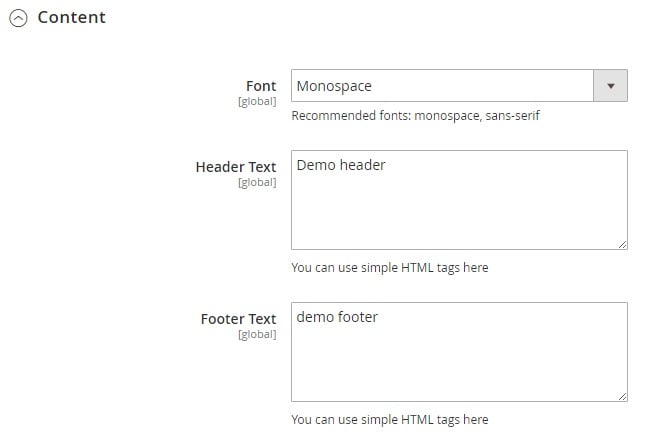
In Content, you choose a font and specify a text for both header and footer.
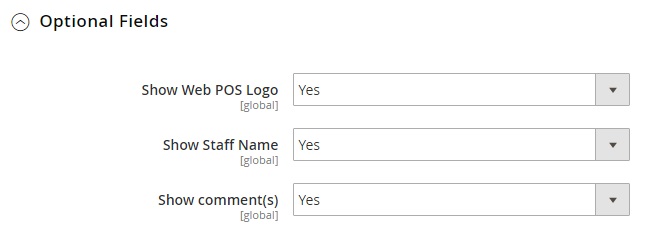
The Optional Fields subsection allows you to enable disable Web POS logo, staff name, and comments.
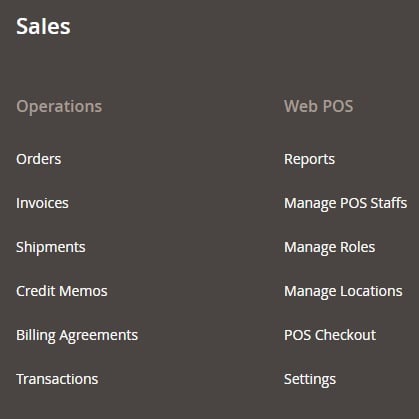
Now, let’s take a look at the Magento 2 Web POS core functionality. Under Sales -> Web POS, there are the following sections: Reports, Manage POS Staffs, Manage Roles, Manage Locations, POS Checkout, and Settings (described below).
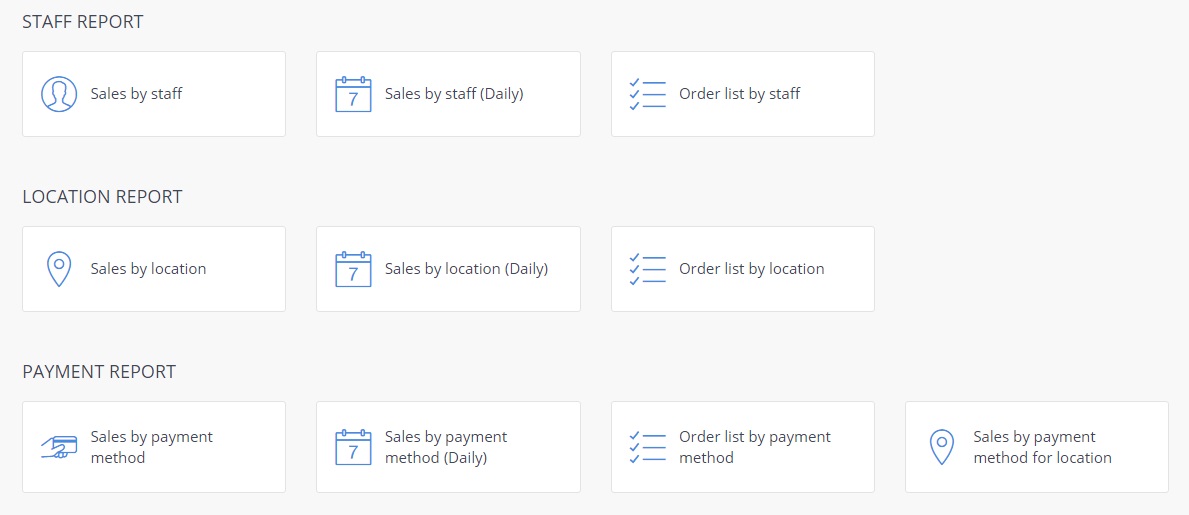
All reports are divided into 3 groups: Staff Reports, Location Reports, and Payment Reports. Stuff Reports include “Sales by staff”, “Sales by staff (Daily)”, and “Order list by staff”. Location Reports are: “Sales by location”, “Sales by location (Daily), and “Order list by location”. Among Payment Reports, you can find “Sales by payment method”, “Sales by payment method (Daily)”, “Order list by payment method”, and “Sales by payment method for location”.
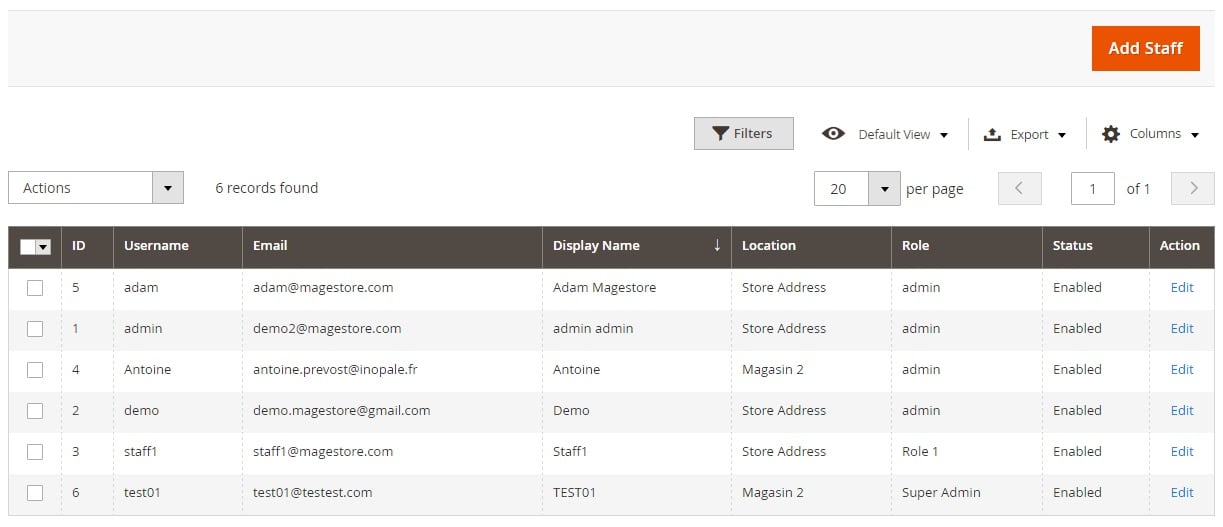
The Manage POS Stuffs window contains a grid with all workers related to the POS system. You can delete them or change their status via mass actions. Roles can be changed within each admin page.
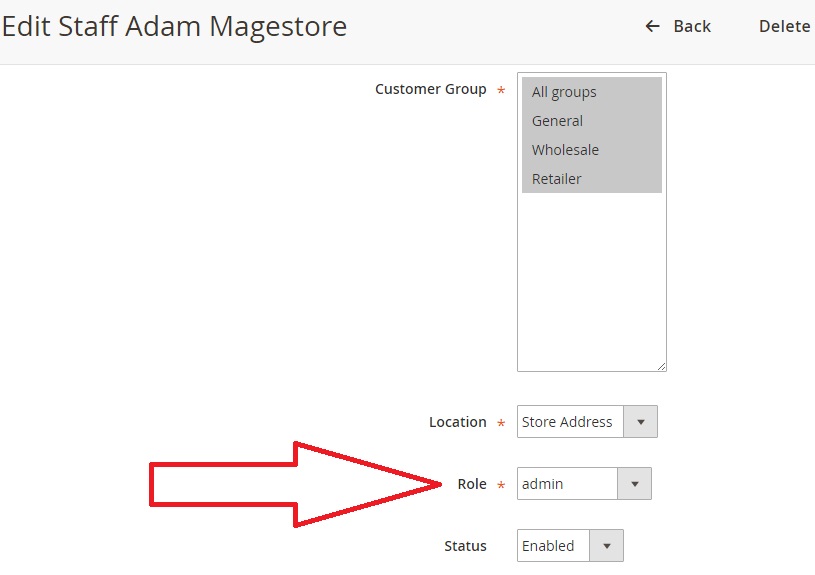
In the grid, Click “Edit”. On a new page, find the “User Settings” section and change the “Role” option.
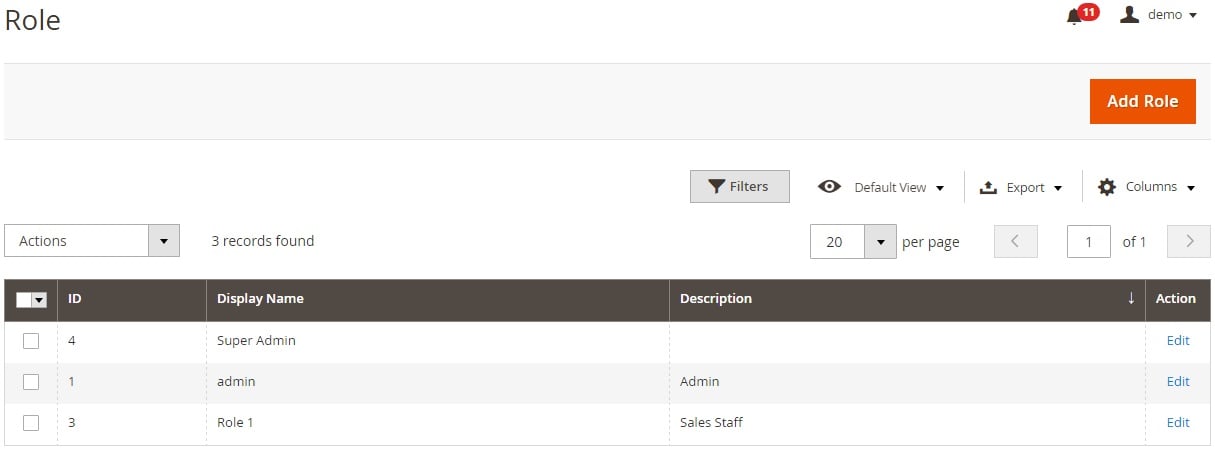
Manage Roles allows you to create new admin roles, as well as delete or edit the existing ones.
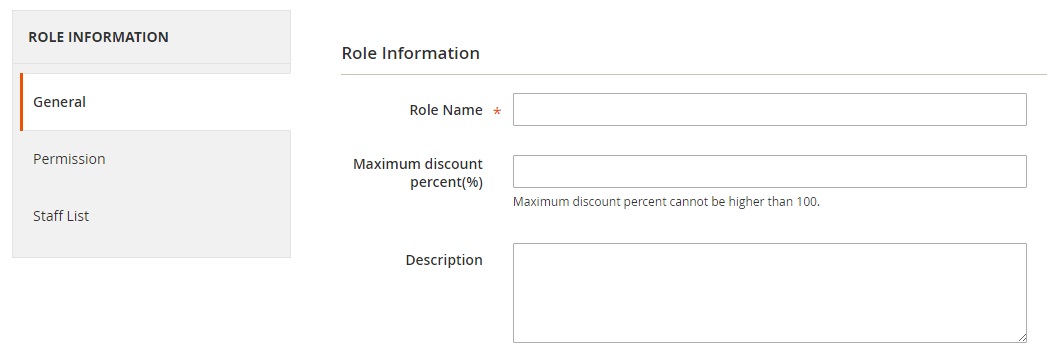
All role information is divided into 3 tabs: General, Permission, and Staff List. Under the first tab, specify Role Name, set discount limit, and add a description (optional).
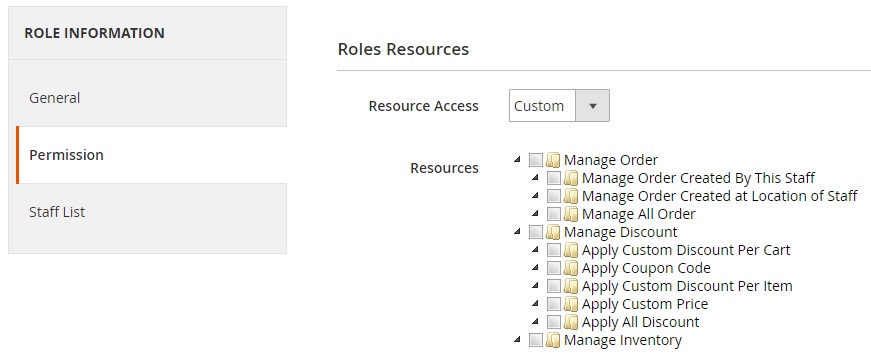
Under Permission, set custom resource access and choose resources available in this admin role:
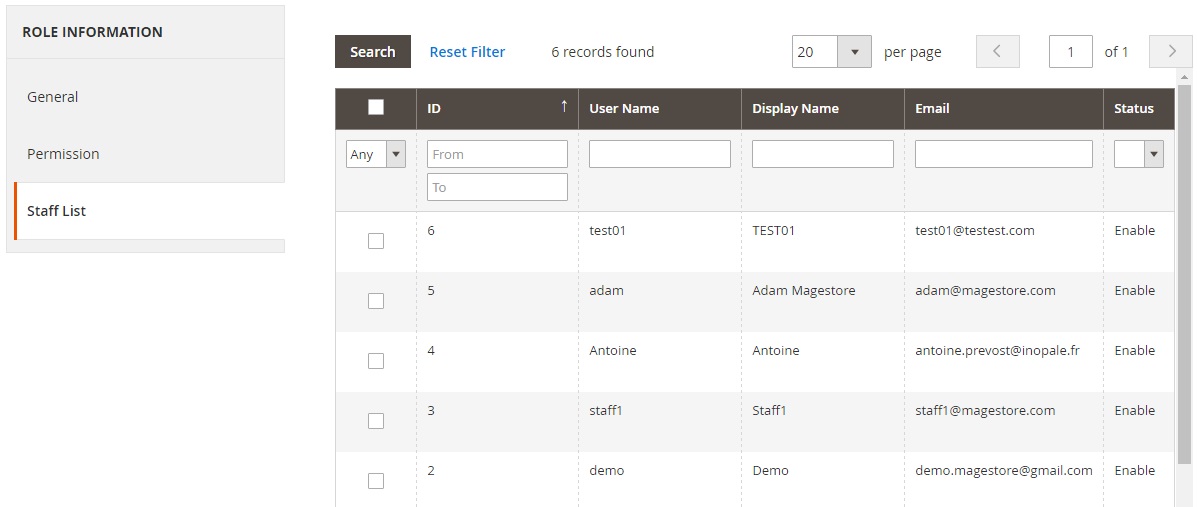
In Staff List, choose staff members, for whom the role will be applied.
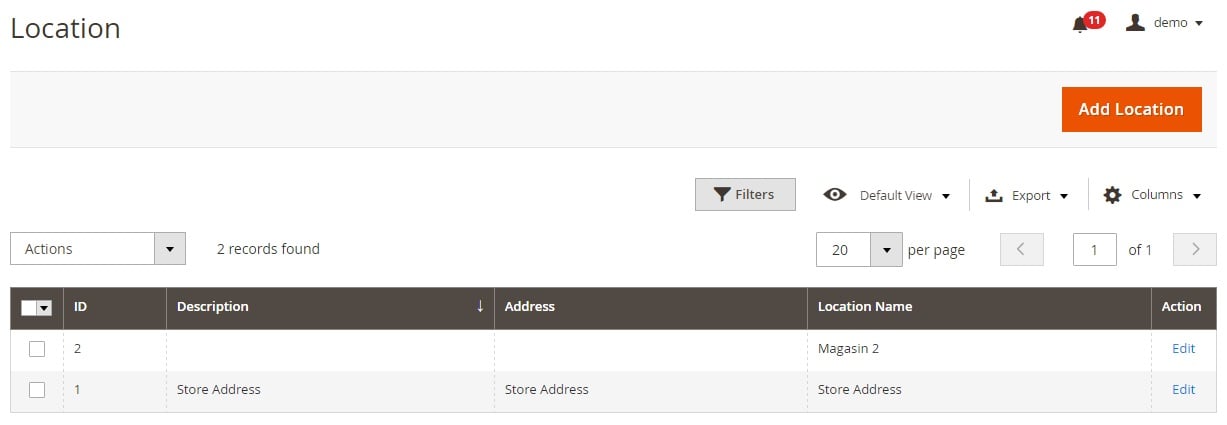
Manage Locations is similar to the aforementioned section: it contains a grid with available locations. You can edit or delete them. Besides, it is possible to add a new location here.
While adding a new location, specify its name, address, and description.

Frontend
Now, we’d like to draw your attention to the frontend appearance of Magestore Magento 2 Web POS. This is how its main screen looks like:
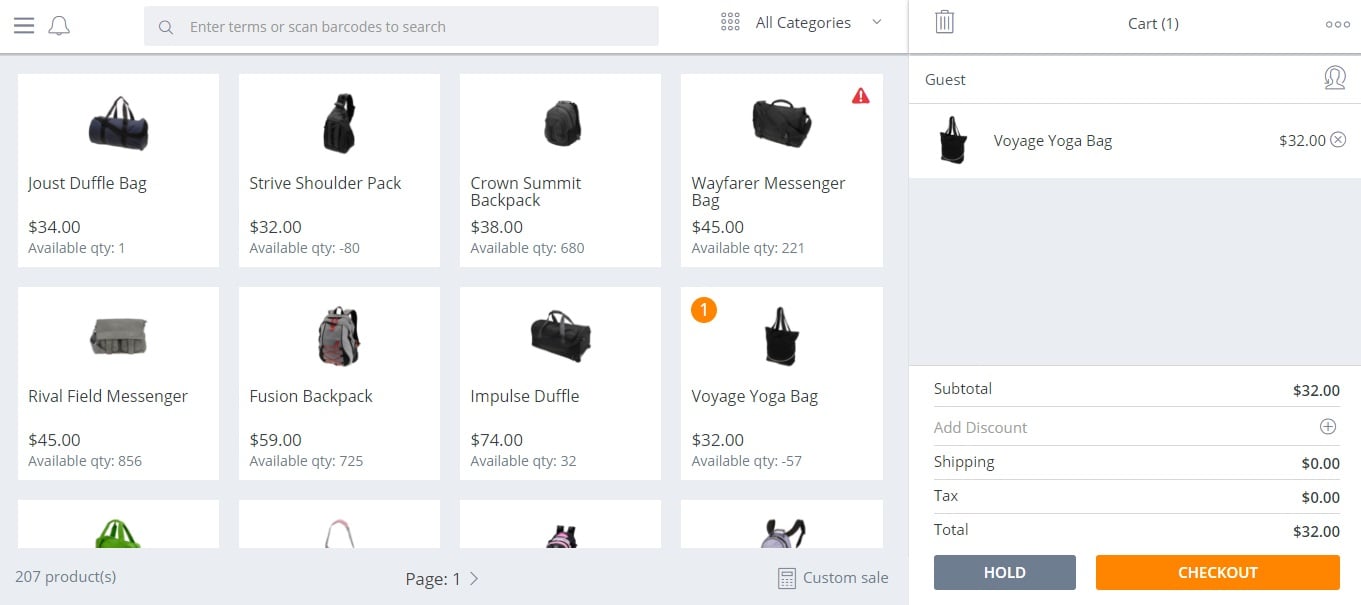
There is a hamburger menu button (it is described further in this post), a search field and a button that brings all categories. To select a product, enter its name, scan a barcode, or simply choose it among items that are available below. You can use the category filter to narrow down the selection.

Below the product section, there is a product count, a page indicator and navigation, and the aforementioned Custom Sale button. Pay attention to a red triangle on a product thumbnail – it indicates that the product is out of stock.
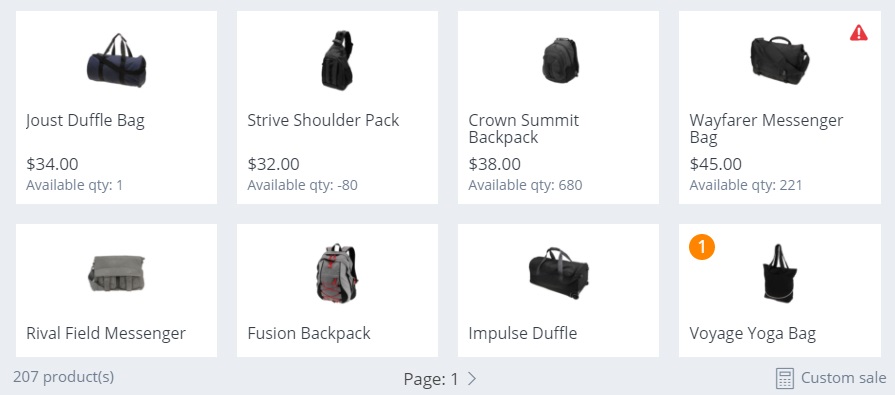
Hit the button and you will get a popup that allows selling goods that are not available in the catalog. Enter a product name, its price, specify whether the item is taxable or non-taxable/shippable or non-shippable, and add it to cart.
Now, let’s take a look at the right part of the screen. It contains such sections as Cart, User, Purchased Items, and Subtotal (Tax + Total).
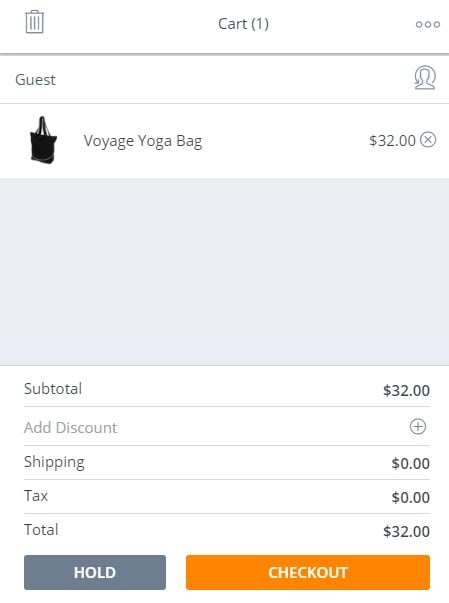
The top bar allows you to empty the cart (the trash bin icon) as well as add an order note or enter/exit the fullscreen mode (the More Options icon).

The User section, allows you create a new customer, checkout the existing one as a guest, or find a corresponding account among already available. Just hit the appropriate icon on the right.
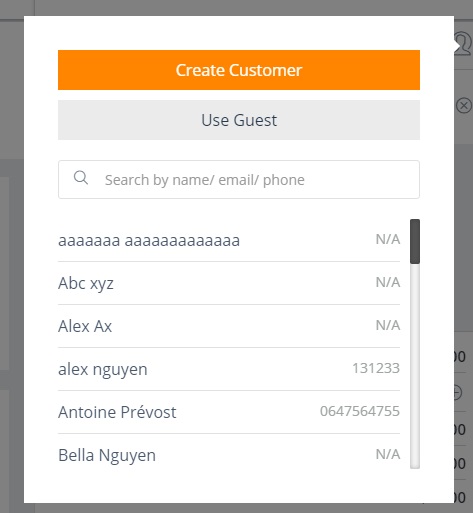
Next, there is a section with selected products. To change their quantity, hit on a product name. In a popup window, you will see a field with a quantity that lets you freely increase or decrease the number of selected items. Below, you can set a custom price or apply a discount. Note that the “Custom Price” button shares similar functionality with “$”, the same is about “Discount” and “%”.

The last core element of the page consists of 4 rows (Subtotal, Add Discount, Tax, and Total) and two buttons (Hold and Checkout).
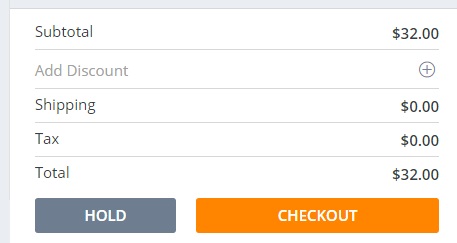
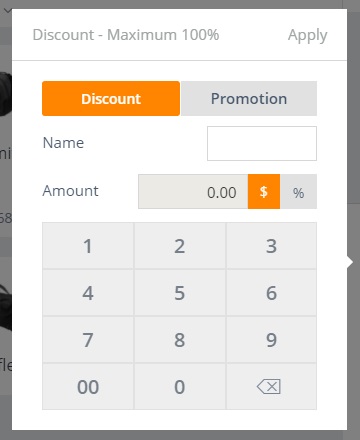
Hit “Add Discount” and a popup window will appear. It allows you to set fixed or percent discount.
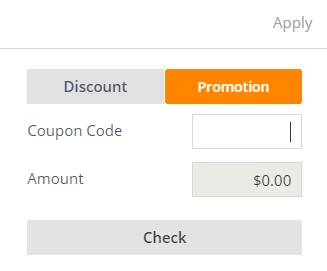
Besides, you can utilize a promo code here: click the “Promotion” button.
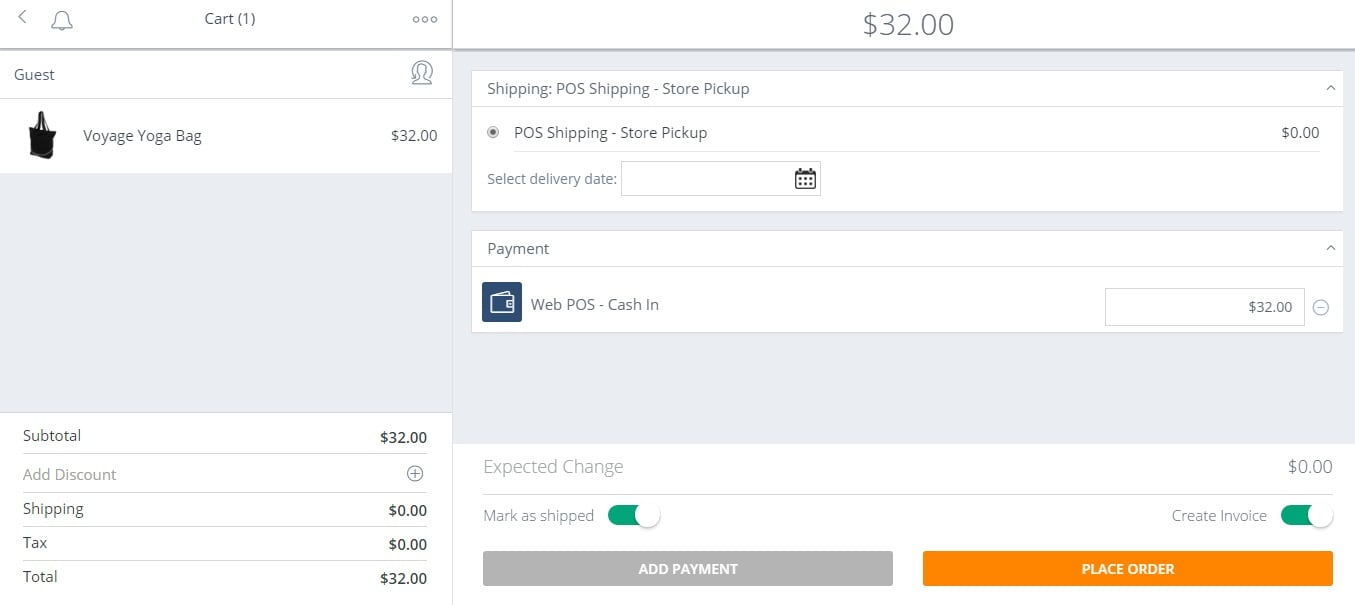
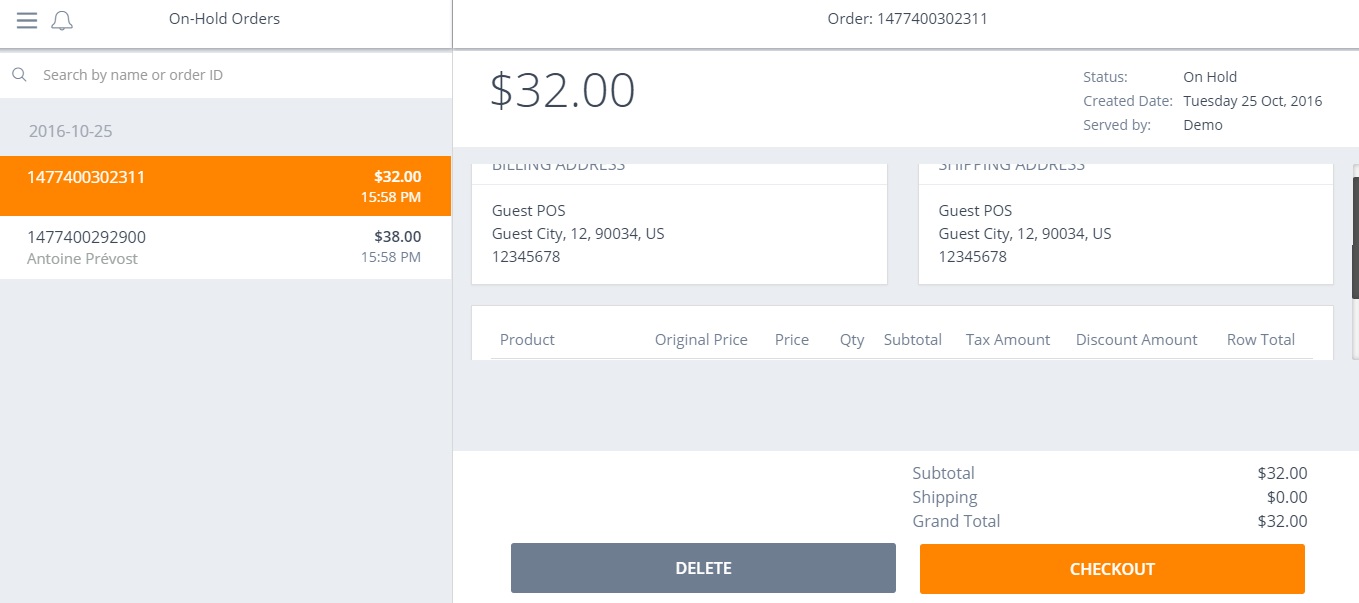
Click the “Hold” button, and an order will be saved in “On-hold Orders”. Click the “Checkout” button to complete the purchase. Select shipping (store pickup) and payment (cash in) methods and decide whether to mark this order as shipped and create an invoice. When everything is done, click the “Place Order” button.
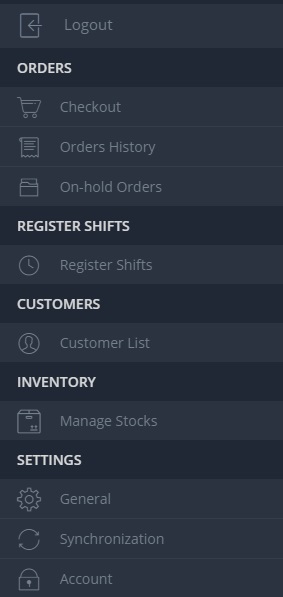
As for the aforementioned Hamburger menu button, allows you to get the following options:
- Orders: Checkout, Order History, On-hold Orders;
- Register Shifts;
- Customers: Customer List;
- Inventory: Manage Stocks;
- Settings: General, Synchronization, Account.
Besides, you can log out.
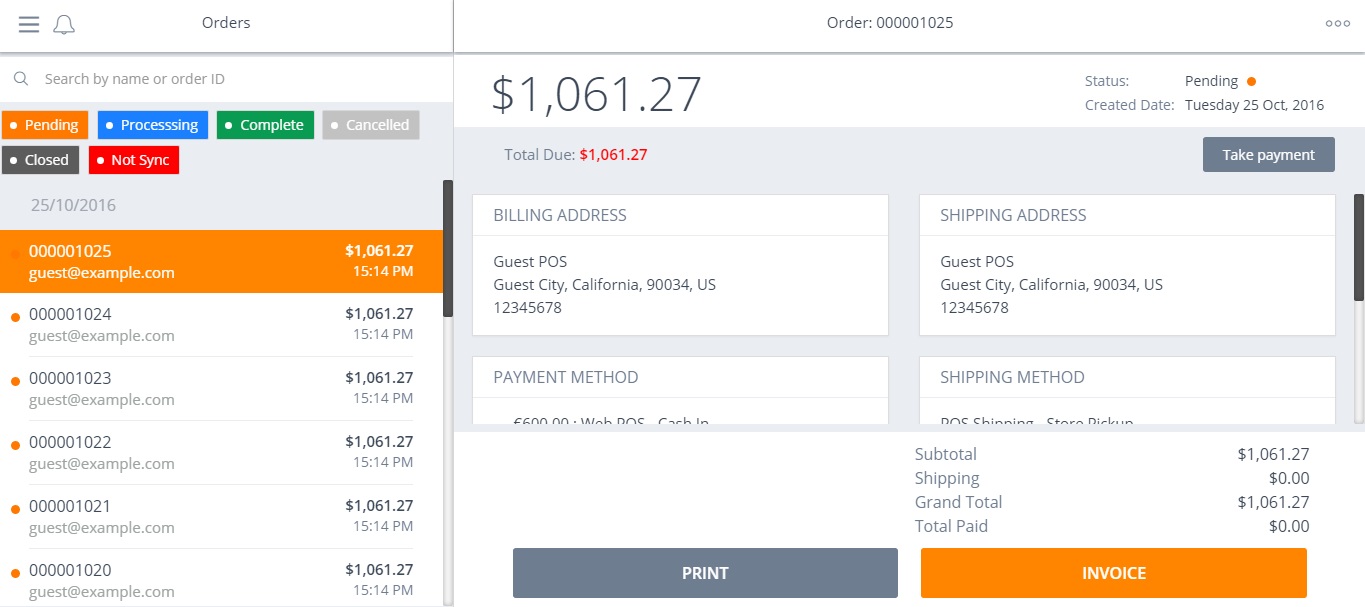
Below, we illustrate some other Magestore Magento 2 Web POS interface elements.
Order History
On-hold Orders
Customer List
Manage Stocks
Synchronization
Note that everything is designed with touchscreens in mind!
Final Words
The Magestore Web POS Magento 2 extension offers a clear and user-friendly interface. It has a perfect backend and frontend appearance which is extremely easy to master. At the same time, the extension offers all settings necessary for synchronizing offline and online stores. Besides, it is handy when it comes to selling goods and processing orders in a brick-and-mortar store. Although Magestore offers 2 hours of consultancy for free, you can always master the extension without any help from third parties. Note that the Magestore Web POS extension for Magento 2 can be used with multiple Magento 2 websites, but only within one installation. As for the price, it starts from $299. For this money, you get a POS solution for Web Browser and the following tools: Manage stock on-hand, Record stocktaking, Adjust stock in mass, Notify low stock products, Forecast supply needs & replenishment. To find more information, follow these links below:


