
Exploring Shopware: CMS Extension for Shopware 6
![]()
In the article below, we continue our exploration of Shopware 6 Shopping Experiences. This time, we shed light on the advanced functionality of this tool represented in the CMS extension for Shopware 6. The latter is available in the Shopware Professional Edition only. Let’s see how it works. For further information on Shopware 6, check this guide: Getting Started With The Platform. As for the current article, it sheds light on how to install the CMS extension for Shopware 6. Next, you will see a description of this tool. The overview section explores such aspects as quickview, scroll navigation, and block visibility. After that, we proceed to the individual forms of the Shopware 6 CMS extension. This chapter describes various options and fields.

Note that we provide Shopware integration with external platforms. Contact our support for further information or try our Improved Import & Export Extension for Shopware.
Table of contents
- 1 How to Install The CMS Extension for Shopware 6
- 2 Shopware 6 CMS Extension Overview
- 3 Individual Forms
- 4 How to Import CMS Pages to Shopware 6
- 5 Shopware 6 Essentials FAQ
- 5.1 How to create a Shopware ID?
- 5.2 How to create a Shopware account?
- 5.3 What is Shopware master data?
- 5.4 How to add a shop in Shopware?
- 5.5 How to add a payment method to your Shopware account?
- 5.6 How to create a deposit in Shopware?
- 5.7 How to purchase Shopware extensions?
- 5.8 How to get support in Shopware?
- 5.9 How to migrate to Shopware 6?
- 5.10 How to automate import and export processes in Shopware 6?
- 5.11 How to integrate Shopware 6 with external systems?
How to Install The CMS Extension for Shopware 6
For the Professional Edition of Shopware 6, you can install the CMS extension under Settings -> System -> Plugins -> Licenses. The tool is situated in My Plugins. You can install the Shopware 6 CMS extension by clicking the “…” button. After installing the module, activate it by clicking the corresponding button in the Status column.
Shopware 6 CMS Extension Overview
Now, let’s look at the functions and features the Shopware 6 CMS extension provides. Below, you will find an overview of the tool’s core functionalities.
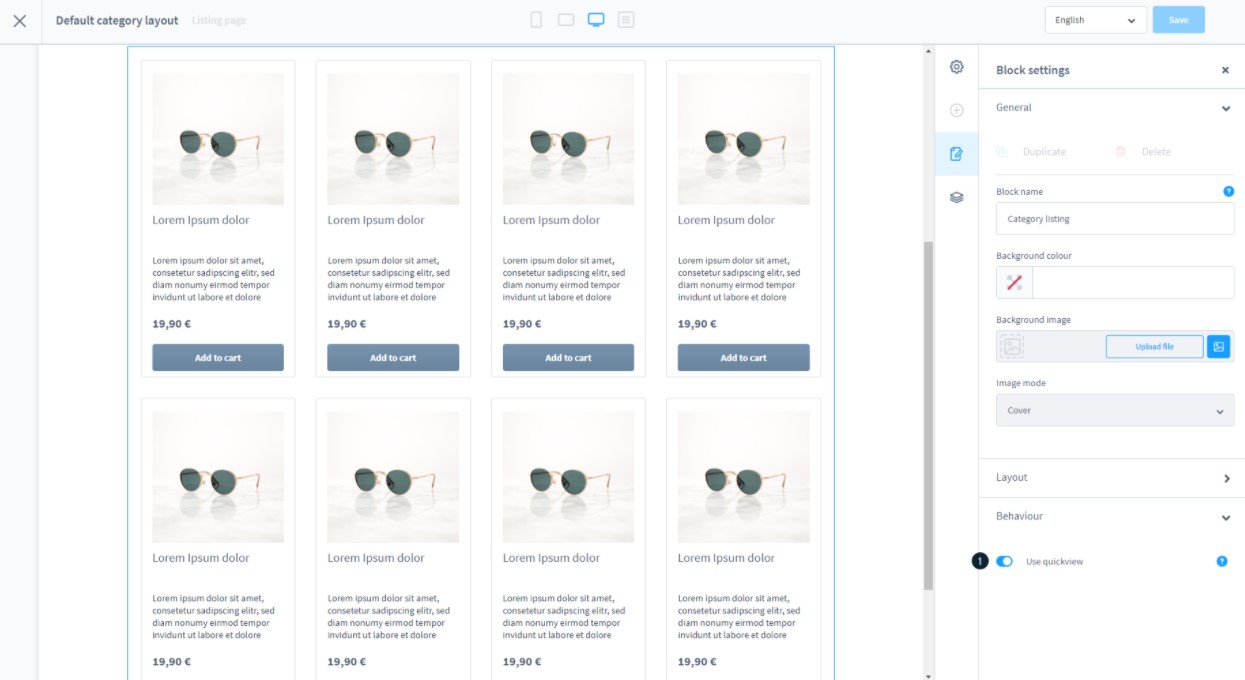
Quickview
With the help of this function, you enable a product view right in the listing. In other words, you enhance your catalog pages by placing additional information there. Consequently, customers no longer need to proceed to product pages to get a more detailed overview.
You can activate the quickview feature of the Shopware 6 CMS extension as follows:
- Go to the corresponding shopping experience.
- Choose the new functionality in the elements of the commerce type.
- Activate quickview under item behavior.
- The new feature appears in all categories to which you assign this shopping experience.
On the frontend, the quickview functionality of Shopware 6 looks as follows:
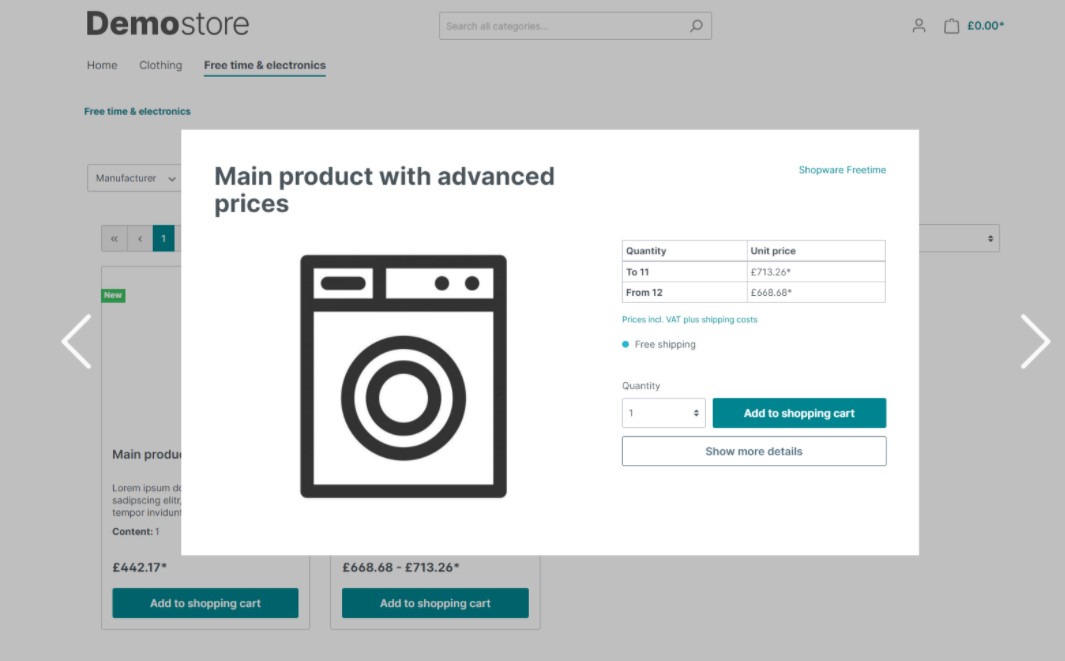
As you can see, it is even possible to add a product to a cart without visiting its page. The corresponding button is available on the quickview screen.
With the scroll navigation functionality, you get the ability to set up navigation points across a shopping experience page. You provide customers with a navigation menu on the left side, which combines all the points and lets store visitors proceed to any section listed there. It is even possible to assign the sections directly via the URL parameters.
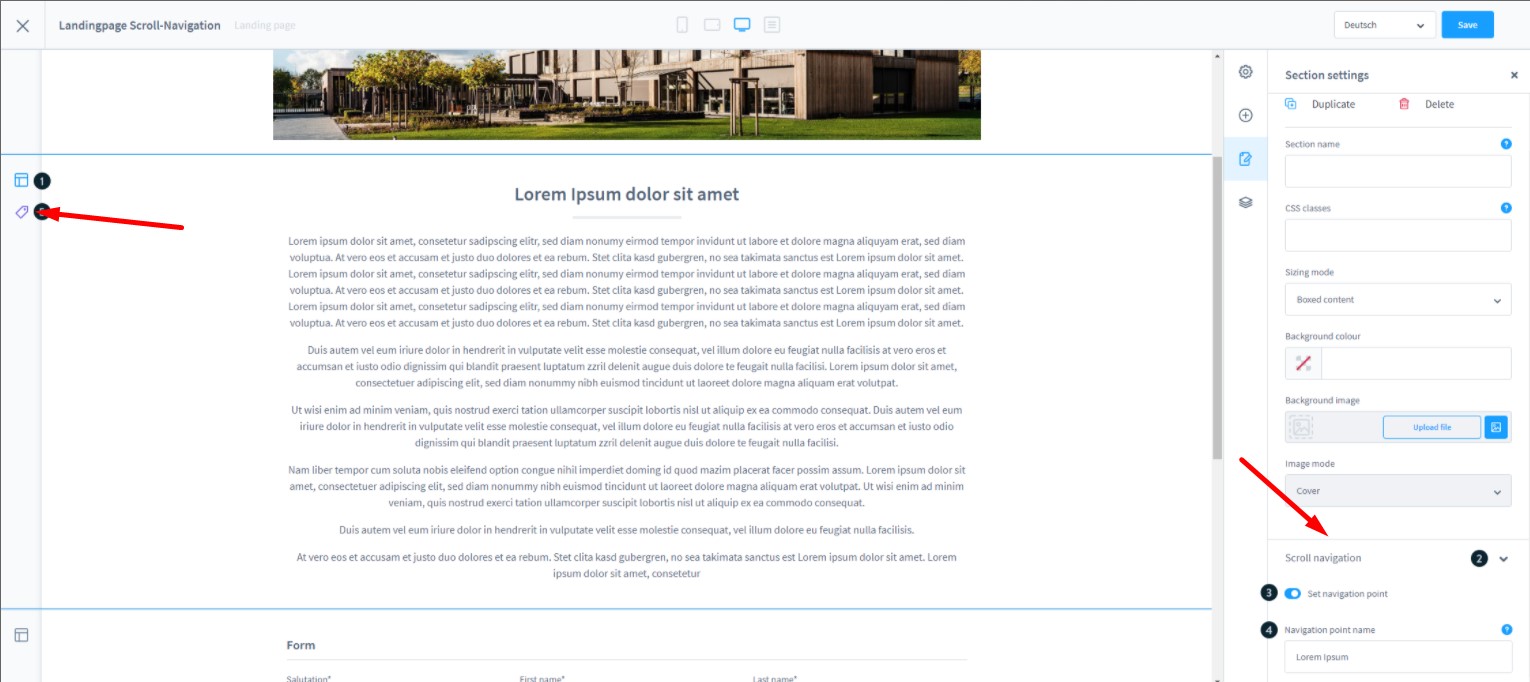
Shopware 6 allows you to create a navigation point for each section in the shopping experience. You get a completely new element called Scroll Navigation. The latter is available in the section settings.
To assign a navigation point to the Shopware 6 shopping experience page, follow these steps:
- Open the section settings: click on the symbol on the left of the section.
- Unfold the configuration of the Scroll Navigation section on the right.
- Activate a new navigation point.
- Assign a name to it.
- Now, when the navigation point is activated, Shopware 6 displays an additional symbol on the left, showing whether the navigation point is active for a section.
To simplify scrolling and avoid various inconveniences, it is recommended to use individual sections that cover the entire screen. Otherwise, a smaller section could lead to inaccurate navigation to the desired section.
Animated scrolling
The Shopware 6 CMS extension provides the ability to activate animated scrolling for navigation points. You need at least one navigation point in a shopping experience to enable the feature. To enable animated scrolling, follow these steps:
- Go to the shopping experience with scroll navigation.
- Choose the scroll navigation icon.
- Open its settings by clicking the gear-wheel symbol.
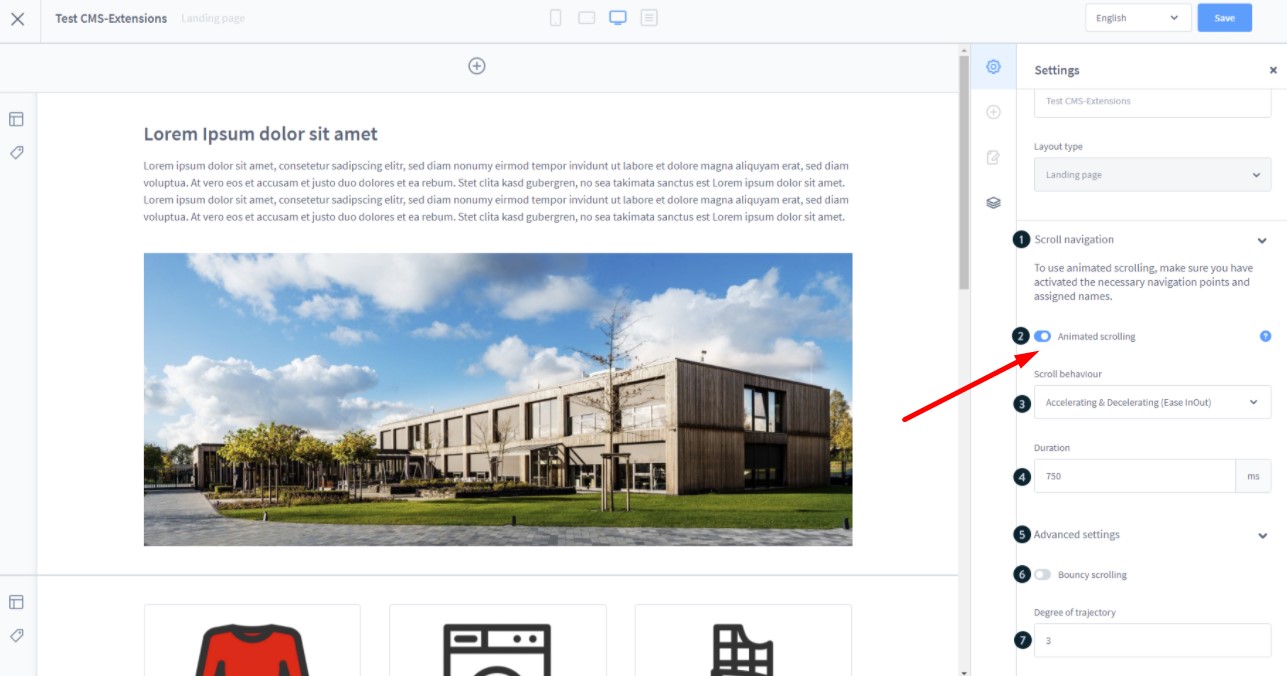
Now, you can choose one of the available scroll behaviors, specify an animation duration, and configure other parameters.
For instance, Shopware 6 supports elastic scrolling. Consider it an animation when the picture jumps before and after a store visitor scrolls the page. Besides, it is possible to adjust the degree of the course curve, controlling the acceleration of the scrolling.
On the frontend, the new navigation bar is situated on the left. You can use it to navigate between points.
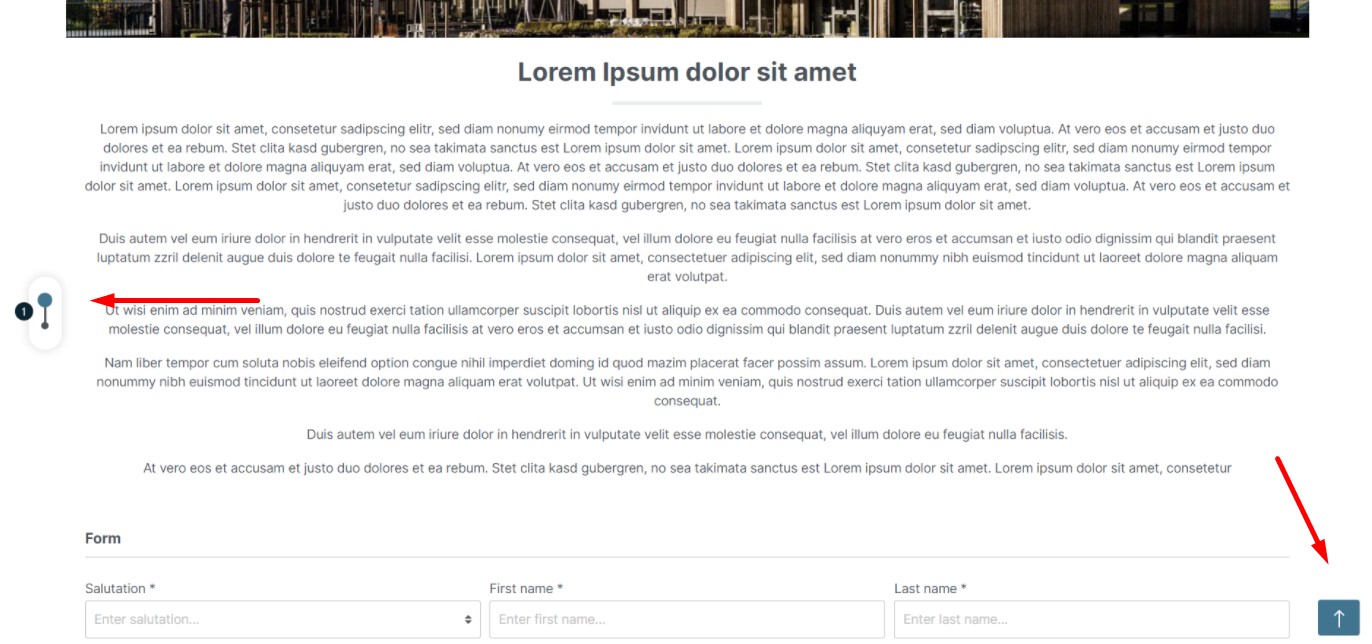
Hover over a navigation point to display the name of the section.
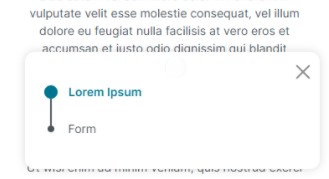
On a mobile screen, the feature looks as follows:

As you can see, the navigation menu is situated at the bottom right. The arrow buttons let you jump between the individual navigation points. If you need to expand the list of points, hit the hamburger menu button:
Call by URL
To extend the basic functionality of the scroll navigation feature, Shopware 6 lets you call up a navigation point via a URL parameter. Use the navigation point name to do that. Let’s assume that the name of our navigation point is “example”. Thus, you can make the call using the following URL: https://your-shop.com/Test-Landingapge/#example
Block visibility
Shopware 6 lets you personalize the appearance of your frontend pages with the help of the CMS extension. You can control the visibility of individual blocks by creating rules and conditions:
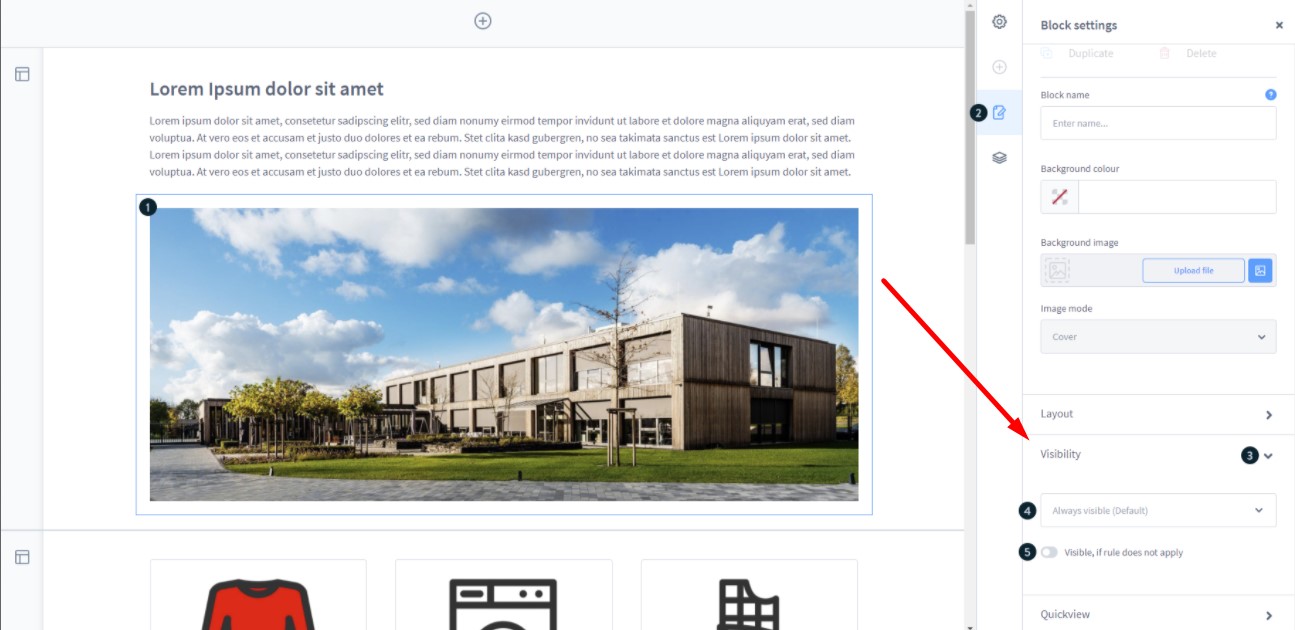
- Select a block you want to edit.
- Open the block settings on the right.
- Define the block visibility.
Note that the block is always visible by default. Therefore, you need to choose a rule to define when it will be hidden. Alternatively, the block can be visible if the rule does not apply.
Individual Forms
The CMS extension for Shopware 6 allows for creating custom forms. You can add the as follows:
- Proceed to Content -> Shopping Experience;
- Select the shopping experience you want to customize;
- Click on the + symbol to add a new block;
- Choose form as the block category;
- Drag your own form into the shopping experience;
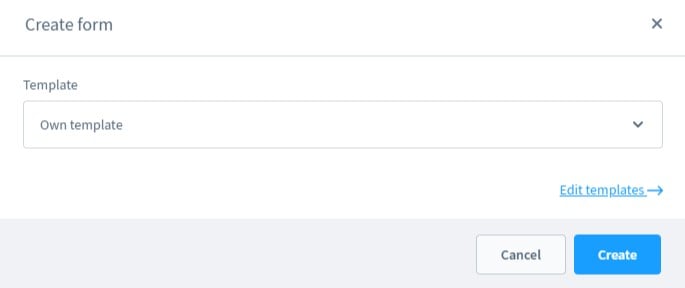
- A pop-up window displays where you can use a previously created template or create a new form.
Options
Сreating a new form or editing an existing one triggers the form settings window with the Options and Fields tabs. You can apply the basic settings for the form in the former:
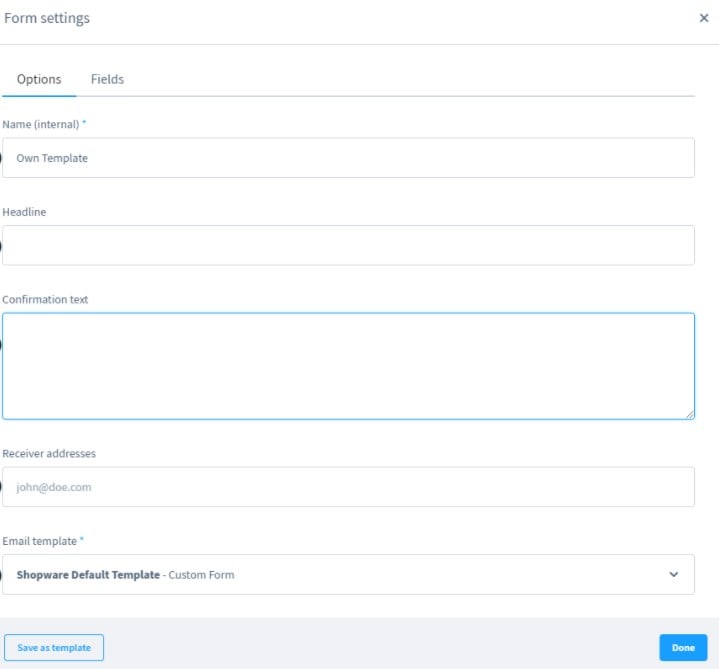
- Name (internal) – you can specify an internal form name here;
- Headline – this title is displayed in the shopping experience on the frontend as a form headline.
- Confirmation text – this text displays to the user upon filling in the form.
- Recipient address – this field contains an email address to which the filled-out form is sent (multiple addresses are supported).
- Email template – you can choose an email template for sending the form content to the recipient.
Fields
This tab provides means for specifying fields visible on the frontend. Besides, you can choose mandatory fields. It is also possible to create groups that consist of one or more fields:
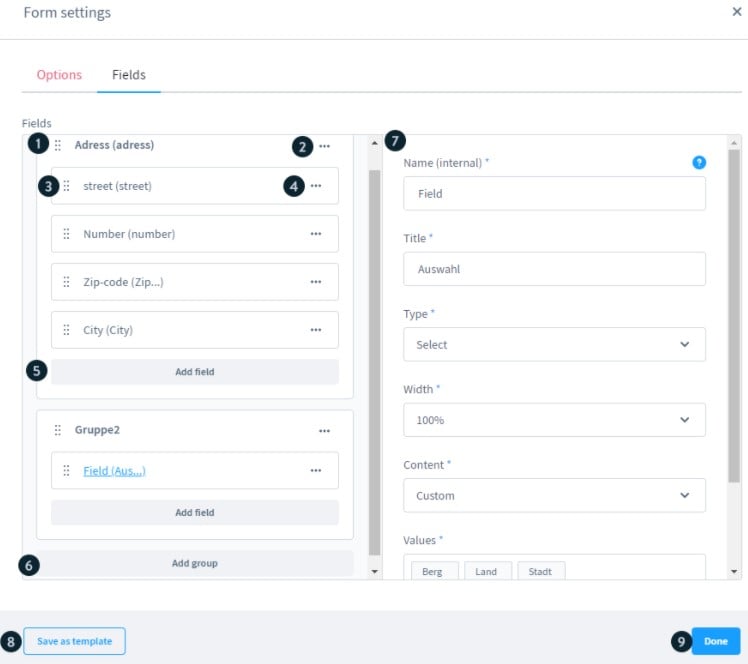
- Groups (1). You can see a group of fields combined under the Address container. Use the dots on the left to change the order of fields in the group and the order of groups.
- Context menu (2, 4). Each group and field has a context menu on the right. You can use it to rearrange the group position, delete the group, edit or duplicate it. Editing options (7) appear on the right and let you enter the group’s internal name and change the heading of the group.
- Field (3). Each group consists of one or more fields. You can rearrange their position using the dots on the left.
- Add field (5). Click on this button to add a new field to the selected group.
- Add group (6). This button adds a new group with a single field.
- Save as template (8). Hit this button to save the form as a template. After that, you will be able to select it while editing shopping experiences.
- Done (9). With this button, you save all changes applied to the form.
Field options
Now, let’s take a look at the most common field options you will face while editing form fields. Note that they always depend on the field type.
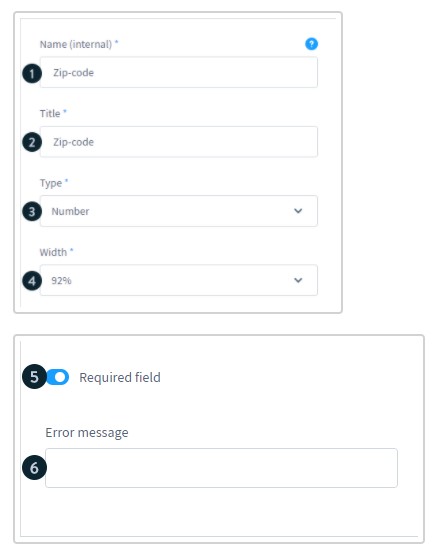
- Name – it is a unique identifier used within the system. It is also utilized as a variable.
- Title – this one is used for external purposes (displayed on the frontend).
- Type – a field type determines which values are supported:
- Text field & email field,
- Number field,
- Selection field,
- Selection,
- Text area;
- Width – how wide a field should be;
- Required field – this option makes the field mandatory;
- Error message – a message displayed on the frontend if a user doesn’t fill in the mandatory field.
Text & email fields

Here, it is possible to set a placeholder text that displays if the field has not been filled in.
Number field
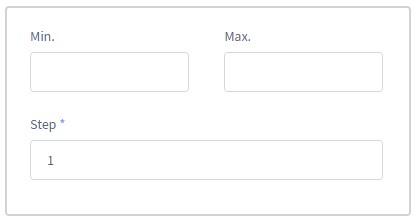
You can specify a minimum or maximum limit as well as steps in which it is possible to enter numbers.
Selection field
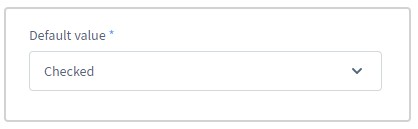
The selection field is a checkbox. As a store administrator, you can specify whether the field should be active by default or not.
Selection
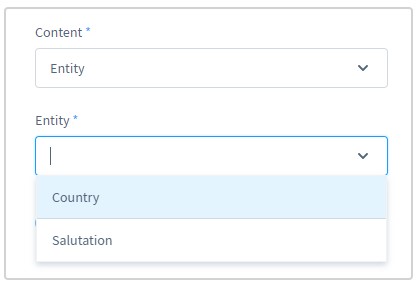
This field type delivers a predefined selection to choose from. If you specify Entity in the Content field, you can select shop entities the user can choose from.
The User-Defined option lets you specify custom values. Type the values and press the enter key.
Text area
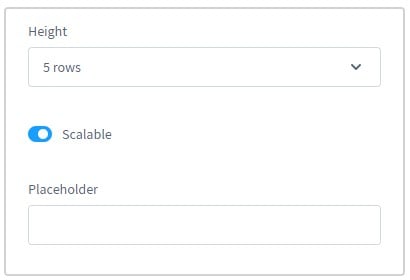
Use this field option to let customers enter longer texts. You can specify the number of lines a user may use and whether the size of the text area can be changed from the frontend.
How to Import CMS Pages to Shopware 6
Our team lets you simplify and automate various routine processes associated with your Shopware 6 backend management. We provide the ability to eliminate the manual creation of most entities, replacing this process with import procedures. Contact our support for more details and try our . You can use it to import any entities to Shopware 6. Please, consult our specialists before using the module for transferring CMS pages, layouts, and form data to Shopware 6.
The module works as follows. You select an entity you want to import. Configure the schedule of updates (it is cron-based). Map its attributes to ones used in Shopware 6. Configure other import parameters, such as your import source and file format. After the corresponding import profile is activated, the extension does all the work for you.
Shopware 6 Essentials FAQ
How to create a Shopware ID?
In the term of the Shopware 6 ecosystems, creating a ShopwareID is one of the initial steps in your e-commerce journey. You get the corresponding ability along with the creation of your Shopware account.
How to create a Shopware account?
You get the ability to create a Shopware account straight on a registration page. Hit the Register Now link and provide the required data. Don’t forget to confirm your intent via a confirmation message provided to your email address.
What is Shopware master data?
All the information you provide while creating a Shopware account is called master data. It combines such company and contact details as an address, email, phone, company name, etc.
How to add a shop in Shopware?
It is possible to launch a new shop in Shopware 6 in your merchant area. The corresponding link is situated on the start screen’s right part. You need to choose between a cloud storefront or an on-premise installation. Next, specify information about your new shop and save changes.
How to add a payment method to your Shopware account?
You can configure a payment method in Shopware 6 under Basic Information -> Accounting. The following three options are available: PayPal, credit card, direct debit.
How to create a deposit in Shopware?
Now, it is possible to use an active payment method to create a deposit for purchasing themes, extensions, and other tools. It is possible to run the corresponding transaction in your Merchant Area -> Shops. You need to specify a shop to provide funds to. Next, click Open Account Details and transfer funds.
How to purchase Shopware extensions?
You can purchase your first Shopware 6 extensions and themes on the Shopware Marketplace or in the Plugin Manager right after the deposit is created. Choose a tool you want to buy and complete the purchase.
How to get support in Shopware?
Shopware lets you provide inquiries regarding your account or license to info@shopware.com or +49 2555 9288 50. As for accounting and financial services, the corresponding source of help is available under financial.services@shopware.com and +49 2555 9288 510.
How to migrate to Shopware 6?
You can use the Improved Import & Export tool for managing the complete migration to Shopware 6. The module provides the ability to move core entities to your new website from any external platform or Shopware’s previous version. The module automates and simplifies all the related processes. Contact us for more information.
How to automate import and export processes in Shopware 6?
Regular data updates are another sphere of application for the Improved Import & Export extension. It provides the ability to create a schedule per each data transfer. Next, the extension launches the corresponding import and export processes, following the time frames you set.
How to integrate Shopware 6 with external systems?
You can also use our module to serve the integration with external platforms and tools. The Improved Import & Export extension makes the Shopware connection with various external systems possible. For instance, you can integrate your store with ERPs, CRMs, accounting tools, etc. The module automates repetitive import and export processes and modifies data according to the requirements of your Shopware store upon import and the connected platforms upon export.
Related posts
 Shopware 6 Advanced Pricing Guide + Import Tutorial
 How To Bulk Import Products In Shopify: CSV Description & Step-By-Step Guide
 Magento 2 B2B Company Guide: Revealing Company Structure & Import
 A Complete Guide to Shopify Customer Import
 How to Import Customers & Customer Addresses to Magento 2
 Reputon Amazon Importer Review: How to Connect Shopify to Amazon in a Few Clicks
 Magento 2 Release Notes
 Amasty ChatGPT AI Content Generator for Magento 2