
Exploring Shopware: Customer Groups in Shopware 6
![]()
Although every customer is unique, you can divide all buyers into groups. It will help you apply different marketing strategies to them and implement other rationalizations. As you might have already guessed, today’s topic is Shopware 6 customer groups. The platform lets you organize your prospects into different groups and use them to configure various management chores. In the following article, we explore Shopware 6 customer groups describing all their nuances. Peruse this blog post to find out how to manage customer groups in Shopware 6, edit the related information, add new customer groups, and delete the data that is already available. Also, we shed light on customer import and export processes.

Note that we provide Shopware integration with external platforms. Contact our support for further information or try our Improved Import & Export Extension for Shopware.
Table of contents
- 1 Shopware 6 Customer Groups Explained
- 2 Customer Groups in Shopware 6 Admin
- 3 Shopware 6 Customer Groups Overview
- 4 Adding a New Customer Group
- 5 How to Import Customer Groups to Shopware 6
- 6 Shopware 6 Customer Groups FAQ
- 7 Shopware 6 Essentials FAQ
- 7.1 How to create a Shopware ID?
- 7.2 How to create a Shopware account?
- 7.3 What is Shopware master data?
- 7.4 How to add a shop in Shopware?
- 7.5 How to add a payment method to your Shopware account?
- 7.6 How to create a deposit in Shopware?
- 7.7 How to purchase Shopware extensions?
- 7.8 How to get support in Shopware?
- 7.9 How to migrate to Shopware 6?
- 7.10 How to automate import and export processes in Shopware 6?
- 7.11 How to integrate Shopware 6 with external systems?
Shopware 6 Customer Groups Explained
In Shopware 6, customer groups let you define whether the prices are displayed net or gross. Although they are quite flexible in the terms of creating and deleting new records, there is one group that cannot be removed. The “standard customer group” has a special role in the functionality of your e-commerce website. Shopware 6 uses it as a fallback for all sales channels. By deleting it, you also disable the frontend, so it is not accessible.
Furthermore, it is impossible to solve this issue by creating a new customer group named “standard customer group” since the original one is associated with a fixed UUID in the database. You need to restore the initial record via a query. The solution is described here: .
Customer Groups in Shopware 6 Admin
The Customer Groups screen is situated in the primary settings section of your administration. You can find it as follows:
- Go to your Shopware 6 administration;
- Open its main menu;
- Proceed to the Settings section;
- Open the Shop subsection;
- Hit the Customer Groups button.
Shopware 6 Customer Groups Overview
The main screen with your customer groups looks as follows:
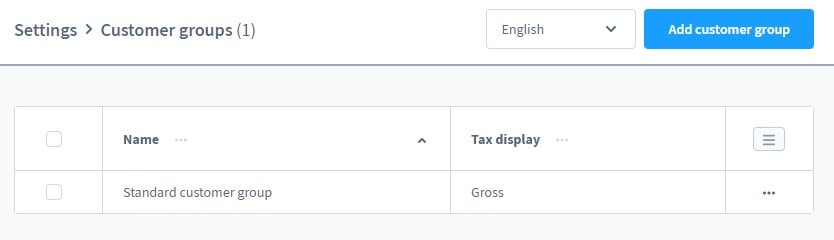
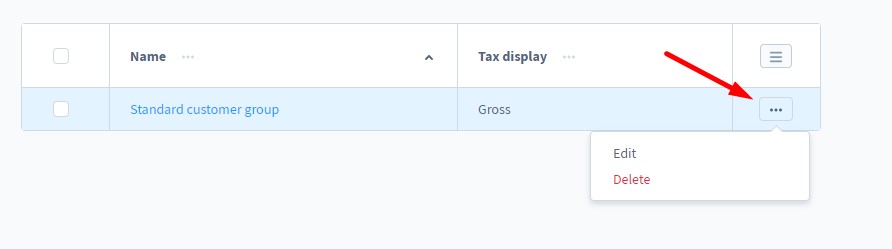
It lets you create and edit the existing customer groups. As for the grid, it looks basic, containing only group names and the related tax schemes: net or gross. Also, you can use a context menu to edit or delete grid records.
Adding a New Customer Group
Click the Create customer group button to add a new customer group. You will see the following screen:
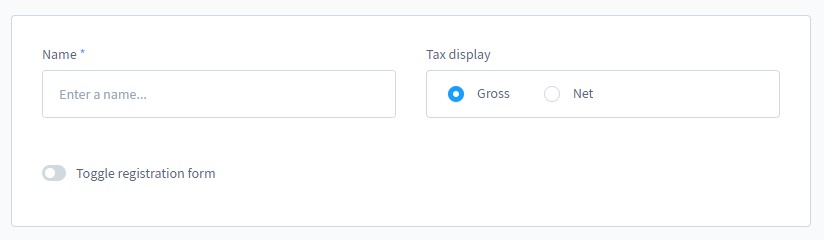
It lets you name your new group as well as specify which tax representation to use with it. Note that Shopware 6 only lets you apply gross or net prices.
Besides, it is possible to link a separate registration form for your new customer group. As a result, any customer can register directly for a specific group. However, the process is not automated since further activation is required. Thus, you can control which prospects are assigned to which customer groups.
Customer group registration in Shopware 6
If you decide to associate a separate registration with your new customer group, it is necessary to activate the registration form toggle.

Further configuration options are divided into the next two sections: Registration Form and Link URLs.
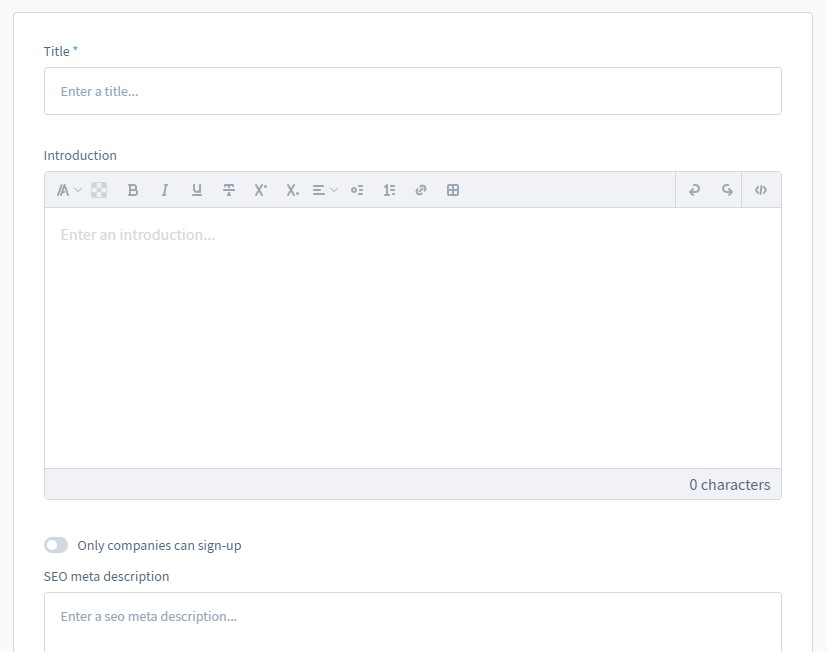
The first one lets you specify a name and introductory text related to the customer group. Next, you can display additional fields for the registration of corporate customers – activate the Only companies can register option to add such input areas as company, department, and VAT ID.
Also, you can add an SEO meta-description.
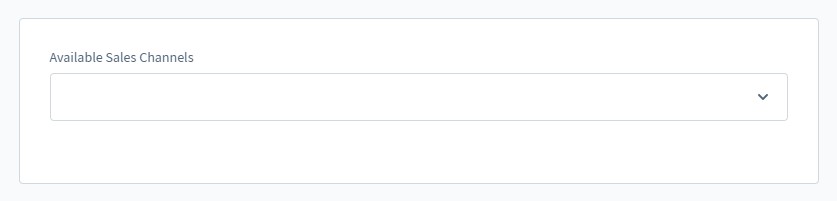
In the URLs section, the form gets its URL. Allocate it to at least one sales channel and save the form. After that, Shopware 6 generates a technical URL and a separate URL for each sales channel. Note that you can access the form directly via the sales channel URL or use this address on external pages.
On the storefront, the new registration looks as follows:
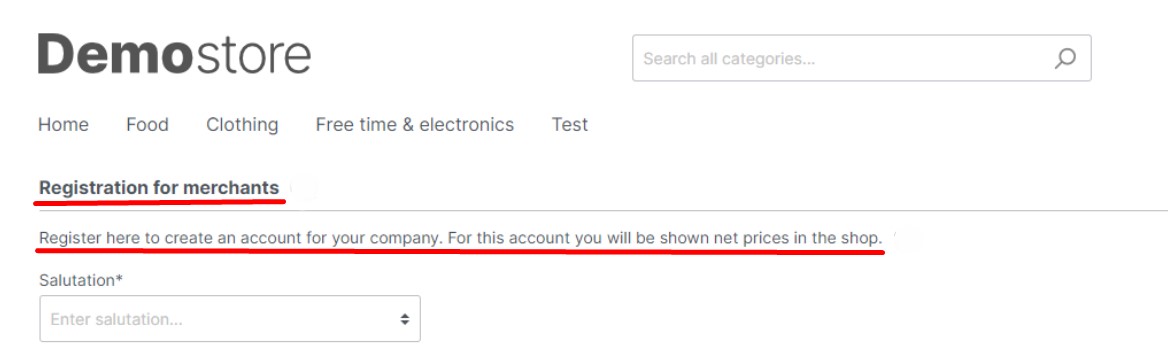
As you can see, it displays the new title and description.
However, using this form doesn’t assign a customer to the desired customer group. As a Shopware 6 administrator, you need to proceed to the Customers screen. Here, the newly registered prospect is available in the grid with a corresponding note.
After that, you need to open the detailed customer view and use the administration function above the navigation tabs to reject or accept the customer for the corresponding group.
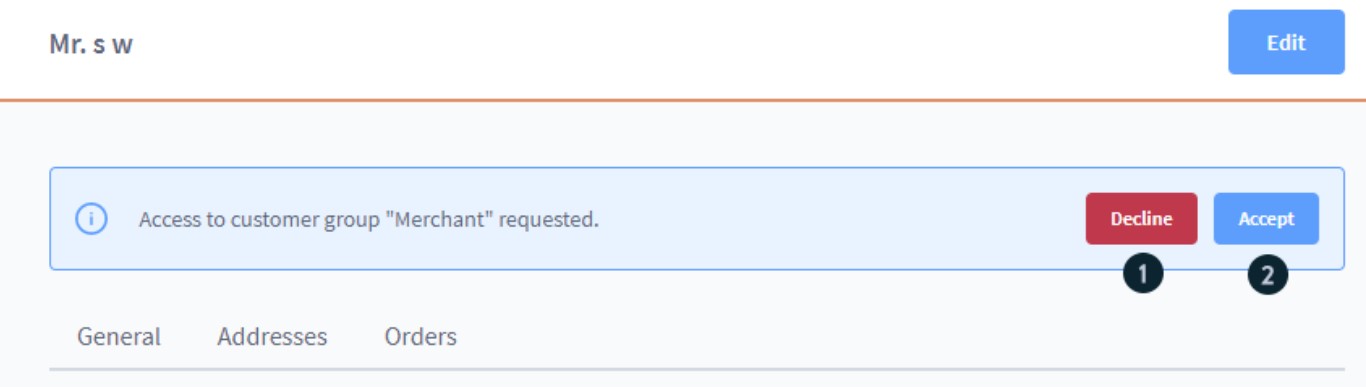
After that, an email notification is sent to your newly registered client.
How to Import Customer Groups to Shopware 6
If you need to import customer groups to your Shopware 6 website, you’ve come to the right place. Our team can help you simplify and automate various processes associated with data transfers to your e-commerce website. Contact our support for more details and try our . You can use it to import any entity to Shopware 6, including customers and customer groups. The extension offers tools necessary to automate regular data transfers to and from your e-commerce website. First of all, you get schedules of updates. Just specify the time you want to run import or export, and the module will do everything for you. Secondly, you get mapping presets or special schemes that match third-party data to data used in Shopware 6. Please, consult our specialists before using the module for transferring customer groups to your website. We will help you get the most out of this procedure.
Shopware 6 Customer Groups FAQ
How to find Customer Groups in Shopware 6?
You can find Shopware 6 customer groups under Settings -> Shop -> Customer Groups.
How to add new customer groups in Shopware 6?
Hit the Add customer group button to create a new customer group in Shopware 6. Next, provide the necessary information as shown above.
How to edit a customer group in Shopware 6?
Go to Settings -> Shop -> Customer Groups and use the context menu on the Customer Groups screen to edit a group.
How to delete a customer group in Shopware 6?
Go to Settings -> Shop -> Customer Groups and use the context menu on the Currencies screen to delete a group. Note that it is prohibited to remove the standard customer group.
What is the initial purpose of Shopware 6 customer groups?
Customer groups in Shopware 6 are used to apply one of the following two tax schemes: net or gross.
Shopware 6 Essentials FAQ
How to create a Shopware ID?
You get a Shopware ID automatically while creating a Shopware account.
How to create a Shopware account?
Click the Register Now link on the registration page and fill in the form to create a shopware account. Next, follow the instructions provided in a confirmation email.
What is Shopware master data?
All the information required for your Shopware account is called Shopware master data. It consists of various company details: physical addresses, phone numbers, email addresses, etc.
How to add a shop in Shopware?
You can add a Shopware shop in a merchant area. There is a link that initiates this process on the start screen’s right part. Choose a type of your new shop: it could be a cloud storefront or an on-premise installation. After that, provide more information and save changes.
How to add a payment method to your Shopware account?
It is possible to configure a payment method for internal purposes, such as purchases of extensions and themes, under Basic Information -> Accounting. PayPal, credit card, or direct debit are at your disposal. Use one of them to add a deposit to buy various tools for your e-commerce website.
How to create a deposit in Shopware?
Add a deposit to your Shopware shop under Merchant Area -> Shops. Choose a storefront to provide funds to and click Open Account Details. Note that you need to add a deposit that covers the amount of your future purchase.
How to purchase Shopware extensions?
Use either the Shopware Marketplace or the Plugin Manager to purchase extensions and themes. Create a deposit that is equal to the purchase amount, choose all the necessary tools, and complete the purchase.
How to get support in Shopware?
Reach Shopware at info@shopware.com and +49 2555 9288 50 with account or license issues. Use financial.services@shopware.com and +49 2555 9288 510 to send inquiries regarding accounting and financial services.
How to migrate to Shopware 6?
The Improved Import & Export module is developed to help you with the migration to Shopware 6. The extension provides lots of benefits over the default tools, including cron-based schedules and mapping schemes. Thus, you can use our module to transfer core entities from any external system or Shopware’s previous versions. We also offer export solutions for other e-commerce platforms to help you transfer data from Magento, Shopify, and other systems to Shopware 6. Contact our team for more information.
How to automate import and export processes in Shopware 6?
Automation of recurring data transfers is another goal that you can achieve with the Improved Import & Export extension for Shopware 6. It simplifies regular data updates due to schedules of import and export processes. You can launch the corresponding import and export procedures according to the specified time frames with no interaction on the admin side.
How to integrate Shopware 6 with external systems?
The Improved Import & Export extension is also responsible for the integration with ERPs, CRMs, accounting tools, and similar tools that help you manage your e-commerce website more efficiently. The module automates repetitive import and export processes with cron-based schedules and modifies data with mapping presets following the requirements of your Shopware store. This works in the export direction as well.
Related posts
 Shopware 6 Advanced Pricing Guide + Import Tutorial
 CopyAI Review 2023
 How to generate order increment IDs automatically during Magento 2 import
 How To Bulk Import Products In Shopify: CSV Description & Step-By-Step Guide
 A Complete Guide to Shopify Customer Import
- How to Import Customers & Customer Addresses to Magento 2
 Reputon Amazon Importer Review: How to Connect Shopify to Amazon in a Few Clicks
 Magento 2 B2B Company Guide: Revealing Company Structure & Import