
Amasty Countdown Timer Magento 2 Extension
Discount offers and special promotions are a vital part of a marketing strategy of any ecommerce store. However, if you don’t use such psychological tricks like scarcity and urgency in your promo campaigns, online shoppers still might tend to abandon their carts. If you are running your store on Magento 2, we recommend you to consider third-party discount tools that add awareness and sense of urgency to product promotions.
Today, we present you a new module by Amasty – Countdown Timer for Magento 2. The extension allows merchants to create limited deals with a defined expiration date and display them on a storefront, stimulating shoppers to quickly decide on making a purchase. Besides, with the tool, store owners get the ability to run sales campaigns according to the specified schedule.
Below, we highlight the Magento 2 Countdown Timer extension’s features and describe its main advantages.

Table of contents
Features
- Special offers with limited time;
- Visualization of special deals in the countdown timer;
- Customizable countdown timers;
- 6 ready-made templates for the timer’s design;
- Flexible display options;
- Possibility to add URL links to the countdown timer;
- Dedicated grid for countdown timers management;
- Scheduled display of the countdown timer.
With the Magento 2 Countdown Timer extension by Amasty, you can make your limited deals more appealing for customers by displaying their expiry date. Using the module’s settings, you get the ability to quickly create special offers with a deadline and visualize them in a countdown timer. You can use the timer to display the number of days, minutes, and seconds left until the expiration of a deal. This way, you will add incentives to a customer’s decision on buying a promoted product by creating a sense of urgency and fear of missing a good bargain. Countdown Timer can be used in various promotional campaigns like seasonal sales, daily deals, flash sales, pre-launch and end-of-season offers, and others.
As a store owner, you will have control over the design and content of your countdown timers. The extension offers 6 ready-made templates from which you can pick the one that will fit best your store theme. All templates are customizable, so you get an ability to change a countdown timer’s color and specify text for catchy messages displayed next to the timer. It is possible to place custom timers on any page of your web store as well as attach them to products, so you will not miss an opportunity to attract a visitor’s attention to your special deal. Moreover, you can insert a URL link in the countdown timer that will forward shoppers to the page with a promoted product.
As for the backend interface of the module, Magento admins can view and manage all created widgets on a dedicated grid. The grid gathers information on all scheduled campaigns with a countdown timer, saving admin time on their management. Besides, the Amasty extension lets users start promo campaigns automatically by setting a timer’s schedule. The module’s configuration allows to quickly choose the start date and time as well as duration for the display of a countdown timer. This way, you will not need to control how your promo offers are running since everything will work according to the specified schedule.
Backend
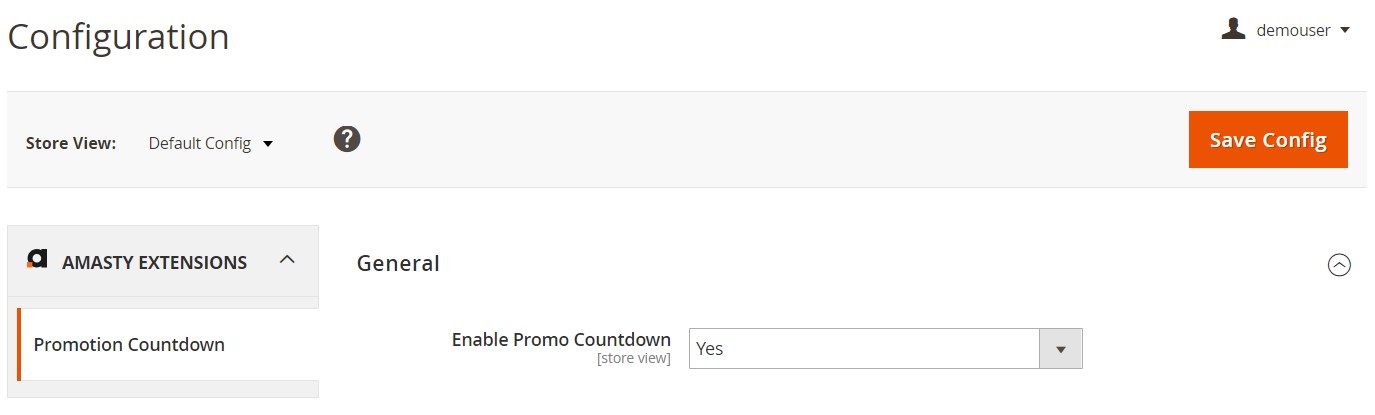
To start using the countdown timer on your website, go to Stores -> Settings -> Configuration -> Amasty Extensions -> Promotion Countdown and enable the module.
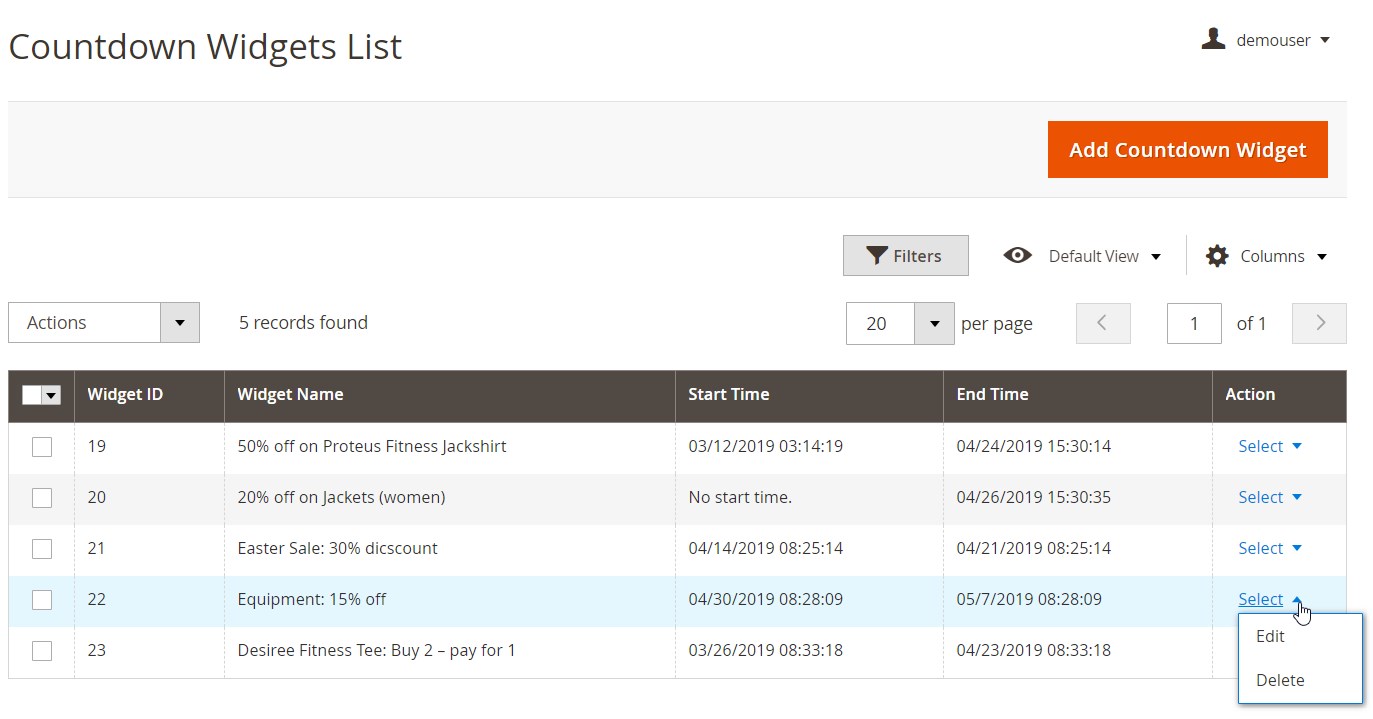
To open a grid with existing countdown timers, navigate to Amasty -> Promotion Countdown in your admin panel. The grid gathers information about each widget’s ID, name, and start and end time. You can edit or delete a timer from the Action column, as well as remove selected widgets in bulk via the appropriate mass action. The grid allows applying filters to the Widget ID and Widget Name columns and sorting all columns. If you want to create a new promo timer, click the “Add Countdown Widget” button.
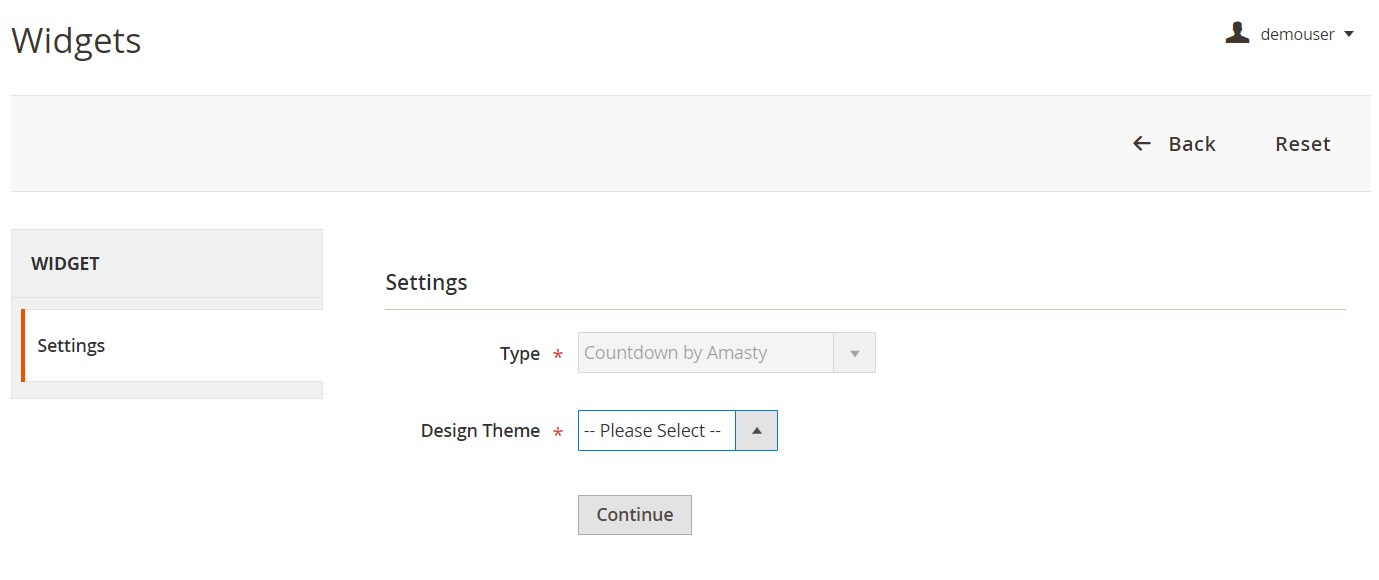
On the Widgets screen, first, select a theme for your store design and click “Continue”. Note that Type is set as “Countdown by Amasty” by default.
The new widget configuration is divided into 2 tabs: Storefront Properties and Widget Options.
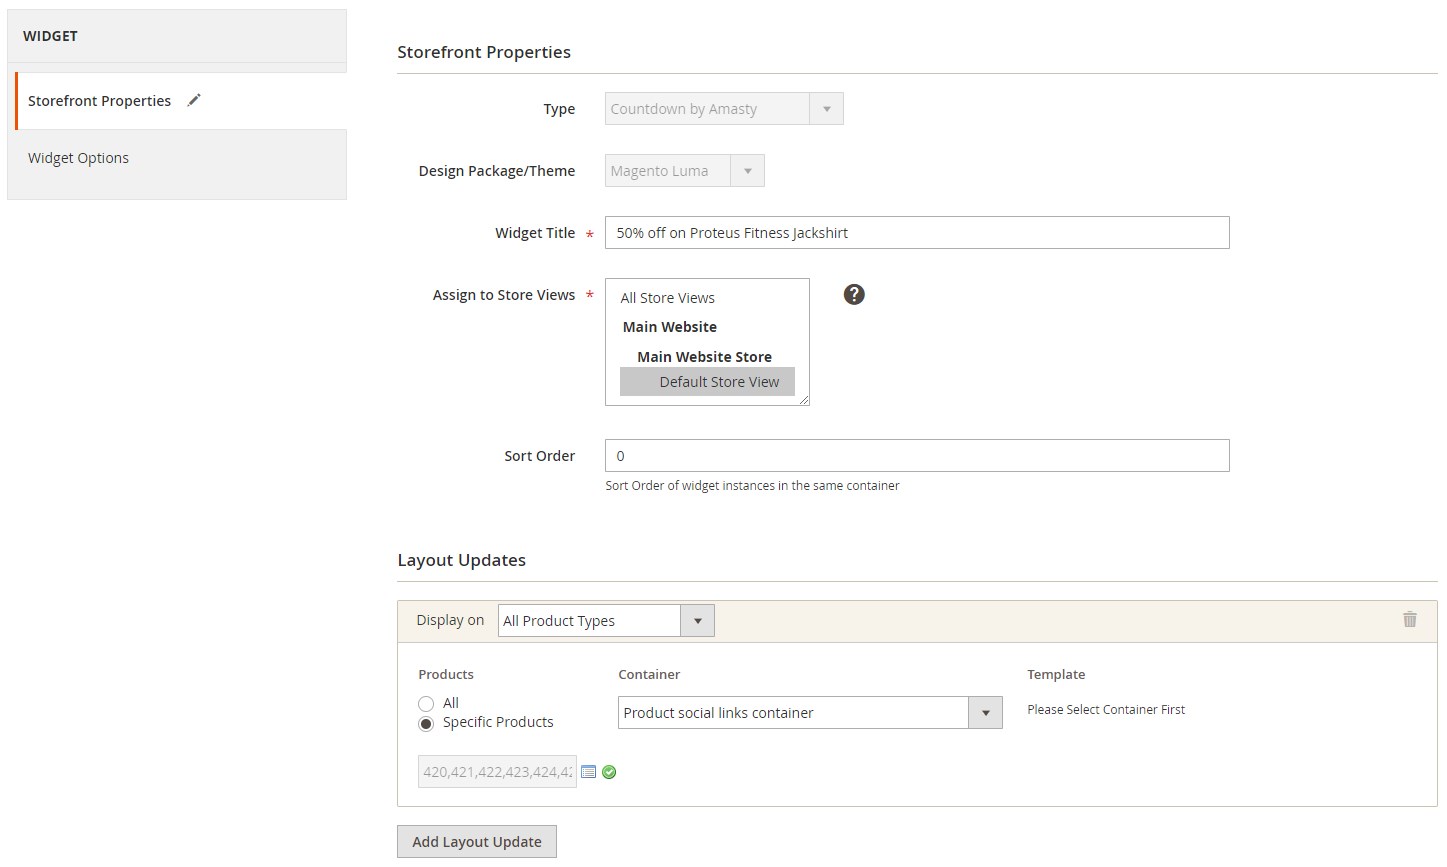
In Storefront Properties, you should create a title of the widget for admin purposes, select store views where it will be visible, and set the sorting order which will define its position on a page in case you have a few active timers at the same time.
Below, there is the Layout Updates section on the same page where you decide where to display the promo widget. It is possible to add as many layout updates as you need. Here, you can choose whether to place the timer in products, categories, or generic pages and select their types. If you want to display the widget on product or category pages, define whether to add it to all of them or specific ones. In the Container field, select a block on the page where the countdown should be placed.
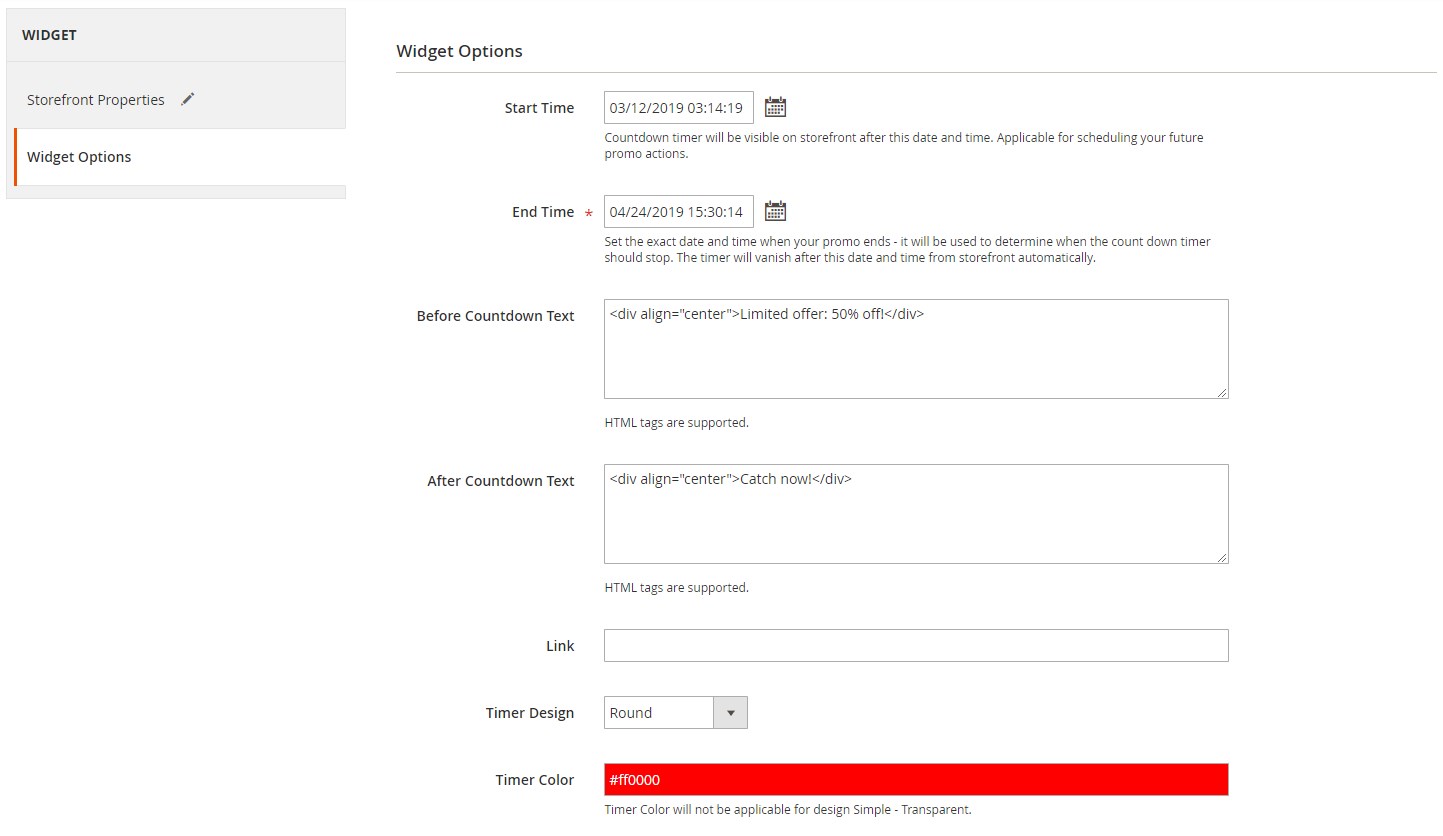
In Widget Options, you can schedule the timer display on the storefront by specifying the start and end date and time. Note that if you don’t set the start time, the timer will become visible on the frontend after you flush Magento cache. Next, you can type in a text for messages that will be shown before and after the countdown widget. It is possible to use HTML tags in the text fields. Here, you also insert a link to a particular page to which you want to lead your website visitors after they click on the timer. As we’ve mentioned above, you can pick one of the 6 ready-made design templates for your promo widget: Clear (Simple), Round (Simple), Honeycomb (Simple), Transparent (Simple), Round, or Progress Bar. Then, you can select the most suitable color for the timer using a color picker tool. Note that for the Transparent (Simple) design you can’t change the color.
If you want to place a promotional widget on a CMS page, go to Content -> Pages and select the necessary page.

On the opened page, expand the Content block, click “Show/Hide Editor”, and then “Insert Widget…”. In Widget Type, select “Countdown by Amasty” and configure the timer in the same way as we’ve just described above. After setting all options, press on the “Insert Widget” button.
Frontend
Now, we want to show you how promo widgets configured with the Amasty Countdown Timer extension look on the storefront.
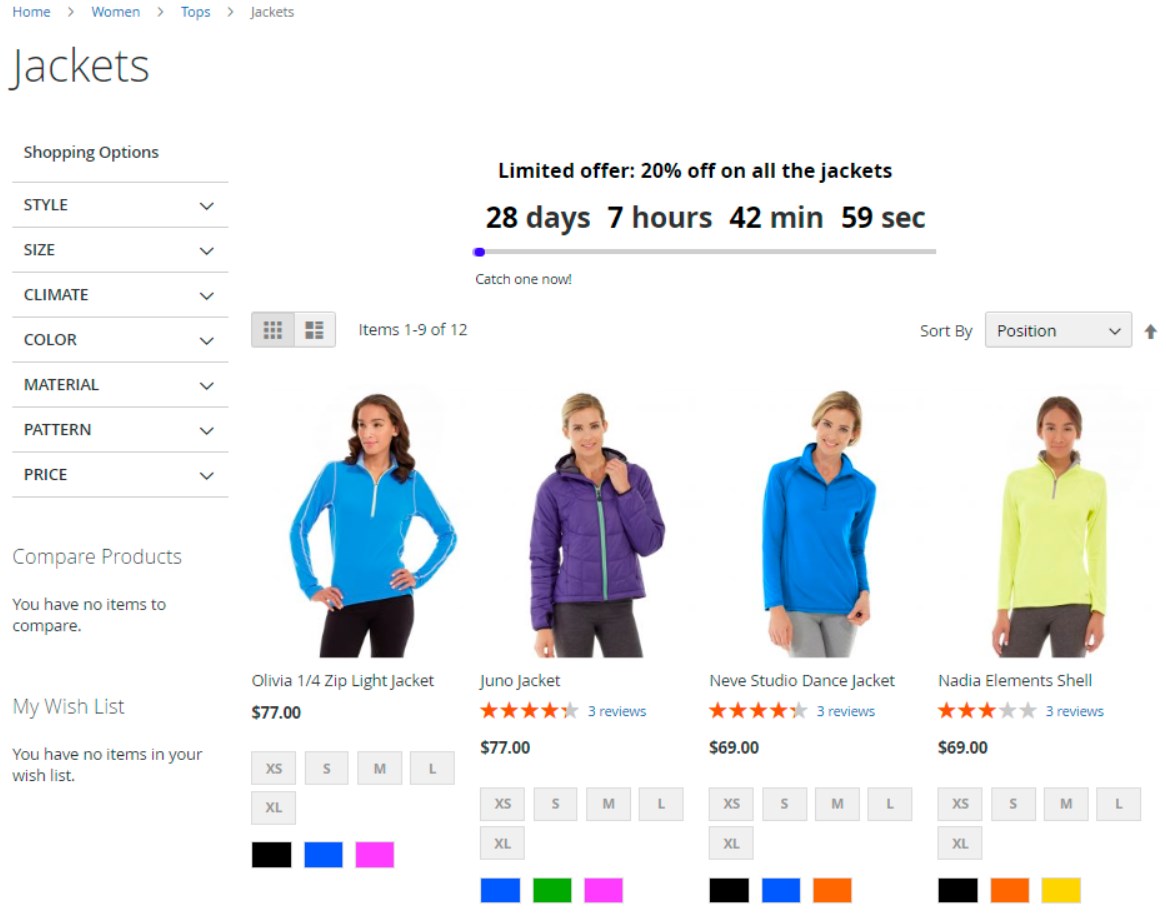
Below, you can see an example of a limited-time offer promotion in the progress bar widget on the category page.
Another possibility offered by the Magento 2 module is placing a timer on the product detail page. The image below shows how the round timer design looks.

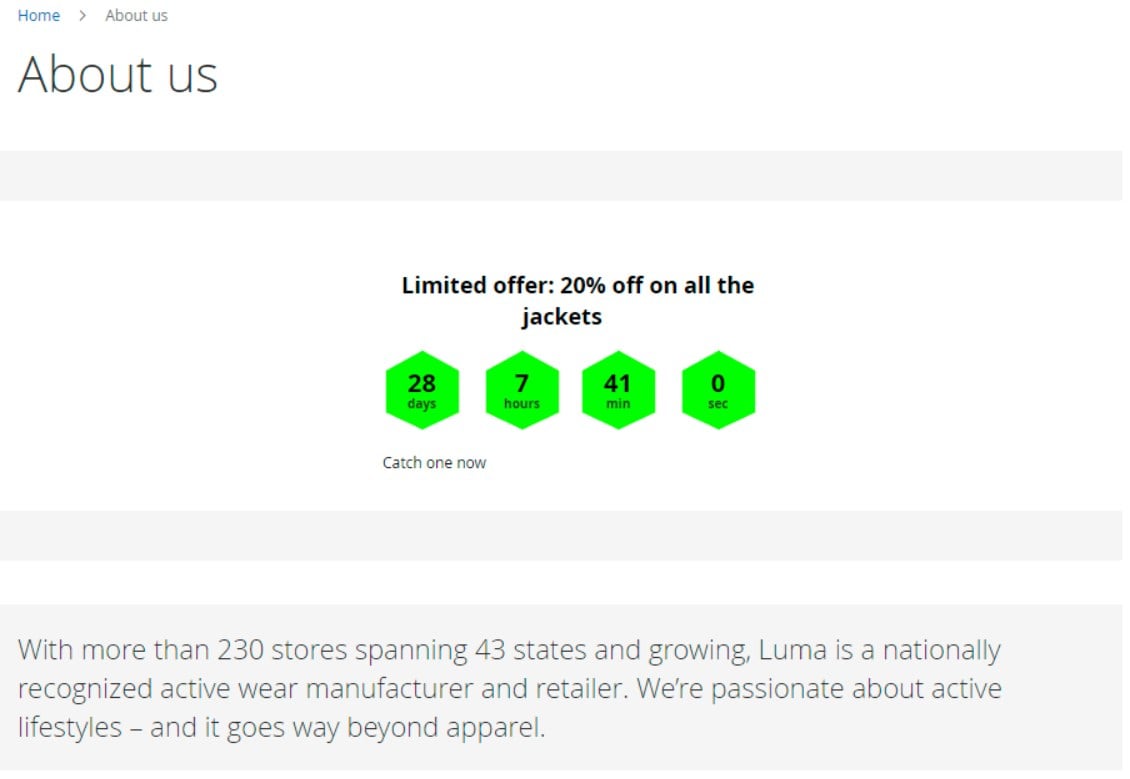
This example shows a special deal displayed on the “About us” CMS page:
Final Words
Amasty Countdown Timer for Magento 2 is a robust module that enhances the default Magento 2 functionality and provides tools for creating engaging and profitable marketing campaigns. By utilizing countdown timers for promoting your products, you will keep your customers always informed about current special deals on your website and create more effective communication with them. As a result, you will increase conversion rates and boost sales on your store and build long-term relationships with your clients. Straightforward backend interface of the extension enables admins to quickly create custom promo campaigns based on specific marketing goals.
The price of the Amasty Countdown Timer extension for Magento 2 is $99, and you can buy it here:
Related posts
 Magento SEO in 2026: Proven Strategies to Rank Higher and Boost Sales (50+ Tips)
 What is Magento AR? Exploring Augmented Reality & Top Magento 2 AR Extensions
 Magento AI Extensions to Unlock Smarter Search, Support & Content Creation
 Shopify Gift Cards Explained: How to Set Up, Manage & Sell Them
 E-Commerce Impulse Buys Guide: Boost Your Sales with Effective Strategies and Smart Tools
 Magento Inventory Management: A Complete Guide to Stock Optimization and Efficiency
 A Complete Guide to Shopify Customer Import
 Magento 2 Export Customers Tutorial: Export Customer Data with Ease