Exploring Shopware: Currencies in Shopware 6

Shopware 6 lets you add numerous currencies to your e-commerce storefront along with countries to make it suitable for customers all over the globe. Although the system provides a list of preconfigured records, you can edit any currency in it and add new ones if necessary. Plain and admin-friendly settings provide the ability to make your store more prepared for international markets in a few clicks. In the following article, we explore Shopware 6 currencies describing all their nuances. Peruse this blog post to find out how to manage currencies in Shopware 6, edit the related information, add new records, and delete the data that is already available.

Note that we provide Shopware integration with external platforms. Contact our support for further information or try our Improved Import & Export Extension for Shopware.
Table of contents
- 1 Currency Settings in Shopware 6 Admin
- 2 Shopware 6 Currencies Overview
- 3 How to Create A New Currency in Shopware 6
- 4 How to Import Currency Data to Shopware 6
- 5 Shopware 6 Currency Settings FAQ
- 6 Shopware 6 Essentials FAQ
- 6.1 How to create a Shopware ID?
- 6.2 How to create a Shopware account?
- 6.3 What is Shopware master data?
- 6.4 How to add a shop in Shopware?
- 6.5 How to add a payment method to your Shopware account?
- 6.6 How to create a deposit in Shopware?
- 6.7 How to purchase Shopware extensions?
- 6.8 How to get support in Shopware?
- 6.9 How to migrate to Shopware 6?
- 6.10 How to automate import and export processes in Shopware 6?
- 6.11 How to integrate Shopware 6 with external systems?
Currency Settings in Shopware 6 Admin
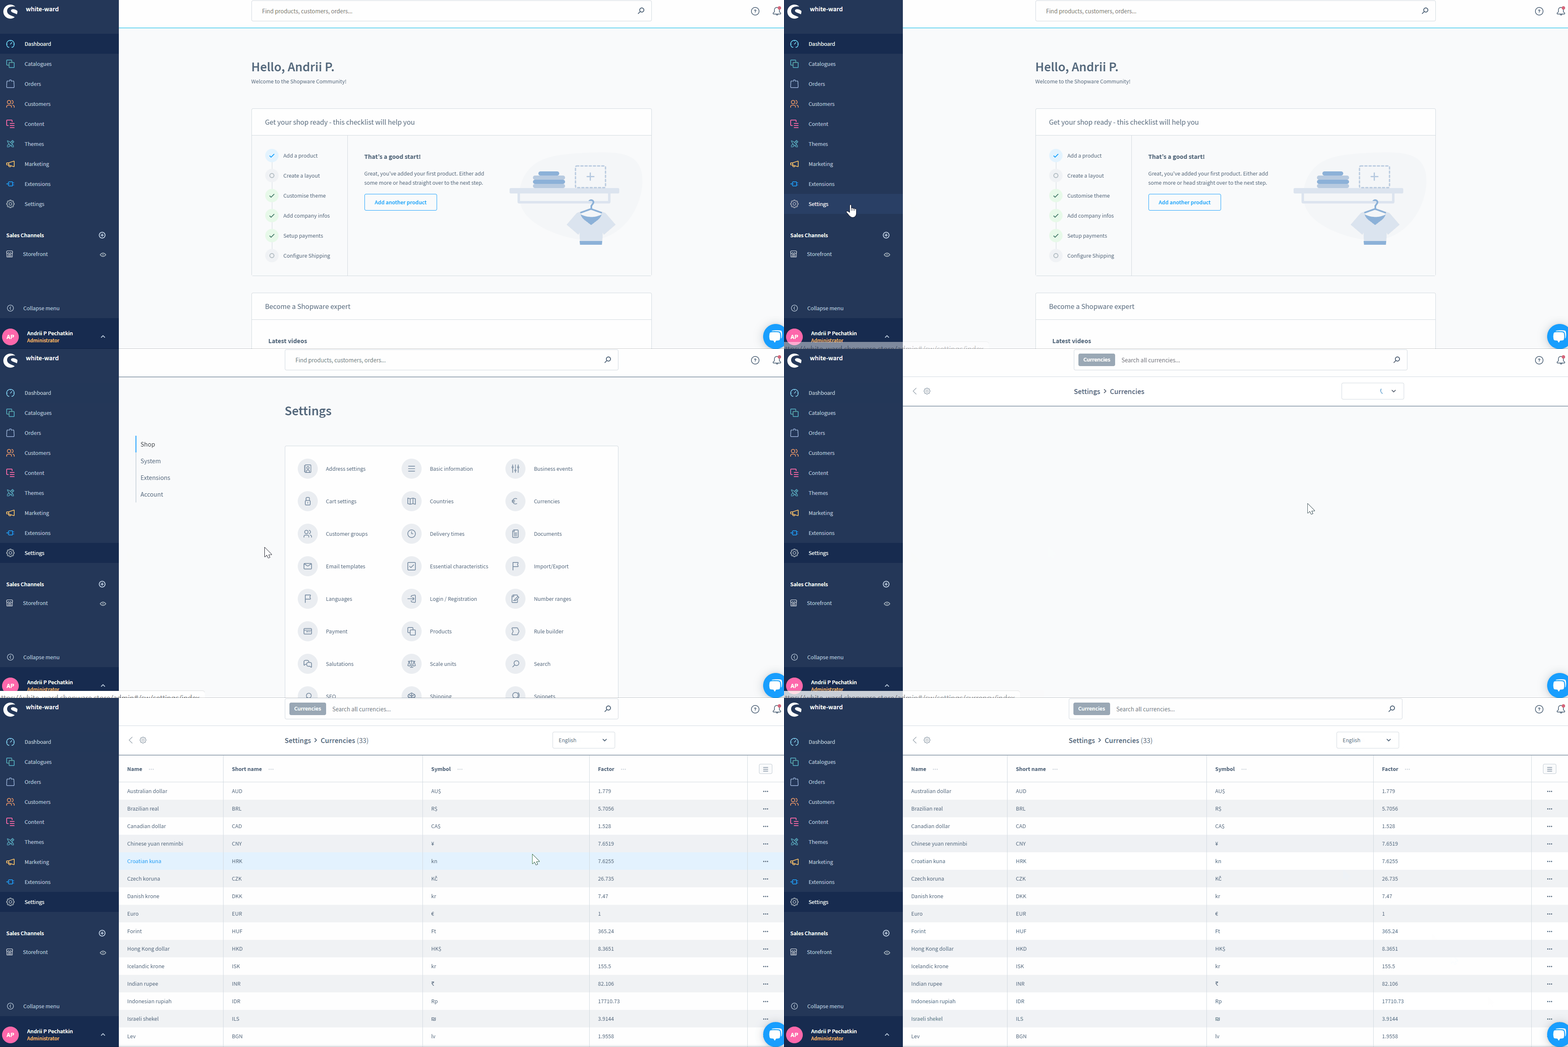
The Currencies screen is situated in the primary settings section of your administration. You can find Shopware 6 Currency Settings as follows:
- Go to your Shopware 6 administration;
- Open its main menu;
- Proceed to the Settings section;
- Open the Shop subsection;
- Hit the Currencies button.
Shopware 6 Currencies Overview
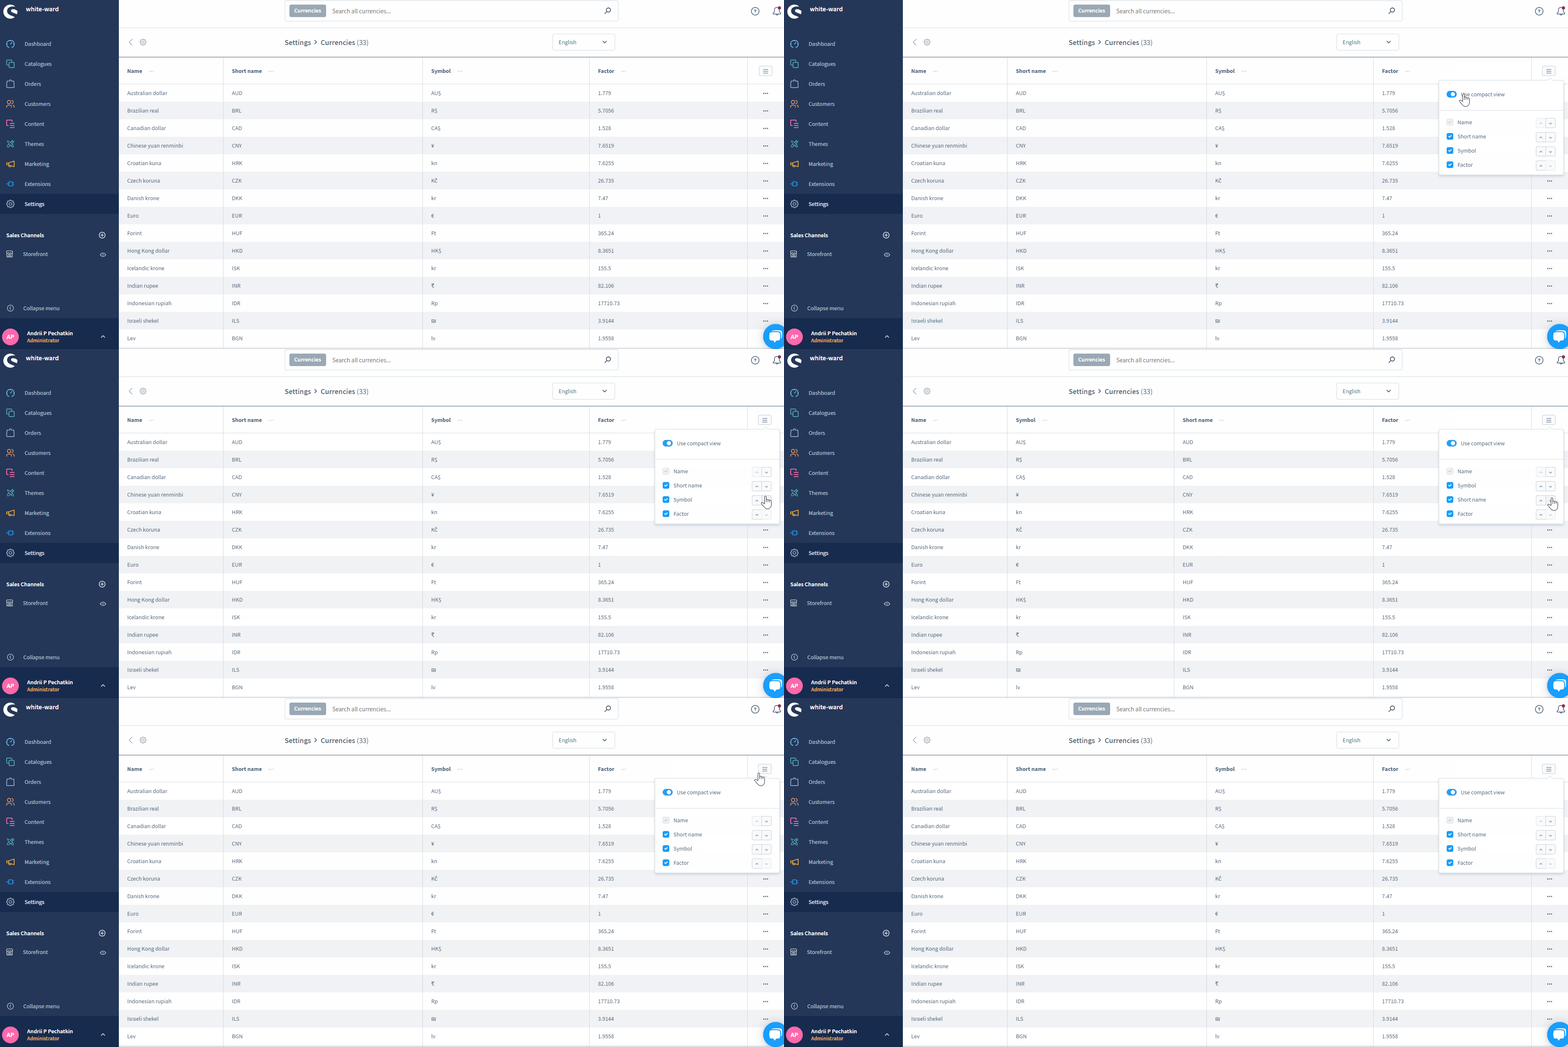
The Shopware 6 Currencies overview contains all currencies pre-configured in your sales channels. The corresponding screen looks as follows:

In the top row, you can see the number of available currencies. It also lets you switch between languages as well as add new currencies to Shopware 6.
As for the grid, it displays the configured currencies, their short name, symbol, and factor defined by the standard currency in your system (e.g., 1.693 for the US dollar).
When it comes to the List Settings column, it contains a context menu that lets you edit or delete the existing currencies. Also, there is the List Settings button that lets you rearrange the order of columns as well as show/hide them and switch to the compact view.
How to Create A New Currency in Shopware 6
Hit the Add Currency button to create a new currency in Shopware 6.
The system redirects you to a new screen divided into the following three sections: Settings, Price Rounding, and Countries. The first one looks as follows:
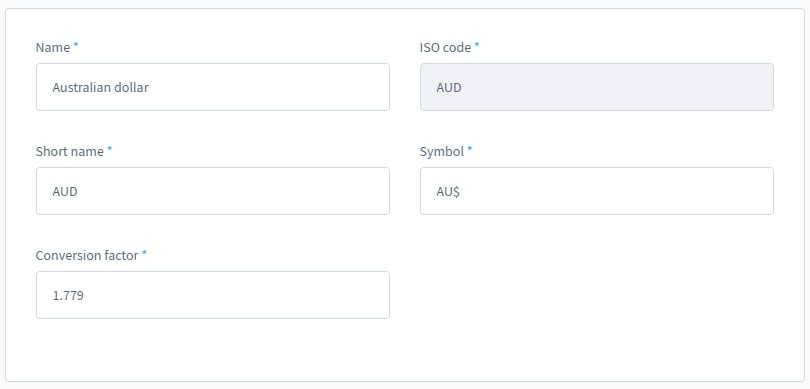
- Name – the name of your currency here;
- ISO code – its ISO code;
- Short name – a name that follows the ISO code EUR and consist of three letters;
- Symbol – a symbol of your currency;
- Conversion Factor – the factor of your currency defined as a multiplier of the standard currency in your system, such as 2.365 to the US dollar. It converts the stored values of the system standard currency, displaying the adjusted prices with the assigned currency in the frontend.
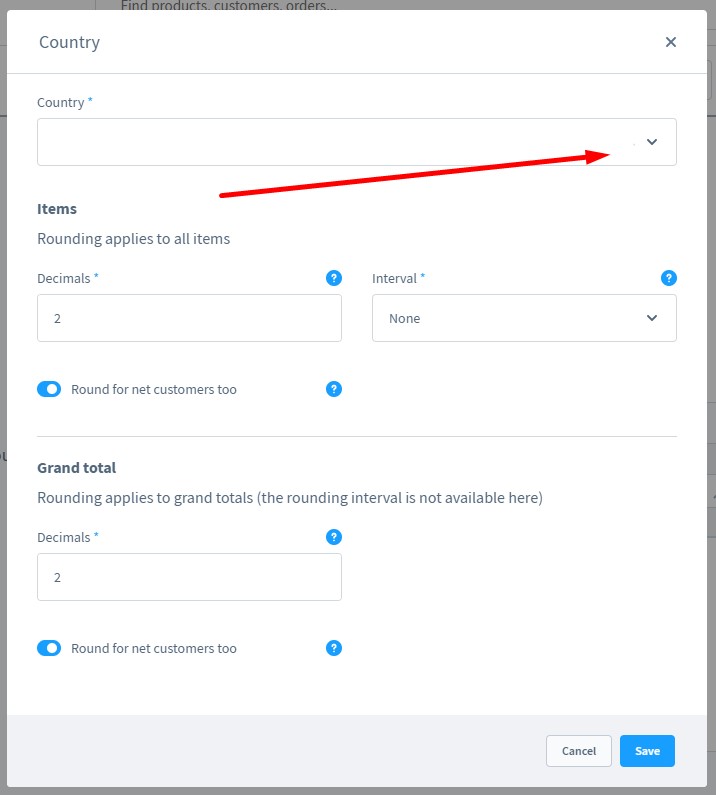
The Price Rounding section lets you create separate conditions for items and grand total. In the first case, you specify decimals – the maximum number of digits after the decimal separator – and rounding intervals. The latter values account for markets where the lowest physical denominations of the currency have been abolished. As a result, you have to rely on cash roundings. By selecting “None”, you can disable them.
As for the Grand Total section, rounding intervals are not available in it. But in both cases, you can enable rounding for net customers.
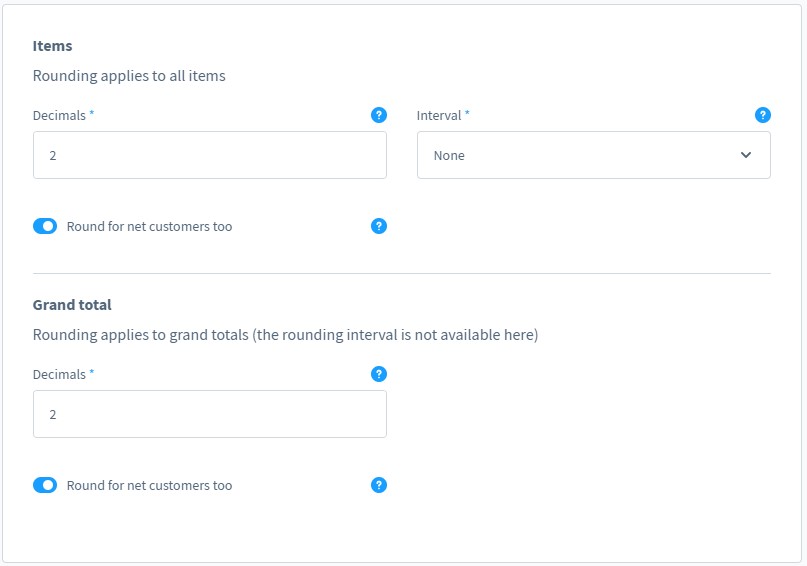
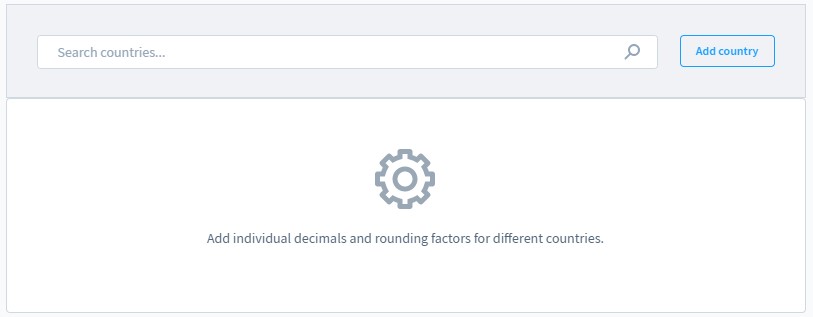
The Countries section provides the ability to add individual decimals and rounding factors for different countries. Hit the Add country button to apply individual configurations.
You will see a screen with settings that we’ve just described except the country field that lets you apply region-based rounding.
How to Import Currency Data to Shopware 6
If you need to import currency data to your Shopware 6 website, our team can help you simplify and automate various processes associated with the corresponding data transfers to your e-commerce website. Contact our support for more details and try our . You can use it to import any entity to Shopware 6, including currencies. The module provides the ability to leverage schedules to automate regular data imports. Furthermore, it offers mapping presets that teach Shopware 6 how to treat any third-party data, replacing it with the corresponding information from your database. Please, consult our specialists before using Improved Import & Export to transfer currencies to Shopware 6. We will explain all the nuances of this process.
Shopware 6 Currency Settings FAQ
How to find Currencies in Shopware 6 administration?
You can find the currencies of your shop under Settings -> Shop -> Currencies.
How to add new currencies in Shopware 6?
Hit the Add currency button to add a new currency in Shopware 6. Next, provide the necessary information as shown above.
How to edit a currency in Shopware 6?
Go to Settings -> Shop -> Currencies and use the context menu on the Currencies screen to edit a currency.
How to delete a currency in Shopware 6?
Go to Settings -> Shop -> Currencies and use the context menu on the Currencies screen to delete a currency.
How to add a price rounding for a currency in Shopware 6?
Go to Settings -> Shop -> Currencies, add a new currency or edit the existing one, Proceed to the Price Rounding section, and create new conditions. Note that it is possible to add country-specific rounding rules in the Countries section.
Shopware 6 Essentials FAQ
How to create a Shopware ID?
You don’t have to assume any additional measures to create a ShopwareID. The system provides it automatically while creating a Shopware account.
How to create a Shopware account?
It is possible to create a Shopware account on a registration page. Click the Register Now link, and fill in the form to initiate the account creation. Next, follow the instructions provided in a confirmation email. Note that you complete the account creation only after providing all the required information. However, it is possible to use it before all the data is specified.
What is Shopware master data?
Shopware master data is all the information required used in your Shopware account. It usually consists of such company details as addresses, phone numbers, emails, and others.
How to add a shop in Shopware?
Visit your merchant area to add a Shopware shop. Hit the corresponding link on the start screen’s right part and choose a type of your new shop. It could be a cloud storefront or an on-premise installation. Provide all the required information and save changes.
How to add a payment method to your Shopware account?
You can add a payment method to your Shopware account under Basic Information -> Accounting. Choose PayPal, credit card, or direct debit. You will be able to use it to add a deposit for purchasing various tools for your e-commerce website.
How to create a deposit in Shopware?
You can add a deposit under Merchant Area -> Shops. Select a shop to provide funds to and hit Open Account Details. Remember that you should add a deposit that is enough to cover the amount of your future purchase.
How to purchase Shopware extensions?
When a deposit is big enough, you can go shopping. Use either the Shopware Marketplace or Plugin Manager to buy extensions and themes for your e-commerce website. Choose all the necessary tools and complete the purchase.
How to get support in Shopware?
It is possible to get help regarding your account or license here: info@shopware.com and +49 2555 9288 50. If you get stuck with issues related to accounting and financial services, you can get help under financial.services@shopware.com and +49 2555 9288 510.
How to migrate to Shopware 6?
With the Improved Import & Export extension, you can dramatically improve your migration to Shopware 6. Our module offers lots of benefits over the default tools, such as cron-based schedules and mapping schemes. You can use the extension to move core entities to your new website from any external system. Besides, it provides the ability to migrate from Shopware’s previous versions. Also, we offer export solutions for other e-commerce platforms, such as Magento and Shopify. Therefore, you can easily transfer data from your existing store to Shopware 6. Contact us for more information.
How to automate import and export processes in Shopware 6?
The Improved Import & Export extension for Shopware 6 is also good at automating recurring data transfers. The module simplifies regular data updates providing the ability to create a schedule of import and export processes per transfer. Consequently, the plugin launches the corresponding procedures according to the specified time frames with no interaction on the admin side.
How to integrate Shopware 6 with external systems?
The Improved Import & Export extension also succeeds in the integration with ERPs, CRMs, accounting tools, and other similar instruments. It automates repetitive import and export processes with cron-based schedules and modifies data according to the requirements of your Shopware store using mapping presets.


