How to Get All Custom Field Data on The Shopware 6 Storefront

We’ve just come across a by . The author is wondering whether it is possible to get all custom field data on the Shopware 6 storefront. Marakeshh also asks how to achieve the desired goal if there is such a possibility. Here at Firebear, we know a possible resolution. Although displaying custom fields on the Shopware 6 storefront is a complex procedure, it doesn’t require advanced coding skills. You can find all the guidelines in the official documentation or our blog. So, let’s add custom field data to Shopware 6 product pages.

Note that we provide Shopware integration with external platforms. Contact our support for further information or try our Improved Import, Export & Mass Actions. We can also help you transfer products with custom fields to your e-commerce website.
Table of contents
The Issue
The story’s origin is quite simple: the author tries to display custom product fields on a product page. Instead of a nice-looking frontend page, Marakeshh gets a technical name and value.
|
1 2 3 4 |
{ "HS_code": "08477548", "length": 30 } |
However, the desired result would be to get the label, and the position displayed as defined in the backend (see image below).
Another goal is to loop through the custom fields to display them. Currently, there is no way to know which custom fields you get back. Therefore, the author cannot define the labels on the go. So, let’s take a look at the most obvious solution.
The Solution
Shopware 6 provides the ability to display custom fields on product pages with the help of the default instruments. You just need to find the Shopware 6 Custom Fields page in your administration interface. It is situated in the main menu under Settings -> System -> Custom Fields.
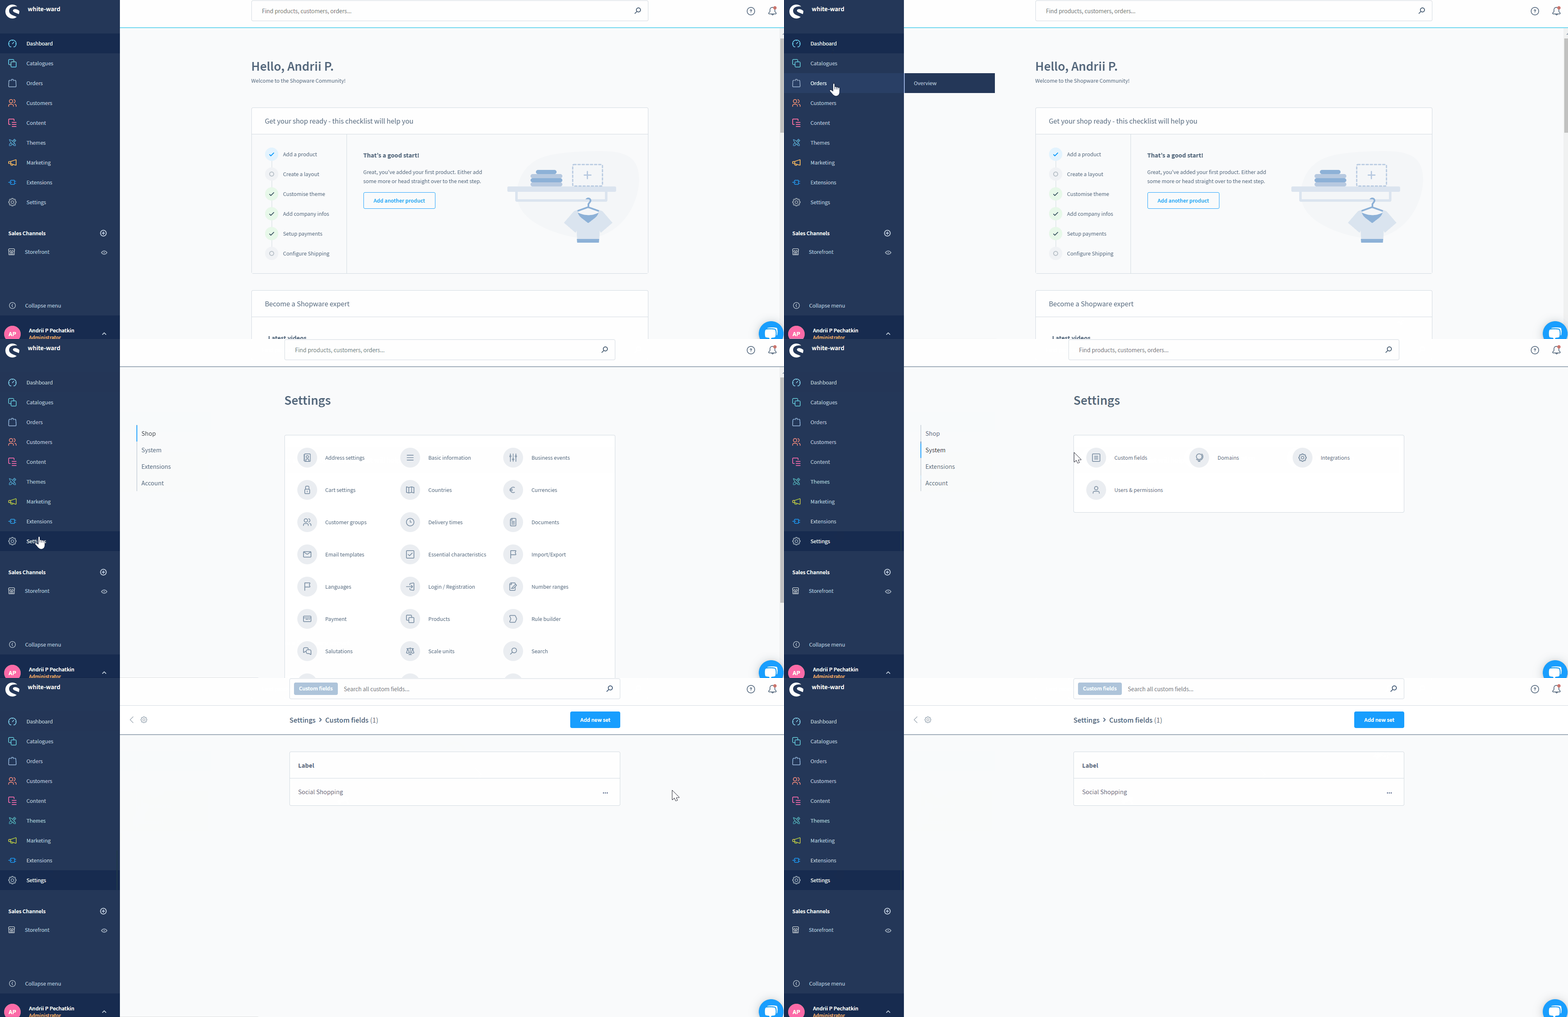
You can see sets of Shopware 6 custom fields that are already available. Use the context menu on the right to either delete or edit them.
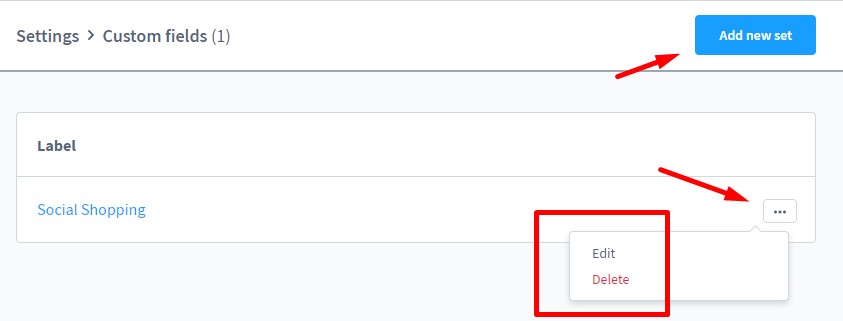
To address our issue, you need to click the Add New Set button. It initiates the creation of new Shopware 6 custom filed sets that will be visible on the frontend. The following form displays:
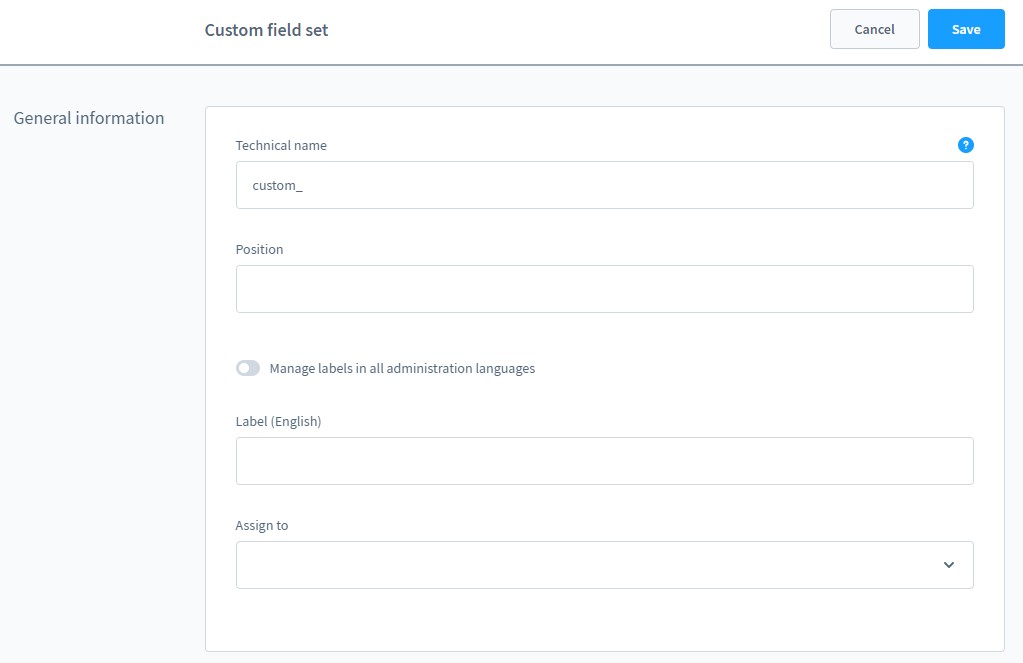
At this stage, you need to specify a unique technical name that cannot be changed later. Set the field position and manage its label (frontend display). Note that you can apply localized labels with the help of the “Manage labels in all administration languages” toggle and assign your set to store pages. Save your new set and create custom fields for it.
Click the New custom field button in the area below the General Information form:
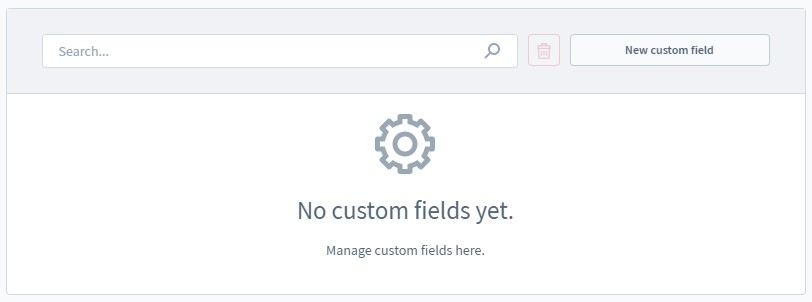
Note that the following form changes following the selected field type. For instance, the Select Field type requires you to specify the field’s technical name, position, label, placeholder, and help text (see the image below).
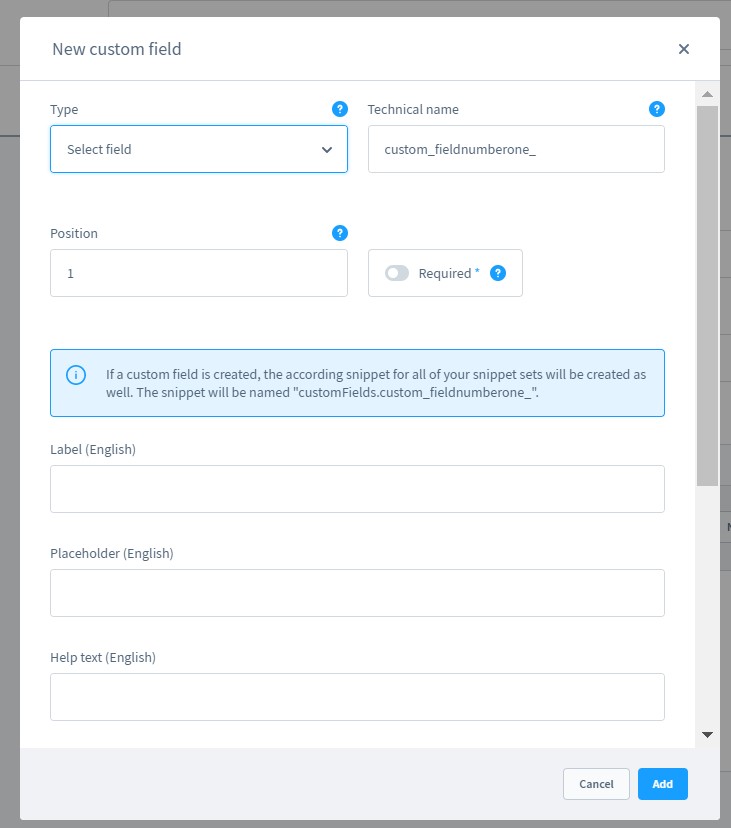
Next, you need to decide whether your new custom field is multi-select or not.
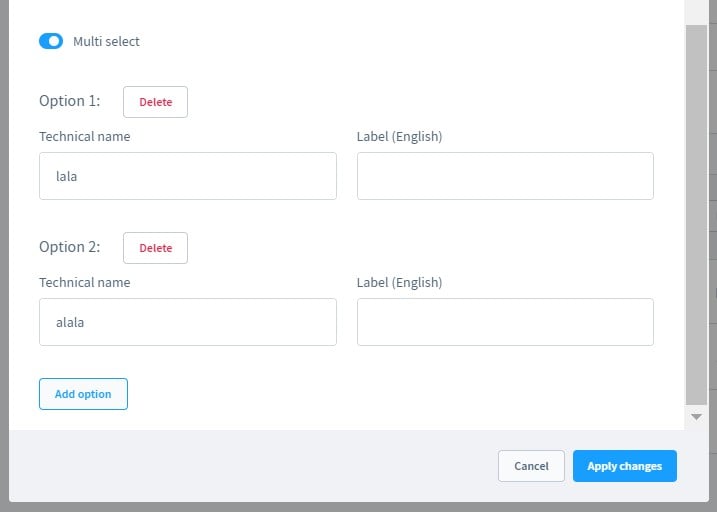
You can add as many custom fields as you need. When all of them are added, save your new set. You can find a detailed description of available custom field types here: Shopware 6 custom field types.
Displaying the custom field content on the Shopware storefront is associated with corresponding template adjustments. Modify the description.html.twig file available under /custom/plugins/YourTheme/src/Resources/views/storefront/page/product-details/. The derivation starts as follows:
|
1 |
{% sw_extends '@Storefront/storefront/page/product-detail/description.html.twig' %} |
Other file content depends on where you need to display the additional field or not. Place it below the description text. Use the following code to include the original content of the page_product_detail_description_content_text block:
|
1 |
{% block page_product_detail_description_content_text %} |
Along with this snippet:
|
1 |
{{ parent() }} |
The following code will help you integrate the custom field:
|
1 |
{{ page.product.translated.customFields.technischer_name_customfield}} |
Note that Shopware 6 stores the technical name in the settings of the additional field.
Below, you can see an example of how a custom field is assigned to a product page on a Shopware 6 storefront:
|
1 2 3 4 5 6 |
{% sw_extends '@Storefront/storefront/page/product-detail/description.html.twig' %} {% block page_product_detail_description_content_text %} {{ parent() }} {{ page.product.translated.customFields.technical_name_customfield }} {% endblock %} |
Check this article for more information: .
How to Import Custom Fields to Shopware 6
As we’ve already mentioned above, you can use Improved Import, Export & Mass Actions for Shopware to automate the product data transfers. The extension lets you transfer custom fields with all the related information. It also provides the ability to automate all data transfers with the help of schedules. Specify when a particular data transfer should be launched, and the tool will follow the selected time frame. Besides, it lets you create schemes to match external attributes to ones used in Shopware 6. You teach the module how to treat unsupported data and what designations to use to replace it. As a result, any external update is easily adopted and moved to Shopware 6. Contact our support for more details.
Shopware 6 Essentials FAQ
How to create a Shopware account?
If you are new to Shopware, create an account. Visit the registration page, hit the Register Now link, and fill in the form to create a new account. After receiving a confirmation email, follow the instructions provided in it.
What about a Shopware ID?
You don’t need to perform extra steps to get a Shopware ID since it is provided automatically upon registration.
What is Shopware master data?
All the information you provide about your company and business is called Shopware master data. It includes physical addresses, phone numbers, emails, etc.
How to add a new Shopware shop?
You need an e-commerce website to add products with custom fields. It is possible to add a shop to your Shopware account in your merchant area. Click the corresponding link, choose the type of your new shop (a cloud storefront or an on-premise installation), and provide all the information the system requires.
How to add a payment method to your Shopware account?
Now, it’s time to add a payment method for internal purposes. Go to Basic Information -> Accounting and select PayPal, credit card, or direct debit as a way to transfer funds to your account.
How to create a deposit in Shopware?
Now, when the internal payment method is configured and enabled, you can initiate a money transfer that becomes a deposit. Go to your Merchant Area -> Shops, choose a shop to provide funds to, click Open Account Details, and transfer a deposit that covers the amount of your next purchase.
How to purchase Shopware extensions?
The Shopware Marketplace and the Plugin Manager introduce the two ways to purchase extensions. Create a deposit in advance that equals the amount of your future purchase. Next, select a tool you want to buy and complete the checkout.
How to get support in Shopware?
You can get support with accounting and financials through these channels: financial.services@shopware.com and +49 2555 9288 510. The following are suitable for inquiries regarding license issues: info@shopware.com or call +49 2555 9288 50.
How to automate import and export processes in Shopware 6?
The Improved Import, Export & Mass Actions module is a solution that automates import and export processes associated with recurring data transfers. You can create schedules to automatically launch the corresponding import and export processes with its help. The extension requires no interaction on the admin side if configured properly.
How to migrate to Shopware 6?
It is also possible to use the Improved Import, Export & Mass Actions tool to conduct the migration to Shopware 6. It can help you transfer data from your existing website to the new platform. You can migrate from other e-commerce systems orShopware’ss previous versions. Since we also offer export solutions for systems like Magento and Shopify, you can simplify your data transfers between them and Shopware. for more information.
How to integrate Shopware 6 with external systems?
Shopware 6 integration with ERPs, CRMs, accounting tools, and other similar platforms can be based on the Improved Import, Export & Mass Actions plugin. As we’ve just mentioned, the extension can help you automate repetitive import and export processes. Also, you can use mapping presets to modify data according to the requirements of your Shopware store during import, as well as follow the rules of the connected platform during export.


