
Mastering XLSX Exports in Shopware 6: A Comprehensive Tutorial

Do you find yourself confined to exporting data from Shopware 6 in just CSV format? What if you need to provide XLSX files to your partners? The traditional route involves converting CSV to XLSX, which can be a bit of a headache. But hold on, there’s a smarter way to streamline this process and export your data in XLSX directly from Shopware 6. In this guide, we’ll navigate through the exciting world of XLSX exports, unlocking the potential of your Shopware 6 data without the conversion hassle. You will need to install the Firebear Improved Import, Export & Mass Actions for Shopware 6 to attain the desired functionality. But before we dive in, let’s explore the intriguing contrasts between CSV and XLSX. And if you’re hungry for more insights, don’t forget to explore our treasure trove of tips in the Shopware 6 Cookbook, and don’t miss our Shopware 6 XLSX import guide.

Table of contents
CSV vs. XLSX
CSV, an abbreviation for ‘comma-separated values,’ is like a digital version of a well-organized checklist. In this format, data blocks are elegantly separated by, you guessed it, commas. It’s straightforward and user-friendly, a file format that’s as approachable as a familiar friend. Even if you’re not a tech guru, handling CSV files is a breeze. The cherry on top? CSV files are lightweights; they won’t hog your server’s resources, making them a practical choice.
Now, let’s talk XLSX. These files are the sophisticated cousins in the digital realm, belonging to the illustrious Microsoft Excel Spreadsheet family. They don’t just arrive casually; they come zip-compressed and laden with XML goodness. XLSX doesn’t just organize data; it orchestrates it with tags and other wizardry.
What sets CSV and XLSX apart? CSV is your go-to for simplicity and agility. It’s like your trusty bicycle, perfect for straightforward data journeys, with no technical acrobatics required.
On the flip side, XLSX is the multi-tool in the data universe. It thrives on complex, structured data, wielding the mighty SpreadsheetML markup language and schema. Imagine data arranged in a grid of cells, each cell a powerhouse capable of holding values and formulas. And here’s the magic – you can have multiple worksheets in one workbook, creating an interconnected data symphony.
Using XLSX over CSV offers several advantages:
- Structured Data Handling: XLSX is well-suited for handling complex and structured data due to its support for multiple worksheets, rows, and columns within a single workbook. This makes it ideal for organizing large datasets with multiple categories and dependencies.
- Formulas and Calculations: XLSX files support formulas and calculations, allowing you to perform mathematical operations and data analysis directly within the spreadsheet. This feature is invaluable for tasks like financial modeling or scientific data analysis and can help you a lot with analyzing your e-commerce business.
- Rich Formatting: XLSX supports various formatting options, including text styles, cell colors, and conditional formatting. This capability enables you to create visually appealing and informative reports and documents.
- Data Validation: XLSX allows you to define data validation rules, ensuring data accuracy and consistency. You can set constraints on data entry, reducing the risk of errors in your datasets.
- Cell Comments: XLSX supports cell comments, which can be used to provide additional context or explanations for specific data points. This feature enhances the documentation and clarity of your spreadsheets. It is extremely helpful in terms of collaboration between your teams since you can leave an important message for other team members right in your XLSX file.
- Data Protection: XLSX files offer password protection and encryption features, adding an extra layer of security to sensitive data. You can restrict access to the spreadsheet and protect it from unauthorized editing.
- Data Visualization: XLSX supports the inclusion of charts, graphs, and images within the spreadsheet. This visual representation of data can help in conveying insights and trends more effectively.
- Compatibility with Advanced Software: XLSX is compatible with various advanced software applications, including business intelligence tools, data analysis software, and reporting platforms. This compatibility facilitates seamless data integration and analysis. And of course, using XLSX files for Shopware export lets you integrate with third-party systems your business case requires.
- Automation: XLSX files can be easily generated and manipulated programmatically using scripting languages like Python, making them suitable for automating data-related tasks and workflows. Think of it as your additional time-saver!
- Google Sheets: You can effortlessly open XLSX files straight in your browser, converting them into Google Sheets spreadsheets within a few clicks.
To sum it up, XLSX offers greater versatility, data management capabilities, and visualization options compared to CSV. It is the preferred choice when working with complex and data-rich scenarios, especially in business, finance, research, and data analysis contexts.
How to export XLSX files using the default Shopware 6 tools
Let’s delve into the process of exporting XLSX files using Shopware 6’s default tools. This procedure involves a two-step approach since Shopware 6’s native export feature primarily generates CSV files. Here’s how you can work around this limitation:
Step 1: Export Data as CSV
First of all, you need to run a standard export procedure in your Shopware 6 admin:
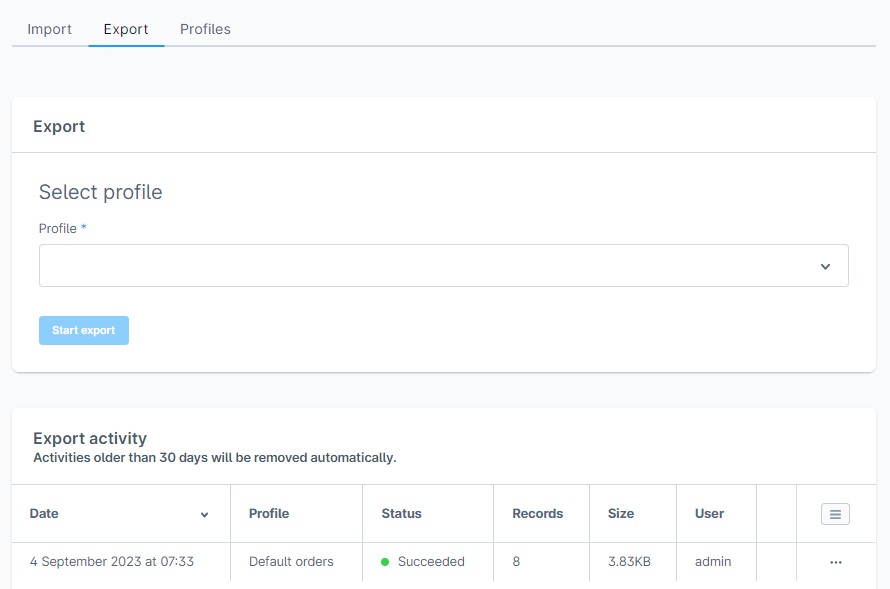
- Log in to your Shopware 6 admin panel.
- Navigate to the “Settings” menu and select “Import/Export.”
- On the “Export” tab, choose the entity you wish to export, such as Products, Customers, or Orders by selecting the corresponding export profile.
- You can configure the export options according to your requirements by editing export profiles.
- Click the “Start export” button. Shopware 6 will initiate the export process and prepare a CSV file containing your selected data.
Step 2: Convert CSV to XLSX
Since Shopware 6 doesn’t inherently support XLSX as an export format, you’ll need to perform a conversion from CSV to XLSX using a third-party solution. Here’s a general outline of how to achieve this:
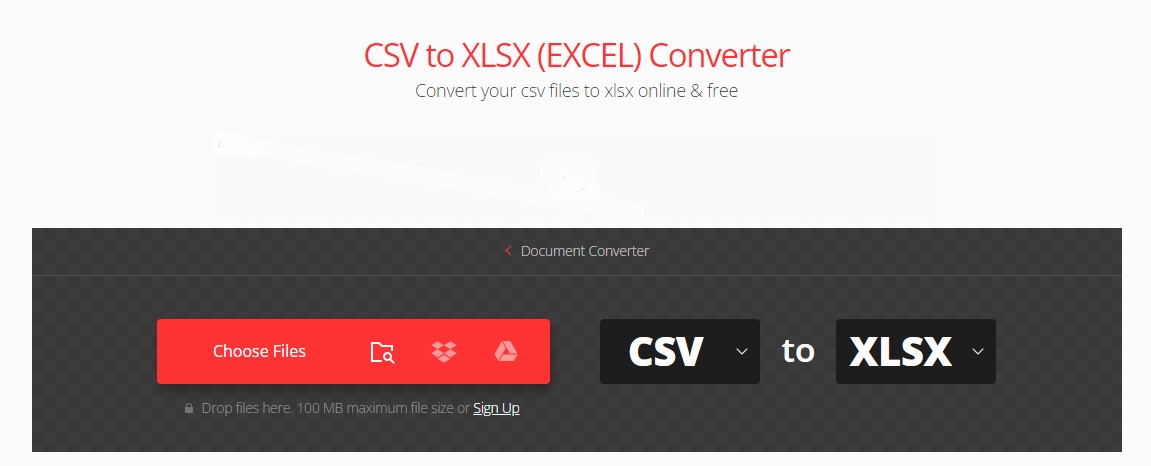
- Obtain a CSV to XLSX converter tool. Many online converters are readily available.
- Utilize the converter to transform your CSV data into XLSX format. We recommend using converters that offer the flexibility to map CSV columns to corresponding XLSX elements and attributes.
- Save the resulting XLSX file, either locally or in a designated server location.
Now, your data is in XLSX format and ready for further use or sharing. Keep in mind that the exact steps and tools used may vary depending on your specific needs and the complexity of your output. The key is to find a CSV-to-XLSX converter that aligns with your requirements. However, you can conveniently skip this time-consuming conversion process by utilizing the Improved Import, Export & Mass Actions application.
How to export XLSX from Shopware 6 without conversion
Exporting Shopware 6 data in XLSX format using the Improved Import, Export & Mass Actions application is a breeze. Simply follow these straightforward steps to get started:
Step 1: Create a New Export Profile
Begin by clicking the “New Profile” button, conveniently located under “Extensions -> Improved Import, Export & Mass Actions -> Product Export.”

Step 2: Configure Export Settings
On the “Configure export” screen, proceed with the following essential tasks:
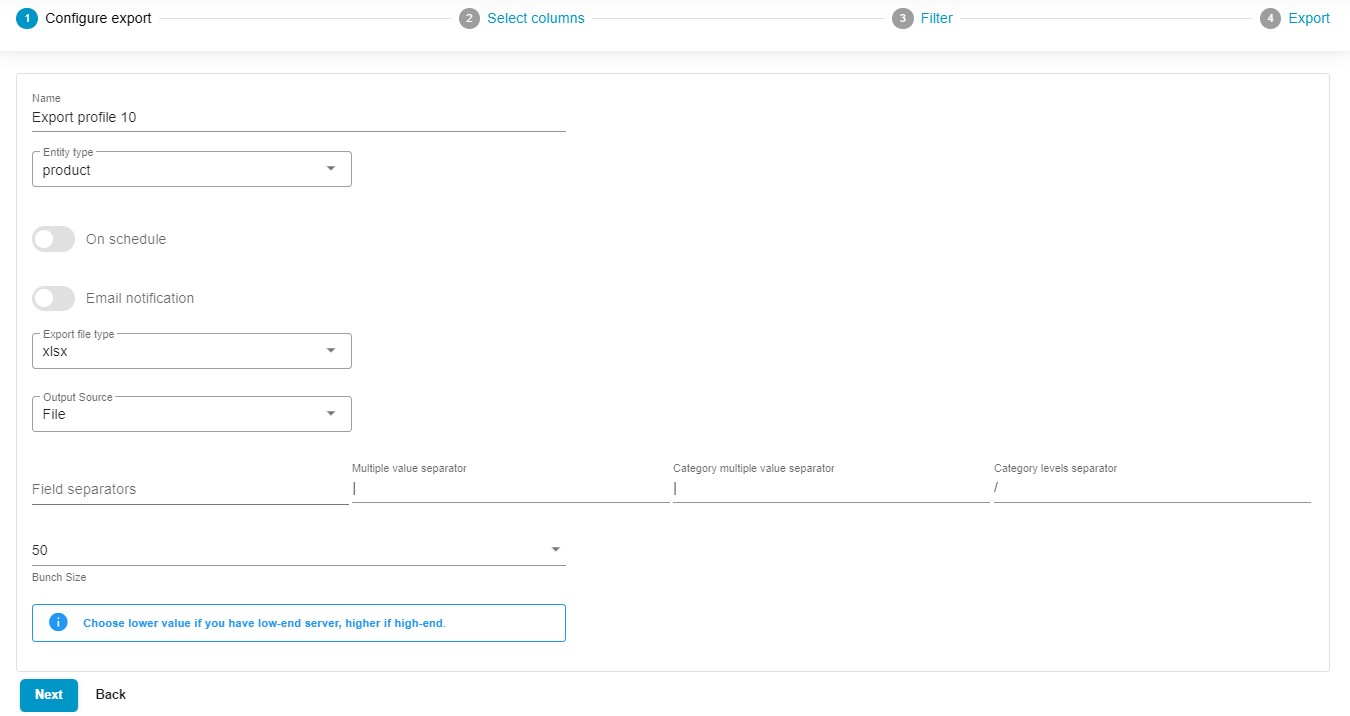
- Assign a descriptive title to your export profile.
- Select the type of data you intend to export, whether it’s products, orders, or customers.
- If necessary, establish a schedule for automated XLSX exports from your Shopware 6 store.
- Set up email notifications to receive alerts for successful, failed, or both types of export processes.
- Choose XLSX as your preferred file format, though you also have the flexibility to export in XML and CSV formats, or even Google Sheets spreadsheets.
- Decide on your preferred export source, whether it’s FTP, Google Drive, or Google Sheets.
- For optimal performance, especially on low-end servers, you can specify a bunch size, opting for a lower value.
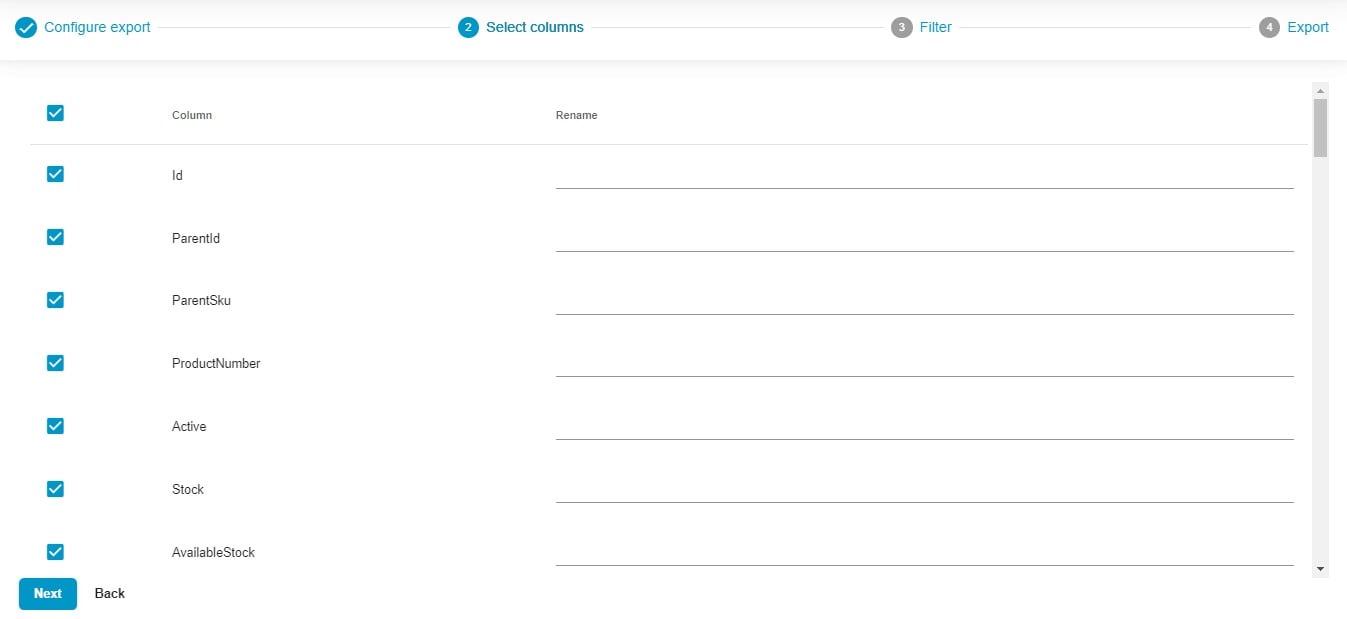
Step 3: Customize Columns (Mapping)
Click “Continue” to progress to the “Select columns” screen, where you can tailor the column titles to align with your partner’s specific requirements. You can easily rename default column titles by adding a new label (“Rename”) after the existing one (“Column”). Additionally, you have the flexibility to uncheck any columns you prefer not to include in the export.
Step 4: Apply Filters
The third screen empowers you to create filters that refine the selection of records in your output. For instance, you can export products that are currently out of stock with ease.

Step 5: Save and Export
Finally, click the “Save & Close” button to store your Shopware 6 XLSX export profile for future use. Alternatively, if you’re ready to proceed, hit the “Export” button located at the bottom of the screen to initiate the export process immediately.

Following these user-friendly steps, you can effortlessly set up Shopware 6 XLSX exports. For more comprehensive information and detailed instructions, please refer to our Improved Import, Export & Mass Actions Manual.
Other Features
As a Shopware 6 store owner, you possess a formidable ally in the form of the Firebear Improved Import, Export & Mass Actions application. This versatile tool not only streamlines the import and export processes but also introduces a multitude of features that fill the gaps in the default Shopware 6 setup. This transformative tool revolutionizes data management in several impactful ways, including:
- Full Product Import and Export. Effortlessly oversee your product data and custom properties, ensuring your catalog is perpetually up-to-date.
- Customer Data Handling. Seamlessly import and export customer details, streamlining customer relationship management for a hassle-free experience.
- Order Export. Efficiently export order data, providing valuable insights into transactions and sales analytics.
- Precise Data Mapping. Craft meticulous data relationships, ensuring seamless integration between your Shopware 6 store and external systems.
- Flexible Scheduling. Customize import and export schedules to align with your preferences, automating data updates.
- File Format Compatibility. Seamlessly work with various file formats, including CSV, XML, and XLSX, facilitating smooth data transitions.
- Google Sheets Integration. Effortlessly transfer data between Shopware 6 and Google Sheets for collaborative data management.
- Direct File Uploads. Simplify data import and export with direct file uploads, streamlining the entire data management process.
- Secure FTP/FTPS Uploads. Enhance data security during transfers with comprehensive support for FTP/SFTP protocols.
- Google Drive Integration. Optimize data file uploads with integrated Google Drive compatibility, enhancing accessibility and convenience.
The Firebear Import & Export Tool empowers Shopware 6 store owners to efficiently manage their e-commerce operations. Whether it’s product catalog maintenance, customer data management, or order processing, this application simplifies complex tasks, ultimately boosting the overall effectiveness of your online store. For more comprehensive information about this remarkable product, please visit:
- Firebear Improved Import, Export & Mass Actions for Shopware 6
- Firebear Improved Import, Export & Mass Actions Manual
- Contact us