Exploring Magento 2 Backend: Currency Rates & Symbols
With Magento 2, you have a perfect opportunity to get a status of an international e-commerce business since the platform enables you to accept currencies from all over the globe – from more than two hundred countries to be specific. When you decide to follow this path, the platform displays a Currency Chooser in the header right after you update your currency rates. Below, we describe how to configure the corresponding options of the Magento 2 backend as well as shed light on how to set up the currency rate settings to avoid profit loss caused by rate fluctuations. Besides, you will learn how to use and customize currency symbols properly. They are displayed in product prices as well as sales documents. Also, we discuss import and export processes that affect Magento 2 currency rates and symbols.

Table of contents
How to Configure Currency in Magento 2
Before applying any changes under the Stores -> Currency section of the Magento 2 backend, you have to set the scope of the base currency which is deployed to the entire store hierarchy by default. For a multisite Magento installation, it is recommended to manage several base currencies, depending on the number of websites you use. You can simply do that by applying the scope to the website level.
Specify the Accepted Currencies
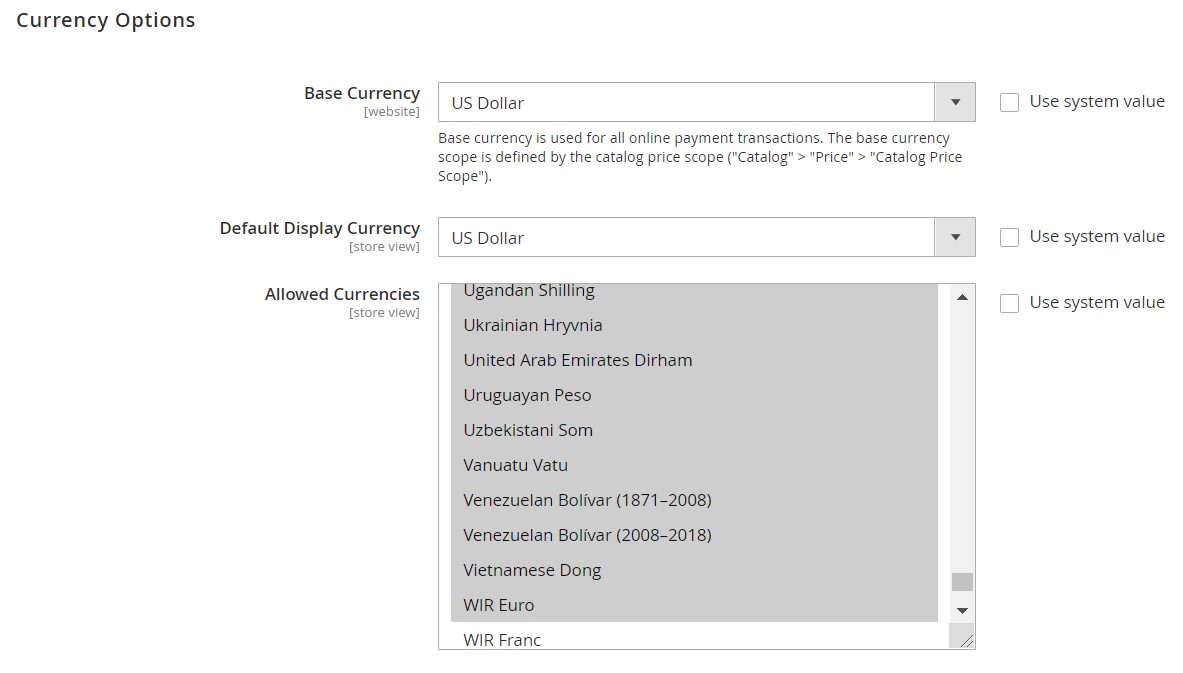
You can set the accepted currencies under Stores -> Settings -> Configuration. Go to the upper-left corner and set Scope to a store view. Now, you can choose Currency Setup from the General section of the left panel. Expand the Currency Options subsection to configure the following options:
- Base Currency — your primary currency uses for online transactions;
- Default Display Currency — your currency used to display pricing in the store view.
- Allowed Currencies — all currencies accepted for payment in the store view.
Now, you can define the scope of your base currency. Return to the left panel to expand Catalog and select Catalog underneath. There is the Price section below. Bear in mind that appears when the scope is set as Store View: Default config. Find the Catalog Price Scope option and set it to either Global or Website.

Configure Currency Rate Import Connection
Magento 2 provides the ability to update currency rates automatically. The corresponding options are available under the same left panel: General -> Currency Setup. You can rely on two services: either or .
To connect to the former one, expand the Fixer.io section and specify your fixer.io API key. You can also specify the maximum possible number of seconds of inactivity before the connection times out.
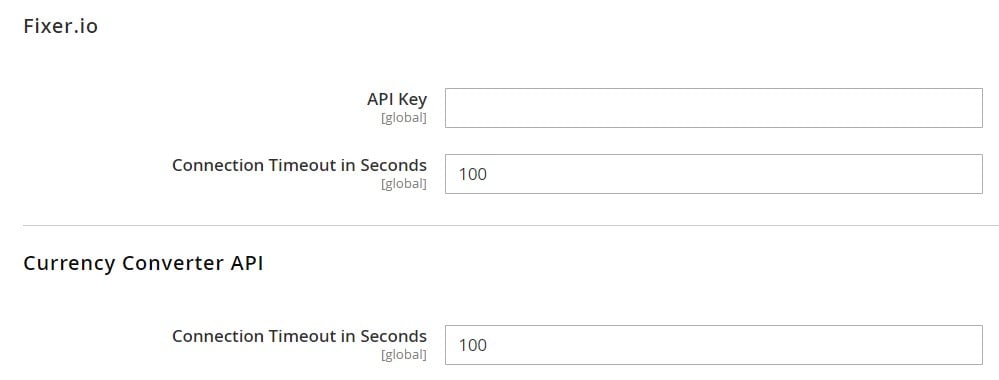
The Currency Convertor API service configuration is available under the corresponding section that bears the same name. Expand it, specify your API key, and set connection timeout.
Scheduled Currency Rate Updates
You can also automate currency rate updates in the Scheduled Import Settings section that looks as follows:
Set Enabled to Yes to automate your daily duties. Next, choose your rate provider and create a schedule to import updates. Next, you can configure various options related to email notifications:
- Specify an error email recipient to receive email notifications if an error occurs,
- Choose an error email sender
- Select an error email template.
Don’t forget to click Save Config and refresh the invalid cache.

How to Updating Currency Rates in Magento 2
According to Magento 2 rules and requirements, you have to update the currency rates with the current values to let them correctly go into effect.
It is possible to set up currency rates manually. Alternatively, you can import them as we’ve just described.
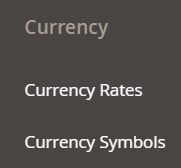
To update currency rates manually, visit a Magento 2 backend screen under Stores -> Currency –> Currency Rates. Choose the rate that should be modified and enter new values for all supported currencies. Don’t forget to save changes.

Alternatively, you can import currency rates to Magento 2 manually by clicking the Import button. The system displays the updated rates in the Currency Rates list. Note that the old rate appears below for reference. You also have to save the applied changes and refresh the invalid cache to apply changes.
And of course, it is possible to rely on schedules. Above, we’ve described how to configure them.
Currency Symbols in Magento 2
It is possible to customize the default currency symbols in the Magento 2 backend. The appropriate screen is available under Stores -> Currency –> Currency Symbols. You can find all currencies that you’ve already enabled on this page. The system lets you specify a custom symbol for each currency you want to use. If you don’t need that, activate the Use Standard checkbox on a per currency basis. Note that you can override the default symbol only by deactivating the Use Standard option.
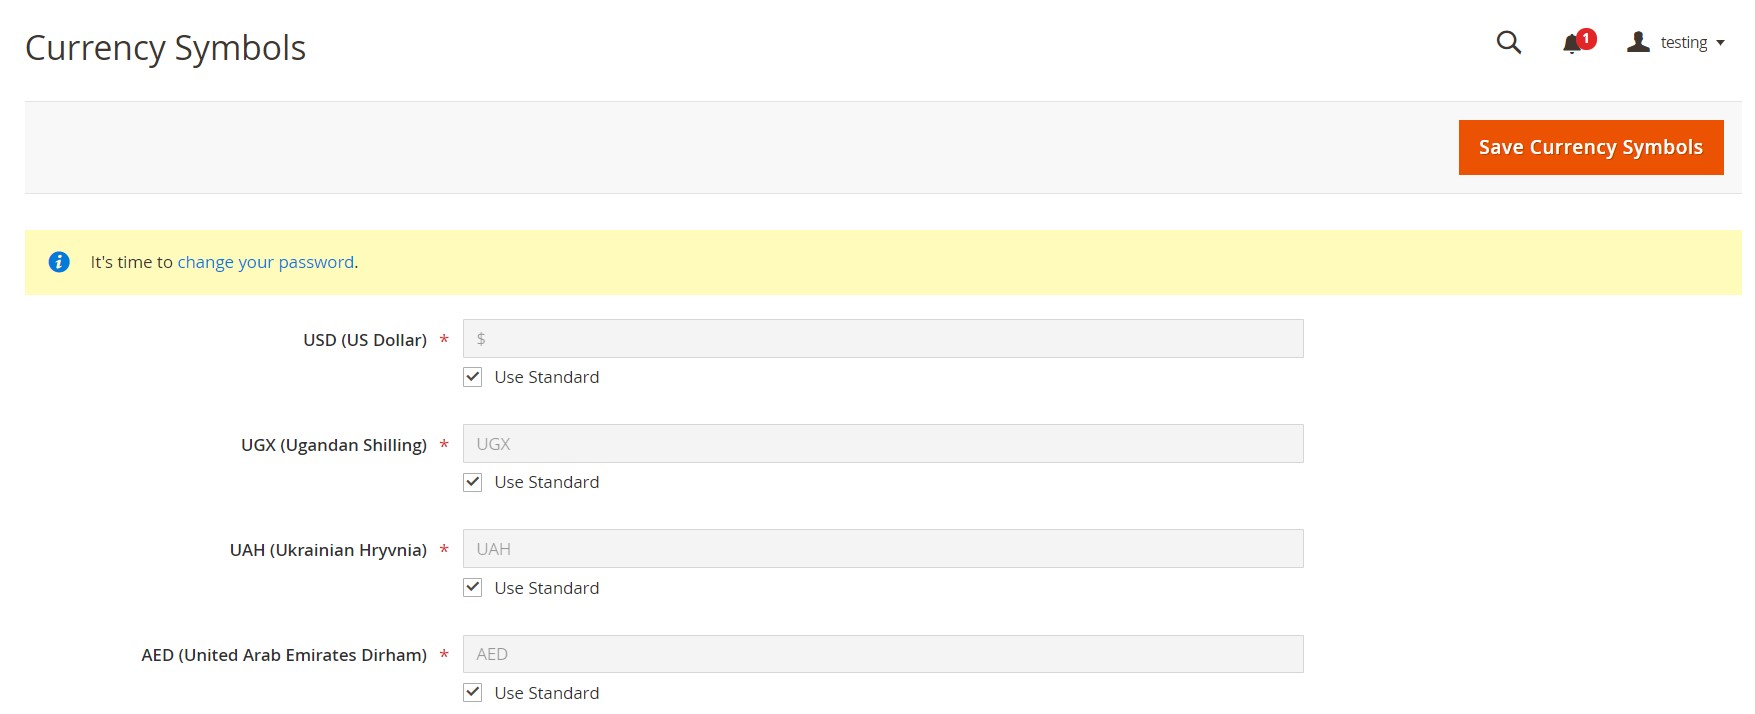
The only limitation is that you cannot change the standard alignment of currency symbols. By default, they are displayed from left to right.
Don’t forget to save changes and clear cache after the configuration is complete.
How to Import & Export Currency Data in Magento 2
You can effortlessly import and export currency data to Magento 2 following the recommendations above. However, the default run of the mill data transfer system of the platform doesn’t let you perform numerous other data migration processes. However, various imminent difficulties associated with the limited functionality can be effortlessly addressed by the Improved Import & Export extension and its Magento 2 Migration add-on. Both tools provide the ability to create a flow of any data between your e-commerce store and a chosen external platform. The extension provides the ability to move all core entities with zero downtime. As for the default migration solution, it requires shutting down your website for a while. Besides, it doesn’t work with all entities, so it is necessary to recreate some store sections manually. Let’s see how to avoid this unpleasant chores.
Automated Data Transfers
As you’ve just seen, Magento 2 provides the ability to update currency rates following a schedule. However, it is not possible to enable automated data import/export processes for other entities unless you use the Commerce edition. But the Improved Import & Export module changes the game. The module lets merchants of all editions create schedules to move data to and from Magento 2. You can select a predefined interval or specify a custom one, as shown below:
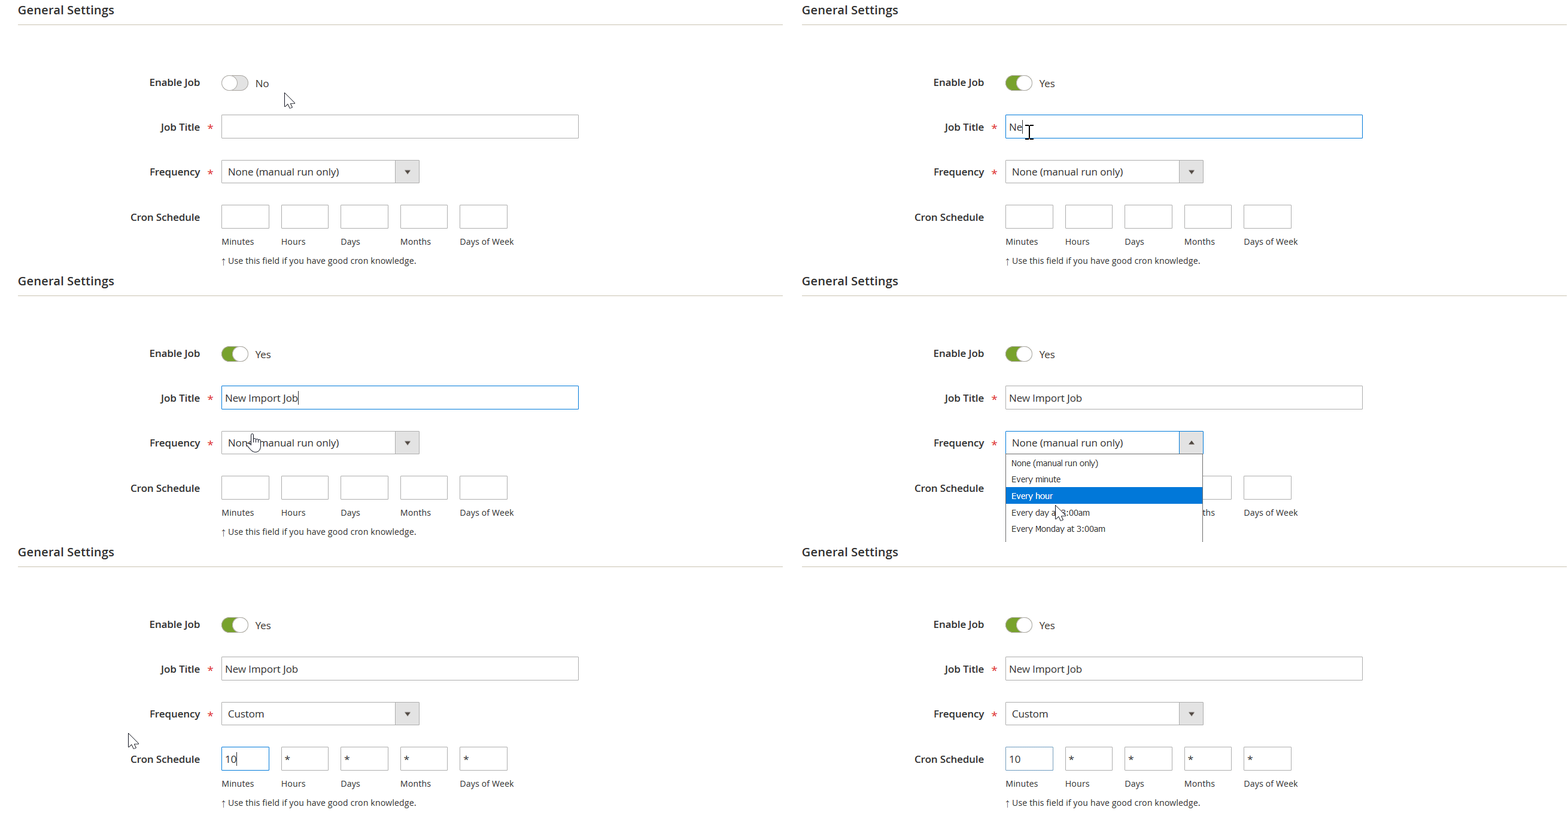
Alternatively, it is possible to create a system of triggers. You can define rules and conditions to initiate the import/export processes.
Mapping
Different data storing standards cause a plethora of mapping issues. When it comes to most existing data transfer solutions, they leave you alone with these problems. The Improved Import & Export Magento 2 extension acts differently. It helps you addresses them with the following features:
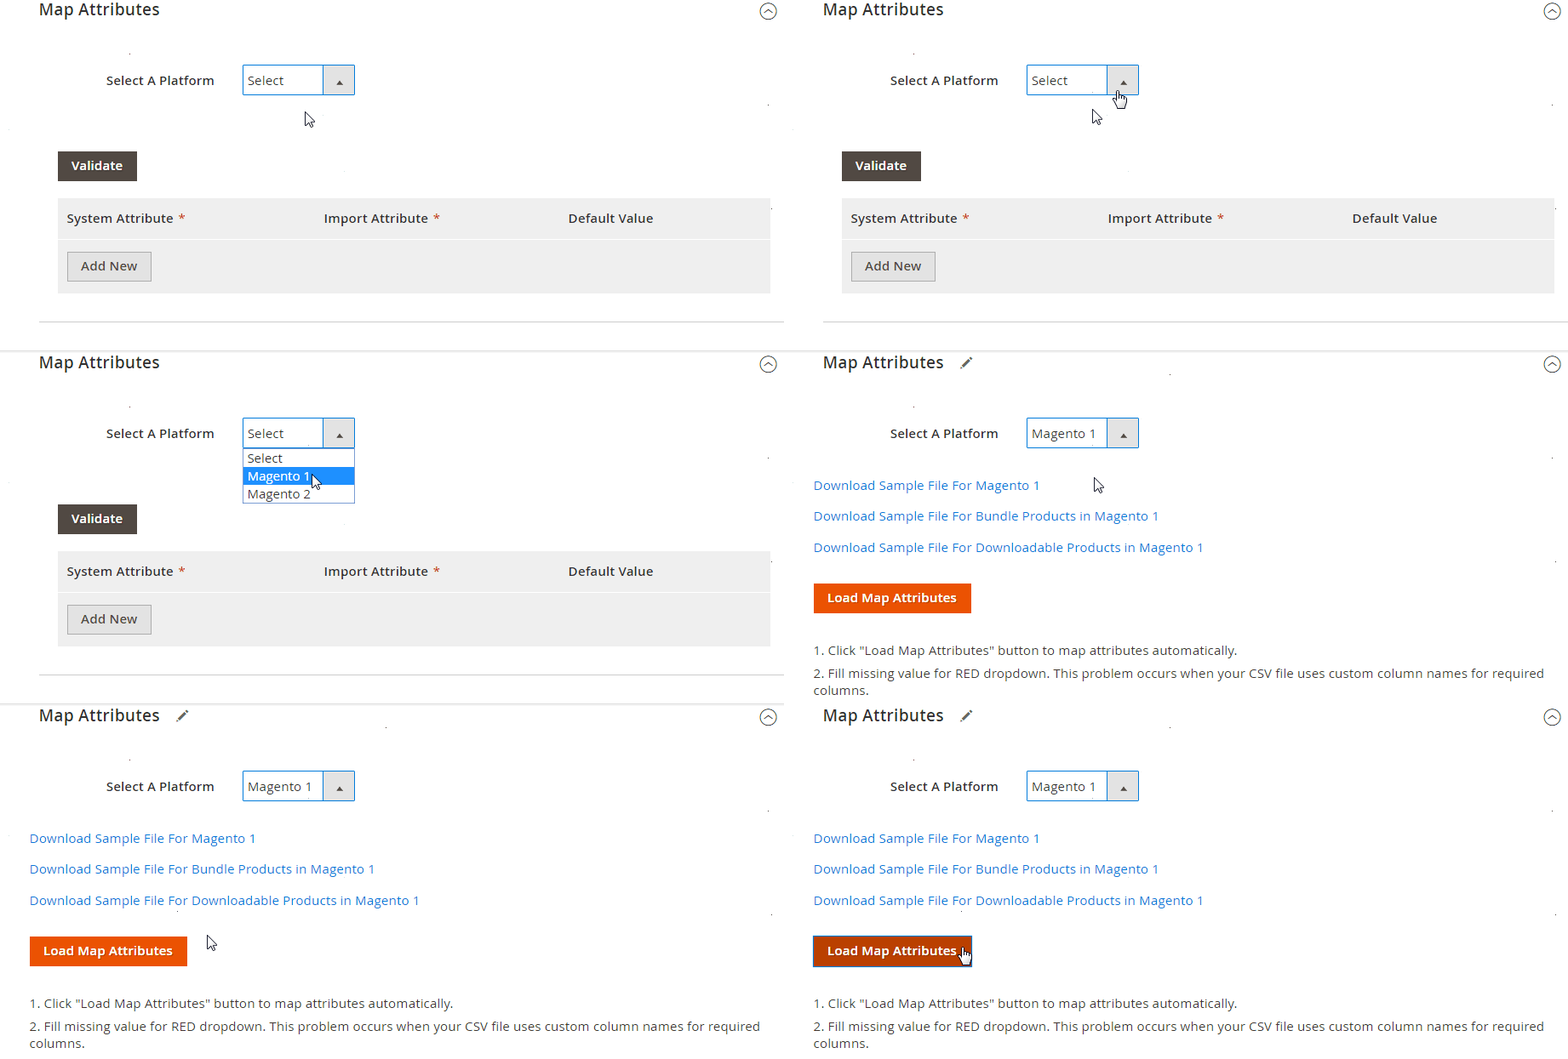
- Presets – the module offers a set of predefined schemes that enable automated attributes mapping;
- Manual Matching – at the same time, it is possible to do everything manually: you still can edit attributes right in the Magento 2 admin area;
- Attribute Values Mapping – attribute values mapping is another option the extension offers;
- Attribute Values Editing – a supplementary feature that enforces the previous functionality;
- Filters – the extension provides the ability to specify additional export parameters, decreasing the selection of exported data;
- Category Mapping – you can specify the path for products, transferring them right to the categories they should be bound with;
- Attributes On The Fly – the problem of lacking data can be addressed as well since the plugin can generate the missing data automatically when you provide several additional parameters regarding what you want to recreate.
The following image illustrates the simplicity of attribute mapping with presets:
Extended Connectivity Options
Unfortunately, the selection of formats for transferring data files in Magento 2 is strictly constrained. But you can dramatically extend it with Improved Import & Export that supports CSV, XML, ODS, JSON, and Excel files. Besides, it lets you move several archive types.
A more extended list of supported data sources is another critical enhancement introduced in our extension. You can synchronize data between your Magento 2 website and any external system via a local or remote server as well as cloud storage.
While Magento 2 enables API import for updating currency rates, Improved Import & Export extends this opportunity even further. It relies on API connections for various complex integrations.
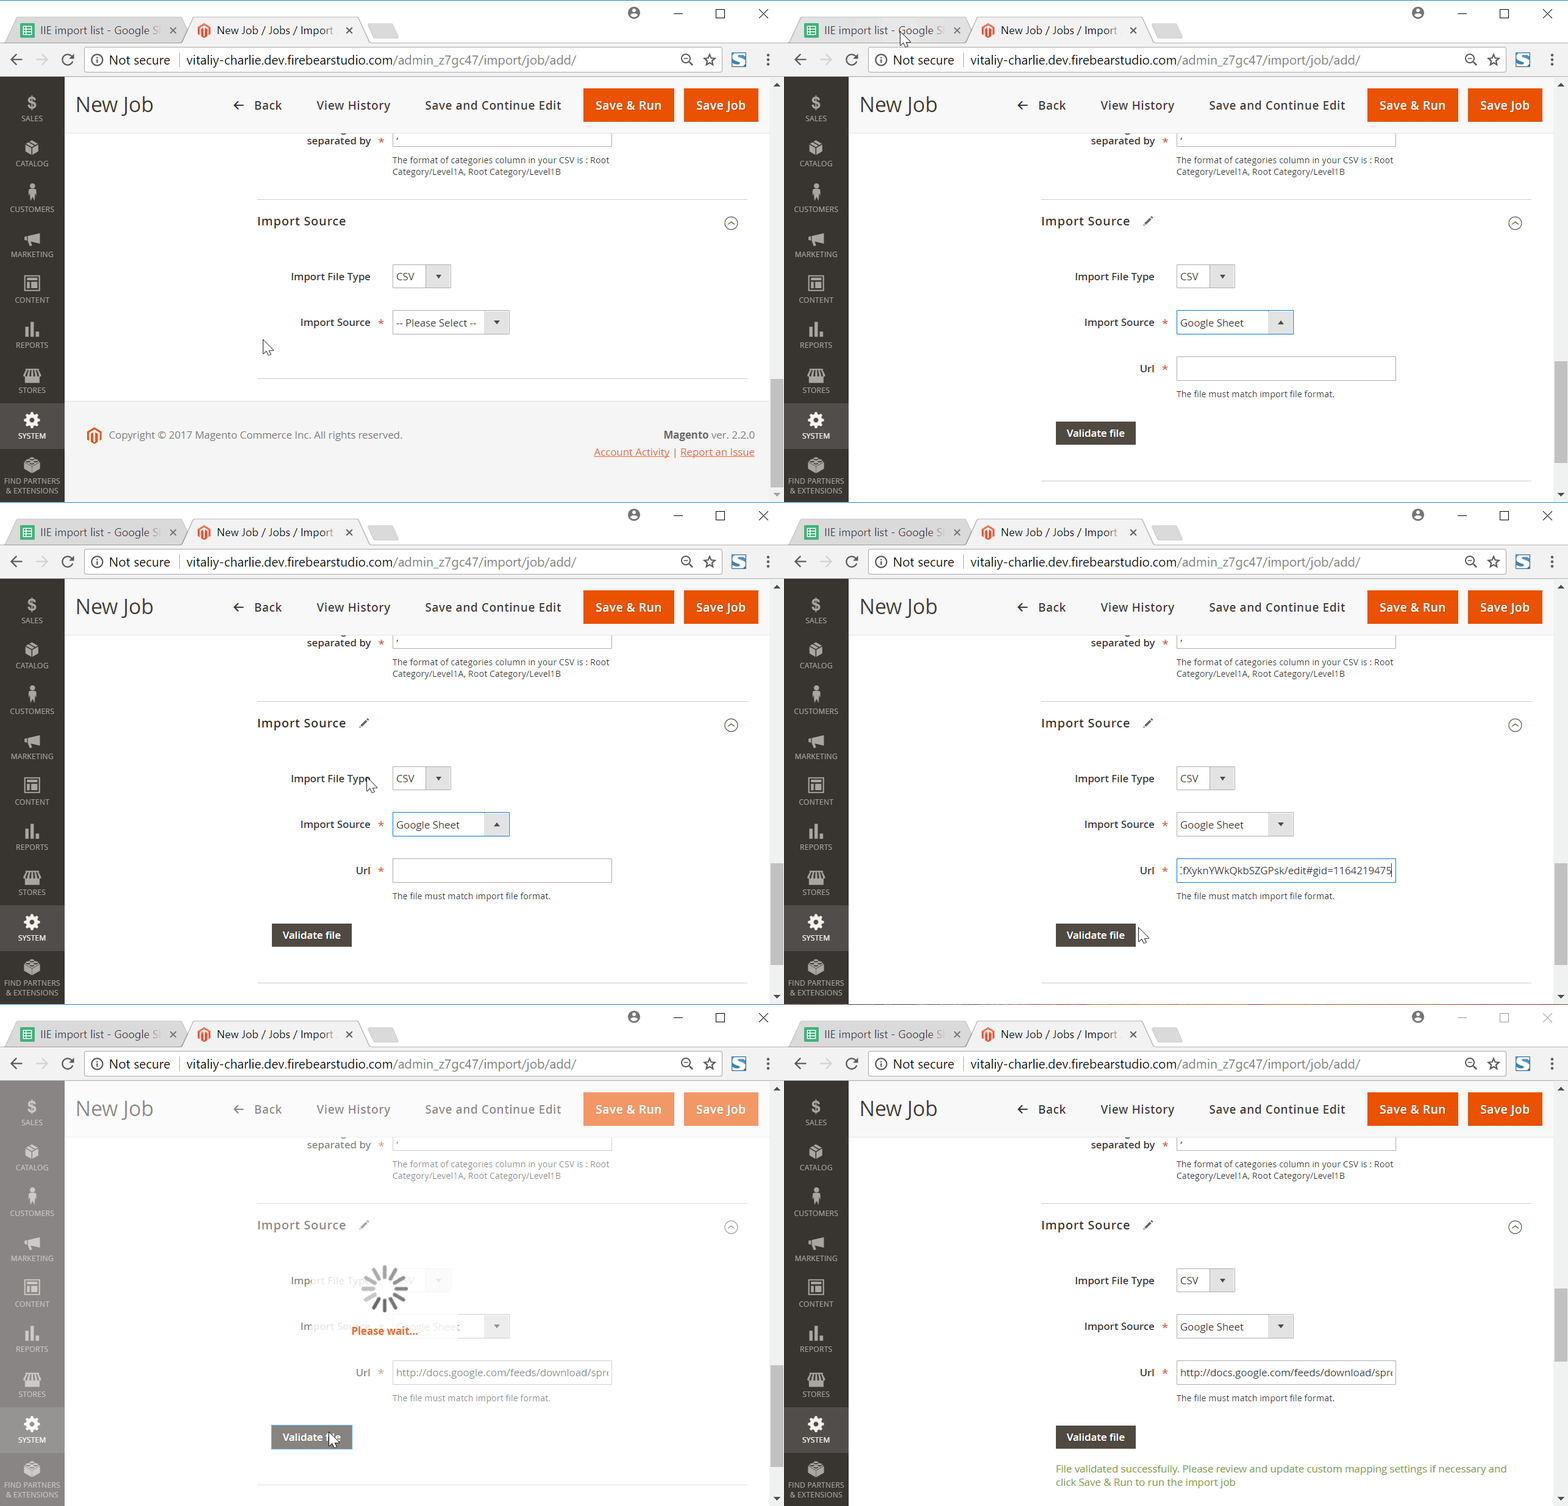
Besides, the module supports direct file URL downloads and Google Sheets import. The latter looks as follows:
As for the Magento 2 Migration add-on for Improved Import and Export extension, it focusses on moving your Magento 1 data to Magento 2 without obstacles. The add-on connects to databases to achieve the most seamless integration.
As an extension user, you can control the process using a command line or admin panel, streamlining the following features:
- Selective Migration. The tool incorporates a mechanism that lets you choose what entities to move. The native Magento 2 migration tool can import all objects it supports in bulk.
- Direct SQL Connection. As we’ve mentioned above, a direct connection between Magento 1 and Magento 2 databases is established. It results in a much faster and user-friendly migration procedure.
- No Downtime. Both the extension and its add-on eliminate the downtime associated with the migration. Don’t forget to reindex data when the transfer is complete.
- M2-M2 Migration. The tool provides the most straightforward way of moving data between two Magento 2 websites.
- Core Entities. All core entities are supported!
For further information regarding the Improved Import & Export extension and its add-ons, follow these links:
Get Improved Import & Export Magento 2 Extension
Get Magento 2 Migration Add-on


