
Boost My Shop RMA Magento 2 Extension
One of the robust business tools provided by Boost My Shop is the RMA extension. The best solutions of this kind are gathered here: Magento 2 RMA Extensions & Magento RMA Modules. As for Boost My Shop, the company’s tool is explored below.

The core aim of this extension is to integrate a return merchandise authorization system into a Magento 2 website, which provides customers with the ability to return previously purchased goods. Note that the Boost My Shop Magento 2 extension is convenient for both B2B and B2C segments. It is also necessary to mention that RMA requests can be created from both backend and frontend.
Now, let’s figure out core RMA request statuses and then proceed to the backend tutorial. If the status is “Draft”, the RMA is not yet visible for a customer. “Requested” means that a customer has sent a return request that needs admin approval. The “Accepted” status shows that the return is accepted, and a customer can print a return form. “Processing” – products are received, and you are preparing to process them. “Complete” – the RMA with all refunds is processed.
Table of contents
Backend
RMA Grid
The core window of the RMA backend is called Manage Returns. Here, you can see a grid that contains all RMA requests. As for the available columns, they are:
- RMA # – a number of each RMA request based on the creation date;
- Order – a corresponding order number;
- Last Update – date and time of the last update;
- Customer – a customer who requested the RMA;
- Products – items included in the RMA;
- Status – one of the described above statuses;
- Store – appropriate store view;
- Manager – a person responsible for the resolution;
- Customer Comments – comments are displayed in this column if there are any.

How to create a new RMA via backend
To create a new RMA request from the backend, hit the “Create RMA from order” button.
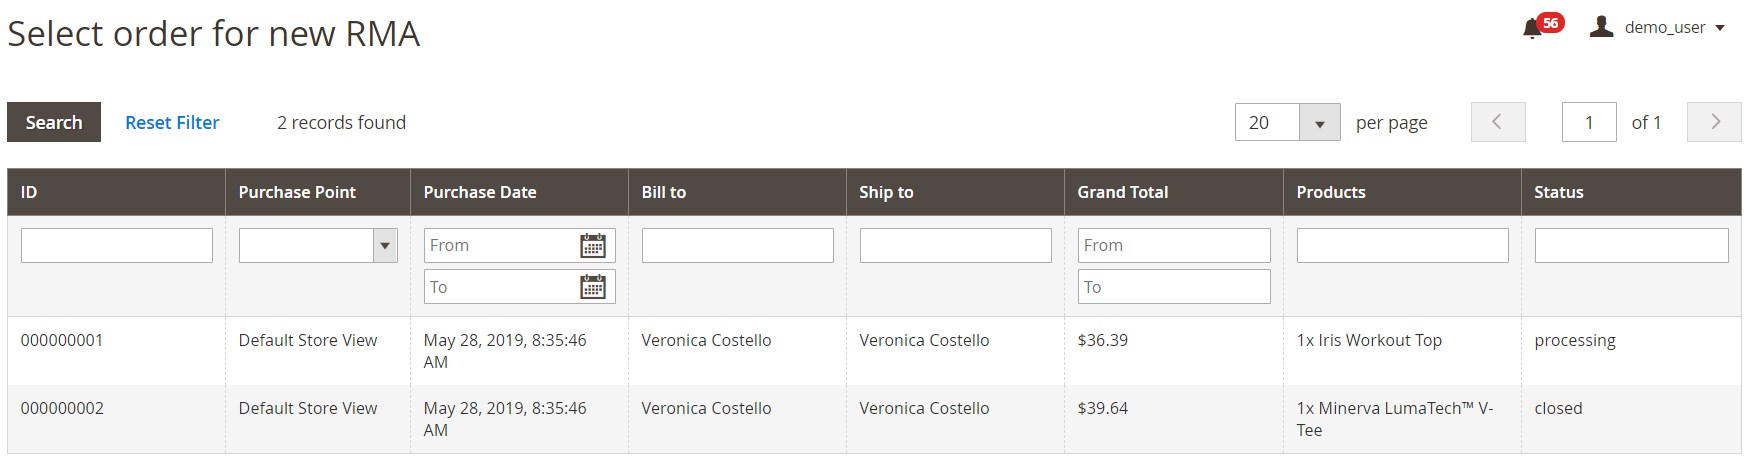
Next, you should select an order to create a new request.
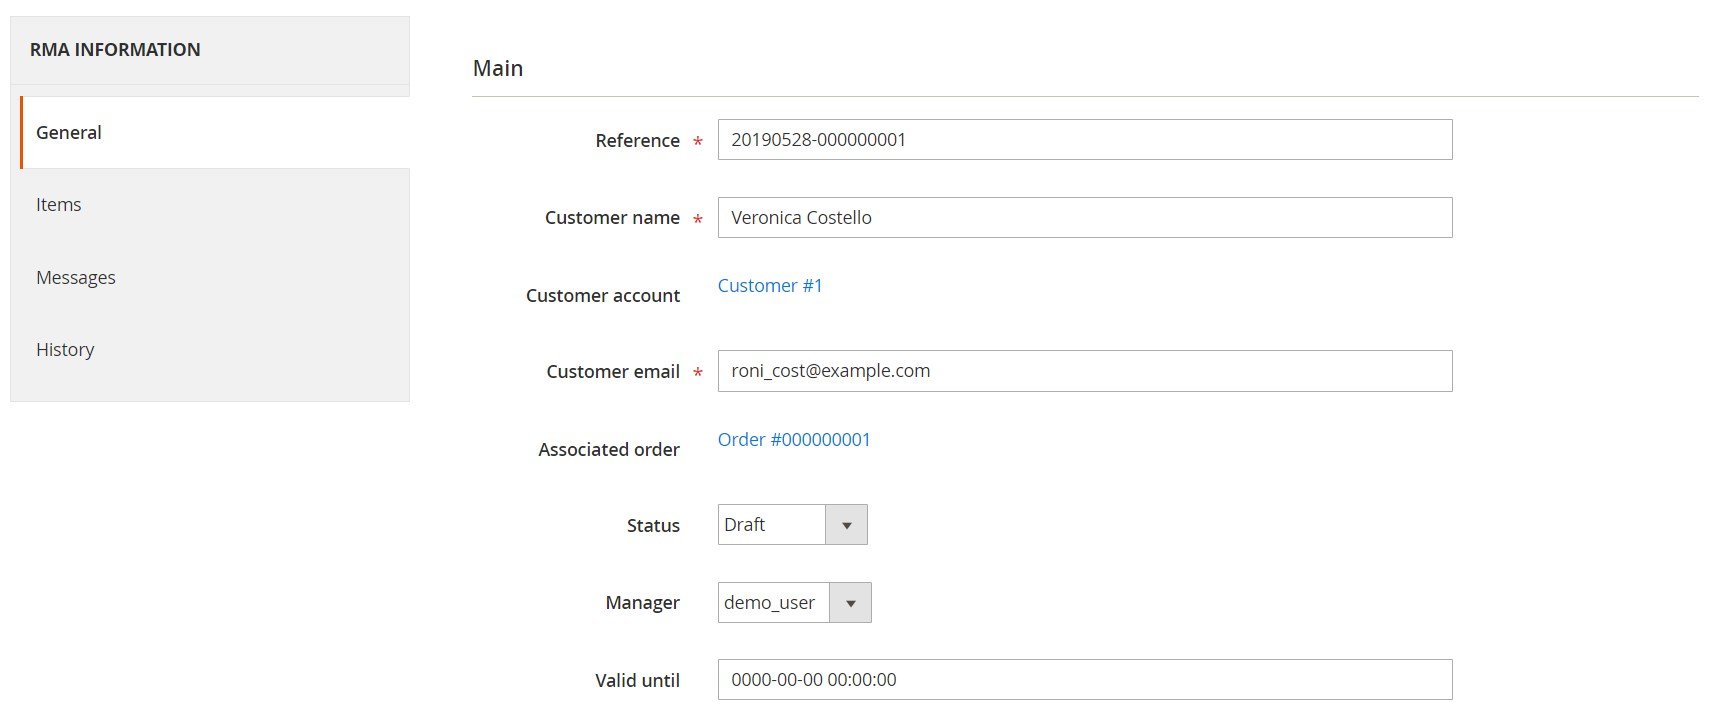
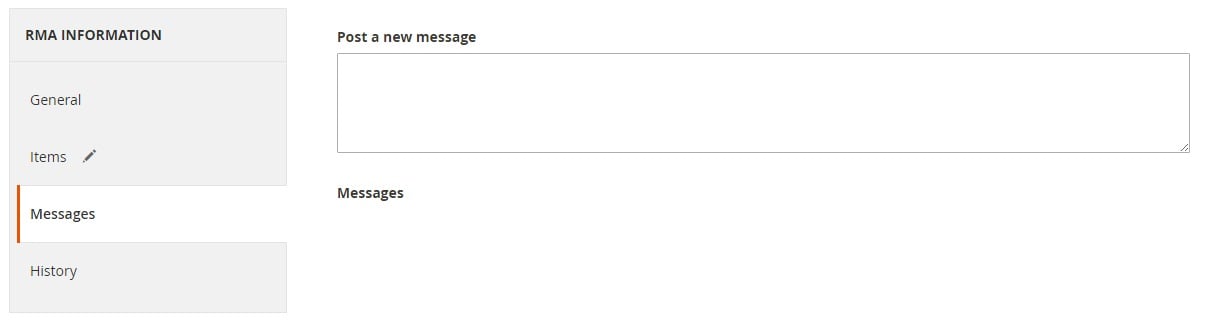
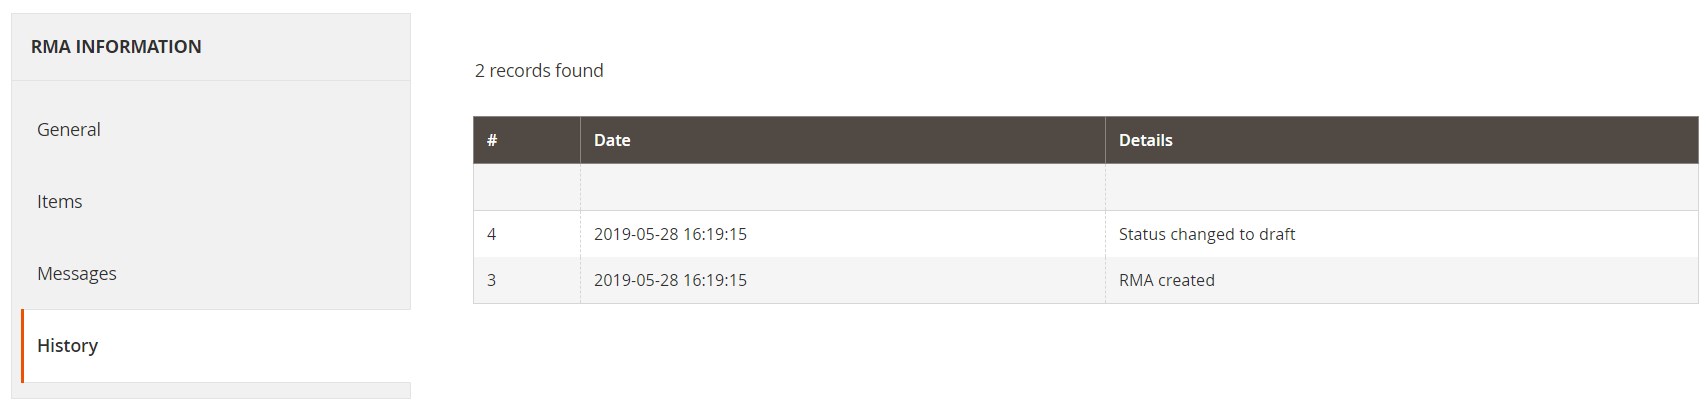
Your RMA is now created. While editing the request, you have to deal with 4 tabs of settings: General, Items, Messages, and History.
The first tab allows you to change the reference and customer name, view customer account and associated order, edit customer email, choose a new status, select a manager responsible for resolution, and specify a date and time for the validity of the request.
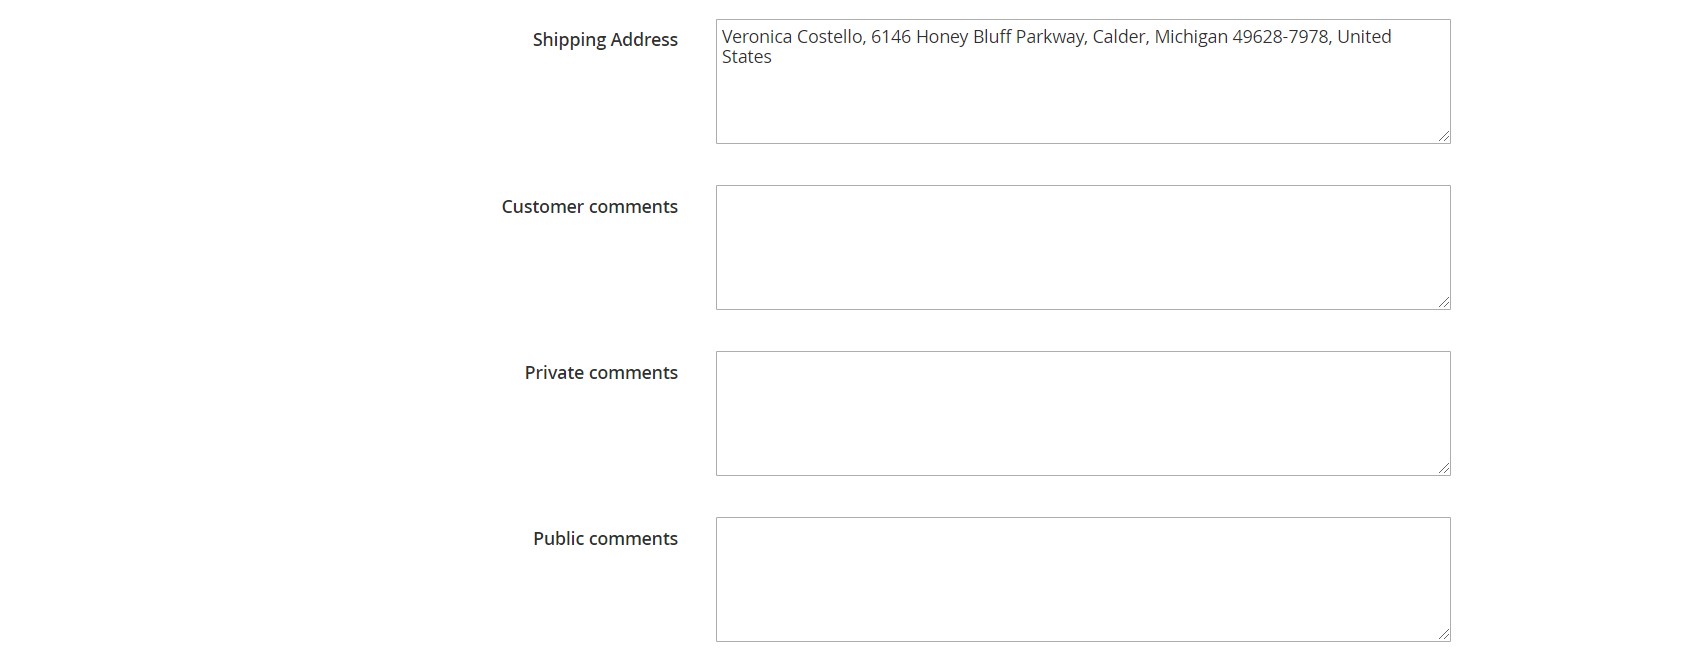
Here, you can also enter a shipping address, as well as add customer, private, and public comments.
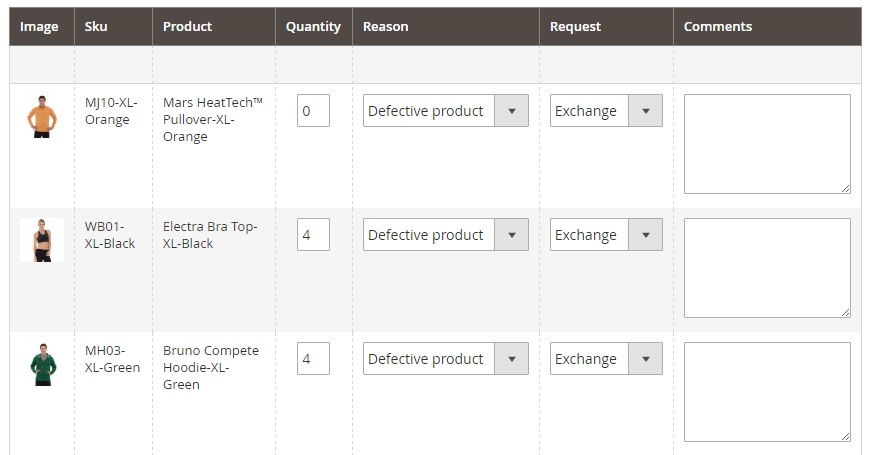
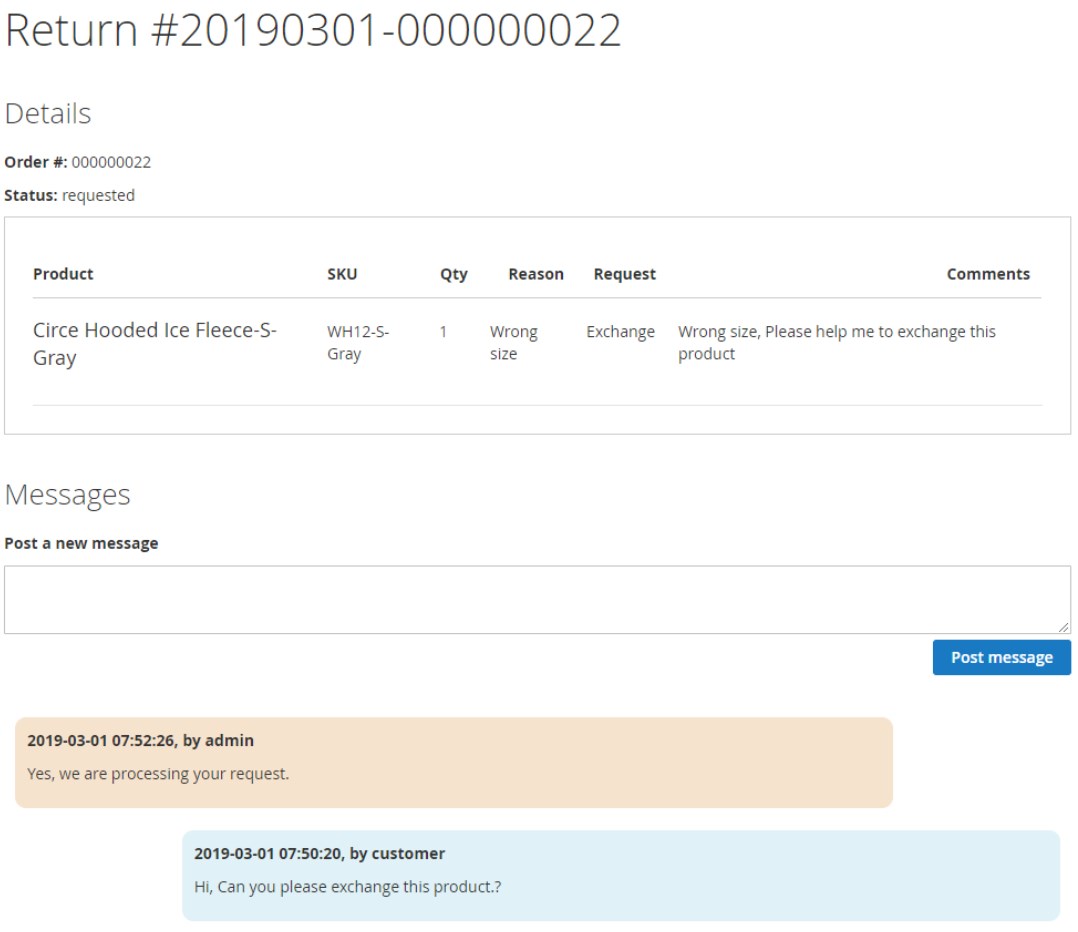
The Items tab contains a grid that displays product images, SKUs, and names. You can adjust the quantity, select an RMA reason (defective product, wrong size, wrong color, wrong address, cancellation), choose a request form (exchange or refund), and place comments.
Under the Messages tab, you can post a new message.
The History tab shows all actions related to the RMA. For instance, time and date when the RMA was created or when the status was changed.
Configuration
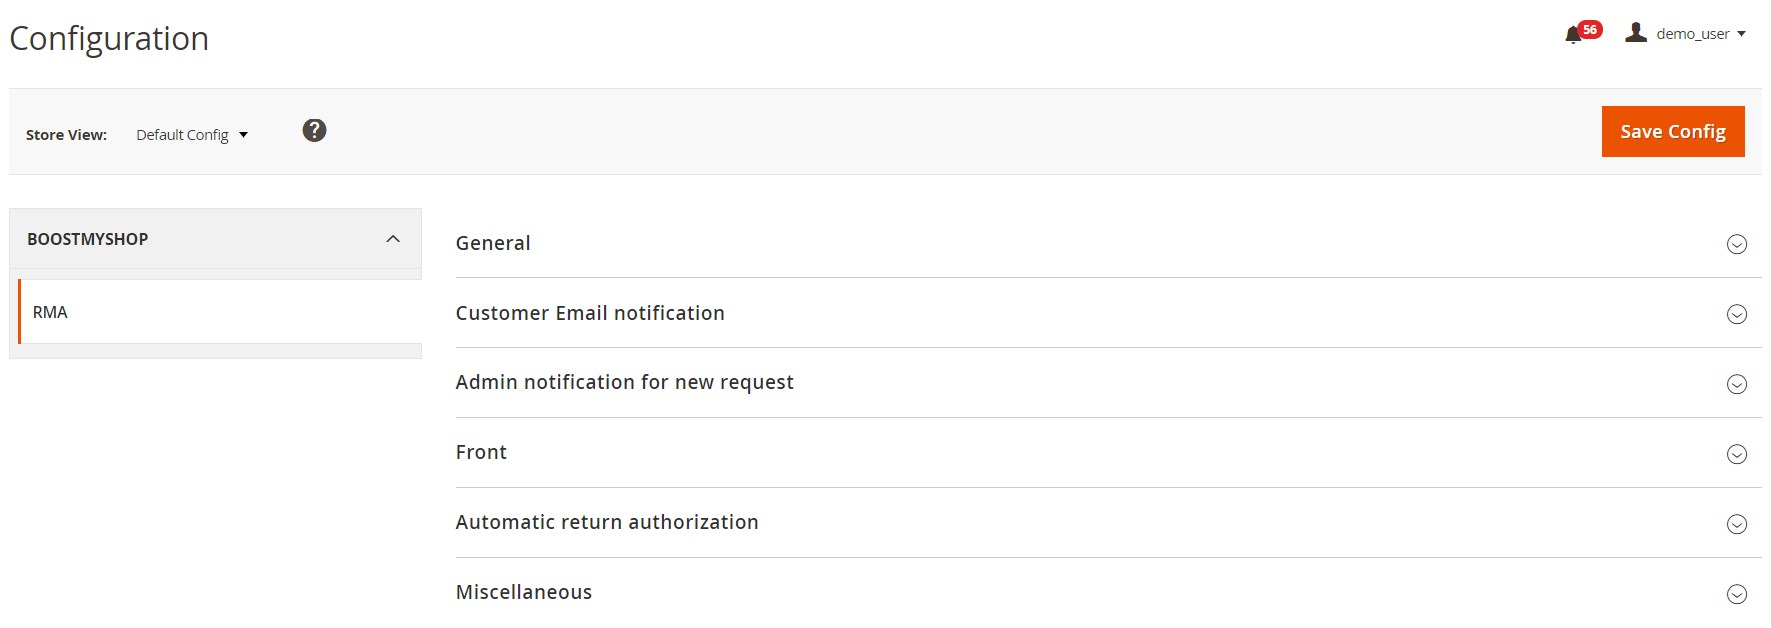
All Boost My Shop RMA settings are available within 6 sections: General, Customer Email Notification, Admin Notification For New Request, Front, Automatic Return Authorization, and Miscellaneous.
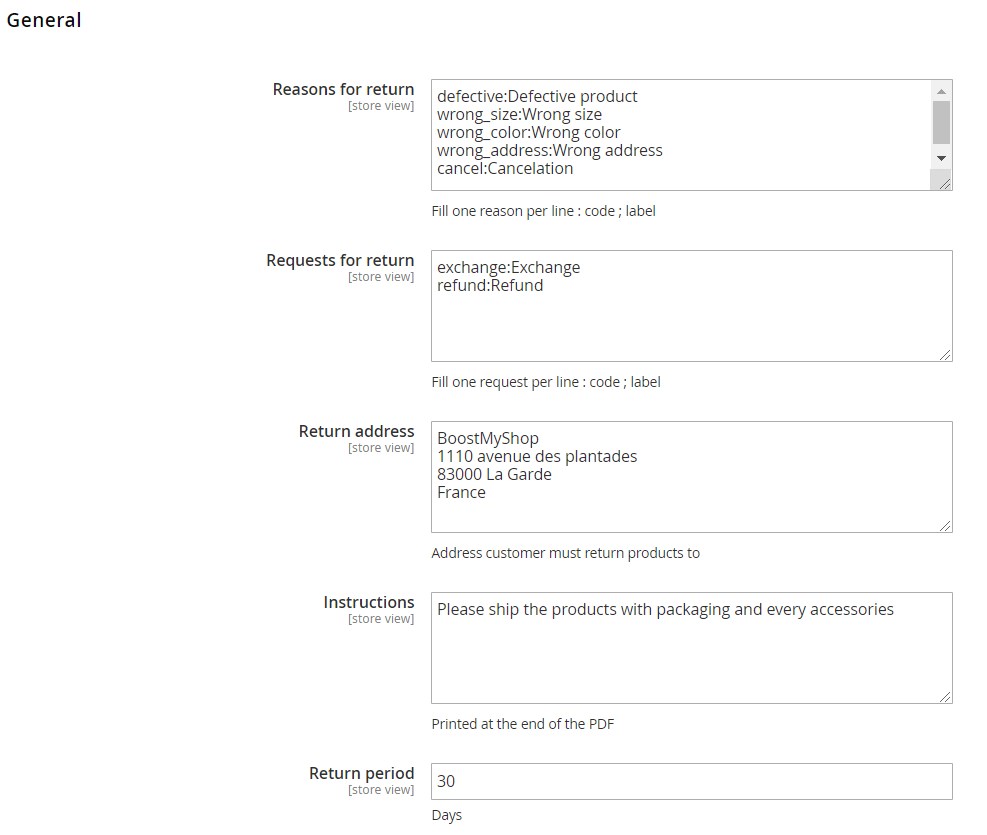
The General section allows you to add custom reasons and requests for return, specify a return address, provide a customer with return instructions, and set a return period.
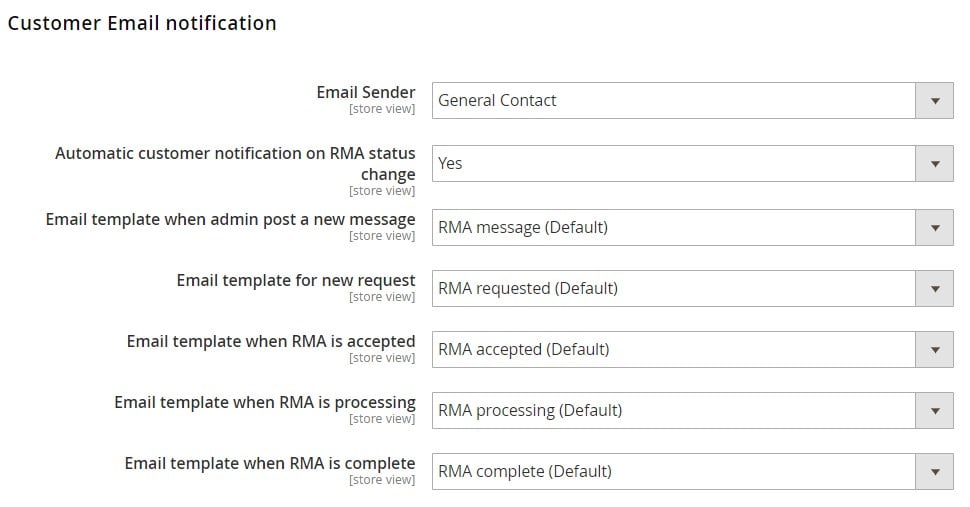
In Customer Email Notification, you select an email sender and enable/disable notifications on RMA status change. Besides, it is possible to choose templates for each status change notification.
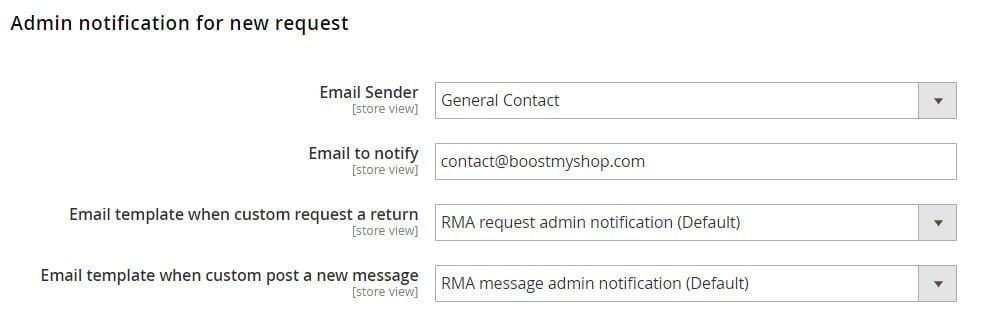
As for Admin Notification For New Request, this section allows you to choose an email sender, an admin email address, and choose templates for the emails on new RMAs and messages.
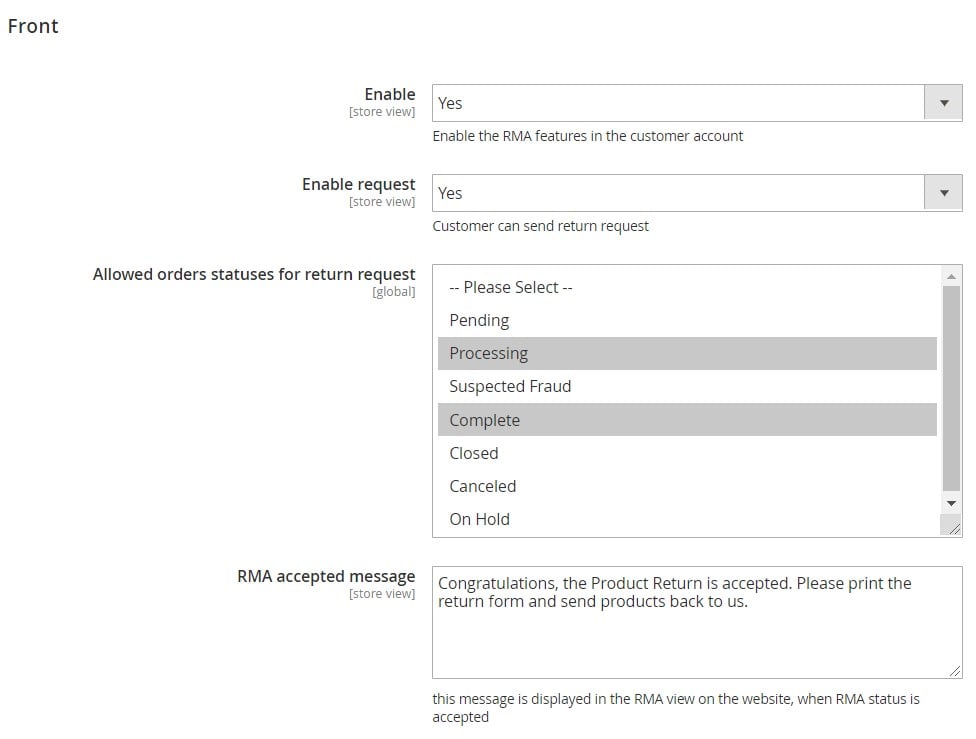
The Front section provides the ability to enable/disable the extension and requests on the frontend, as well as choose order statuses that will allow customers to request returns. Here, you can also enter a text for the message when RMA status is accepted.
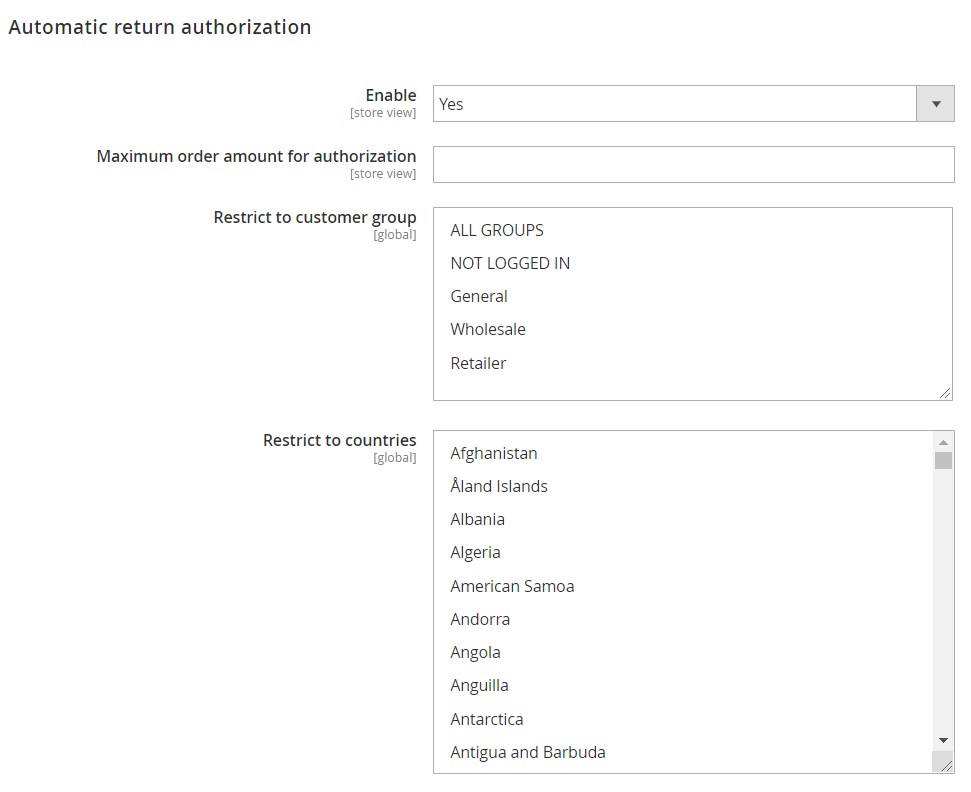
In the next tab, you can enable automatic authorization of return requests, specify maximum order amount for this function, and select customer groups and countries for which the feature will be available.
In the last settings tab, you enable/disable generation of credit memos for each order.

Frontend
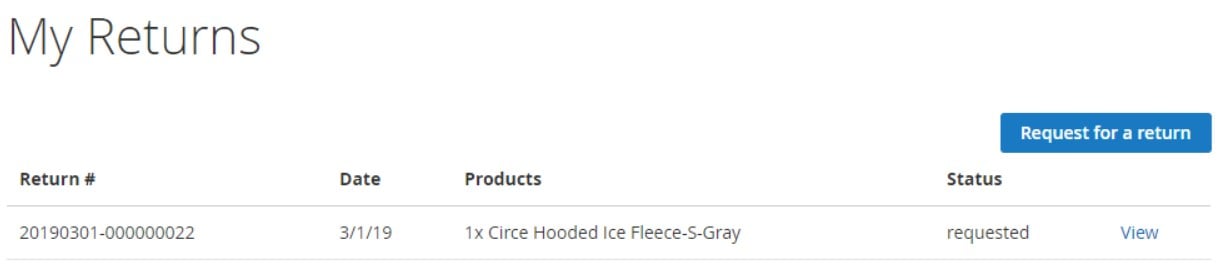
From the frontend user perspective, a request for a return can be created in a customer account under the “My Returns” tab. All current returns can be viewed there as well.
It is also possible to send messages to admin from the return view page.
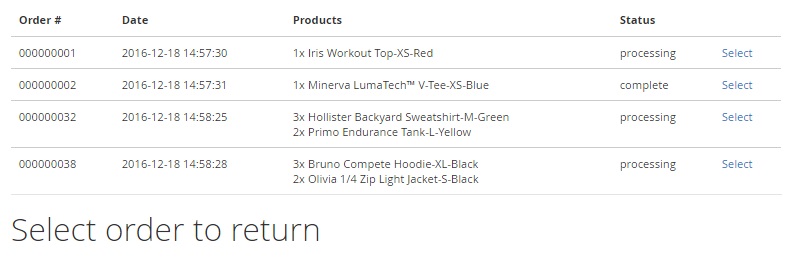
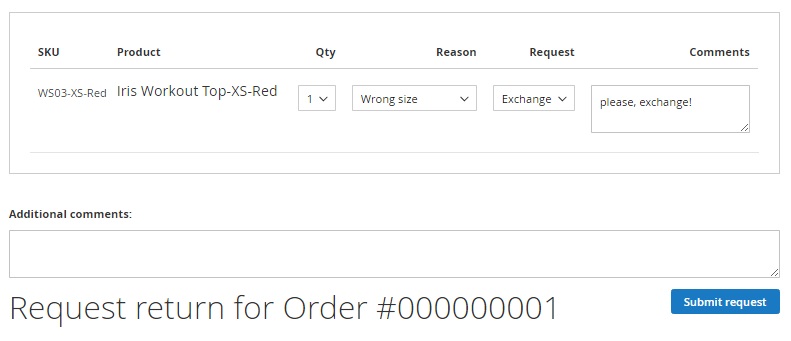
When creating a new request for return, first of all, it is necessary to select a relevant order.
Then, a customer should specify the number of items to return, reason, and a type of request (exchange or refund). Next, the RMA module provides the ability to type in comments as well as additional comments.
Final Words
The Boost My Shop RMA Magento 2 extension is an easy-to-use tool since it has the minimum number of configuration sections in the backend. All necessary settings are available in the Magento Admin, while all RMA requests are listed in one grid. Besides, you can easily create more RMAs from the admin side of your Magento 2 store. The same is about the frontend experience – Boost My Shop RMA for Magento 2 adds a fully-featured but easy to master interface. It is also necessary to mention that the extension costs just $99, so don’t hesitate to give it a go.
Related posts
 Magento 2 B2B Company Guide: Revealing Company Structure & Import
 How to Import Customers & Customer Addresses to Magento 2
 Adobe (Magento 2) Commerce and Cloud (Enterprise Edition) Specific Features
 Reputon Amazon Importer Review: How to Connect Shopify to Amazon in a Few Clicks
 Magento 2 Release Notes
 How To Bulk Import Products In Shopify: CSV Description & Step-By-Step Guide
 A Complete Guide to Shopify Customer Import
 Amasty ChatGPT AI Content Generator for Magento 2