
Boost My Shop Embedded ERP Magento 2 Extension

Enterprise resource planning is a vital aspect of business for both big and midsize online stores. The software of this kind helps to automate various backend processes, providing you with additional free time that can be used for gaining your ecommerce influence. We all know that there are lots of ERP solutions for Magento 1, but what about Magento 2? Now, this group of business tools is represented with a few modules only, and today, we shed light on the Embedded ERP Magento 2 extension by Boost My Shop.

The module is designed to improve your work in the following three fields: inventory management, supplier management, and order management. Besides, you get dashboards with various stats. Also, since everything is done within your Magento 2 backend, there is no need to synchronize the tool with any external software, services, or platforms.
From the perspective of inventory management, the Boost my Shop Embedded ERP Magento 2 extension provides the ability to read barcodes, track and transfer stocks, and receive alerts on low stock levels.
As for supplier management, the module enables you to add suppliers and edit their data, track purchase prices, monitor supplier needs and get corresponding alerts, manage purchase orders, and follow backorders.
The order management functionality of the extension allows you to plan customer orders and their delivery from еру beginning to the end.
Now, we will describe each extension’s area in more detail.
The Embedded ERP Magento 2 module provides all features necessary to manage and fully control different warehouses and inventory. You get a perfect opportunity to monitor and track all stocks. Besides, as mentioned above, there is advanced support for barcodes. Due to multi inventory management capabilities, it doesn’t matter whether your warehouses, offline stores, and online stocks are separated geographically or not. You can easily control everything within one convenient interface. Furthermore, it is possible to create an unlimited number of both physical and virtual deposits. Also, the Embedded ERP Magento 2 extension allows automating the distribution of customer orders with the help of rules created in the backend.
As for stock levels, they are divided into 4 categories: Physical Inventory, Stock Available, Stock Alert, and Ideal Stock. Physical Inventory illustrates product quantity that is available in a warehouse. Stock Available is the amount that can be sold. Stock Alert is a minimal level of stocks that triggers an alert. Ideal Stock represents a stock level that provides the availability of products within a specified period of time.
Now, let’s take a look at stock movements. The Embedded ERP Magento 2 extension by Boost my Shop lets you monitor all stock migrations. Thus, you can easily control such processes as shipping a sales order, receiving a purchase order, as well as receiving products as a result of RMA. The origin of movement and the description are mandatory, so all unknown stock items are eliminated.
Product booking is another essential feature of the Embedded ERP module. The extension detects ordered products, automatically reserves appropriate items, and assigns them to the customer order.
The extension also provides support for bulk actions. It means that you can edit several products simultaneously, changing their alert threshold level or location. Sales history and import/export capabilities are also supported.
Although there are tons of other features available with the ERP Magento 2 extension, we will cover most of them through the following tutorial related to the backend.
Table of contents
Backend
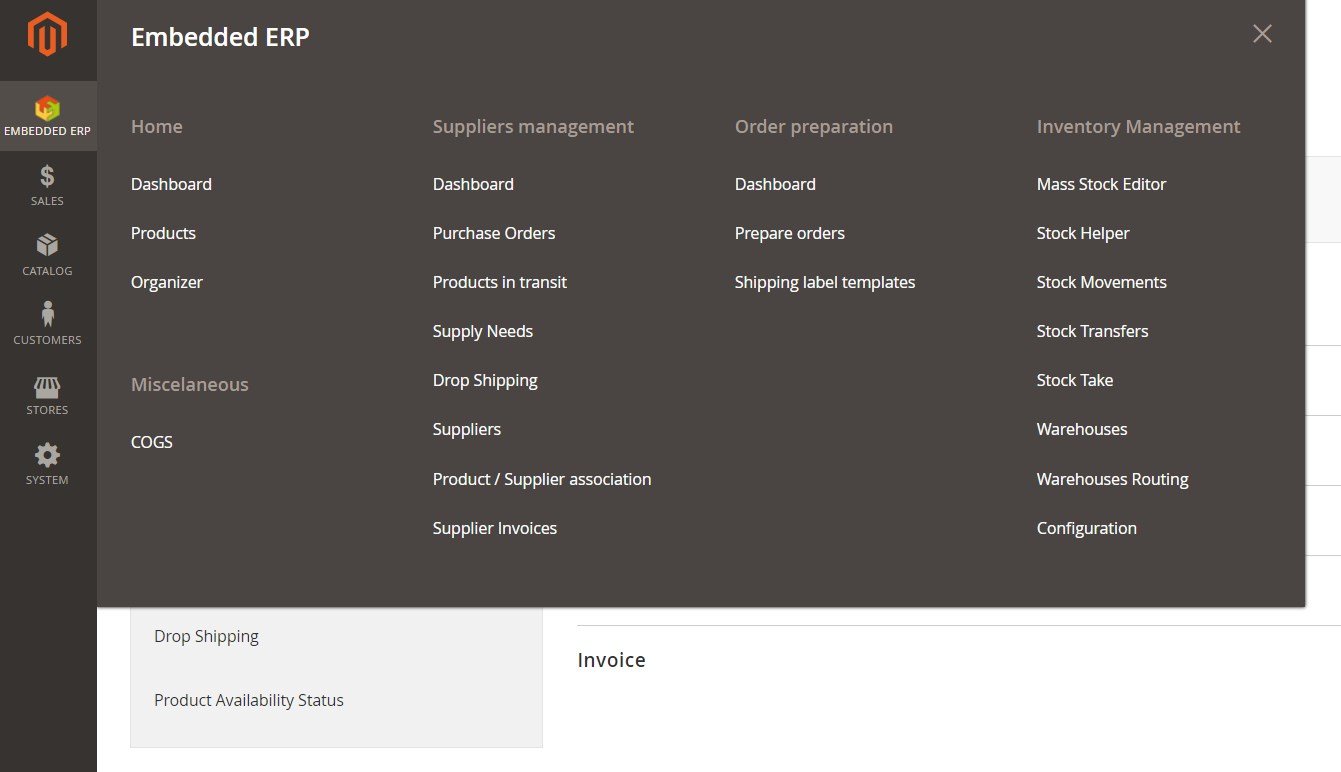
There are 5 different sections available in the Embedded ERP Magento 2 extension: Home, Order Preparation, Suppliers Management, Inventory Management, and Miscellaneous.
Home
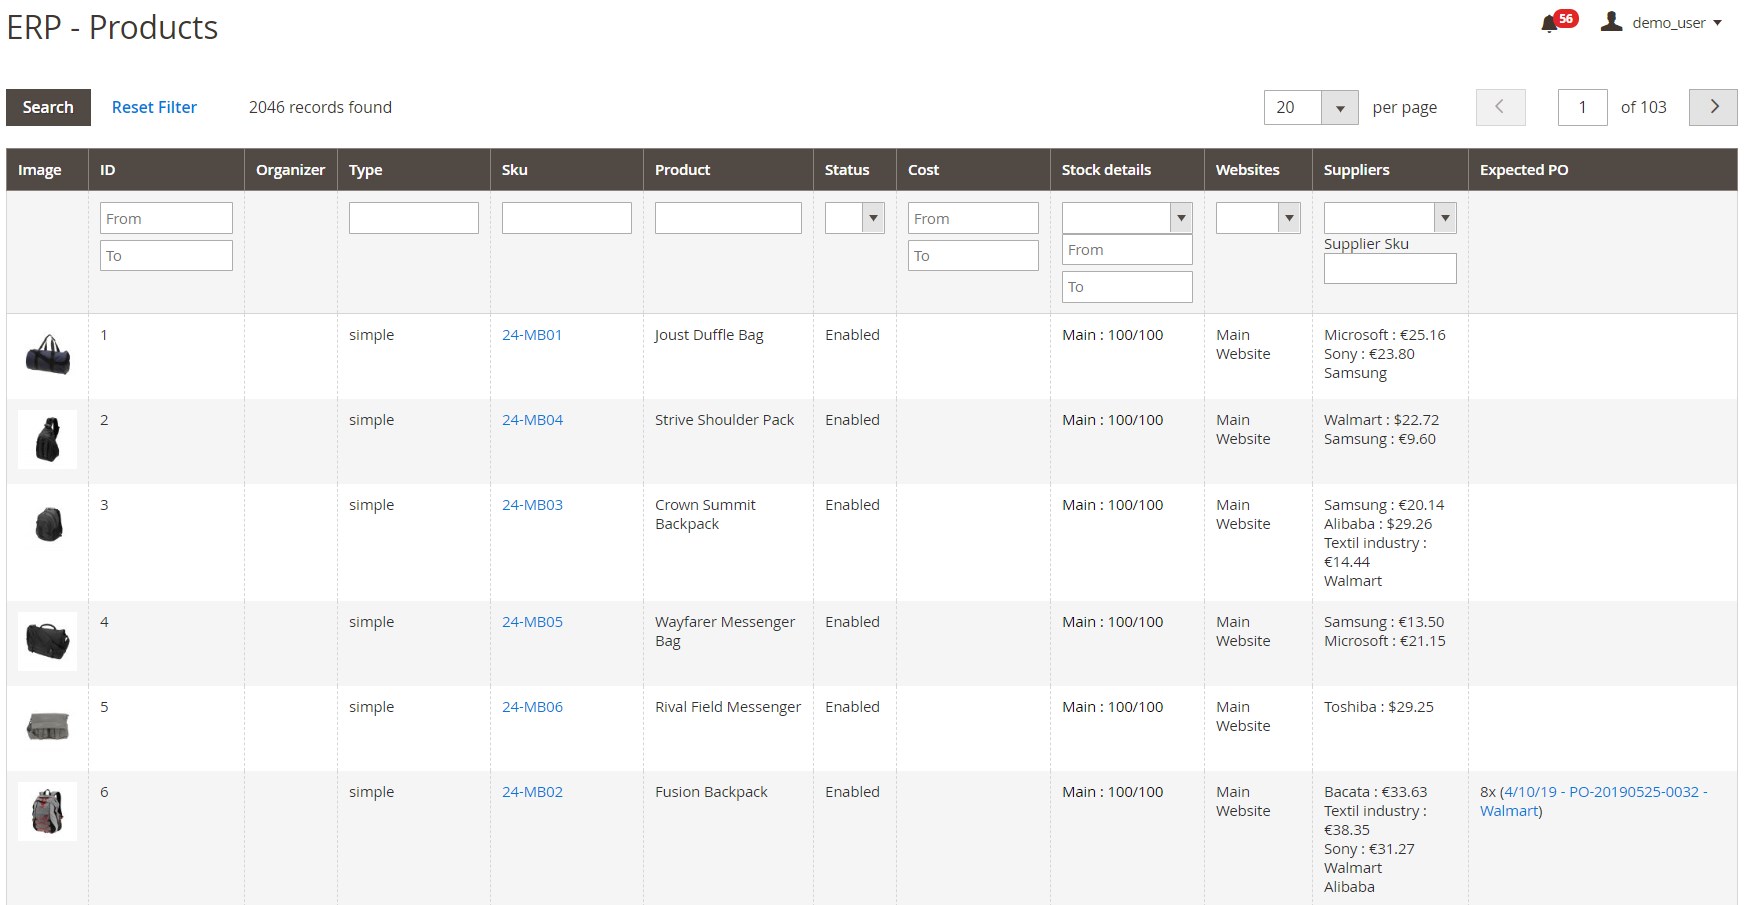
The core page of this section illustrates all products gathered in a grid. The grid is enhanced with a few new columns, but some of them are standard:
- Image – shows product images;
- ID – a unique number assigned to each product;
- Organizer – points at the designated organizer;
- Type – a product type;
- SKU – shows product SKUs;
- Product – displays product names;
- Status – defines whether a product is enabled or disabled;
- Cost – a product price;
- Stock Details – how many items should be shipped and how many are received;
- Websites – a website where the product is available;
- Suppliers – suppliers and prices they offer;
- Expected PO – a purchase order with an expected delivery date and supplier.
Note that you can easily filter out products, as well as change their order from ascending to descending from each column.
Order Preparation
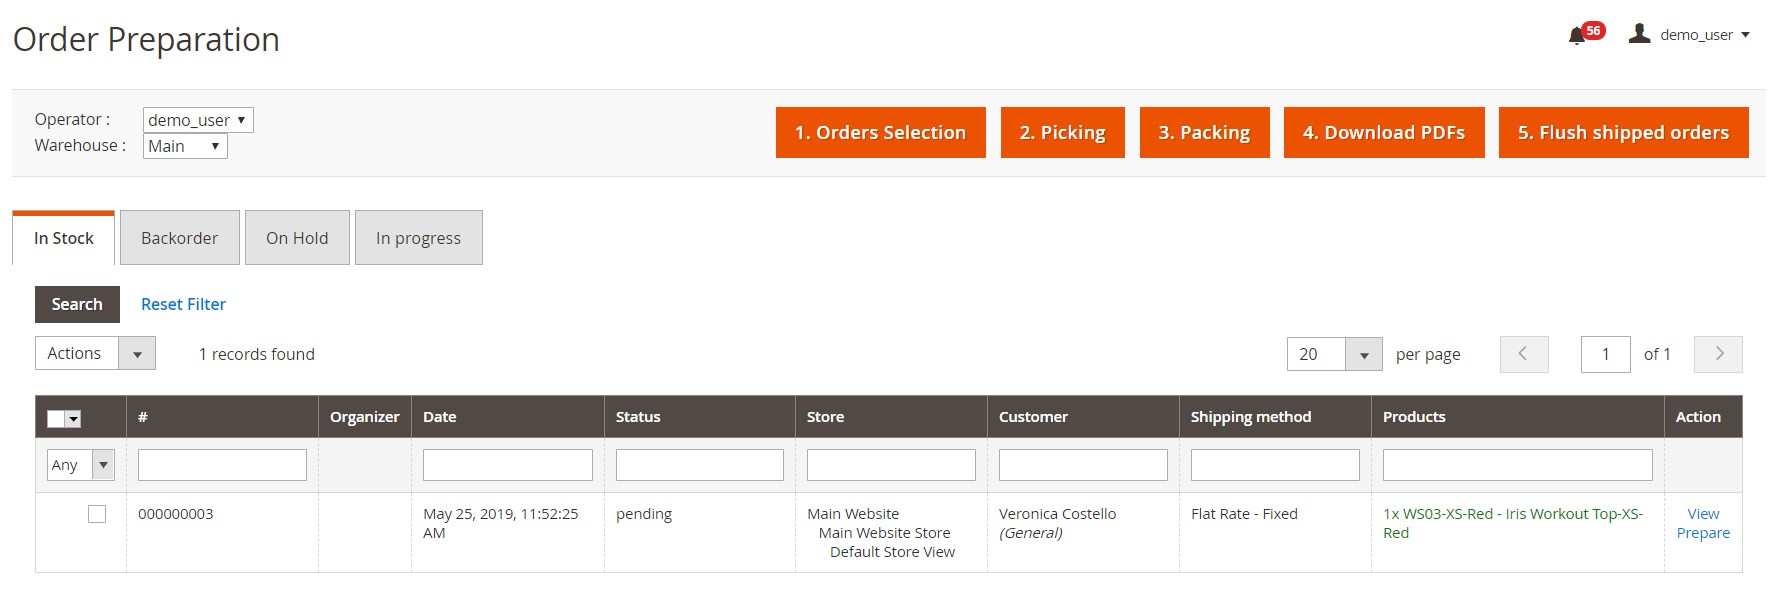
The Order Preparation screen contains the following 5 steps: Orders Selection, Picking, Packing, Download PDFs, and Flush Shipped Orders.
The first step offers 4 tabs: In Stock, Backorder, On Hold, and In Progress. Each tab contains the grid with the same structure:
- # – order number;
- Organizer – assigned organizer;
- Date – order date and time;
- Status – current order status;
- Store – store view;
- Customer – a customer who made the order;
- Shipping Method – a chosen shipping method;
- Products – products in the order;
- Action – you can view or prepare each order from here.
After choosing an order on the Packing screen, you get the following picture:
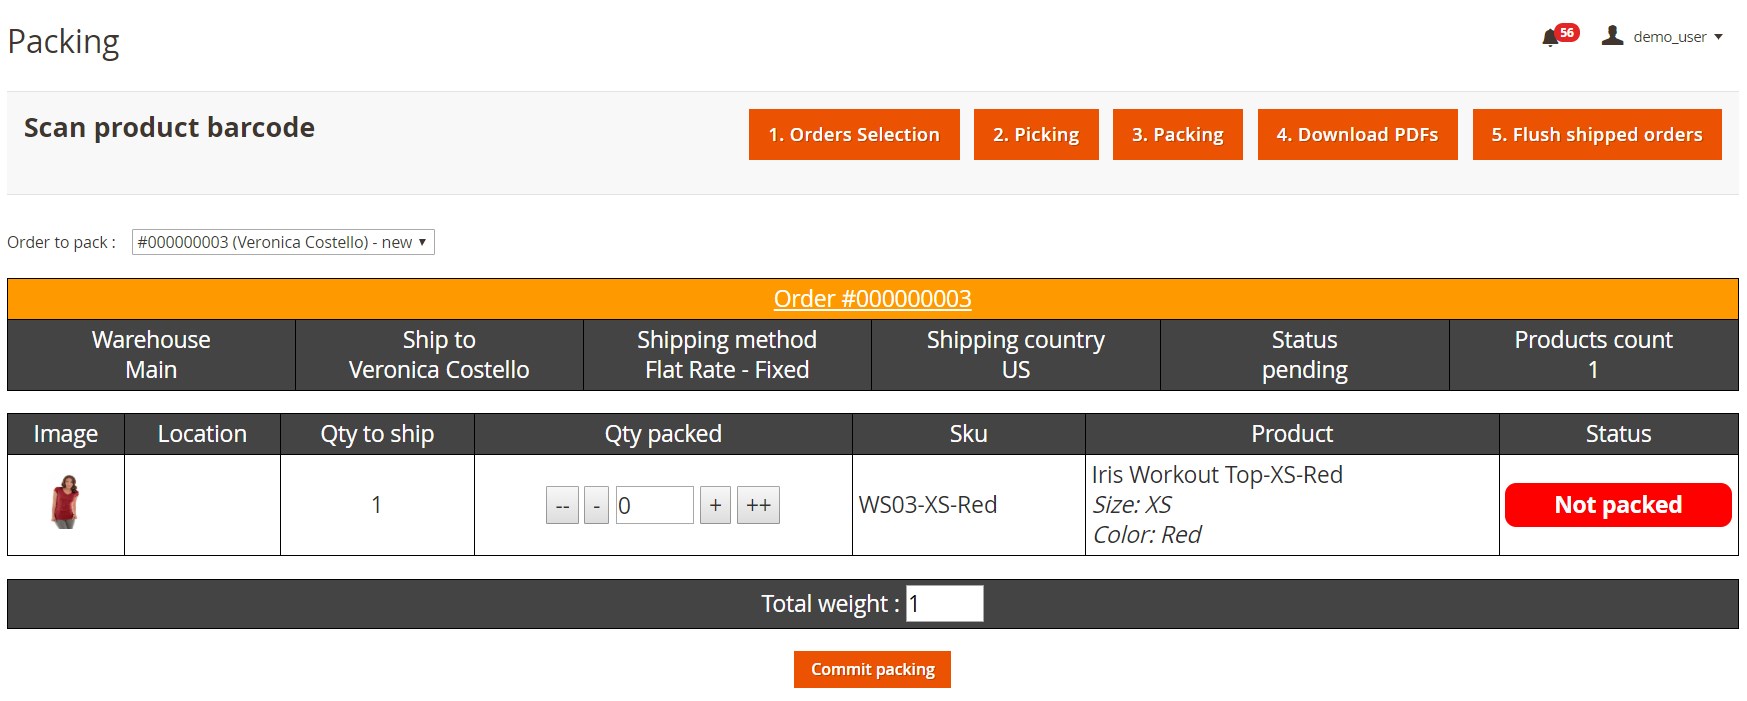
As you can see, the order is described in the closest details. Next, you can pack all products and specify the packed qty of each item from the order. Their status will be changed to “Packed”. Then, hit the “Commit Packing” button and you will see the following screen:
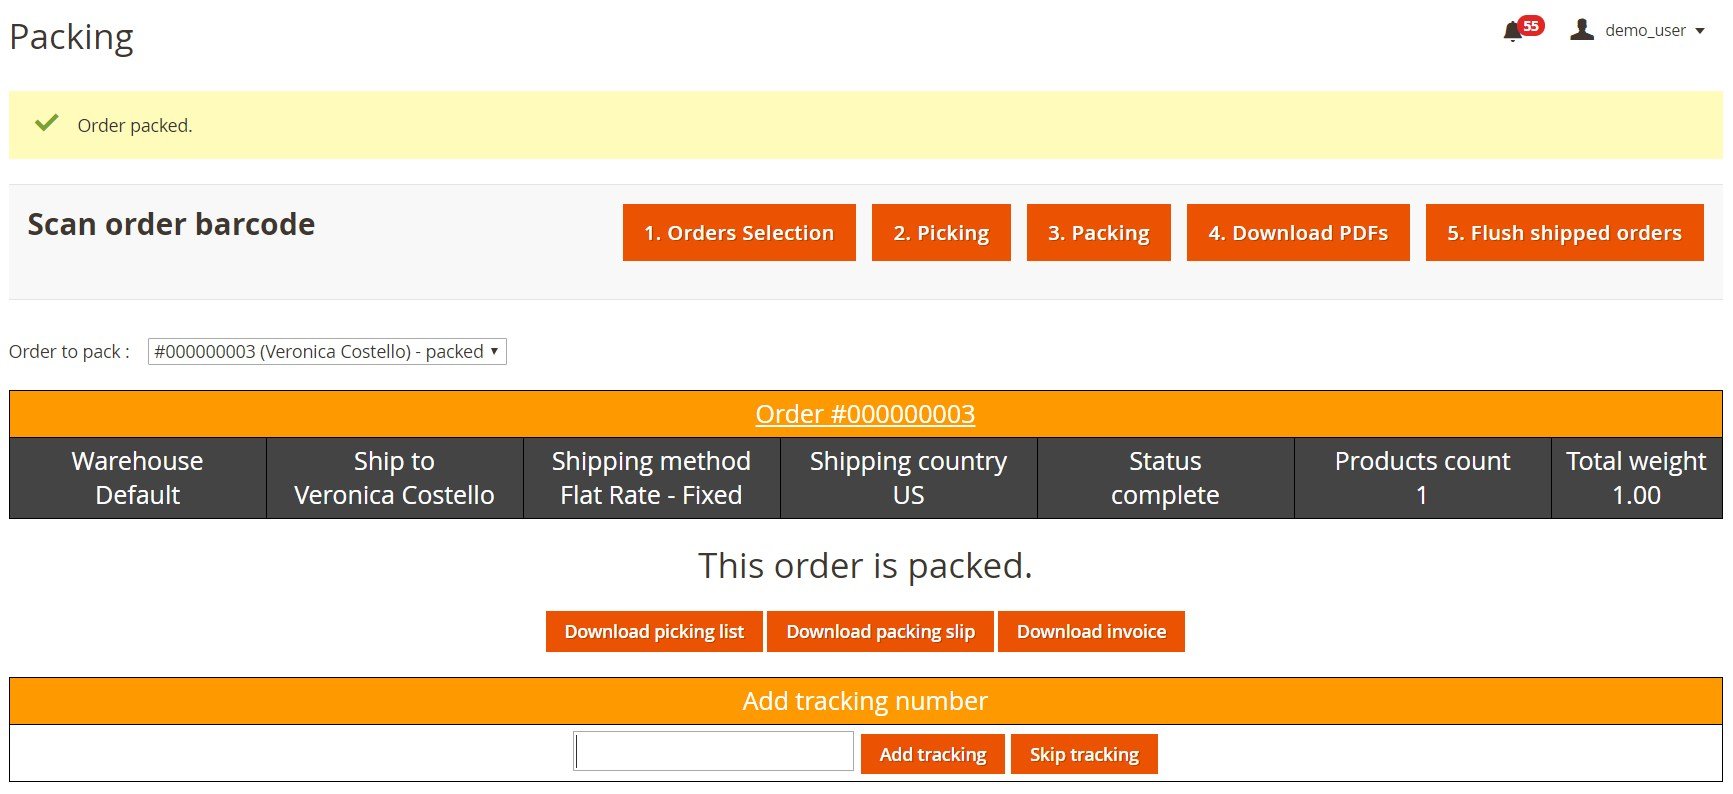
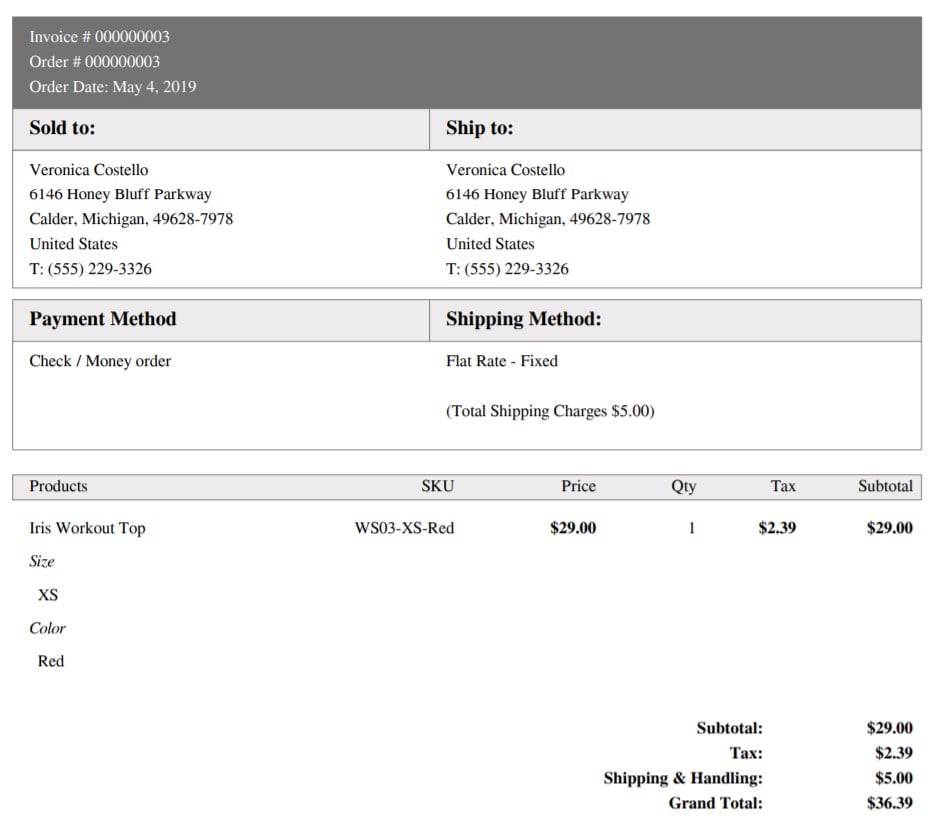
You can download a packing list, a packing slip, and invoice. Besides, it is possible to add a tracking number or skip tracking.
As for other steps, Download PDFs allows you to get all invoices in a single document, while the “Flush Shipped Orders” button has quite a self-explanatory name.
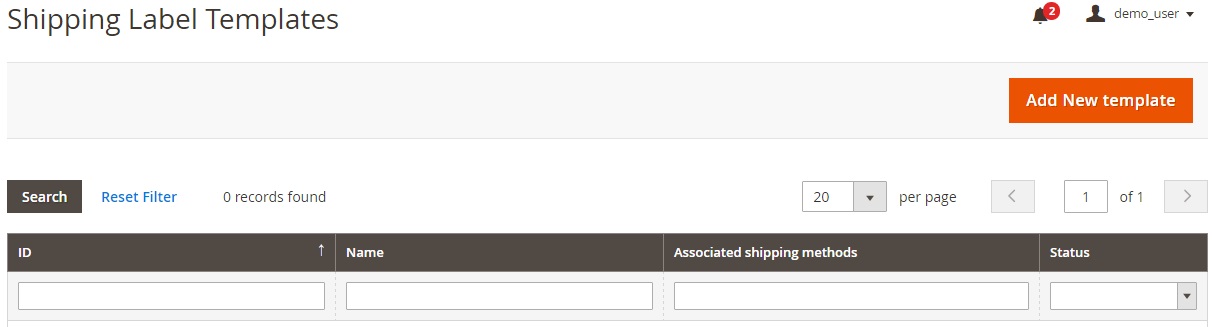
Another element of the Order Preparation section is Shipping Label Templates. In the demo of Embedded ERP, this page contains an empty grid.
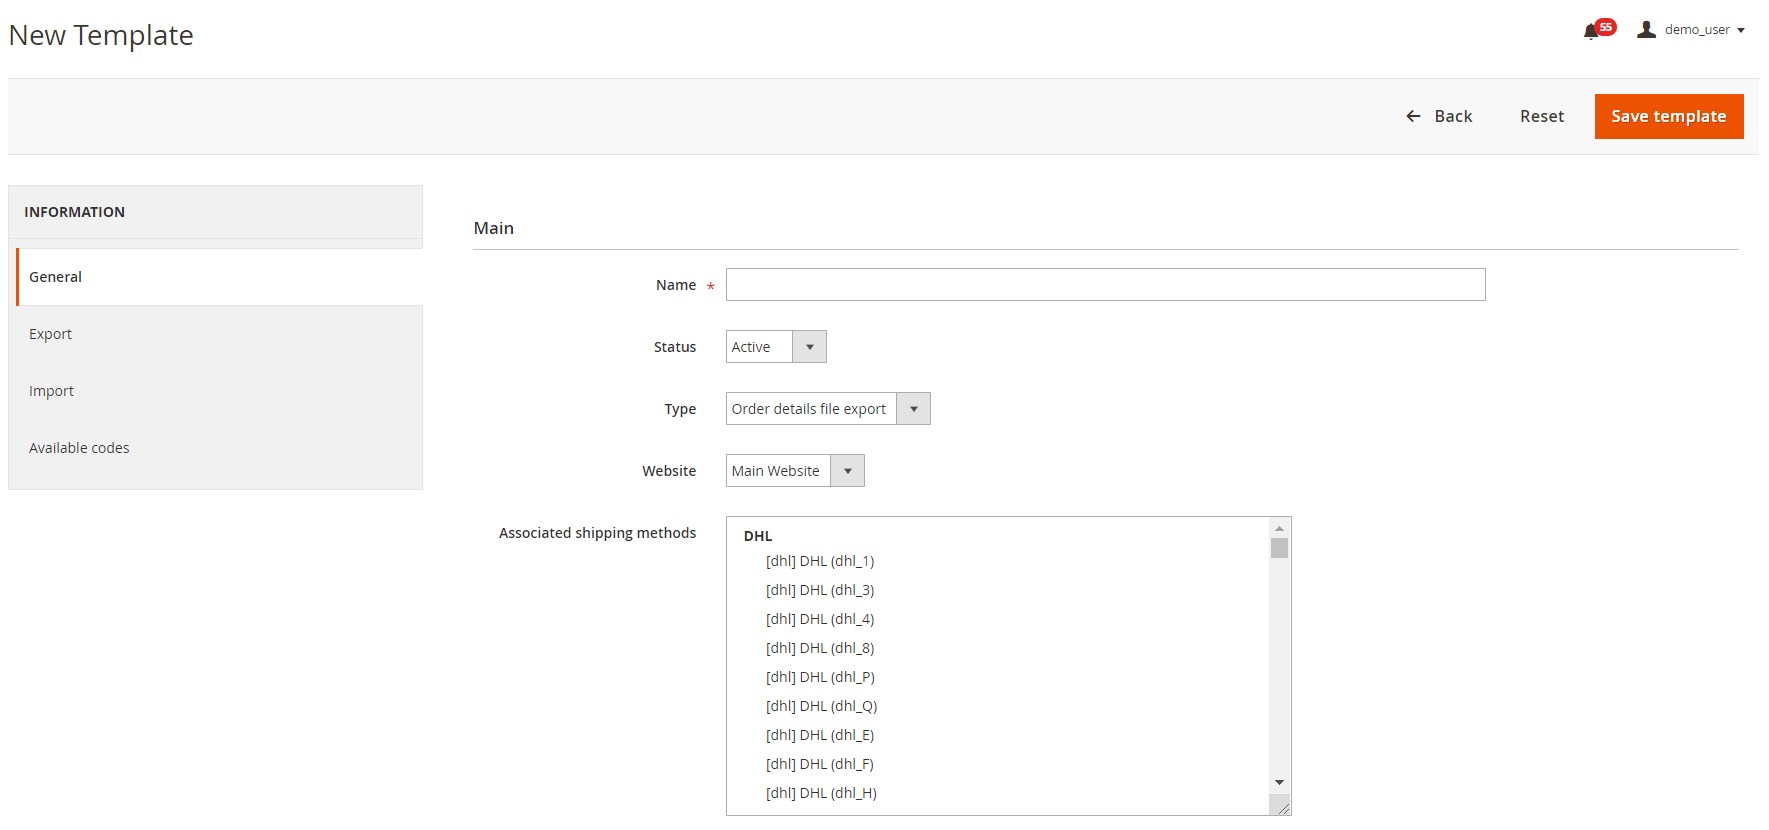
To add a new template, first, specify the general information: enter a template name and choose its status, type, website, and associated shipping methods.
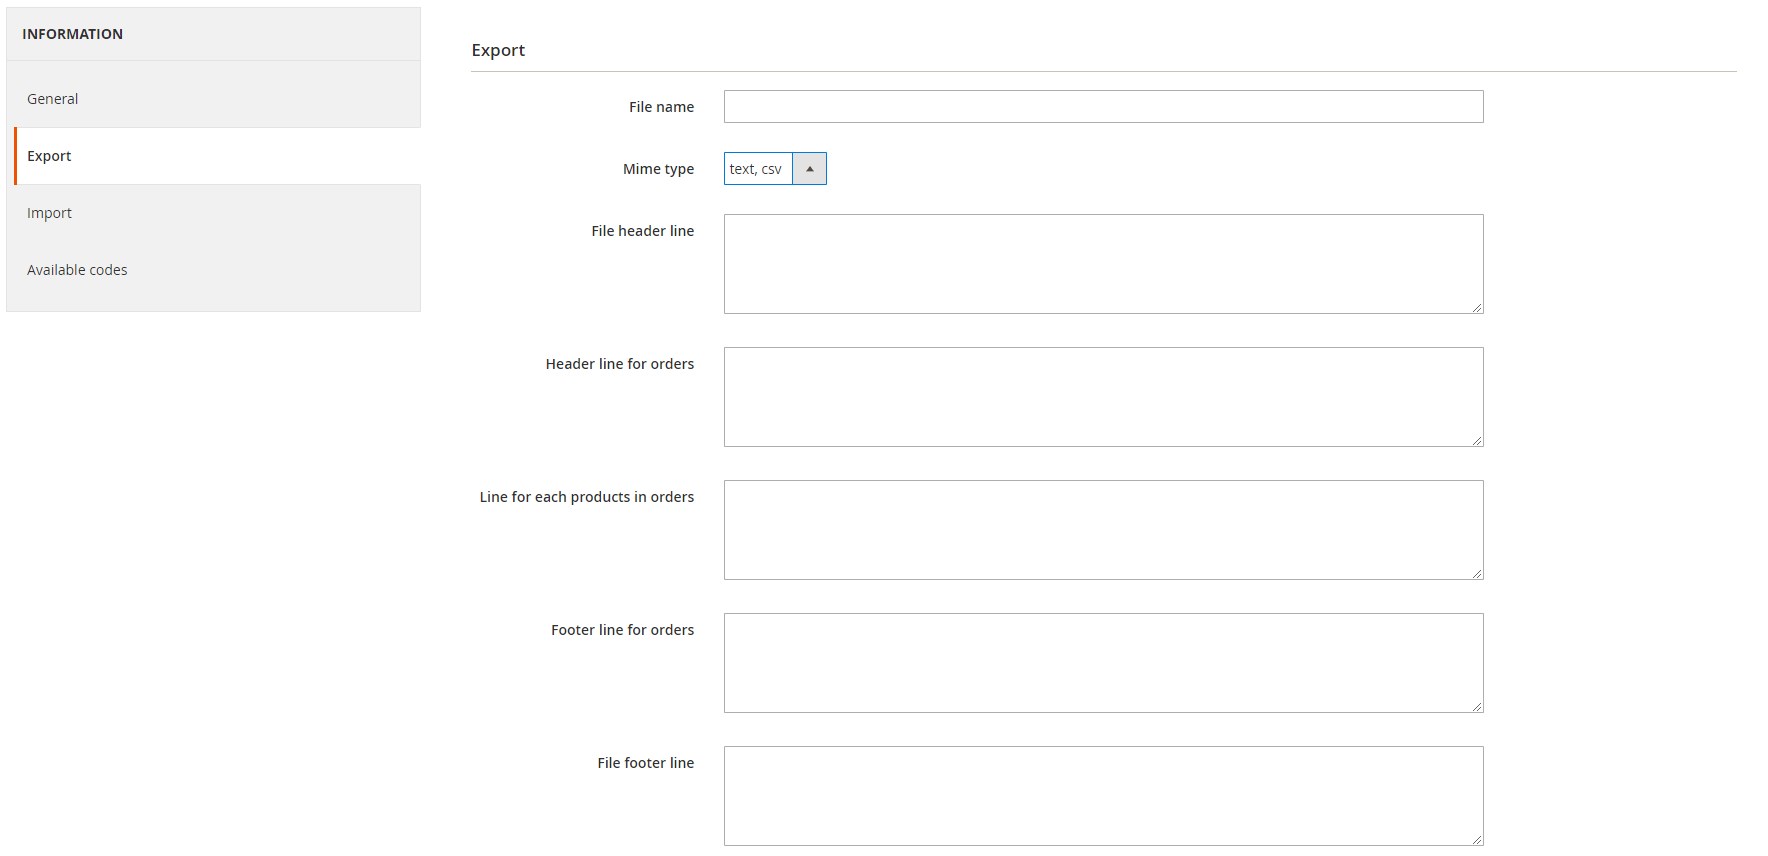
In the Export tab, there are 7 fields: File name, Mime type, File header line, Header line for orders, Line for each product in orders, Footer line for orders, and File footer line.
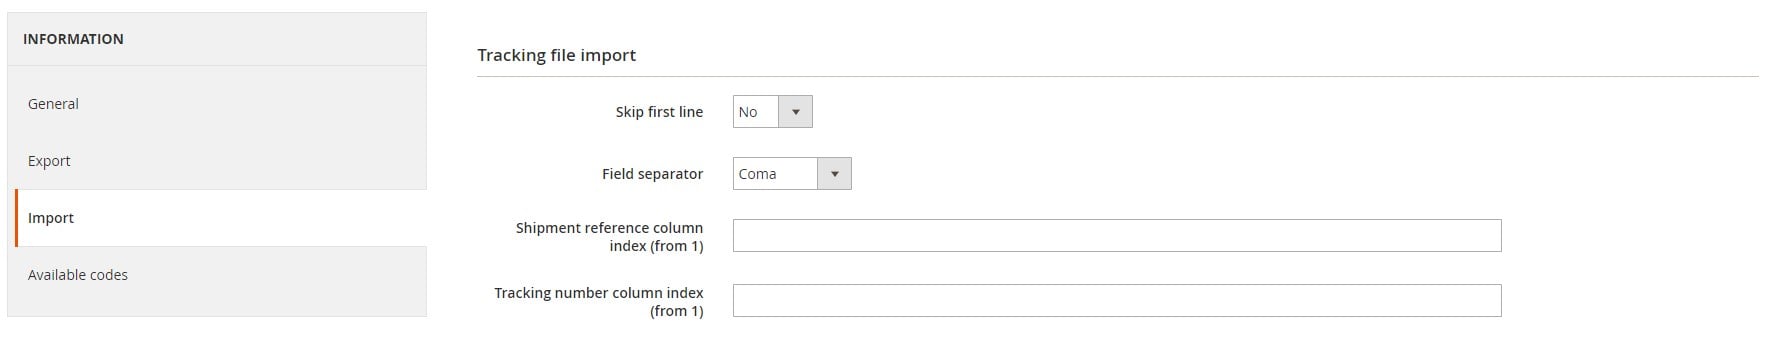
It is also possible to configure tracking file import:
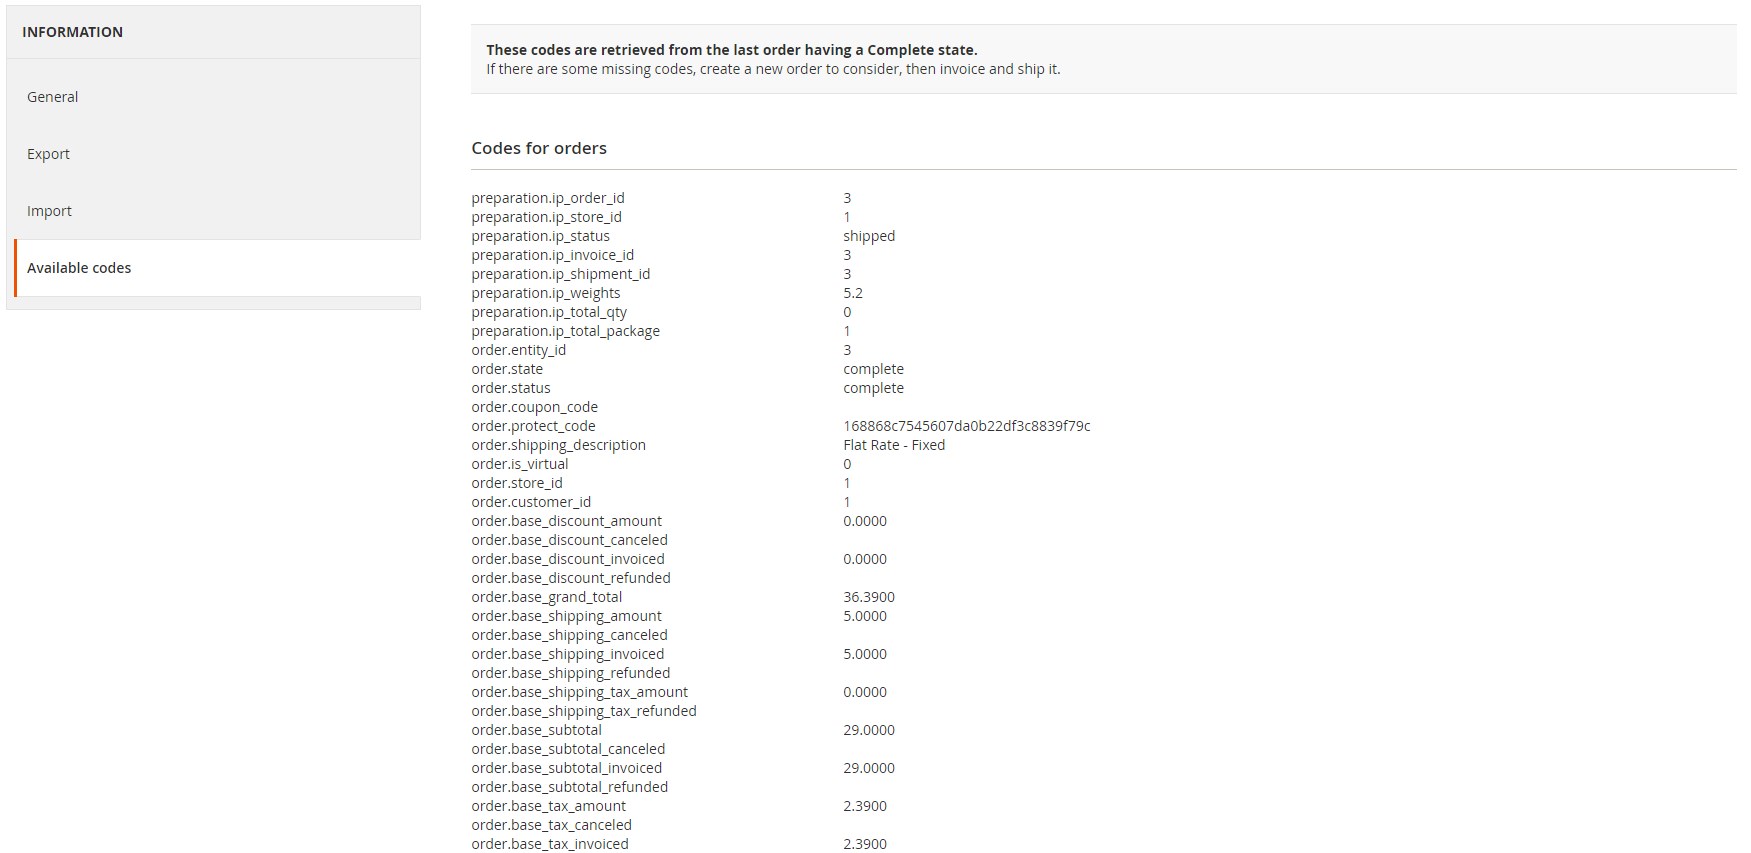
The last tab gathers all available codes:
Suppliers Management
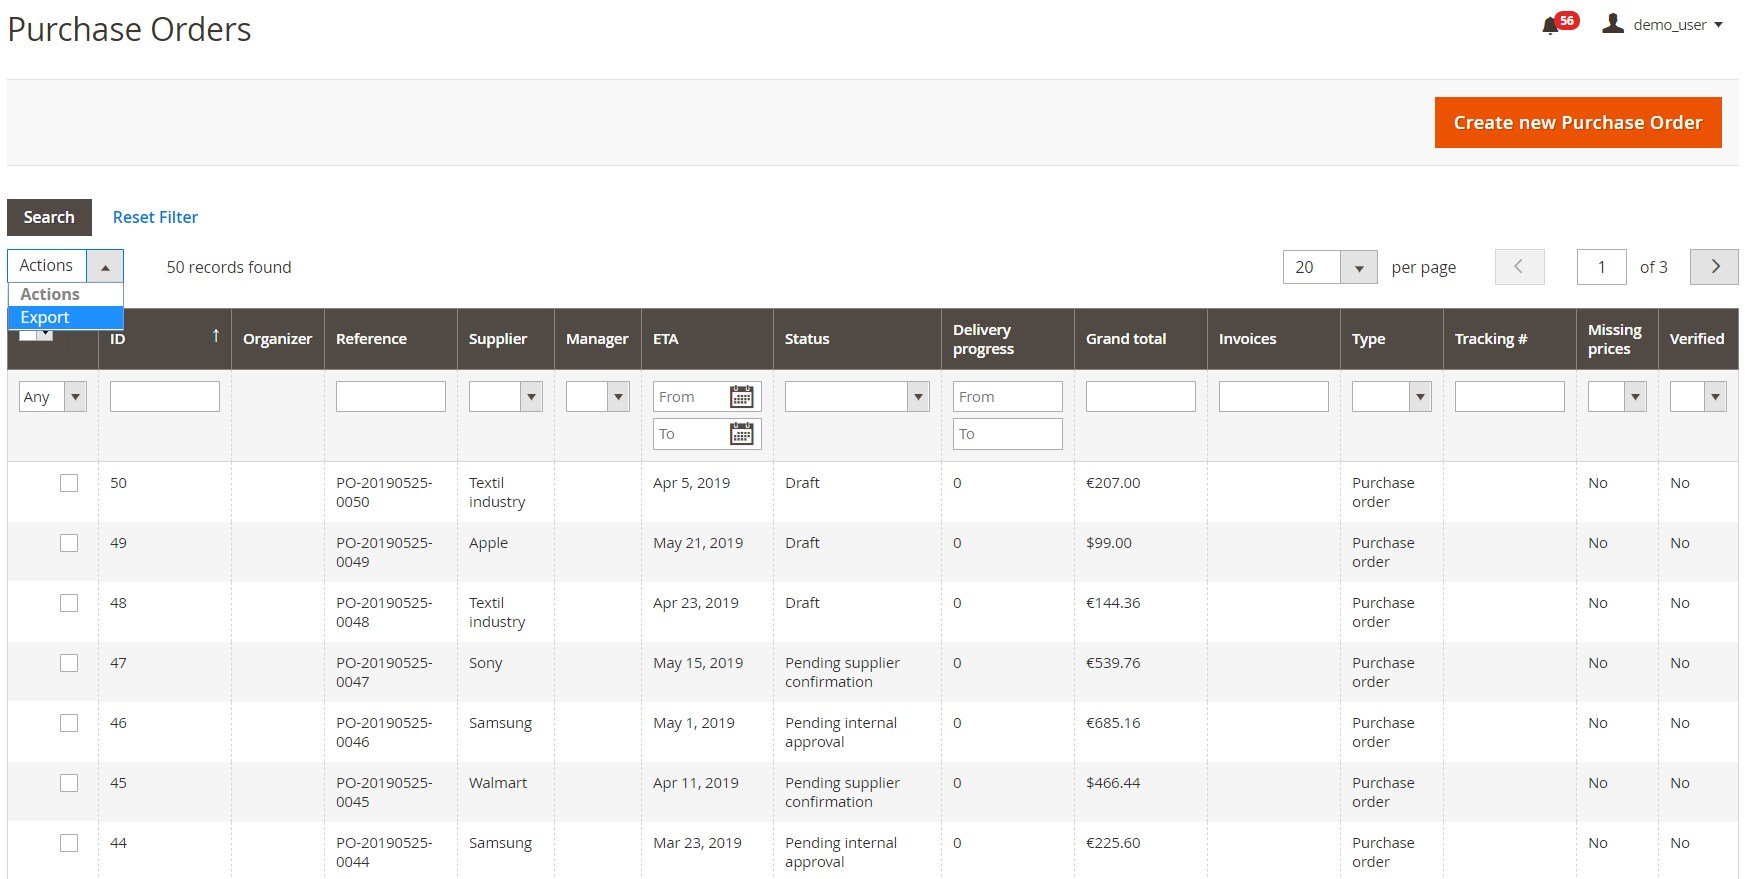
All purchase orders are gathered in a grid that consists of 15 columns:
- Checkbox – for POs selection to apply mass actions;
- ID – PO ID;
- Organizer – assigned organizer;
- Reference – PO reference number;
- Supplier – PO supplier;
- Manager – responsible manager;
- ETA – estimated time of arrival;
- Status – complete, expected, canceled, etc.;
- Delivery Progress – how many items are already delivered;
- Grand Total – the total cost of each purchase order;
- Invoices – related invoices;
- Type – purchase order or drop shipping;
- Tracking # – a number for PO tracking;
- Missing prices – Yes or No;
- Verified – Yes or No.
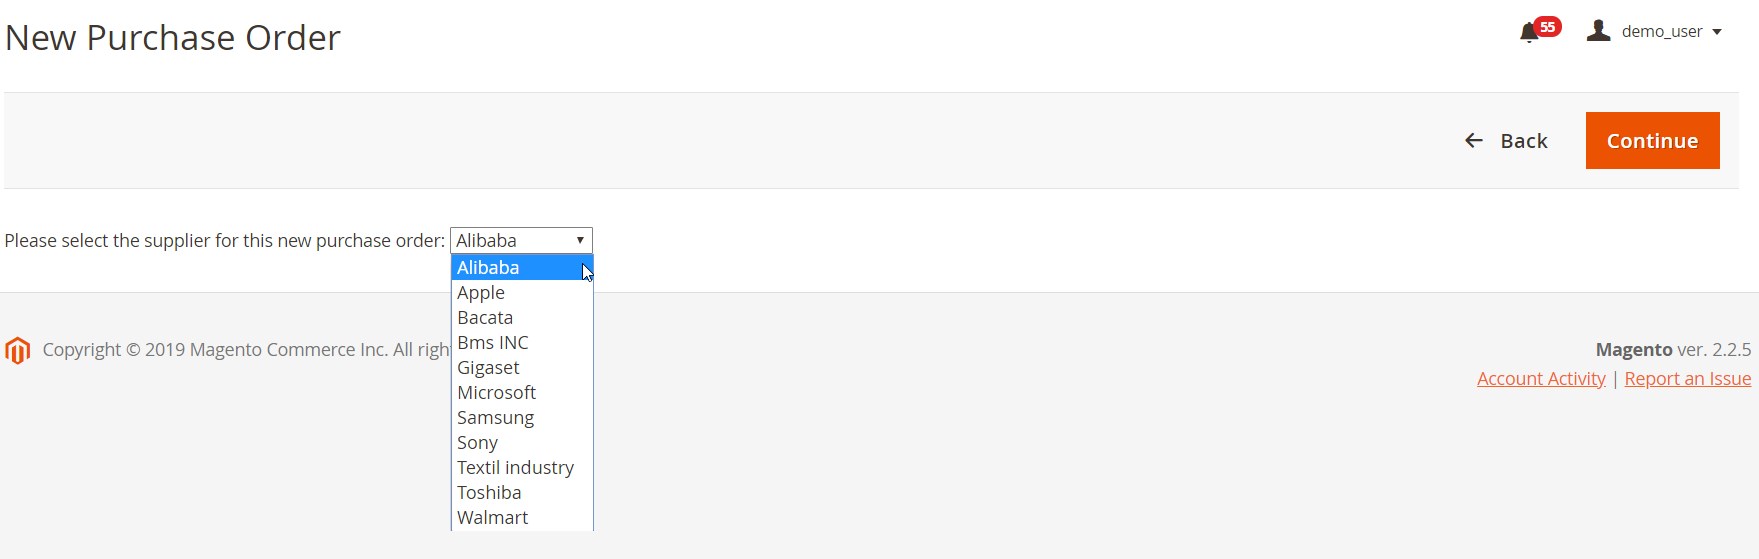
To create a new purchase order, you should select the supplier and click Continue.
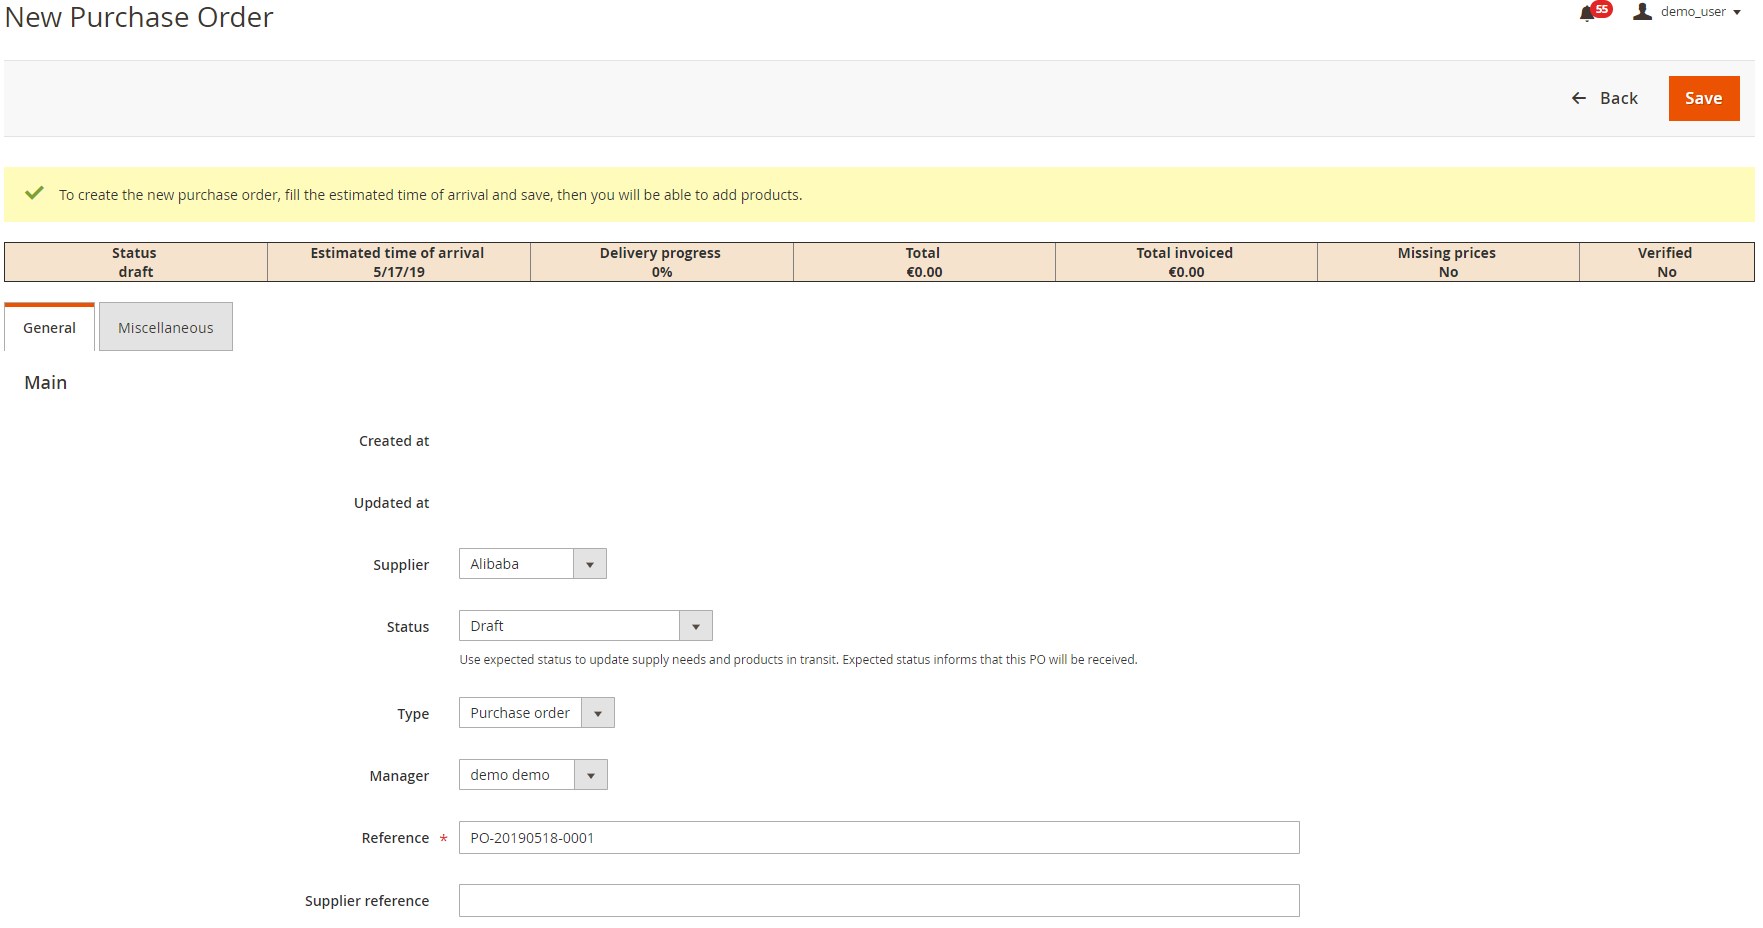
Next, you should fill in the General tab. It allows admin to change the supplier, set a PO status, select a PO type (purchase order, dropshipping, or consignment), choose manager, and add a PO and supplier reference.
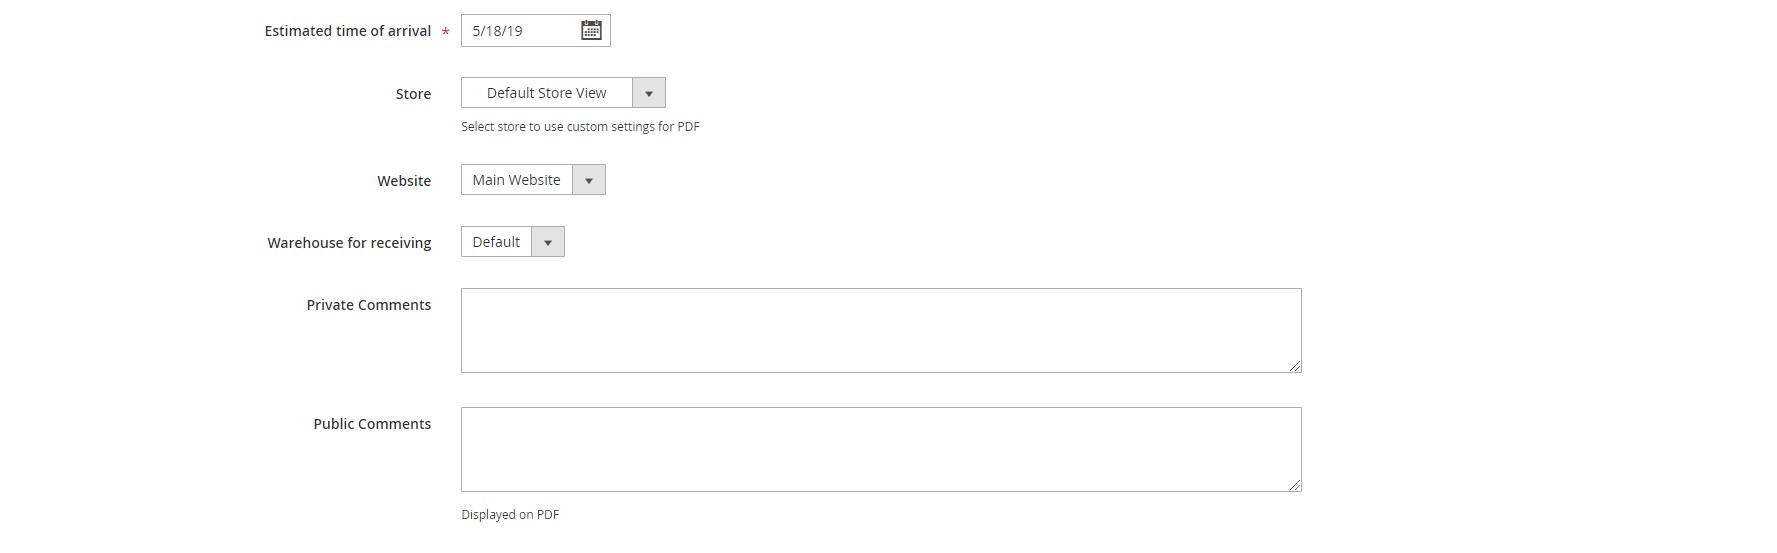
Next, select an estimated time of arrival, store view, website, and warehouse for receiving. Here, you can also add private and public comments.
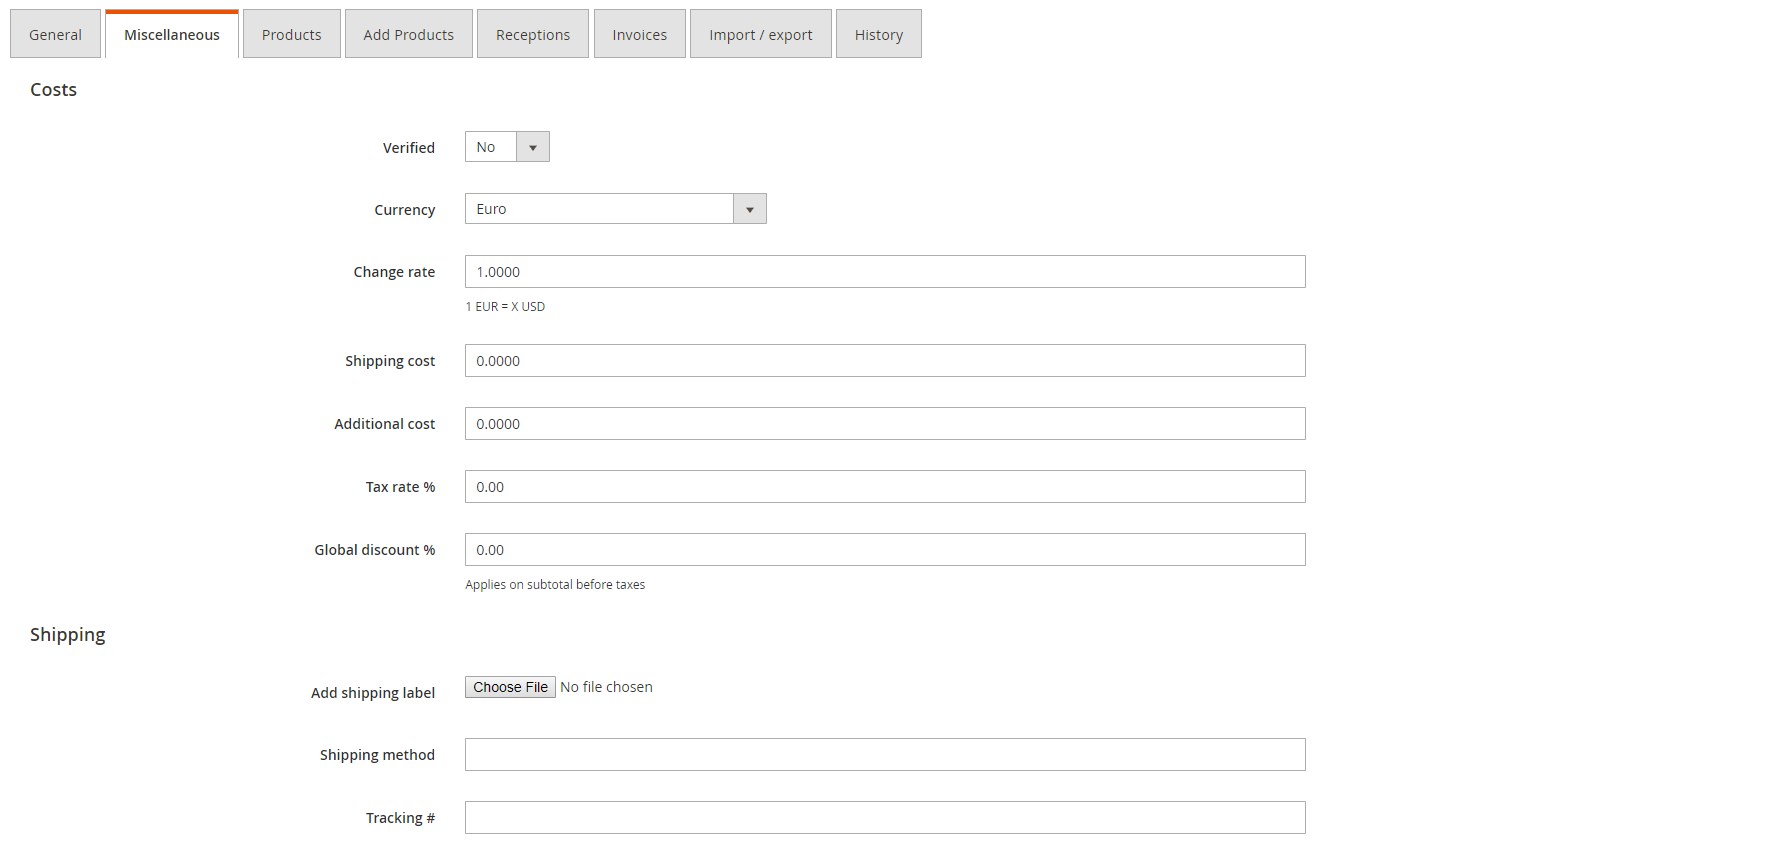
As for the Miscellaneous tab, it is divided into several sections. In Costs, you should specify a currency, change rate, shipping cost, additional cost, tax rate, and global discount. In Shipping, upload a file with a shipping label, set a shipping method, and add a tracking number.
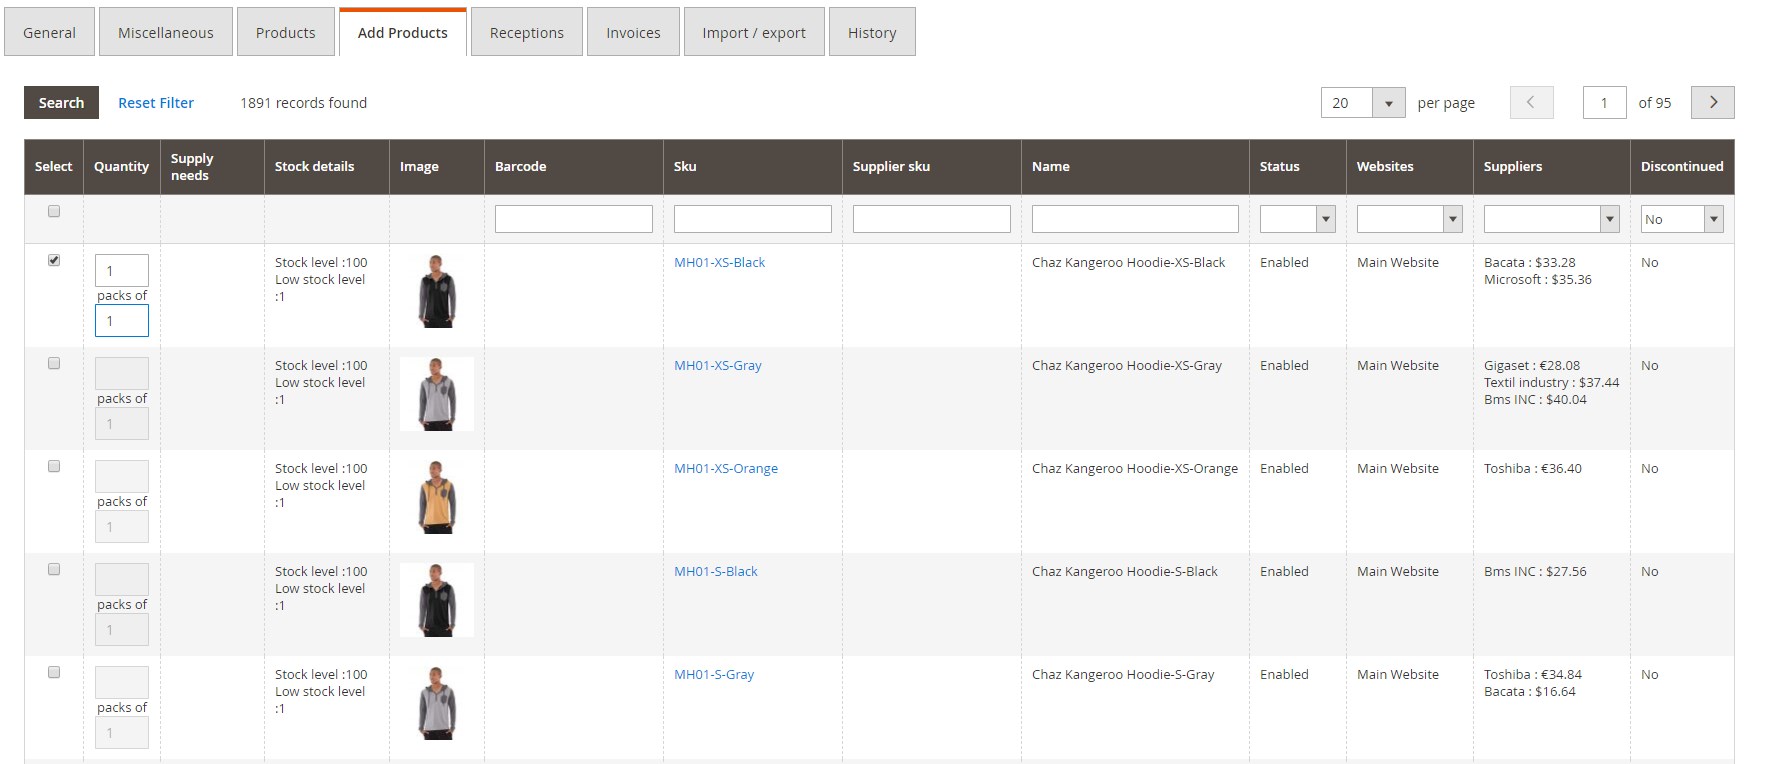
In the Add Products tab, you can select particular products to include in the purchase order.
A grid in the Receptions tab displays date, user, received products, and other details.

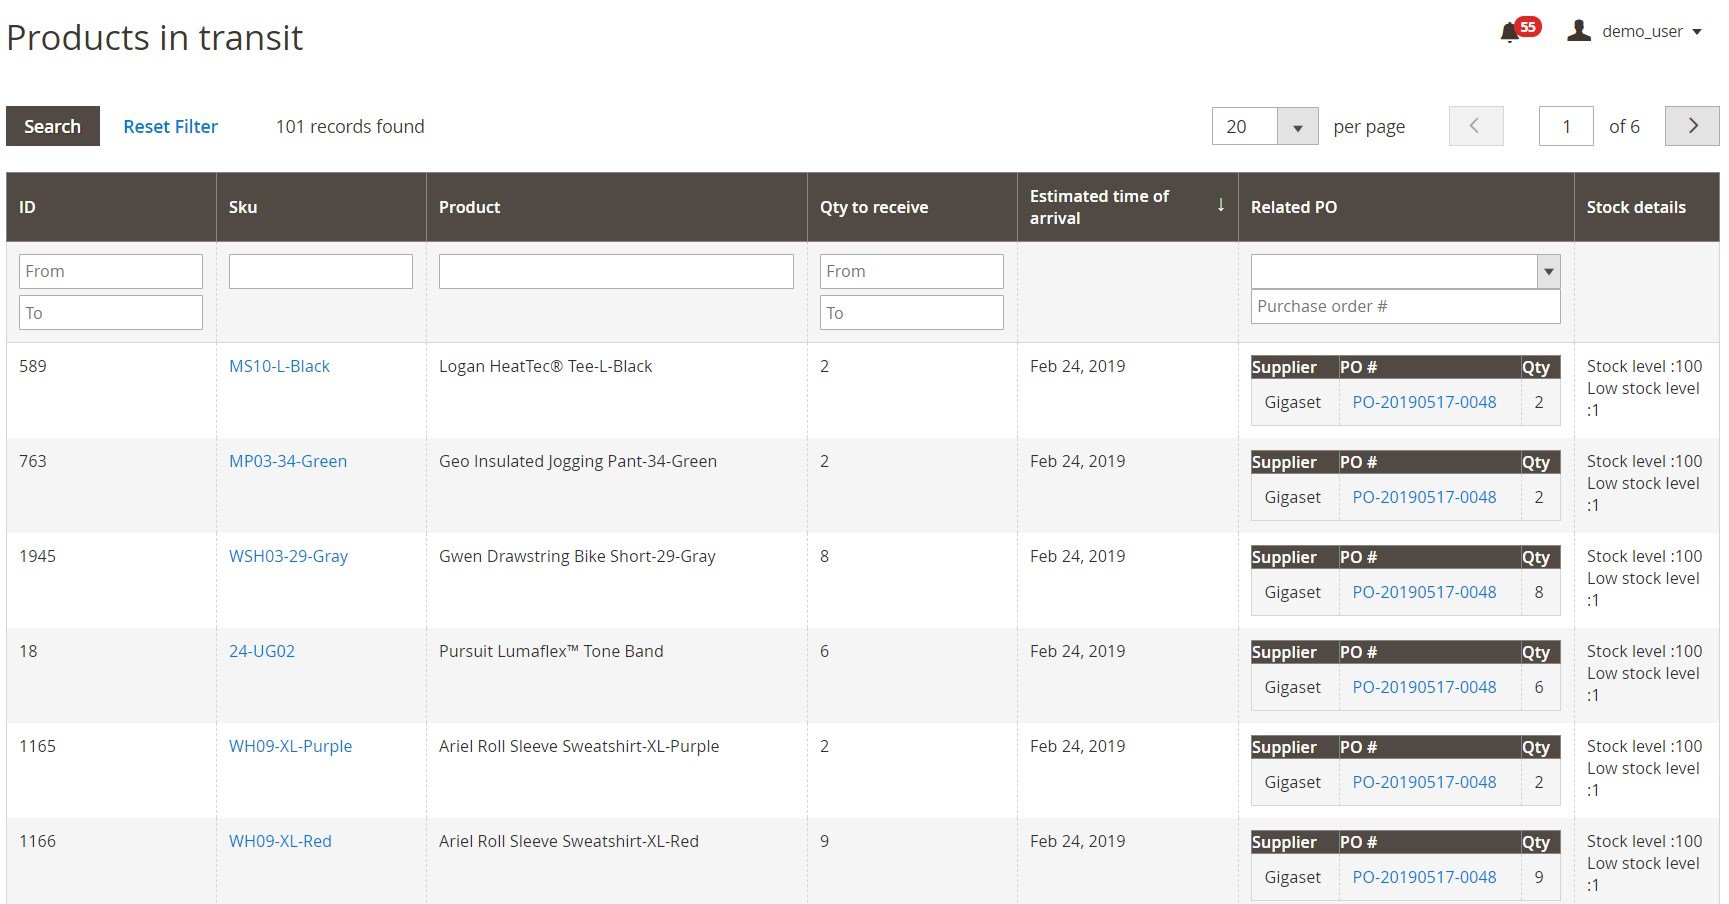
Now, let’s explore the structure of the Products in Transit grid. It consists of 7 columns: ID, SKU, Product, Qty to receive, Estimated Time of Arrival, Related PO, and Stock Details. You can apply filters to find certain products. Besides, it is possible to display products in ascending or descending order in each column except Stock Details.
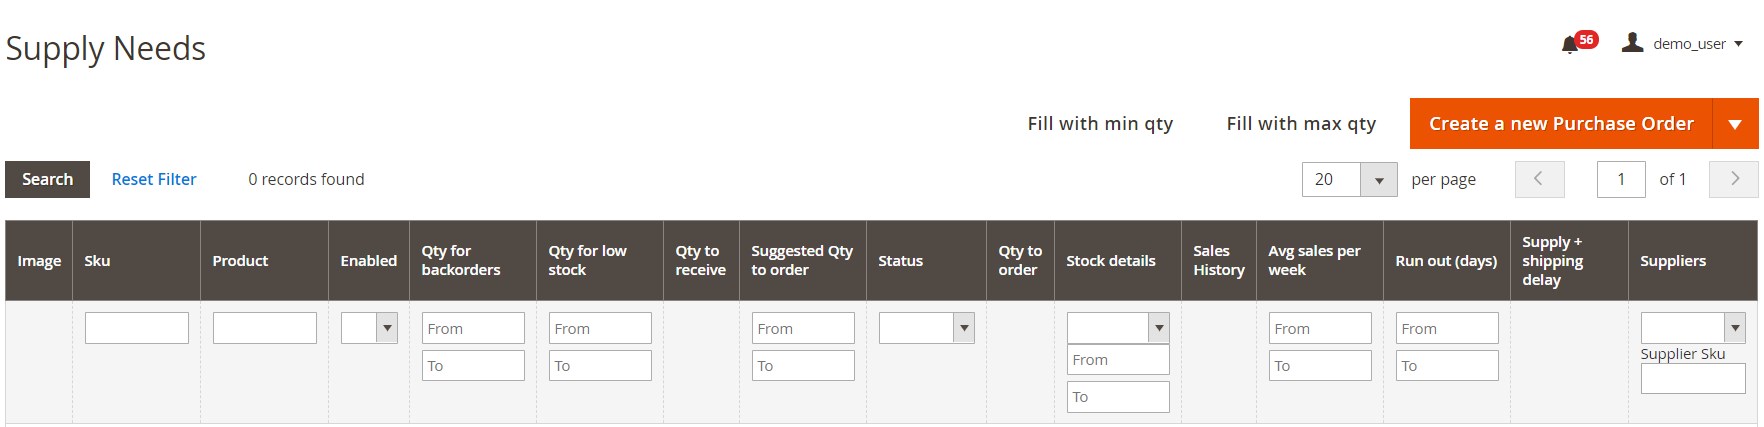
The Supply Needs grid is more complex. It consists of 16 columns: Image, SKU, Product, Enabled, Qty for Backorders, Qty for Low Stock, Qty to Receive, Suggested Qty to Order, Status, Qty to Order, Stock Details, Sales History, Avg Sales Per Week, Run Out (days), Supply + shipping delay, and Suppliers. You can apply filters and change the current order of products.
We’ve already described how to create a new purchase order, so let’s proceed to another screen of the Magento 2 ERP module’s backend configuration.
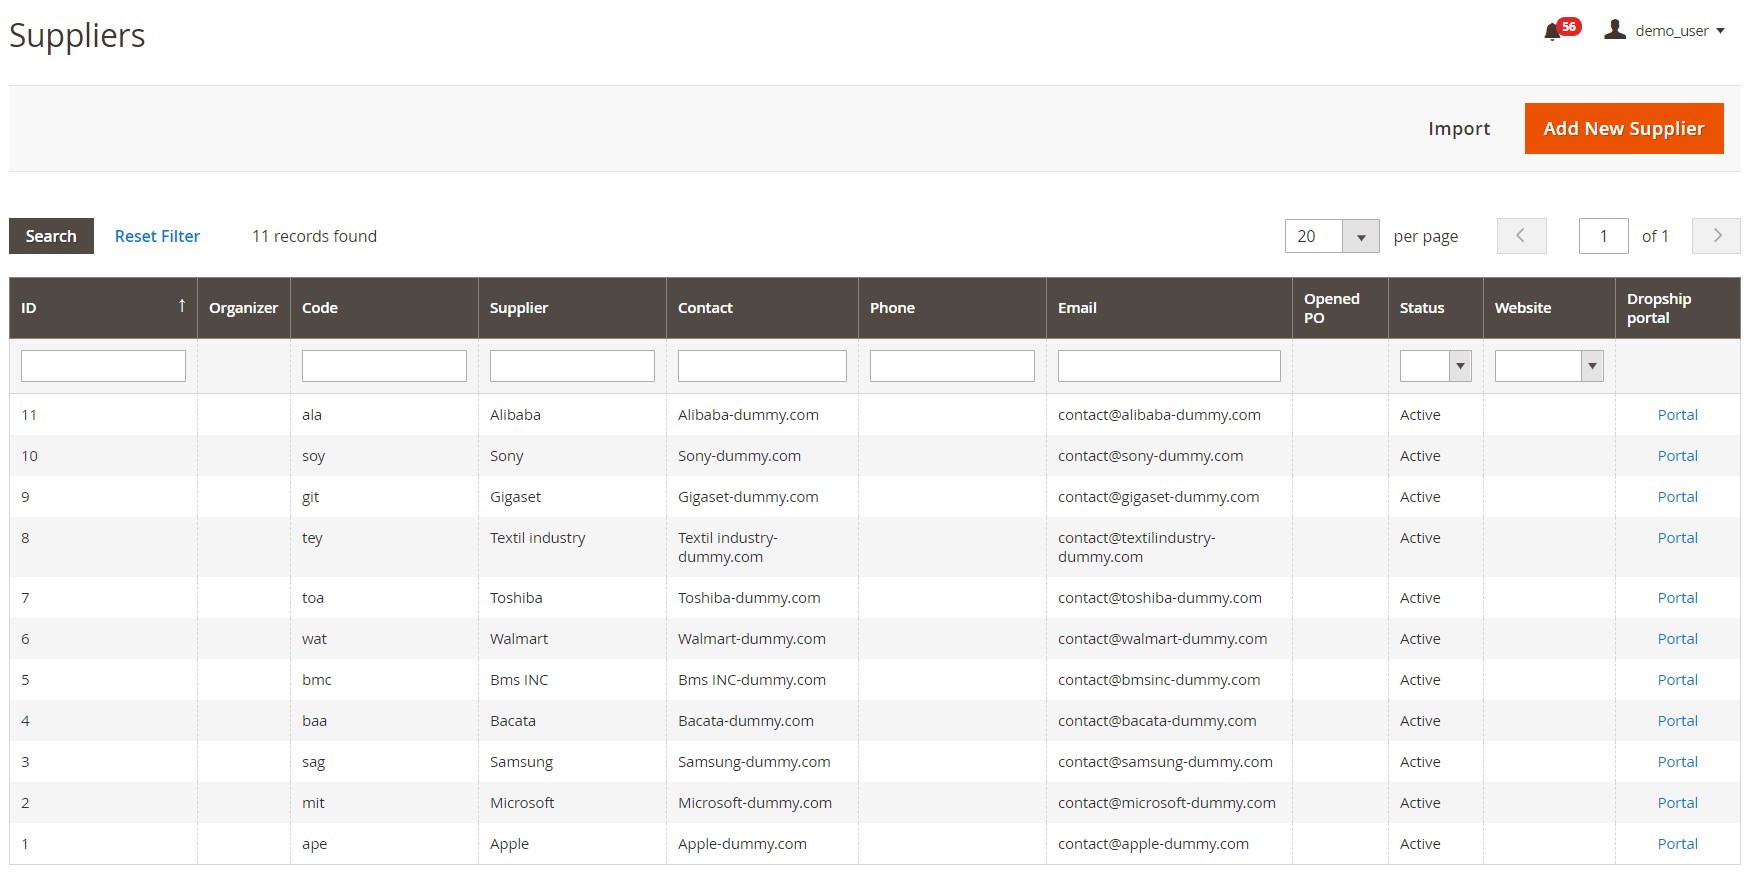
Another important element of the Boost my Shop extension is the Suppliers grid. It consists of 11 columns:
- ID – each supplier gets one;
- Organizer – assigned organizer;
- Code – there is also a unique code;
- Supplier – here, you can see a supplier name;
- Contact – a website address;
- Phone – a phone number;
- Email – contact email addresses of each supplier;
- Opened PO – the number of opened purchase orders;
- Status – active or inactive;
- Website – relevant websites;
- Dropship portal – the link that forwards to the dropship dashboard.
While adding a new supplier, you have to deal with 6 tabs: General, Settings, Contacts, Reports, Stock Import Settings, and Stock Import History. In its turn, the General tab is divided into 2 sections: Main and Address. The Main section has only one mandatory field – Name. Code, Contact, Email, Website, and Notes can be left empty. As for Locale and Status, they already have default values which can be changed.
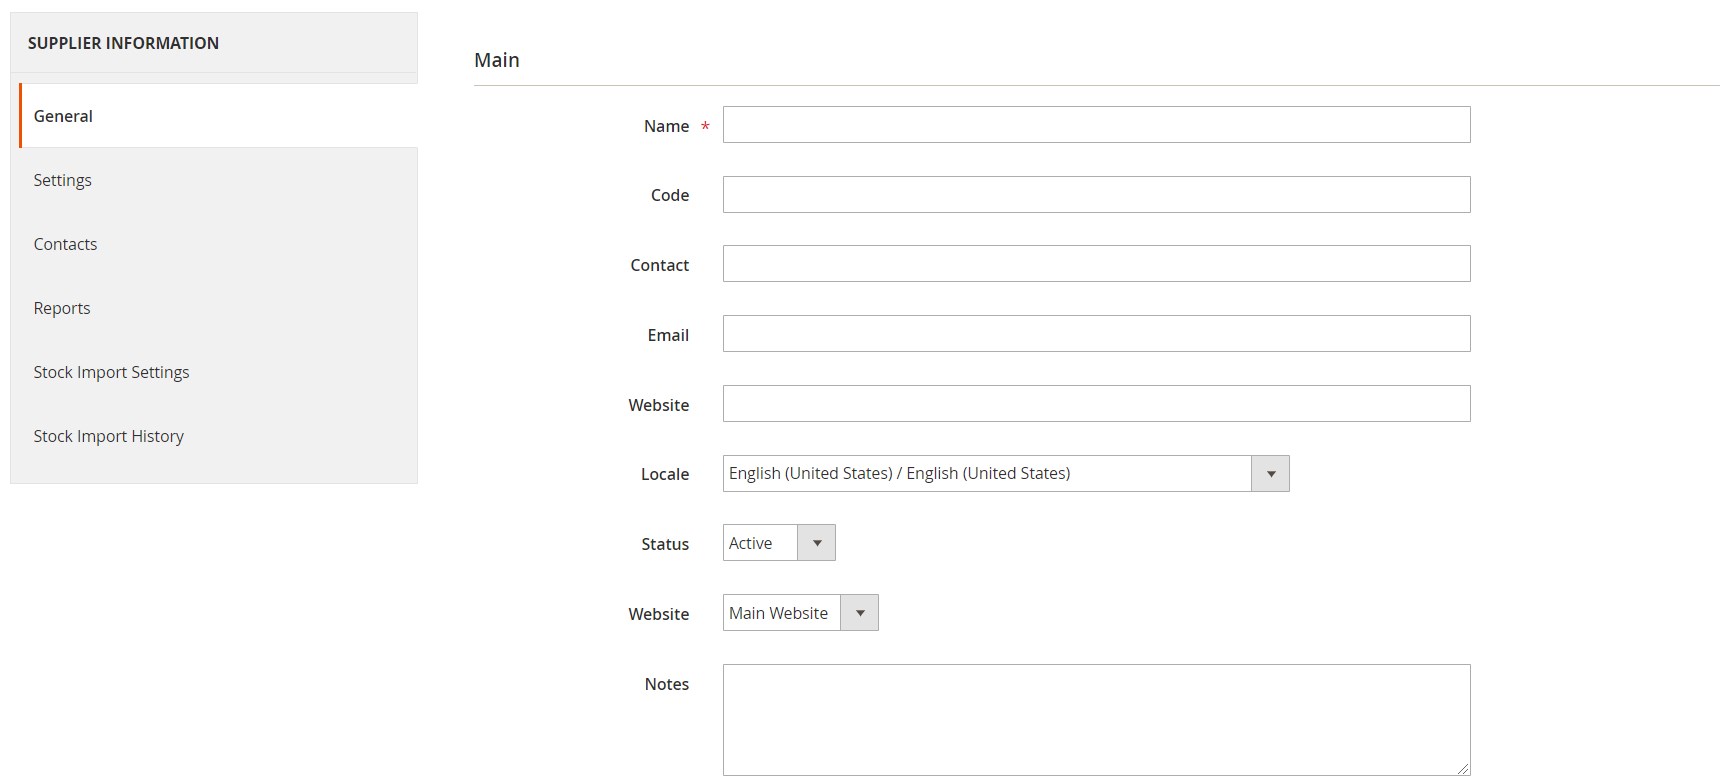
Address information is not mandatory, but by filling it in, you will make your Magento 2 backend more admin-friendly.

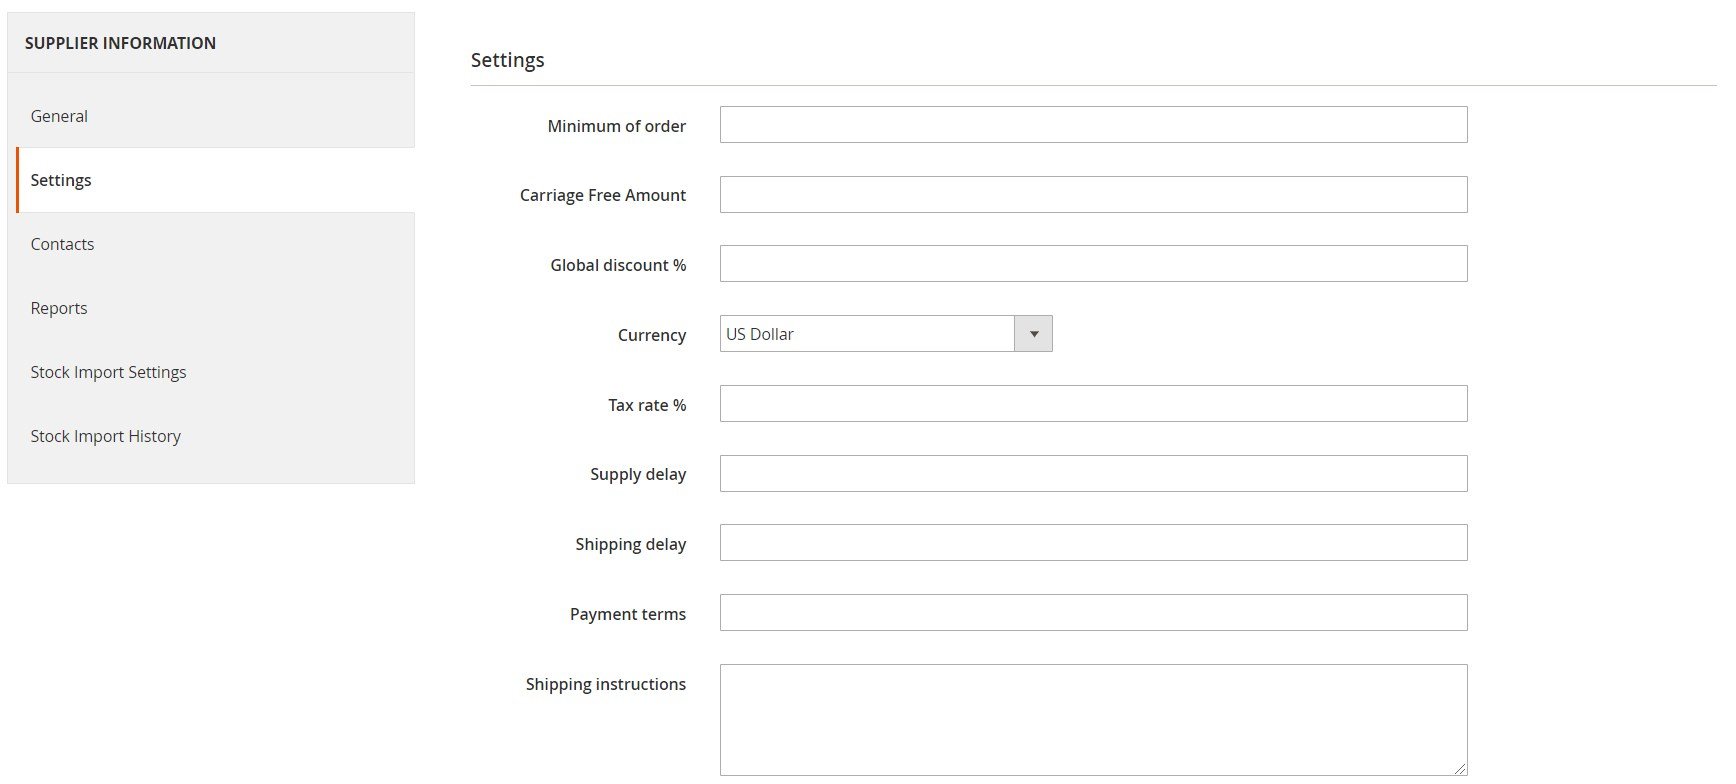
The Settings tab allows you to specify the minimum value for order, carriage free amount, global discount, currency, tax rate, supply and shipping delay, payment terms, and shipping instructions.
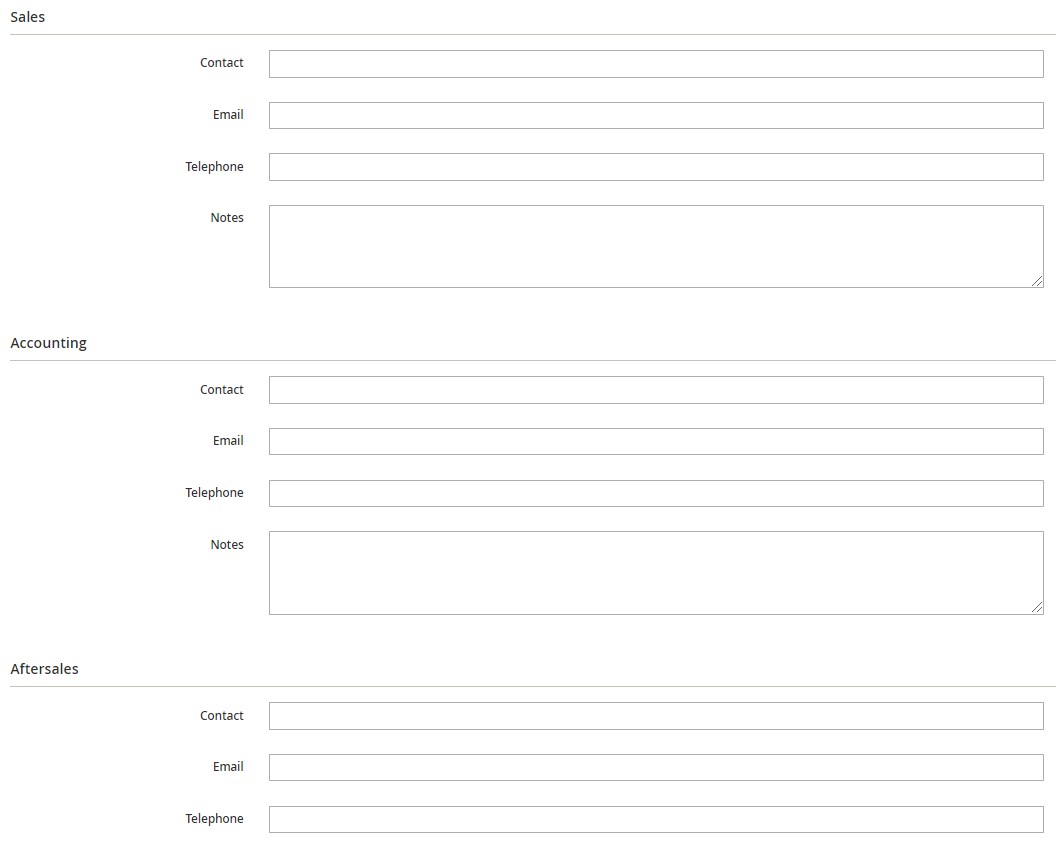
In Contacts, fill in sales, accounting, and aftersales contacts: emails, telephones, notes, etc.
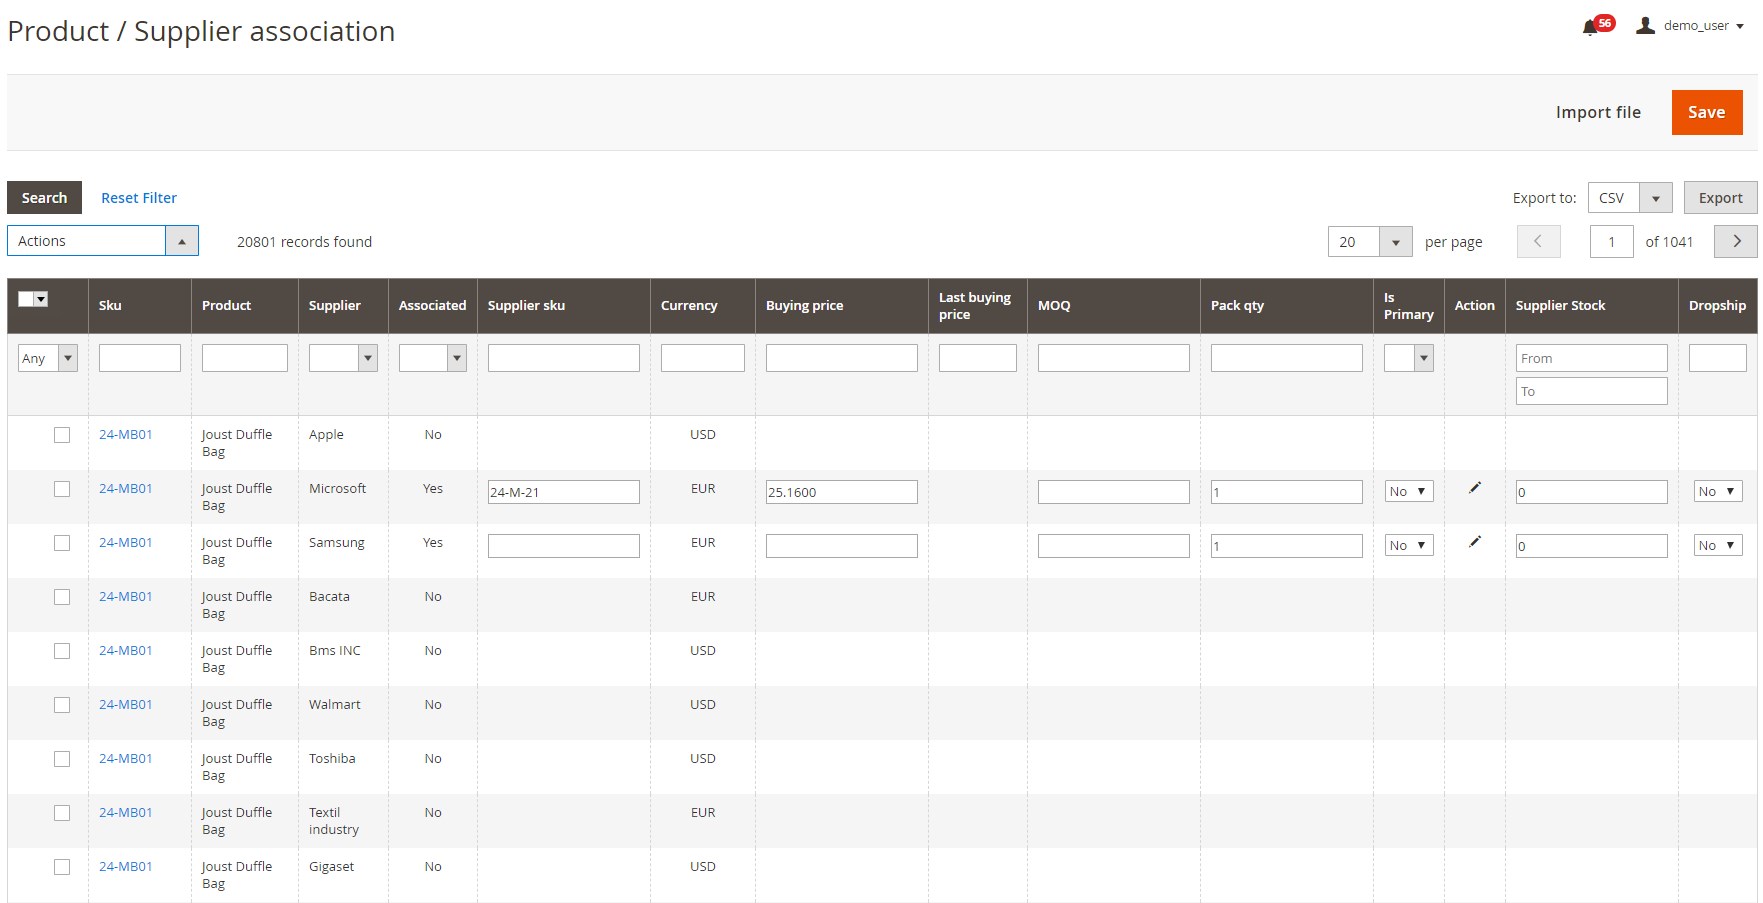
Product / Supplier Association enables you to perform various mass actions: remove, associate to supplier, and mass edit. Besides, the grid allows you to export/import data.
Inventory Management
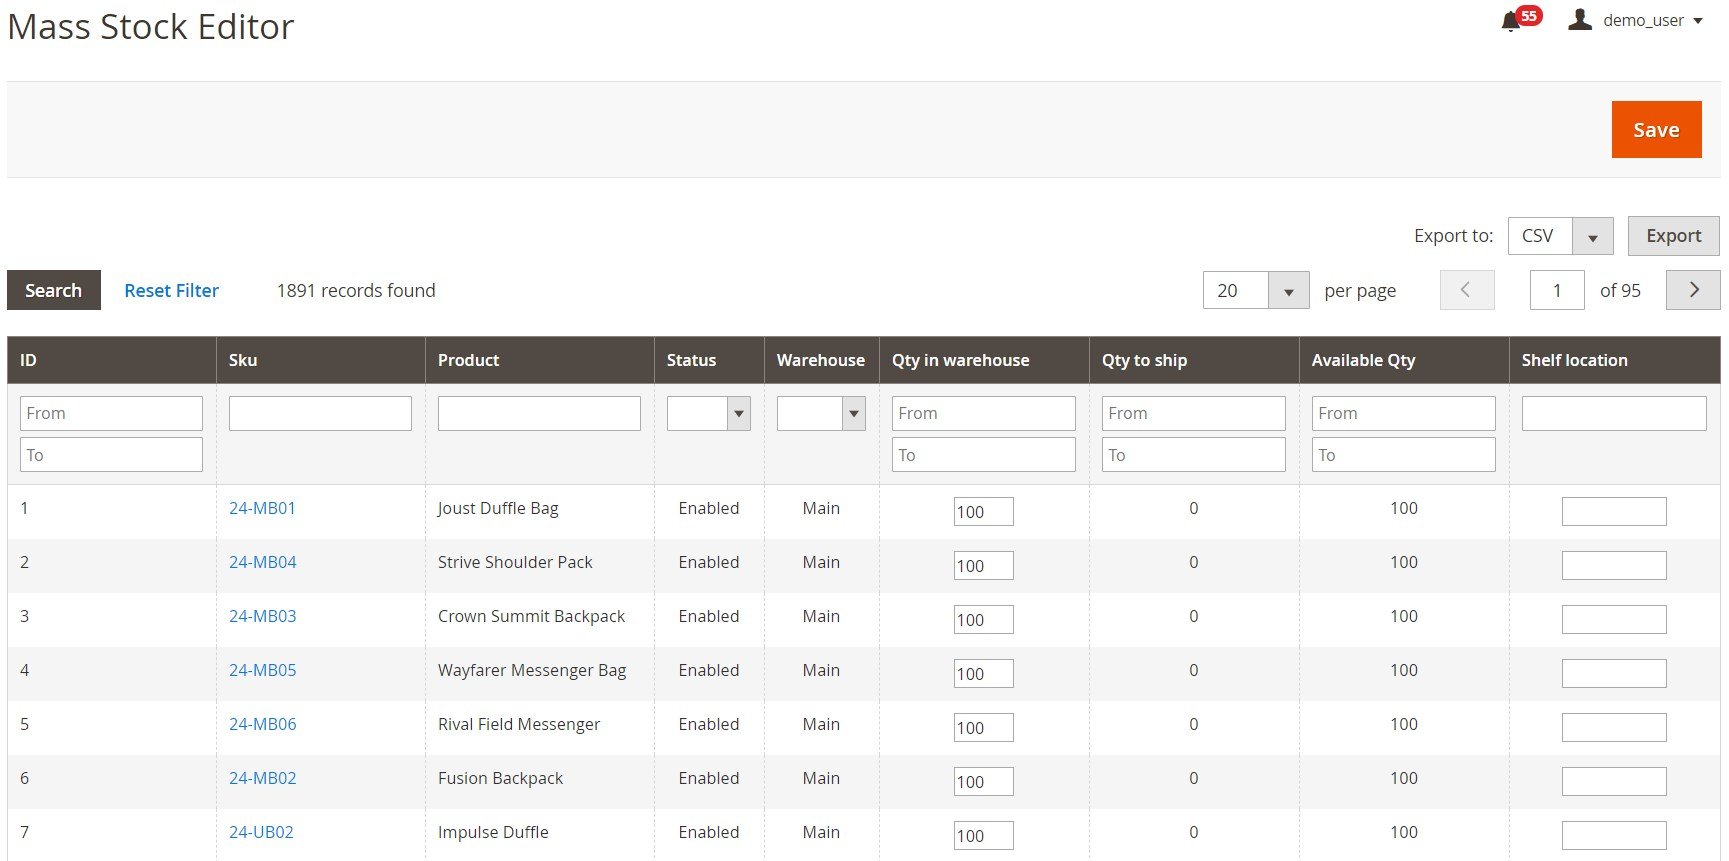
The Mass Stock Editor page contains a grid with products that illustrates the following data: ID, SKU, Product (name), Status (enabled or disabled), Warehouse, Qty in Warehouse (this column is editable), Qty to Ship, Available Qty, and Shelf Location. You can export the grid via CSV.
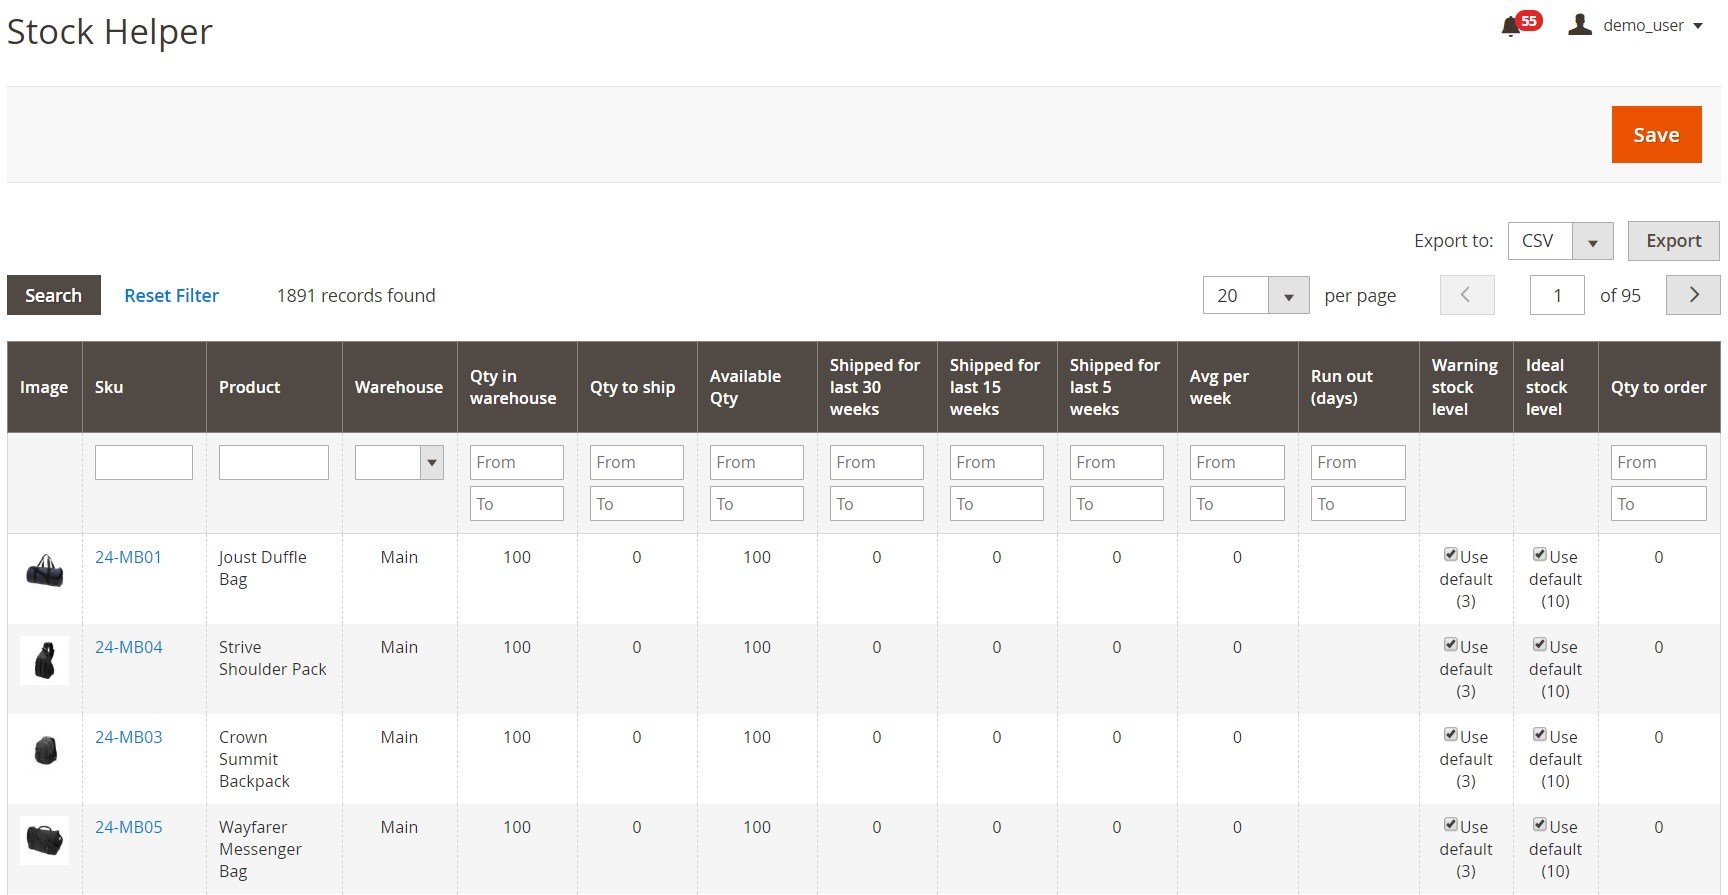
The Stock Helper page also contains a grid. The following columns are available:
- Image;
- SKU;
- Product;
- Warehouse;
- Qty in Warehouse;
- Qty to Ship;
- Available Qty;
- Shipped for Last 30 Weeks;
- Shipped for Last 15 Weeks;
- Shipped for Last 5 Weeks;
- Avg Per Week;
- Run Out (days);
- Warning Stock Level (you can use a default value or set a custom one);
- Ideal Stock Level (the option is the same);
- Qty to Order.
Note that the data mentioned above can be exported via CSV as well.
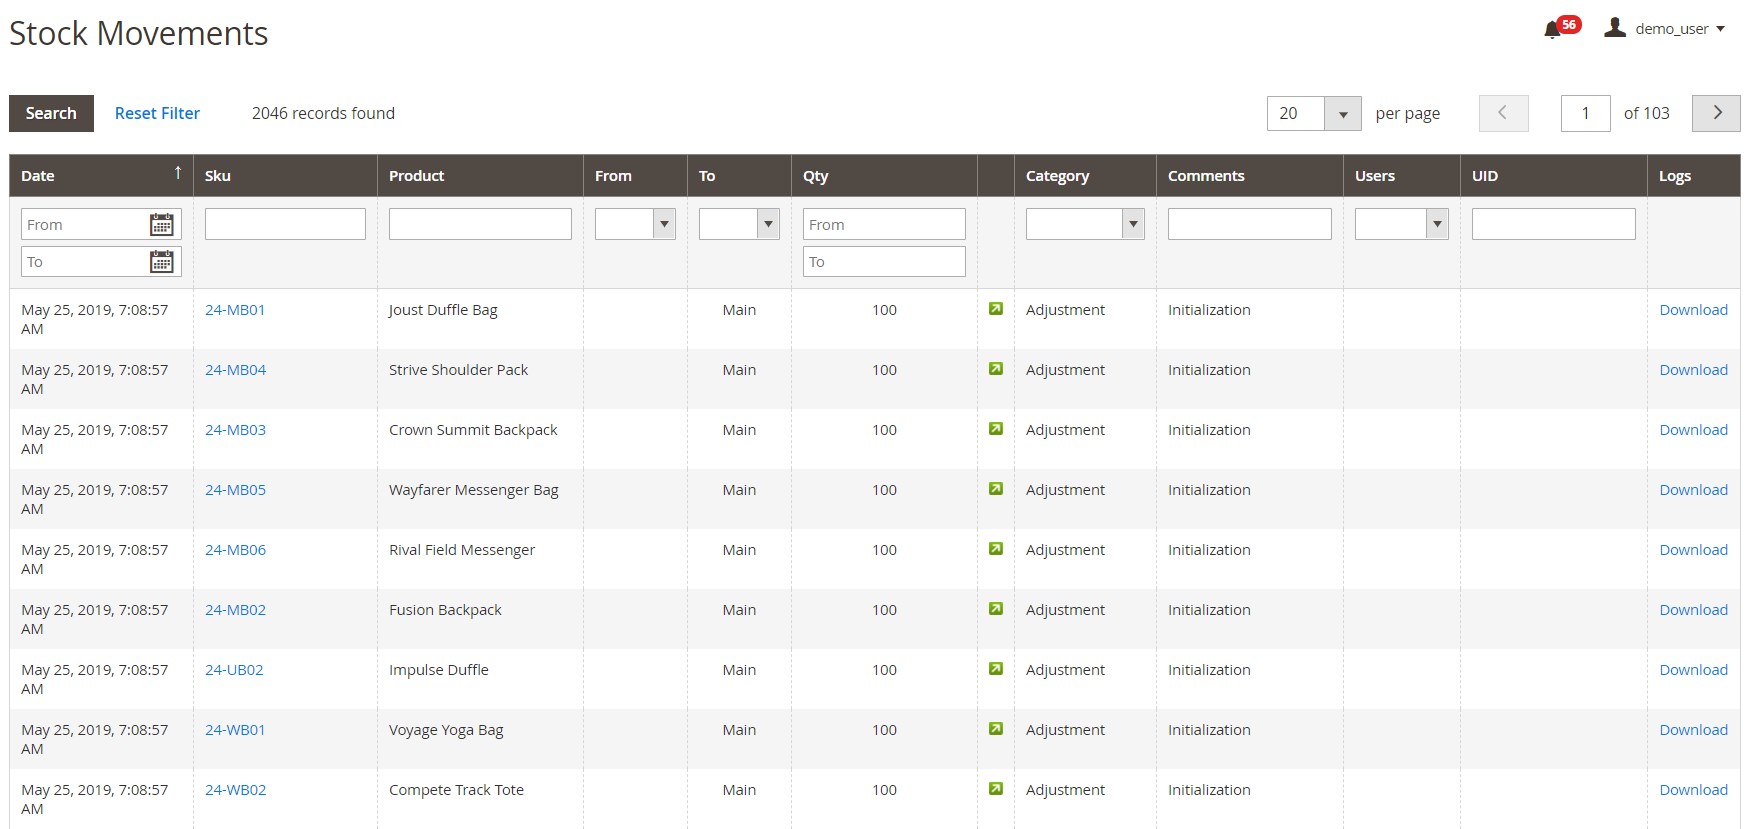
The Stock Movements grid is informative as well. It illustrates the date of the movement, a product SKU and name, a place from where the product was moved and a place of its destination, quantity, arrived or departed, category (shipment, adjustment, defective, etc.), comments, users, and UID.
And this is the Warehouses grid:
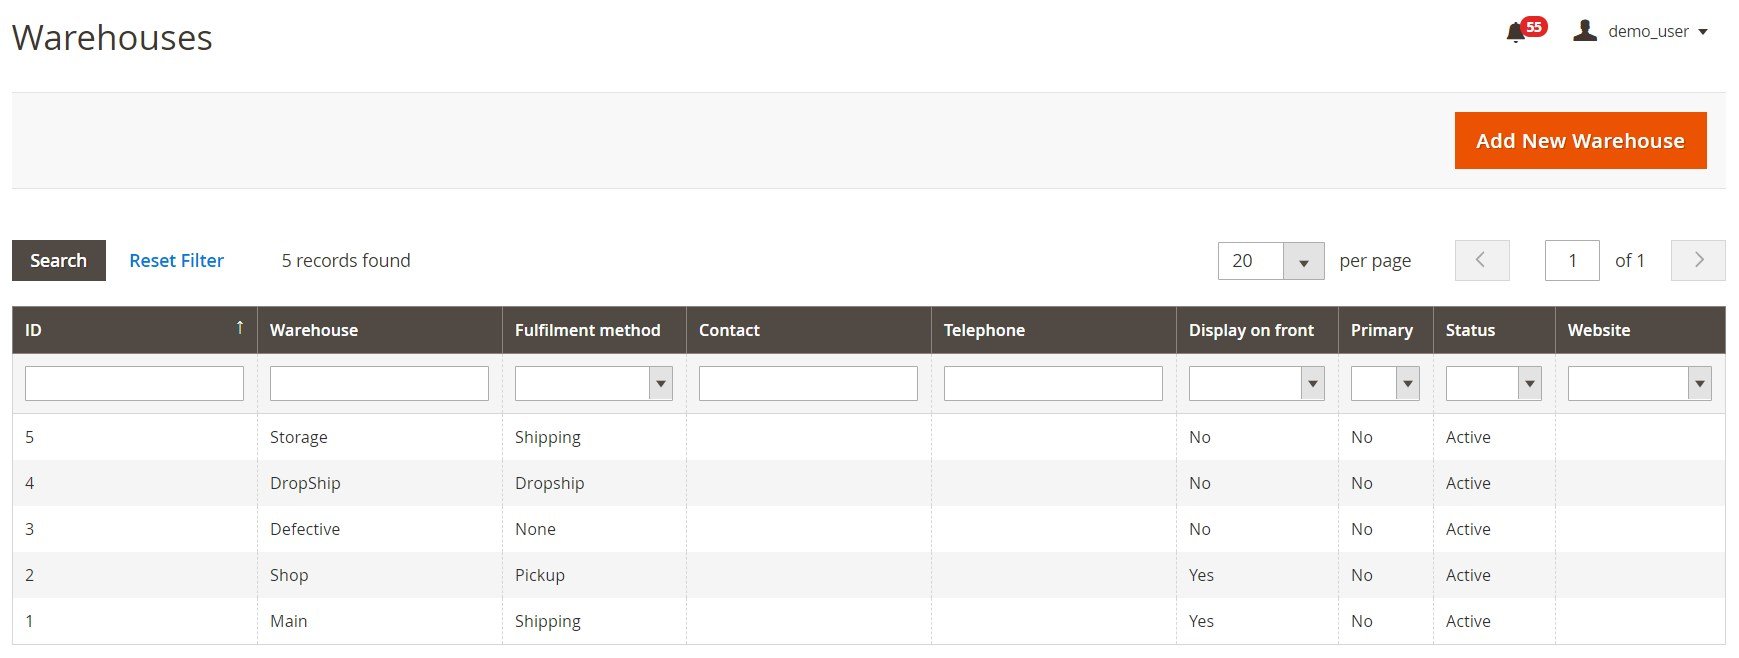
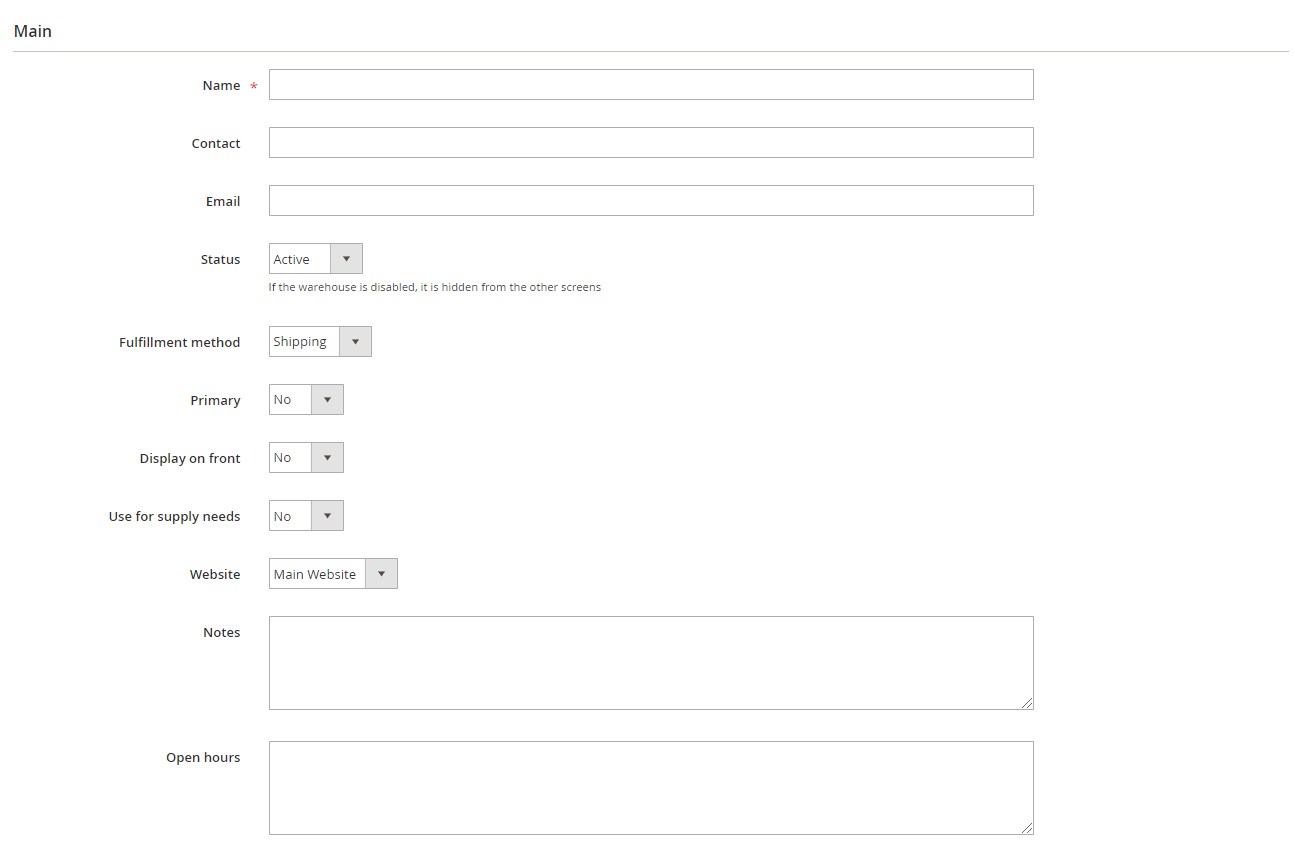
To add a new warehouse, you only need to specify its name, but we recommend you to fill in all fields available in two sections (Main and Address). They are: Name, Contact, Email, Status, Fulfillment method, Primary, Display on front, Use for supply needs, Website, Notes, and Open hours in the main section, and contact information in the Address section.
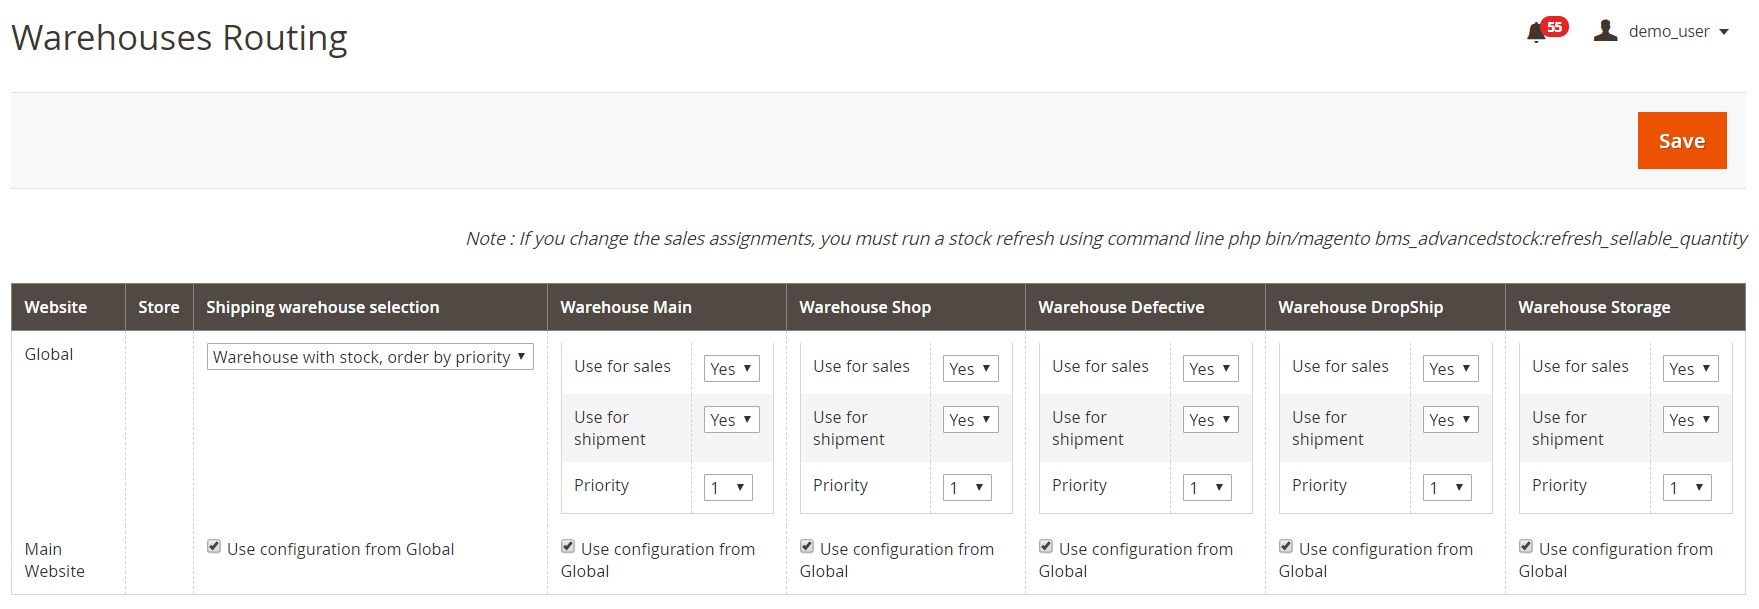
Warehouses Routing is designed to automate your daily work. You choose where each warehouse should be used by default and set priority.
Configuration
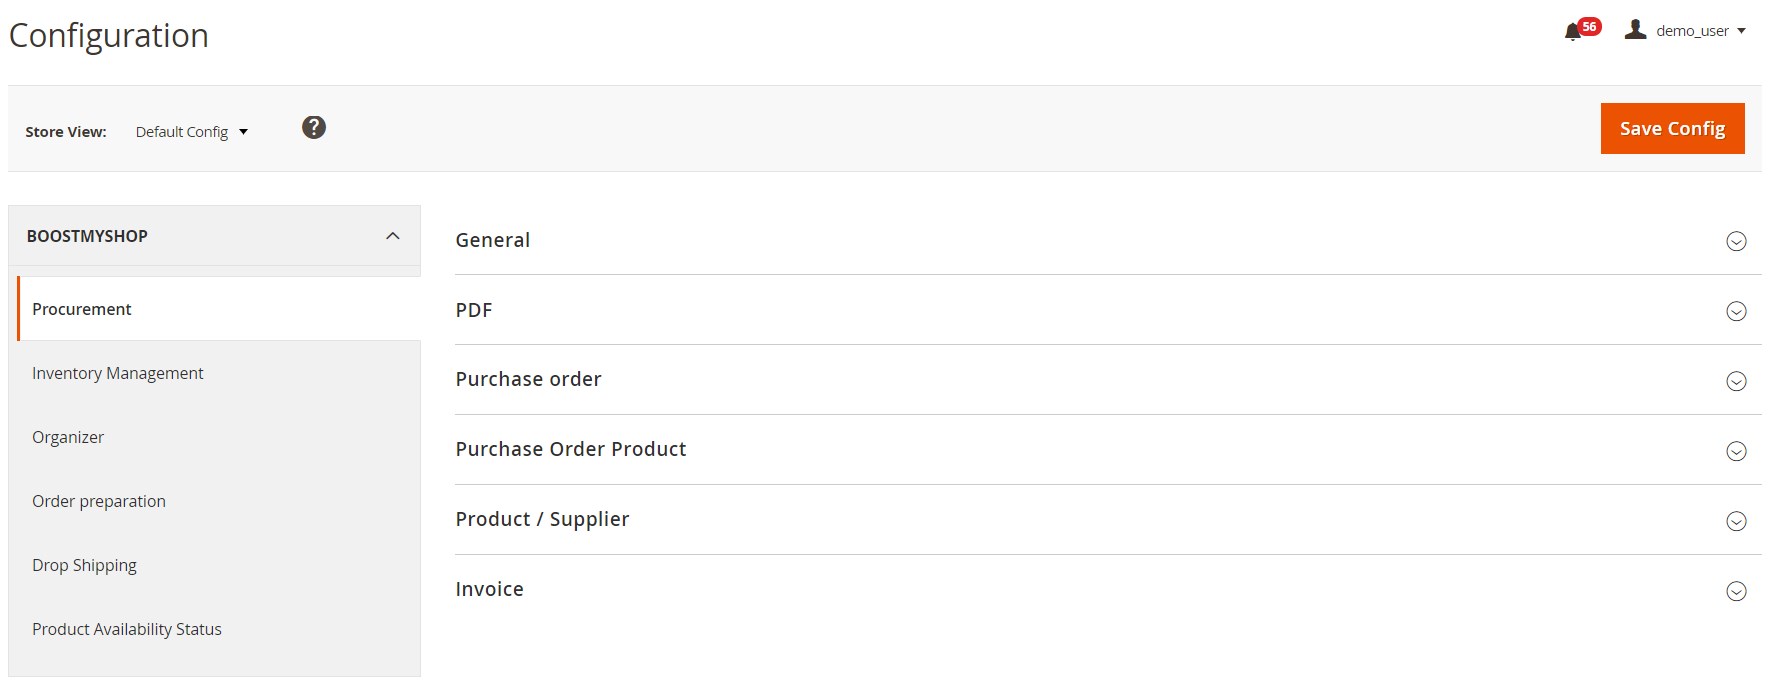
General settings of the Boost my Shop Embedded ERP Magento 2 extension are divided into 6 tabs: Procurement, Inventory Management, Organizer, Order Preparation, Drop Shipping, and Product Availability Status. Each tab is divided into sections, so there are lots of settings designed to fine-tune the extension and make it suitable for all ecommerce requirements.
Final Words
The Boost my Shop Embedded ERP Magento 2 extension is a very powerful tool when it comes to enterprise resource planning. The extension allows you to control all aspects of this process. Besides, you can effortlessly automate some time-consuming tasks and make the Magento 2 backend more user-friendly. As for the price tag, the extension costs $1287, and it is an absolutely reasonable price for such an advanced tool.
Related posts
 Adobe (Magento 2) Commerce and Cloud (Enterprise Edition) Specific Features
 How to Import Customers & Customer Addresses to Magento 2
 Adobe Customer Journey Analytics: Revolutionizing E-commerce
 Magento 2 Release Notes
 Adobe Real-Time CDP: Unleashing the Power of Customer Data in Real Time
- How to generate order increment IDs automatically during Magento 2 import
- How to update products that are not listed in a product table during Magento 2 import
 Amasty ChatGPT AI Content Generator for Magento 2