Exploring Magento 2 Backend: Visual Merchandiser
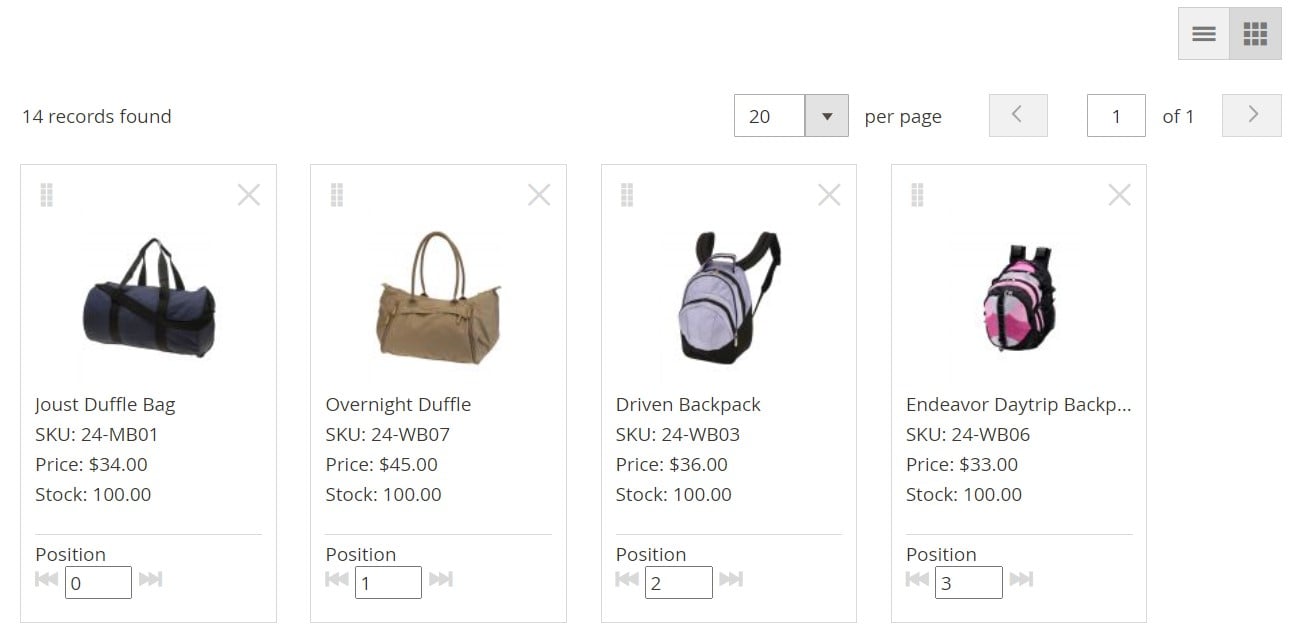
Today, we shed light on a feature that is exclusively available for Magento Commerce users only. Meet the Visual Merchandiser tool for Magento 2. It is a set of instruments developed to position products on a category page faster and more efficiently. You can apply various conditions to determine which items to display and when to show them. Consequently, a static category listing turns into a dynamic selection of products that automatically adjusts to ever-changing circumstances. Let’s see how to work with Magento 2 Visual Merchandiser and what key perks it offers. You can find more sections of the Magento 2 admin described here: Magento 2 Commerce In-Depth Review. Also, check Commerce-specific features and our comparison of Magento 2 editions.

Table of contents
- 1 Magento 2 Visual Merchandiser Definition
- 2 How to Access Visual Merchandiser in Magento 2
- 3 How to Change the Position of a Product in Visual Merchandiser
- 4 How to Create Category Rules for Visual Merchandiser
- 5 How to Configure Visual Merchandiser in Magento 2
- 6 How to Import & Export Visual Merchandiser Data in Magento 2
Magento 2 Visual Merchandiser Definition
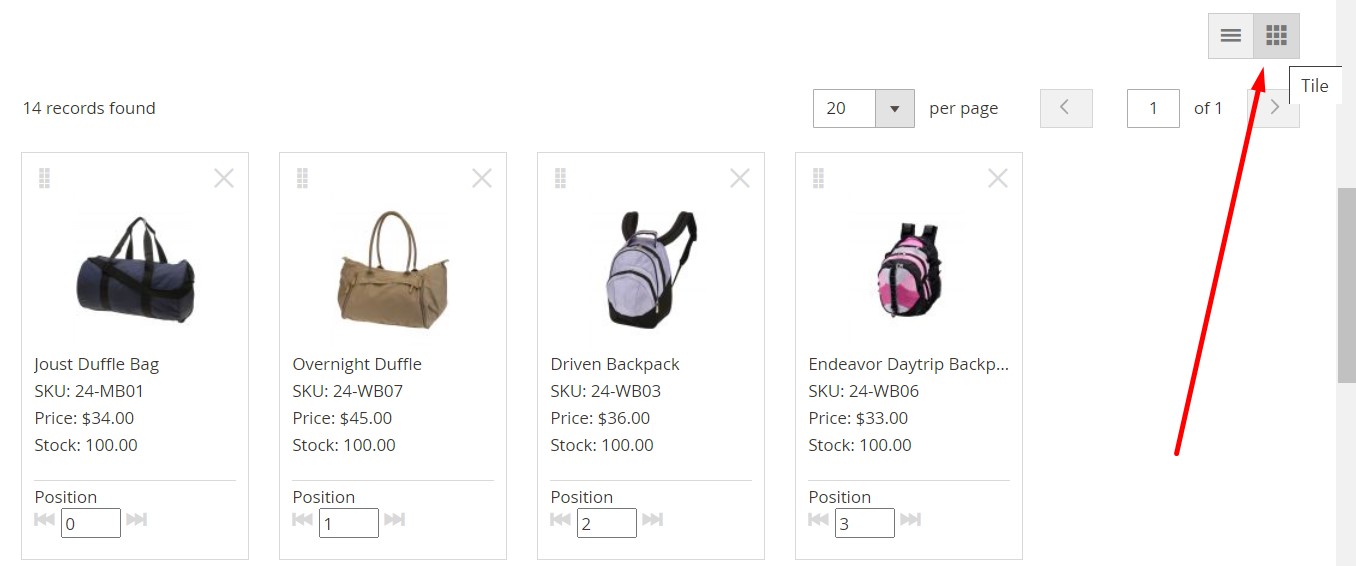
In a nutshell, Magento 2 Visual Merchandiser is a screen that displays each product as a tile on a grid, where you can rearrange everything in the most intuitive manner. Still, the feature lets you work with a standard list of products in a category. Despite the selected visual representation (you can use the buttons in the upper-right corner to switch between display types), you get the same selection of tools: matching by rules, sort orders, priorities, etc.
How to Access Visual Merchandiser in Magento 2
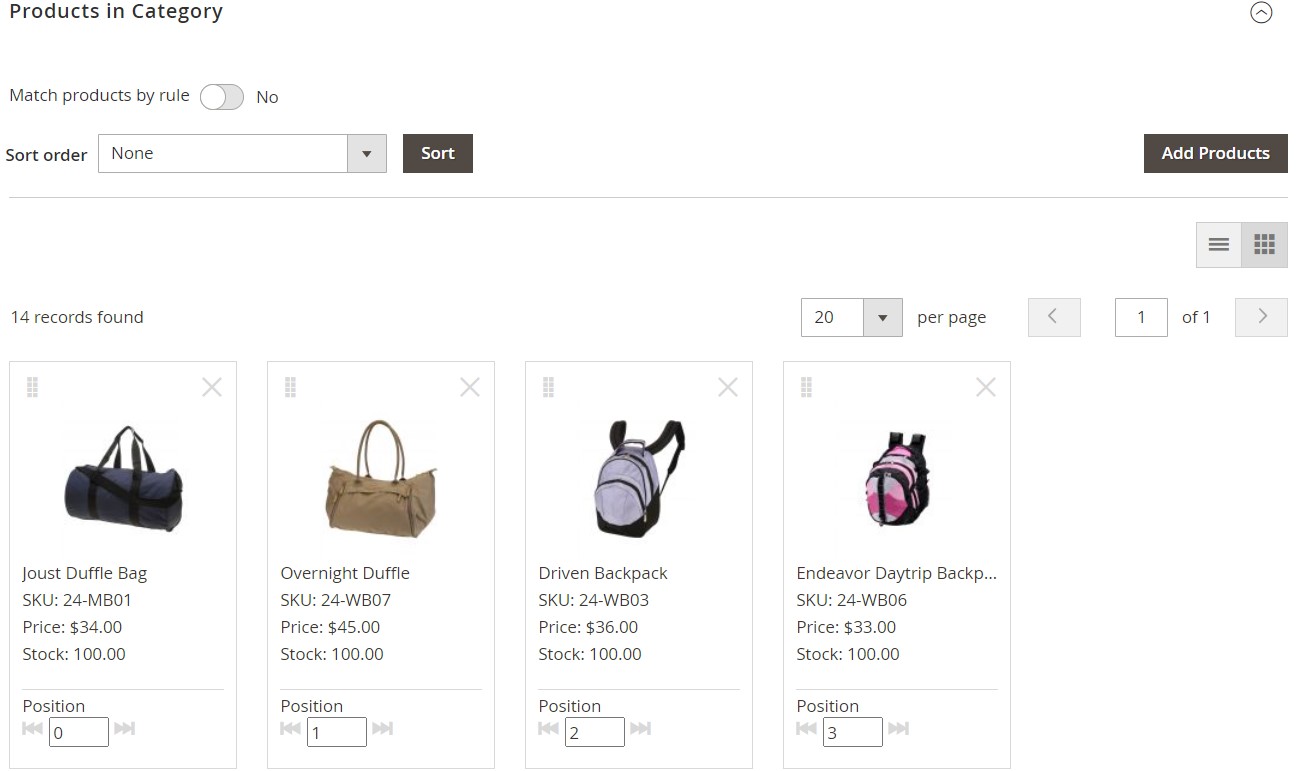
You can find Magento 2 Visual Merchandiser under Catalog -> Categories of your admin. It is only necessary to choose the category that you want to edit. Next, you need to scroll down and expand its “Products in Category” section. There, you can find the “View as Tiles” button that switches to the grid view.
How to Change the Position of a Product in Visual Merchandiser
Magento 2 lets you either drag and drop each product as a tile or set a position value to rearrange items on a category page. According to the first method, you need to grab the Drag control in the upper-right corner of the tile and move the item towards its new position. Note that the system automatically adjusts the product’s position value according to the new location.
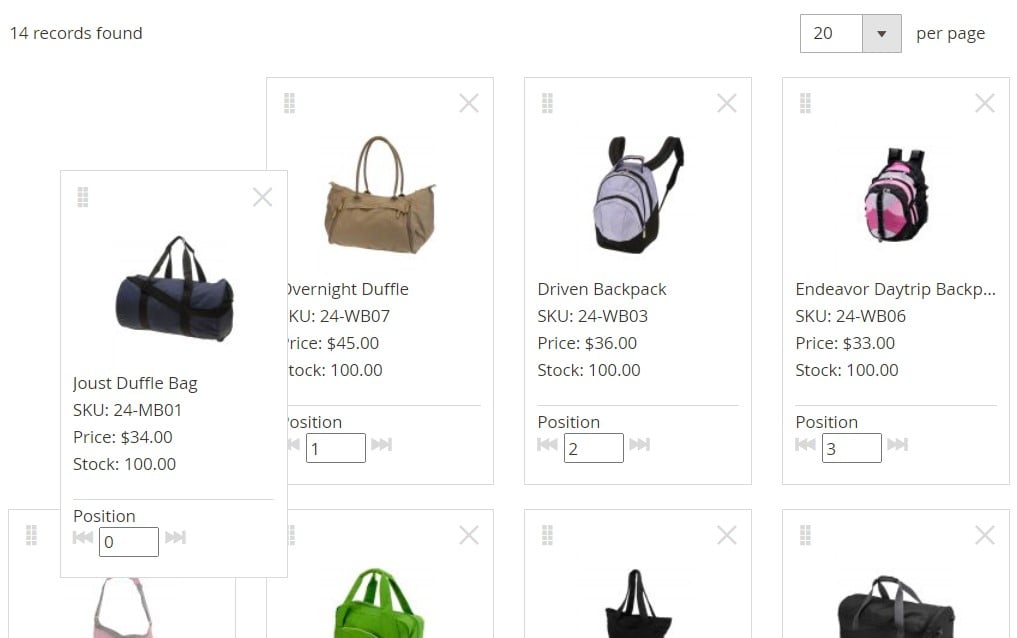
Alternatively, Magento 2 lets you enter a number in the Position field displayed for each tile. The number zero moves a product to the top of the list.
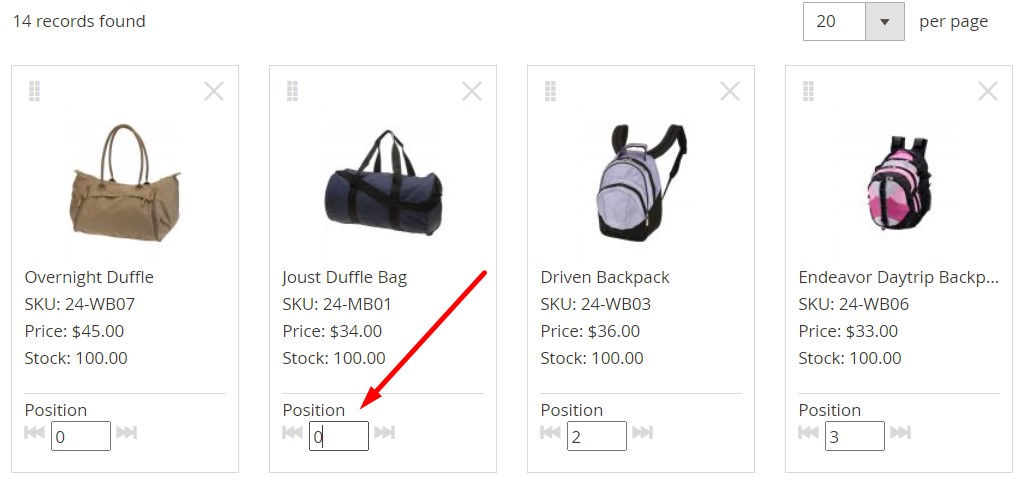
Also, note that Visual Merchandiser is aimed at categories with an ID number of 3 or higher.
How to Create Category Rules for Visual Merchandiser
With adequately created category rules, you can dynamically change the product selection following changing conditions. Magento 2 lets you create a single rule per category. However, any rule can contain numerous conditions.
Let’s assume that you need to implement a correct product display for a specific brand. Magento 2 lets you create a rule to automatically display items related to this particular company, even if they are assigned to different categories. The number of conditions is unlimited, resulting in the most accurate product display.
Let’s explain the structure of a condition to illustrate the core principles being utilized. The following three elements are the background of any rule:
- Attribute;
- Value;
- Logical operator.
Note that category rules incorporate only those attributes that have the enabled “Use in Product Listing” property. Set it to “Yes” for the attribute you want to use in a rule.
Also, note that the system doesn’t support Date attributes. Still, you can use Date Created or Date Modified instead.
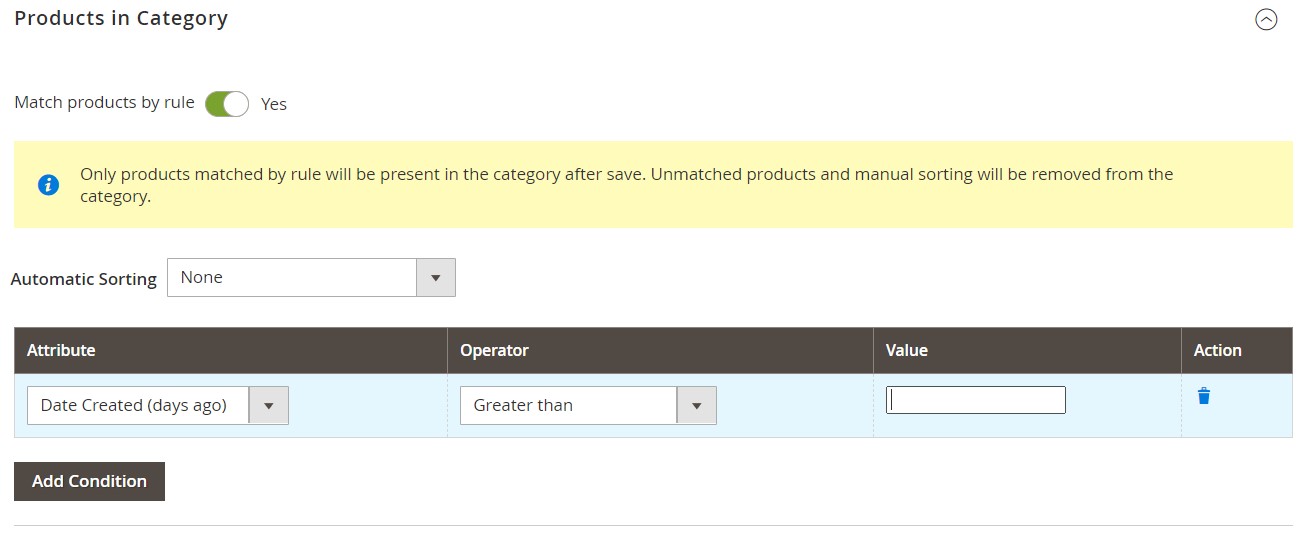
You need to configure each attribute as “smart” to speed up the process of assigning specific products to categories. However, products that do not meet the conditions are not displayed in the category. For instance, if you create a rule that includes only Nike running shoes, all other brands are removed.
As we’ve just stated, you need to set “Use in Product Listing” to ‘Yes” for each attribute that is to be used in rules to make it “smart” and suitable for Magento 2 Visual Merchandiser. Note that the multi-select input type is not supported.
Now, you can create a new category rule to automate the Visual Merchandiser duties in Magento 2. The algorithm is quite simple. Go to the category tree, open a category, and enable “Match products by rule.” Click “Add Condition” and follow these steps:
- Choose the basis of the condition. It can be any “smart” attribute.
- Next, you need to select an Operator necessary to form the expression.
- Finally, you can enter a Value that products should match to be displayed in a category.
Repeat these steps for each attribute to create more strict conditions.
Note that Magento 2 Visual Merchandiser lets you rearrange the dynamically generated product list automatically by applying for predefined sort order. The “Automatic Sorting” option can be set to one of the numerous values, including “Move out of stock to bottom” and ” “Special price to top.”
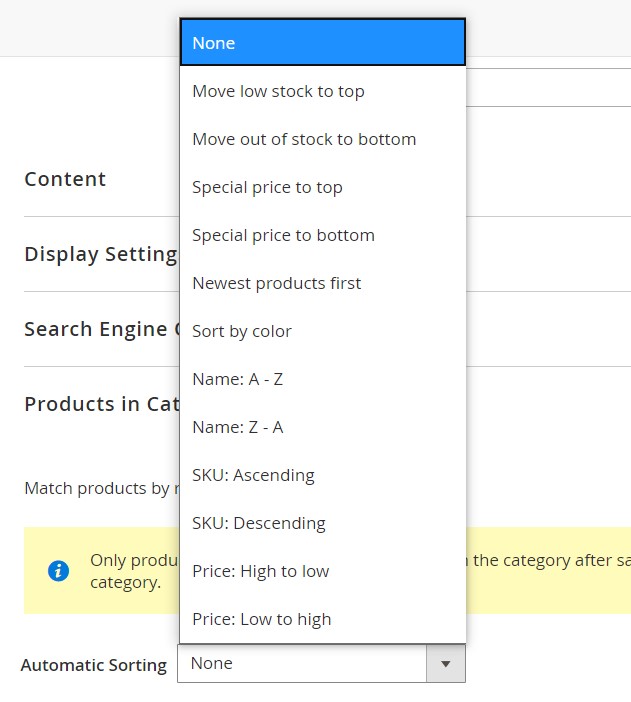
It is also worth mentioning that products created after category changes were saved may not appear in the listing even if they follow the conditions. Therefore, it is recommended to re-save each category that is set to match products by rule.
How to Configure Visual Merchandiser in Magento 2
You can configure Magento 2 Visual Merchandiser under Stores -> Settings -> Configuration of your admin. Go to the left panel, expand Catalog, and click the Visual Merchandising Options section. Here, you can select each attribute available for visual merchandising (Attributes for Category Rules), specify the Minimum Stock Threshold, set the Color Attribute Code if you don’t use the default one, as well as determine a Color Order by typing each color value on a separate line. Don’t forget to save changes when complete.
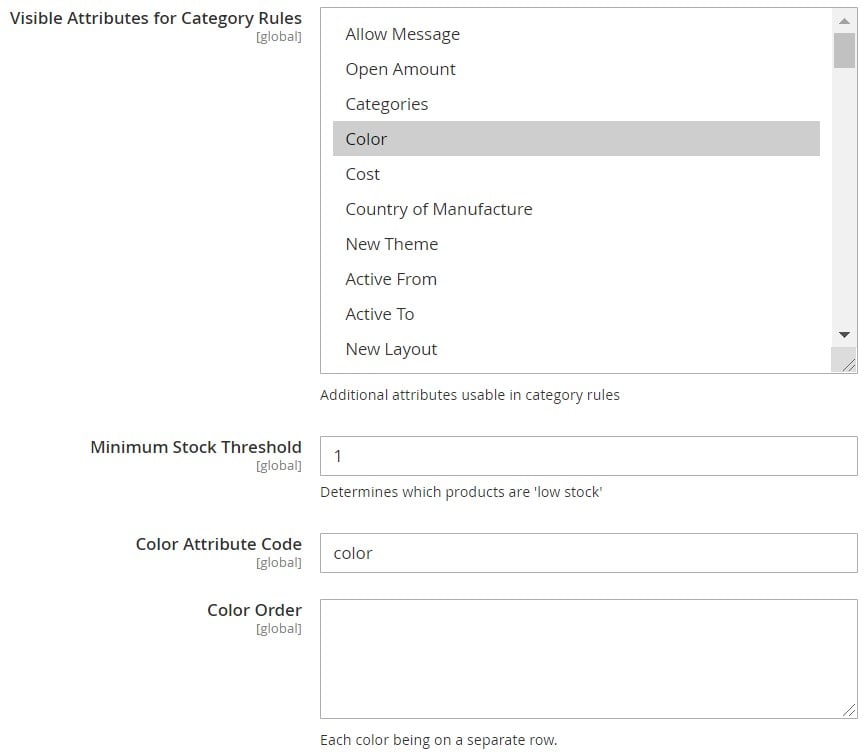
How to Import & Export Visual Merchandiser Data in Magento 2
You can freely import and export Visual Merchandiser data in Magento 2 with the help of the Improved Import & Export extension. For instance, you need to copy product priority for specific categories between the two Magento websites. Use the extension to export the corresponding data from one site and import it to another.
As for Magento 2, it doesn’t offer anything similar, so you have to recreate product positions manually. But you can dramatically extend the default capabilities with the Improved Import & Export extension. Let’s see how the module works to enable data sync with other Magento 2 stores and other external systems.
Automated Data Transfers
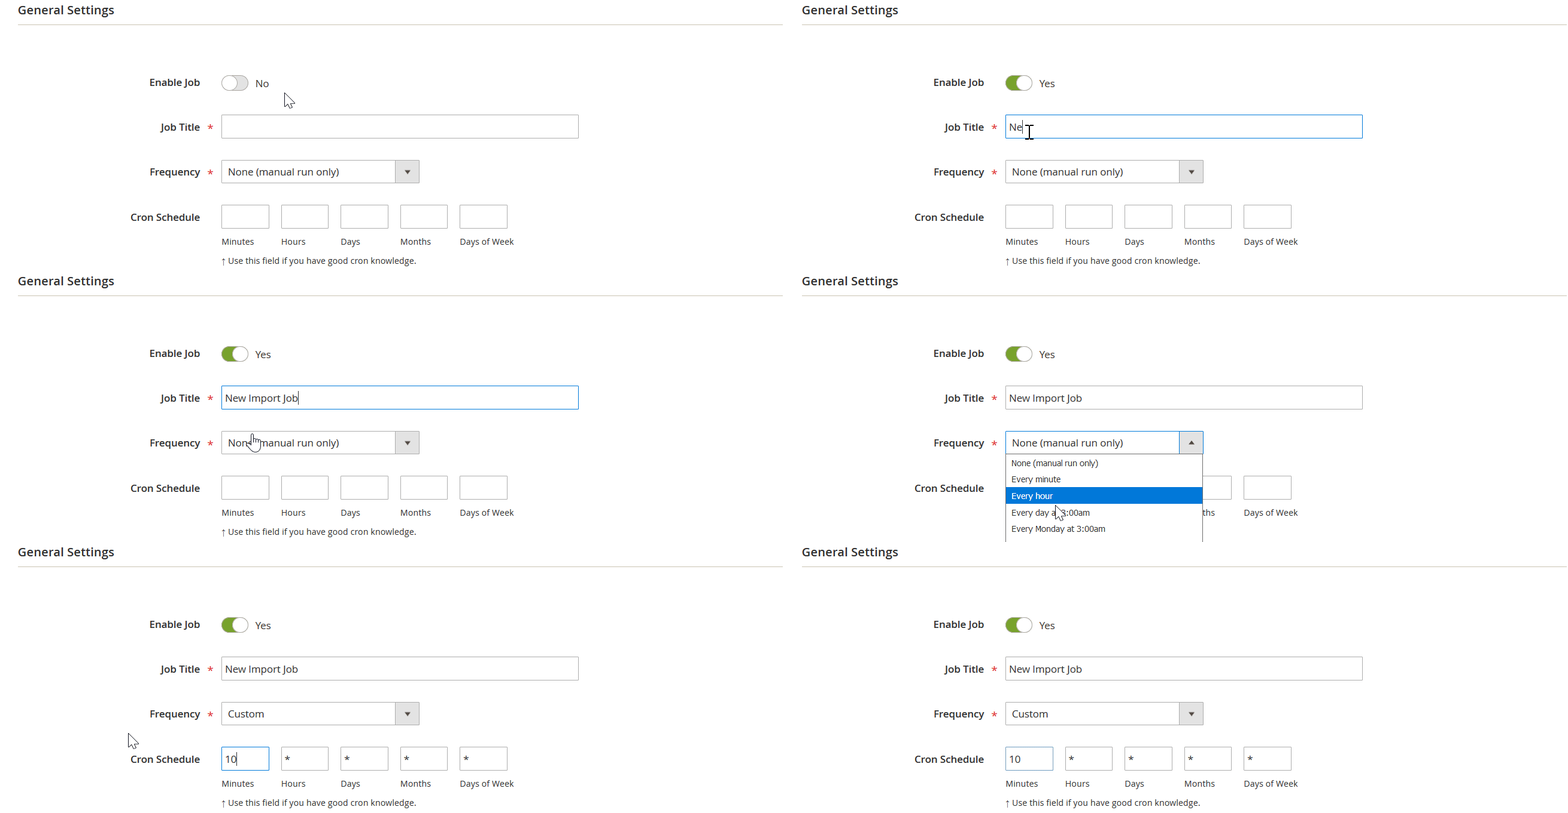
With Improved Import & Export, you can automate data synchronization following two different patterns: use update schedules, when you choose a predefined interval or specify a custom one, or create a system of triggers that initiate the import/export processes when certain conditions are met – a principle similar to the one we’ve just described for Visual Merchandiser.
Mapping
Issues caused by different attribute standards are also among the problems that the Improved Import & Export extension can quickly fix. It delivers such enhancements as:
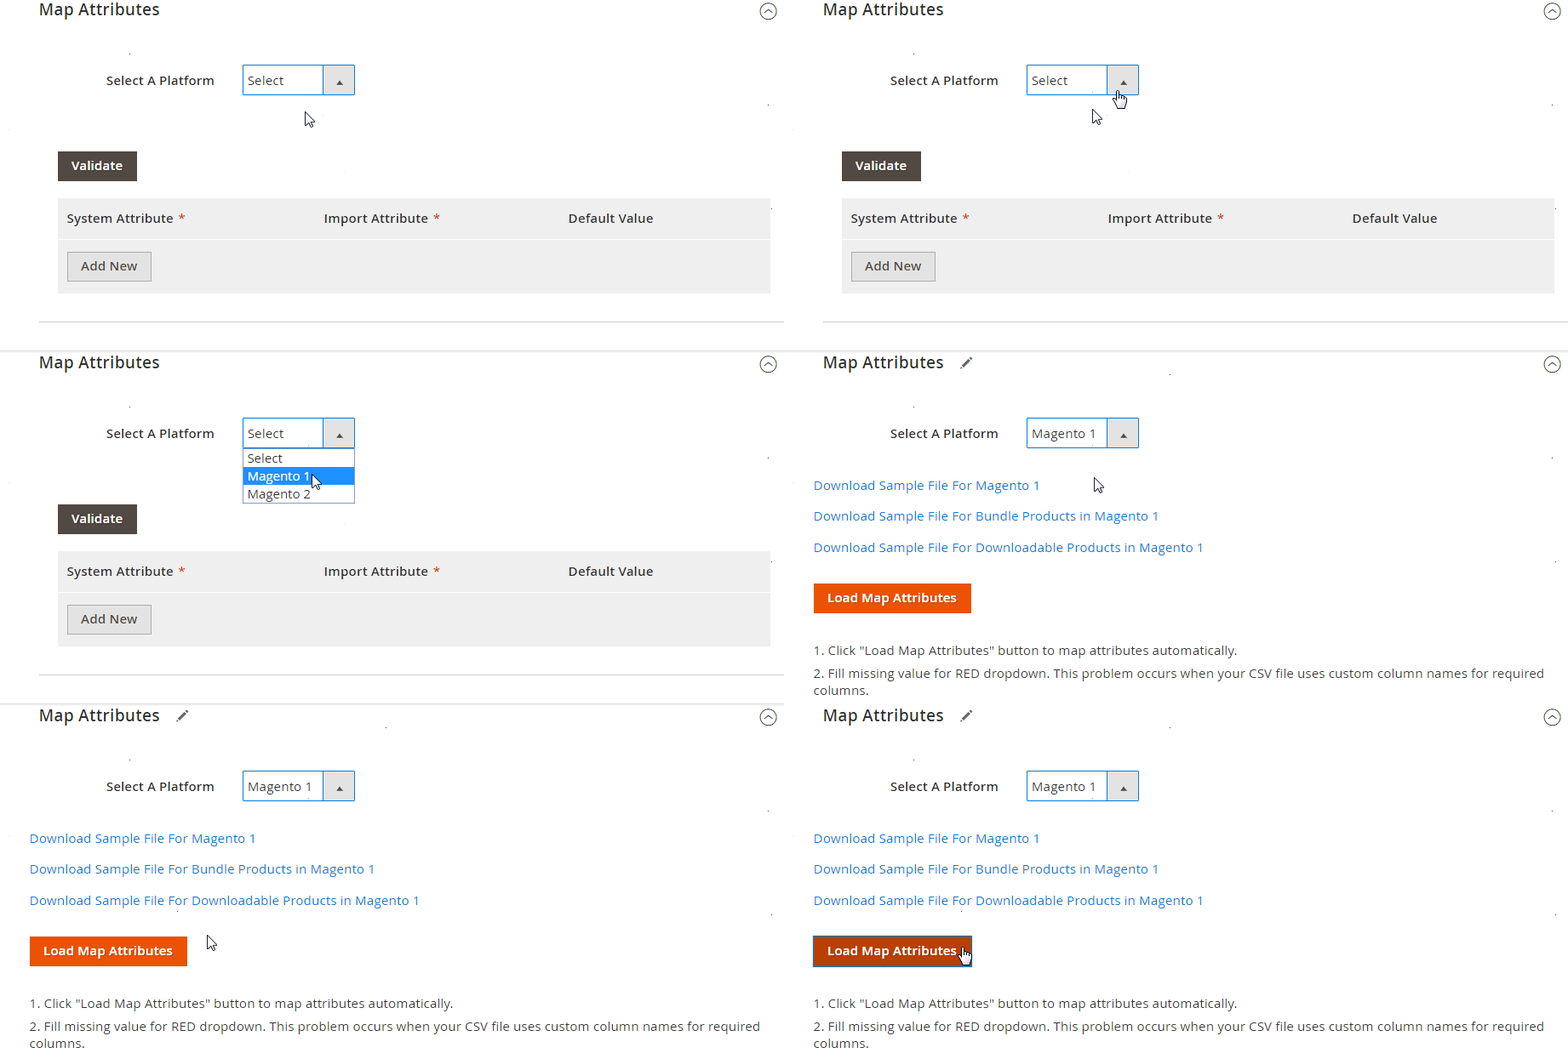
- Presets – predefined schemes that let you map attributes automatically;
- Manual Matching – an admin interface where you can edit attributes manually;
- Attribute Values Mapping – a similar section for attribute values;
- Attribute Values Editing – a place where you can modify multiple attribute values in bulk;
- Filters – additional export parameters that let you narrow down the selection of exported data;
- Category Mapping – a place to link imported products to the existing categories;
- Attributes On The Fly – a feature that lets you create missing attributes and values automatically by specifying various parameters.
The following image shows how simple it is to use mapping presets:
Extended Connectivity Options
With the Improved Import & Export module, you can rely on various file formats and sources to connect Magento 2 to any external system. The extension works with CSV, XML, ODS, JSON, and Excel files, as well as several archive types. You can move them via a local or remote server or cloud storage. Besides, it is possible to import files by URL.
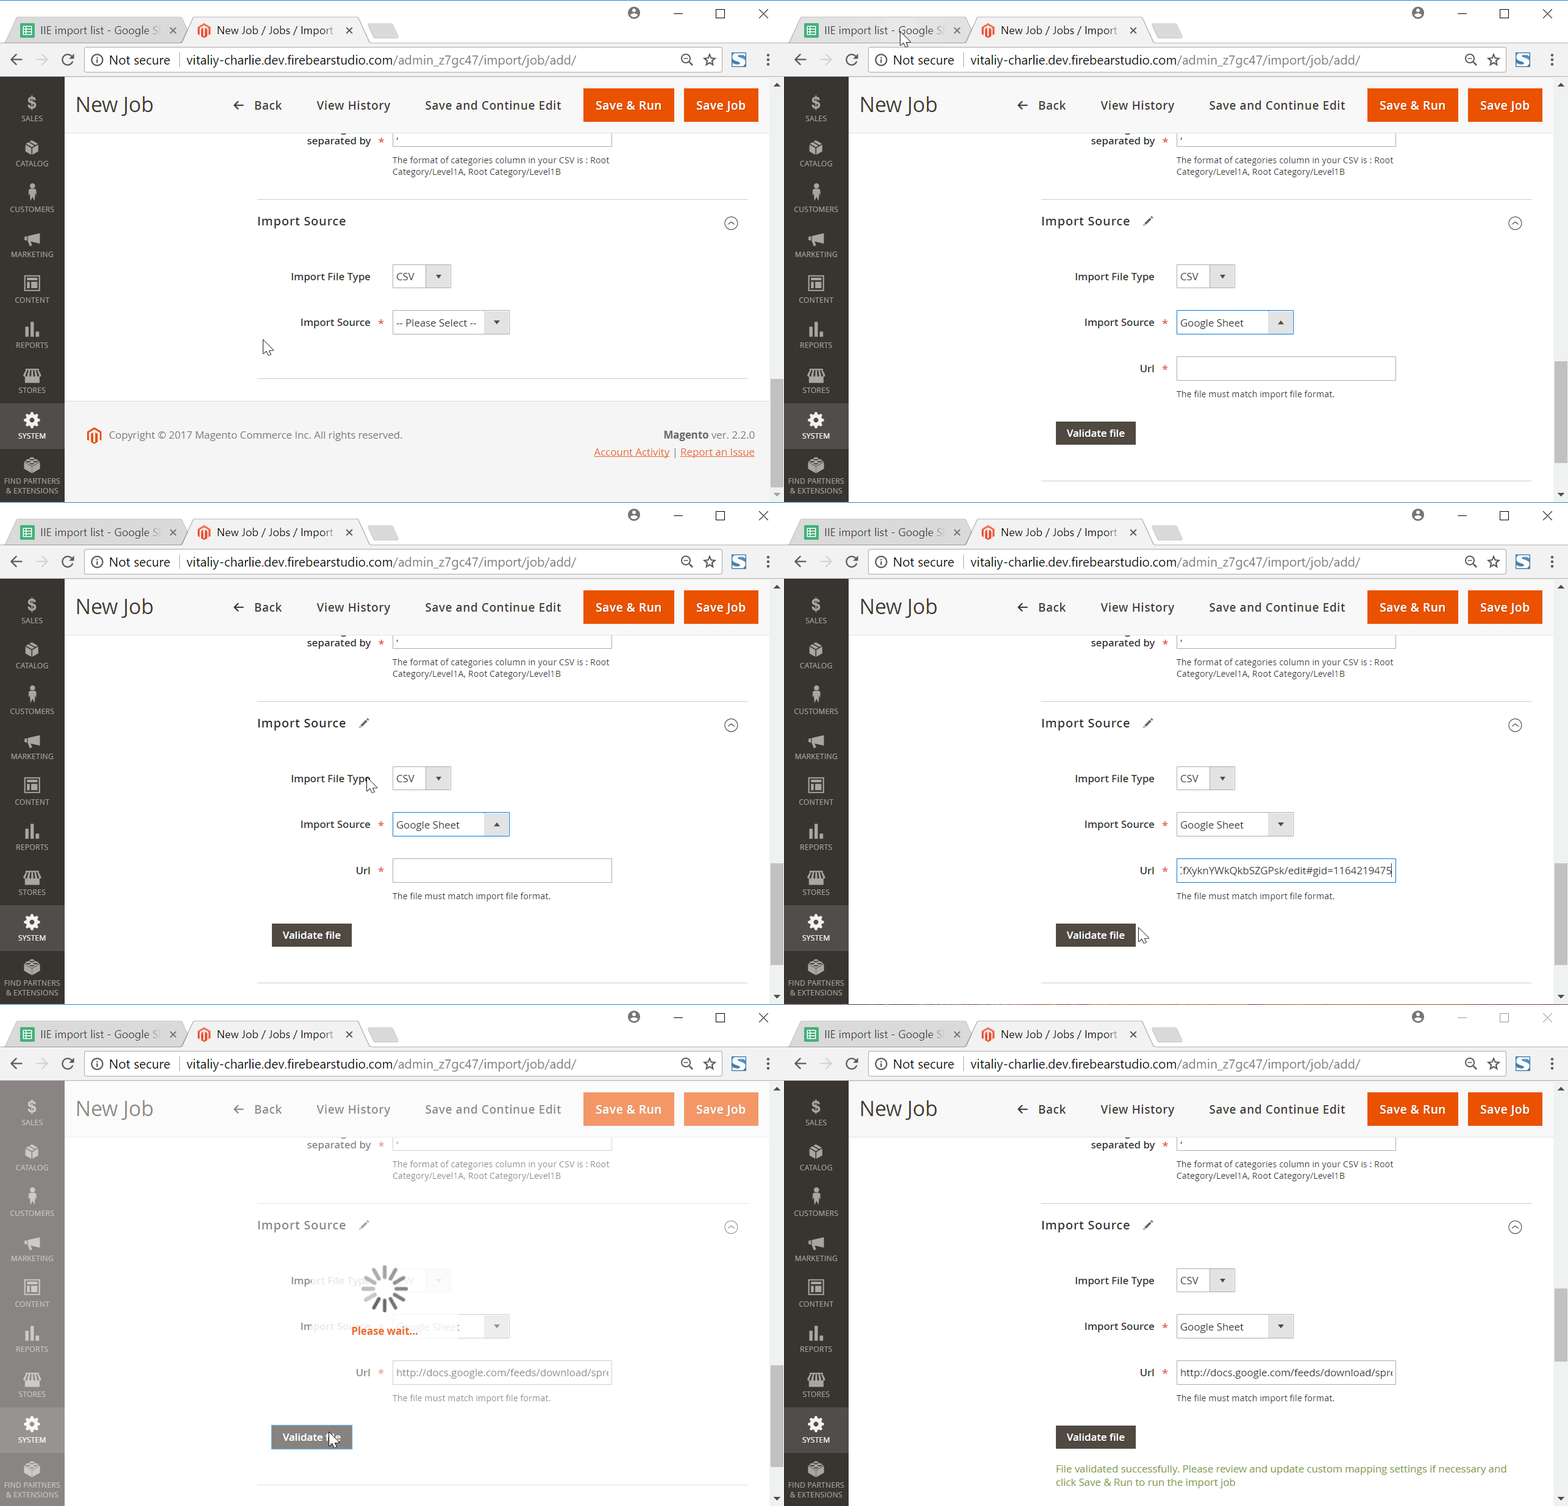
Another competitive advantage of Improved Import & Export is its ability to maintain API integrations for complex connections. Also, it supports Google Sheets import and several other alternative approaches to data transfers.
You can discover more information about the extension, its support for Visual Merchandiser, as well as its possibilities related to other integrations, here:
Get Improved Import & Export Magento 2 Extension


