MagePsycho Region & City Dropdown Manager for Magento 2
Today, we present a tool that improves address management on Magento 2 sites – the Region & City Dropdown Manager extension by MagePsycho. The default Magento 2 functionality displays region and city field in the text input type. With the MagePsycho solution, you can convert the region/city select field into a dropdown menu both in the backend and storefront. Such enhancement helps customers quickly find an appropriate city when specifying their shipping or billing address. Store administrators, in their turn, save time on looking for a required city when managing customer profiles and creating orders in the backend.
Below, we describe the functionality and advantages of the Region and City Manager Magento 2 module in more detail and show how it works from both admin and customer perspectives.

Table of contents
Features
- Ability to manage regions/states and cities in the Magento Admin;
- Mass actions for editing and deleting selected regions or cities;
- Import of regions/cities listing via a sample CSV file;
- Export of regions and cities data via CSV;
- Support for multiple locales;
- Display of the city select field as a drop-down menu at the checkout and in the customer account;
- Display of the city selection as a drop-down field in the backend.
MagePsycho Region & City Dropdown Manager improves the default Magento 2 capabilities by introducing settings for managing regions, provinces, or states, as well as cities from the backend. Store managers can view all created regions and cities in separate grids, edit and delete them individually or in bulk, and create new entities.
Besides, the region and city manager for Magento 2 provides import/export functionality. Admins can quickly upload the whole list of cities or regions in the Magento backend using a sample CSV file. This way, they can save a significant amount of time on adding each new entity individually. This feature is especially useful for store owners who have long lists with regions/states or cities that need to be uploaded to the system. It is also possible to export the existing data of all or filtered regions/states and cities in a CSV format.
Moreover, the MagePsycho Region & City Dropdown Manager extension provides support for multiple locales. This feature is beneficial for merchants who operate several stores for selling their products or services. The Magento 2 extension’s backend interface allows users to specify locale-specific names for regions and cities that differ from default ones. Locale-based values are also supported during import and export.
As for the user experience on the frontend, the city and region manager Magento 2 module converts the city field into a handy dropdown menu. The modified city select field is displayed at the checkout when choosing shipping or billing address, as well as on the edit address page in the customer account area. Note that the extension modifies the default text-input city field in the backend. Thus, the Magento 2 module makes it easier for store admins to specify a correct customer’s address when creating an order on their behalf.
Display of the city field as a dropdown has various advantages for both customers and store owners. First, it reduces the probability of typos and mistakes, which can lead to entering incorrect shipping or billing address by a customer. Store owners can use the information about customers’ regions or cities to calculate shipping fees on a location basis. Also, cities and regions info can be utilized when setting conditions for the cart price rules. This way, online merchants get additional possibilities for targeting particular areas, as well as restricting shipping based on the customer’s location. Also, note that region and city names are shown per locale to website visitors, as configured in the backend.
Backend
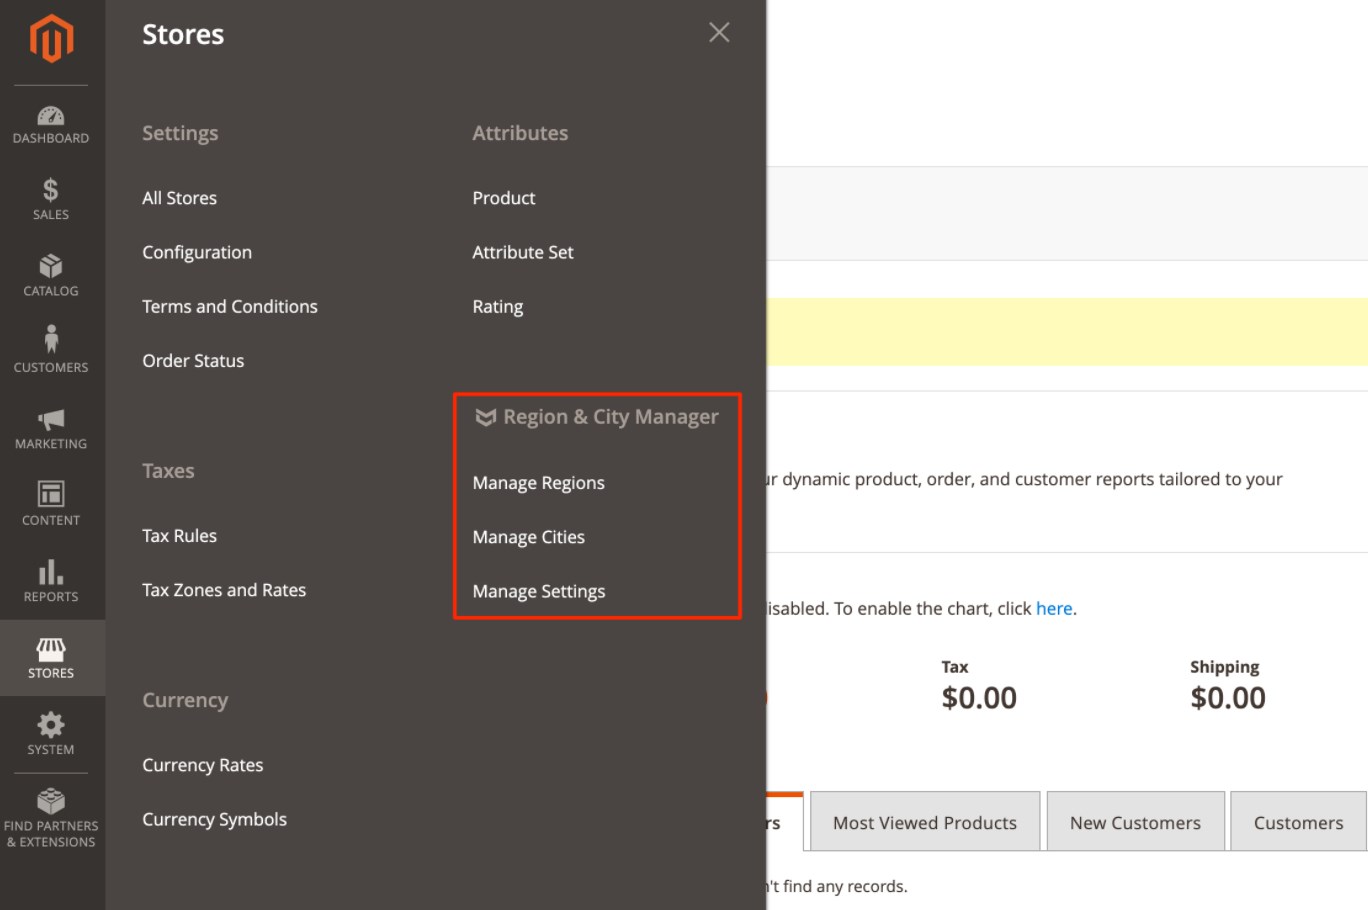
All settings of the Region & City Dropdown Manager extension are located under the Stores -> Region & City Manager -> Manage Regions/Manage Cities/Manage Settings menu.
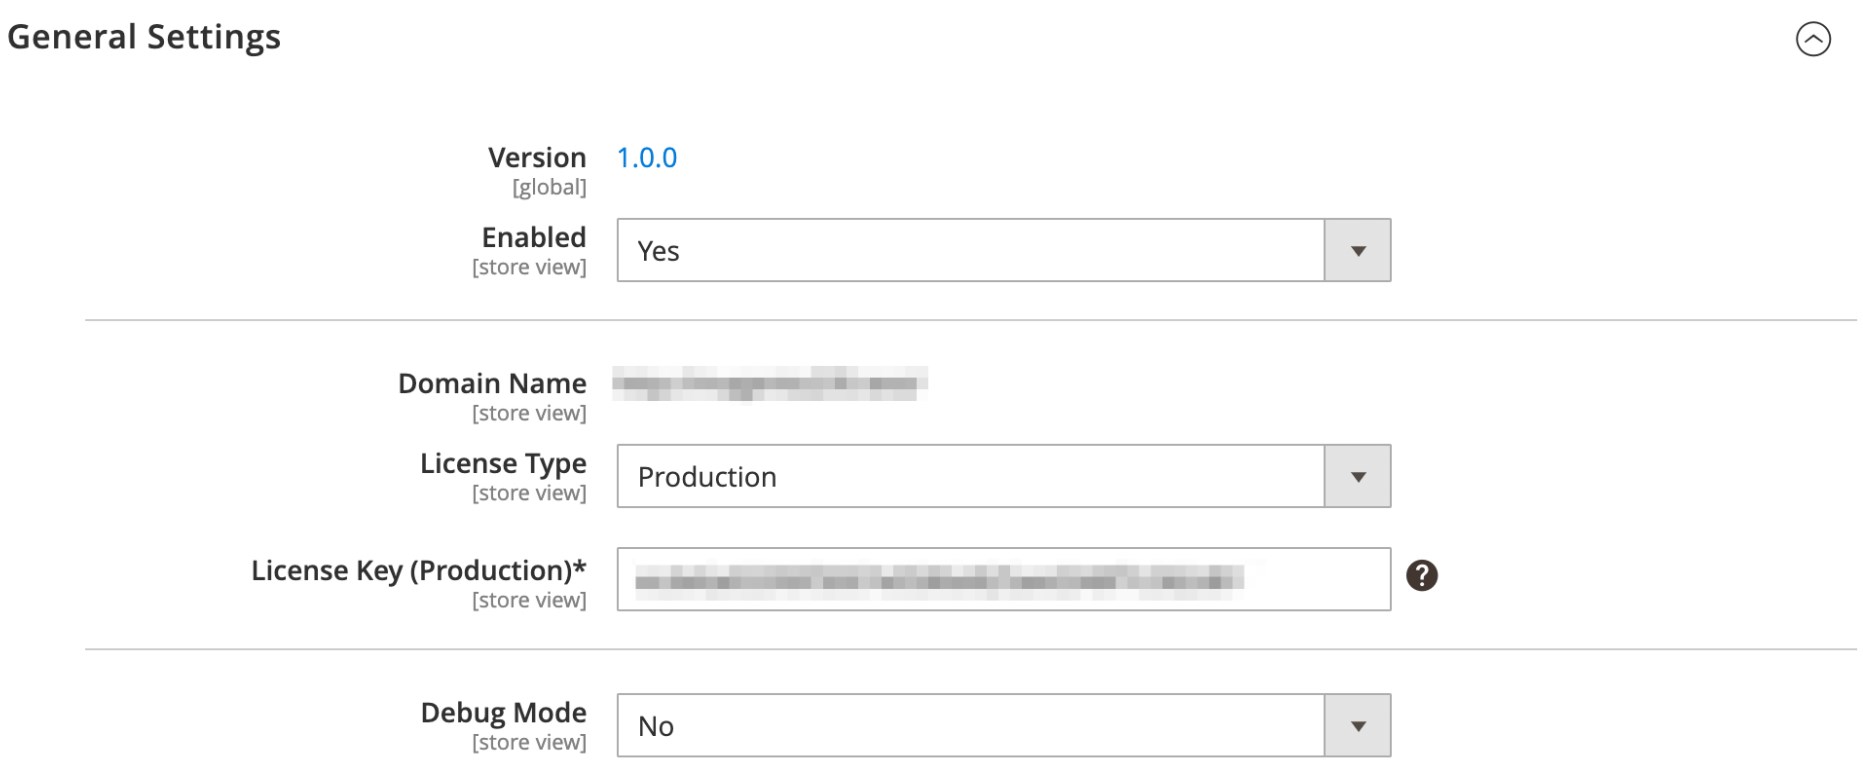
The general settings of the Magento 2 module can be found under Manage Settings. Here, you can enable/disable the extension, select a license type, and activate debug mode.
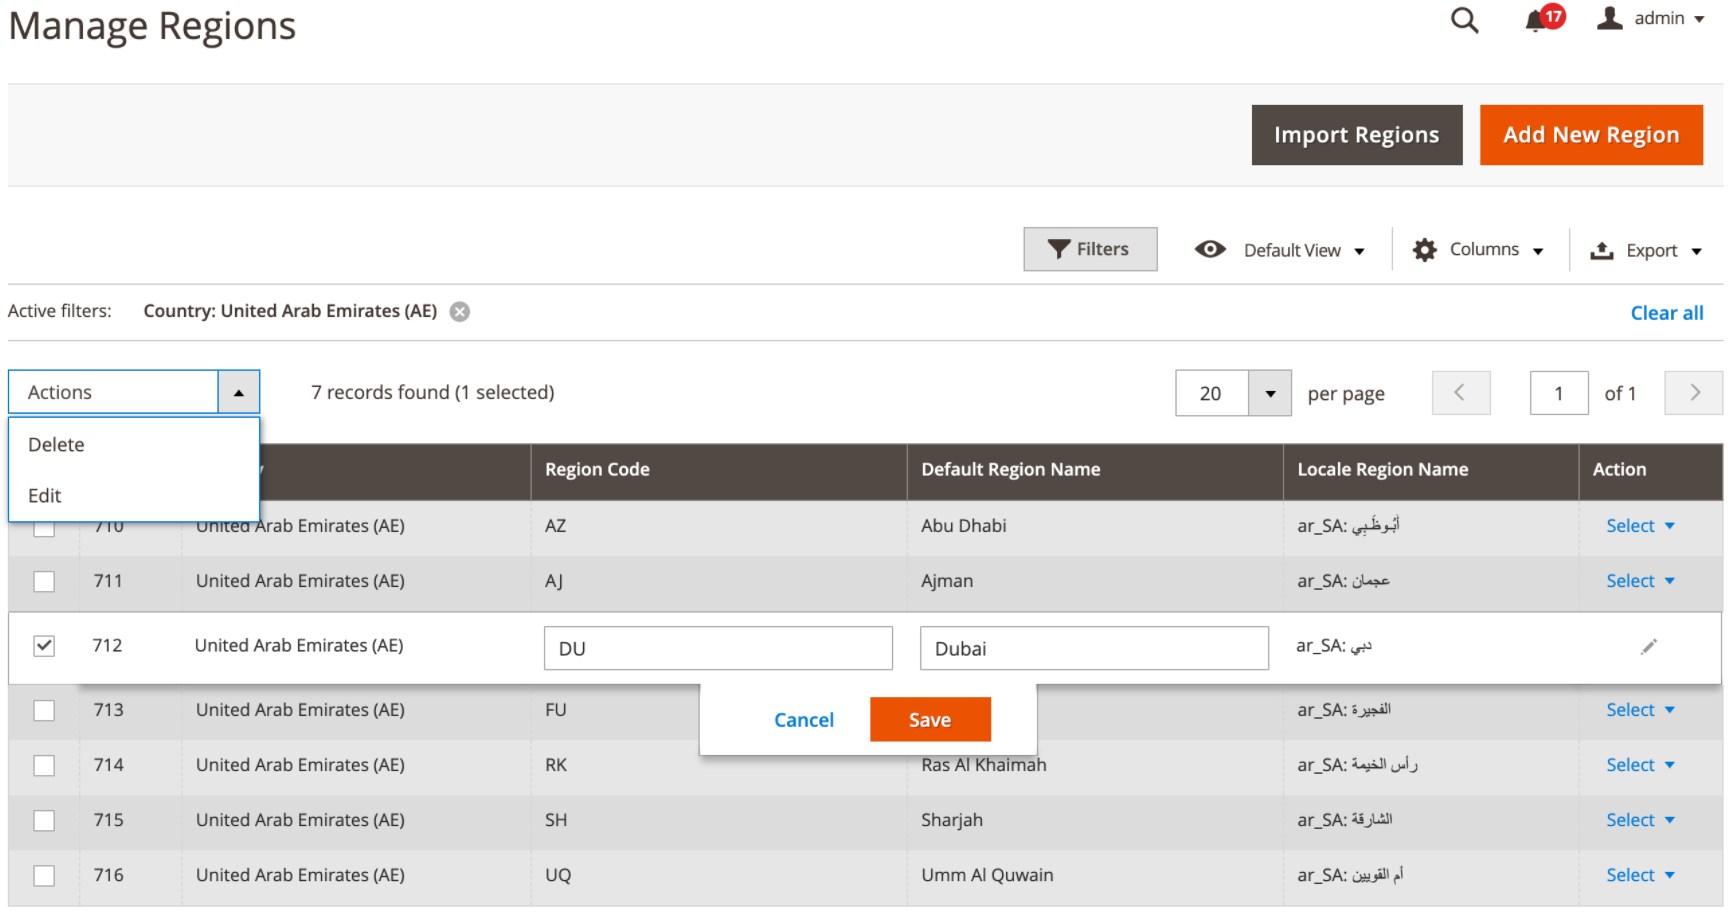
Now, let’s see which options for managing regions are available with the Region & City Manager Magento 2 module. Existing regions are gathered in a separate grid that contains the following columns:
- Checkbox;
- ID;
- Country;
- Region Code;
- Default Region Name;
- Locale Region Name;
- Action.
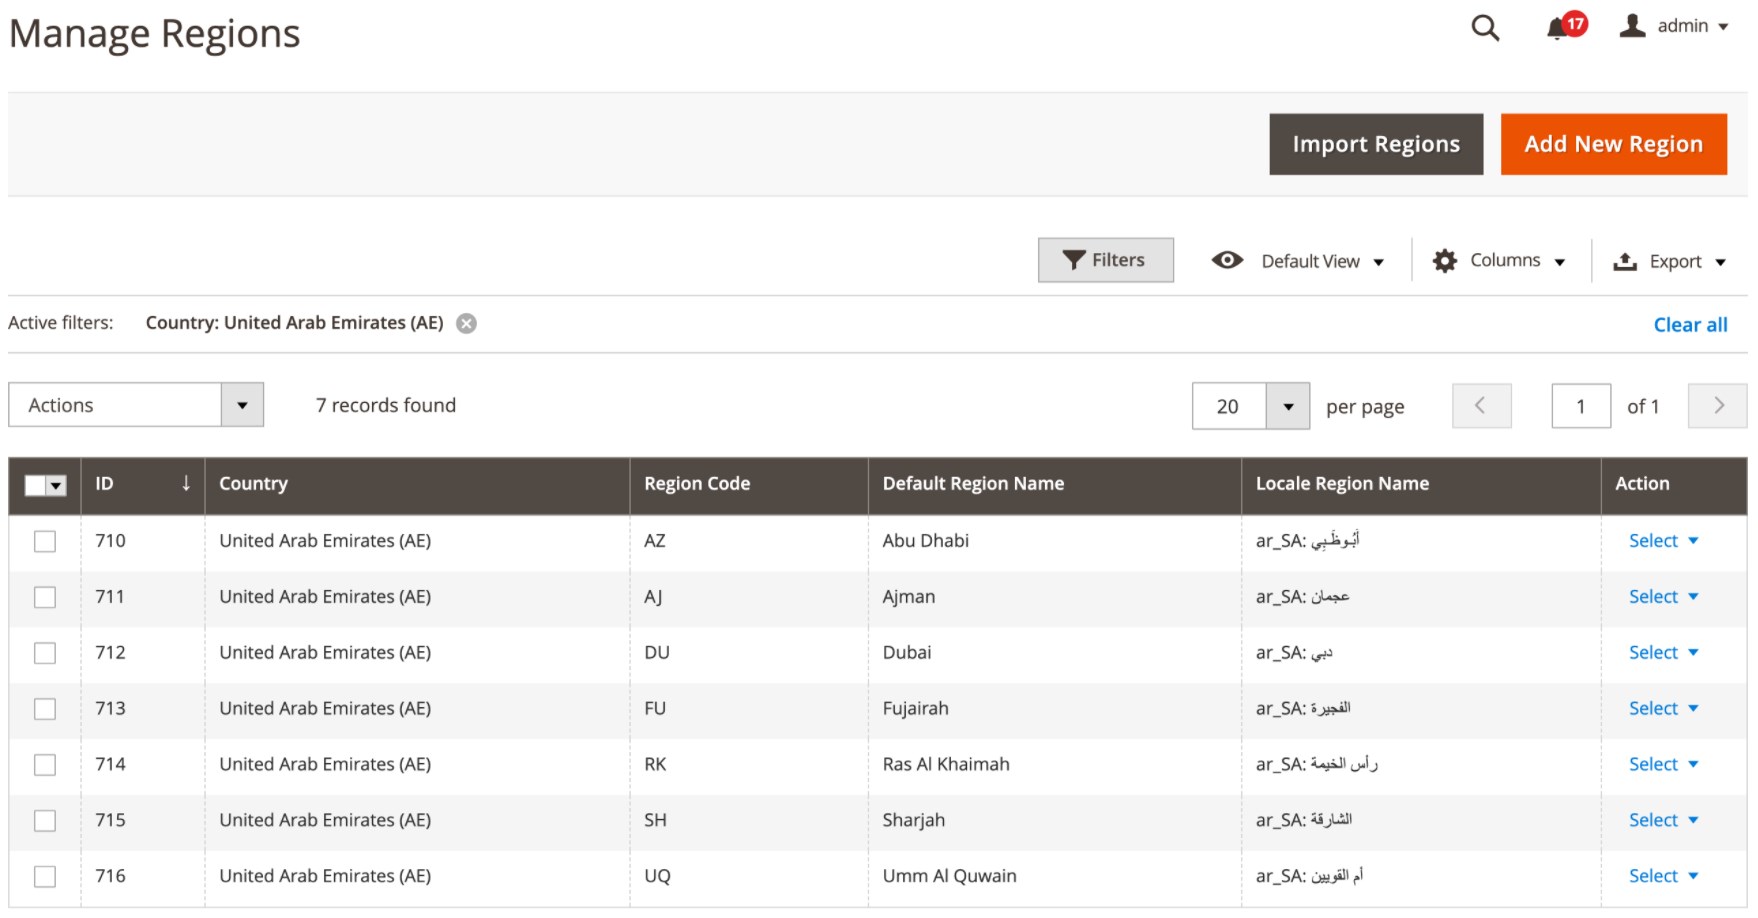
You can change a region’s code and default name right on the grid using the inline editor. Besides, it is possible to edit or delete selected regions in bulk using appropriate mass actions. As mentioned above, the Magento 2 region and city manager allows importing a CSV file listing all regions via the “Import Regions” button. If you want to create a new region, click the “Add New Region” button.
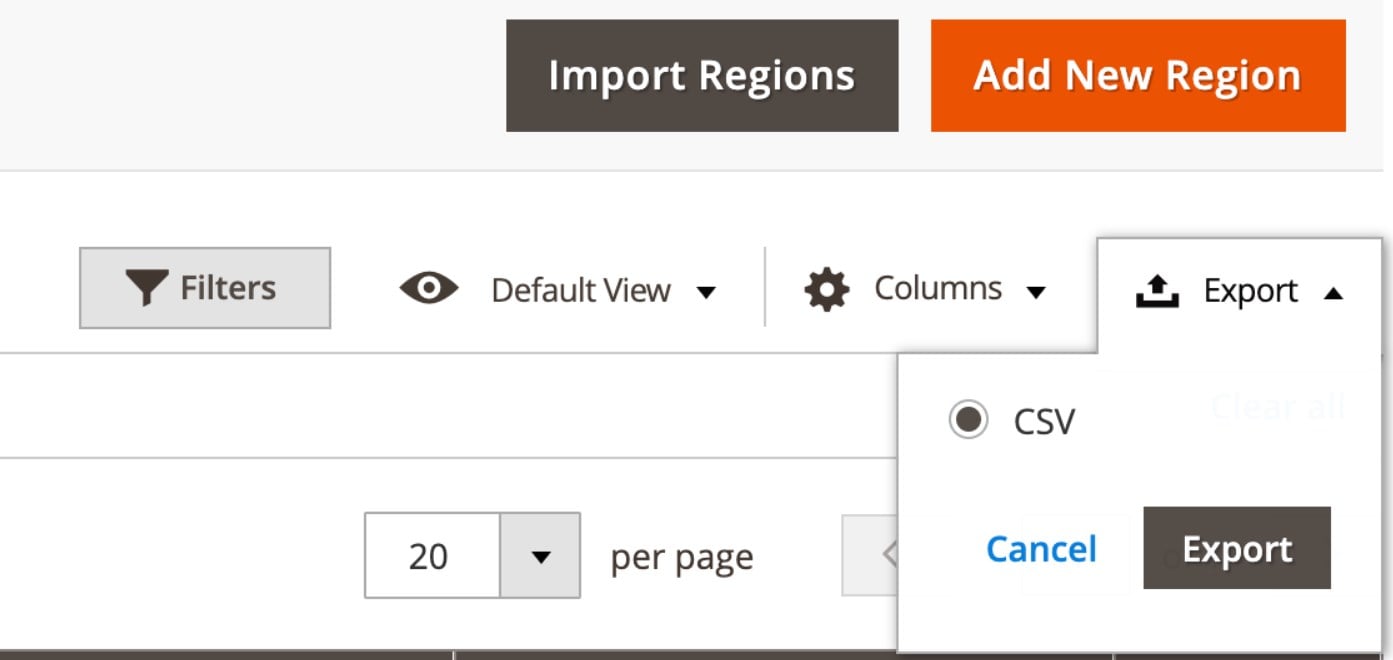
Note that you can also export regions’ data in the CSV format.
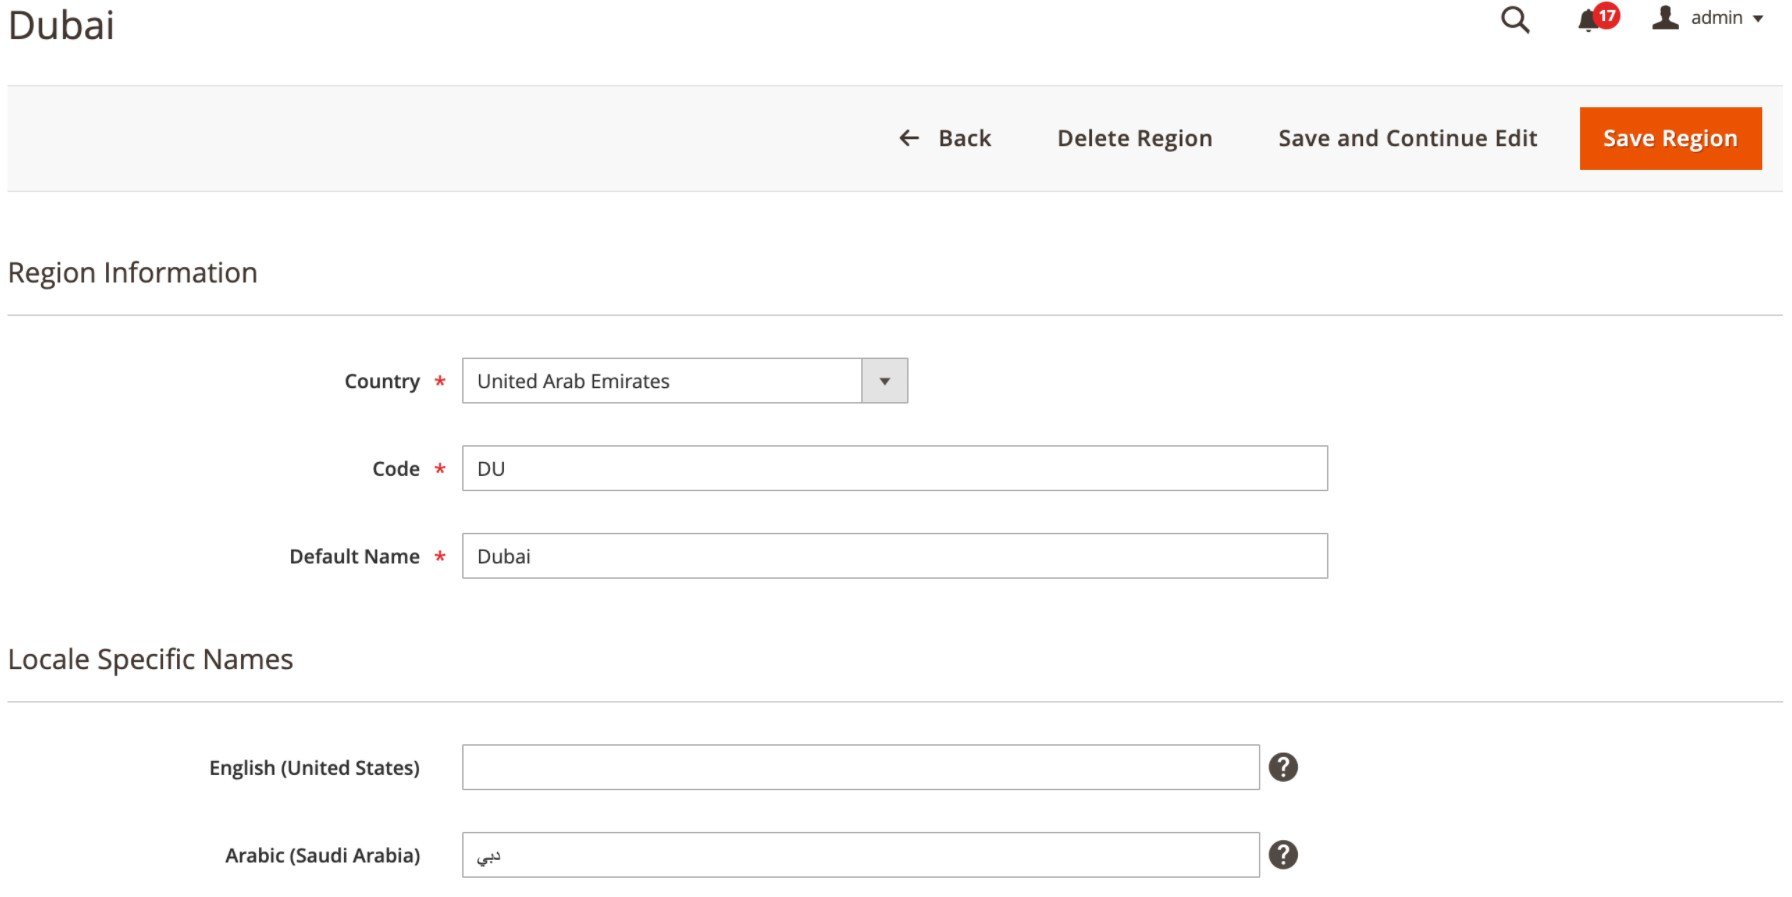
Now, let’s see how the edit region page looks. When creating or editing a region, you need to select a relevant country, specify a region code, and assign its default name. You can also enter locale-specific names per each store.
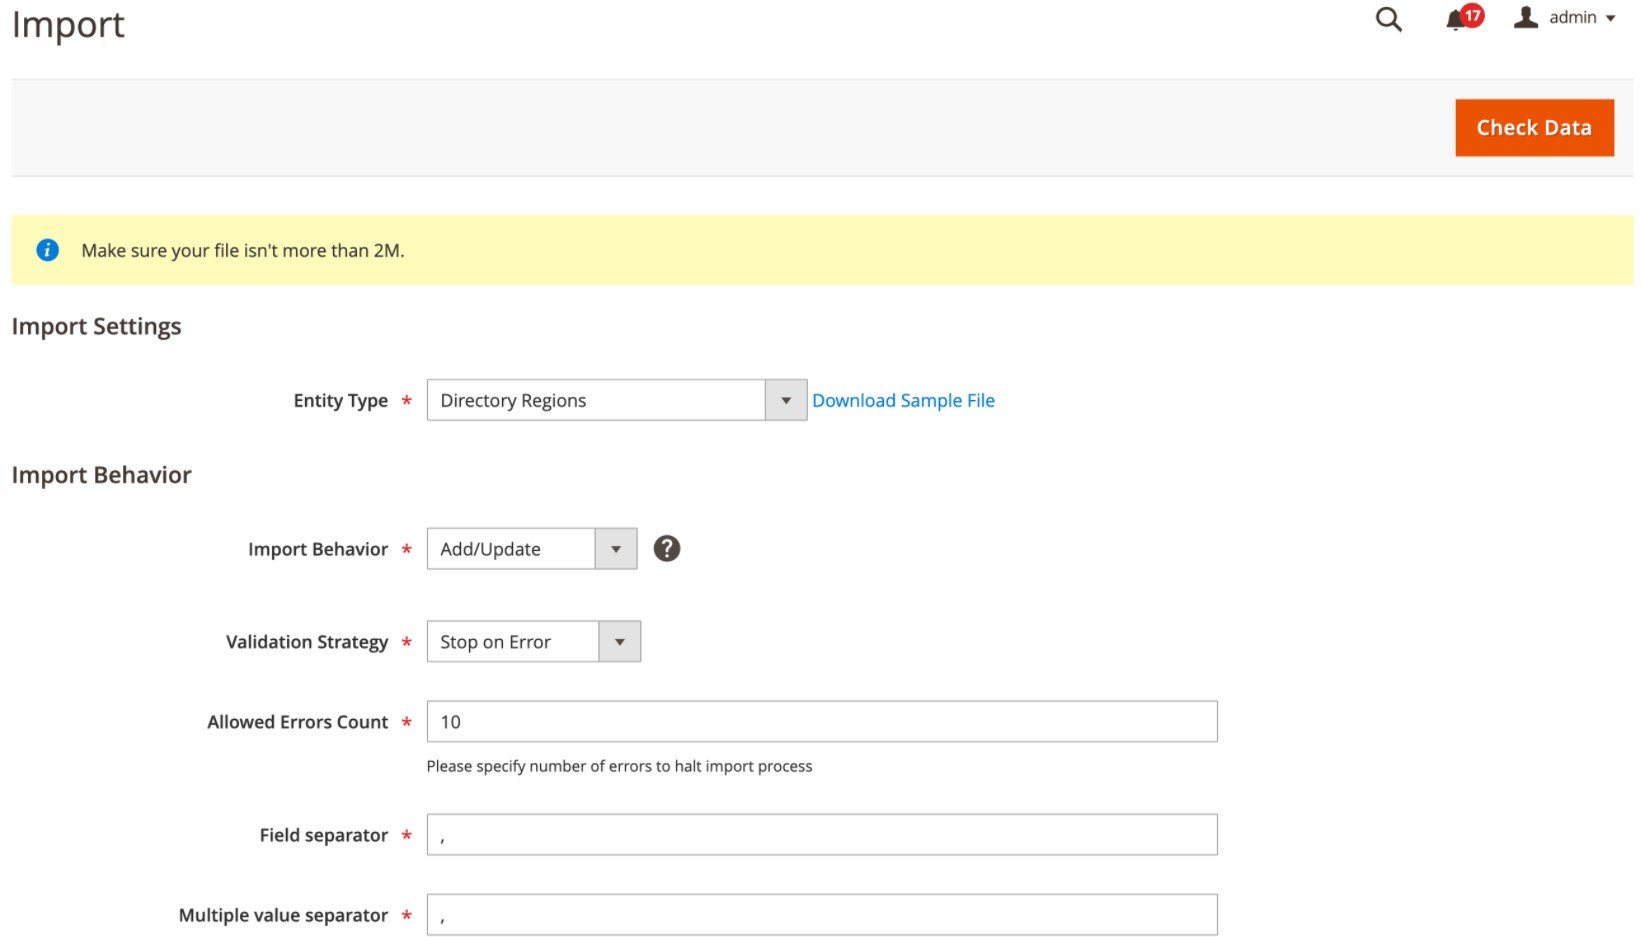
As for the import of the regions’ data, the region and city manager Magento 2 module allows specifying the import parameters and uploading a sample CSV file with filled in data.
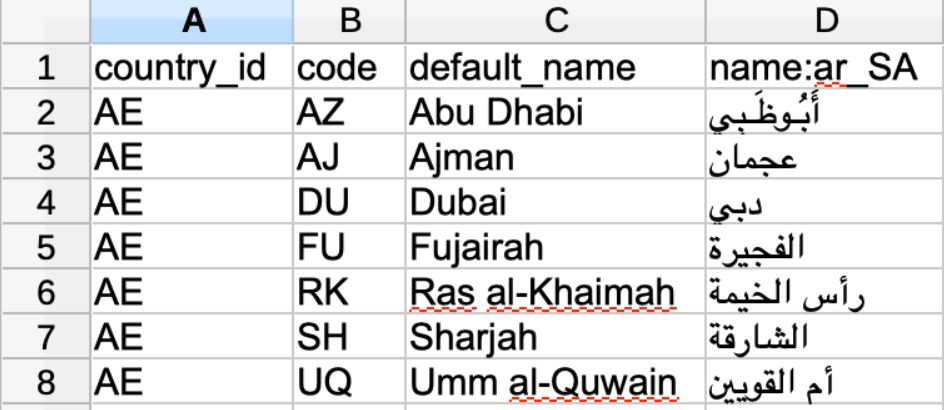
Note that currently the extension offers a prepared CSV file for the United Arab Emirates only. Below, you can check how the sample file looks:
As for the cities management, the MagePsycho region and city dropdown manager offers a separate grid with the following columns:
- Checkbox;
- ID;
- Country;
- Region;
- Default City Name;
- Locale City Name;
- Action.
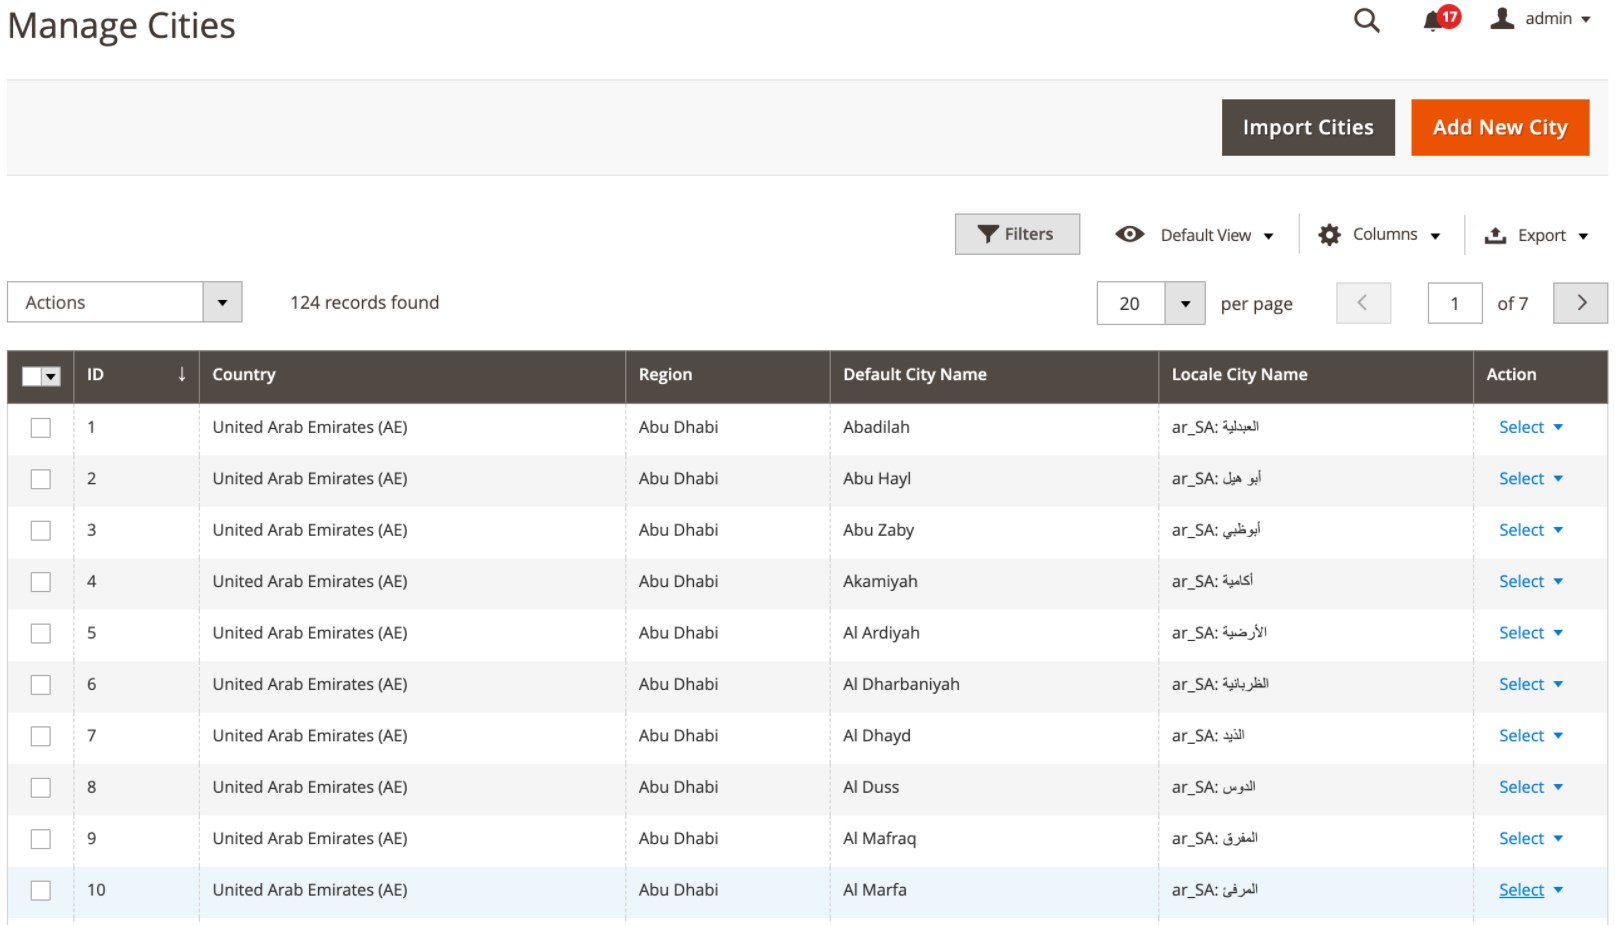
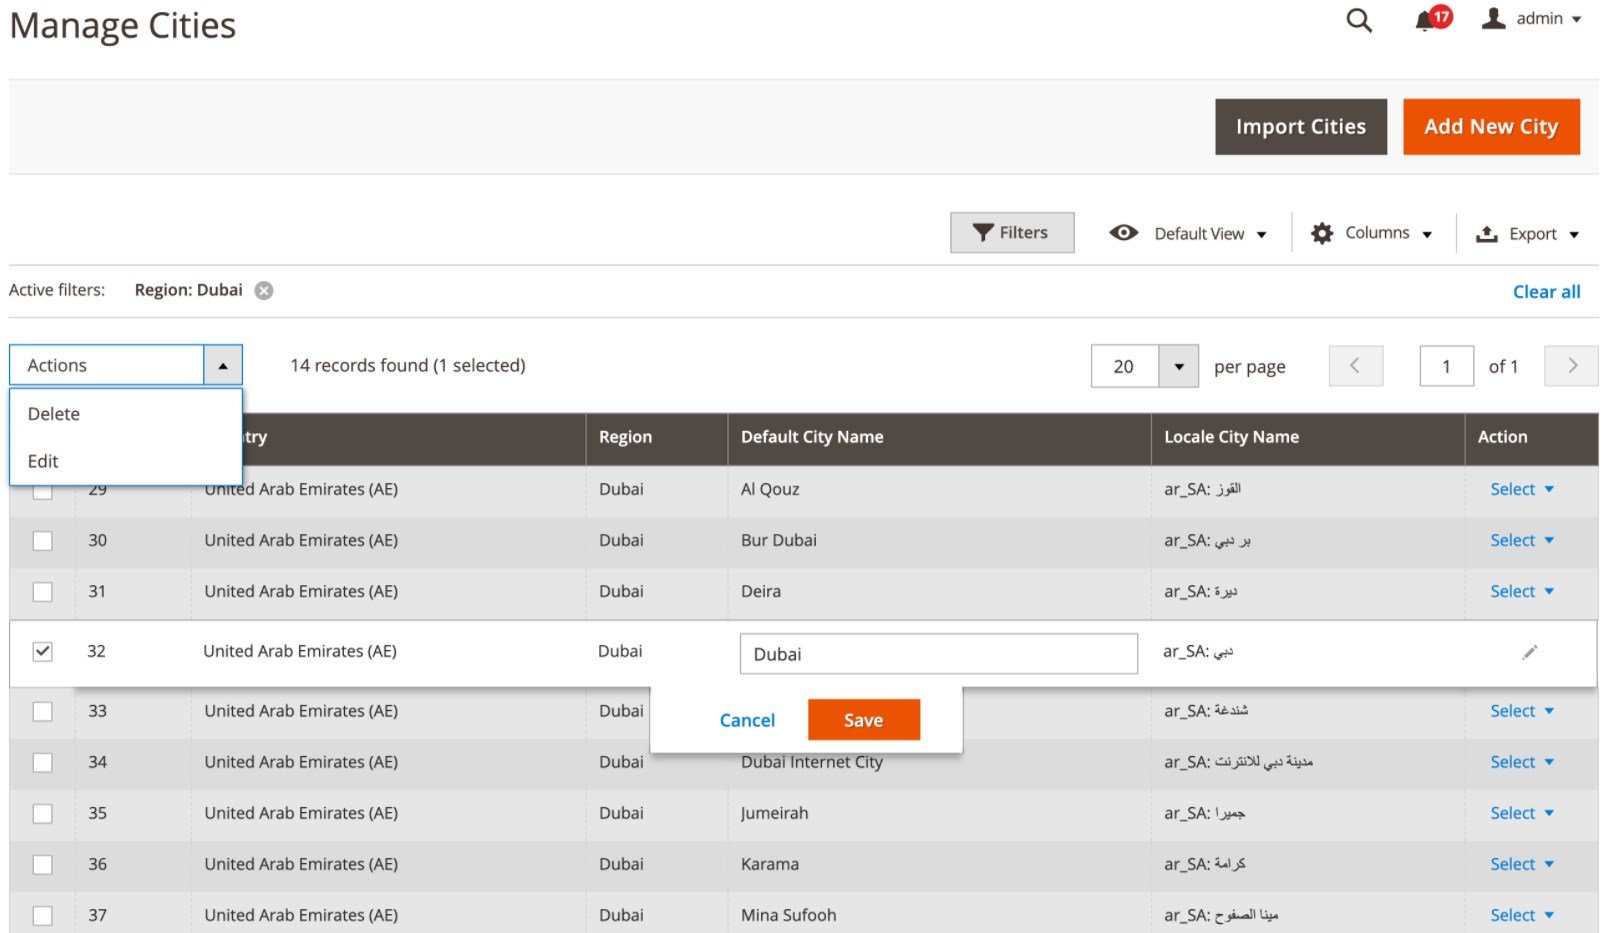
In the same way as on the Manage Regions grid, you can modify cities’ names and apply mass actions for editing and deleting particular cities in bulk. Other possibilities offered by the Manage Cities screen include import of the cities’ data in bulk, export of existing data using a CSV file, and creation of new city profiles.
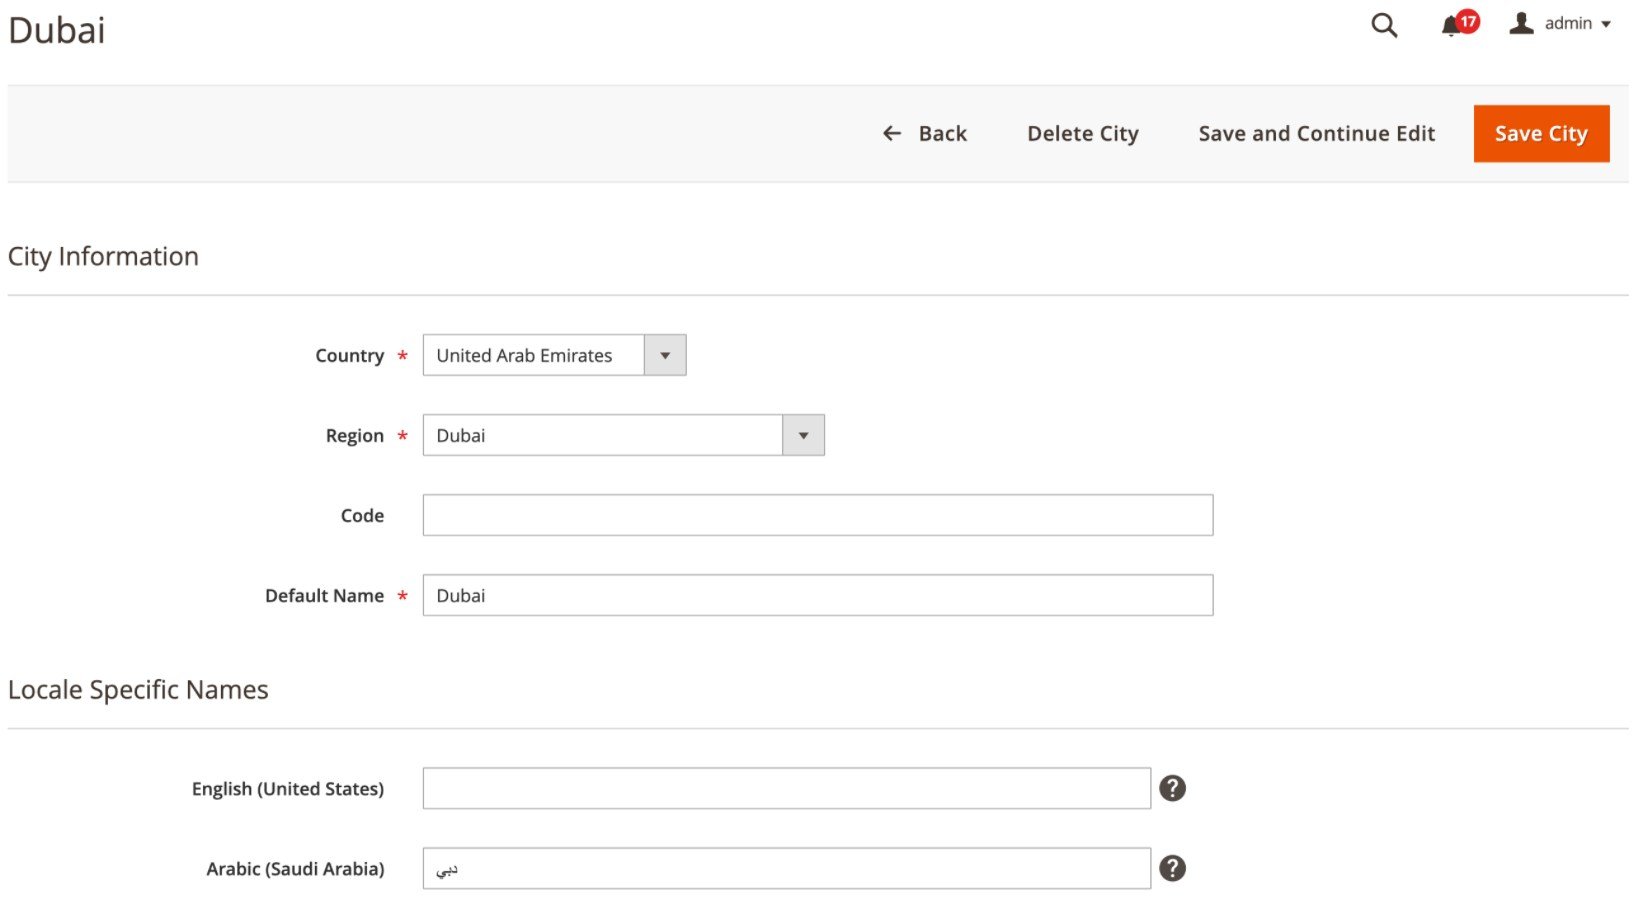
When adding a new city or editing an existing one, you need to select an appropriate country and region, enter a region code, and create the city’s default name. If you have multiple stores, you can specify names for each locale.
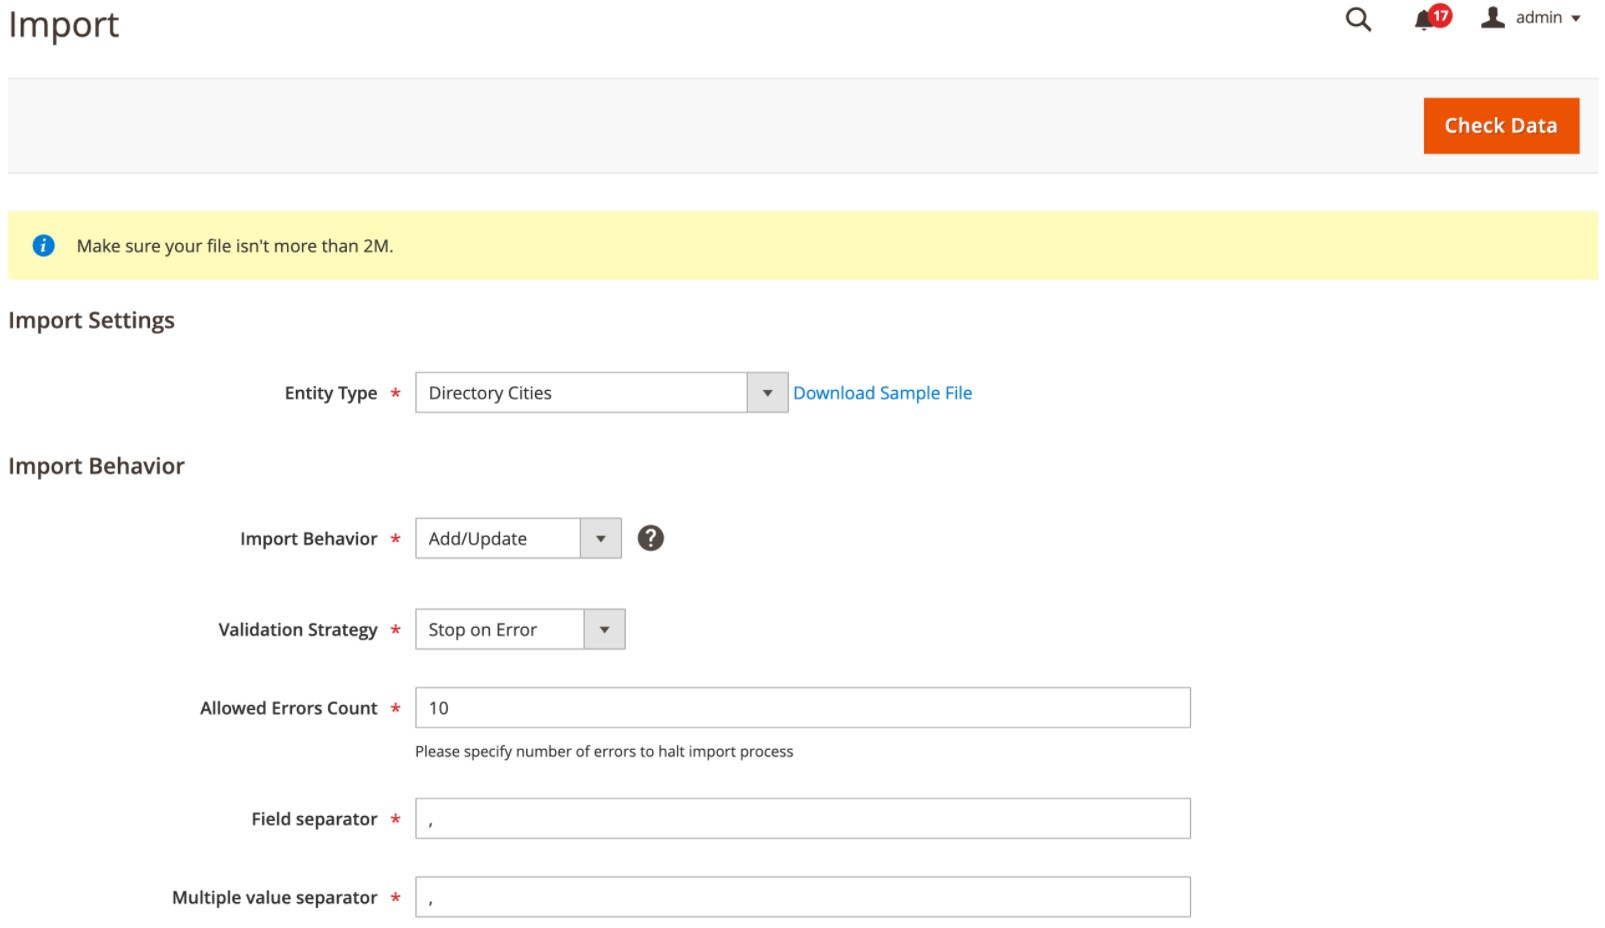
If you want to import cities’ data in bulk, on the Import page, select the “Directory Cities” option in the Entity Type drop-down and specify import behavior parameters.
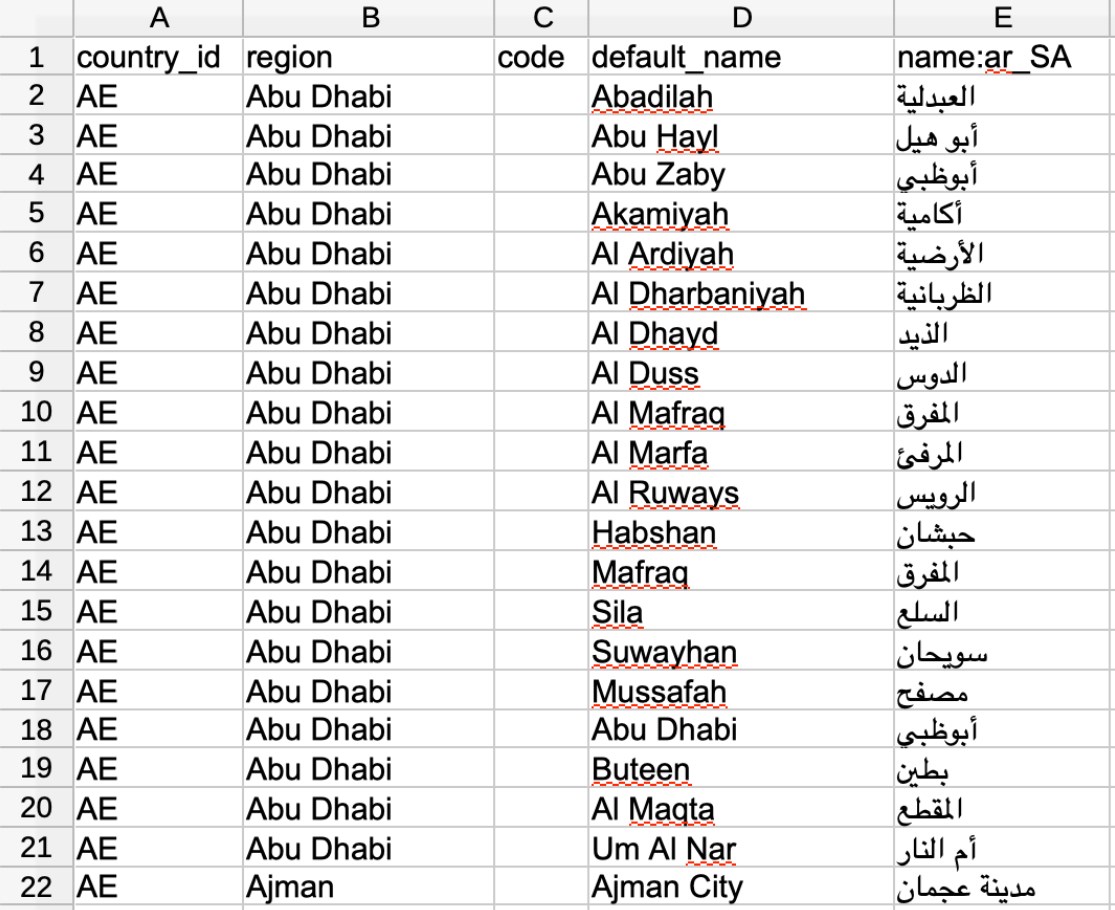
Below, we show you how the sample CSV file with the cities’ details looks:
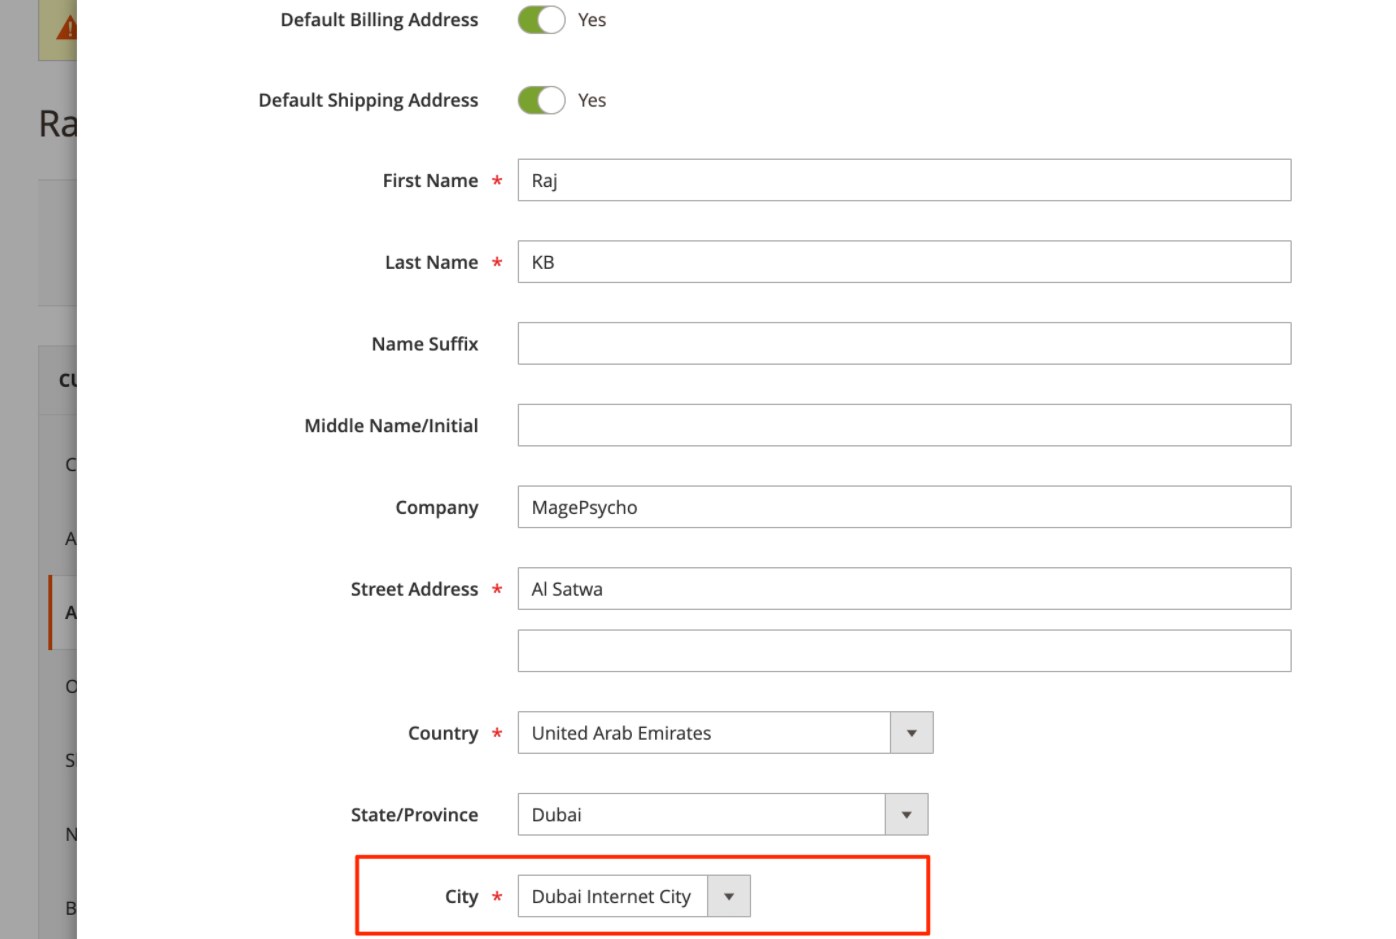
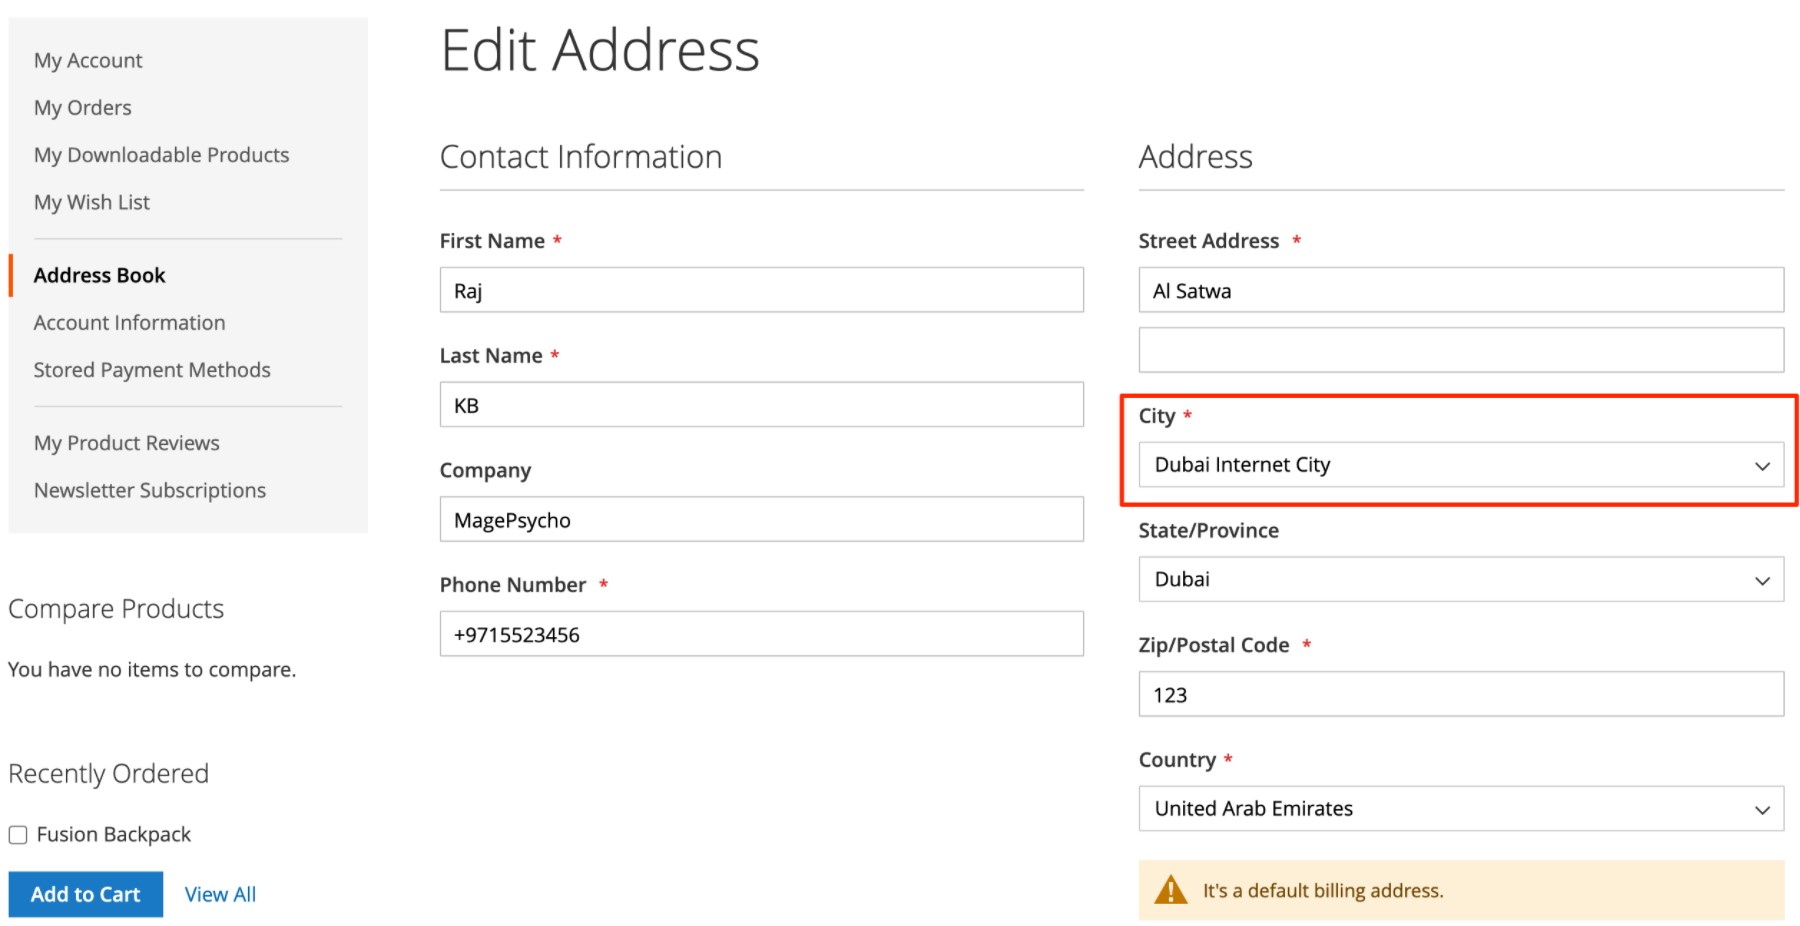
Also, note that Region & City Manager for Magento 2 adds the City drop-down select field to the customer address page.
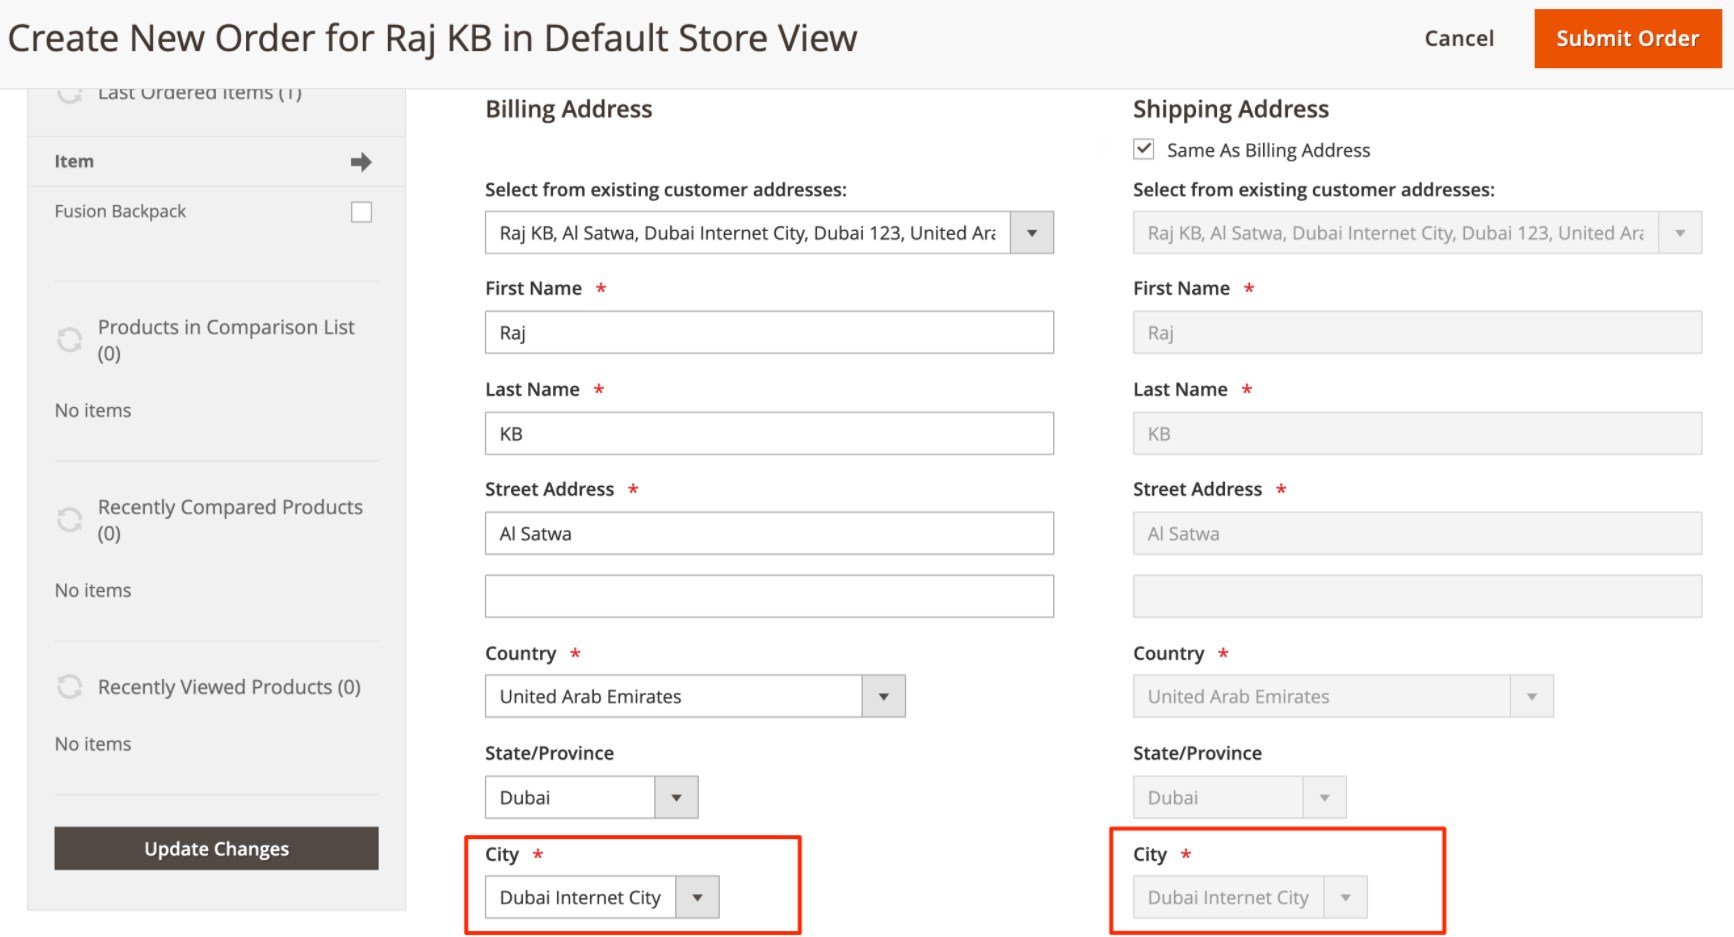
When specifying order address details in the backend, admins can also select a required city for the shipping/billing info.
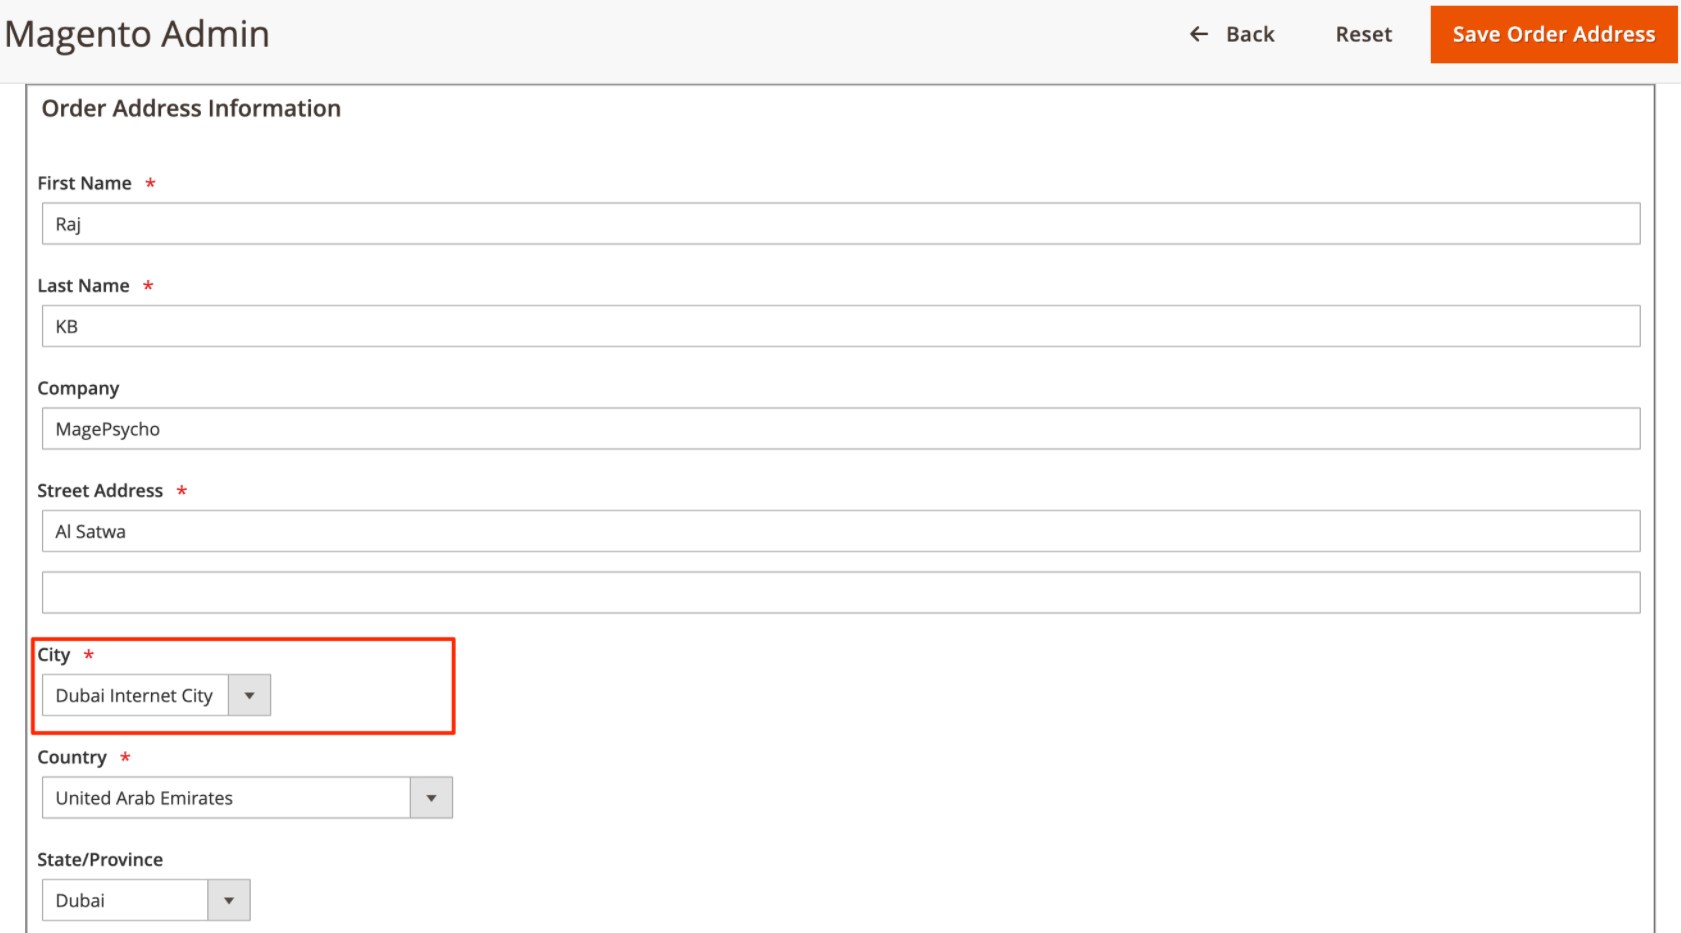
The extension also adds the city drop-down field to the Billing Address and Shipping Address sections on the new order creation page in the Magento Admin.
Frontend
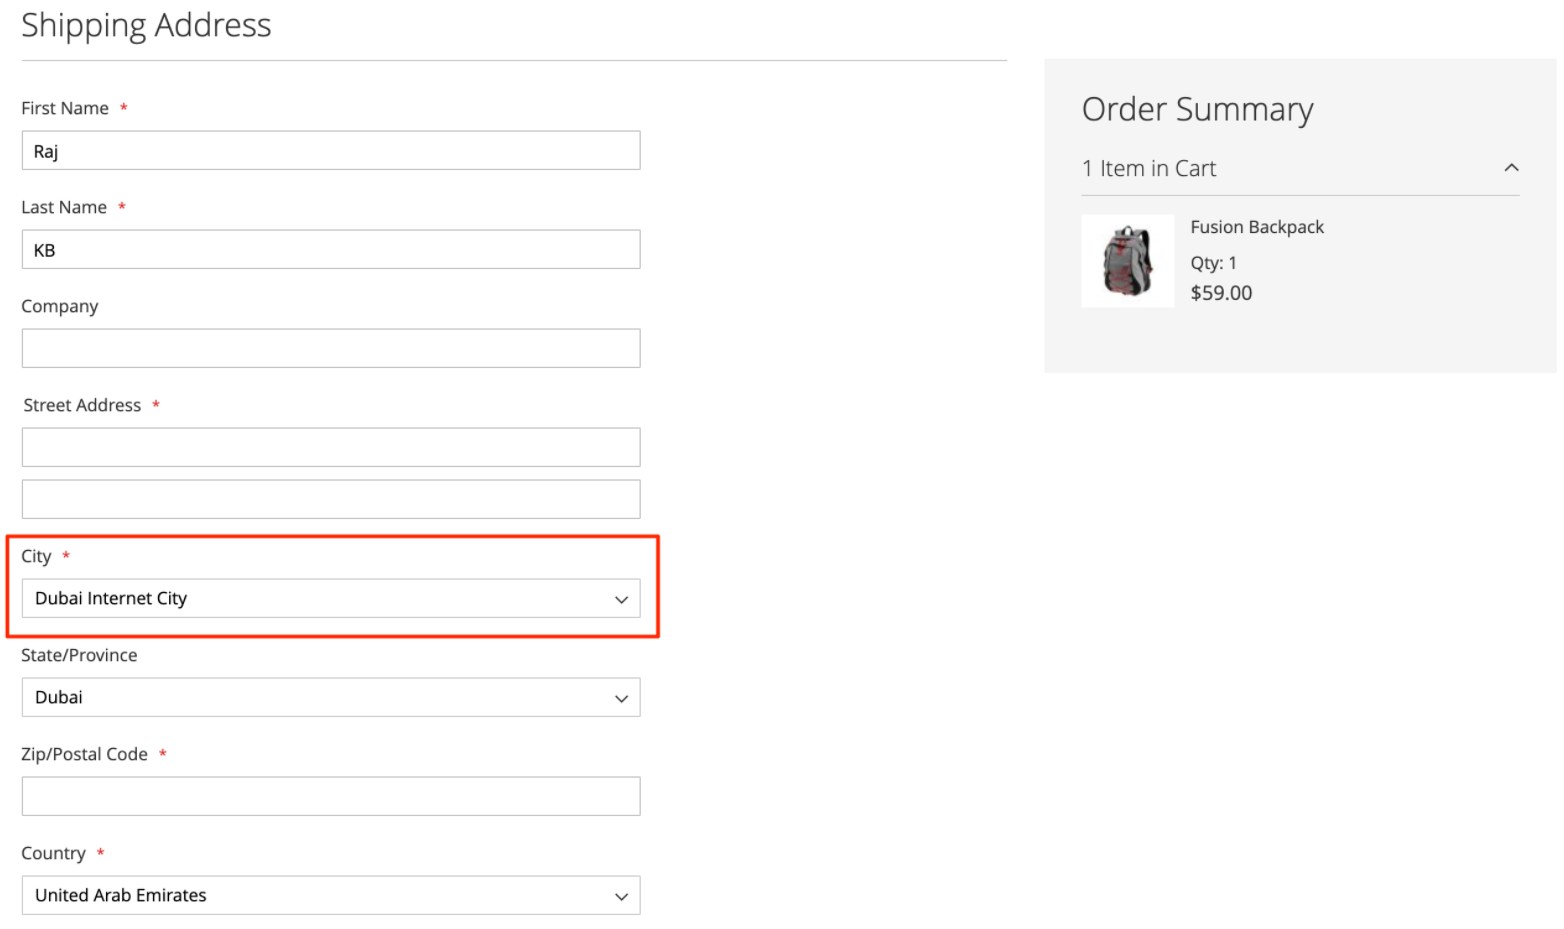
Now, let’s see which functionality the MagePsycho city and region switcher Magento 2 module offers on the frontend. The extension adds the city drop-down to the Shipping Address page on the checkout.
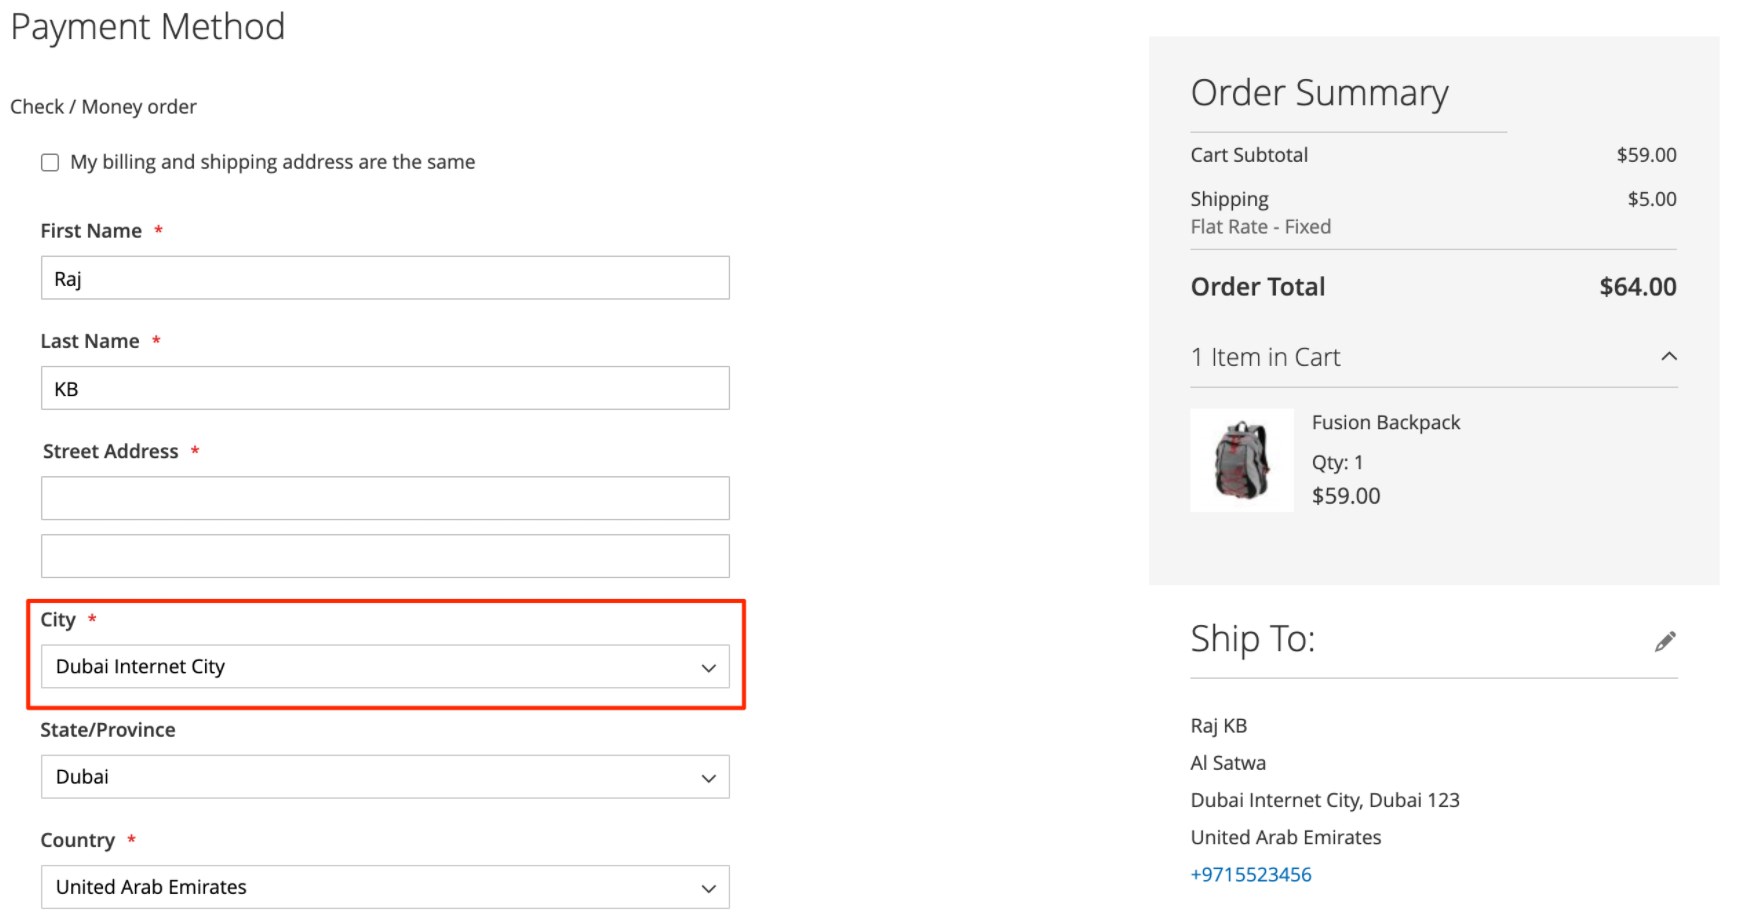
Customers can also select a city when specifying their billing address on the checkout page.
Registered users get the possibility to select a necessary city when editing their address.
Final Words
The MagePsycho Region & City Dropdown Manager extension offers necessary tools for easy management of regions and cities during shipping and billing address selection. The module’s features improve customer experience on the frontend by helping online shoppers quickly specify an exact address. The Magento 2 extension also allows merchants to set more specific rules and restrictions based on the address values.
MagePsycho sells its Magento 2 region and city manager module for $99, but now you can get it with a discount for just $75.


