
Magento 2 Backend Exploration: Private Sales and Events
In this article, we travel through the Private Sales section of the Magento 2 backend. The feature is available in Magento 2 Commerce, introducing additional possibilities in comparison to the Open Source version. Below, we describe all the corresponding subsections. Let’s see what Magento 2 Private Sales are.

Table of contents
Magento 2 Private Sales: Definition
Private sales and events are a powerful marketing tool designed to generate new leads as well as quickly sell the surplus inventory, using the existing customer base. What key opportunities does this Magento 2 Commerce feature provide?
It is possible to create limited-time sales based on Private Sales. Next, you can limit sales to specific members, providing more in-depth personalization. It is even possible to create a standalone private sale page.
Besides, Magento 2 lets you define invitations as well as event details. Thus, the platform provides the ability to increase sales, generating buzz around your online storefront. Your best customers get the VIP treatment with exclusive access to Member Only sales. As a result, you get more attention and enhance brand loyalty.
Note that the feature incorporates customer groups so that you can leverage them to set up Members Only and VIP sales. Everything is intuitive and straightforward because
- Categories are included: each event is associated with your catalog;
- Every event has a lifetime: use a countdown ticker to engage your customers;
- There is Catalog Event Carousel to involve your store visitors into sales;
- You get full control over the specific activities due to category permissions;
- It is also possible to redirect customers who are not related to private sales to a landing page or registration/login page;
- You can implement the restriction on the ability to create an account with the help of invitations;
- With Private Sales Reports, Magento 2 lets you monitor such metrics as the number of sent invitations and invited customers invited.
Event Ticker
Since we’ve mentioned a countdown ticker above, let’s say a few more words about it. The feature is inextricably bound up with private sales, indicating the time left before the event closes. As for upcoming sales, the block displays the start and end date. The same is about closed events. You can enable tickers for both categories and products.
Magento 2 Private Sales: Configuration
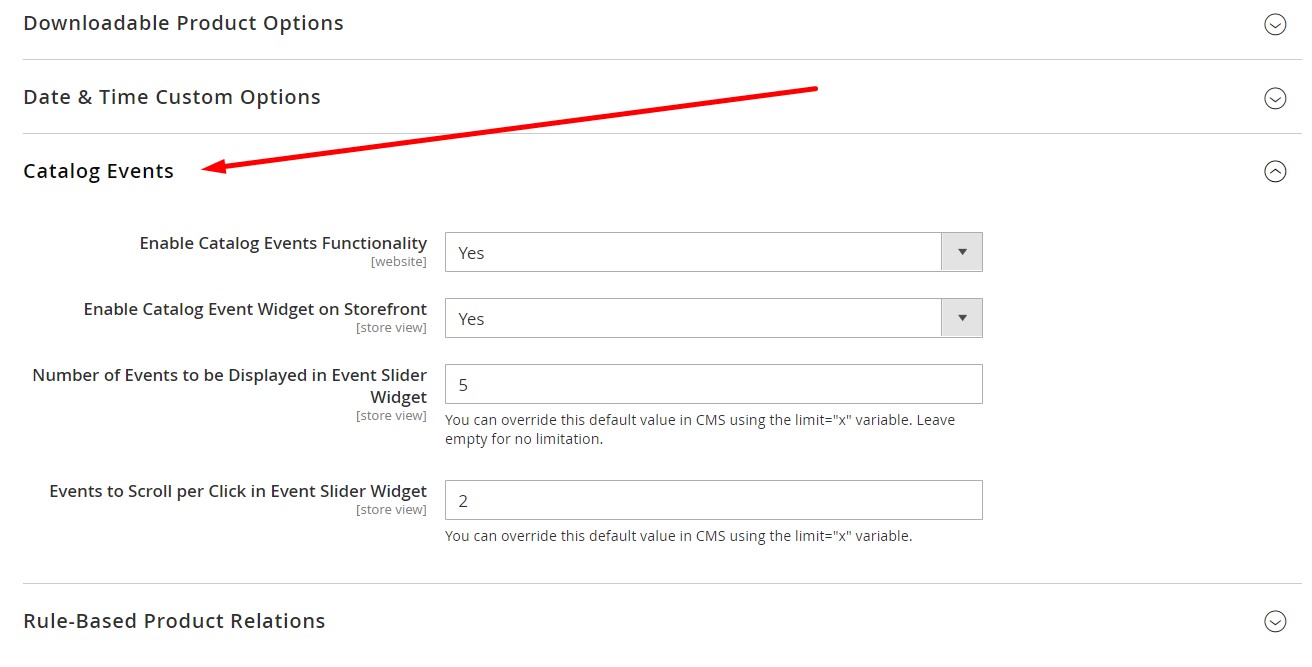
Before going any further, let’s see how to configure private sales in Magento 2. Under Stores->Settings->Configuration, expand Catalog in the left panel, and select Catalog underneath. Scroll down to the Catalog Events section. Here, you can enable the Catalog Events functionality in the backend and on the storefront. Besides, the section lets you specify a maximum number of events in a sidebar widget as well as a number of events to scroll per click. Save the configuration.
Access restrictions
Now, when private sales are enabled, you have to restrict access to them. It can be limited to registered customers only who should log in before riching the desired content. As for non-registered customers, they must register before gaining access.
The action takes place under Stores->Settings->Configuration. Expand General in the left panel and choose General underneath. Find the Website Restrictions section in the list. You can enable access restrictions here as well as choose a restriction mode (Private Sales: Login Only or Private Sales: Login and Register). Next, specify a page to redirect users before they access the site and choose a landing page that appears before logging in to private sales.
Don’t forget to inform search engine bots that the landing page is correct. Set HTTP Response to 200 OK, and they will know that there are no other pages on the site to index. Save changes.

Before we proceed, it is necessary to highlight several more facts about private sales. Products from upcoming or closed events are not available for general sale. It means that you won’t find the Add to Cart button on a corresponding product list or page. However, there is an exception. When a product is associated with several categories, and one of them has no selling restrictions, you will see the button but won’t see the ticker block.
If a product appears in a single category associated with a closed event, delete the event to restore the Add to Cart button.
Magento 2 Private Sales: Events
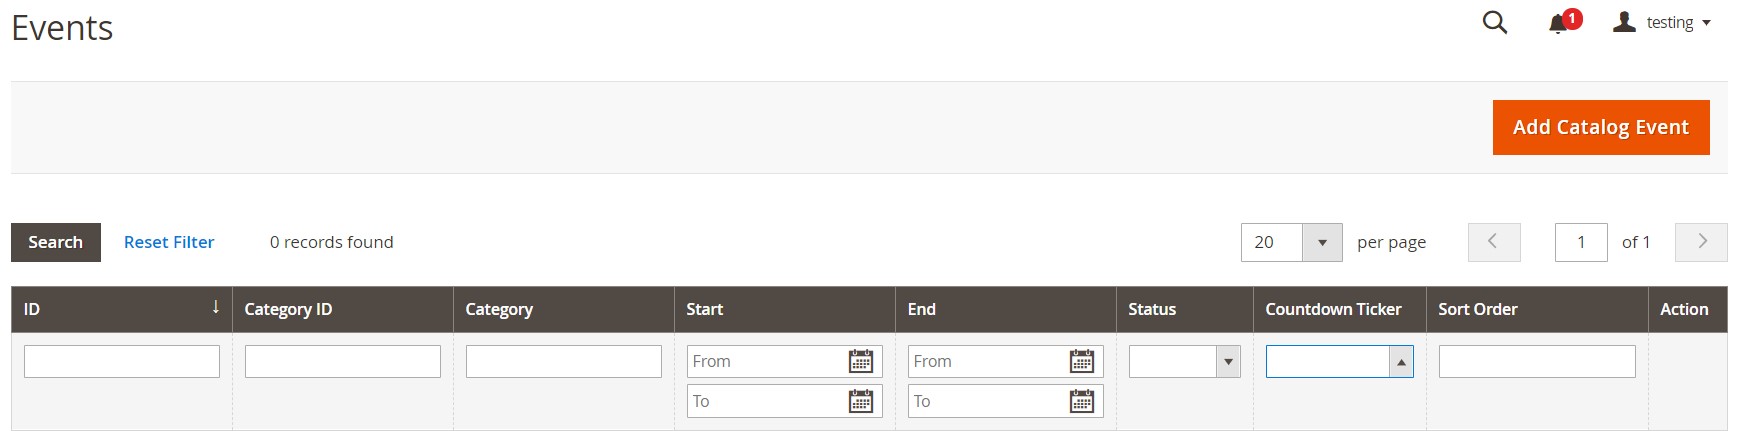
You can find a grid with events under Marketing->Private Sales->Events. It consists of the following nine columns:
- ID – each event has an internal ID number;
- Category ID – an ID number of a corresponding category;
- Category – a name of a related category;
- Start – the beginning of an event;
- End – the end of an event;
- Status – Upcoming, Open, or Closed;
- Countdown Ticker – Category Page or Product Page;
- Sort Order – a sequence in which events appear when listed together;
- Action – you can edit every event here.
Note that there is a filter in every grid column. You can also specify the number of records per page.
How to add a catalog event
Hit Add Catalog Event above the grid on the right to add a new private sale.
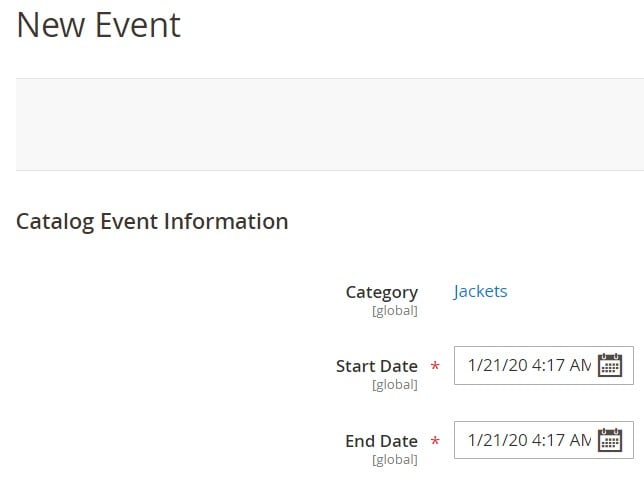
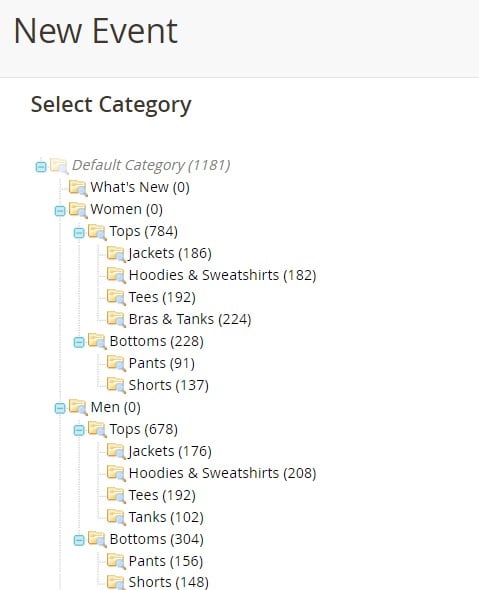
Magento 2 redirects you to a new screen, where you should select a category to associate your new even with. Note that each category can have only one event at a time.
Next, specify the start and end dates for the event, upload an image to highlight your sale, set a sort order, and show/hide a countdown ticker for category and product pages.
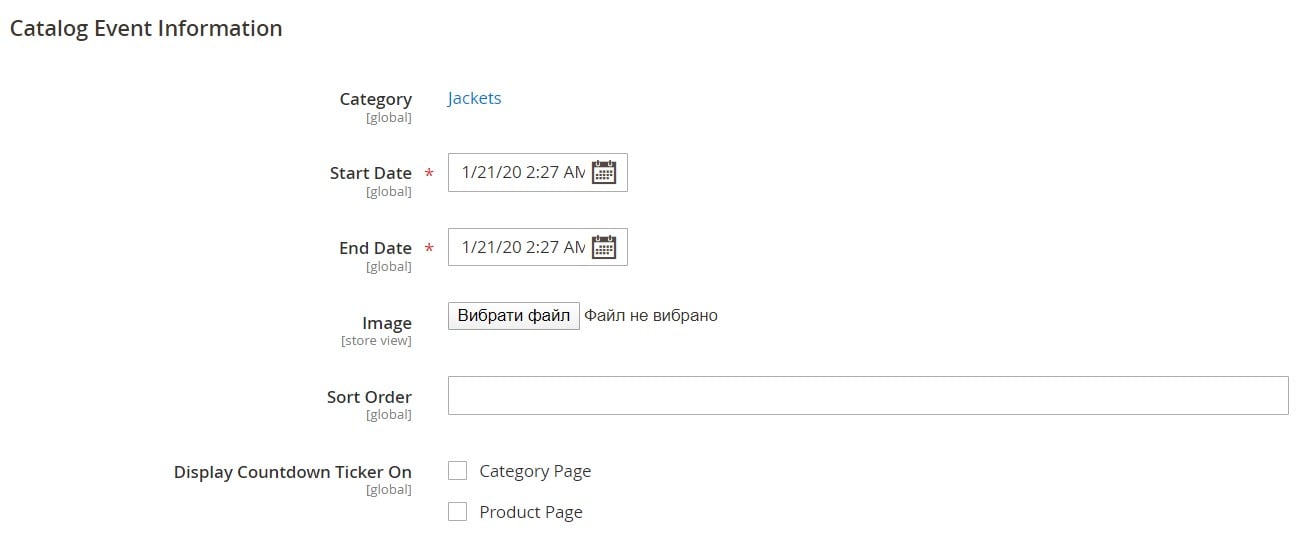
Don’t forget to save your new private sale.
How to edit private sales
There are two ways to edit private sales. You can either go to the Events grid and edit a record from the Action column or do everything under Catalog->Categories. In the second case, select a category associated with your event and click Edit Event in the upper-right corner. That’s it! Both approaches lead you to the same event page.
Catalog Events Carousel
Now, let’s say a few more words about the Catalog Events Carousel widget and its configuration. The Magento 2 Private Sales feature provides the ability to displays a slider of upcoming events. As a store administrator, you can choose a page and its area to show the carousel. Furthermore, it is possible to control such widget parameters as the width and number of events that appear at a time.
How to enable the Catalog Carousel widget
We already described how to enable the feature in the Configuration section above. The same settings enable the Catalog Carousel widget. However, you have to create it.
How to create the Catalog Carousel widget
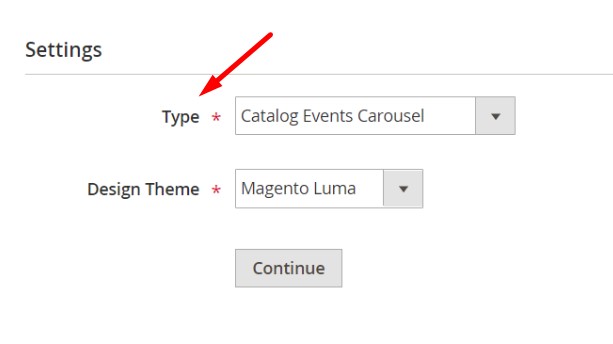
You can find the necessary settings under Content->Elements->Widgets. Click Add Widget in the upper-right corner above the grid. The system transfers you to a new screen where you can create a new Catalog Carousel widget. It is only necessary to choose Catalog Events Carousel from the Type dropdown. Next, select the Design Theme that is used by the store and click Continue.
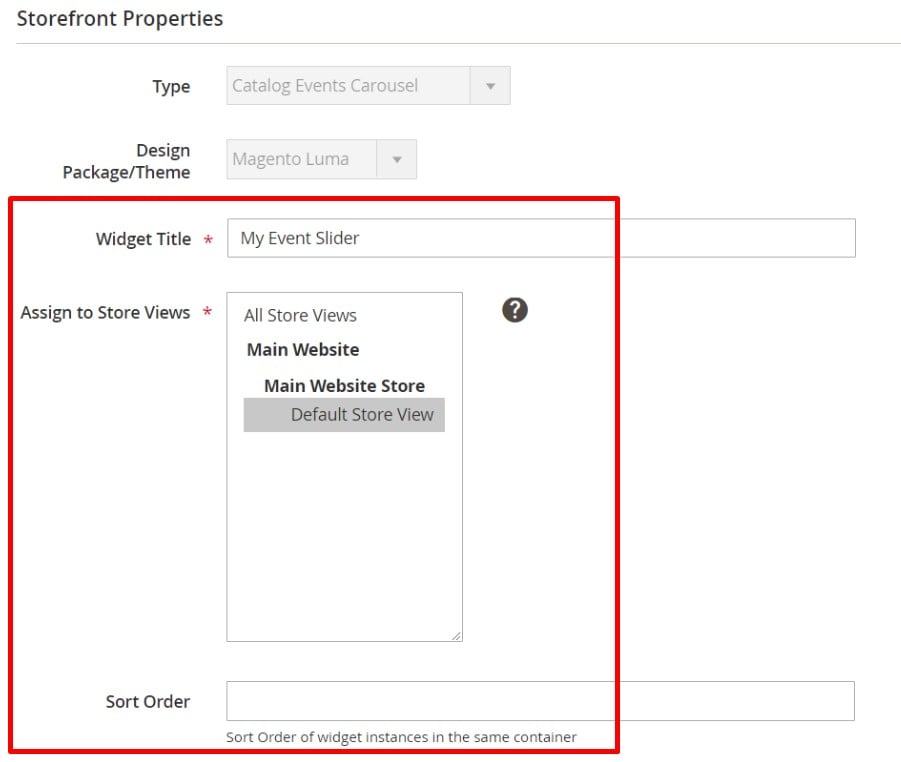
Continue configuring the Storefront Properties section:
- Add a widget title;
- Select a store view;
- Specify a sort order.
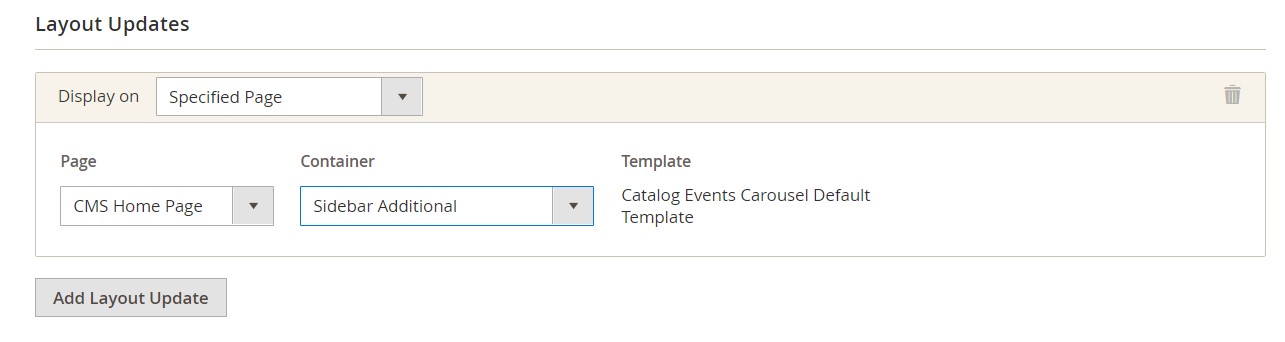
Now, you can proceed to the Layout Updates section. Here, click Add Layout Update to specify the widget location. Set the following parameters as follows:
- Display On to Specified Page.
- Page to CMS Home Page.
- Container to Main Content Area, Sidebar Additional, or Sidebar Main.
To display the Events Carousel in another location, click Add Layout Update and repeat the steps above.
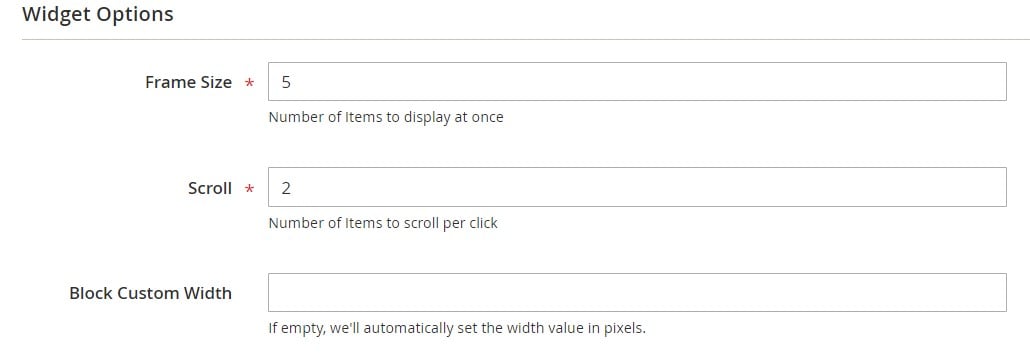
Now, you can configure additional options. Open the Widget Options tab in the paned on the left:
- Specify the number of events to display in the slider simultaneously in the Frame Size field.
- Set the number of events to scroll per click in the Scroll field.
- Enter the number of pixels to specify a custom width in the Block Custom Width field.
- Save the widget and refresh the cache.
Magento 2 Private Sales: Invitations
Invitations are tightly connected with a customer account, so let’s explore this aspect first. Every invitation email contains a link to a Customer Login page. As a registered customer, you can send and view invitations from the dashboard, prepare the list of recipients, add a custom message, etc.
When you click the Send Invitations button from a customer account, the system sends invitations in batches. Next, you can monitor the status of each invitation. Invitations you submit can be accepted or canceled.
How to configure invitations
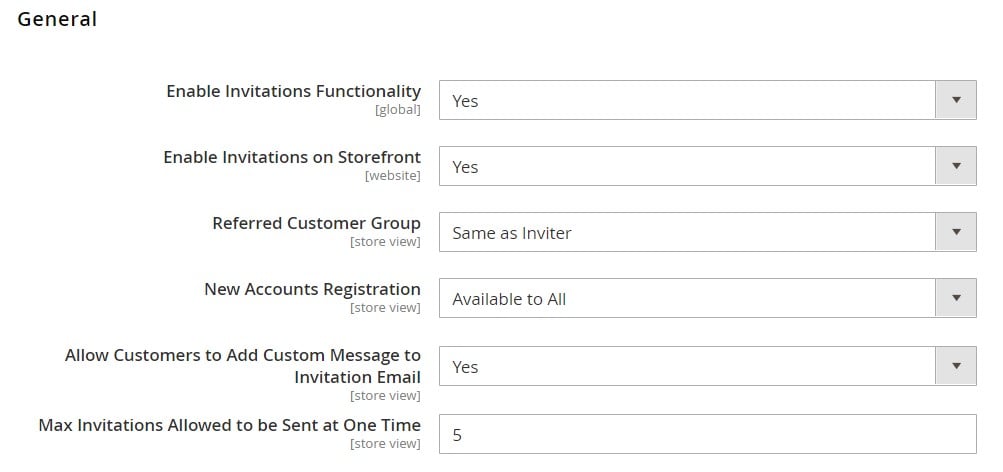
You can configure invitations under Stores->Settings-> Configuration. Expand Customers in the left panel and choose Invitations. In the General section, enable Invitations Functionality and Invitations on Storefront (your customers will be able to manage invitations). Next, set Referred Customer Group to Same as Inviter or Default Customer Group from Configuration. As for New Accounts Registration, it can be either By Invitation Only or Available to All.
Besides, it is possible to let your customers ass custom messages to invitation emails as well as limit the number of invitations that can be sent at one time.
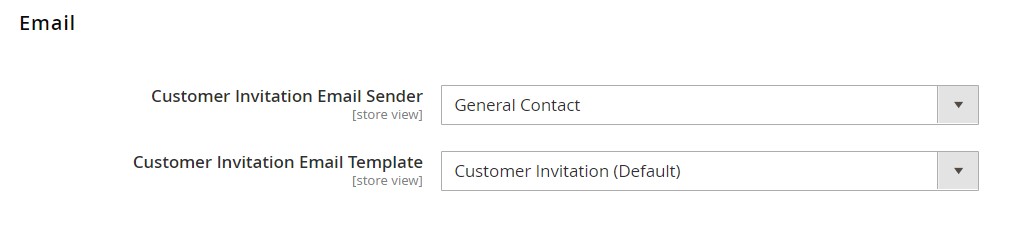
In the Email section, select the store identity for the Customer Invitation Email Sender and choose an email template for the invitation email. Don’t forget to save configuration when complete.
Invitations Grid
You can find a grid with invitation emails under Marketing->Private Sales->Invitations. The grid contains the following nine columns:
- Checkbox – to send or discard invitations in bulk;
- ID – an internal ID number of an invitation;
- Email – a corresponding email address;
- Invitee – a related invitee;
- Sent – time and date an invitation was sent;
- Registered – time and data a customer was registered;
- Status – Sent, Not Sent, Accepted, Discarded;
- Valid Website – a corresponding website;
- Invitee Group – a customer group of an invitee.
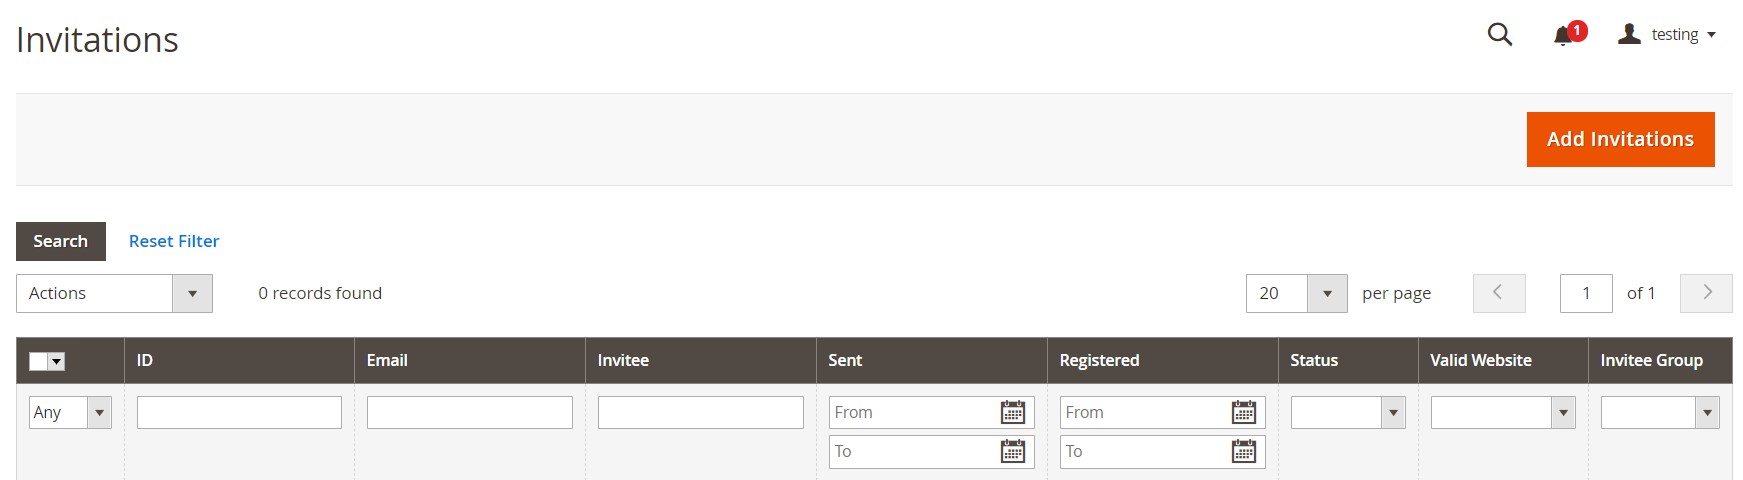
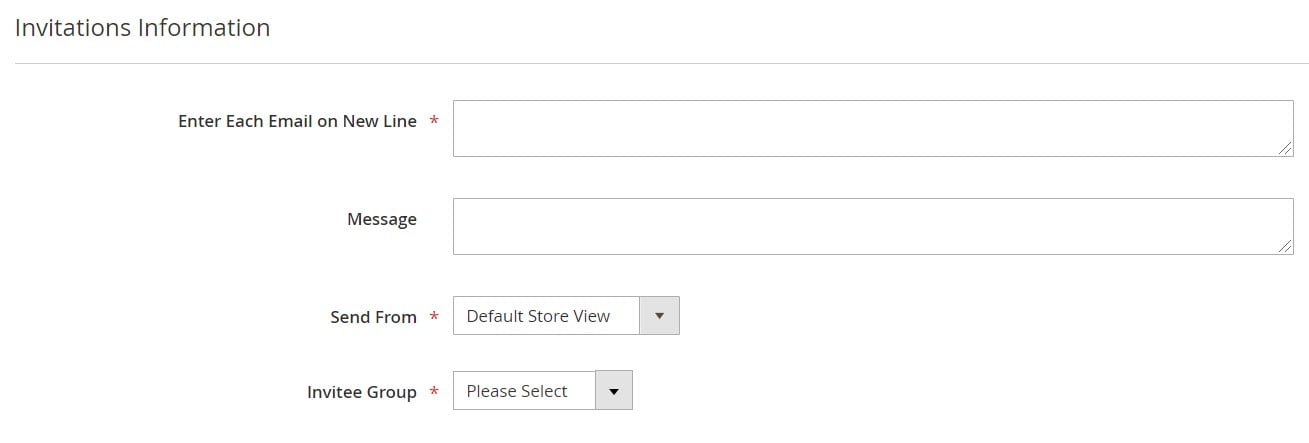
How to add invitations
To add invitations in Magento 2, use the corresponding button on the right above the grid. On a new screen, enter email addresses to invite new customers, add a custom message, choose a sender, and select an invitee group. Don’t forget to save your invitation information.
That’s it! Now, you know everything about Magento 2 Private Sales and Events. For further information, check the . If you need to import and export Magento 2 entities, get the Improved Import & Export Magento 2 extension. The module enables data transfers using multiple file standards, from Google Sheet, or via API.
Related posts
 Adobe (Magento 2) Commerce and Cloud (Enterprise Edition) Specific Features
 Magento Open Source and Adobe Commerce 2.4.7 Release Notes
 Magento 2 B2B Company Guide: Revealing Company Structure & Import
 CopyAI Review 2023
 How to Import Customers & Customer Addresses to Magento 2
 Magento 2 Release Notes
 Shopware 6 Advanced Pricing Guide + Import Tutorial
 Amasty ChatGPT AI Content Generator for Magento 2